Avoid Blowouts in Photos: Tips for Proper Exposure and Adjustments

Mastering the technical side of photography is just as important as having a good idea about what to photograph. Blowouts, also called blown highlights, are overexposed areas in a photo where detail is completely lost. They can easily ruin an otherwise great shot. Learn how to avoid blowouts both while shooting and during editing.
Blown highlights are part of an image where the light was so intense that the camera sensor maxed out at pure white and couldn’t record any further detail. Even if there was detail, like beautiful cloud shapes, it’s lost, and the area appears flat and featureless.
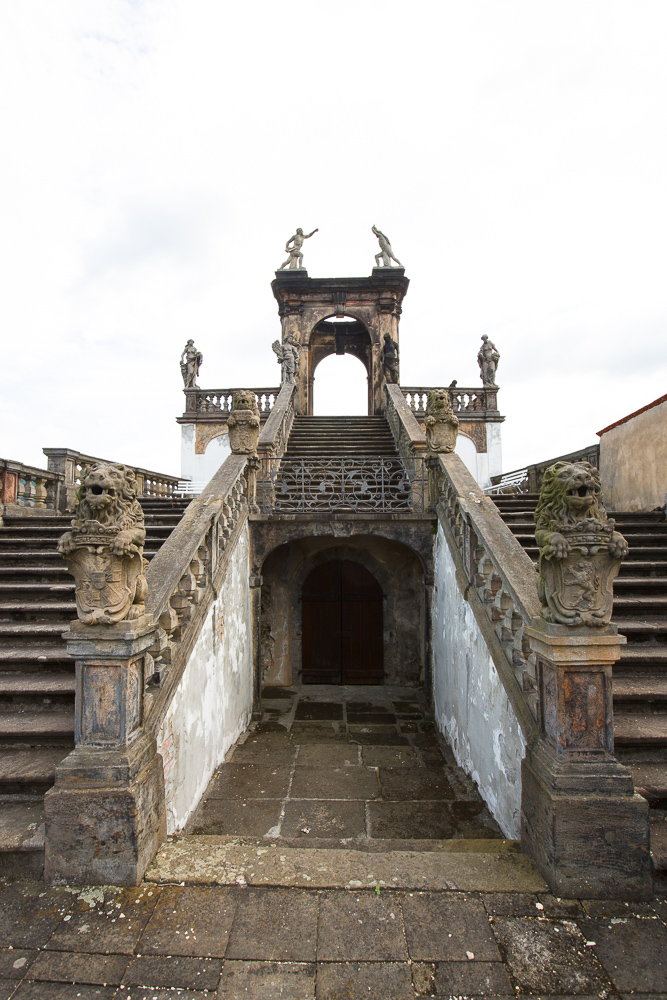
Canon 5D Mark III, Canon 16-35/2.8 II, 1/15s, f/8, ISO 100, focal length 18mm
When shooting outdoors, it can be hard to tell from the camera’s display whether an area is blown out or just very bright. This is where the camera’s histogram comes in handy. Blowouts appear as a column of pixels pushed up against the right edge of the graph.
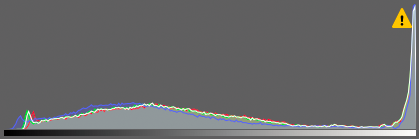
Some cameras have the option to highlight overexposed areas by making them blink on the preview.
How dynamic range affects blowouts
You may be thinking, “I’ve photographed clouds before, and they came out fine.” And that’s true. Bright skies on their own usually aren’t a problem. Trouble arises when you want to capture both the clouds and something much darker in the same shot, like the inside of a cave.
Each camera sensor has a limited dynamic range, the maximum difference between the brightest and darkest parts of the image it can capture. If your scene exceeds that range, you generally have two options:
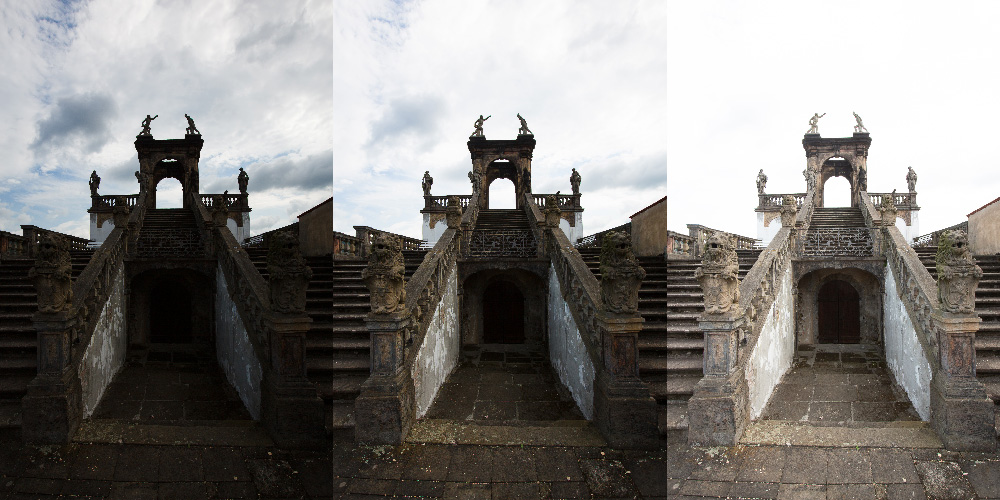
- Expose for shadows so the dark areas are visible. But at the cost of blown highlights. This is what happened in the cover photo for this article.
- Expose for highlights so bright areas retain detail. But dark areas are pushed into deep shadow.
Underexposing: A simple fix
One of the most straightforward approaches is to expose for the highlights and later brighten the shadows in post-processing using Zoner Studio.
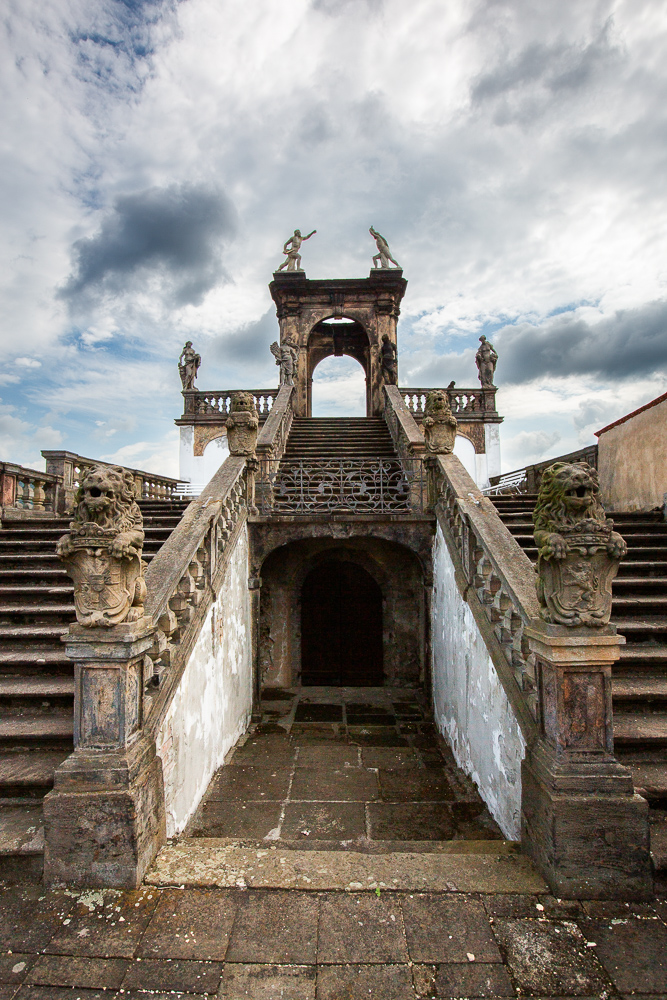
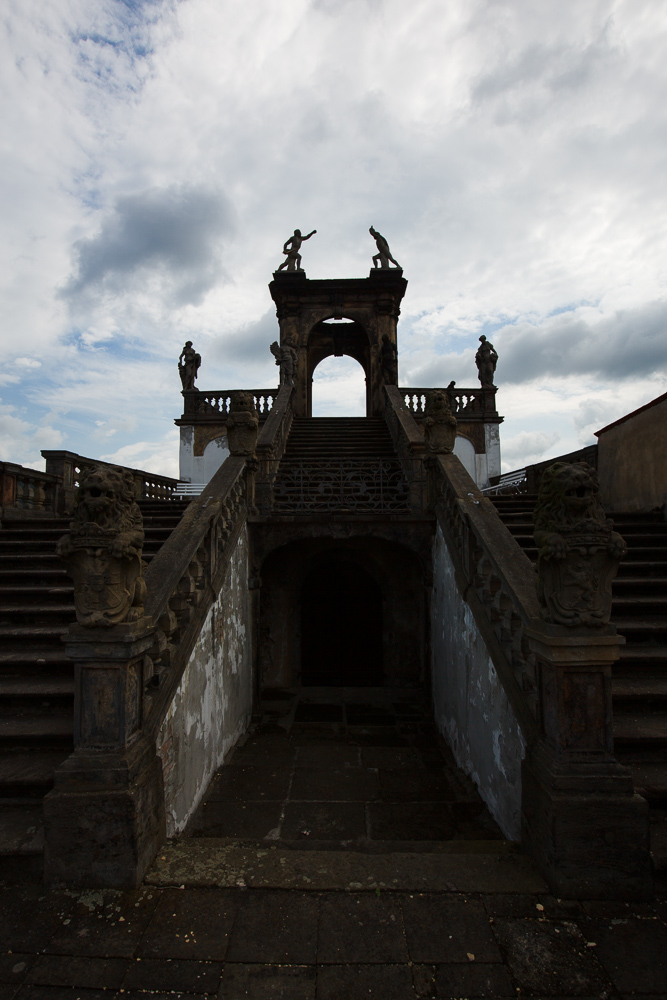
Canon 5D Mark III, Canon 16-35/2.8 II, 1/125s, f/8, ISO 100, focal length 18mm
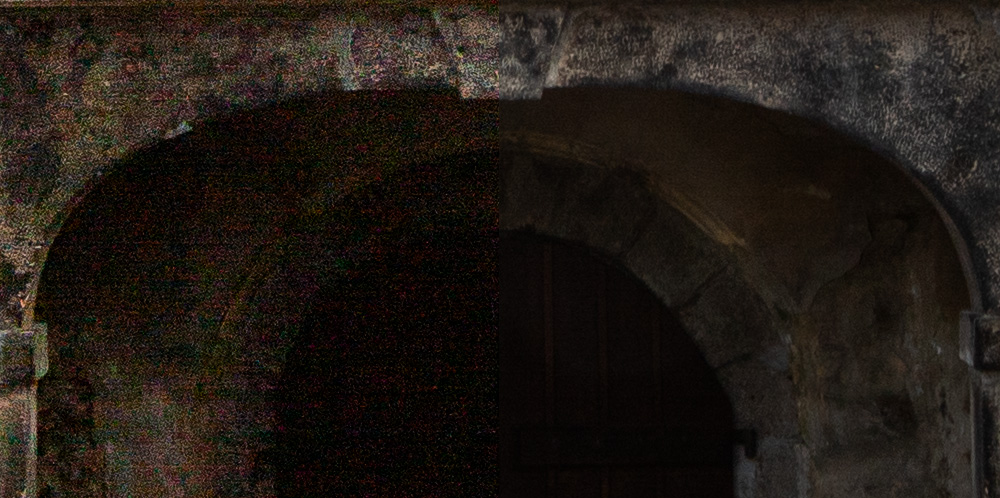
But the problem is the noise. The more you brighten dark areas, the more noise you introduce. How much you can push the exposure depends on the sensor size and quality of your camera. The bigger the sensor, the better the result.
For the best quality, shoot in RAW at a low ISO, ideally around ISO 100. Always check the histogram to take full advantage of your camera’s capabilities without causing blowouts.
While underexposing avoids any white spots, overexposing can lead to an unusable noise level. That’s why advanced methods may be necessary.

If the noise isn’t too severe, you can easily reduce it. Learn how in the article Say Goodbye to Noise—How To Get Rid of Noise in a Few Clicks.
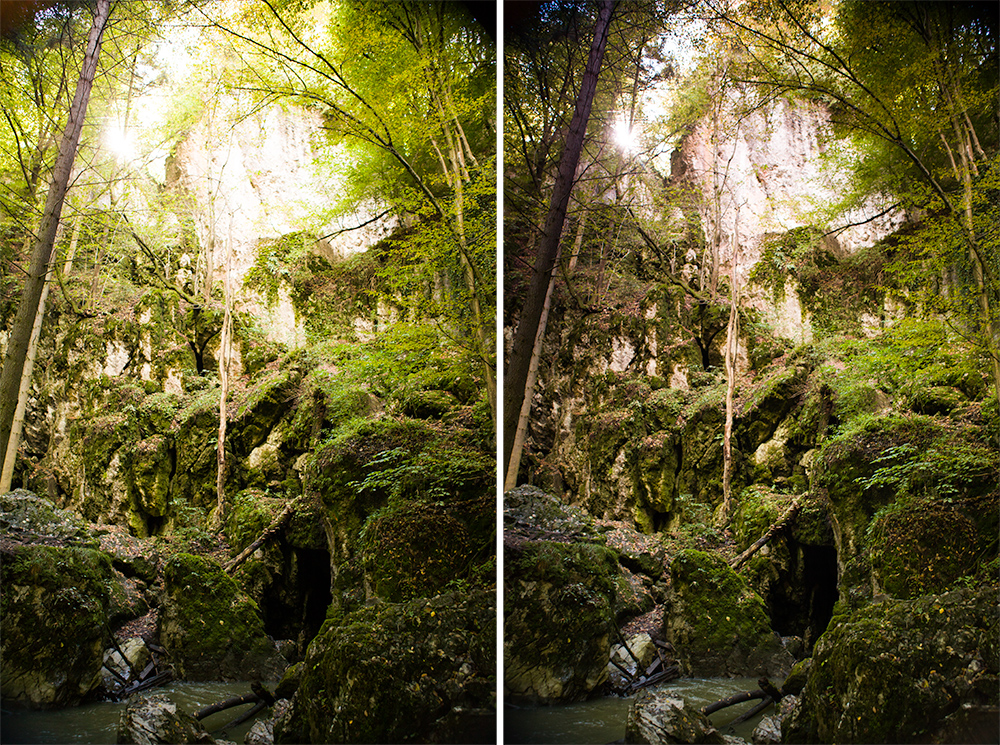
Exposure blending: Combine multiple shots without blowouts
A classic solution is exposure blending. Take multiple shots at different exposures and combine them. The darker shot preserves highlights, while the brighter one provides cleaner shadows. Again, you have to brighten the whole photo, similar to an underexposed photo, but there’s less noise.
You can blend exposures automatically using HDR stacking in Zoner Studio. Or manually using layers. We walk you through the entire process in the article Image Stacking for Landscape Photos: Use Layers to Tackle High Dynamic Range Images.
The quality of the resulting image should be noticeably better in the brightened areas than the previous example.
Unfortunately, this method doesn’t work well for moving subjects, and stacking multiple images takes time.
Graduated ND filters: Fix it while shooting
Landscape photographers often use graduated ND filters. These are semi-transparent filters that darken part of the frame, usually the sky.
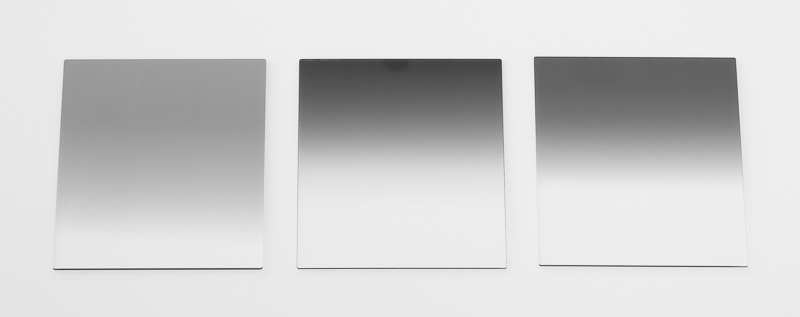
These filters help balance the brightness difference between the sky and foreground in-camera.
You can rotate the filter to match the horizon, but if the horizon isn’t flat, like when rocks or trees are sticking out, it becomes trickier to use.
Also, filters can slow you down in dynamic scenes, where light and movement change quickly.
Balancing light with flash or reflectors
When photographing, a secondary light source can help. The simplest option is a flash mounted on your camera, ideally with a small softbox to soften the shadows. This works well for action, documentary, or reportage photography.
A more advanced setup involves an off-camera flash on a stand, paired with a softbox or umbrella. This gives you great creative control but limits mobility.
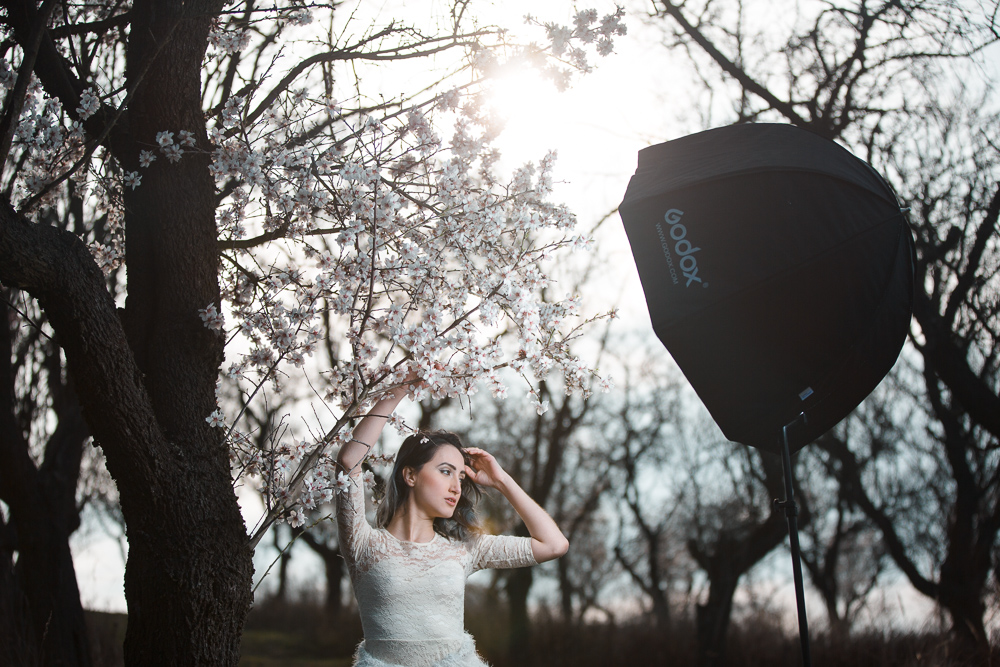
The alternative is to have an assistant hold a reflector. A reflector redirects the sunlight to fill in the dark areas. It’s a very simple method, but requires an assistant especially with large reflectors because the wind can move them and it’s not easy to fix them somewhere.
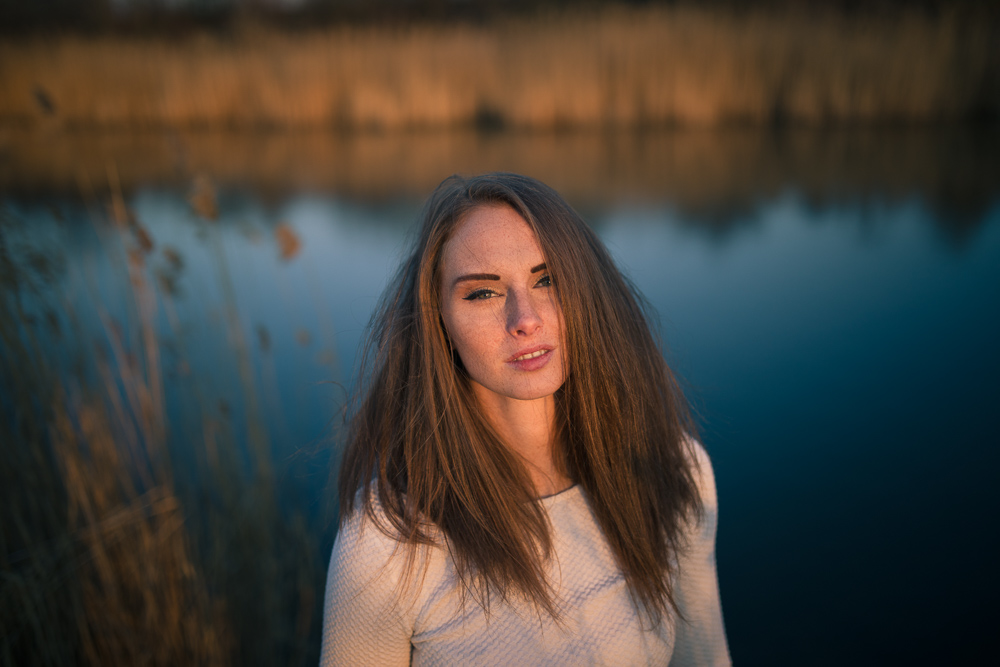
Lighting conditions: Timing matters
We won’t go too deep into lighting, but if you can choose when to shoot, timing makes a big difference.
Midday sun is harsh. There are tricky situations where your subject is very dark on one side and overexposed on the other, especially when shooting portraits. It’s better to wait for the golden hour around sunrise or sunset because the light is softer.
Canon 5D Mark IV, Sigma 35/1.4, 1/2500s, f/1.4, ISO 100, focal length 35mm
If you’re unsure, it’s better to find a spot in the shade so you don’t struggle with noticeably uneven light on faces.
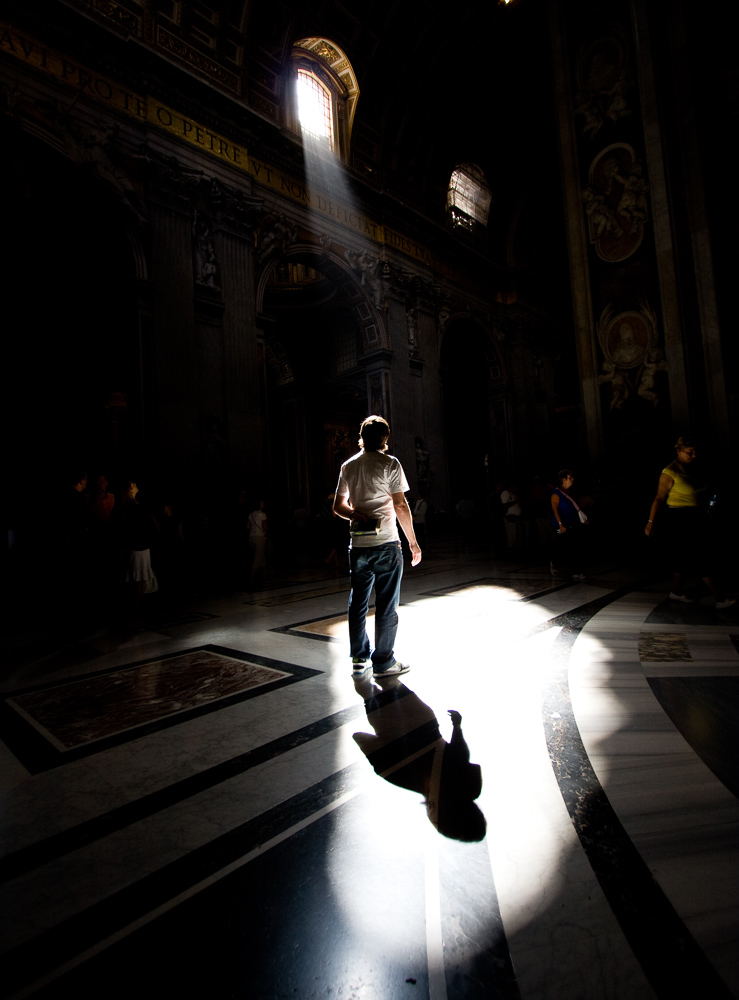
Are blowouts always bad?
You don’t need to avoid blowouts at all costs. Sometimes they’re unnoticeable, and other times they can actually help hide the chaos in the background and make the main subject stand out.
Canon 40D, Canon EF-S 10-22/3.5-4.5, 1/125s, f/3.5, ISO 400, focal length 10mm
There’s a solution for everyone
It might feel like there’s a lot to learn about avoiding blown highlights, but it’s not as complicated as it seems. These are all just options, and in practice, you’ll have your two or three go-to methods. With them, you can handle most situations with ease. And if you run into a tricky one, you can always come back here for other possible solutions.
There are no comments yet.