Bird Photography Basics
When shooting outdoors, landscapes and people are probably the first things that come to mind. However, there are plenty of other opportunities for outdoor photography. A commonly available, ever-present subject is birds. There are several ways to capture birds, from simple methods to those that will push the limits of both you and your camera.
Birdwatching is a relaxing and educational activity that can be done with just the human eye or using a simple pair of binoculars. For us photographers, it’s more fun to birdwatch through the viewfinder of our camera, all while trying to get the best possible shot.
Where to seek out bird photography
Even though looking out your window may suffice, you’ll find a wider variety of bird species elsewhere.
The areas surrounding lakes or wetlands are often a great idea. If you’re lucky, you‘ll even find bird observation towers.
Or, for a completely different type of bird photography, head to the zoo and get much closer to the birds because they usually can’t fly far away.
Finally, don’t overlook the options offered by ordinary outings to local nature or forest preserves, where you can find all sorts of wildlife. You’ll usually find going off the designated walking paths is to your advantage. In the middle of the quiet woods, you may hear a woodpecker or robin and can simply follow the sound to get closer.
Key qualities of a bird photographer
Bird photography is not for everyone. Waiting for that perfect shot requires patience. Otherwise, you may startle the birds or get a bunch of the same, dull shots. Sometimes even staring at the same landscape for a long time is not enough. Rather, you need to have your lens pointed at a specific bird with your finger on the shutter button and wait in suspense to see what it does. Will something happen in ten seconds or ten minutes? Nobody knows.
Choosing the right lens
The right lens makes all the difference with this type of photography. Even though most bird close-ups are taken with a telephoto lens, in some cases, you can get by with shorter focal lengths. Shorter lenses come in handy when shooting flocks of birds or when you want to include the surroundings to give the viewer context.
A telephoto lens gives you the ability to zoom in and get a much closer look at your subjects. This also applies to commonly available focal lengths of 200-400mm (converted to full-frame).
With higher focal lengths, the potential is even greater.
It’s a good idea to use the fastest possible lenses, especially if you’re photographing birds in flight and/or during sunrise or sunset. High-end equipment is extremely costly, but fortunately, you can still get captivating shots even with cheaper options.
Camera settings
Each device has different focusing options, so I suggest consulting your camera equipment’s manual for details. For more dynamic shots, you’ll definitely need to switch on continuous focus mode, which will follow the bird’s trajectory.
High-end mirrorless cameras can locate and track birds within the frame. Lower-end mirrorless cameras and DSLRs can track moving objects between separate focus points. However, even if you don’t own a camera with these capabilities, don‘t worry – it is perfectly normal to use the camera’s center focus point (which is the most accurate) and track the subject using only that. Don’t worry about perfect composition, take up a greater amount of space, and crop the image in post-processing according to your needs.
It is useful to use burst mode, which allows you to shoot a greater number of images per second. Sometimes everything happens so quickly that this may be the only way to capture the exact, perfect moment.
Due to the fast speed of movement, it is very common to use shorter exposure times. 1/2000s is common. Naturally, this requires you to increase ISO accordingly. For this reason, when the birds get tired and sit, I try to reduce exposure time even more for greater image quality.
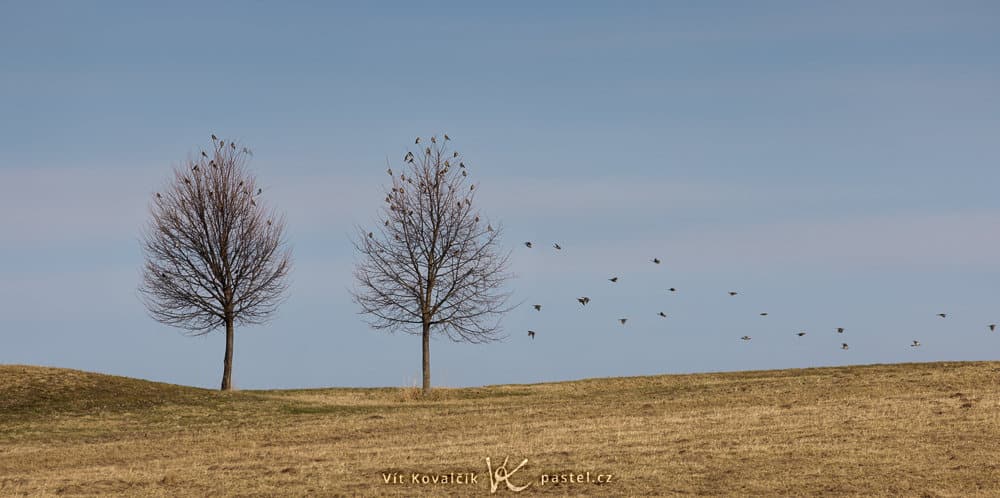
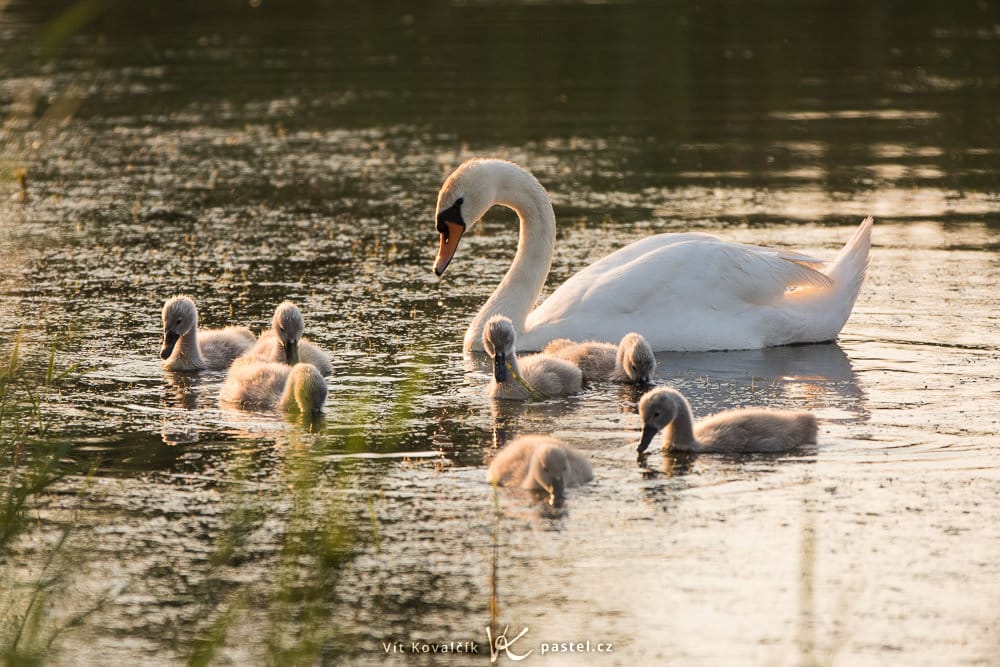
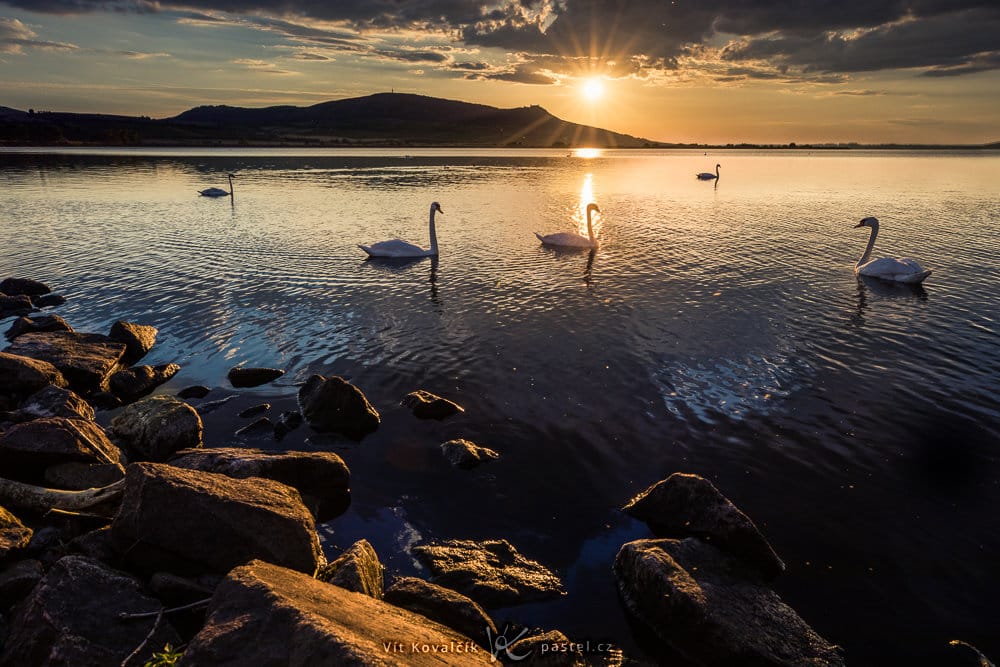
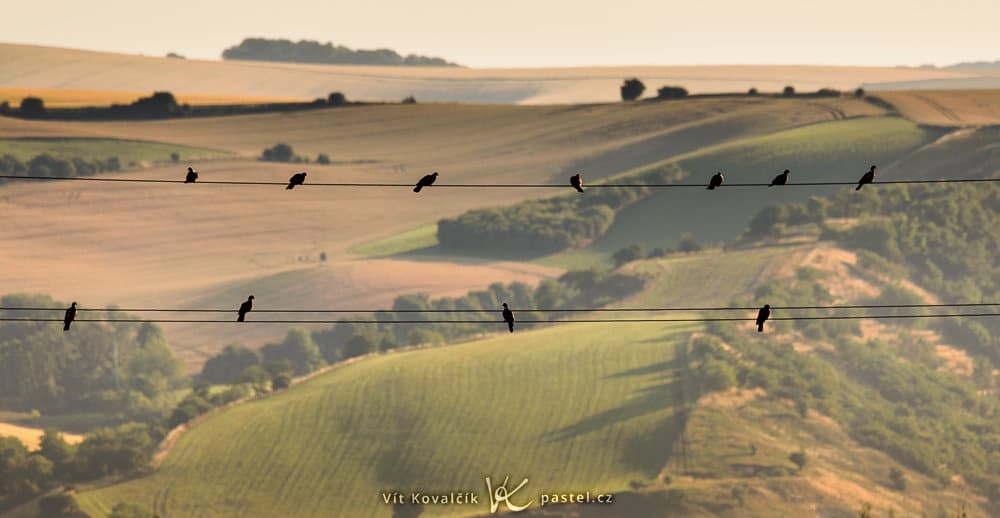
Simpler, wider images
As mentioned earlier, there are many ways to capture birds in a photo. One of the simplest ways, technically speaking, is a wider image of essentially motionless birds. While the image below has complicated backlight, I didn’t have to worry too much about focusing, I didn’t have to shoot multiple frames per second, and my exposure time was a comfortable 1/160s. Even a high aperture is an advantage in these cases.
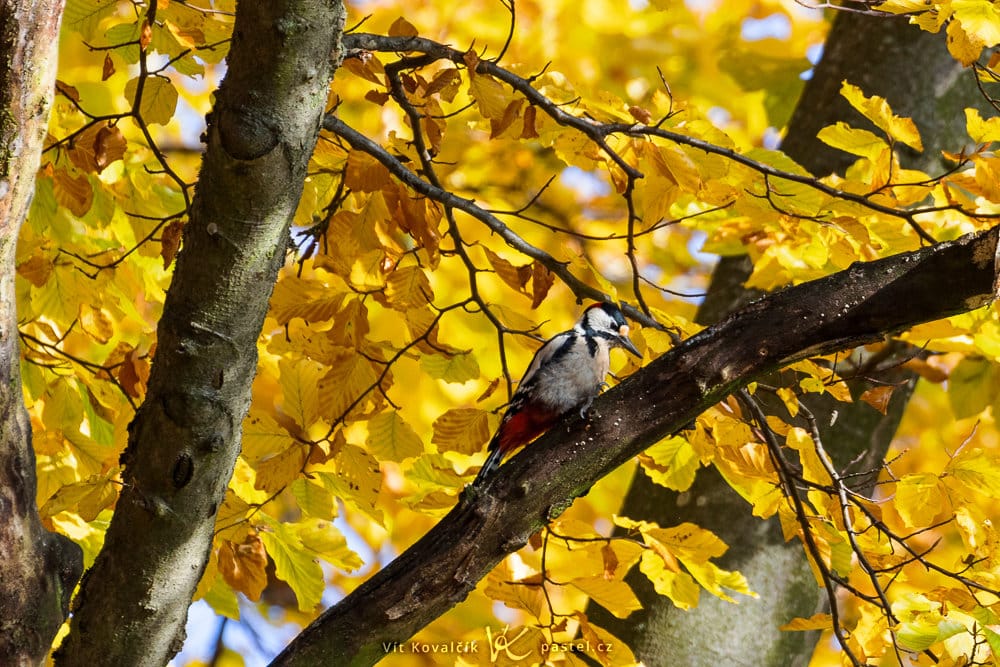
Telephoto lenses and motionless birds
Attaching a telephoto lens may change the situation. However, if you are still shooting birds that are not in flight, it will save you a lot of time and worry.
The zoo is a great place for experiments like this. One disadvantage of doing bird photography at the zoo is the mesh barriers, but even these can be partially eliminated by having the lens almost touching the barrier when shooting. Unfortunately, the mesh will be visible in the bokeh in the background, where its shape is imprinted. As you can see in the following pictures, there are horizontal and vertical “threads” in the background that resulted from this shooting strategy.
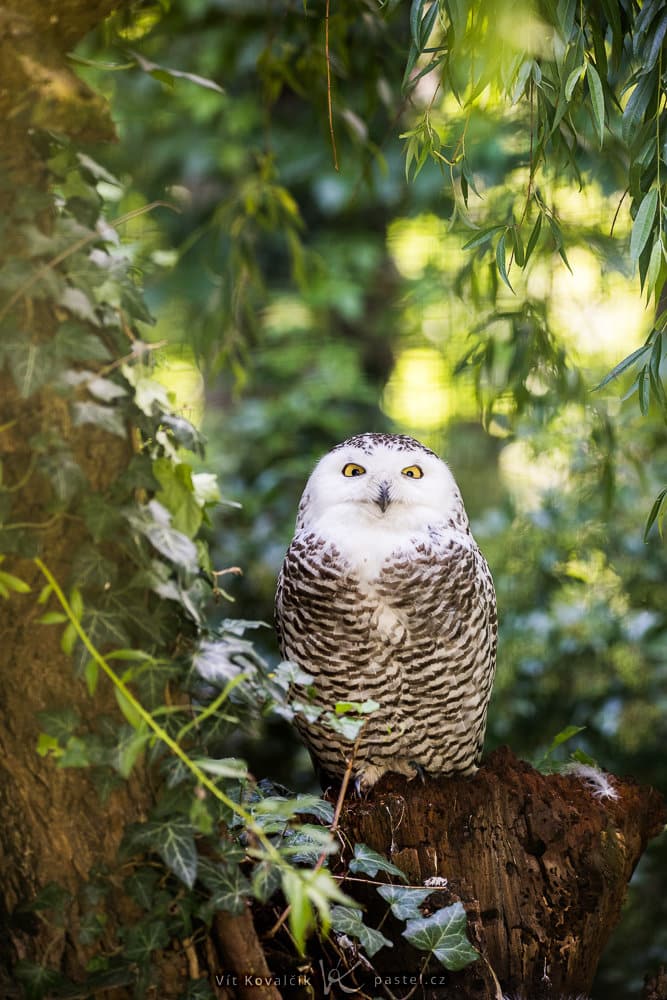
At the zoo, visitors are able to get so close to the birds that a large amount of detail is possible, compared to shooting in the wild. The image of the eagle head is also a demonstration of how basic equipment can be used for bird photography – this was shot on a beginner’s Canon 350D DSLR from 2005, ancient by today’s standards.
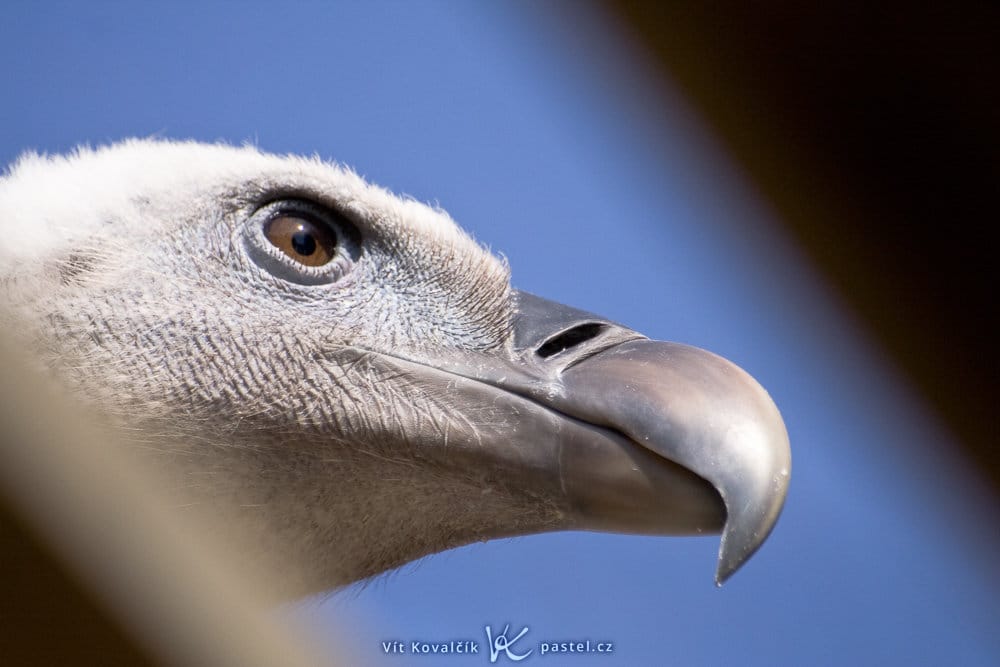
An opposite approach is to focus on the background and tweak the shot so that the birds enhance the scene. I was over 100 meters from the mesh barrier, so I had plenty of space for maneuvering, and moving several meters in any direction resulted in a completely different background.
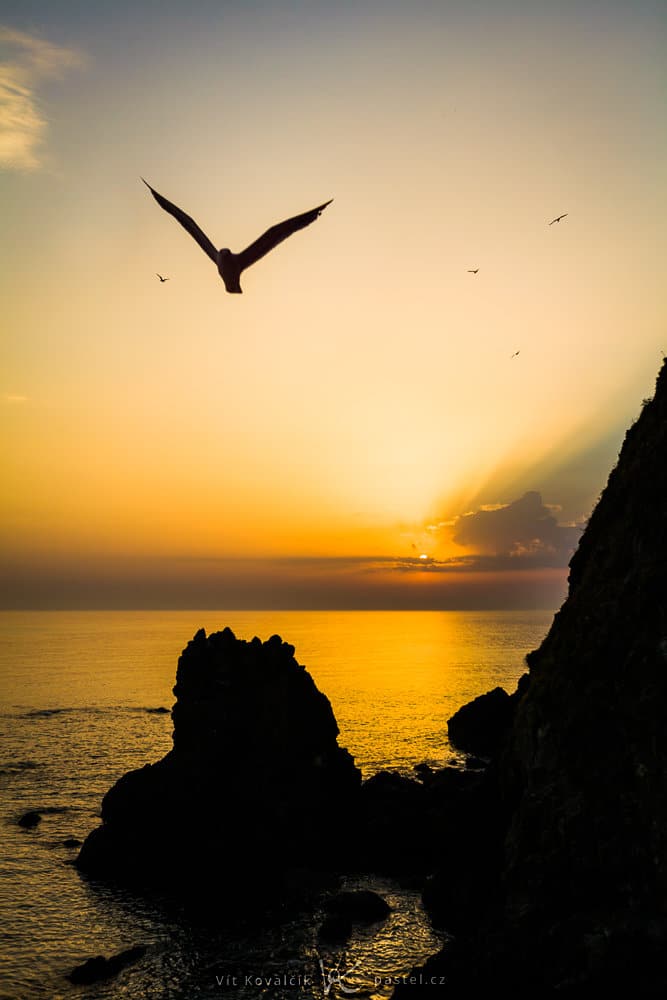
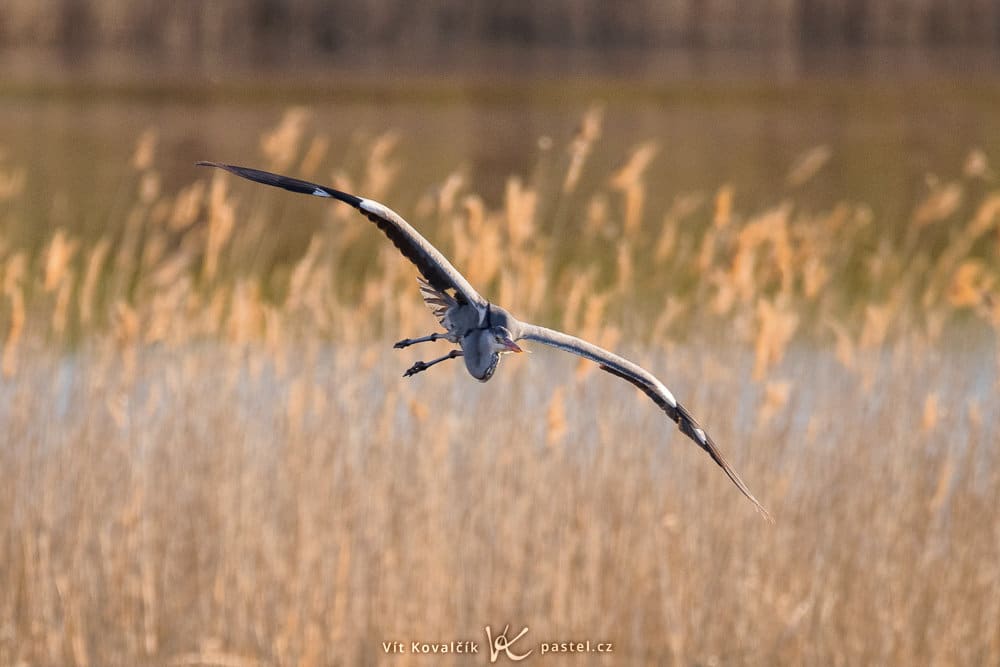
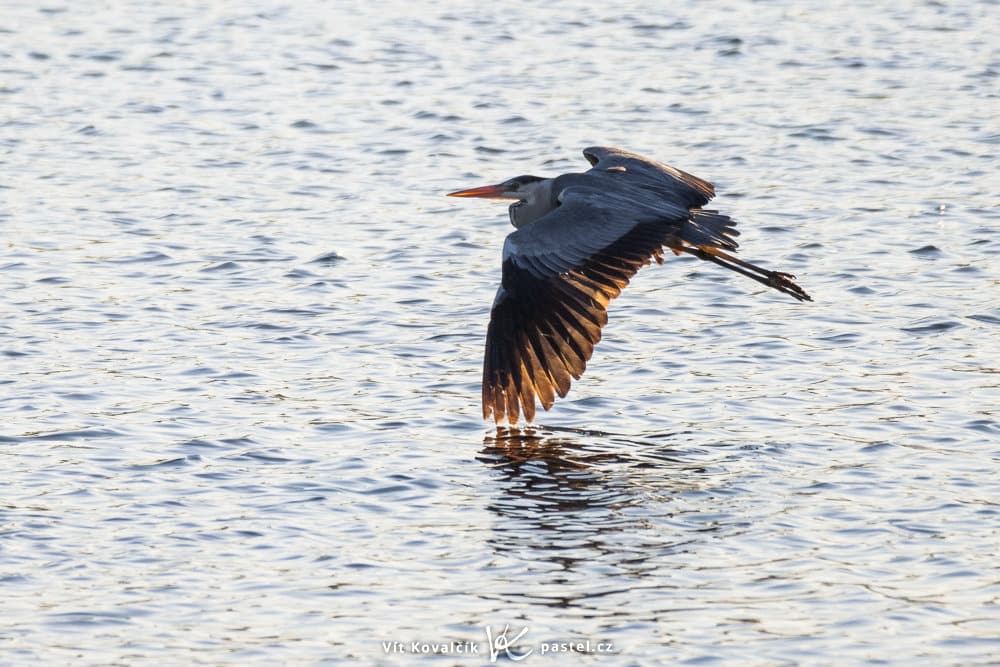
Telephoto lenses and birds in motion
Birds in motion is the most challenging genre, with a large number of rejected shots. Again, there is the option to get shots that are composed of multiple birds.
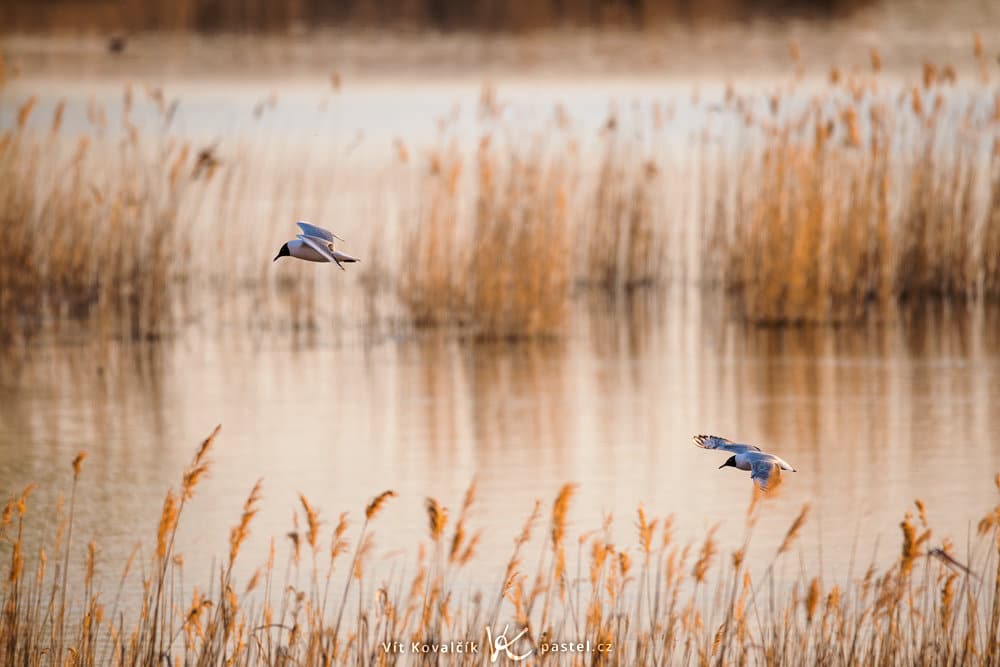
However, it is more common to shoot individual birds. After you get the hang of bird photography, capturing a bird in flight will become easy and the true challenge will be getting photos that are unique. This may include a dramatic landing, a thrilling hunt, or just basking in the sun.
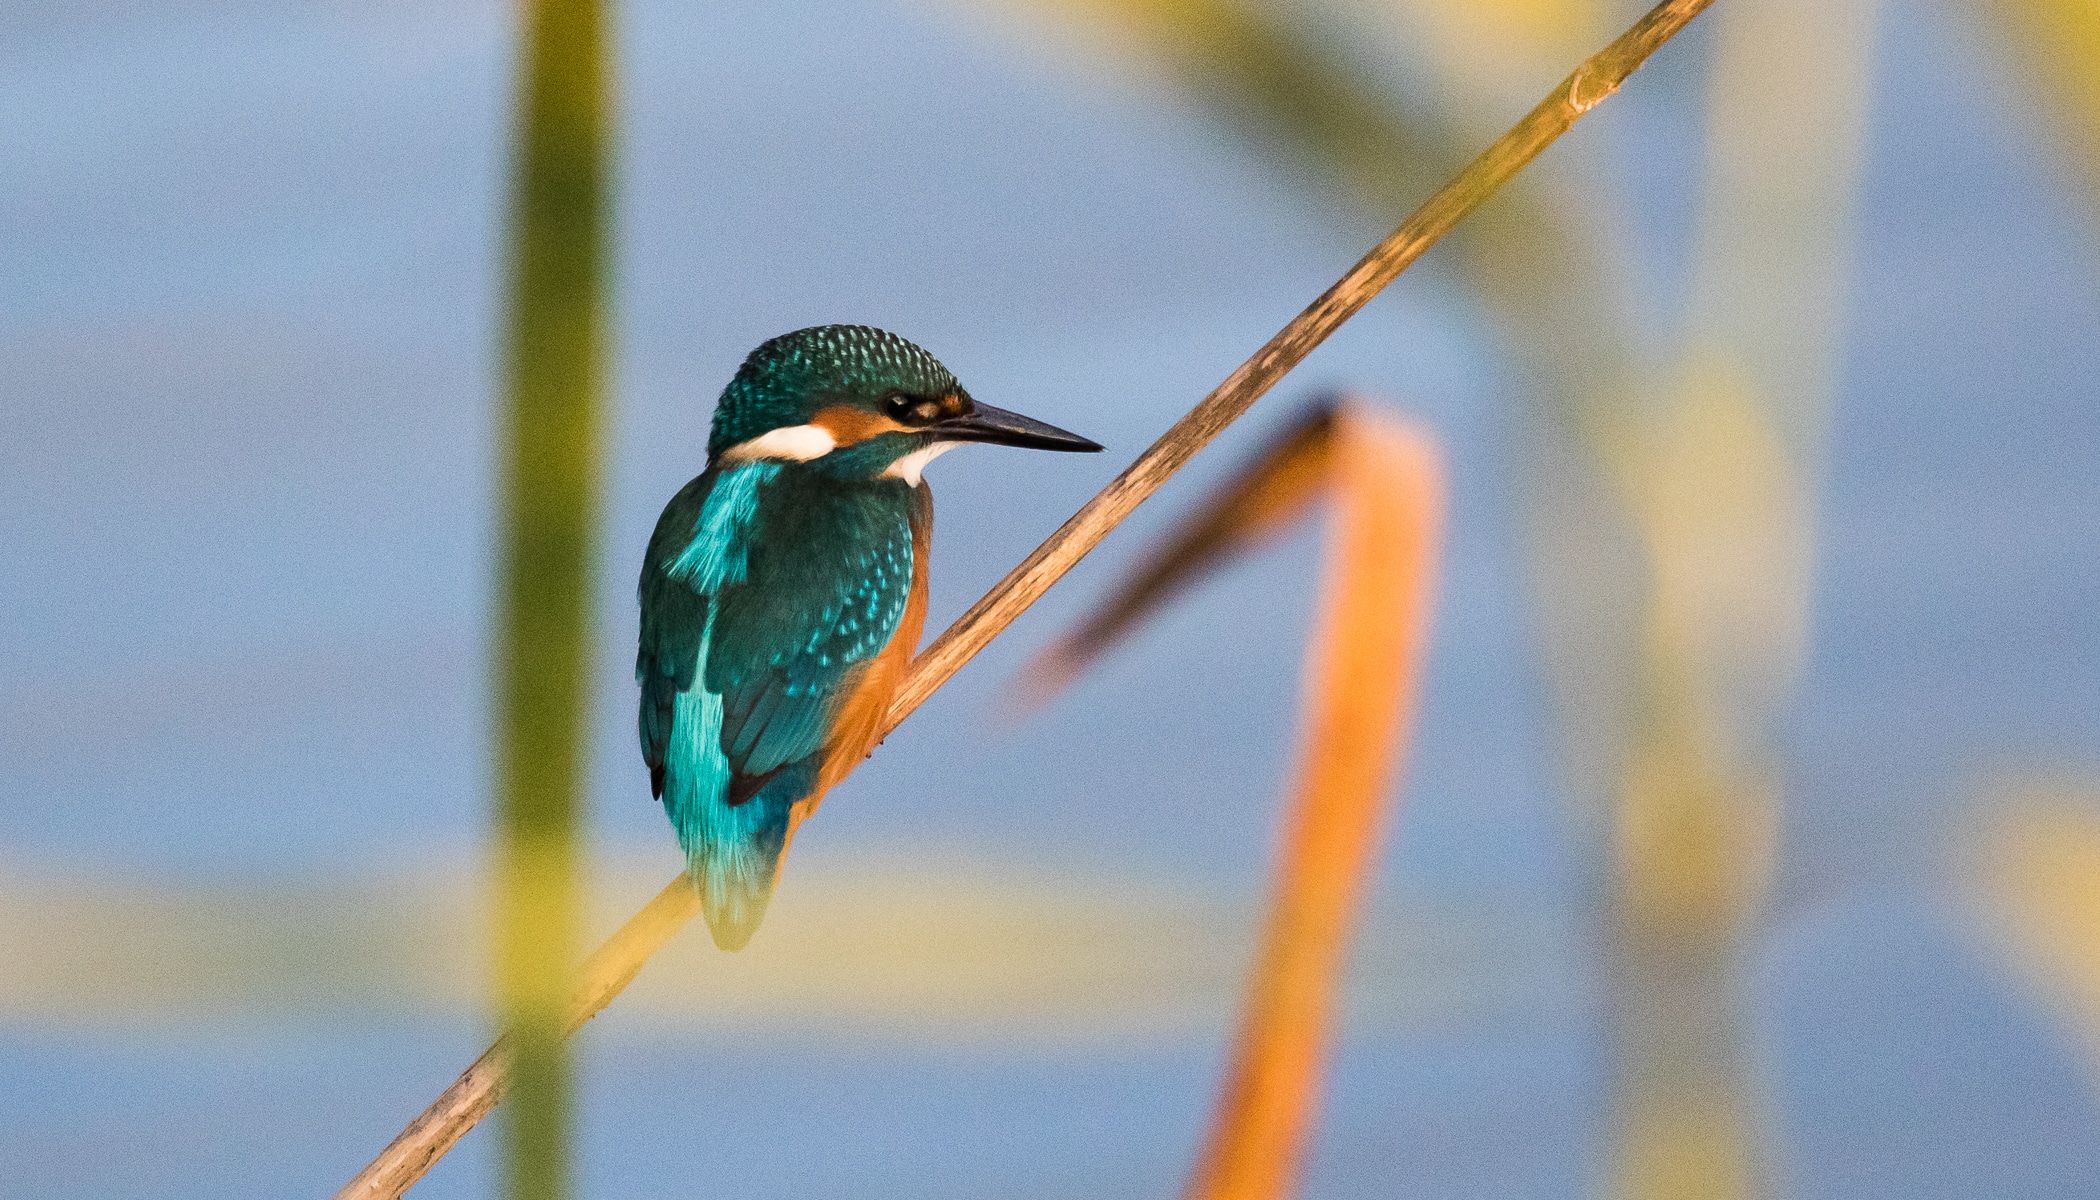
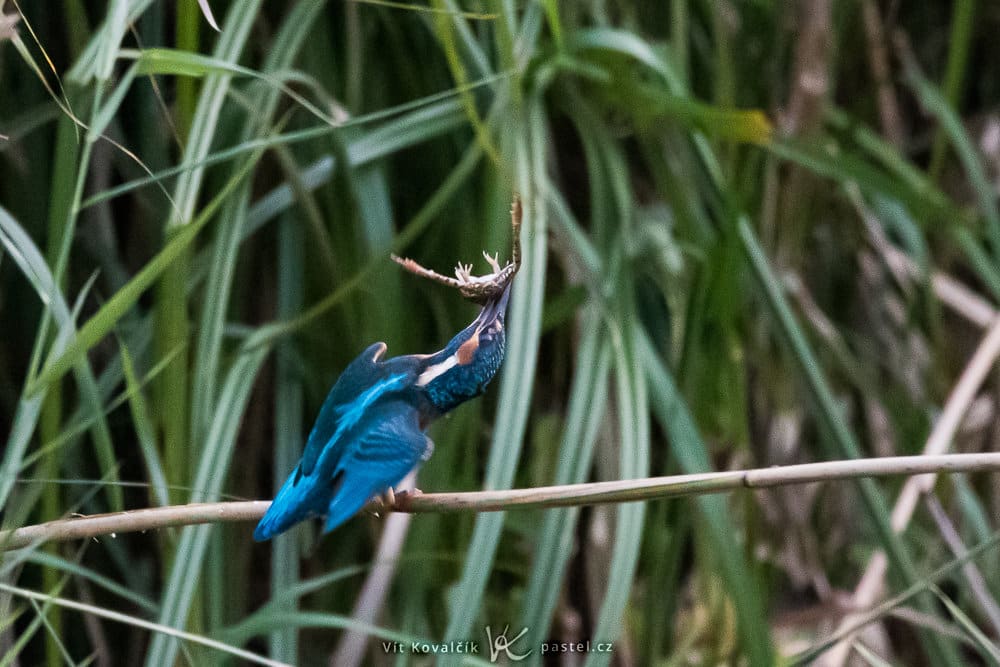
This stand-off between a Kingfisher and the frog it caught was a tough one in this respect. The bird itself is small and happened to choose a spot in the dark grass after dark. ISO needed to be increased to 12800 and even with a 600mm telephoto lens, I still couldn’t get close enough. The result is a cropped image of less than one-fourth of the original image.
The zoo works well for action shots too. But the birds’ short flights are very abrupt, so it’s easy to miss them. If you don’t give up after several minutes, you are bound to get a good shot in time.

Good luck and have fun
Photographing birds in flight is challenging, but rewarding all the same, yielding new and different photographs each time. Also, it’s time well spent in the great outdoors. Some even consider birdwatching therapeutic. Last but not least, you will get more experience taking similar shots with your camera and become familiar with both its capabilities as well as its limits, which will certainly come in handy in the future.
Graeme
Bird photography is a very challenging field, particularly birds in flight. I appreciate that this article is aimed at beginners, but there are a couple of things that weren’t included that in my view are quite important. You didn’t mention camera mode, and often people are given advice that isn’t always helpful. I recall several people who considered themselves expert bird photographers advising me when I started several years ago to use Aperture Priority. This will work with stationary birds but is basically useless with action shots as you get shutter speeds that don’t capture the action. I have yet to see a real wildlife photographer recommend anything other than Manual. This is a little more difficult to manage when you start, but isn’t really all that difficult and gives you control over both aperture and shutter speed. Used with Auto ISO you rarely need to bother with exposure settings. The other setting I would recommend using is back-button auto focusing. Half-press focusing is a real nuisance and leads to problems with composition etc.
I’m not sure what northern hemisphere birds are like, but my Australian experience is that, for small birds particularly, chasing them through the bush seldom gets good results. They are generally timid and easily scared off, so I find it best to find a spot where the birds are and stay put for at least 10 minutes so the birds get used to your presence and let them come to you once they realise you aren’t a threat.
Thanks for the article – photographing birds is a really satisfying pastime and I’d encourage everyone to give it a try.
Ben
Hallo Vit, thank you for the ideas and suggestions. During Covid lockdowns I could only photograph birds in our garden and after some time I wanted to get more detail and beter shots, so I upgraded from a Canon 7D ii to a Canon R5 but kept using the Canon EF 100-400mm ii . One thing to try in bird photography with the Canon R5 is 8K video and then capture the best frame with Canon DPP software. I think you’ll be surprised how good the R5 is in video mode with animal eye detection and how you can get that split second shot of the right action when doing frame captures. The same applies to wildlife
David
Thanks Vit. Enjoyed the article and your tips.