How to photograph the Moon – landscape photography
The Moon is a captivating subject. However, photos with the Moon alone are all very similar. This celestial body shines (pun intended) when you add other objects to the image, whether it’s the silhouette of the landscape or a human figure. Read about finding the right time, place, and method to shoot the Moon.
At first glance, it may seem that when shooting at night, an amazing camera and lens are required to make the image worth it. But it isn’t always so. It’s important to acknowledge that the Moon is frequently bathed in sunlight, so the basic settings will approximate daytime values. There are always exceptions and other things to consider.
Longest possible focal length
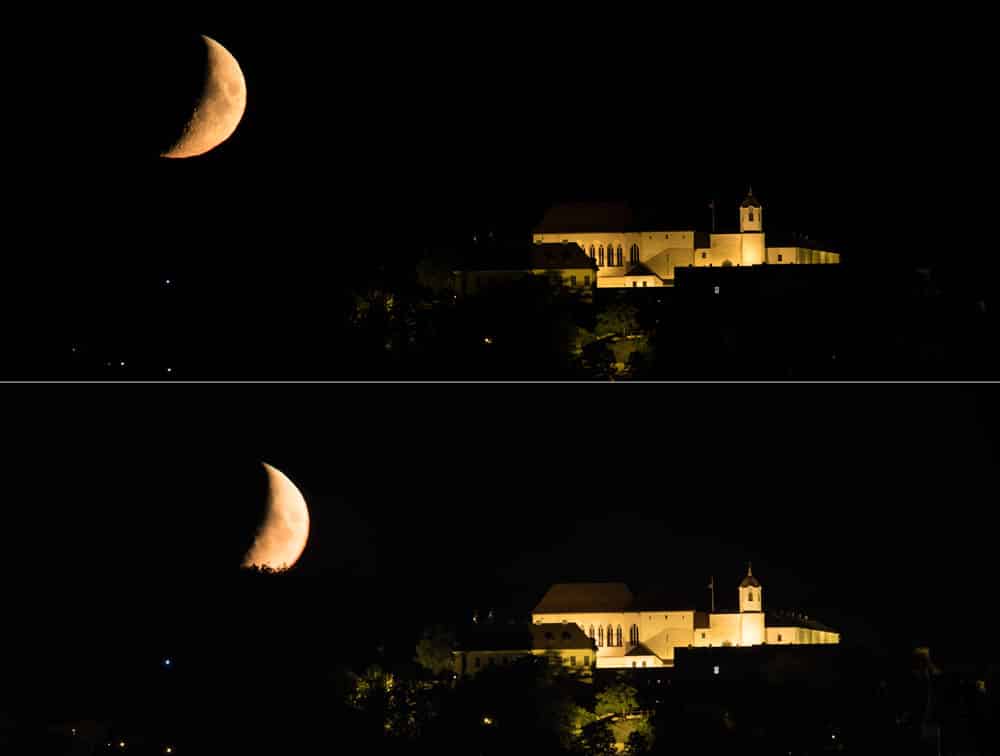
You can photograph a moonlit landscape in many ways. It makes sense to use a wider perspective, where the sky is the main object and the Moon and foreground silhouettes become additions to the scene. This method certainly makes the lay-out easier and choosing a location less demanding.
Canon 5D Mark IV, Canon EF 16-35/2.8 III, focal length 30mm, stacked using various exposures.
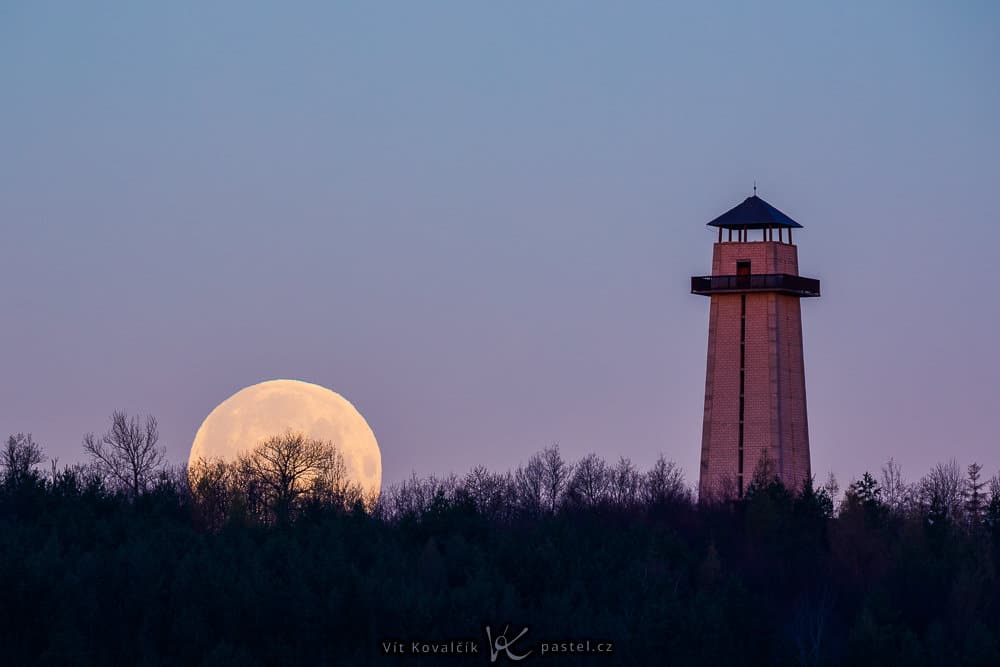
To make the Moon come alive in the image, it’s better for the Moon to be as large as possible. This means a bigger focal length. The longer, the better. But you’ll have a harder time finding the right place to photograph. The following image was taken with a focal length of 150mm, as opposed to the other shots in this article, which had a focal length between 400 and 600mm.
Canon 5D Mark IV, Sigma 150-600/5-6.3 C, 1.6 s, f/6.3, ISO 3200, focal length 150mm.
What and where to photograph
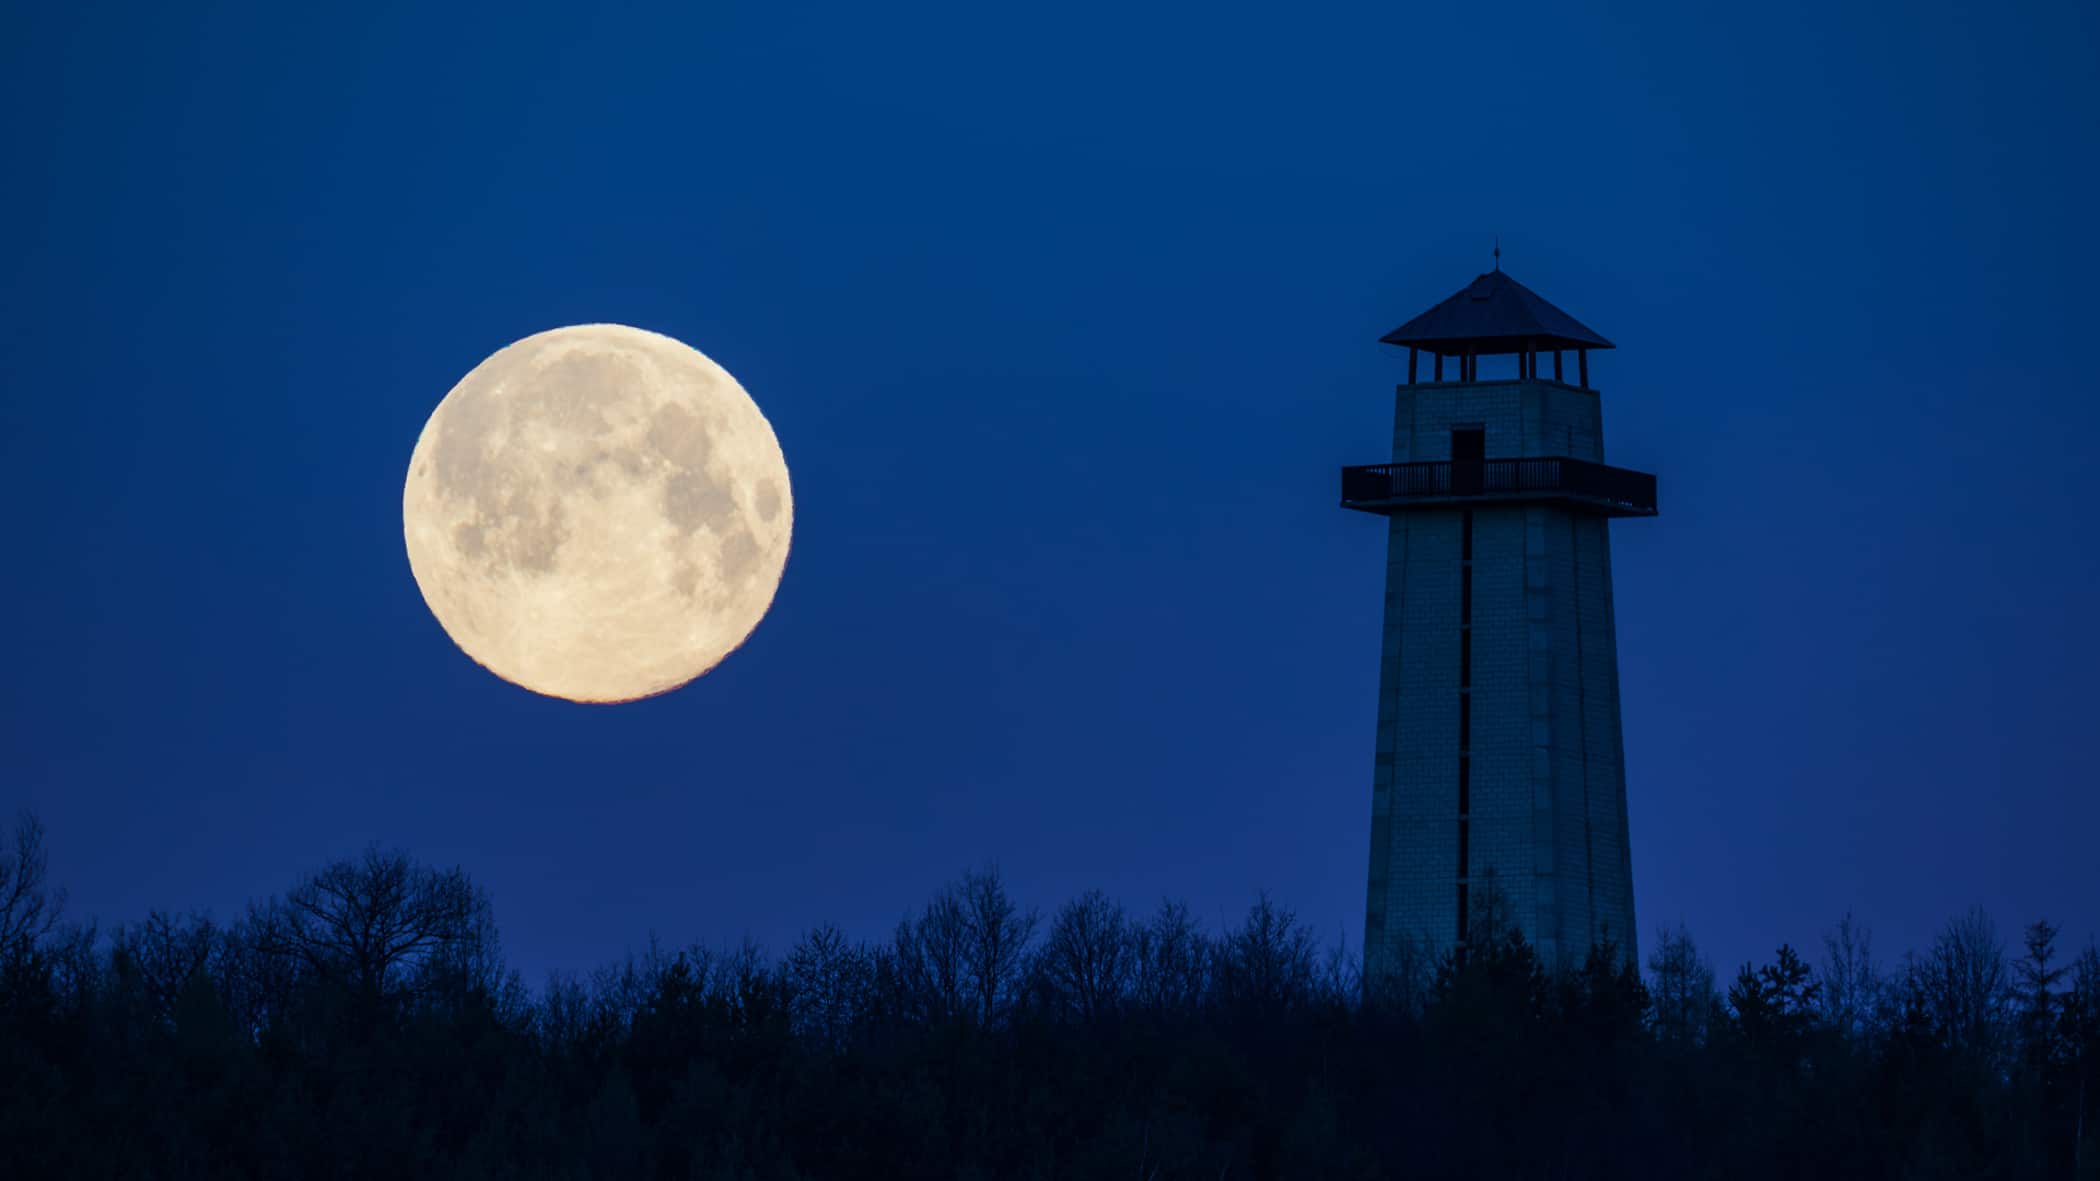
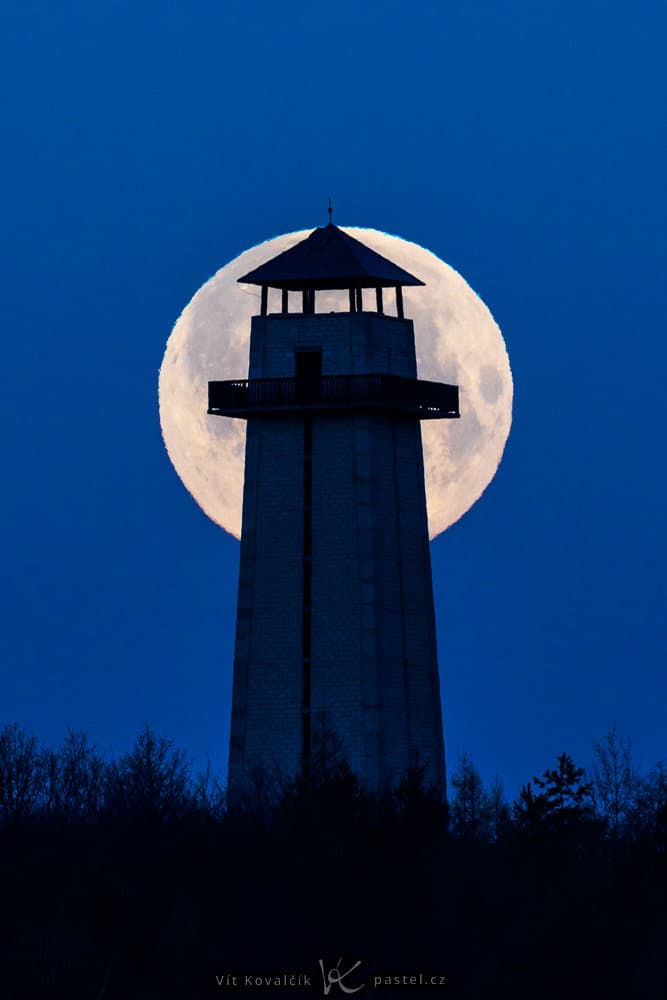
The Moon is a given, but what else would you like in your image? In general, buildings with a distinctive silhouette reaching to the sky are ideal. When shooting shortly after sunset or, alternately, before sunrise, the sky remains blue with dark silhouettes emerging.
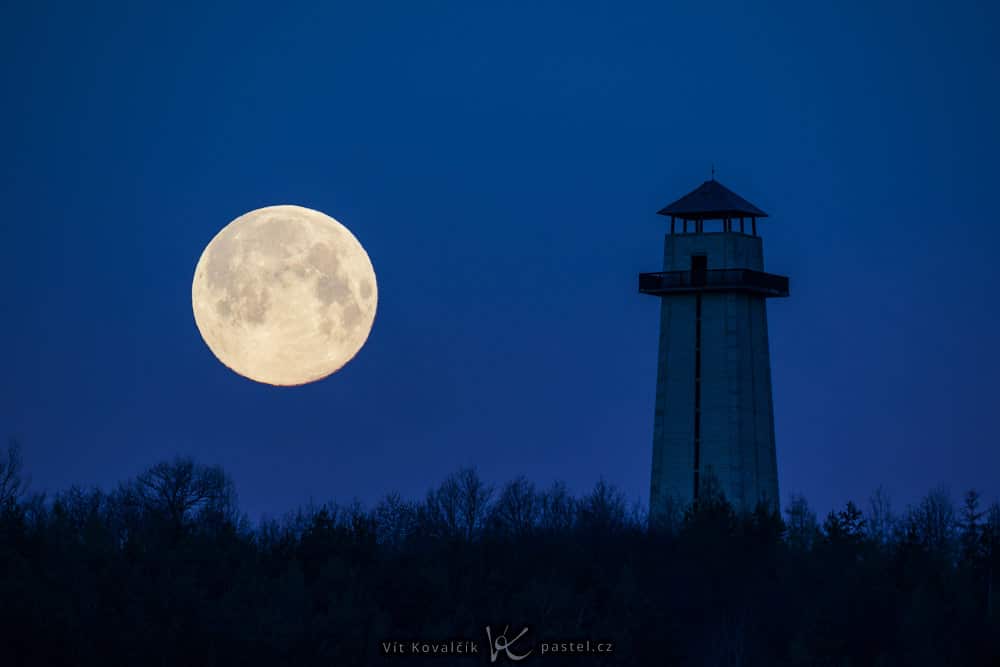
Canon 5D Mark IV, Sigma 150-600/5-6.3 C, 1/100 s, f/9, ISO 100, focal length 600mm.
This is a middle of the road option, but it’s not a problem to diverge from this method and shoot with the sun at your back.
Canon 5D Mark IV, Sigma 150-600/5-6.3 C, 1/25 s, f/13, ISO 100, focal length 600mm.
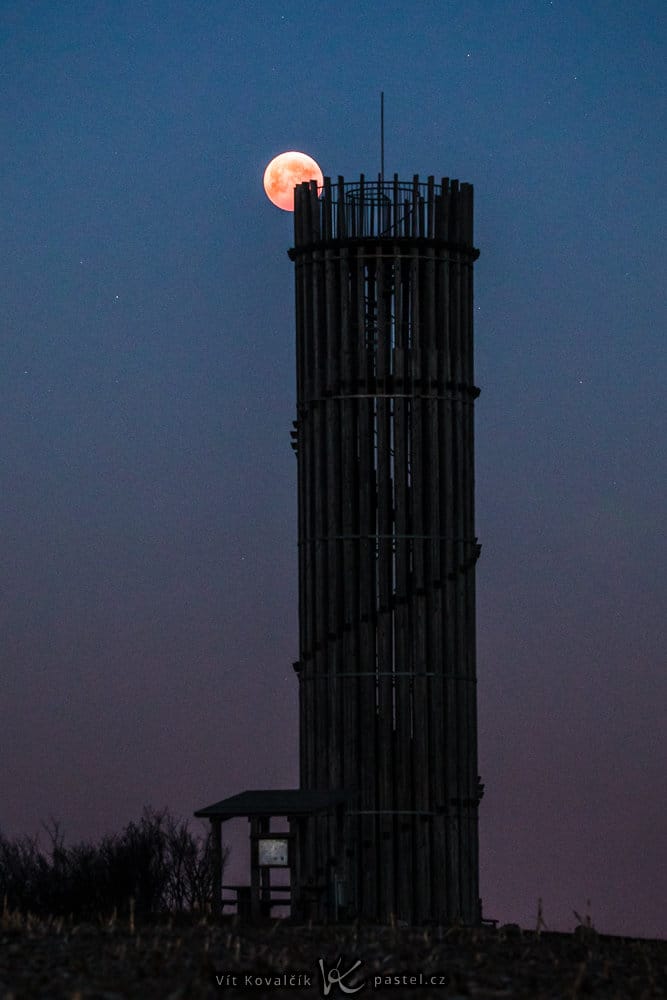
On the other hand, you may want to shoot a photo in the middle of the night. The sky isn’t bright, so the Moon must be very close to your foreground subject in order to light up the sky around it. You also need to get various bright shots which you’ll combine later using the HDR technique:
Canon 5D Mark IV, Sigma 150-600/5-6.3 C, 1/100 s to 0,6 s, f/6.3, ISO 100, focal length 403mm.
An alternative is to use the Moon to completely lighten the sky directly behind the subject:
Canon 5D Mark IV, Sigma 150-600/5-6.3 C, 13 s, f/6.3, ISO 100, focal length 361mm.
A simpler option may be a city setting, where the buildings are lit up. Even so, assume you will have to combine several photos (I would try to do this even when shooting the city on its own).
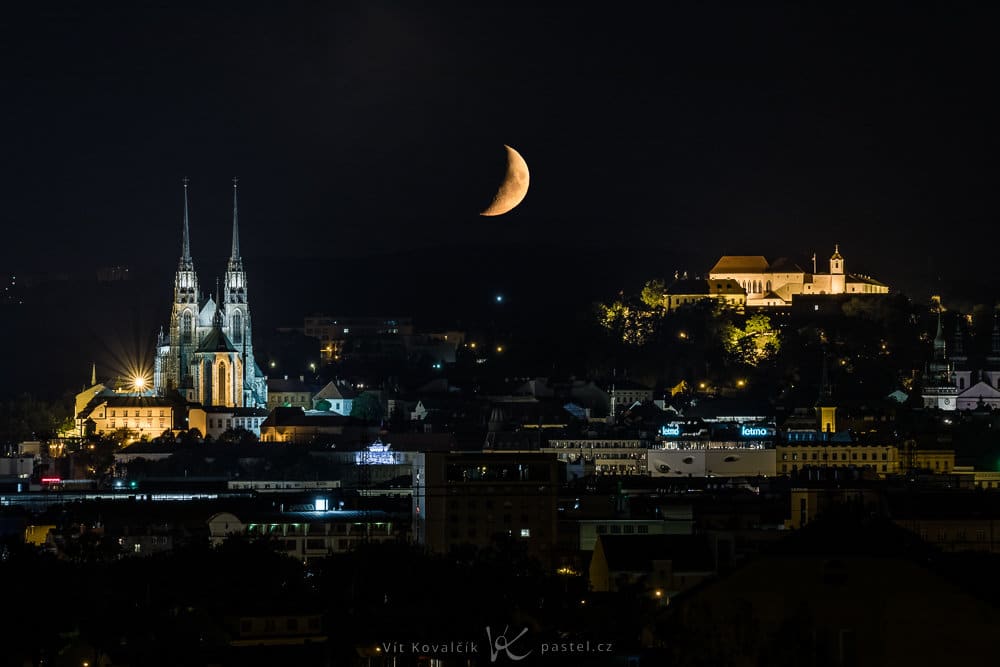
Canon 5D Mark IV, Sigma 150-600/5-6.3 C, 0,5 s, f/8, ISO 400, focal length 252mm.
The darker it is, the more you need to be familiar with the surroundings at daylight. Otherwise, you may be waiting for the Moon to move to the right position, but it will stay hidden behind a hill many kilometers away, impossible to see in the dark.
When and where to stand
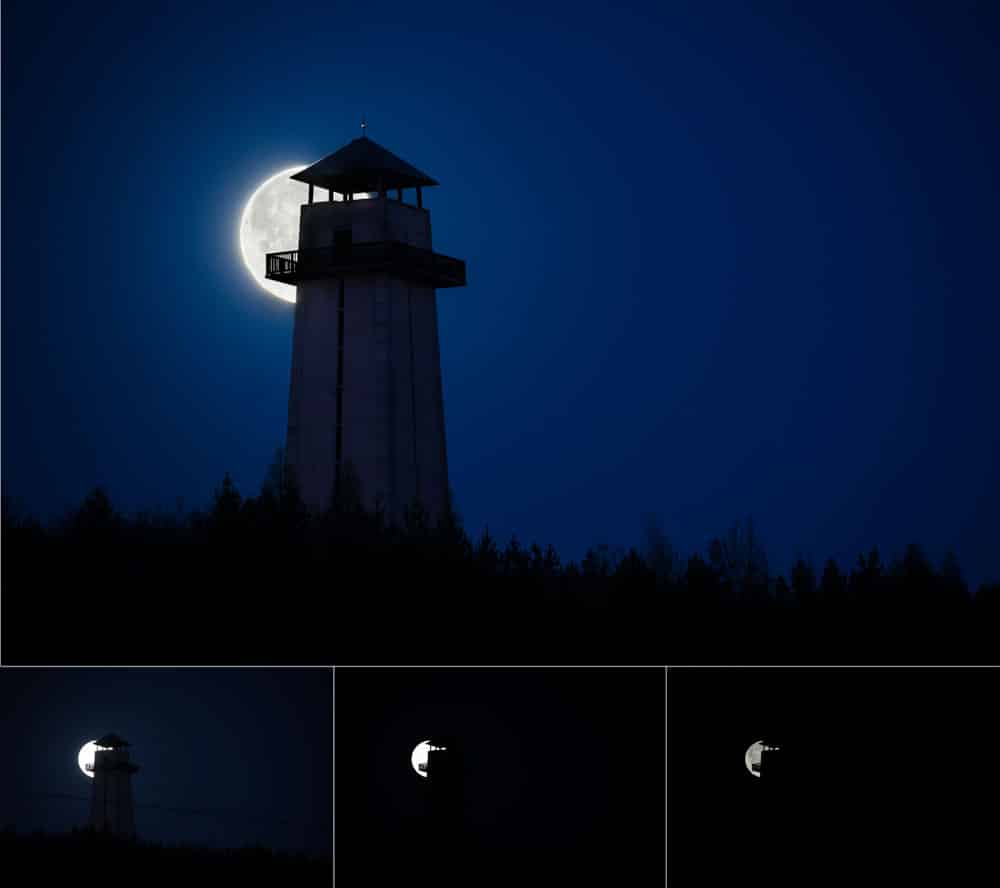
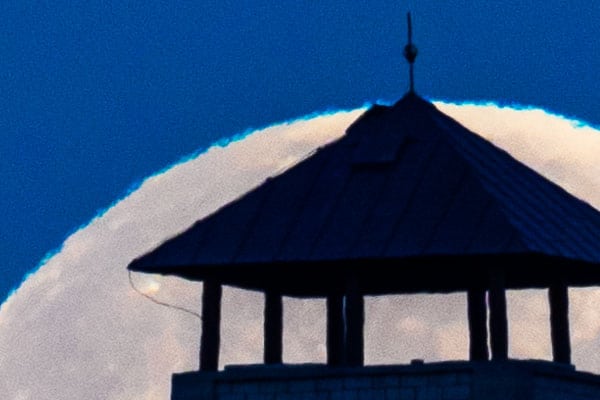
Using a longer focal length is more complicated. In the photos from the previous sections, I used a 600mm lens several times. At the time, I stood 1.5 kilometers from the observation tower and in the case of the Brno landmarks, at a distance of 3 kilometers.
Cameras with a telephoto lens capture a very tiny section of the sky so you need to be sure that the Moon, as well as your chosen foreground subjects, fit. The Moon’s position at any given time is easily able to be calculated and displayed with the help of one of the many apps designed for this purpose. I personally use Sun Surveyor for Android, but The Photographer’s Emphemeris and others are also popular.
You also need to know the distance and elevation from the place where you set up to the chosen building or point of interest in the landscape. Alternatively, you can gather this all from a map, even if the results won’t be 100% accurate. In any case, it is still necessary to allow a larger margin of time when taking pictures. The Moon moves very quickly. If you are zoomed in, it might be gone in a matter of a few seconds, or light up the wrong place.
To demonstrate this, I am showing you shots below of the same scene, taken exactly two minutes apart.
Canon 5D Mark IV, Sigma 150-600/5-6.3 C, 0,5 s, f/8, ISO 400, focal length 252mm.
The changes happen so quickly. In your monitor, you can observe the movement of the lunar object and if you want it in a precise location, the only solution is to observe it all carefully and press the shutter at the exact right second.
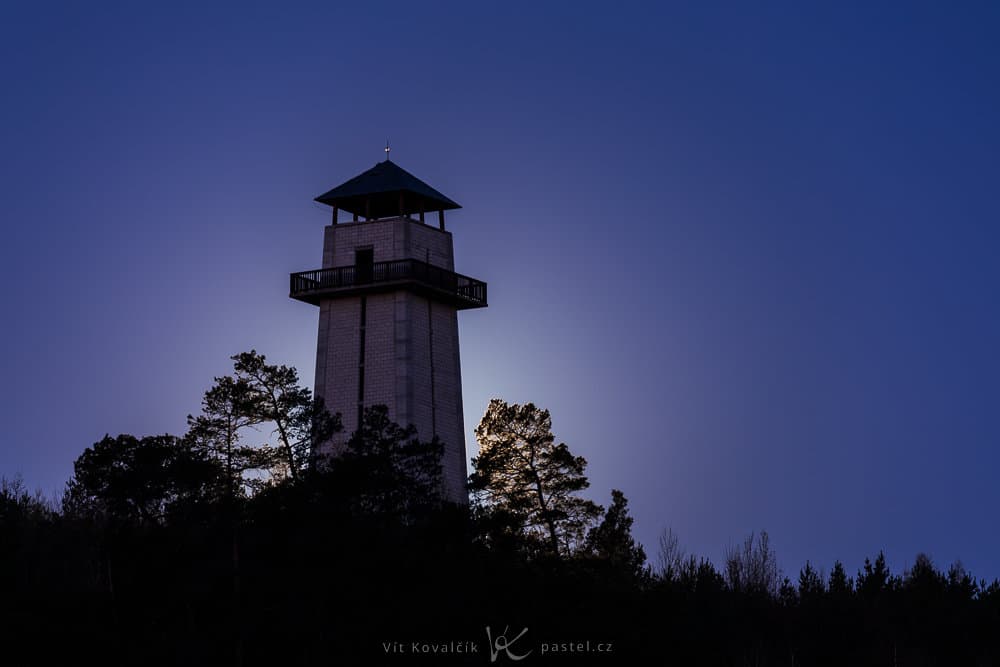
In order to take the following image, you need to set up your tripod with your camera aimed at the place where the Moon will be and then…wait. Also, as in my case, try it again several times because everything wasn’t just right the first few times.
Canon 5D Mark IV, Sigma 150-600/5-6.3 C, 1/100 s, f/13, ISO 100, focal length 600mm.
It was worth it for me to find a focal point to shoot on a hill above a field, where I was able to move around in all directions. Then, I had no problem fine-tuning the angle while shooting, moving closer to the building or away from it. I also resolved horizontal imperfections by moving left and right. If you’re going to experiment with shooting from different angles, take adjustments into account. Use an allowance of hundreds of meters rather than single digits so that you can have enough space without trees available for adjustments.
Optical issues
Unfortunately, when photographing in landscape orientation and with high focal length (400mm and more), the air vibration is all too noticeable.
This issue doesn’t have an ideal solution, perhaps only a suggestion. It is better to use a shorter exposure time. While you’ll still get a jagged outline of the Moon, the overall image will be sharper. With a longer exposure time the Moon will appear blurry.
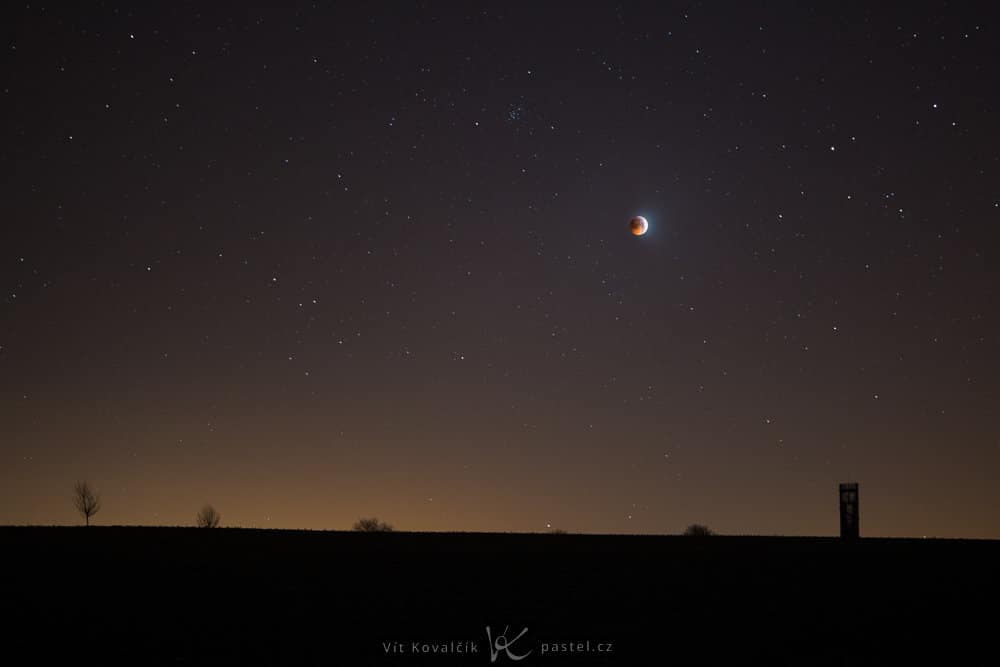
Requiring a short exposure becomes a problem when setting off to observe the Lunar Eclipse. For the next photo, I was by a small chapel, which I had to get much closer to than in the previous examples – about 250 meters. This was an obstacle, because for such a “short” distance, it became evident that when focusing on the chapel, the Moon looked fuzzy and vice versa. I wasn’t able to use a high aperture because there was so little light during the eclipse. In the end, I didn’t combine two images shot from the same location. Instead, I photographed the Moon on its own a bit earlier and then added it into the photo with the chapel later, with its fuzzy version beneath it:
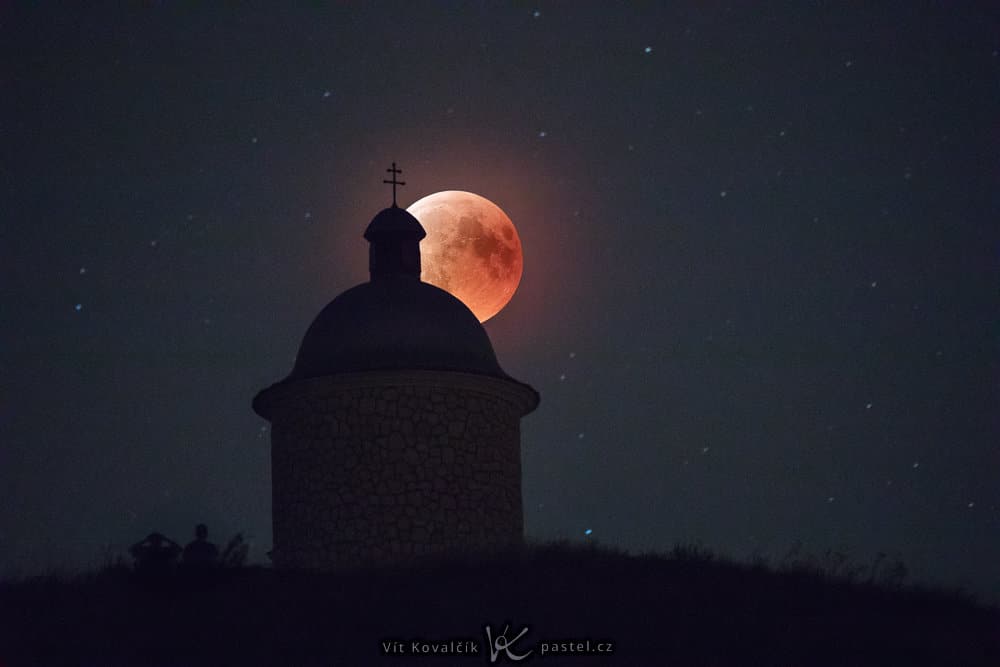
Canon 5D Mark IV, Sigma 150-600/5-6.3 C, 3.2 s, f/6.3, ISO 25 600, focal length 600mm.
It’s fun
Taking pictures of the Moon is an untraditional experience which will give you decent results in a relatively short amount of time. For a properly calculated photograph, however, it is necessary to do a bit of planning and be willing to set out into the night. In all cases, being in the fresh air in the middle of the night certainly isn’t a waste of time and will bring you plenty of photographic and other fulfilling experiences.

There are no comments yet.