How to Photograph Waterfalls Using Basic Photo Equipment
A photographer has the ability to transform even rough water into beautiful shapes. All you need is the right location and basic photography equipment. With the help of a few tips and tricks, you’ll quickly start getting some captivating shots. Let’s take a look at how it’s done.
All types of waterfalls are photo-worthy. Massive and tall waterfalls are certainly spectacular, but you can’t always get close enough. Or, picturesque waterfalls that flow from tiny creeks in the forest can be shot at a distance of just a few inches.
Where to find waterfalls
You can find larger waterfalls on maps or as local attractions in tourist guides.
Canon 5D Mark III, Canon 16-35/2.8 III, 1/10s, f/16, ISO 100, focal length 11mm
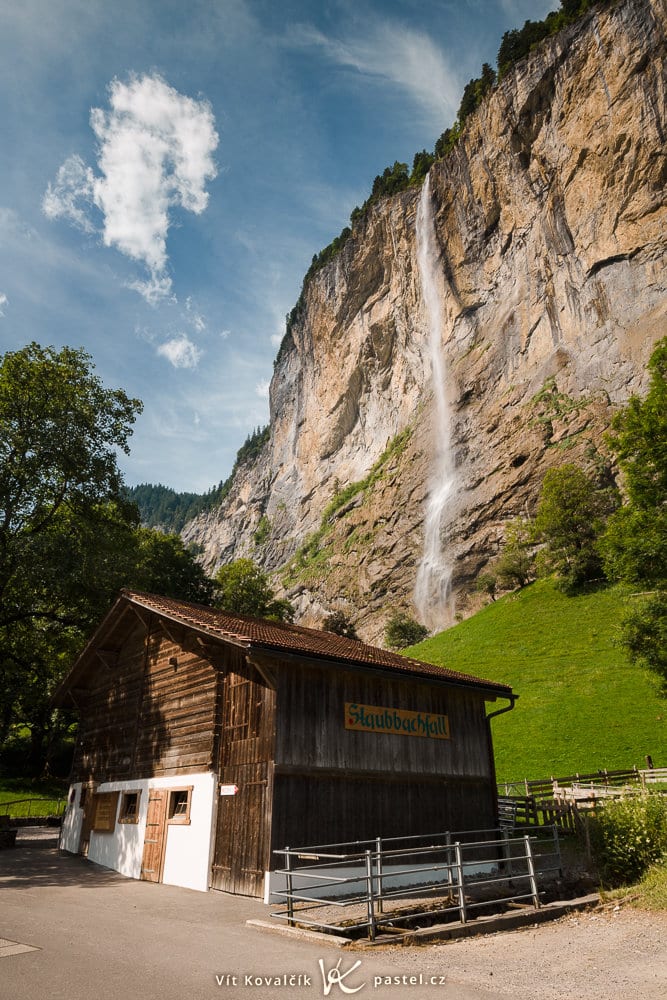
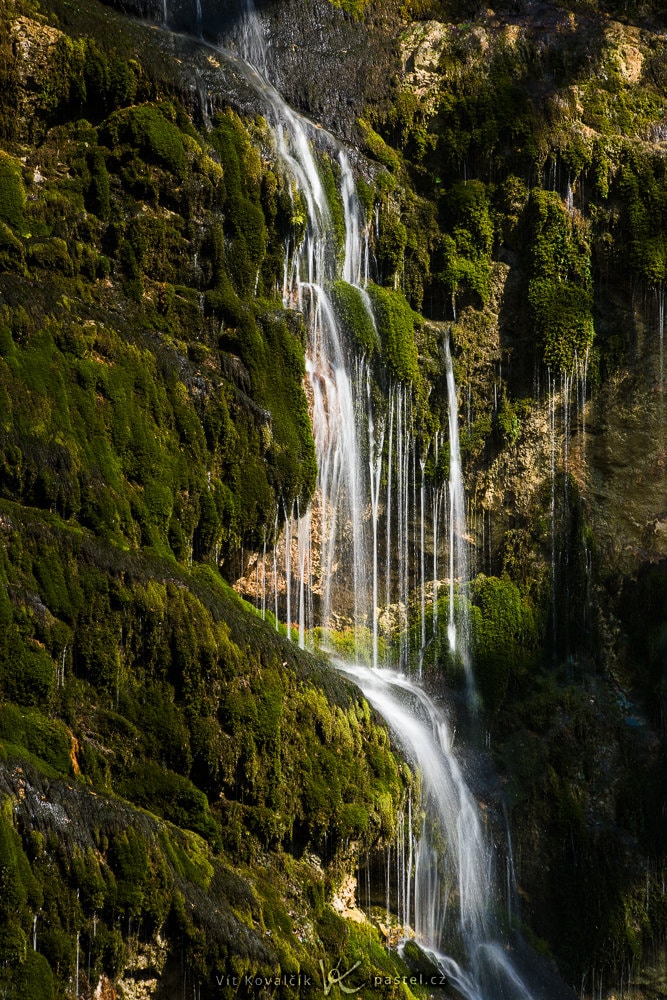
In places where waterfalls aren’t as common as they are in Switzerland, even smaller waterfalls are marked on the map.
Canon R5, Canon 16-35/2.8 III, 1.3s, f/8, ISO 100, focal length 35mm
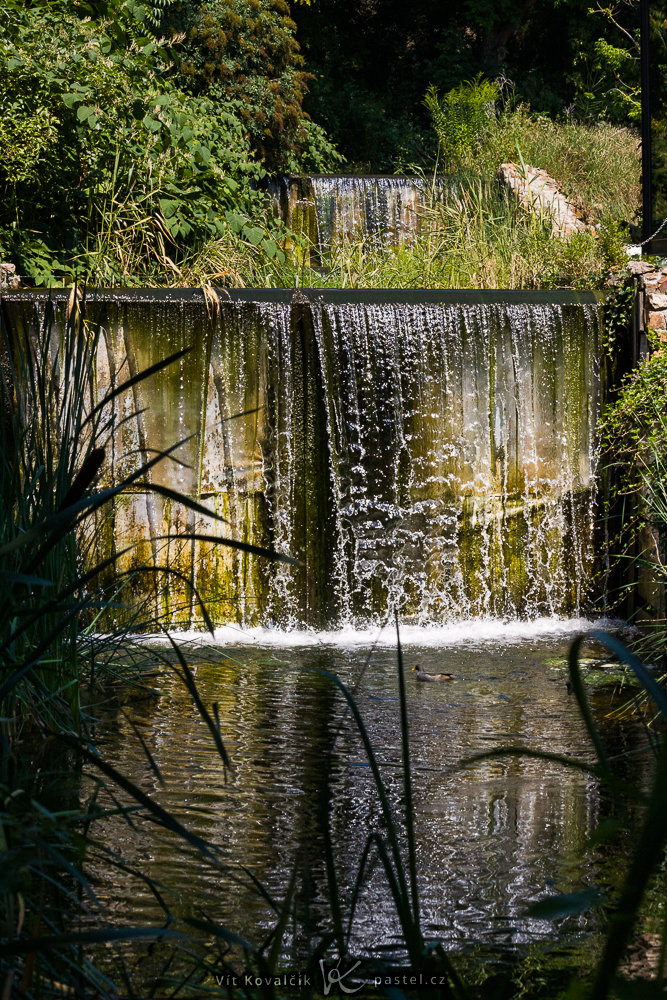
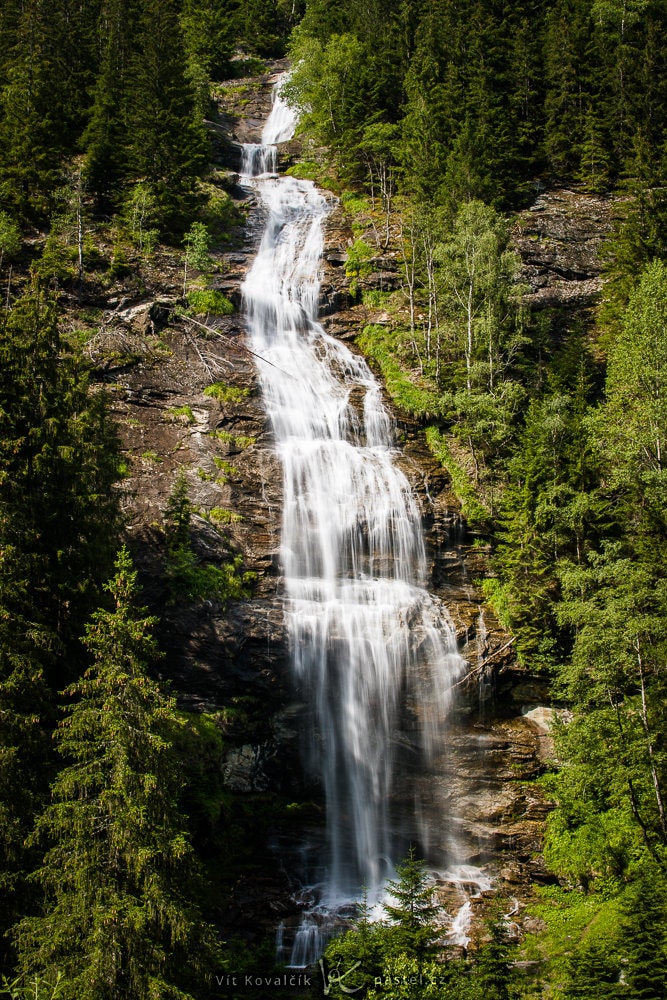
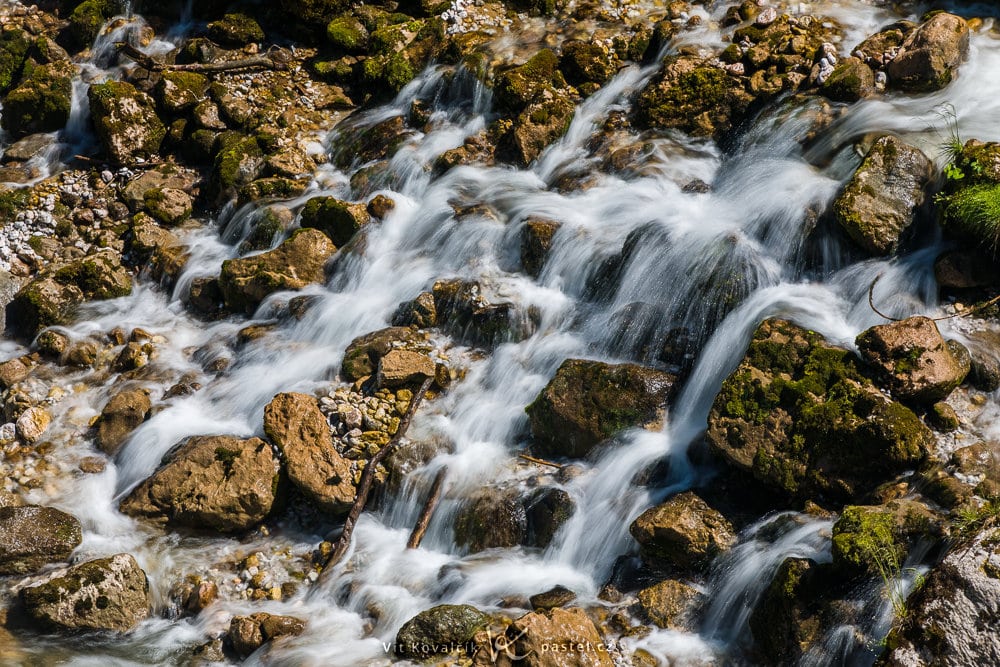
In places where small rivers and streams flow swiftly from the hills, there’s a good chance you can find a small, unknown waterfall.
Canon 5D Mark III, Canon 16-35/2.8 III, 30s, f/22, ISO 100, focal length 11mm
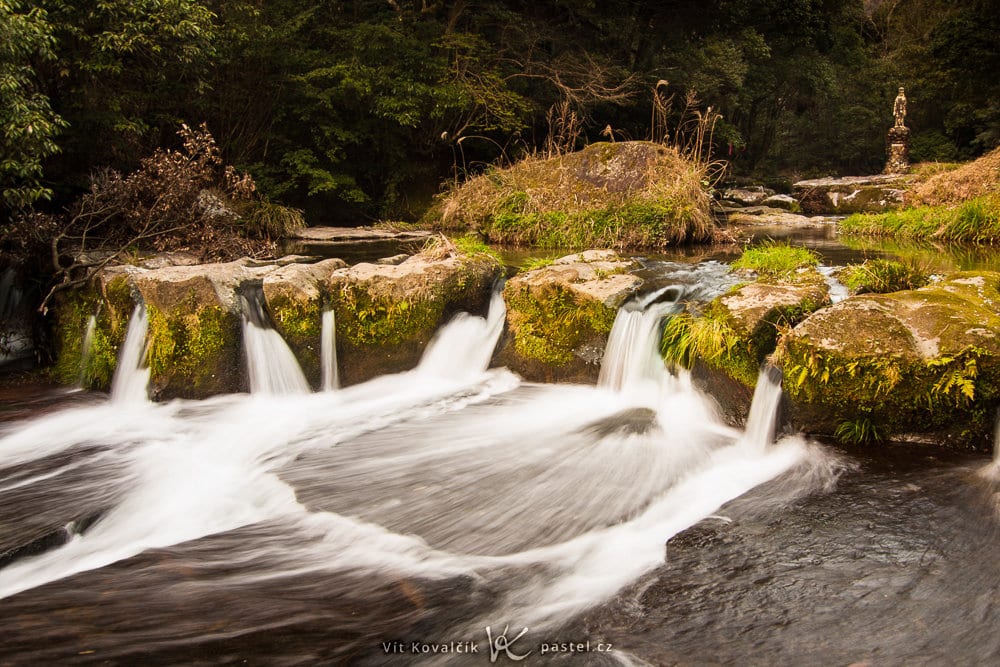
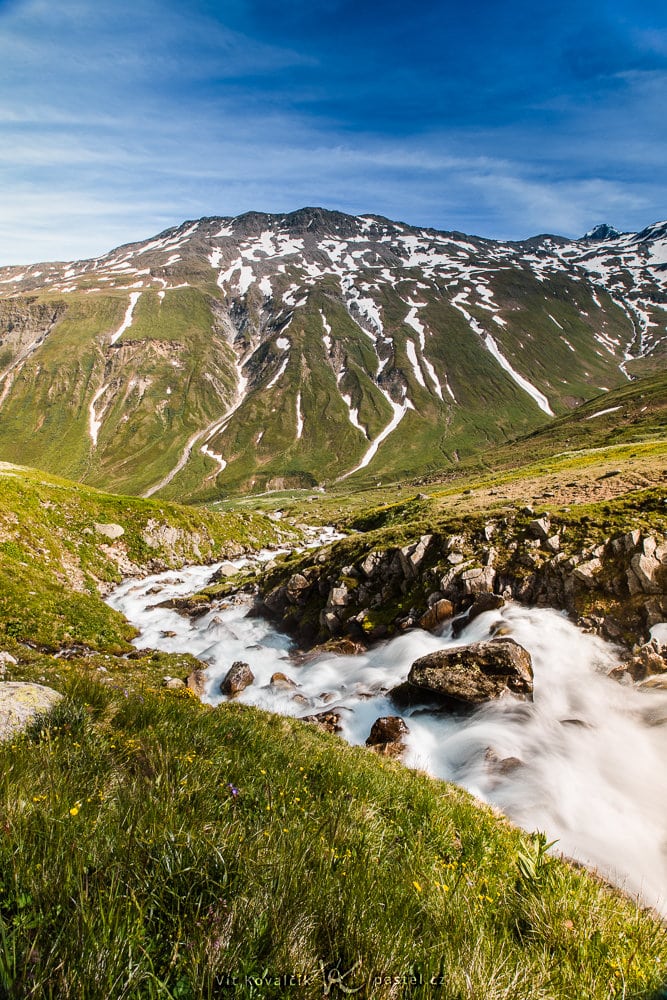
Weirs, rapids, and all types of man-made waterfalls can be used for similar photographic experiments.
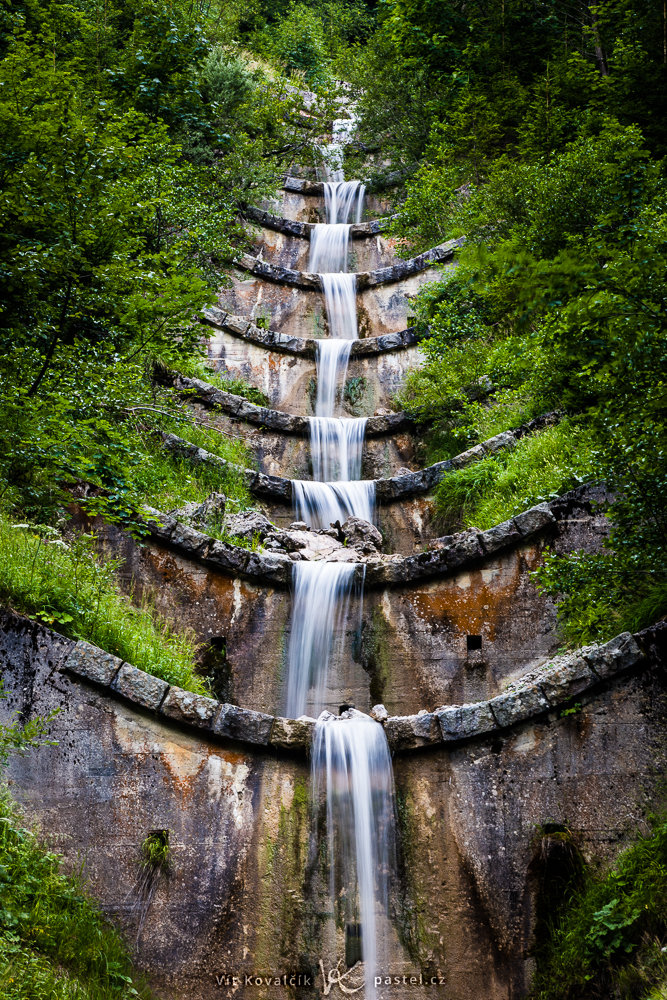
Canon 5D Mark IV, Canon 70-200/2.8 IS II, 0.5s, f/18, ISO 100, focal length 155mm
Use long shutter speeds
All waterfall effects have one thing in common: they are shot using longer shutter speeds.
Compare the following image taken with an extremely fast shutter speed of 1/2000 second. In actuality, the setting was made by mistake (ISO 1600 in the sun was certainly not intentional). Still, it shows how the water looks frozen in time.
Canon 40D, Canon EF-S 55-250/4-5.6 IS, 1/2000s, f/8, ISO 100, focal length 55mm
An image like this is not necessarily bad, but there are better options using significantly longer shutter speeds. Keep in mind, there is no ideal shutter speed. Everyone may prefer something different. Even relatively small adjustments to speed can result in completely different visual effects.
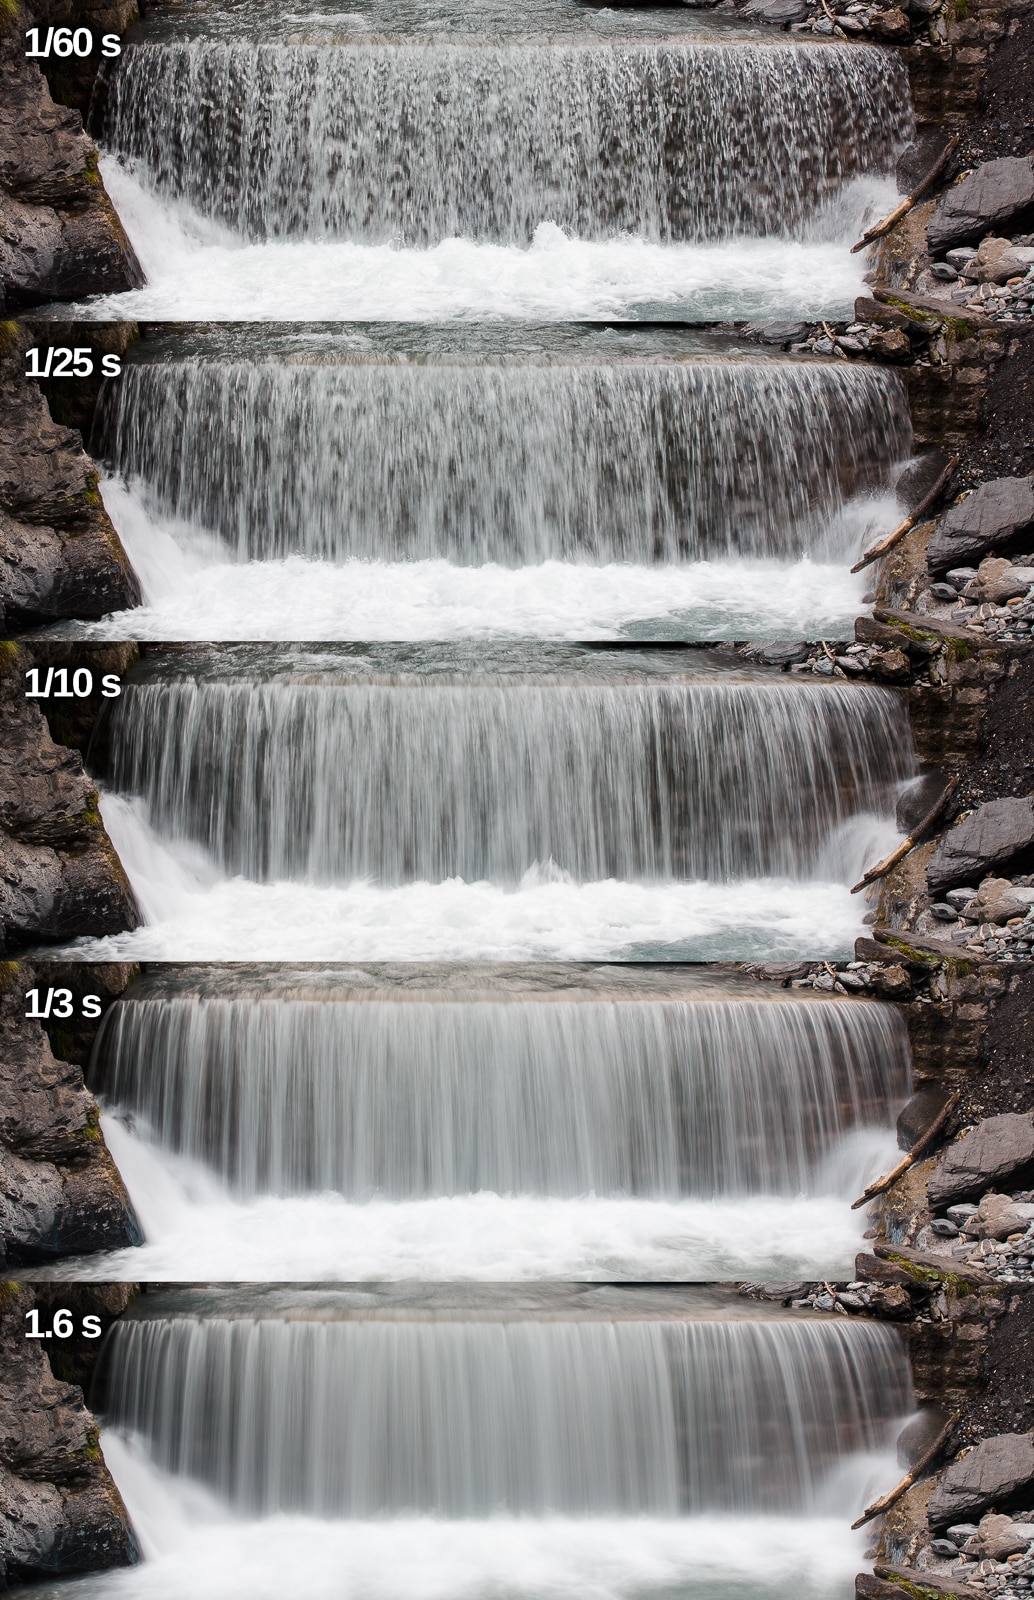
While you may like a certain shutter speed, it should be taken with a grain of salt. Every waterfall is slightly different and the shutter speed will vary depending on the speed of the waterfall and the lens being used.
The small image on your camera’s display is not always the most informative, so it’s best to take multiple shots using different settings and choose the best one from the series later.
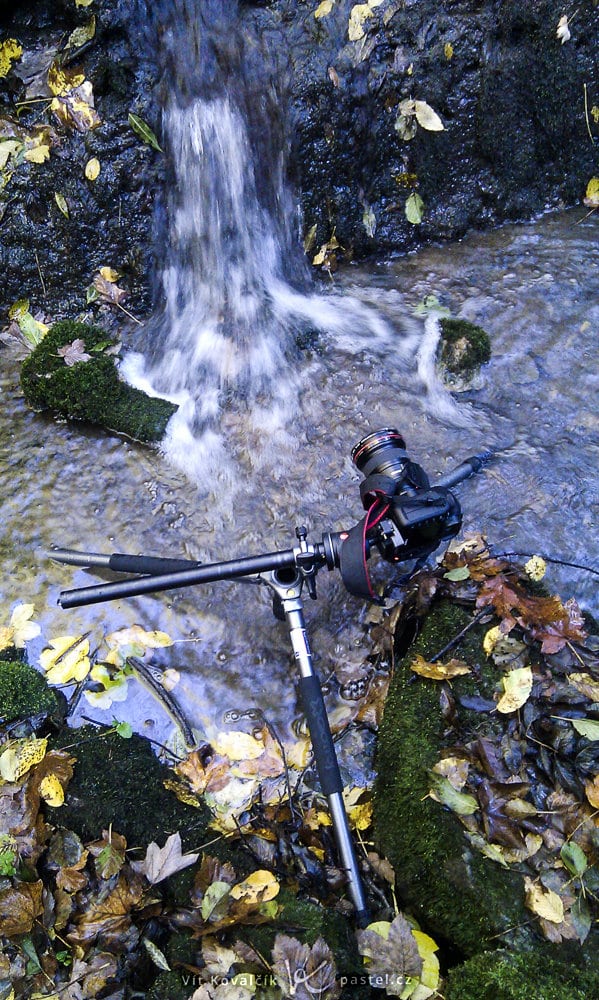
With or without a tripod?
A tripod is a highly recommended tool for photographing waterfalls and our article is no different. A tripod helps you get pin-sharp shots and is an ideal tool for replicating the same composition multiple times with different settings.
On the other hand, if you prefer fast shutter speeds and your camera or lens has image stabilization, chances are, you can get motion blur without a tripod.
It will likely take several attempts. Under even the best of circumstances, you’ll most likely end up with an image that is less sharp than a shot using a tripod.
Canon 40D, Canon EF-S 10-22/3.5-4.5, 0.3s, f/7.1, ISO 100, focal length 1mm
Camera settings
Since our goal is faster shutter speeds, you must set ISO sensitivity to a minimum. Aperture, on the other hand, should be set to higher values but not its absolute maximum. Maximum values could cause diffraction and thus overall blurriness of the image.
There are times when you’re shooting in the sun and even a high f-number won’t darken the scene enough to stretch the exposure. This is where ND filters or, at the very least, polarizing filters come in handy for blocking the surrounding light. A polarizing filter is also useful for reducing glare and increasing color saturation.
When using a tripod, the basic rules apply. In particular, turn off image stabilization to avoid any unwanted camera shake. For the same reason, I also recommend using a delayed shutter. Two seconds won’t hurt anyone and are enough to stabilize the camera after being manipulated.
Composition options
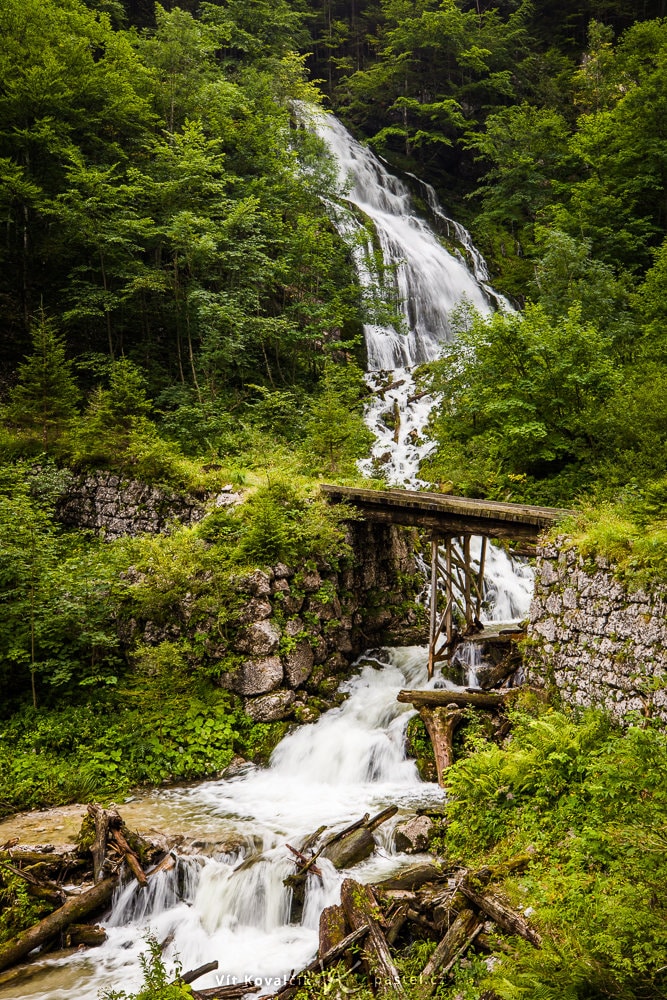
When photographing waterfalls, it is common to be limited by the surroundings. You may have little choice in terms of composition. For example, when there is a gap between the trees and a waterfall on the opposite hill that is inaccessible (or simply off the path), you are limited to shooting from below.
Canon 5D Mark IV, Canon 70-300/4-5.6L IS, 1/6s, f/14, ISO 100, focal length 70mm
Whenever possible, I try to give the photo context. Usually, there is water flow that leads to the main waterfall. At that point, I try to find a viewpoint from which the river is visible and has a curved shape. The best prize goes to an S-shaped curve, but even a C-shaped curve is not to be discounted.
Canon 5D Mark IV, Canon 16-35/2.8 III, 1/15s, f/10, ISO 100, focal length 20mm
Canon 5D Mark IV, Canon 16-35/2.8 III, 1/15s, f/9, ISO 200, focal length 35mm
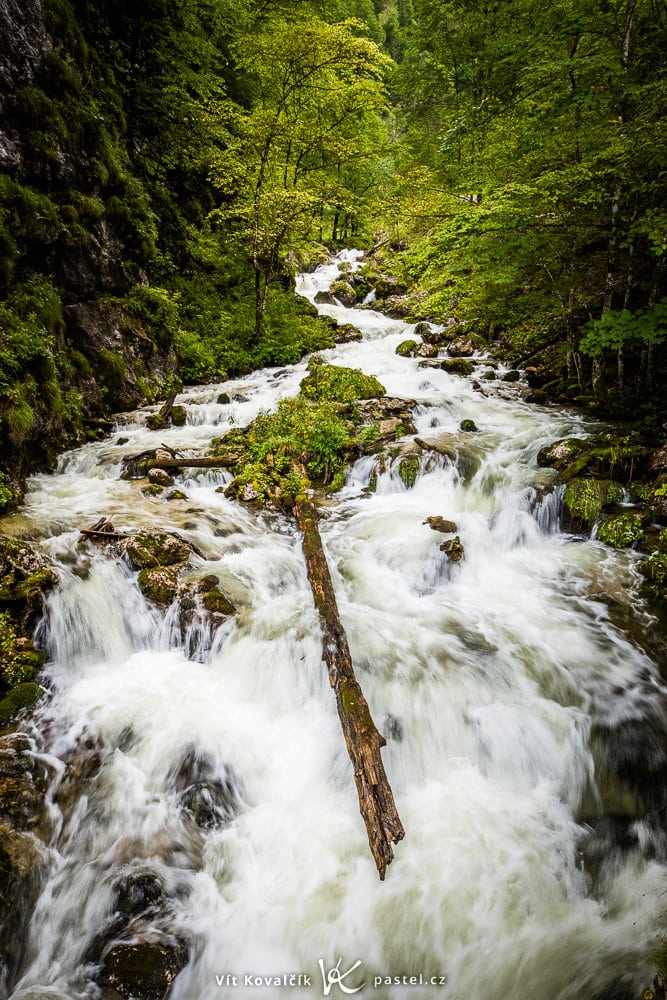
Another option is to do without the surroundings and get a close-up shot hidden somewhere in the middle of the waterfall. A telephoto lens can help isolate the given area without needing to expose yourself or your camera equipment to the water’s spray.
Canon 5D Mark IV, Canon 70-300/4-5.6 IS, 0.5s, f/16, ISO 100, focal length 165mm
Canon 5D Mark IV, Canon 70-200/2.8 IS II, 1/6s, f/16, ISO 100, focal length 165mm
Interestingly, when using an ultra wide-angle lens for blurring the water, it’s unclear which direction the river flows, even at a steep incline. For example, in the photo below and photos similar to it, many people have told me that it appears as if the water is flowing towards the camera, though the opposite is true. It’s important to watch out for this confusing effect.
Canon 5D Mark III, Canon 16-35/2.8 III, 0.4s, f/14, ISO 100, focal length 16mm
It is also useful to point out that even though you are shooting a moving scene, it is repetitive enough that it may be worth stitching together a realistic-looking panorama. The following photo was stitched together using the freeware program Hugin:
Individual images: Canon 5D Mark IV, Canon 16-35/2.8 III, 1/200s, and others due to HDR, f/14, ISO 100, focal length 16mm
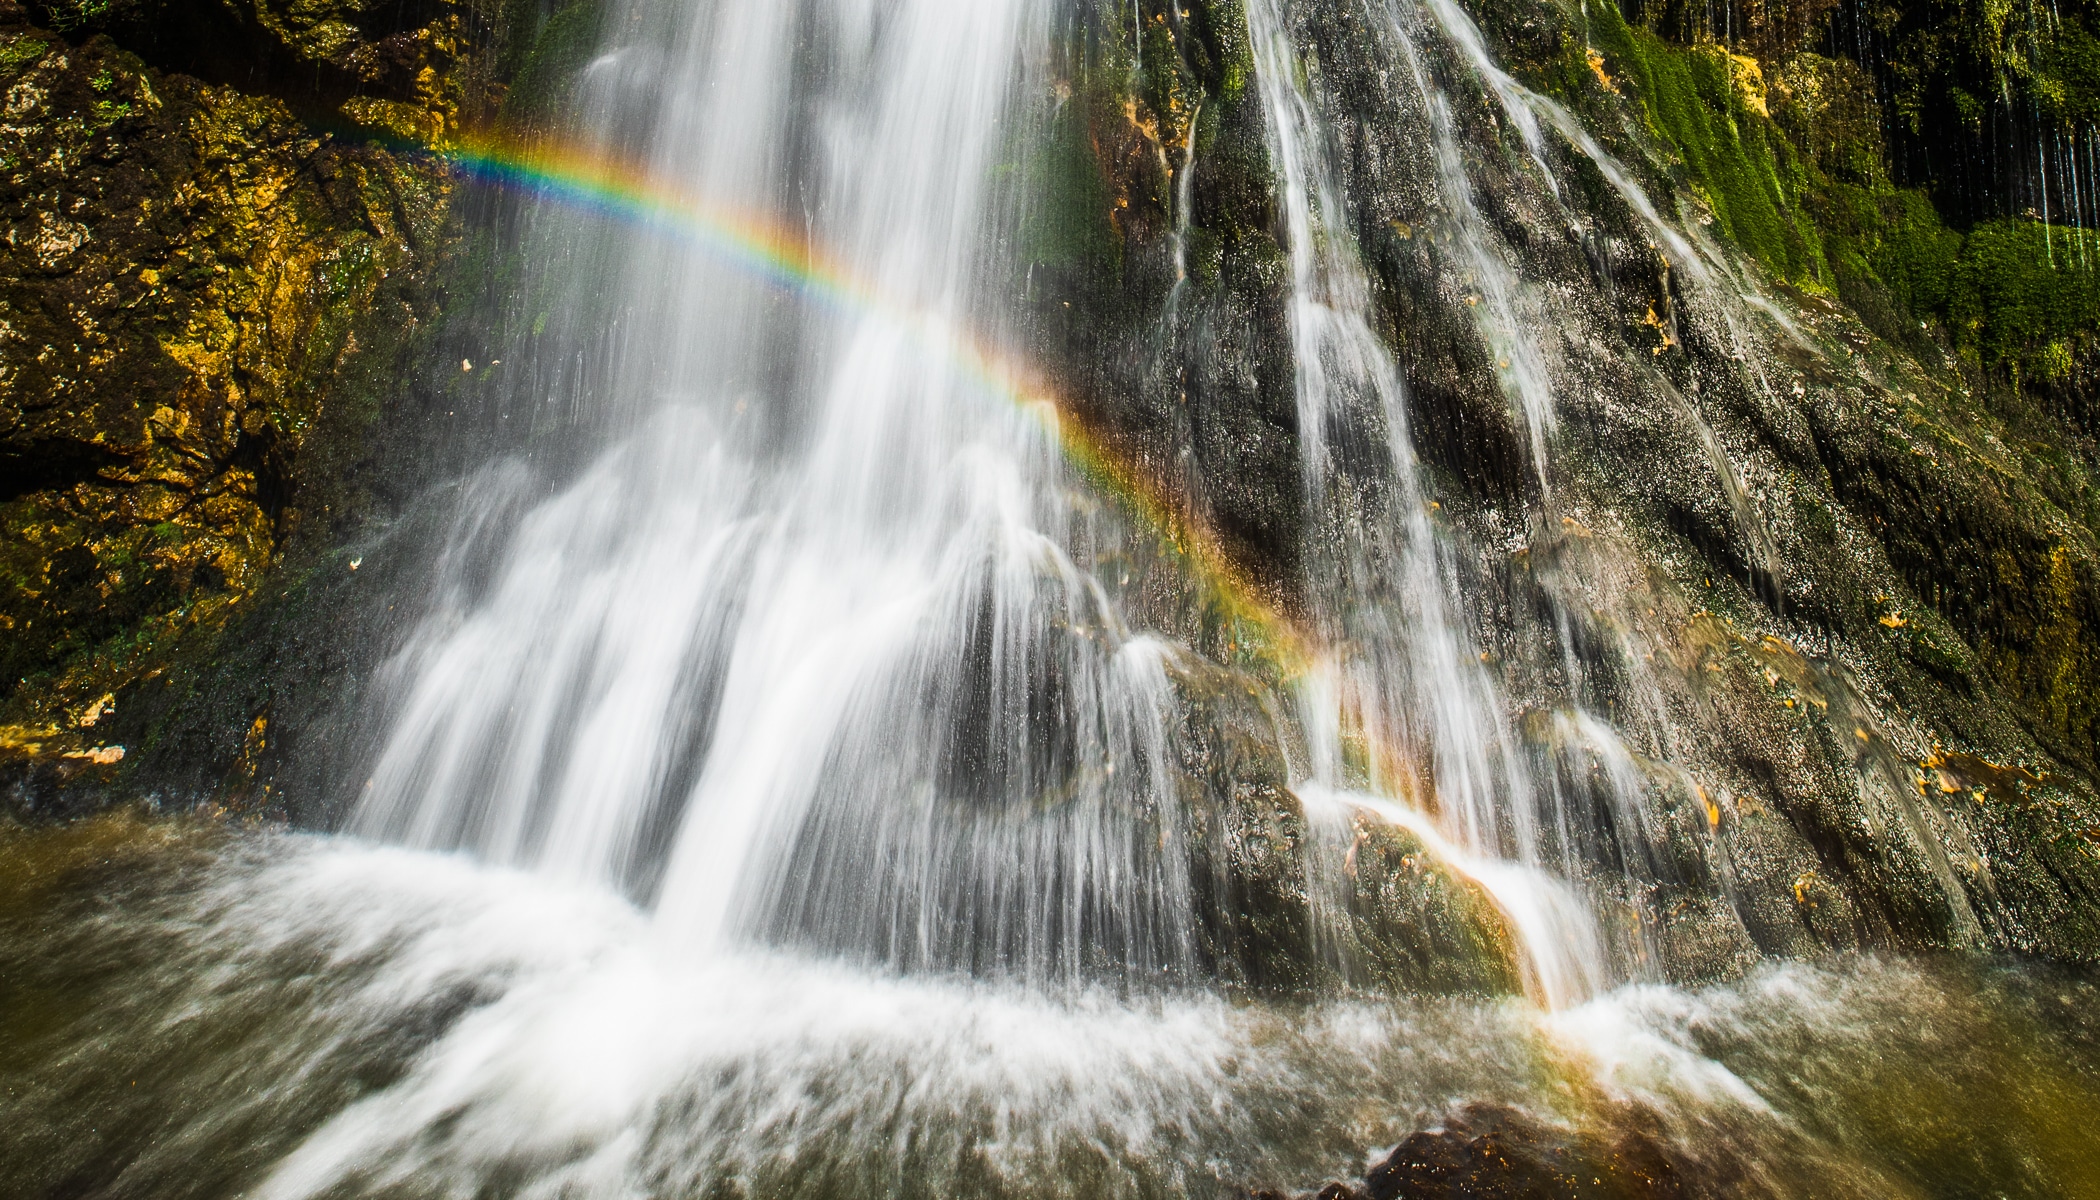
Also, notice the rainbow that is created in the direction of the sun when enough water droplets are held in the air. They seldom appear, but when they do, they are worth capturing.
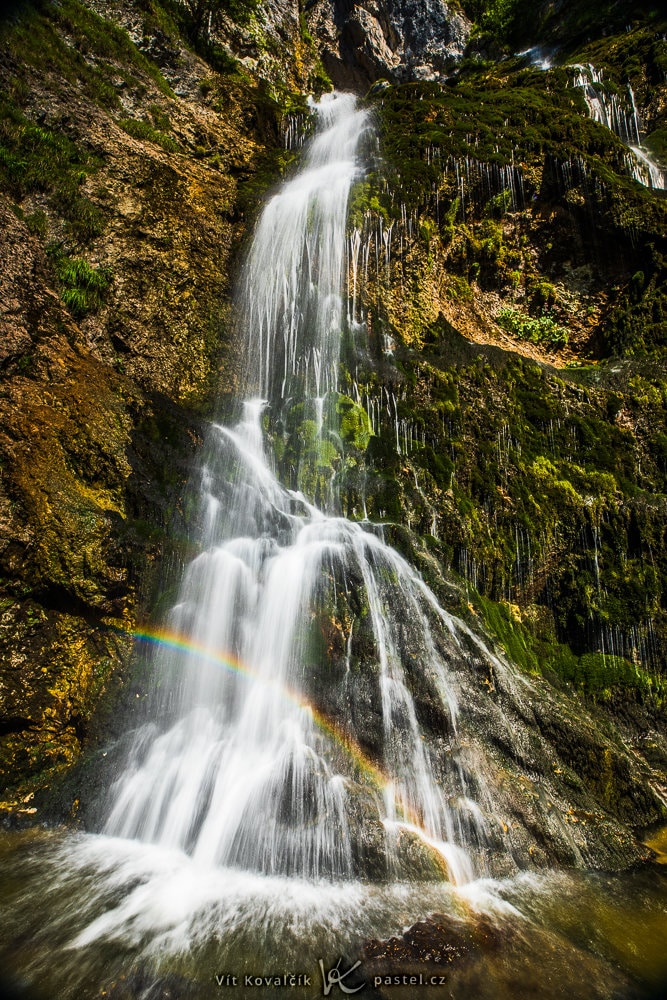
Canon 5D Mark III, Canon 16-35/2.8 III, 1/5s, f/14, ISO 100, focal length 16mm
Final suggestions
Waterfalls offer many possibilities and are among destinations that are photo-worthy even when it’s overcast. With a bit of determination and basic photography gear, you can get captivating shots that showcase your photography skills.
Now that you know all the tricks, I’ll add one more in closing. From time to time, water droplets appear on your camera lens and may sabotage your hard work. Don’t forget to bring along a cloth!
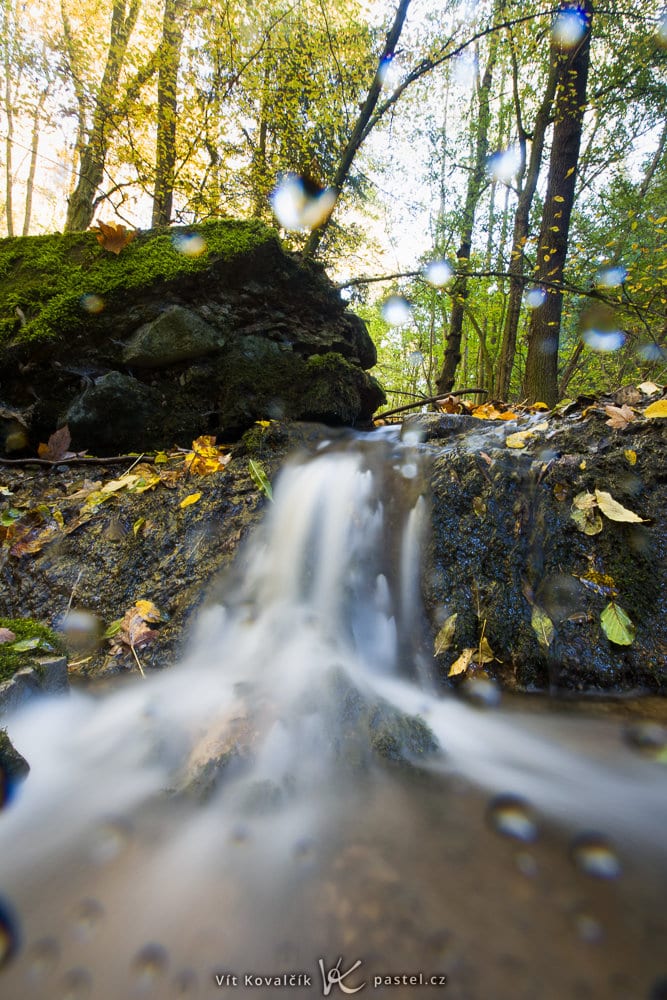
Canon 5D Mark III, Canon 16-35/28 III, 20s, f/22, ISO 100, focal length 16mm
There are no comments yet.