Learn to Stop Red Blowout
The article is over 5 years old. The information in it may be outdated.
![]()
We are working on its update. In the meantime, you can read some more recent articles.

![]()
We are working on its update. In the meantime, you can read some more recent articles.
Loss of detail in red objects is a common problem in digital photographs. Digital cameras’ sensors are more sensitive to the red color channel than the other two (blue and green), and meanwhile overexposure of the red channel can lead to the loss of detail in red objects. In this article, we’ll show how to restore detail in red objects using Zoner Studio.
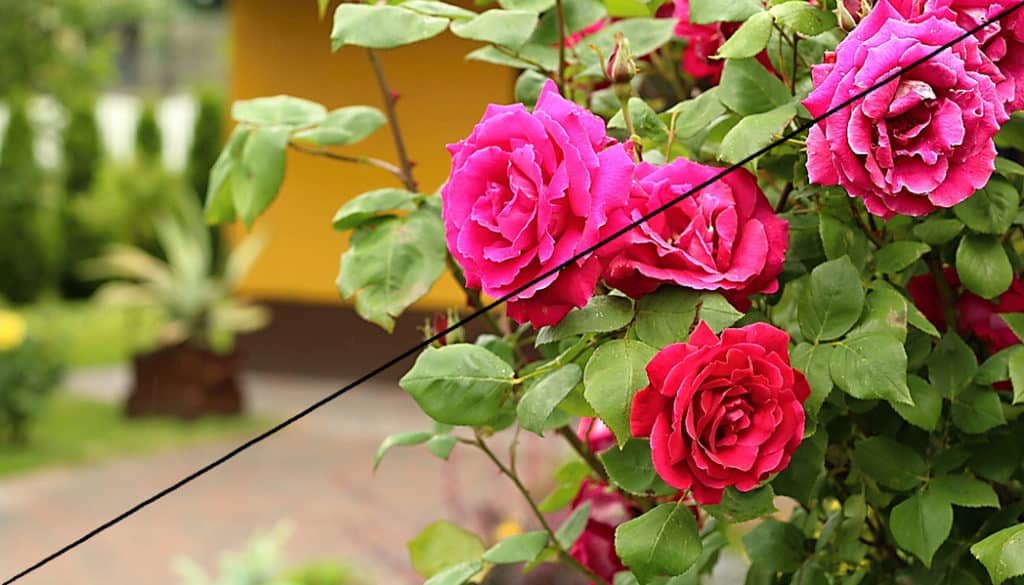
The photo below is a typical example of a blown out (overexposed) red channel—the roses have lost their details.
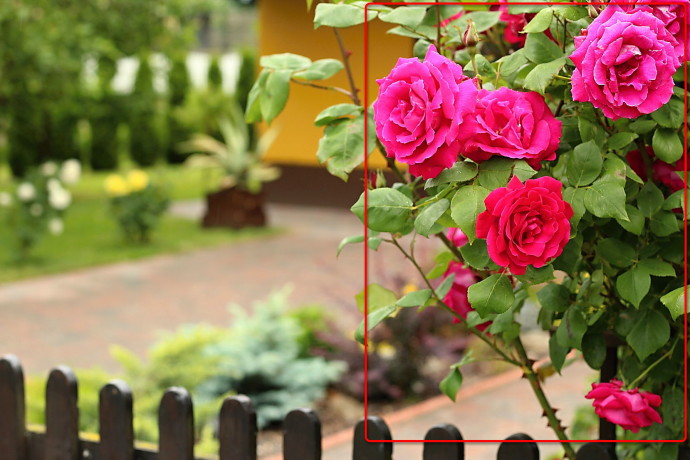
There’s a way to stop this problem before it starts. When photographing something with a striking red color, don’t just watch the overall histogram. Watch the red channel’s histogram separately, too. Sometimes you’ll need to mildly underexpose a photo in order to preserve detail in red objects.
Or instead you can put a blue filter on your lens, reducing the amount of red light coming in, so that the reds won’t be overexposed unless your whole picture is. Just be prepared in that case to adjust the white balance, to keep your whole picture from turning bluish.
But what if it’s too late for any of that? Today we’ll cover two post-production tricks for restoring detail in red objects.
You’ll be using these tools:
The simplest option—and it’s an effective one too—is to use Vibrance in combination with Saturation.
Use the Vibrance setting to increase saturation in the hues of a picture that are relatively unsaturated. Meanwhile, Vibrance avoids saturating any hues that are saturated enough already—typically this means hues containing reds and skin tones.
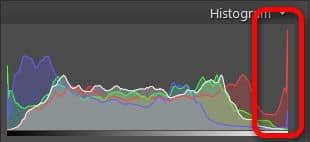
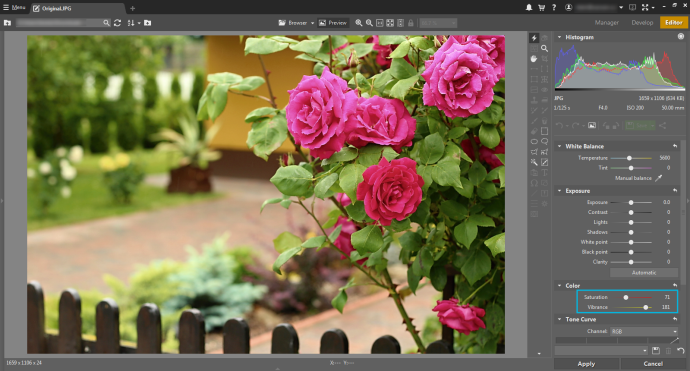
Go to Quick Edits (Q), and then, while monitoring the histogram and the image, lower the Saturation to restore detail to the red channel.
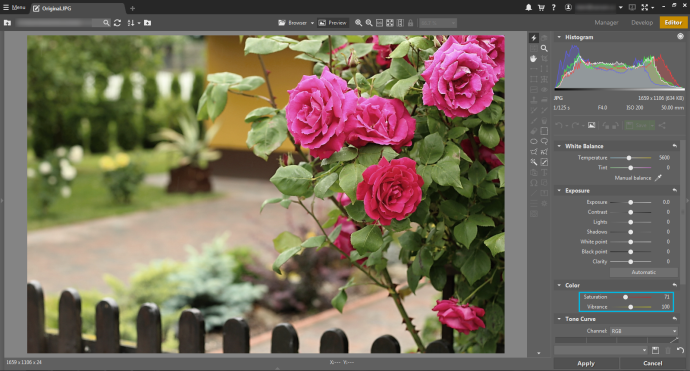
So follow up by raising Vibrance to restore the photo’s saturation in the places where it matters.
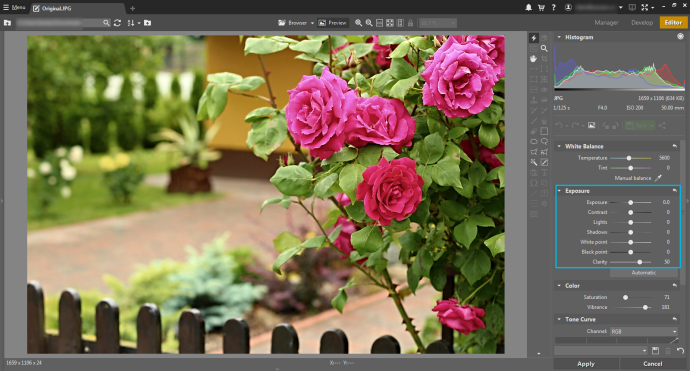
You may want to wrap up by also raising Clarity. This helps to add detail to flowers, by increasing local contrast.
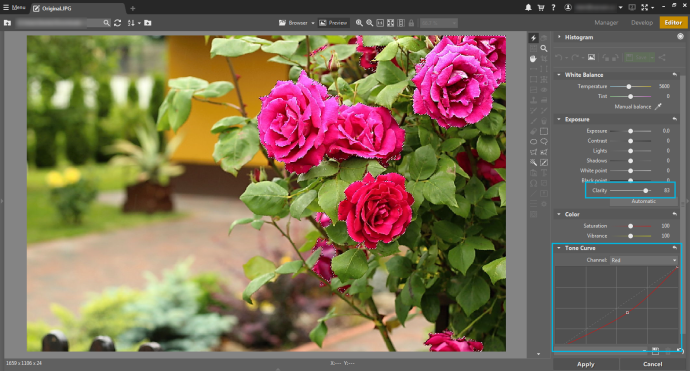
The more classical way to reduce red-channel blowout is to select the red area and selectively desaturate it.
To create such a selection, use the Magnetic Lasso (A) or the Magic Wand (W) tool. The selection need not be 100% precise.
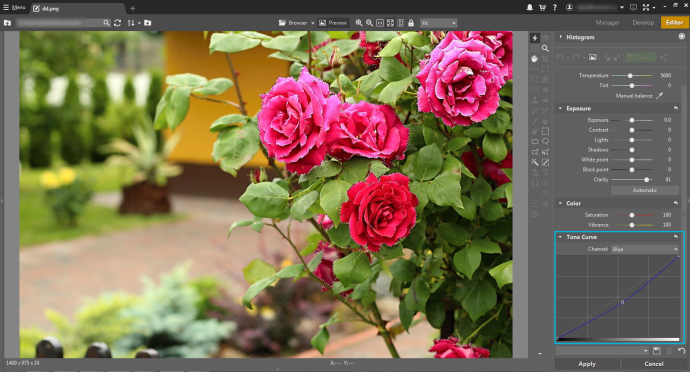
After making the selection, add some Vibrance to it via Quick Edits (Q) and pull the red channel’s tone curve downwards. That will desaturate the reds.
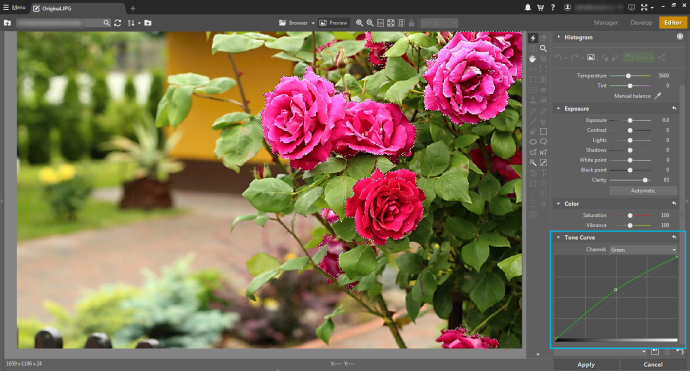
To add even more detail to the roses, move the green channel’s tone curve upwards.
And to wrap up, emphasize the roses’ redness by dragging the blue channel’s tone curve downwards.
All this does take some work, and it never looks quite as good as just getting exposure right in the first place. How do you do that? While taking a picture of any scene that contains strikingly red objects, you need to watch not only the overall histogram, but also the histograms for the individual color channels.
But when mistakes happen, the photo-editor option is always there for you as a fallback.
In closing, here’s a before-and-after:


Subscribe to receive the best learn.zoner.com has to offer
By confirming the subscription, you consent to the processing of your personal data for receiving newsletter. Learn more in our privacy policy.
25. November 2015
I have worked in the field of digital editing since 1996. I started photographing in 2006 and from that moment, it has gradually become my main field of expertise. Professionally, I do portrait photography (http://portretyzeman.cz), architecture, cityscapes, and also product/commercial photography. You’ll find a sampling of my work on the web at http://janzemanphotography.com and other articles and photographs on my blog http://janz.cz.
There are no comments yet.