Super Macro Photography: Discover the Magic of Close-up Macro Photography

The majority of photographers spend their time shooting things that are normally observable. But it is possible to use your camera differently and immerse yourself in a world that is usually unseen, or at the very least, not seen in great detail. Embark on a journey with us to the limits of normal Macro photography. We’ll show you one of the methods for photographing Super Macro, that is, Macro with larger magnification.
Anyone can do Super Macro photography, however, it does require some less-than-standard equipment. Nevertheless, this equipment is available at many different price points. You can start out very simply and when the observation of minute details draws you in even more, you can splurge for higher-end equipment.
What is Super Macro?
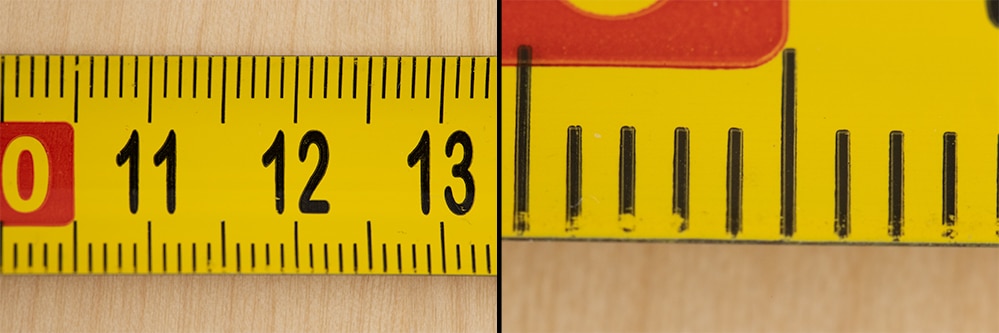
Standard Macro photography is defined by a magnification of 1:1 – objects are projected on to the sensor at their actual size. That is, at least on a full-frame sensor with a width of 36mm.
With increased magnification, we gradually move to the realm of Super Macro. For an 18mm wide object that fills the entire 36mm sensor plane, you’ll get 2:1 magnification. If you are able to shoot a 9mm object, the magnification is 4:1, and so on.
Shooting tiny objects at a very close distance has its joys, but also brings complications that we must deal with. In this article, we’ll take a more in-depth look at these issues.
Use your own lens, a Macro lens, or add-ons
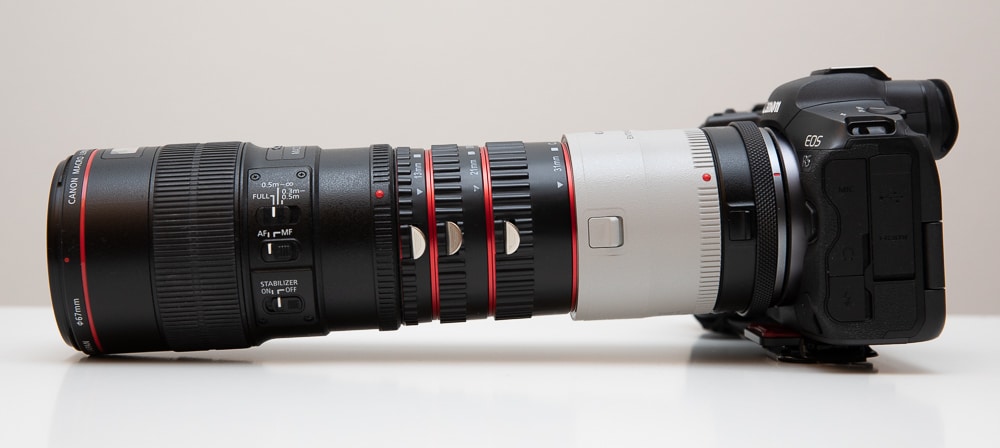
The simplest solution is to purchase a specialized Macro lens. At the same time, it’s the most expensive solution because Super Macro lenses frequently cannot be used for other types of photography. A classic example is the Canon MP-E 65mm/2.8 1-5x Macro with a maximum focusing distance of about 31cm. You can forget about using it for portraits and landscapes.
Luckily there are other options available. The majority of them operate under the assumption that you own an interchangeable lens camera. But if you don’t, you can get close-up filters based on your specific type of camera. There are also close-up lenses that screw into the universal filter thread of your camera. You can picture both as acting like a magnifying glass in front of the lens, enlarging the image before sending it on.
For interchangeable lens cameras, extension tubes are common and attach between the normal lens and camera body. This way, only an enlarged cutout from the center of the image is sent to the sensor, magnified according. What’s more, the focal distance range moves significantly closer to the camera, hence making it unable to focus in the distance.
Teleconvertors work in a similar way, even though Macro magnification is more so secondary in these lenses. Their high price tag makes them impractical to purchase solely for Macro photography.
A useful trick is the use of a reverse lens, where all you need to do is add an affordable reversing ring to your existing equipment.
We shouldn’t forget even the simple cropping of the photo on a computer. Today’s devices have tons of megapixels, so the loss of even a few million pixels may not matter.
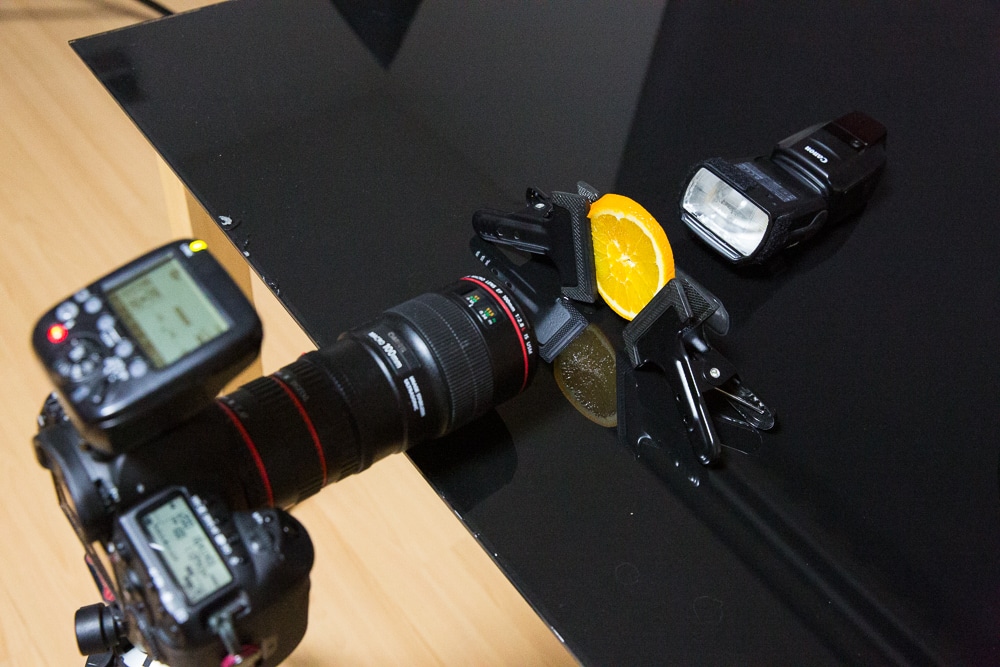
By combining the above options, you may get an even more intense magnification. For instance, for the majority of the photos in this article, I’ve used a 100mm Macro lens with 1:1 maximum magnification with the option to focus to infinity, to which I’ve added a total of 65mm in extension tubes, and finally, a 2x teleconverter. This way, I got a maximum magnification of approximately 4:1.
Problem one: loss of image quality
For every extra piece of equipment you add to your setup, you are enlarging the image along with its imperfections. For this reason, before starting to shoot, I recommend you find out what range of f-numbers gives you the best picture using your lens and its add-ons. For me, it was around f/4 to f/5, but when increasing or decreasing the depth of field, I found myself needing to readjust.
Naturally, the higher quality the lens is that you are starting out with, the better. With a lens that is just barely passable under normal conditions, adding extension tubes may give you a Macro shot, but it will be blurry or full of color problems.
Problem two: loss of light
The majority of adaptors reduce the amount of light that travels to the sensor. Adding more adaptors only increases this loss of light.
In my case, the Canon 100/2.8L IS Macro has a standard maximum aperture of f/2.8. After focusing at the minimum distance for Macro photography, it behaves like an f/5.6 (essentially with built-in extension tubes). This means there will be four times less light. After adding the set of extension tubes, it’s eight times less, and when I add the teleconverter, we’re talking about a loss of light of 32 times compared to the starting point. The aperture is still set to its lowest f/2.8, so if I wanted to use f/8, the level of light would decrease by a total of 256 times! That’s like photographing with an aperture of f/45.
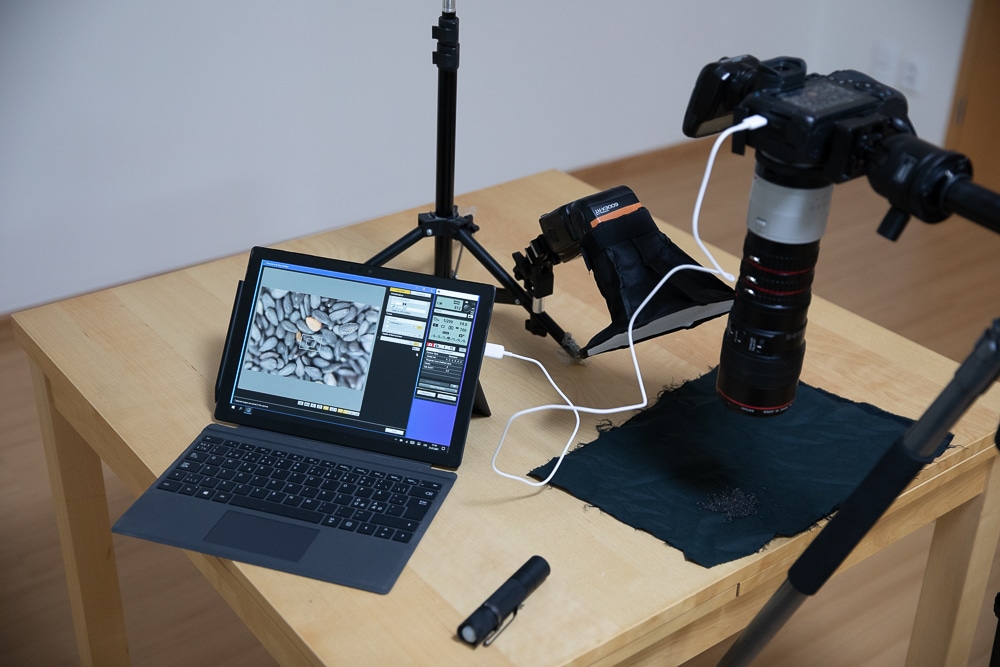
A light source placed at a short distance will luckily only greatly increase in strength, so all you need to do is get very close to the photographed item. If you’re not afraid to use a tripod, you can use a long exposure to compensate for the loss of light.
In my case, the source of light was a remote, external flash. Fans of Macro photography also like using a ring flash. Diffused light is more pleasing than a directional light straight from the flash, so I used a small softbox or a piece of paper in front of the photographed object.
Problem three: lots of camera shake and nothing is in focus
Depth of field at this distance is truly tiny. The problem is not only sharpness, but also keeping the plane of focus in the right place. When shooting handheld it’s simpler to manually set the minimum distance beforehand and then with slow movement get the object into the plane of focus.
For more precise results and consistency, it’s best to use a tripod. Even here, camera shake is an issue, so use a delayed shutter and prepare yourself for more complicated focusing. A number of cameras are also able to connect via the computer or smartphone, so those that are ultra tech-savvy can potentially control the shutter, settings, and even focus remotely.
For those of us that aren’t proud owners of tripod heads with Macro rails, it’s often more practical to move the item than adjust screws on the tripod.
Helicon Focus is a specialized app for the pros. It allows you to automatically take a number of photos with only slightly adjusted focus and then connected them all into one image on the computer. For each image source, only the sharpest part is used and together it results in a picture with a much larger depth of field than would be possible with the camera alone. This technique is referred to as focus stacking.
TIP: Focus stacking can be done in Zoner Photo Studio X. We’ve written an article about it – Graduate to a narrow depth of field – Discover the magic of focus stacking.
Let the natural world inspire you
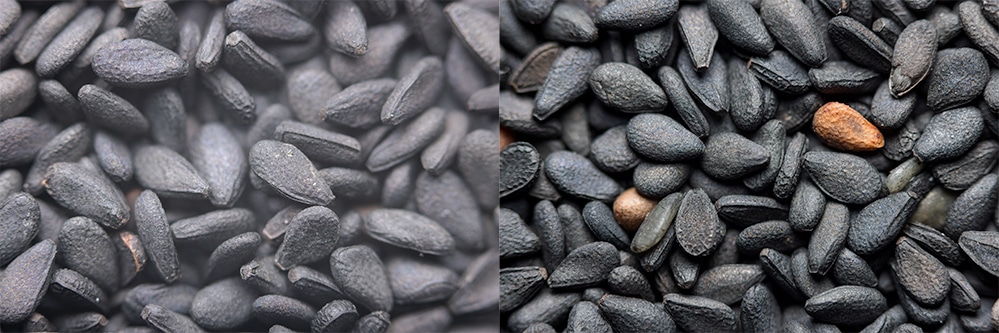
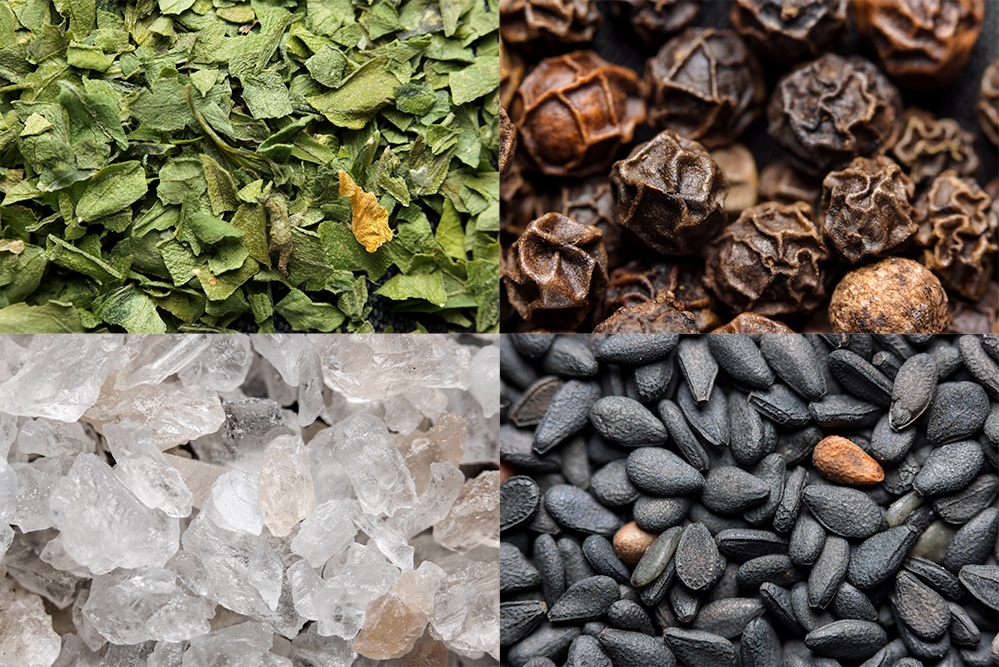
The most typical subject of Macro photography is the natural world. Details of insects in particular are an all-time favorite. I chose a more static setting, the world of spices.
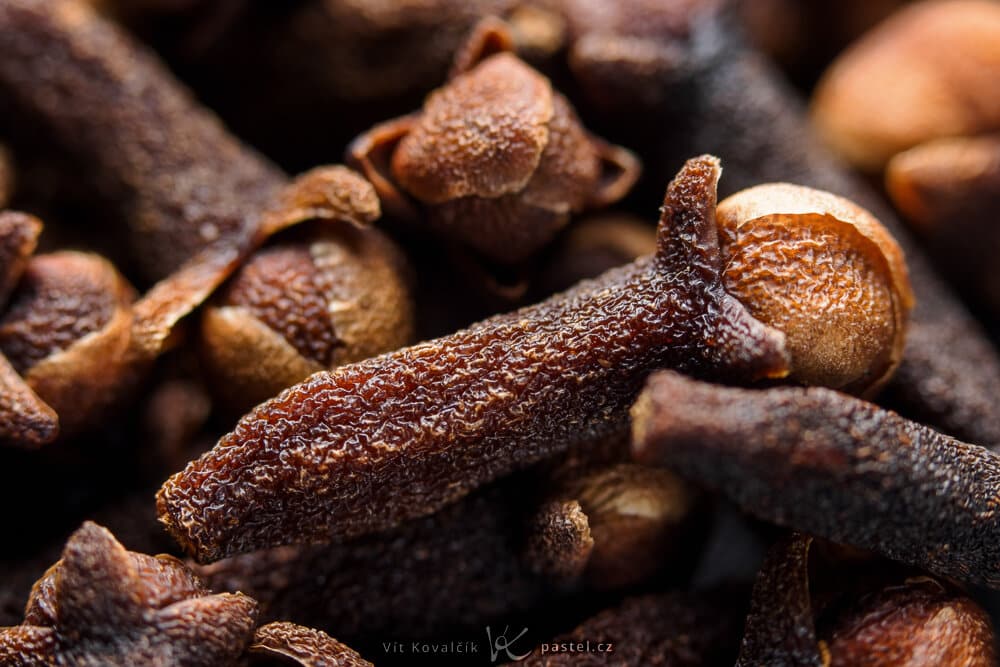
Canon R5, Canon EF 100/2.8L IS Macro + extension tubes + 2x TC, 1/200 s, f/5, ISO 100.
Another suggestion I’d add is to use a dark base (in our case a piece of black cloth). When experimenting with a white plate, it reflected light from the flash. Even though the plate isn’t visible in the photo itself, it functions as an intensive reflector and significantly lowers contrast.
You can easily get pictures of other spices in a similar manner.
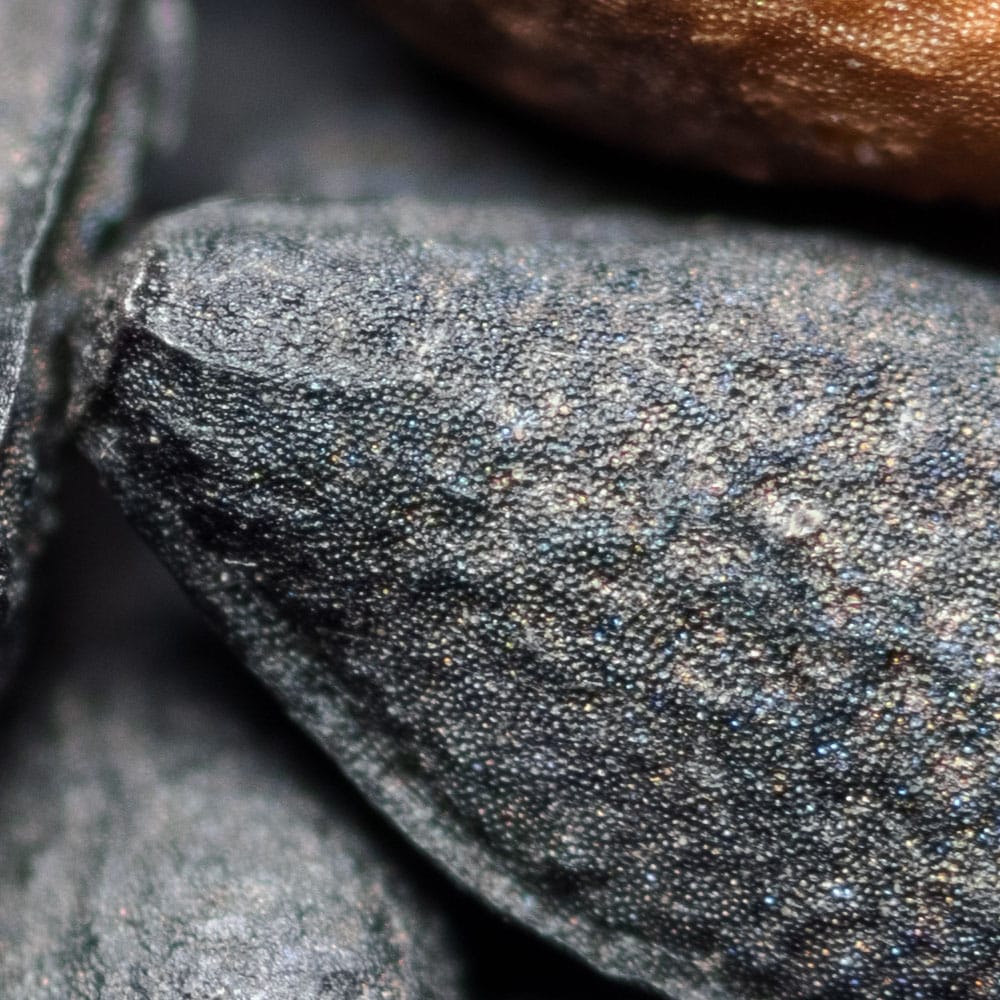
If you’ve ever wondered what a sesame seed looks like in detail, here is an enlarged cutout of the shot above:
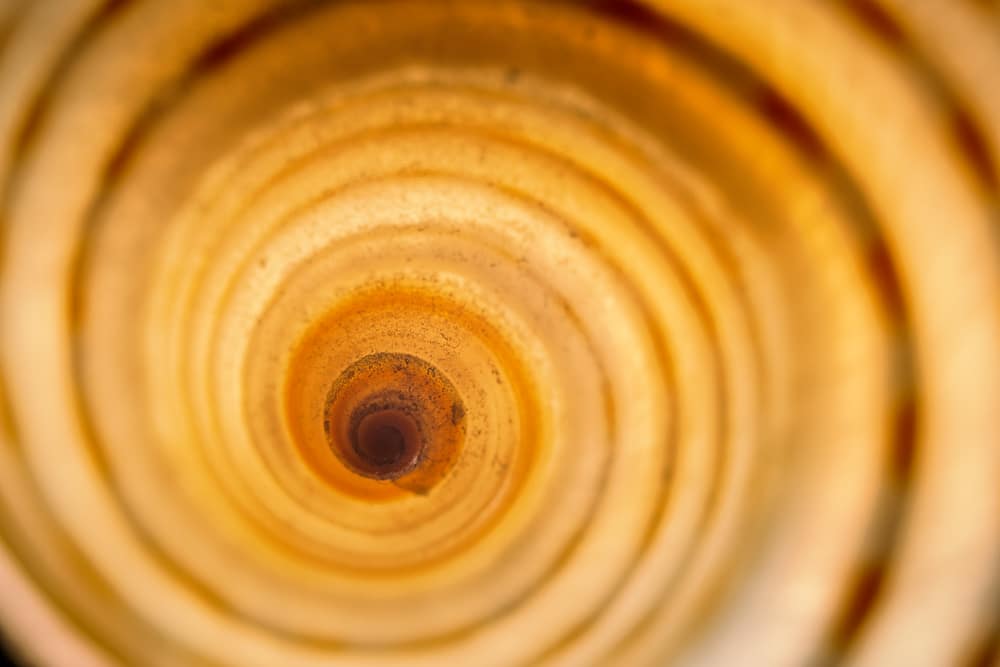
Other items from nature can also be fascinating, such as the detail of a seashell below.
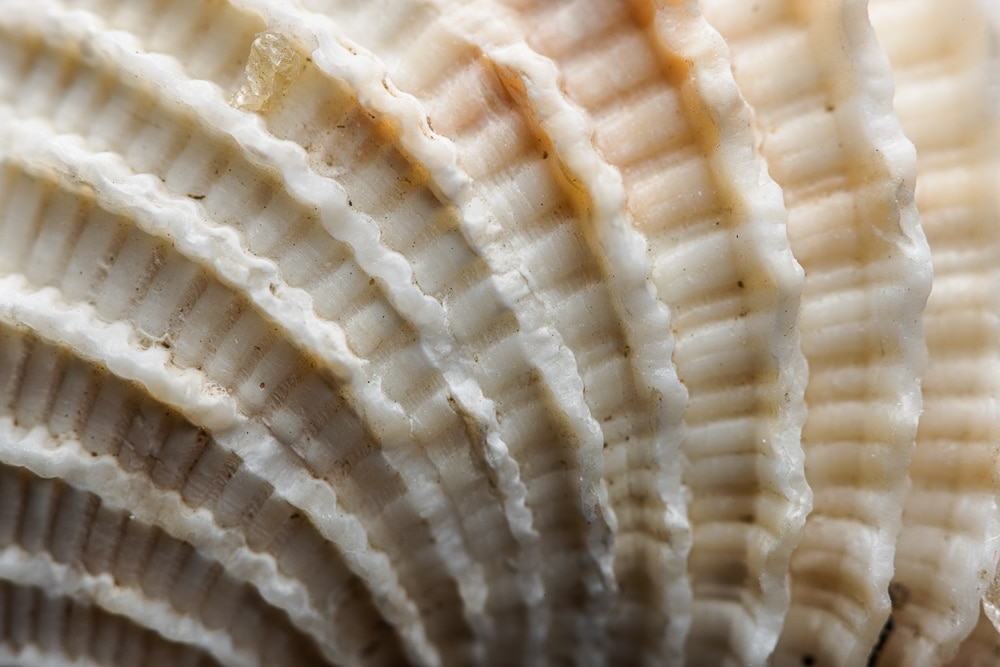
Canon R5, Canon EF 100/2.8L IS Macro + extension tubes + 2x TC, 1/200 s, f/5, ISO 100.
You’ll get this unique effect with a light that shines through the item towards the lens. This can bring delicate seashells to life.
Canon R5, Canon EF 100/2.8L IS Macro + extension tubes + 2x TC, 1/200 s, f/5, ISO 100.
A similar process also works with other objects. In the following example, we used a thin orange slice:
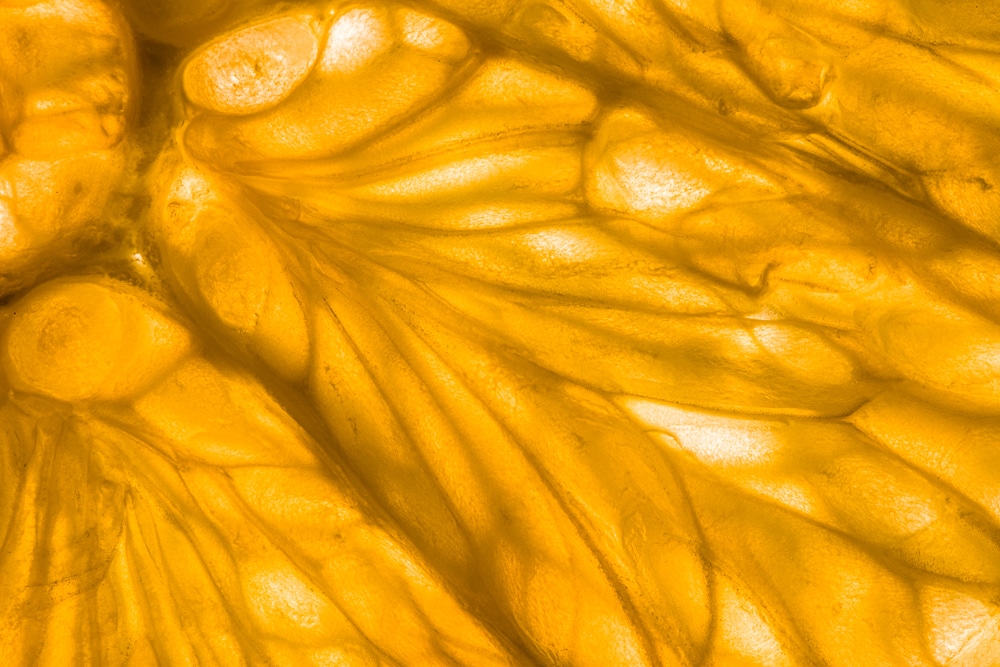
Canon 5D Mark IV, Canon EF 100/2.8L IS Macro + extension tubes + 2x TC, 1/200 s, f/16, ISO 100.
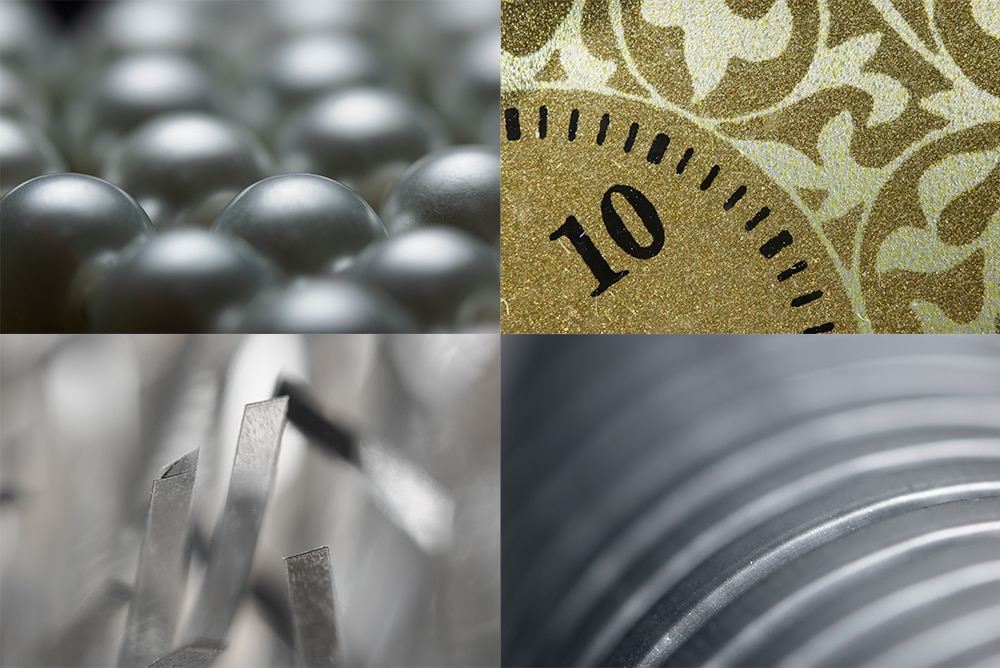
Include man-made objects
When nature doesn’t catch your eye, it may be worth having a look around your own house. Some examples to inspire you can be found in the picture below.
Super Macro is your gateway to a whole new world
No matter what you choose in the end, you will be surprised at your brand-new perspective on everyday items. It may just be that something won’t be able to be photographed the way you imagined it. Then again, there will be times when you’ll discover fascinating possibilities. All you have to do is try.
There are no comments yet.