A well-organized collection—the way to find any photo fast, any time
The article is over 5 years old. The information in it may be outdated.
![]()
We are working on its update. In the meantime, you can read some more recent articles.
Organizing of your photos takes you minutes – and saves hours. Let’s look how you can do it.
Downloading Photos Through Zoner Studio Saves You Time
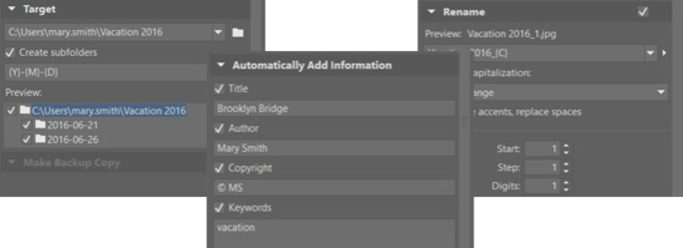
There are many reasons why it’s great to download photo files onto your computer via the Import button in Zoner Studio. For example: you can have your photos automatically renamed however you need, sorted into subfolders by when they were taken, and auto-tagged with keywords describing your photo set.
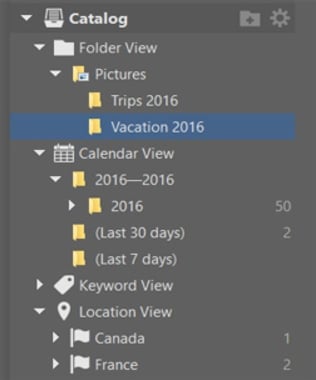
Usually, I store photos in the “Pictures” folder—but not right in its top level. I create subfolders inside it for each vacation, trip, or event. That’s why I’ll be creating a “Vacation 2016” subfolder and several other subfolders inside it, where I’ll be adding photos from certain days or certain trips that my family and I went on. I’ll also add the keyword “vacation” to every photo, so that I can browse for these photos easily any time I want. Lastly I’ll have the photos automatically named and numbered for me. And that’s all.
The Catalog — A Reliable Friend
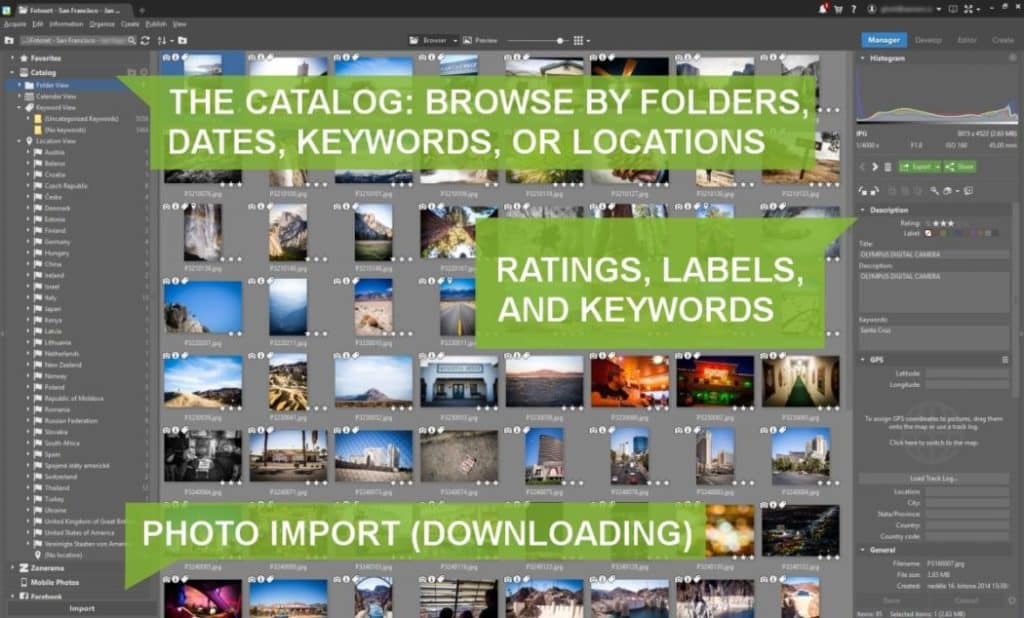
The Catalog is the heart of photo browsing in Zoner Studio. It remembers photos’ thumbnails, so that you can work with them much faster than you can with uncataloged photos. But it also does much more.
You can add any folder to the Catalog. Just click the ![]() icon and pick the folder. You can browse the photos in cataloged photos by folder, but also by date, keywords, or location.
icon and pick the folder. You can browse the photos in cataloged photos by folder, but also by date, keywords, or location.
The cherry on top: the Catalog even remembers the thumbnails of cataloged photos from portable devices (USB flash drive, external drives, etc.) after you disconnect them from your PC!
Ratings, Labels, and Keywords
Zoner Studio offers lots of ways to label your photos, but three are especially great and easy to use.
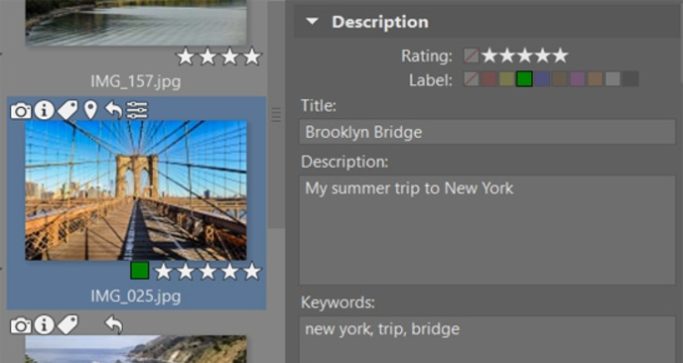
Rating stars help you separate good photos from bad. Use 5 stars to mark exceptionally beautiful photos, and 1 star to mark photos that are on the road to deletion.
Colored labels are an easy way to mark the current state of your photo. You can use the built-in set of colors, or customize them in the Preferences. As for their meanings, that’s up to you. For example, you might want to use a yellow label for photos that are waiting to be edited, a green one for finished photos, a blue one for photos you want to publish on Zonerama, and so on.
Keywords help you to browse photos by their contents, topic, or the event they were taken at.
You can tell keyword-tagged photos by the icon on their thumbnails… and also by the editable keyword list on the right!
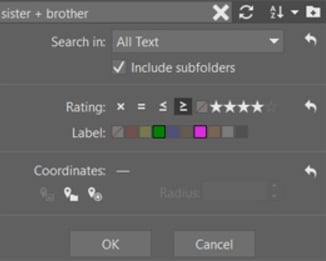
Let’s wrap up with an example of how tagging your photos make your work with them much easier. Say you’d like to delight your brother and sister with a photo book crafted from their photos. Start by writing keywords into the search box towards the top left. Write “sister+brother,” and the Catalog lists every photo you have that’s marked with these keywords. To narrow things down, also restrict the search to photos with a purple label (maybe you’re using it to mark your high-resolution photos!) and at least a 4 star rating. Now you don’t have to browse all day to prepare your book. See why sorting and labeling helps so much?
There from Start to Finish
From the moment you download your photos to the moment you share them with the world, the powerful organizing tools in Zoner Studio are there to make your work easier. So try them out, master them, and work faster. Then you’ll have more time for friends… and your camera!

There are no comments yet.