Camera Lens Filters and What They Can Do for Your Photos
Why should you consider using camera lens filters when photo editing software lets us simulate most filters during editing? High-quality camera lens filters can help you get the maximum potential out of your scene, use your camera sensor to the fullest, and give your photos the look you want.
Using filters while shooting lets you skip certain adjustments in post-processing. Some filters can also give you a much better effect, without going to the extreme of needing to break up the image.
Let’s use specific examples to demonstrate when it’s a good idea to use the following camera lens filters:
- Graduated filter
- Polarizing filter
- ND filter
- Night sky filter
- Mist filter
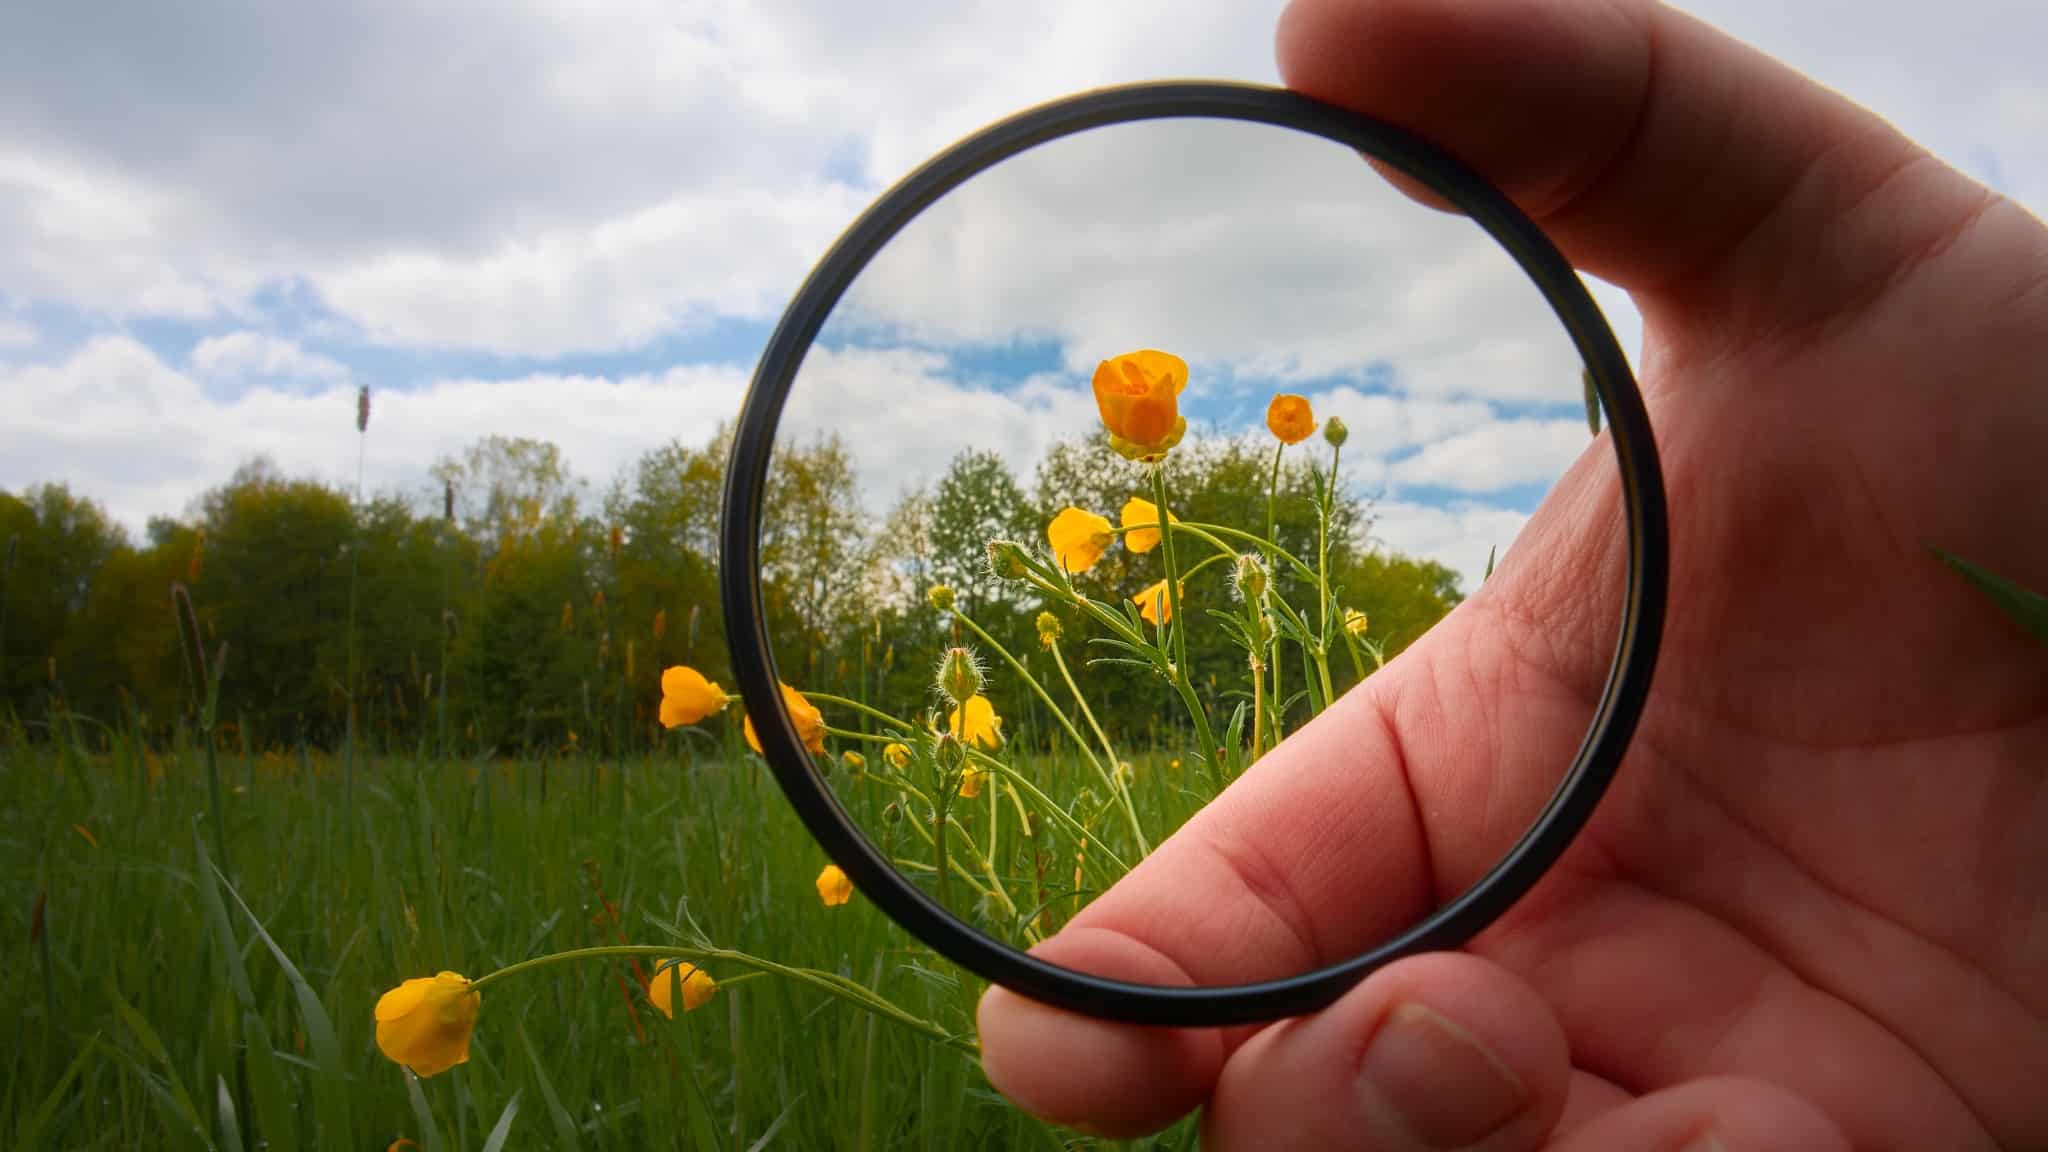
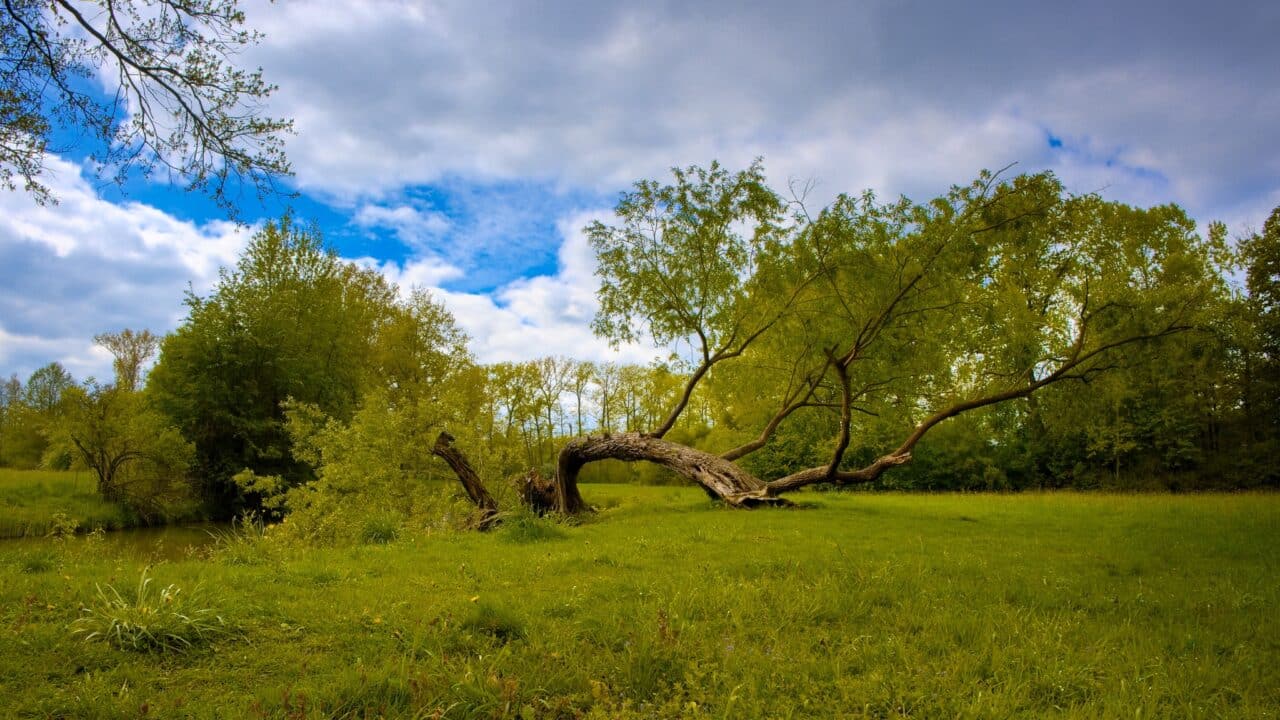
Fields – Graduated ND filters
The best time to use a graduated ND (neutral density) filter is any ordinary spring day. Imagine you’re in a meadow, the sun is shining, but the thick clouds in the sky mean there’s a bit of shade. If you want to take a picture of a scene like this, your camera’s automatic mode either gives priority to the highlights or the shadows. You’ll need to rely on adjustments in post-processing.

For situations like this, a graduated ND filter can reduce the intensity of the light in the sky. The shutter speed may be longer, but the shadows will be brighter and the highlights will be protected from overexposure. The sensor’s dynamic range lets you make better use of the scene, so adjustments in post-processing don’t have to be so extensive.
-
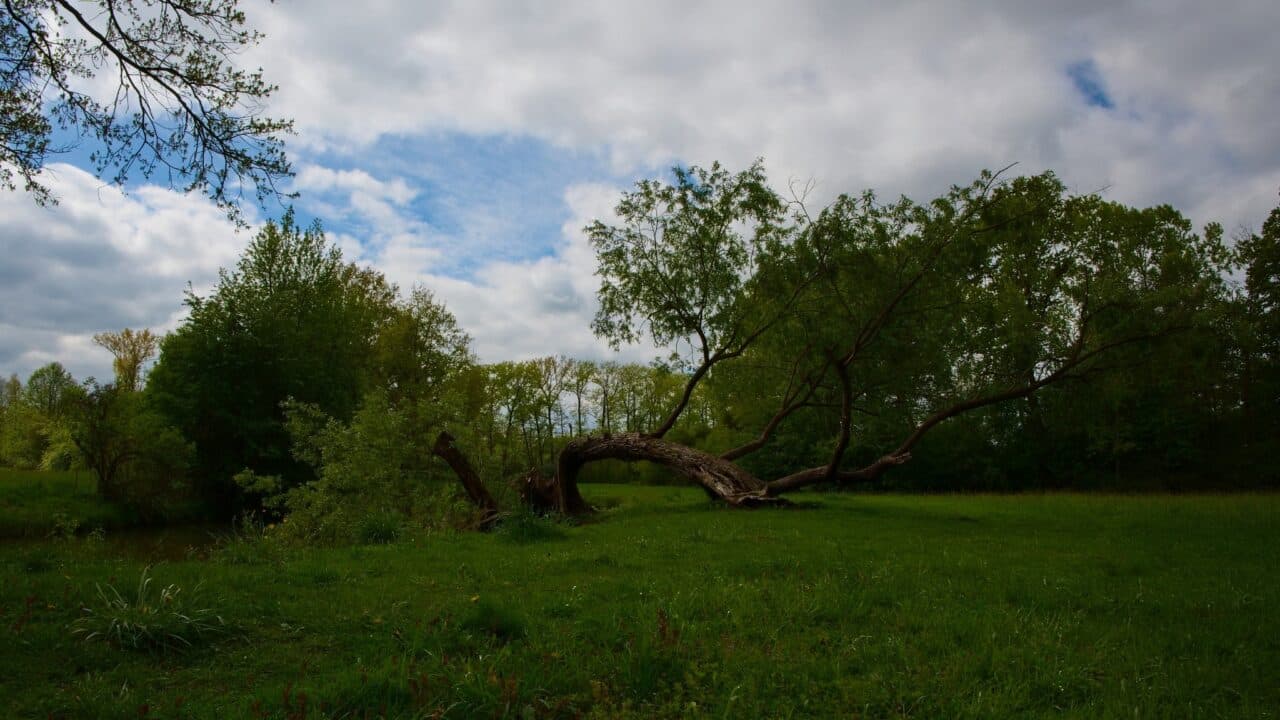
u003cspan style=u0022font-weight: 400;u0022u003eThe camera prioritized protecting against overexposure, resulting in dark shadows.u003c/spanu003e
-
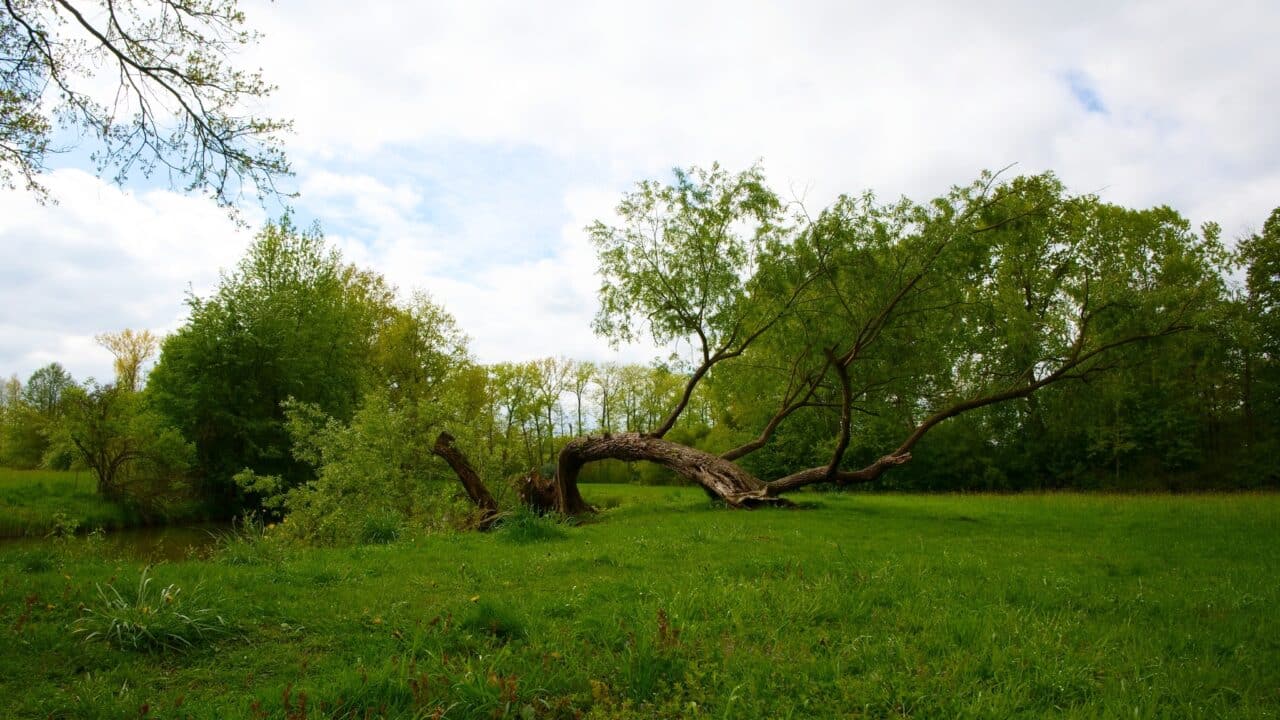
u003cspan style=u0022font-weight: 400;u0022u003eThe camera prioritized detailed shadows, resulting in an overexposed sky. u003c/spanu003e
-
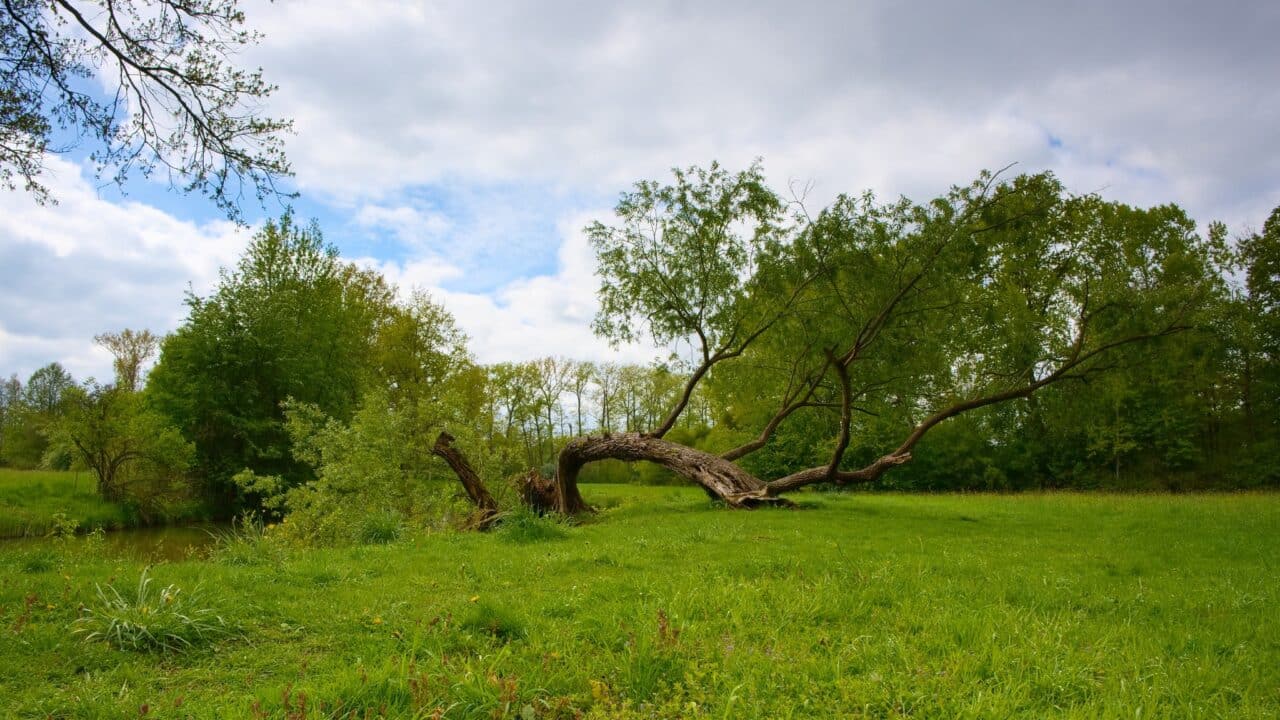
u003cspan style=u0022font-weight: 400;u0022u003eA graduated ND filter results in balanced exposure.u003c/spanu003e
-
u003cspan style=u0022font-weight: 400;u0022u003eFinal image of photo taken with ND filter and editing in Zoner Studio. u003c/spanu003e
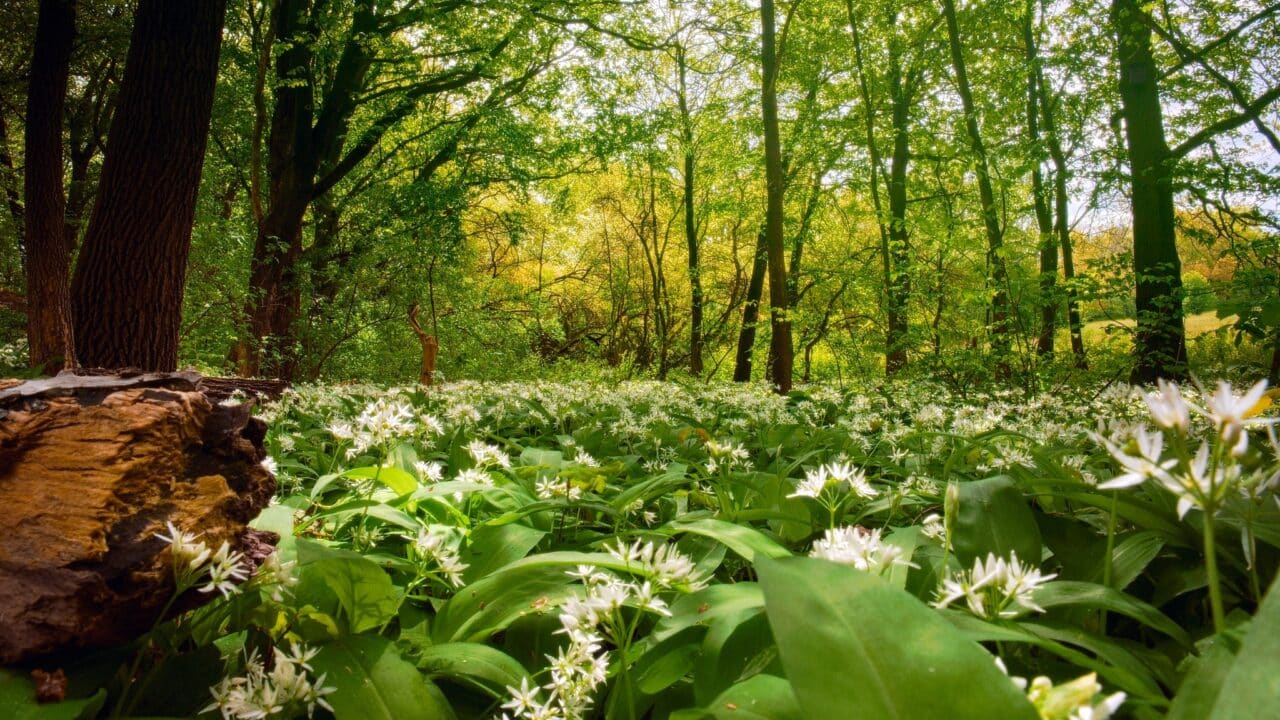
Riparian forest – Polarizing and gradient filter
The perfect opportunity for using a Polarizing (CPL) filter is when shooting in the forest, where the leaves have a layer of water on them. The sun’s rays on the wet leaves result in glare. If you rotate the filter correctly, you can remove this glare and bring out more color and contrast.
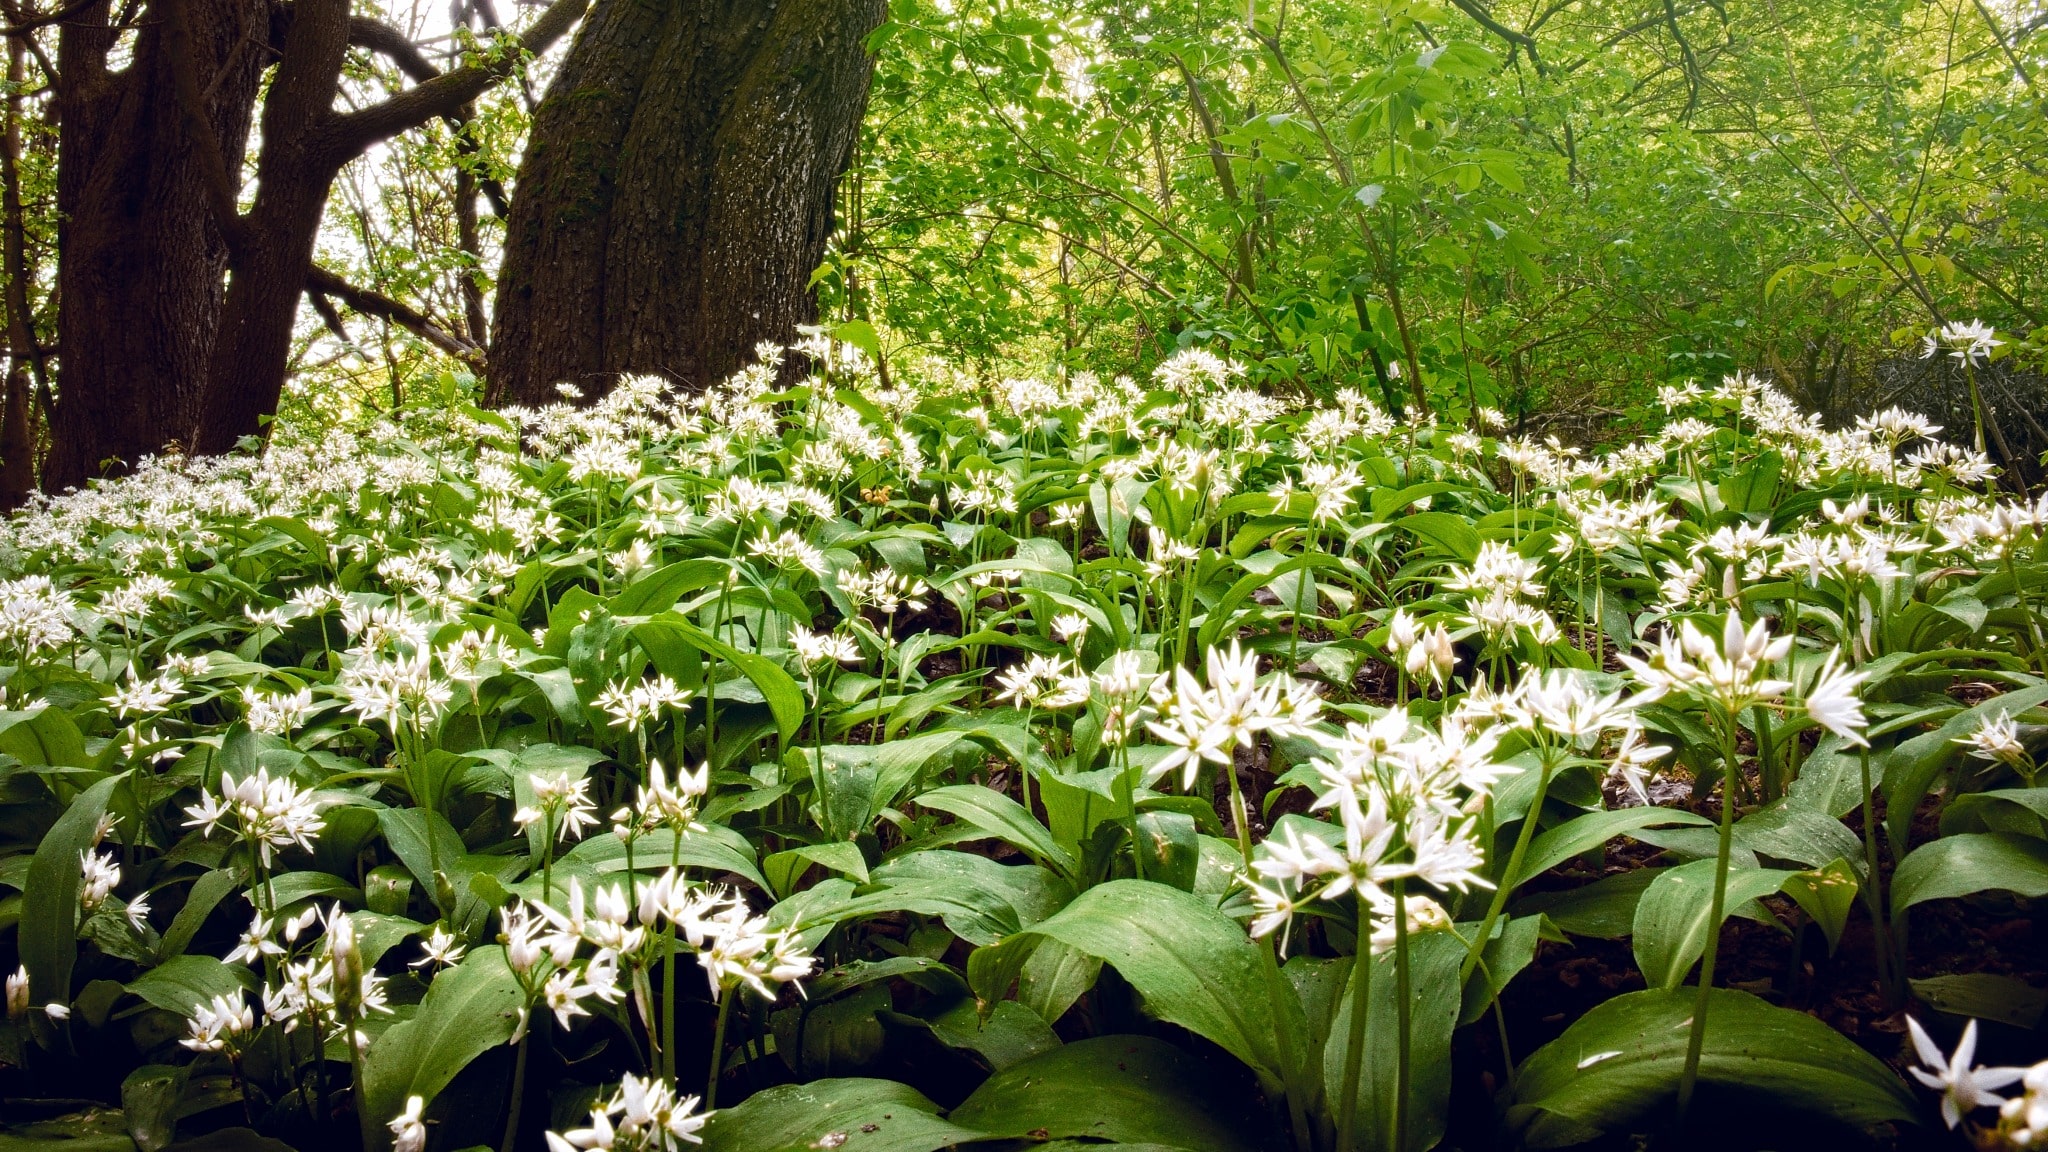
By darkening the upper part of the image using a gradient ND filter, we achieve a better rendition of the lower part of the photo. We don’t have to apply many adjustments in post-processing but still get an amazing result.
-
u003cspan style=u0022font-weight: 400;u0022u003eThere is light glare on the leaves of wild garlic caused by a thin layer of water on the surface. u003c/spanu003e
-
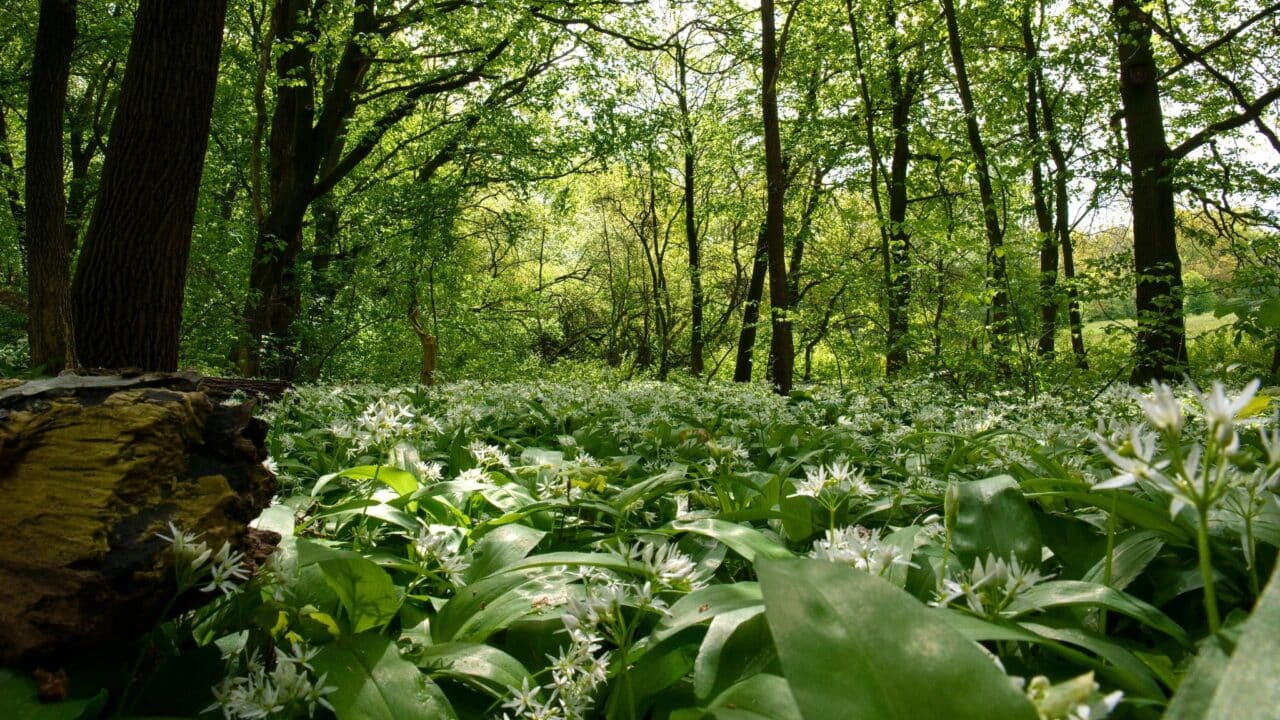
u003cspan style=u0022font-weight: 400;u0022u003eA polarizing filter eliminated the glare and the color on the leaves is full and with more contrast. u003c/spanu003e
-

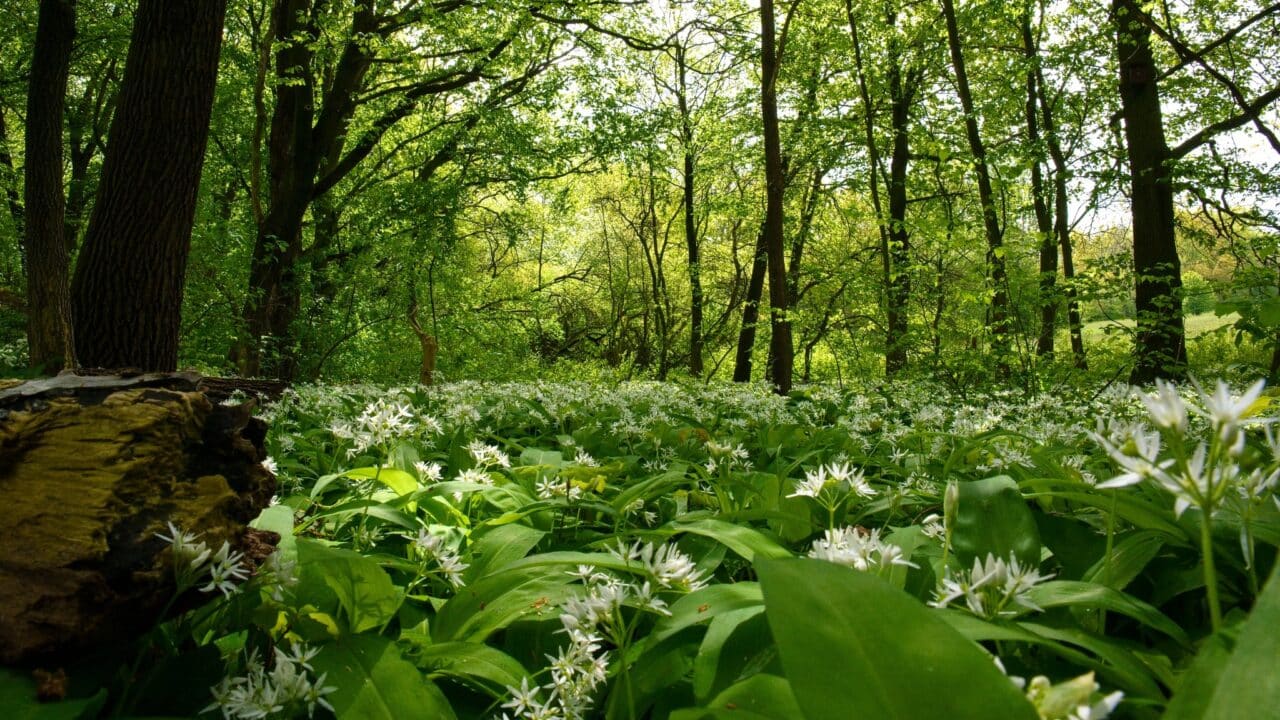
u003cspan style=u0022font-weight: 400;u0022u003eThe simultaneous use of a polarizing and gradient ND filter resulted in a better rendering of the lower part of the image.u003c/spanu003e
-

u003cspan style=u0022font-weight: 400;u0022u003eThe final image editing using Zoner Studio. Glow and Halation were added, giving the image a dreamier look. u003c/spanu003e
-
u003cspan style=u0022font-weight: 400;u0022u003eHDR version u003c/spanu003e
Solar eclipse – strong ND filter
A partial solar eclipse is a good opportunity for photography. Since we are pointing the camera directly at the sun, which isn’t protected by clouds, the sun can look like a big white spot.

(learn) For eclipse photography, it’s a good idea to use a very strong ND filter, at least ND 2000 or even better, ND 32000. This darkens the entire scene and we can capture the sunspots.
With longer shutter speeds, the clouds floating in the sky will appear more dynamic and the images get a new look. This filter can also be used for sunrise photography.


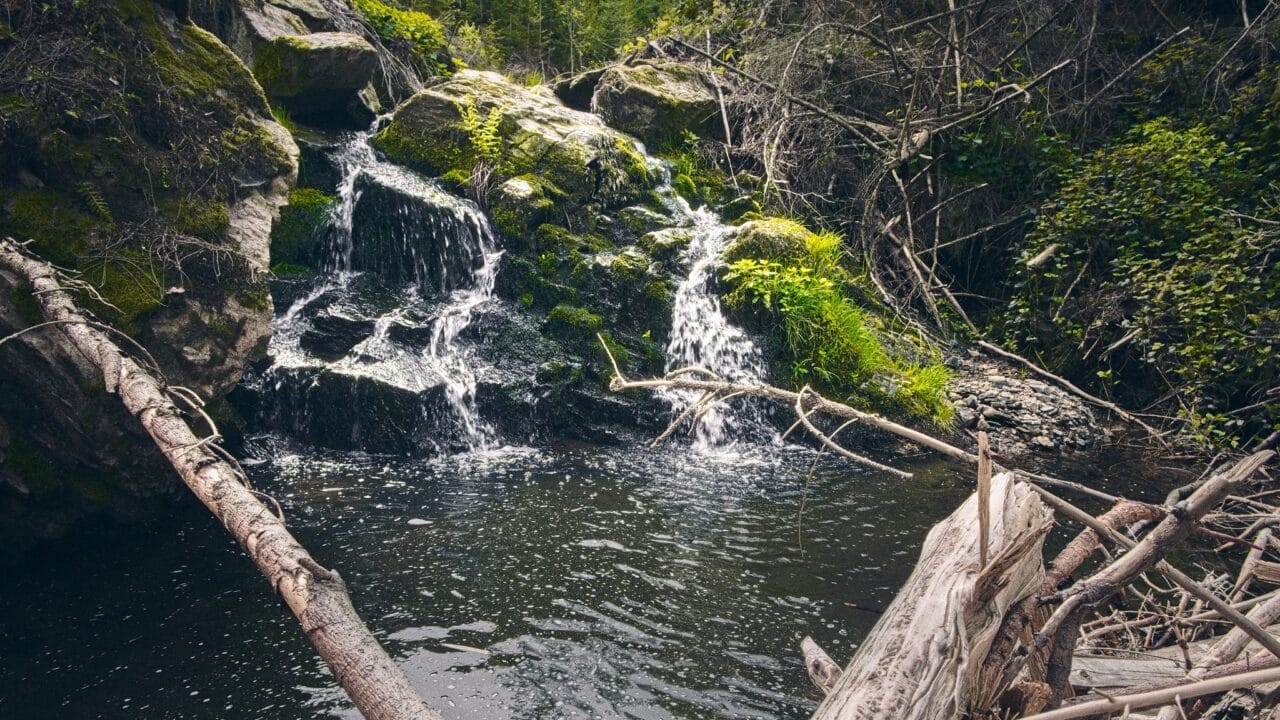
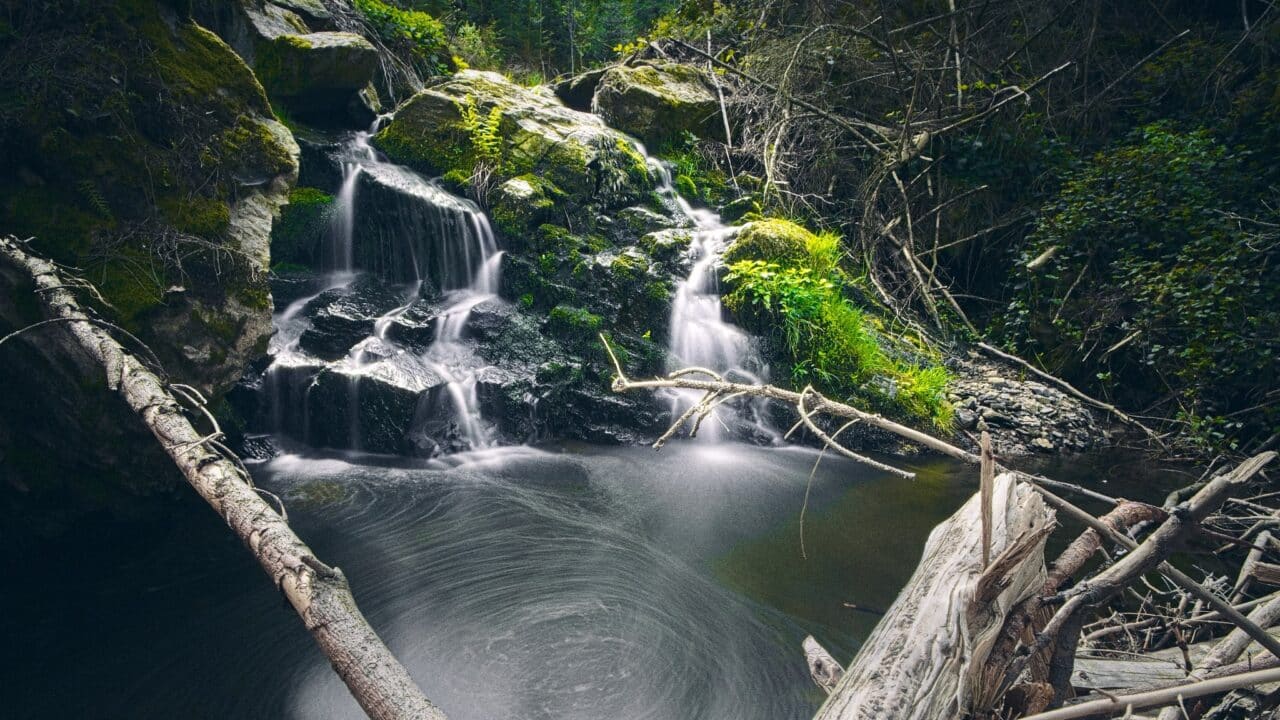
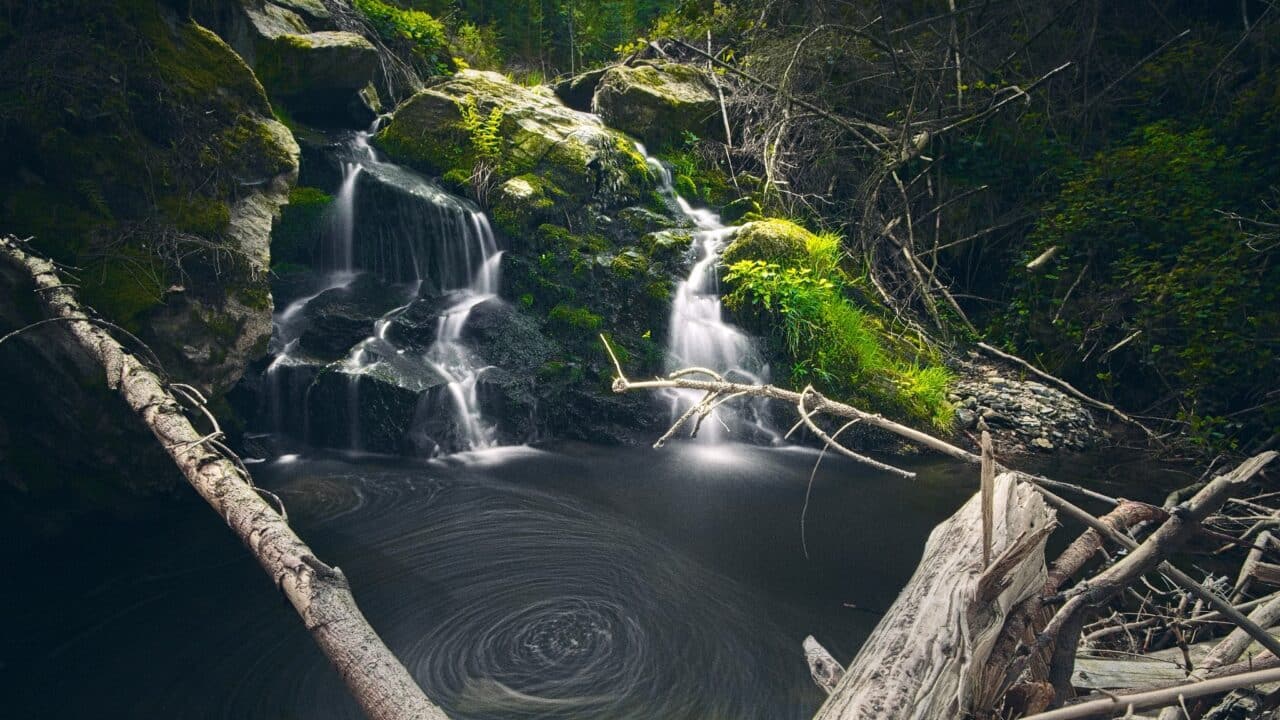
Rivers and streams – ND filters
The countryside is filled with many beautiful rivers and streams. The Czech Republic is known as the roof of Europe because many rivers have their source here and these rivers then flow into large streams. There are also many large cascades, rapids, and waterfalls. Although they are often small, they are all the more interesting for their variety and accessibility.
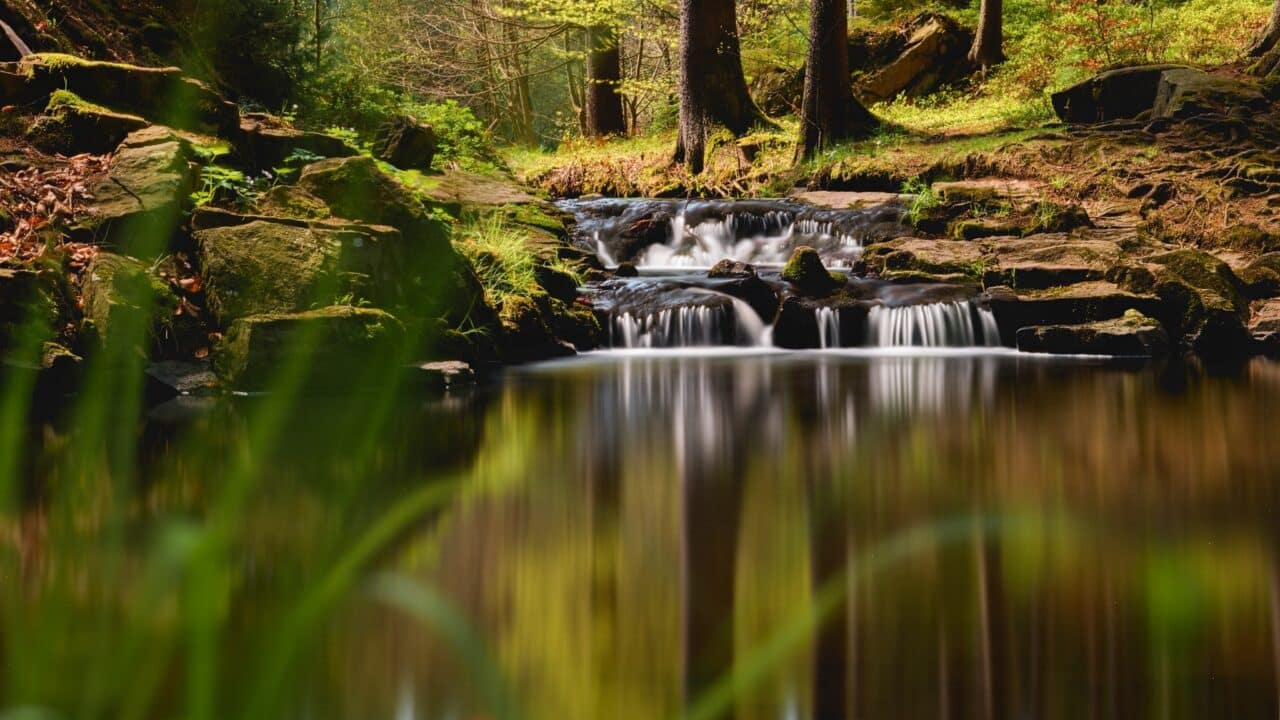
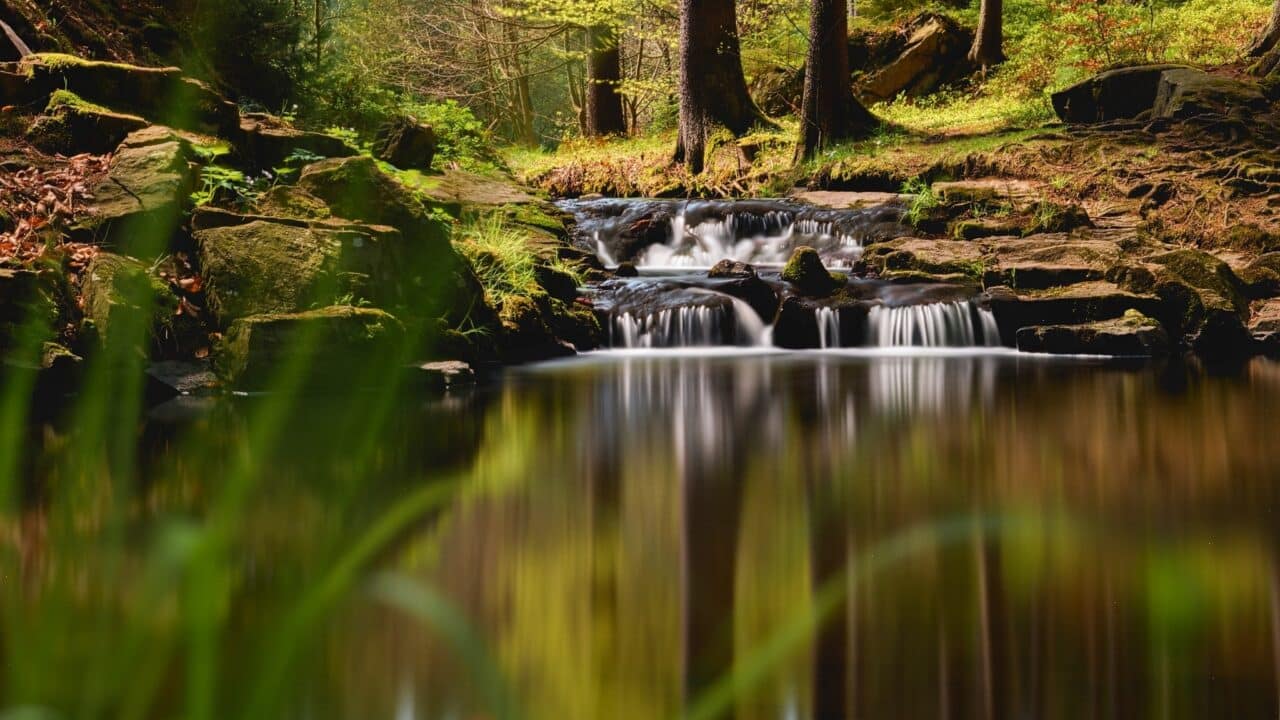
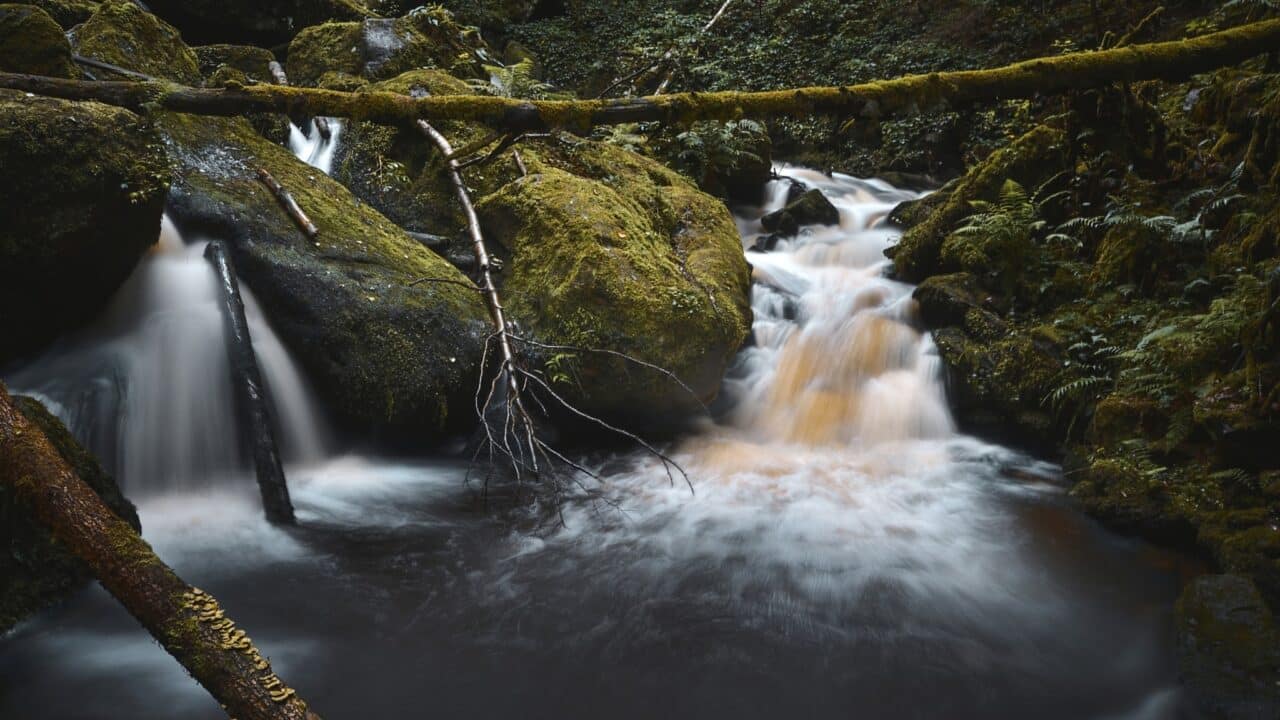
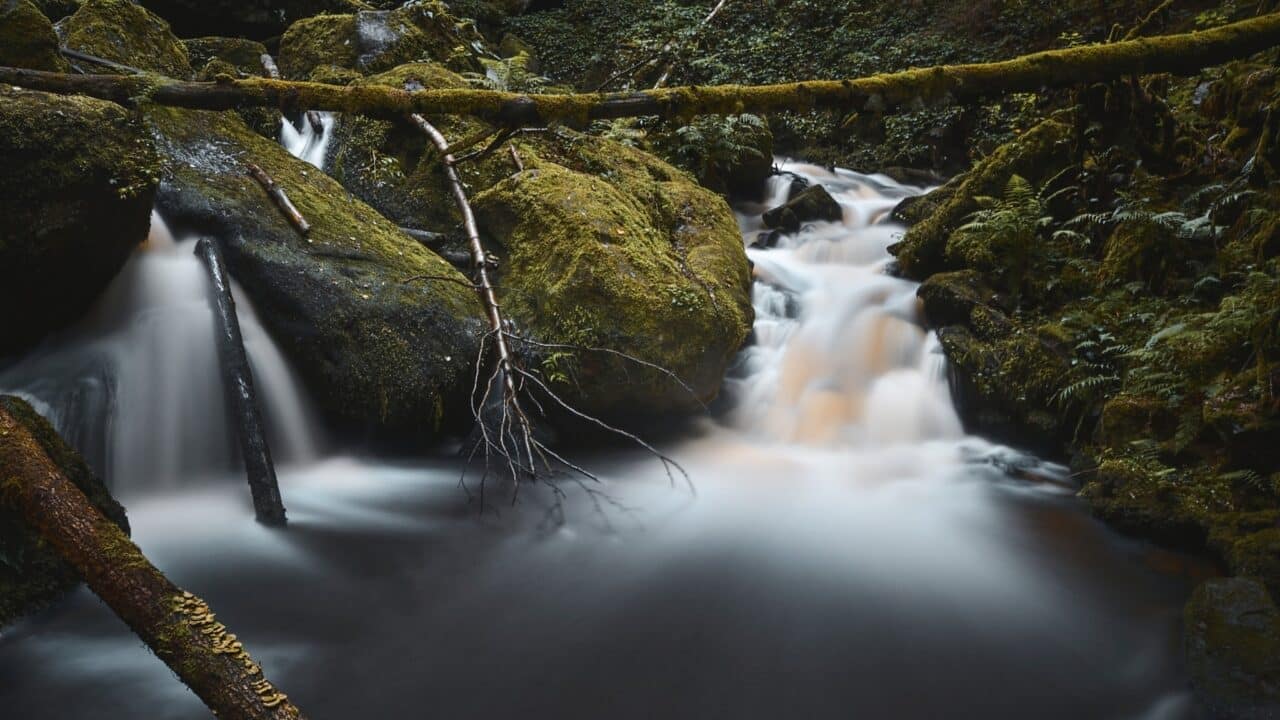
Use an ND filter to best capture the dynamic nature of rivers and waterfalls and how they flow over time. ND filters reduce the passage of light through the lens and can prolong shutter speeds. Since streams and rivers are often hidden in forests, there is no need for the filter to be overly strong. Usually, an ND filter with a strength between 64 and 1000 is enough.
I used the image stacking technique to edit the final image. This blends the short shutter speed image with the long shutter speed image. This makes the water look smooth while maintaining its texture.
-
u003ciu003eu003cspan style=u0022font-weight: 400;u0022u003eŠumava National Park—St. Wolfgang waterfallsu003c/spanu003eu003c/iu003e
-

u003ciu003eu003cspan style=u0022font-weight: 400;u0022u003eŠumava National Park—St. Wolfgang waterfallsu003c/spanu003eu003c/iu003e
-
u003ciu003eu003cspan style=u0022font-weight: 400;u0022u003eŠumava National Park—St. Wolfgang waterfallsu003c/spanu003eu003c/iu003e
-
u003ciu003eu003cspan style=u0022font-weight: 400;u0022u003eŠumava National Park—St. Wolfgang waterfallsu003c/spanu003eu003c/iu003e
-
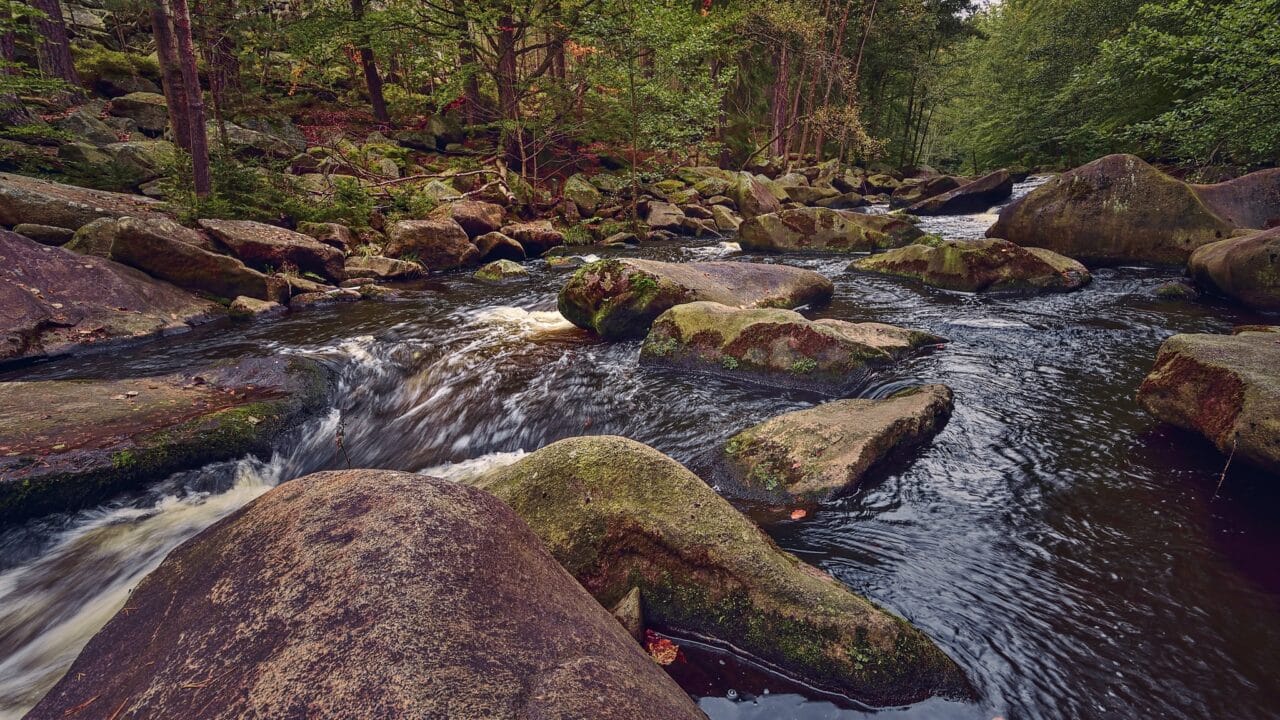
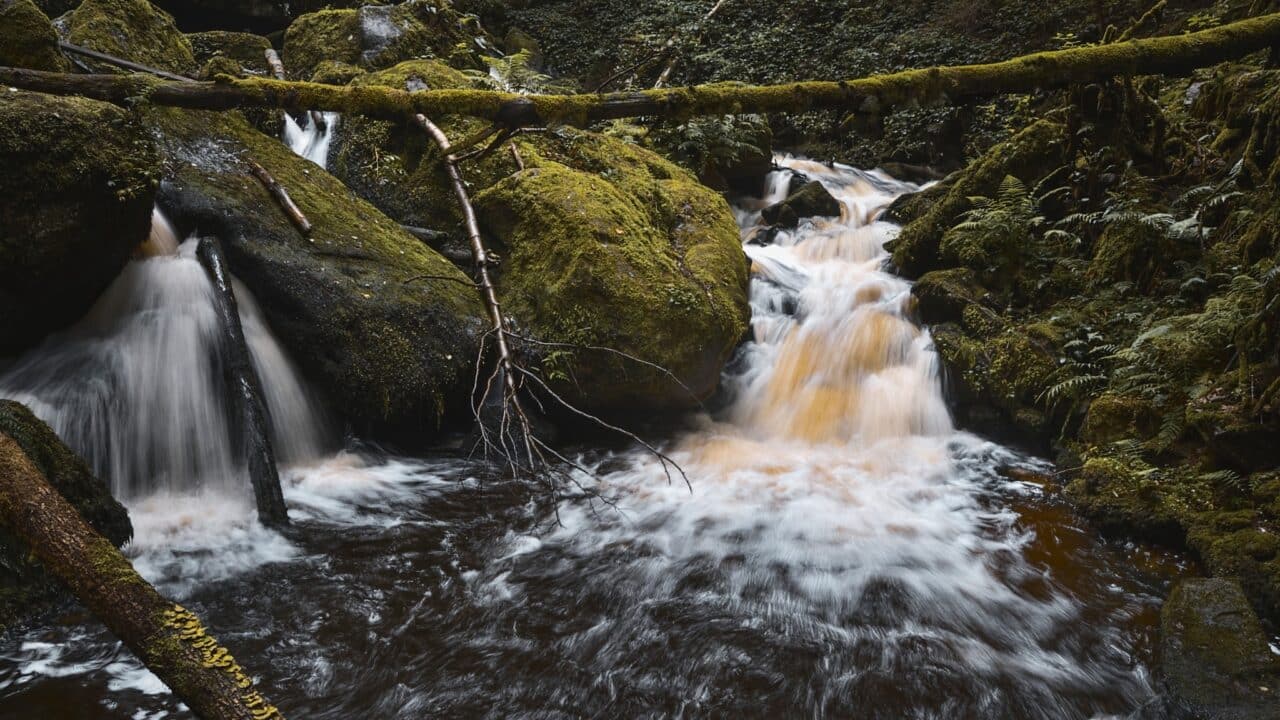
u003ciu003eu003cspan style=u0022font-weight: 400;u0022u003eDevil’s Streams, Vltava Riveru003c/spanu003eu003c/iu003e
-
u003ciu003eu003cspan style=u0022font-weight: 400;u0022u003eDevil’s Streams, Vltava Riveru003c/spanu003eu003c/iu003e
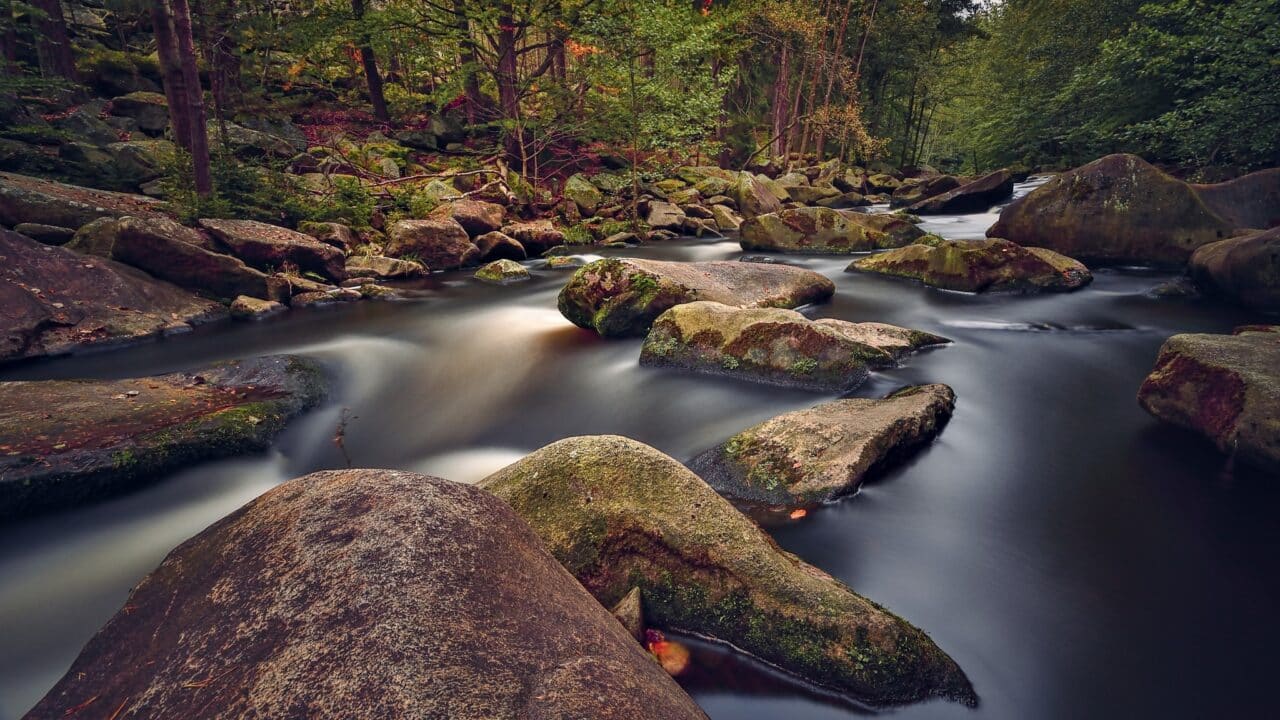
-
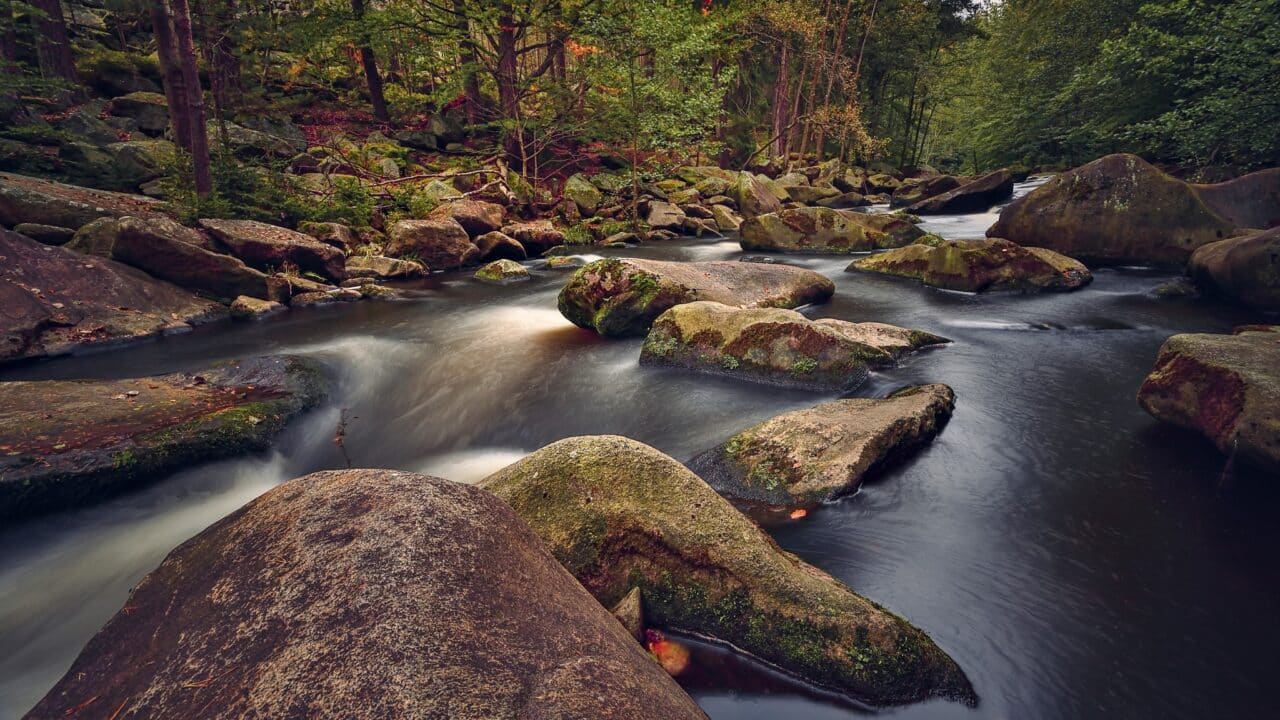
u003ciu003eu003cspan style=u0022font-weight: 400;u0022u003eDevil’s Streams, Vltava Riveru003c/spanu003eu003c/iu003e
-

u003ciu003eu003cspan style=u0022font-weight: 400;u0022u003eDevil’s Streams, Vltava Riveru003c/spanu003eu003c/iu003e
Polarizing filters come in handy when shooting water sources with glare, where the texture can get lost. The filter reduces some of the glare and you can get better contrast. It can even help us see the bottom of the water from certain angles.
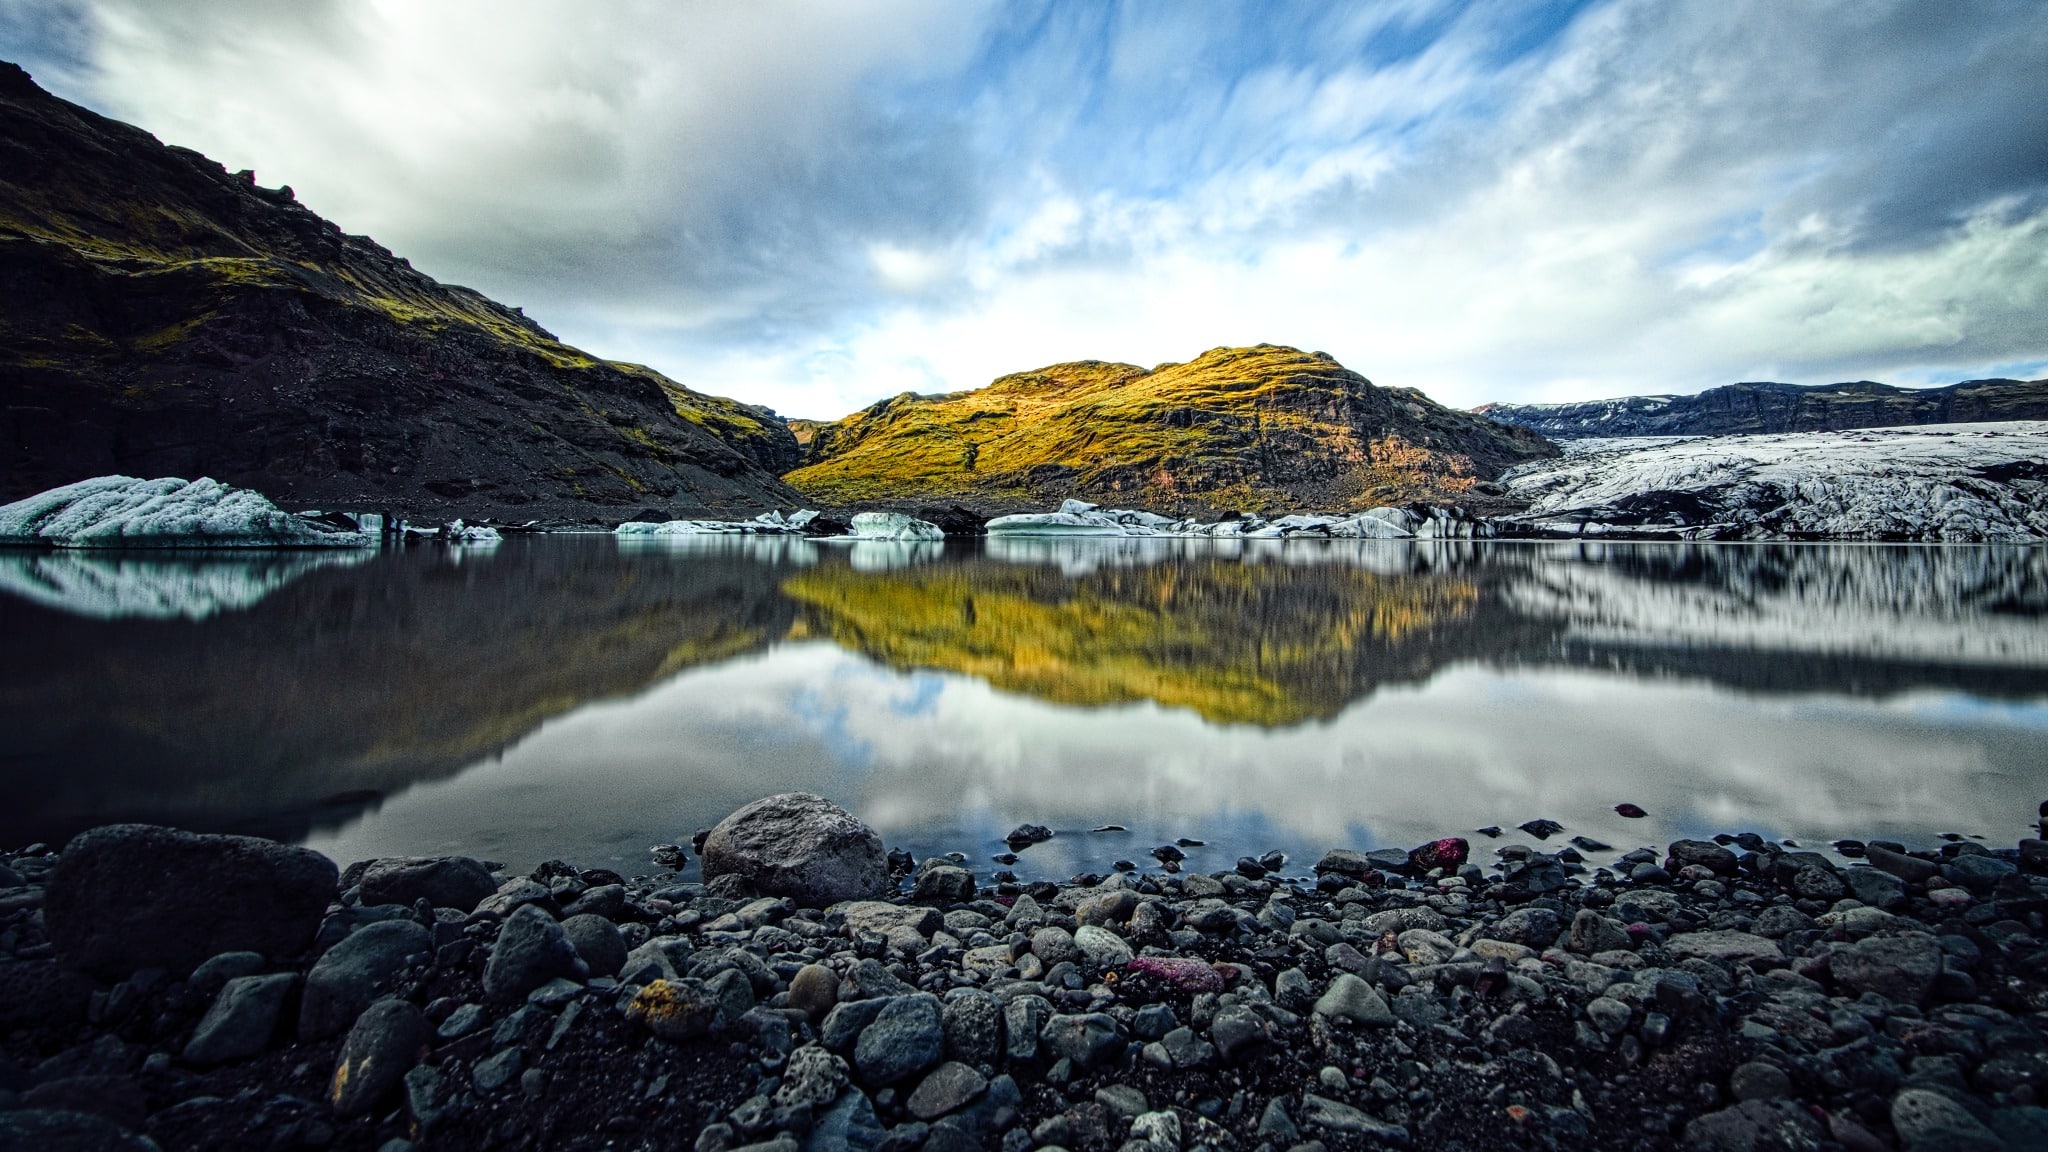
Iceland, large waterfalls, and forgotten ruins—strong ND filter
With its huge waterfalls, glacial lakes, and dormant volcanoes, Iceland is a photographer’s paradise. The weather is incredibly unpredictable and you can experience all four seasons several times in a single day. There are good lighting conditions almost all day long thanks to the midnight sun, with the sun moving low over the horizon.
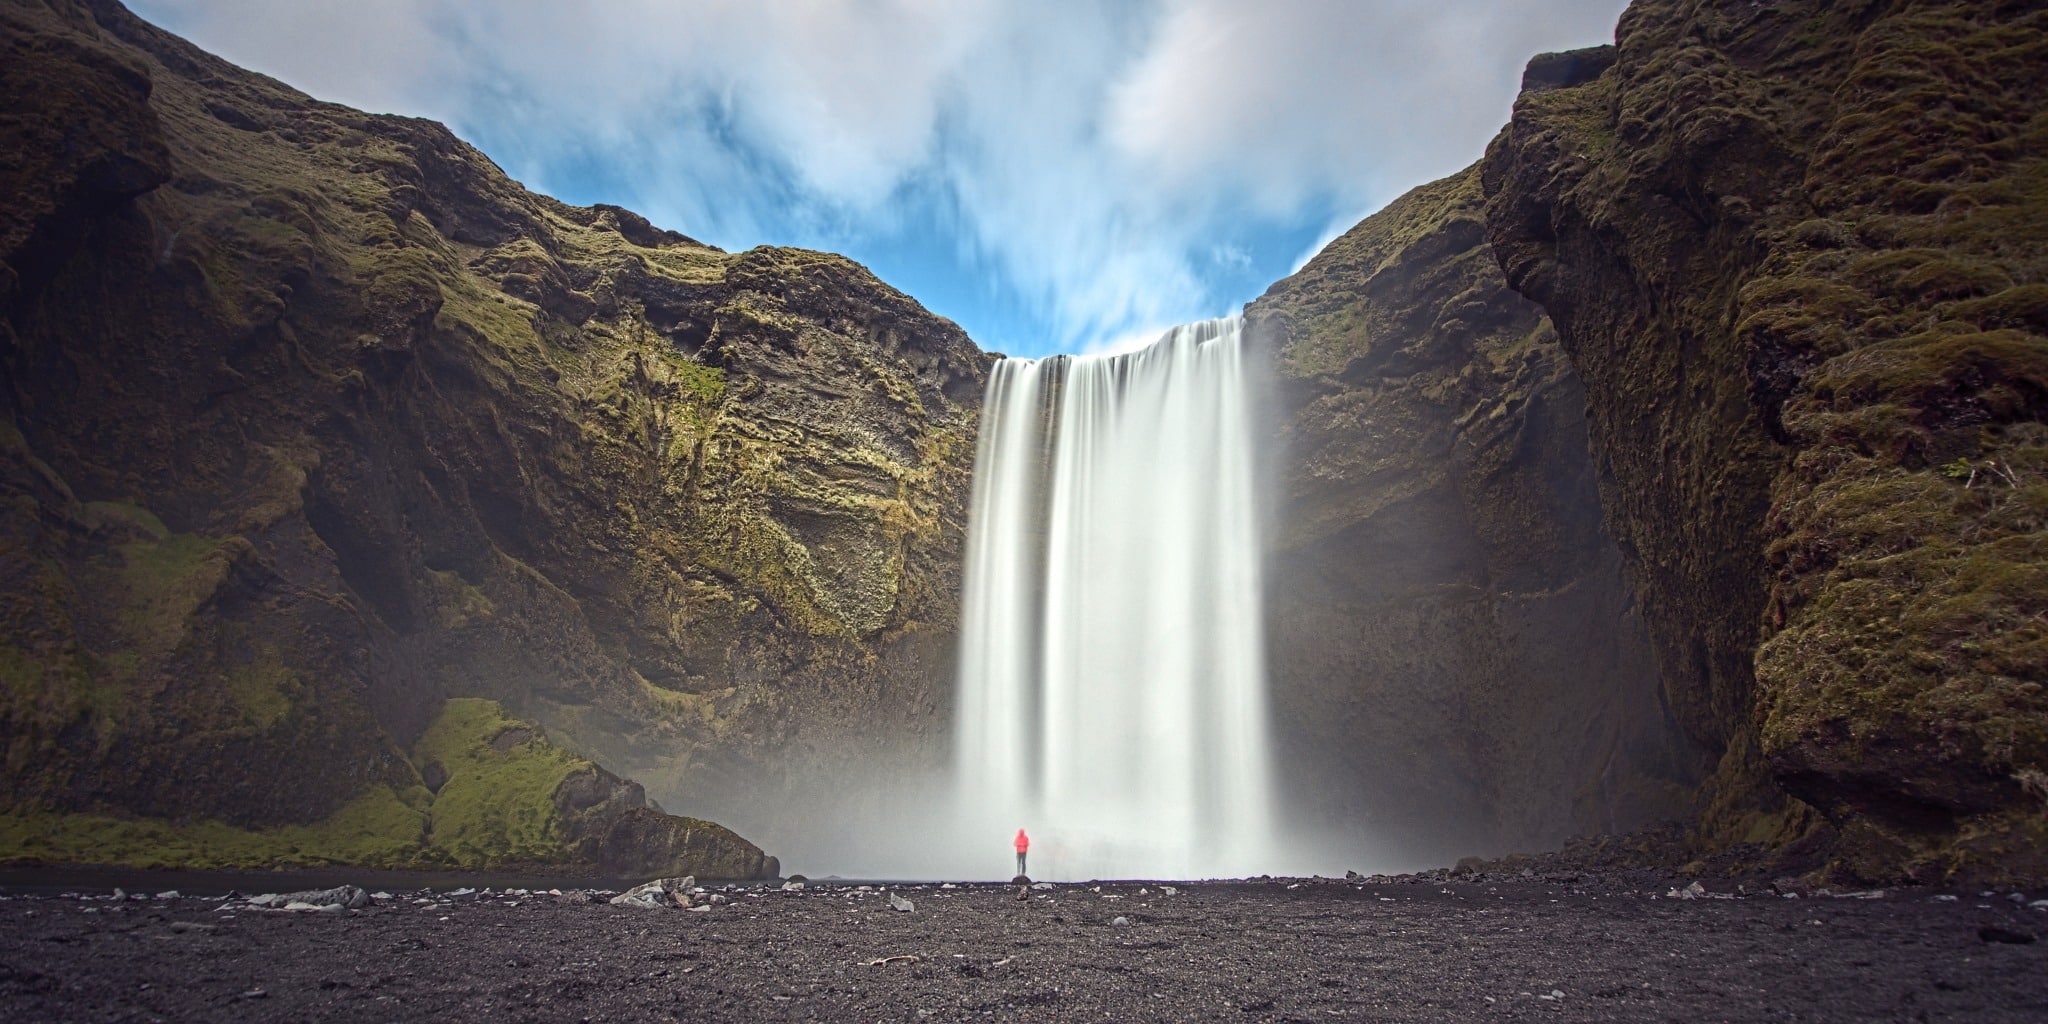
It’s important to prepare for a considerable number of tourists at popular locations. You can remove unwanted people from the photo, even without the use of software. It’s a good idea to shoot using a longer shutter speed and a strong ND filter to do this. A magnetic 2000-strength ND filter worked well for me.


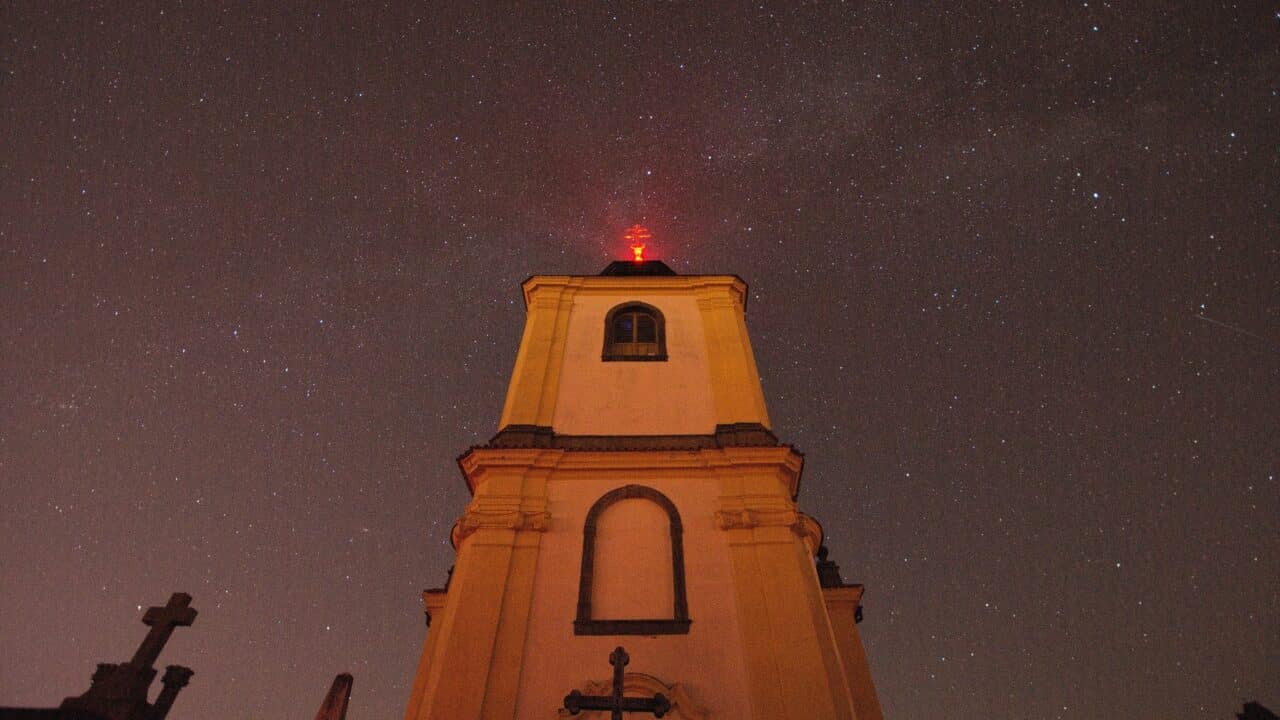
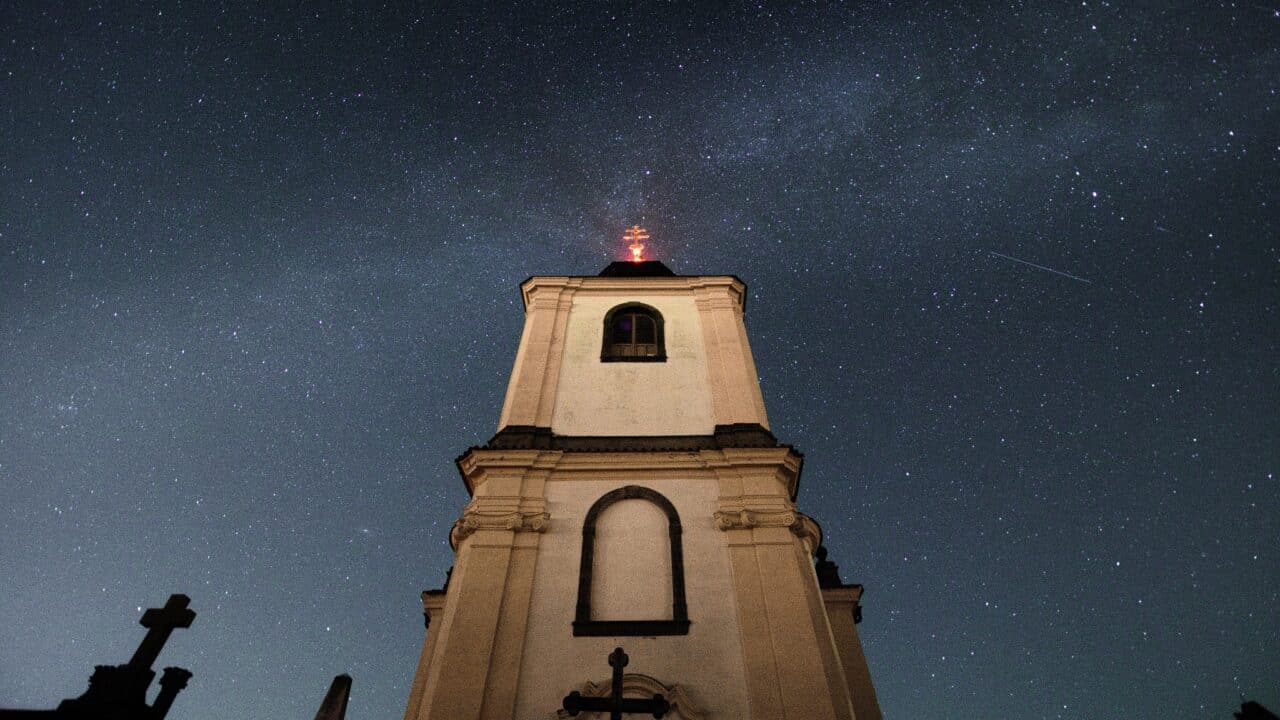
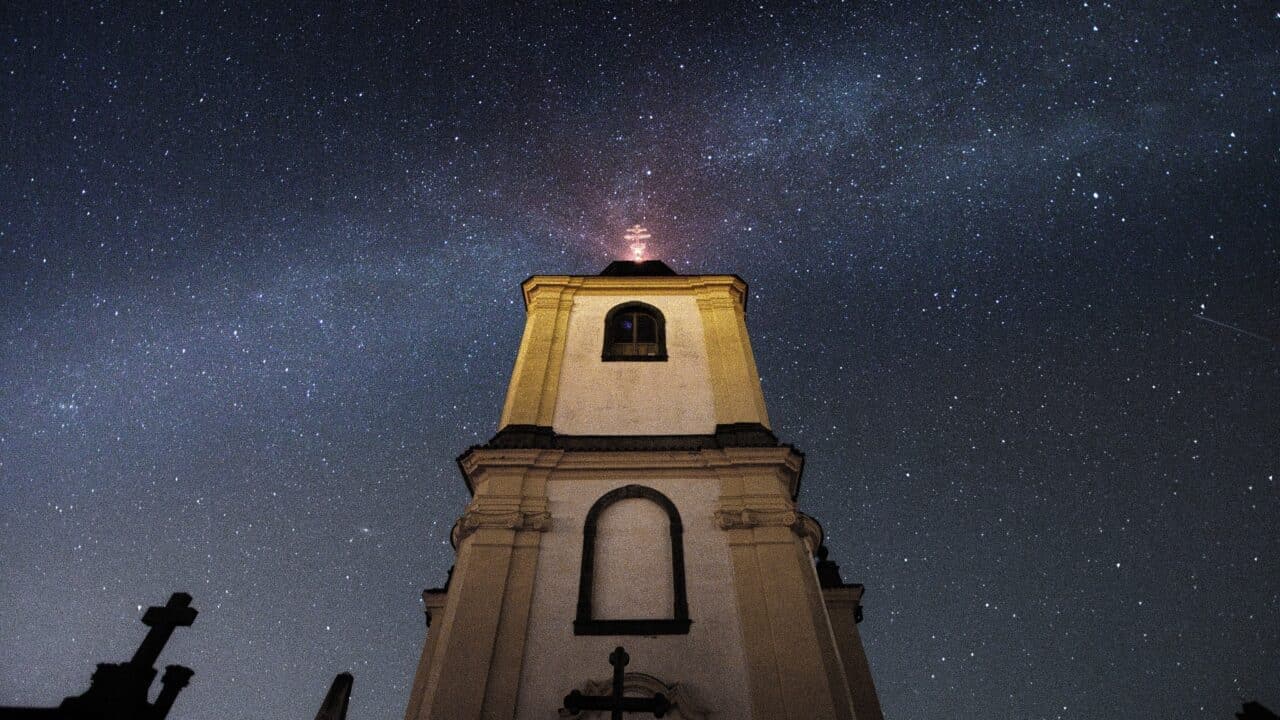
The night sky – Night sky and Mist filters
When was the last time you saw the beauty of the Milky Way? City lights are getting brighter and brighter and seeing the night sky is getting more and more difficult.

Night sky filters adjust the color spectrum to match street lighting, hence eliminating light pollution and improving contrast. This improves the visibility of the starry sky even near cities. When the night sky filter is combined with a mist filter, it results in slight light scattering. This brings out bright stars and tiny stars are subdued, improving the clarity of the stars in the night sky.


Most commonly used camera lens filters

UV filters
Most sensors now have their own protective layer that protects against UV radiation, and UV filters are primarily used for mechanical protection purposes. When photographing races, fine sand particles fly off and can scratch your lens. This filter does little to reduce the light streaming into the lens, doesn’t cause glare, and does not shift the color of the light.
Modern UV filters enhance the lens’ protection against raindrops and skin oils. They are usually easier to clean and do not scratch the front of the lens.
Today, it is much more common to use a filter that combines UV and IR-cut to eliminate wavelengths of the light spectrum that are invisible to the human eye. Quite often, the UV filter comes with an adaptor, like the one used for magnetic attachments, making it easier to work with high-strength ND filters.
Polarizing filter (CPL)
Polarizing filters reduce polarized, or reflected, light. They can be used when shooting through glass or water. Polarizing filters can make water or glass transparent.

A polarizing filter is used to bring out the clouds and reduce the concentration of vapor in the air in landscapes.
Many photographers use polarizing filters to bring out the colors of a landscape. It can also be used to filter out the reflections on the surface of leaves that can be created by a layer of water and water vapor. This improves the image’s contrast and color.
With polarizing filters, you need to allow for a loss of light passing through the lens (usually 1 to 2 EV), and at the same time, there is a slight shift in color temperature.
The best way to use a polarizing filter is perpendicular to the light source. This means the effect is greatest when the sun is shining from the side.
If the sun is in front of you or behind you, the polarization effect is smallest. A polarizing filter does not work for reflections from metal objects. However, that doesn’t mean you can’t use it for product photography. In certain circumstances, it can improve the contrast of colored surfaces.


Use a polarizing filter to highlight the clouds in the sky.
ND filters
ND filters are hard to replace with photo editing software. The goal of an ND filter is to reduce the light transmitted into the lens while distorting the colors as little as possible.
Weaker dark ND filters can be used for bright sunny days. Or when shooting on a very fast portrait lens when there is so much light that it would result in an overexposed image. Use ND filters when shooting videos that need a shutter speed that corresponds to the natural look of the film.
Variable ND filters are useful for shooting video because you adjust the intensity of the darkening by rotating.

Strong ND filters are useful for shooting landscapes and architecture because they can extend the shutter speed by up to several times.
By using an ND 1000 filter and a shutter speed of 1/100th of a second, you multiply the shutter speed by a thousand and get 10 seconds. Anything moving in the frame that would have been static with the short shutter speed blurs beautifully with the long shutter speed.
Combining ND filters with long shutter speeds allows you to:
- Remove unwanted people from your image
- Make your photo more dynamic with blurred, floating clouds
- Give rivers and streams a flowing quality
- Remove ripples from ponds and lakes and get a mirror-like reflection on the surface
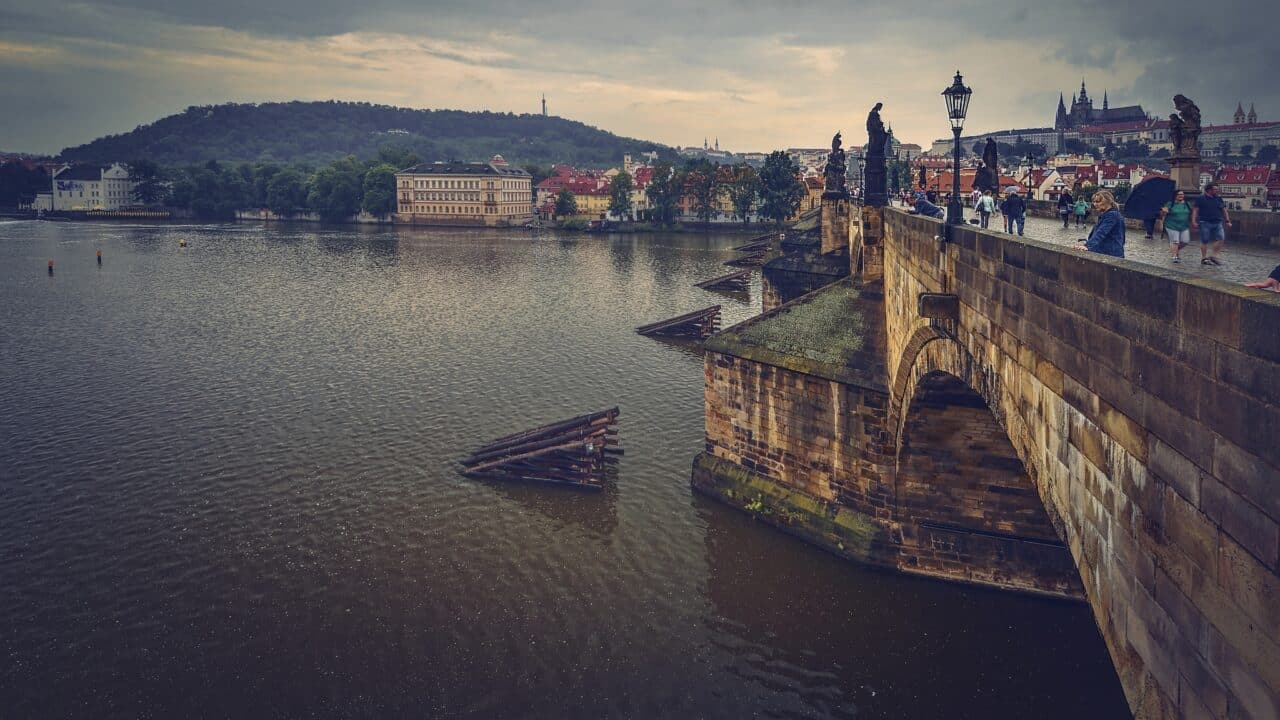
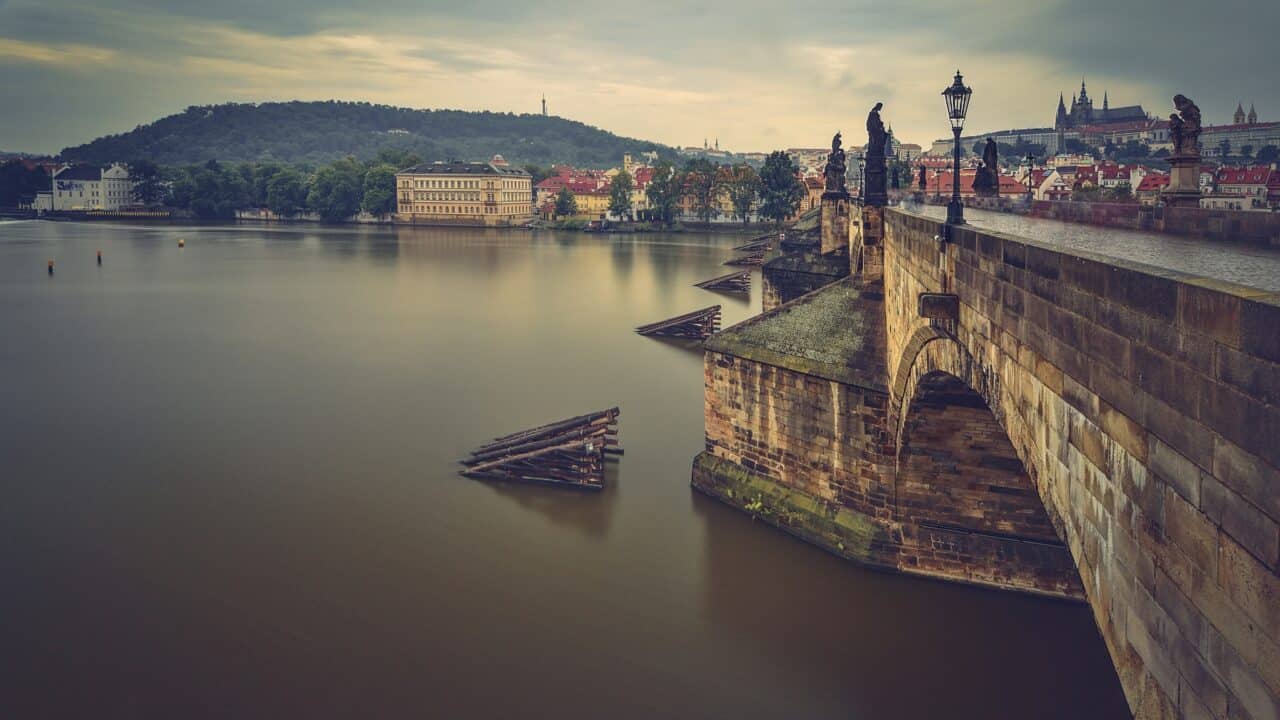
ND filter used for architecture photography.
Graduated ND filters
Though it may seem like graduated filters can easily be replaced with photo editing software, this is not the case. Graduated filters slightly darken from the edge to 1/3 or 2/3 of the filter. It usually comes in two versions based on how sharp the transition is. I most often use the one with a more subtle transition.
Using a graduated ND filter makes it easy to darken the light part of your image, usually the sky. This evens out the exposure. And, you don’t get overexposed as quickly, getting much more out of your sensor’s dynamic range.

NightSky Filter
Use a night sky filter to get better contrast from the night sky, even near large cities. The night sky filter doesn’t let the part of the light spectrum through that matches the tone of streetlights.
-
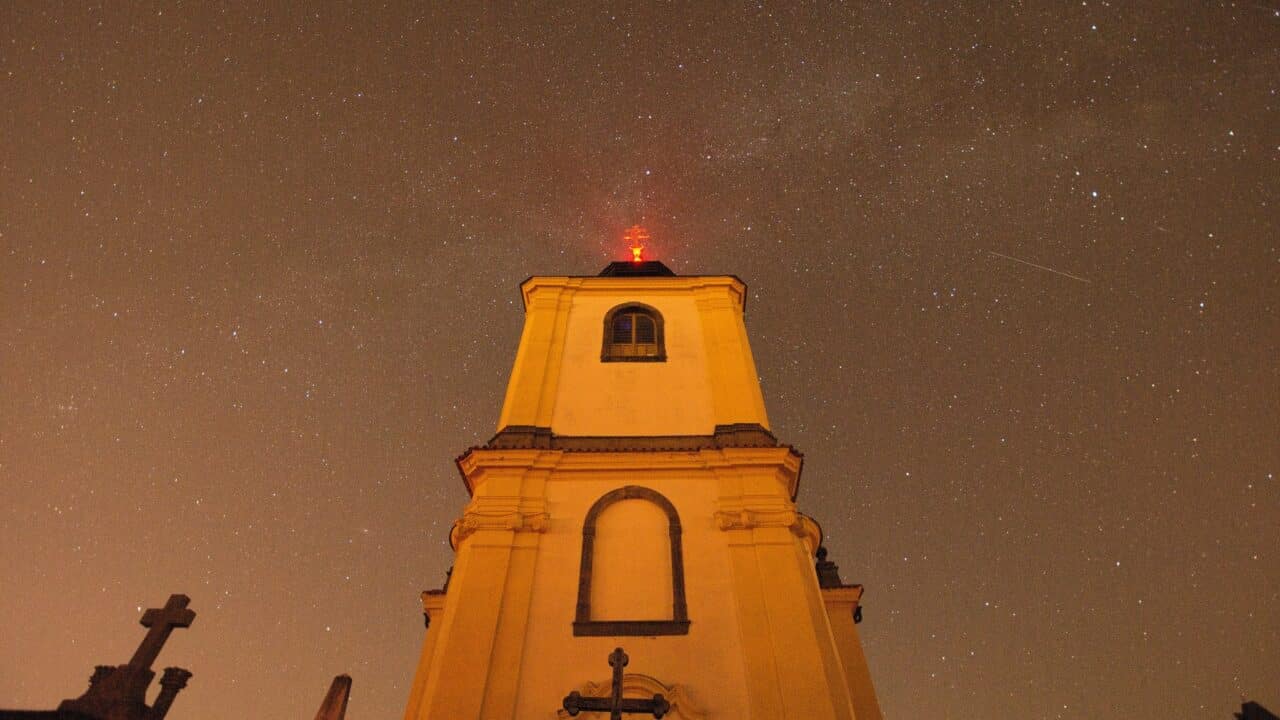
u003ciu003eu003cspan style=u0022font-weight: 400;u0022u003eTaken between two large cities. It’s nice to see how the filter helped improve the clarity of the Milky Way. u003c/spanu003eu003c/iu003e
-
u003ciu003eu003cspan style=u0022font-weight: 400;u0022u003eTaken between two large cities. It’s nice to see how the filter helped improve the clarity of the Milky Way. u003c/spanu003eu003c/iu003e
-
u003ciu003eu003cspan style=u0022font-weight: 400;u0022u003eTaken between two large cities. It’s nice to see how the filter helped improve the clarity of the Milky Way. u003c/spanu003eu003c/iu003e
-
u003ciu003eu003cspan style=u0022font-weight: 400;u0022u003eTaken between two large cities. It’s nice to see how the filter helped improve the clarity of the Milky Way. u003c/spanu003eu003c/iu003e
Effect, mist, and IR filters
Many filters create different effects when hit by light, like streaks and stars. Mist filters are unique with their dotted surface that gently diffuses the light, giving the image a dreamy quality. If you use it for the night sky, it can help bring out the stars. The Infrared filter only lets in an invisible spectrum of light, giving the image a very unique look.
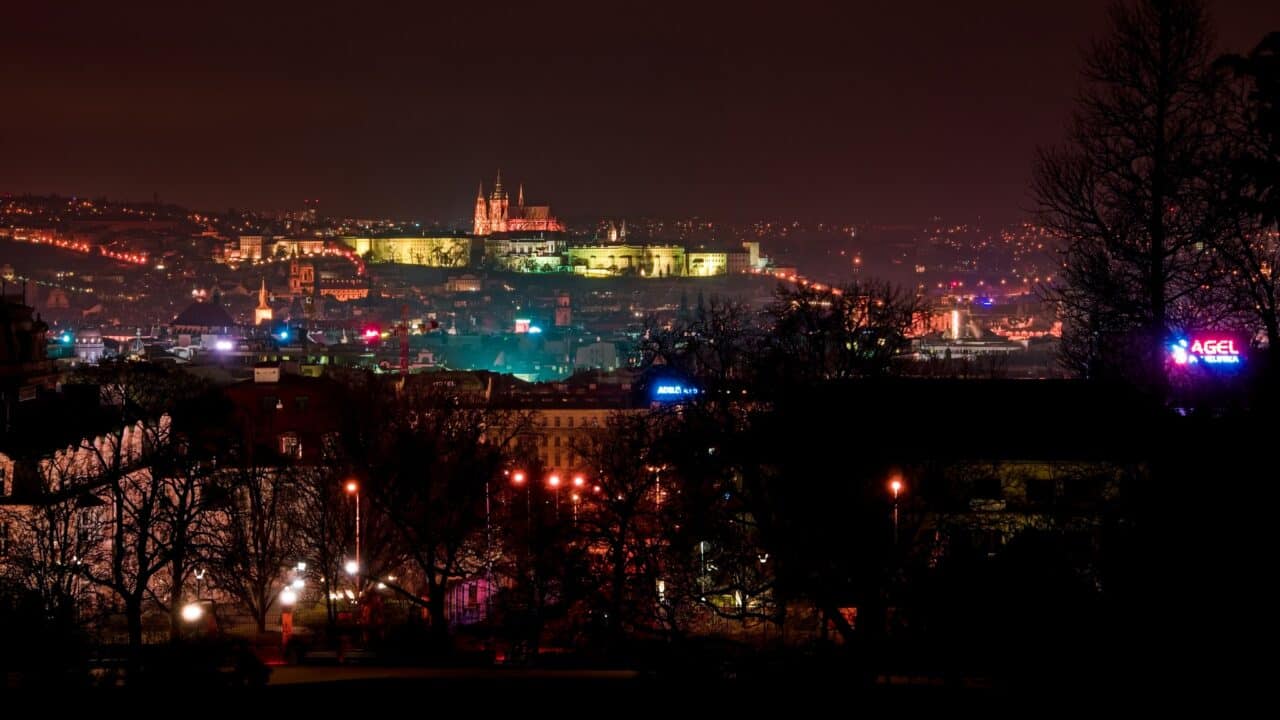
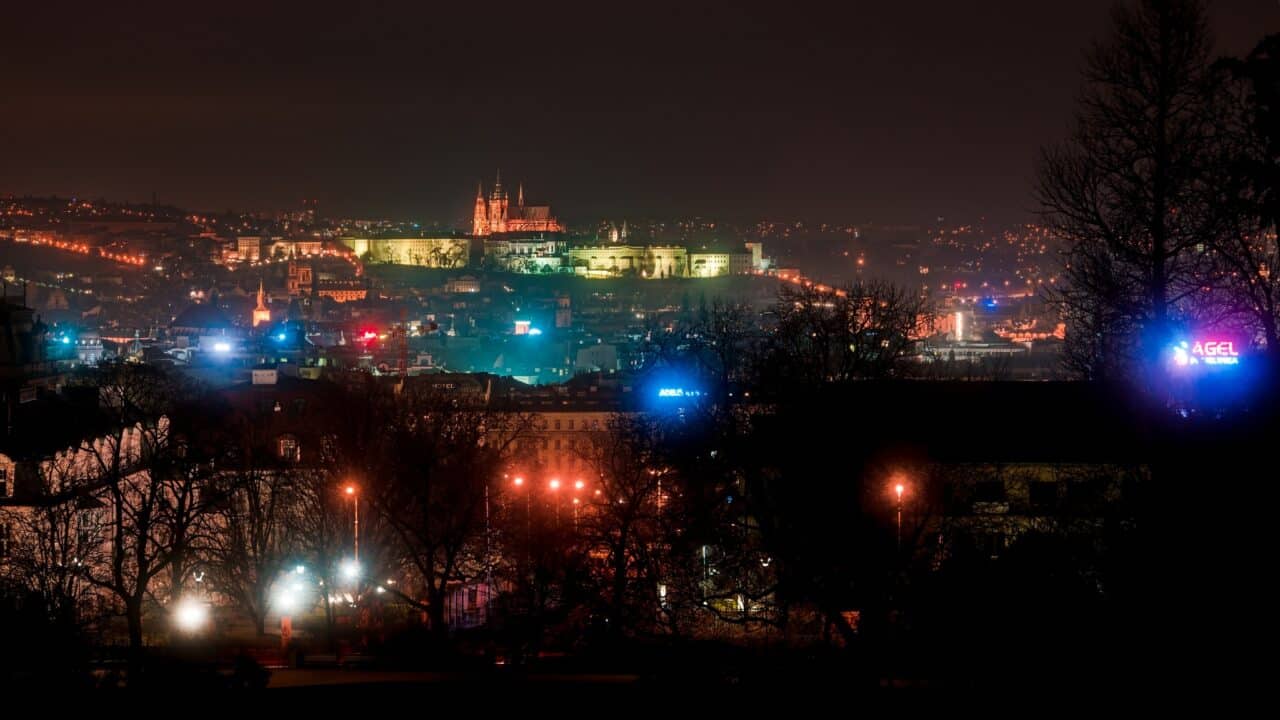
Special effects mist filter on lights for night photography.
There are no comments yet.