Camera Settings for Landscape Photography
Landscape photography is a classic photography discipline. You can take simple snapshots with any camera, or even your phone. But if you want to get the most out of your camera and capture truly high-quality photos, the right camera settings are essential. Here’s an easy-to-use guide for how it’s done.
In this article, you’ll learn:
- why it’s best to shoot landscapes in RAW format
- which shooting mode to use: aperture priority vs. manual
- which ISO values ensure minimum noise
- what f-numbers work best for sharp landscapes
- how to focus properly when shooting landscapes
- how to use exposure compensation
- when to shoot with or without a tripod
- how HDR works and when to use it
Of course, there are exceptions to every rule. Take the following tips as a solid starting point for the most common situations in landscape photography.
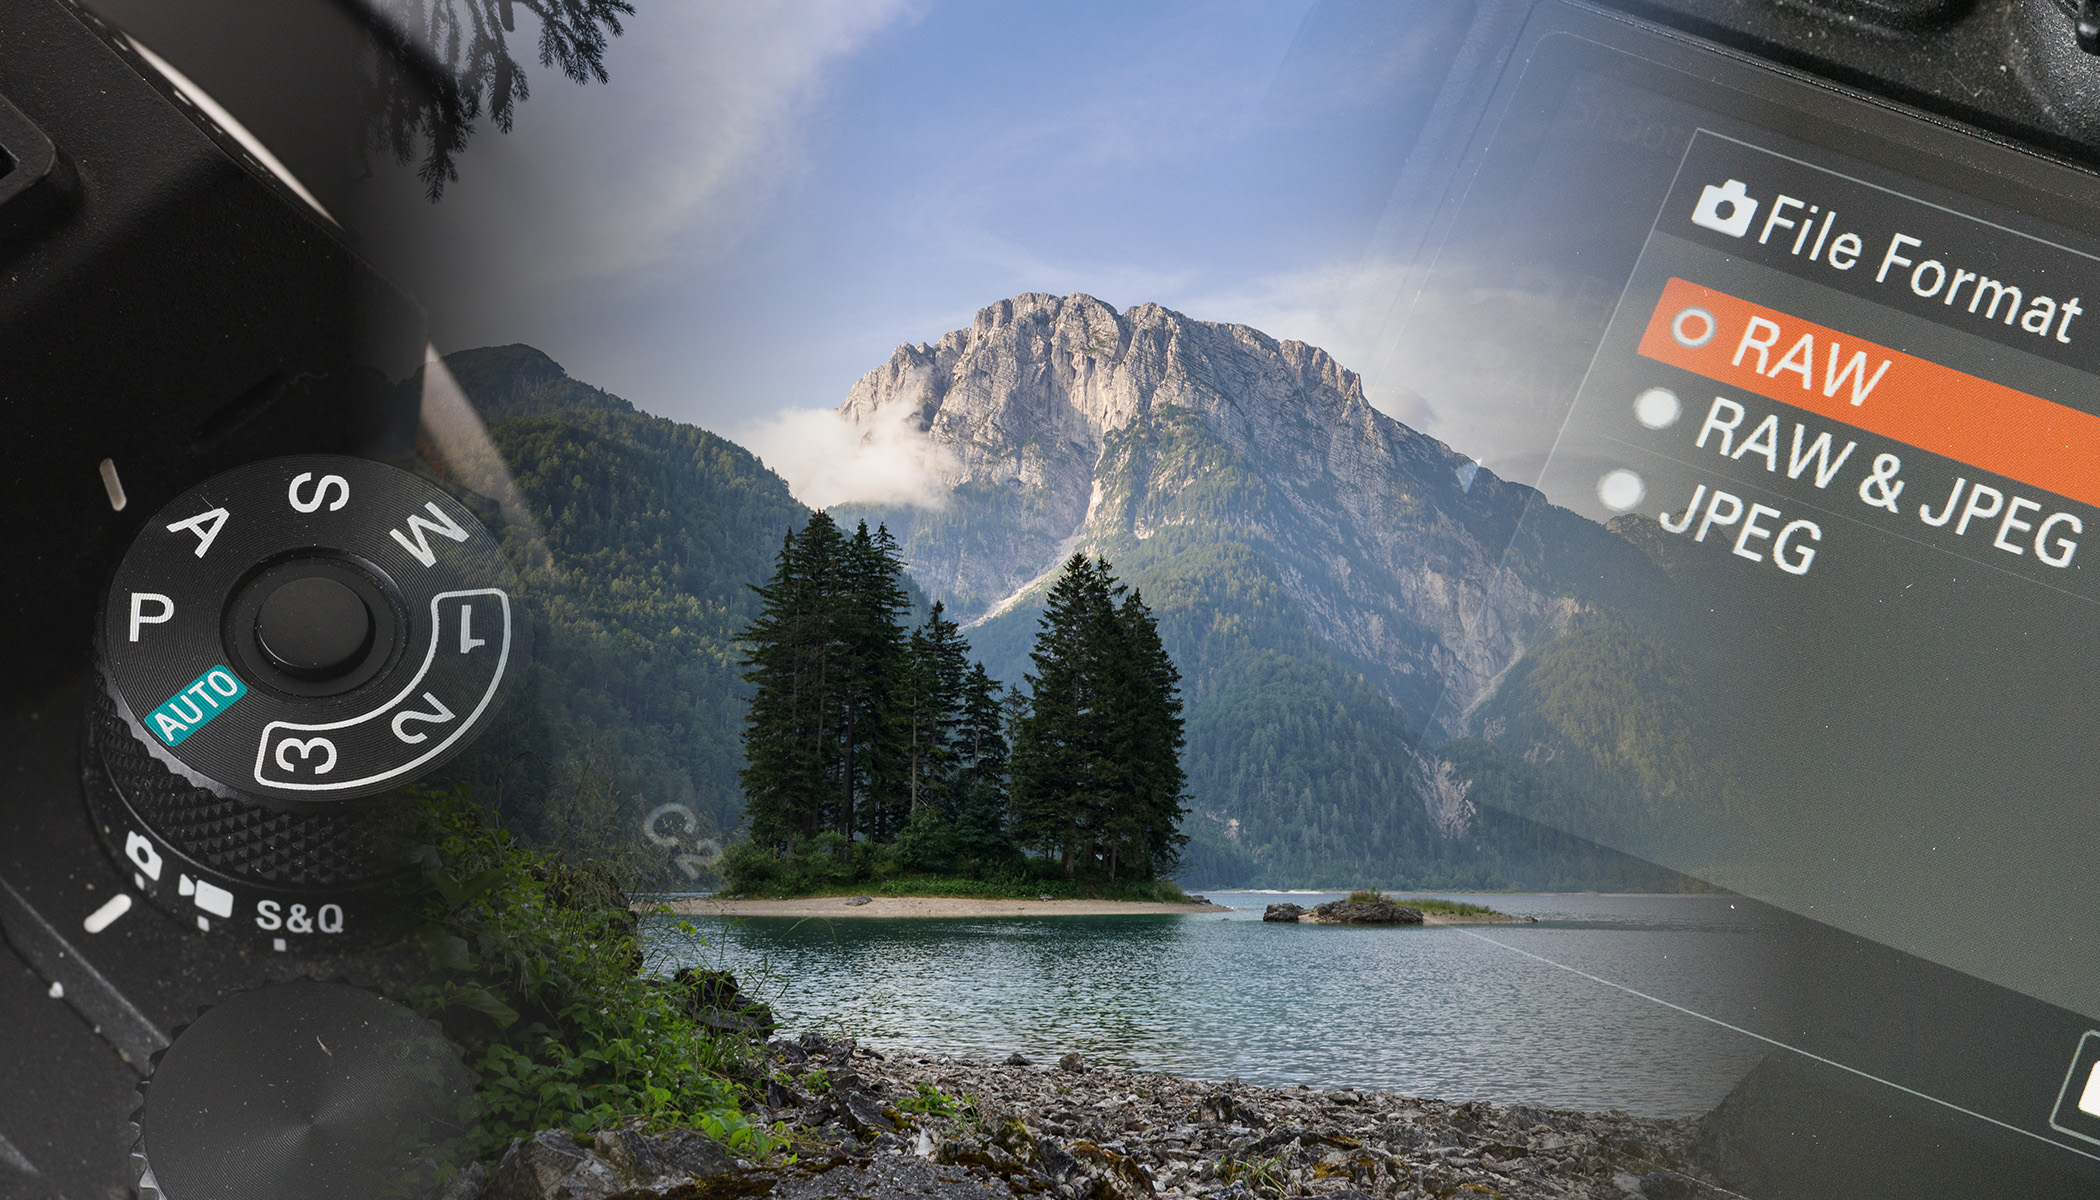
Shoot in RAW format
Setting your camera to save images in RAW format preserves all the image data captured by the sensor. Unlike JPEG, RAW files don’t suffer from limited dynamic range or degraded quality due to compression.
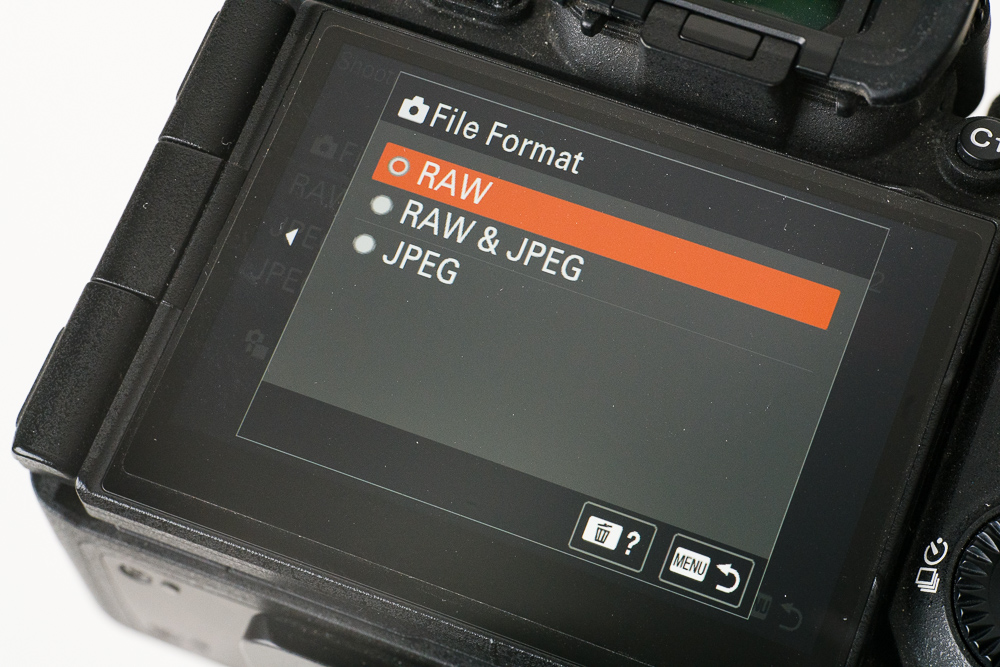
RAW also saves you from having to worry about white balance while shooting. You can easily adjust it later in editing without losing quality. That’s why I often leave white balance set to auto.
Shooting modes
Depending on the situation, I alternate between aperture priority (A or AV) and manual (M) mode.
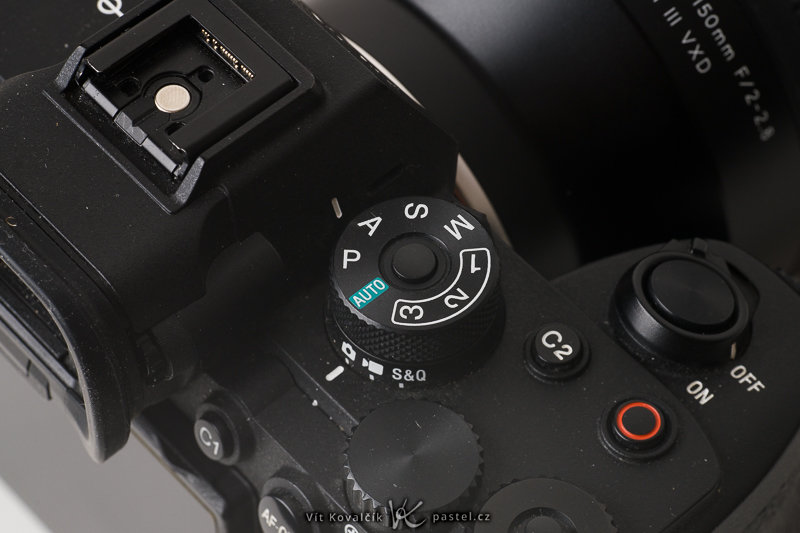
Aperture priority is best in normal conditions. This i when I want to shoot quickly and the lighting isn’t overly complicated, unlike when I’m shooting directly into the sun.
I switch to manual mode when the camera struggles with a complex scene and can’t decide whether to expose for light or dark areas. Manual is also essential when shooting panoramas, since you need all the photos to share the same settings.
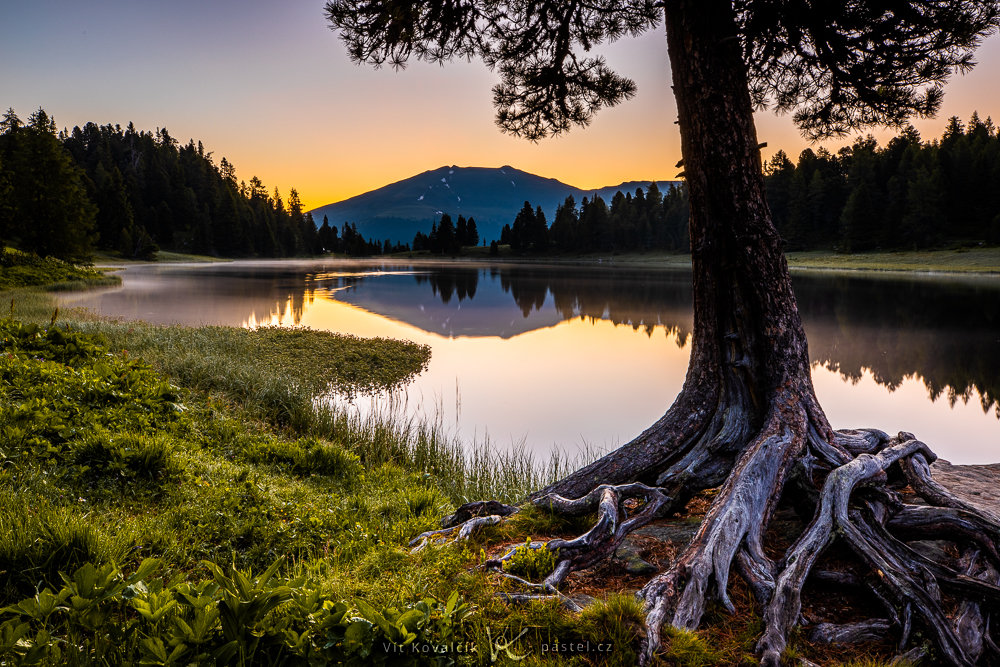
Canon 5D Mark IV, Canon 70-300/4-5.6L, 20s, f/14, ISO 100, focal length 70mm
ISO settings for landscape photography
The lower the ISO, the less noise you see. That’s why it’s best to stick to your camera’s base ISO—usually ISO 100, sometimes ISO 64. Noise may not be obvious right away, but it becomes very noticeable once you brighten the photo in post-production.

Canon R5, Canon 70-300/4-5.6L, 1/160s, f/13, ISO 100, focal length 70mm
Canon R5, Canon 70-300/4-5.6L, 1/160s, f/13, ISO 100, focal length 70mm
I specifically say base ISO, and not lowest ISO, because many cameras also offer an extended ISO, which lets you use even lower values. But this comes with compromises like reduced dynamic range.
For example, Canon’s base ISO is 100, and that is the best choice. Extended ISO is 50, which I would not recommend using.
Choosing the right f-number
For sharp landscape photos, you want to use a higher f-number. At first, it might seem like setting the maximum value, say f/32, guarantees sharpness. But there are two problems: first, too little light reaches the sensor, forcing you to use long exposures. Second, very high f-numbers reduce sharpness overall due to the bending of light, or diffraction.
It’s better to stay in the middle range—typically between f/8 and f/16, depending on your camera and lens.
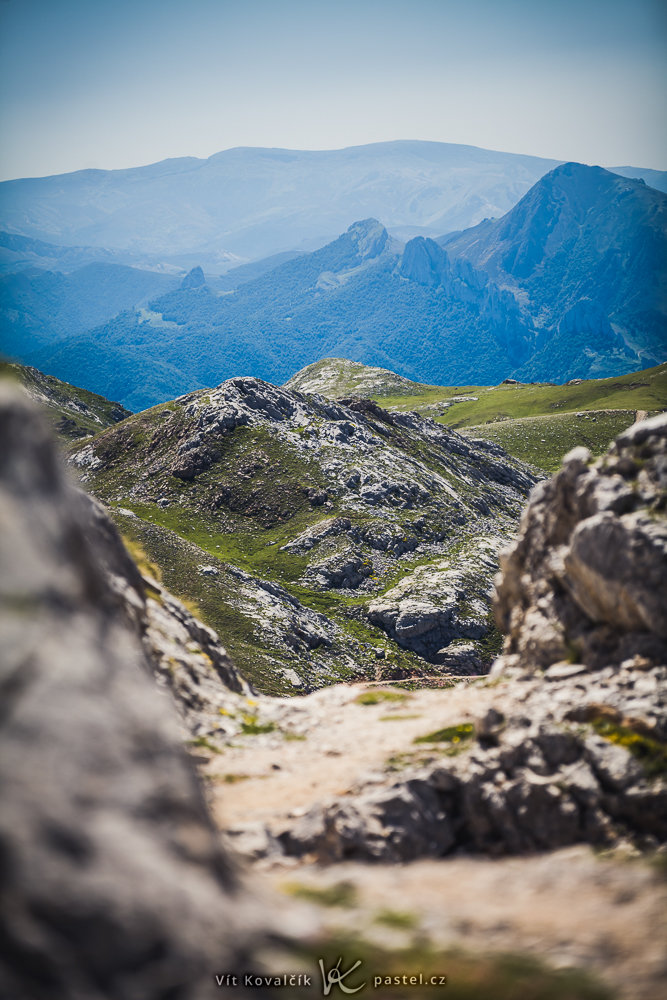
Focusing for landscapes
Even with a higher f-number, you still need to focus carefully. The depth of field is usually considerable, so if you focus too close, the distance details are blurry. And if you focus too far, the foreground is out of focus.
To stay in control, switch to single-point focus and set your point about one-third of the way into the scene, not at the exact middle. This ensures both foreground and background are sharp.
Always double-check the result on your display.
Exposure compensation and the Histogram
Turn on the live histogram, if your camera allows. It depends on the shooting mode you’re using.
In aperture priority mode, use the exposure compensation dial or button to lighten or darken the scene so it’s bright enough while avoiding overexposure.
In manual mode, you can directly change the shutter speed.
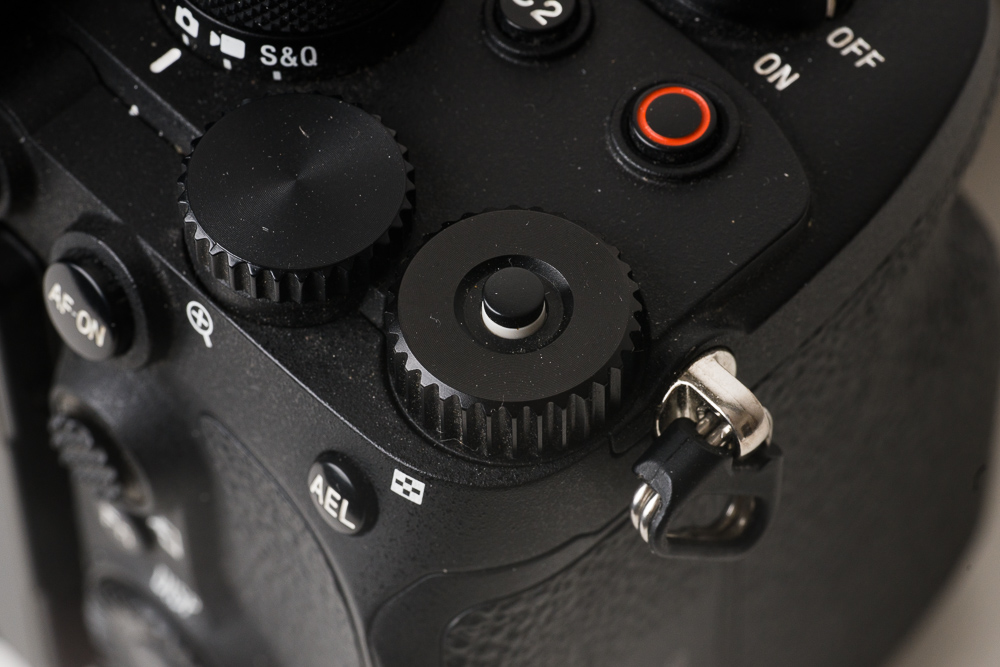
Shooting without a tripod
When shooting handheld, you’re limited by how long you can hold the camera steady without camera shake. This is usually not an issue in the middle of the day. Image stabilization helps a lot, especially with longer focal lengths. Turn it on if your camera or lens offers it.
Shooting with a tripod
For maximum sharpness and longer shutter speeds, a tripod is essential. But there are rules for using a tripod.

It’s a good idea to turn off image stabilization to prevent it from shaking the tripod and camera. In some cases, this can result in images that are unusable.
Another useful tool is shutter delay (self-timer) of 2 to 5 seconds. This eliminates the vibrations made while pressing the shutter button, resulting in an image that’s sharper. An alternative is to control the shutter remotely, which you can do using your mobile phone.
Still, a tripod won’t save everything. The camera could still shake in strong winds. Even if it doesn’t, moving grass or tree branches will blur with long exposures.
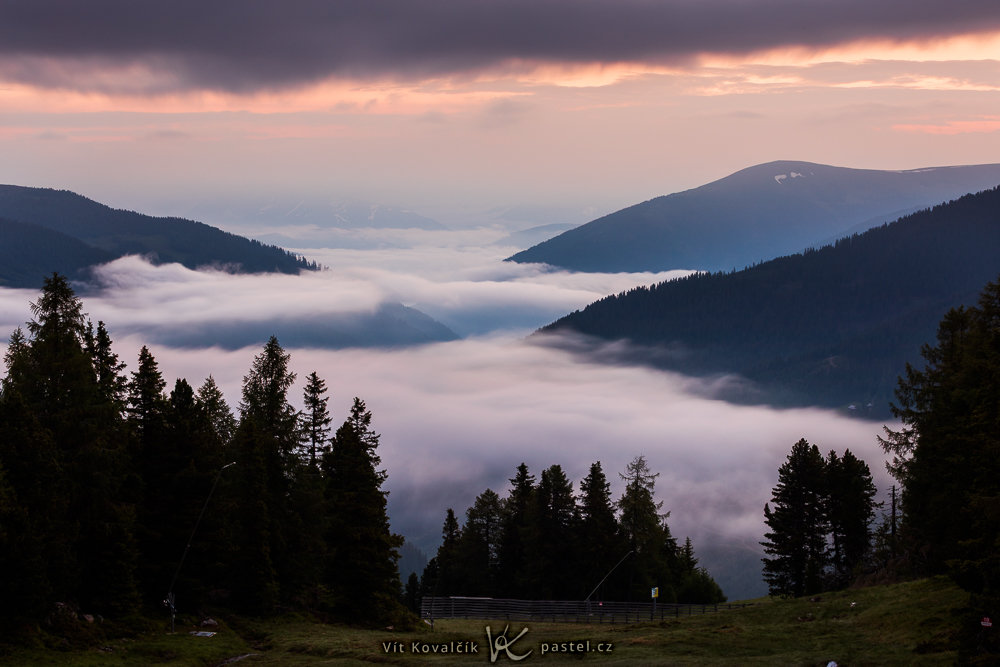
HDR
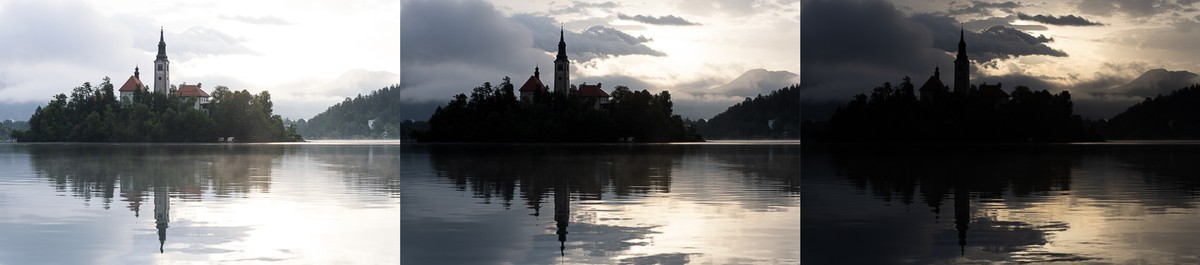
When there’s a wide range of light and shadow, it’s often better to shoot multiple exposures and merge them into an HDR image.
Most modern cameras have a bracketing function that lets you take three or more shots with a single press of the shutter button. The details vary by manufacturer, but you usually set the exposure difference between shots, with 1 to 1.5 EV being enough. If the difference is too great, it’s better to increase the number of shots (e.g., five) rather than widen the EV gap.
Canon R5, Canon 70-300/4-5.6L, various shutter speeds, f/13, ISO 100, focal length 70mm
Exceptions to the rules
As I mentioned in the beginning, there’s no single “right” way. Sometimes you’ll want to capture movement in the wind. Sometimes you’ll deliberately underexpose your landscape for mood. You can even shoot everything in portrait mode.
Don’t be afraid to experiment. Here’s one final example—an unconventional f/2.8 landscape.
Canon 5D Mark II, Canon 70-200/2.8 II, 1/250s, f/2.8, ISO 100, focal length 200mm
Landscape Photography FAQs
What is the best f-number for landscapes? Usually between f/8 and f/16, depending on the lens and depth of the scene.
What ISO should I use for landscape photography? Use the lowest base ISO (usually 100) to minimize noise.
How should I focus when shooting landscapes? Focus roughly one-third of the way to the horizon and check for sharpness on the display.
Do I always need a tripod for landscape photography? Not always. You can shoot handheld during the day. But for long exposures, HDR, or low light, a tripod is essential.
There are no comments yet.