Black and White Landscapes: See How to Add Life to Black and White
Generally, when photographing a landscape, you’ll try to capture faithful, saturated colors. But sometimes a different approach is in order: going black and white. Black-and-white landscapes have immense magic to this day. But there are some golden rules for how to do this edit. And to get the best picture possible, it pays to follow them.
Nearly every digital camera today offers a black-and-white option. But you can get far more interesting pictures if you wait and convert them to black and white on your computer. That gives you a number of ways to work with a picture during conversion.
First, though, you’ll need to choose which photos to convert to black and white. After all, it’s not a good fit for every photo.
A Color Landscape, or Black and White?
If you’re considering B&W for a photo, then when you first open it on your PC, think about why you took it. Were you drawn by the exceptional colors of the sun, the clouds, and the flowers? Then a black-and-white edit probably won’t work.
Or are high-contrast lines, textures, and a lightly melancholic mood what catch your eye when you look at the picture? Then black and white will be the right choice.


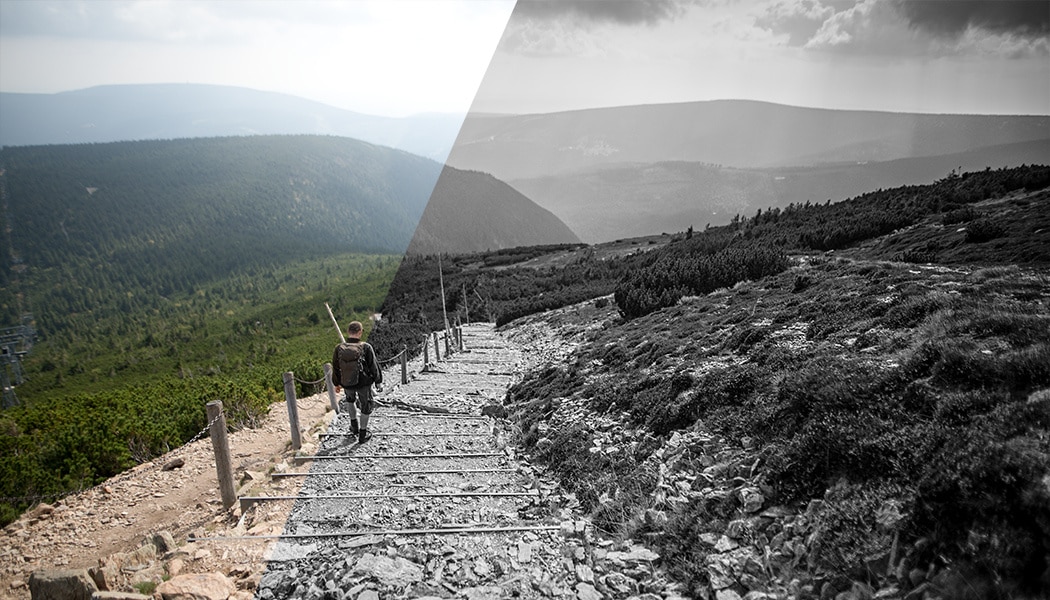
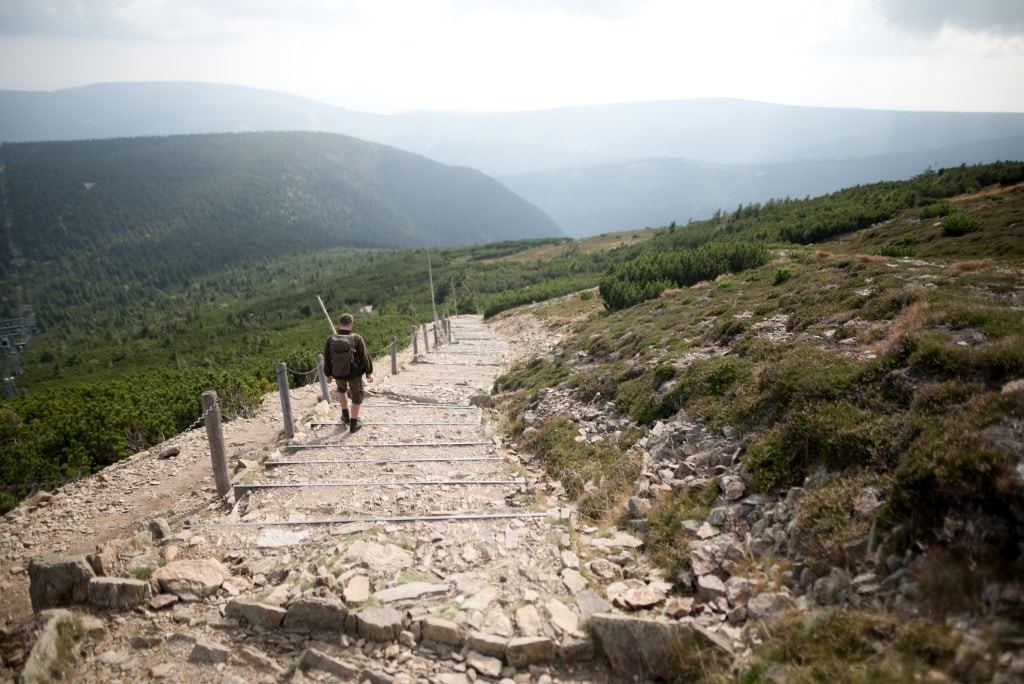
The picture above is a typical example of when it’s better to keep the colors. The picture below, meanwhile, contains lines that tie into each other interestingly in the picture’s composition. And meanwhile, its colors aren’t that interesting. So it’s better to use a black-and-white edit.

A Basic Black-and-white Conversion
Picked a good photo for black-and-white and wondering what to do next? Just desaturating it definitely isn’t a good idea.
Instead, open it in the Develop module in Zoner Studio. Then go to the Color group on the right and click Grayscale. Your first step is done.

Exposure Adjustment and Other Tools
Now it’s time to work with the settings in the Exposure section.
For landscape photos, you’ll generally draw down the Shadows and highlight the Lights. Move Clarity and Dehaze to the right as well. Doing this will infuse the photo with an interesting contrast, and all of its textures and details will stand out better as well.

Then consider adding Vignetting, which you’ll find in the Effects group. For an interesting vignetting-based effect, just reduce the Strength and darken the picture’s borders. This emphasizes its center.

Manual Channel Mixing
To really tweak a B&W photo and make it fit your ideas, turn on Manual Channel Mixing. (You’ll find it in the Method dropdown in the Color group after you’ve turned on Grayscale.) Then you can adjust values for the picture’s individual color channels, and through that, adjust the tones for various parts of it. Don’t be afraid to experiment to find out what’s just right for your particular picture.
For example for this picture here, I’ve darkened the green channel. This has created a contrast between the path and its surroundings. Meanwhile, I needed to make sure that the blue mist on the horizon—which the light-colored path leads to—would stay light. So I brightened the blue channel.
For photos with a cloudless clear blue sky, meanwhile, it’s generally better to darken the blue channel.

Wrap up by checking to see if adding some Polarization will help the picture. Its effect on black-and-white photos is often quite attractive.
Fine-tune With Local Edits
Certain parts of a photo tend to require some special edits. The horizon is among them. Even just my exposure adjustments have revealed a number of hidden details in the example photo, but the Filter Brush (B) will reveal far more.
But first I’ll turn off the mask display so that I know where I’m drawing.

Here I’ll add some Clarity to the area I’ve selected. That emphasizes the contours in the distance.

Darkening the sky using the Gradient Filter (G) is another frequently useful local edit.
To do this, place the Gradient Filter on the upper portion of the picture and reduce the exposure. Here this edit has given me a light and misty horizon that transitions into a much more contrasting sky.

Some Final Detail Retouching
Often a photo will have some elements that it doesn’t need. In the example photo, the pole sticking out of the backpack is such an element. Draw over areas like this using the Retouching Brush. If it doesn’t pick a good source region for retouching automatically, adjust the source manually. And you’re done.

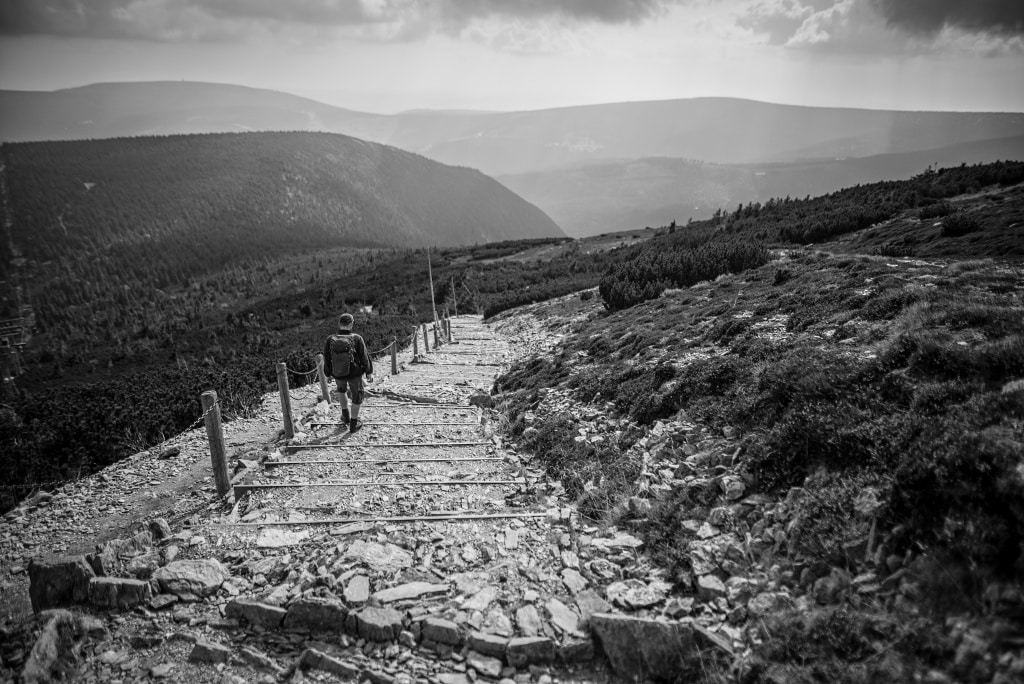
The original color photo and the final black-and-white photo.
Try Both Colors and Black and White
With digital cameras, you don’t have to decide whether to buy color film or black-and-white, like you did in the old days. You can take everything in color and wait to decide what to make black and white until you’re on your computer.
Try it for yourself. Download Zoner Studio, try it free for 7 days, and see how your pictures would look in black and white.
There are no comments yet.