Tips for Landscape Photography

There are a lot of articles we could write about landscape photography. But in this one, we take a look at this genre’s major guidelines and at things to keep in mind before pressing the trigger.

What to Take on the Road…

Sometimes people ask me what the best lens is for landscape photography. I tell them I don’t know. Any lens will produce an acceptable landscape photo, it’s just that some will produce different photos than the others. But, OK. Probably the most impressive pictures come from ultra-wide lenses, that is, ones with a focal length of 20 mm film equivalent or less. For cameras with the widely-used APS-C sensor size format, this works out to a focal length of 13 mm or less.

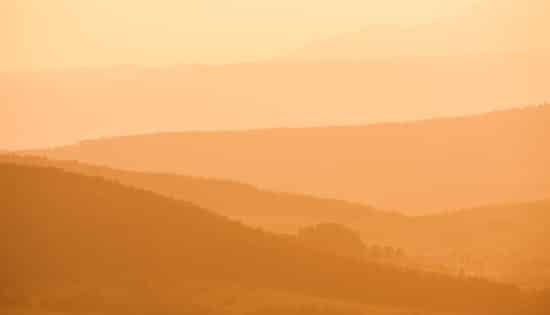
I take this lens type on the road myself. I also take a telephoto lens to capture a variety of detail shots. The lenses in-between, meanwhile, I leave at home. Compare the following two pictures for example:

An overall view of a castle, with a very wide angle. Canon 40D, EF-S Canon 10–22 mm F3.4–4.5 USM, 1/200 s, F8.0, ISO 100, focus 13 mm. Photo: Vít Kovalčík
Taken from the same spot as the last photo. This time a telephoto lens was used to crop the picture down to just a small part of the landscape (a part of the horizon located roughly in the middle of the top picture). A white-balance edit was used after the shot to deliberately shift the picture’s tones heavily towards orange. Canon 40D, EF-S Canon 55-250 mm F4-5.6 USM, 1/250 s, F8.0, ISO 100, focus 194 mm. Photo: Vít Kovalčík

…Besides the Camera

In landscape photography, you want to have everything sharp, and so you’ll almost always be using f-stops of F8 and beyond. The best time of day for photographing open landscapes is the “golden hour,” that is, the time around dusk or dawn that’s full of long shadows that add depth to the landscape. While long on beauty, the golden hour is however short on light. That’s why the real number one aid for a professional landscape photographer is a tripod. But if you want to head out for a trip and you’re not up for being loaded down (and your friends aren’t up for you slowing them down), then you can try just raising the ISO.

And if you really want to have everything just right, you can turn to other accessories designed to improve image quality. Polarizing filters are the classic here. They increase contrast in clouds and prevent reflections off of plants. Unfortunately, their secret weakness is… ultra-wide lenses. That’s because with these lenses, the rim of the filter often affects the corners of the picture, causing ugly vignetting.

Camera Filters You Might Want

For advanced landscape photography, you might also want to carry a gradient filter, or even several. These pieces of glass (or plastic) are transparent at one end and dark at the other. They come in various types with various sizes and variously sharp transitions in the middle. They are designed to be attached to a lens’s front flange or inserted into a special holder (or held manually in front of the lens). They are used to darken the sky, which is usually too bright in photos relative to the ground. Their rectangular shapes and special holders help a photographer line them up precisely against the horizon.

Then there are the more complicated reverse gradient neutral density filters, which are transparent at one end, then sharply transition to a very dark color, and then gradually transition back to transparency after that. These filters are made for photographing sunrises and sunsets, where the brightest part of the scene is somewhere in the middle, and the scene is darker towards the bottom and top.

Dropping Weight

All of these filters can be replaced using digital edits, generally by brightening part of the picture, though it’s always at the cost of increasing noise. In order to be able to make these computer edits, you’ll need to start from a picture where the sun or clouds are not overexposed, and the image is of maximal quality—in other words, in RAW. This is how typically I handle these shots, because I don’t often have the patience for playing with filters on-site, and the quality after a computer edit is usually good enough.

Before and after. Some saturation and sharpness was added to the clouds, and a digital gradient filter was applied to darken the sky so it wasn’t brighter than the grass. Canon 5D Mark II, EF Canon 16–35 mm F2.8 II USM, 1/100 s, F7.1, ISO 100, focus 26 mm. Photo: Vít Kovalčík

Another alternative here is to take several different exposures from the exact same spot and then join them into a single picture on a computer—that is, to use the technique called HDR. That’s a topic broad enough on its own for more than one article.

Getting the Horizon Right

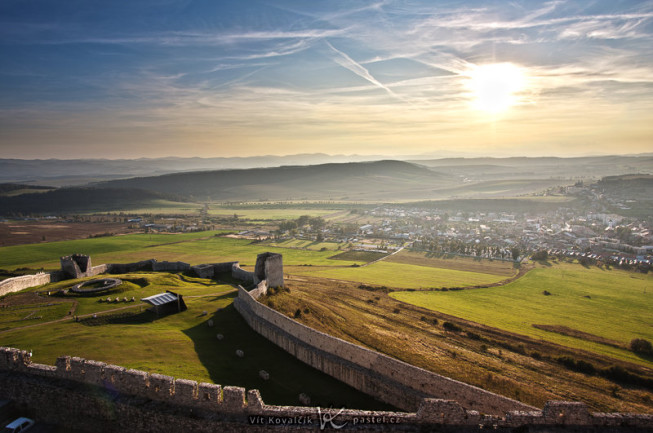
No matter what gear you use, you also have to think about composition. The most common beginner’s mistake is to place the horizon right in the middle of the photo. While there are some photos where this arrangement might look elegant, in most photos it definitely won’t. It’s better to put the horizon about a third of the way into the picture, from either the bottom or the top, depending on whether ground or sky is more interesting (and important for you) in this picture. Watch out that you don’t tilt the horizon; this can be fixed on a computer, but—still.

Try to include a nearby object in the picture to add depth to it. Note the difference in the following photographs:

A hilltop sunset. Add dramatic clouds and you’ve got yourself the kind of picture everyone loves, except that... here there’s nothing really eye-catching. Canon 5D Mark II, EF Canon 16–35 mm F2.8 II USM, 1/100 s, F9.0, ISO 100, focus 20 mm. Photo: Vít Kovalčík
A hilltop sunset. Add dramatic clouds and you’ve got yourself the kind of picture everyone loves, except that… here there’s nothing really eye-catching. Canon 5D Mark II, EF Canon 16–35 mm F2.8 II USM, 1/100 s, F9.0, ISO 100, focus 20 mm. Photo: Vít Kovalčík
The same sunset, but this time with a dry branch that illustrates the real extent of the scene. Also note the positioning of the horizon a third of the way from the top of the picture. Canon 5D Mark II, EF Canon 16-35mm F2.8 II USM, 1/50 s, F7.1, ISO 100, focus 20 mm. Photo: Vít Kovalčík
One last version. This time the horizon is positioned a third of the way up. It is especially striking due to the tree, not only because of depth but also because the tree, which looks black against the light, is a great contrast to the colored sky. Canon 5D Mark II, EF Canon 16-35 mm F2.8 II USM, 1/100 s, F9.0, ISO 100, focus 16 mm. Photo: Vít Kovalčík

Guidelines to lead the viewer’s eyes around the picture are also very useful:

A sea near Cape Town. The shoreline and hill line guide your eyes. Canon 40D, Canon EF-S 18–50 mm F3.5–5.6, 1/200 s, F7.1, ISO 400, focus 23 mm. Photo: Vít Kovalčík

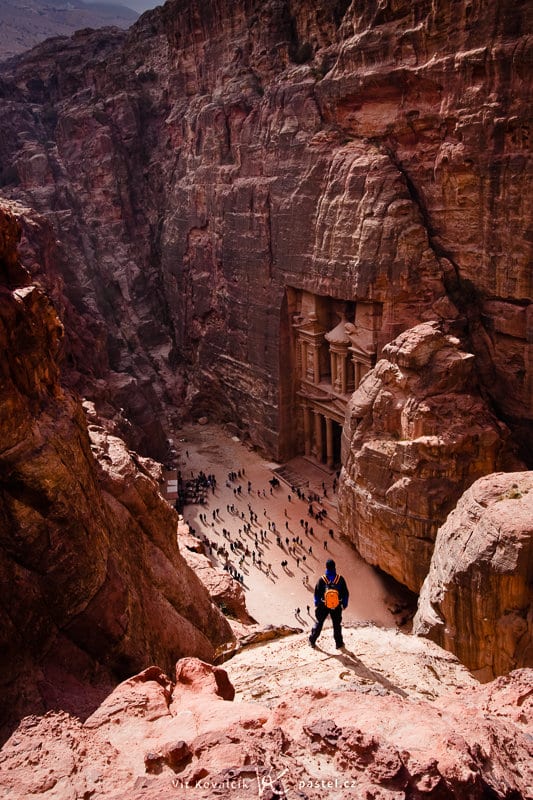
I should note before I wrap this up that just because it’s landscape photography doesn’t mean it can’t contain people. People help establish scale and provide anchor points. They can really be a foundation for a picture’s composition. Best of luck on your human photo safari!

The stone-carved city of Petra in Jordan. The figures of my friend at the top and of the tourists at the bottom give a rough notion of size. Canon 40D, EF-S Canon 10–22 mm F3.4–4.5 USM, 1/160 s, F8.0, ISO 100, focus 22 mm. Photo: Vít Kovalčík
A morning beach after grooming, with athlete. Without the jogger, this picture would be boring. Canon 5D Mark II, EF Canon 70–200 F2.8 IS II USM, 1/25 s, F8.0, ISO 100, focus 115 mm. Photo: Vít Kovalčík

Receive our weekly newsletter to stay on top of the latest photography trends

Subscribe to receive the best learn.zoner.com has to offer

Invalid email

By confirming the subscription, you consent to the processing of your personal data for receiving newsletter. Learn more in our privacy policy.

AuthorVit Kovalcik

I’ve been a freelancer since early 2012; photography is my living. I acquired my photography experience, both inside and outside the studio, during the previous years—when I was working all day and taking pictures every evening and weekend. I don’t have just one clearly defined topic; I like photographing people, but also cityscapes and landscapes.

Comments (0)

There are no comments yet.

Leave a Reply

Your email address will not be published. Required fields are marked *