Editing Tutorial Sports Photography in the Develop Module
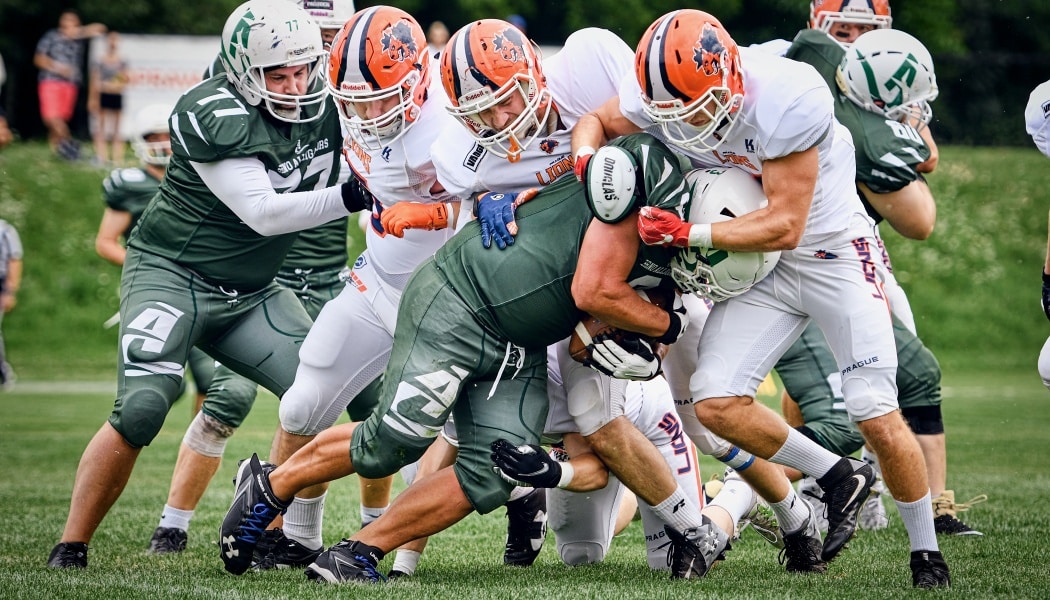
In this article, we’ll take a look at the editing workflow in Zoner Studio for sports photography. If you’re new to Zoner Studio, you’ll learn many basic adjustments that will make your photos pop. Even if you’re not an absolute beginner, you can get inspired by the techniques described. We’ve chosen a photograph from an American football game as our demonstration photo. So let’s jump right in!
I don’t dramatically edit my sports photography because sports photography is considered reportage photography and should be as close to reality as possible. In my opinion, over-the-top saturation, sharpness, or contrast takes away from the overall impression of the photo. For this reason, I strongly recommend using the Show Original (/) function throughout the entire editing process. This way, you won’t gradually get used to the editing and lose your sense of judgment. If you don’t, you may end up with a photo that goes beyond what is realistic.
White Balance and Exposure
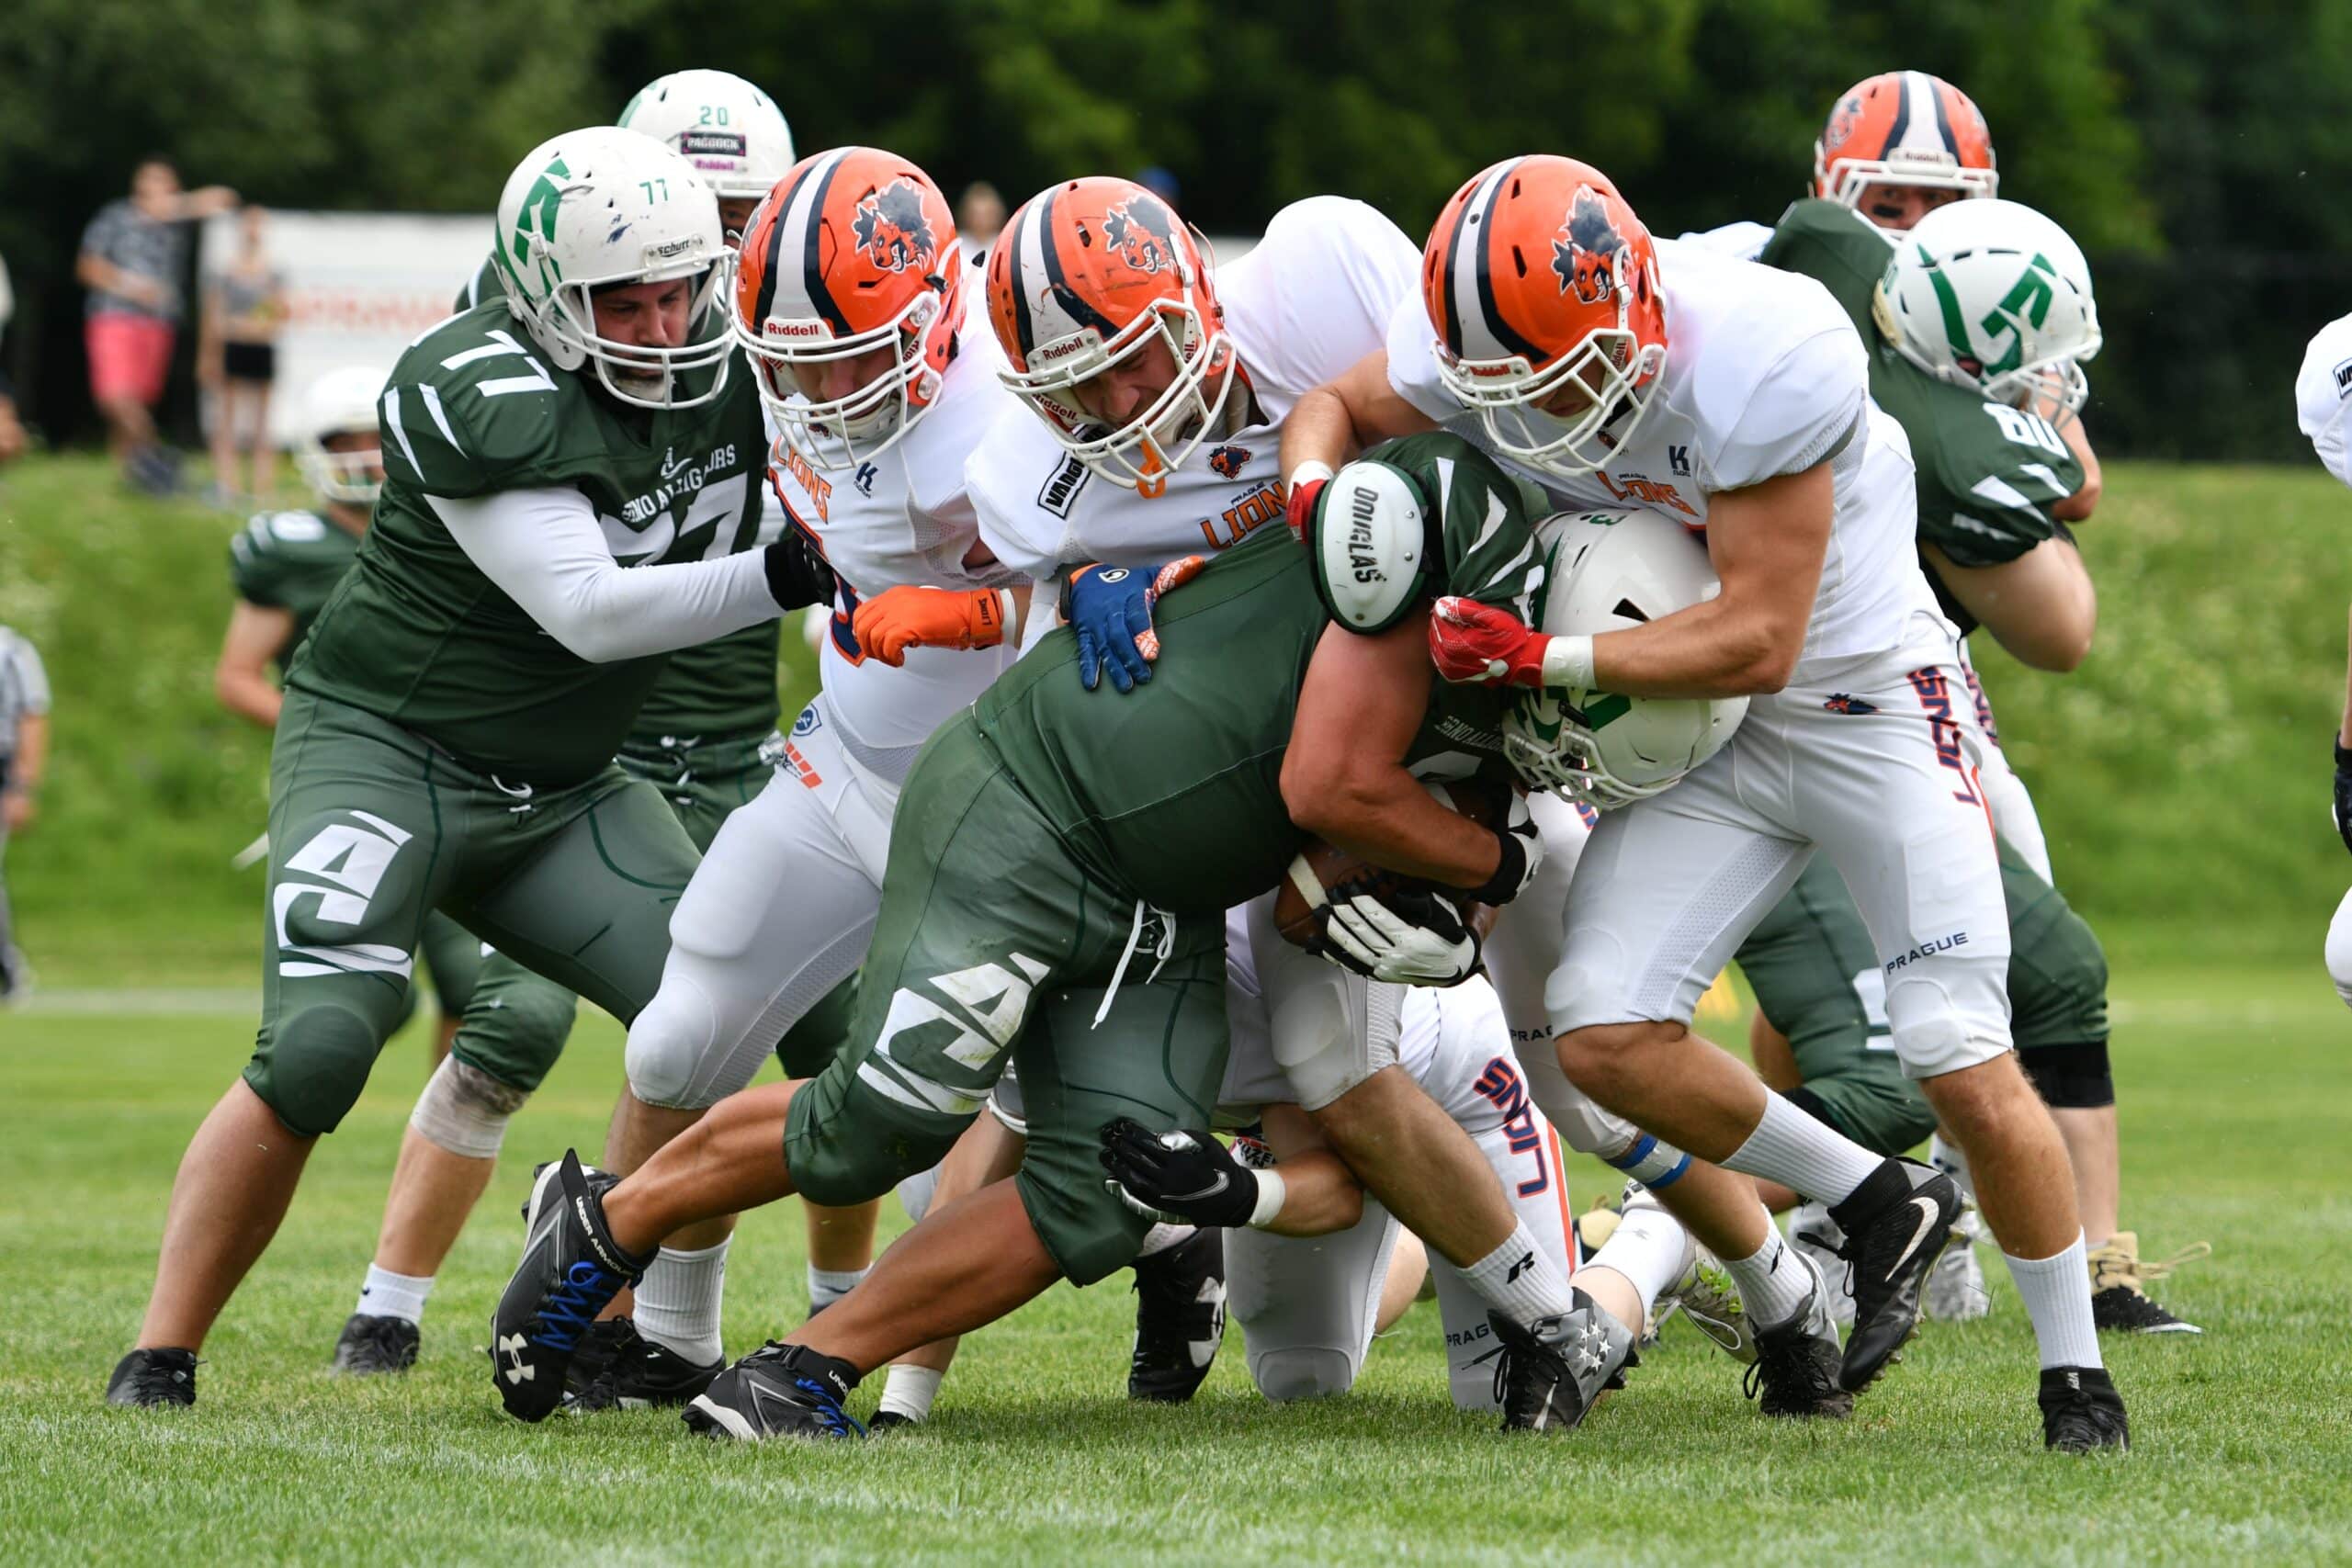
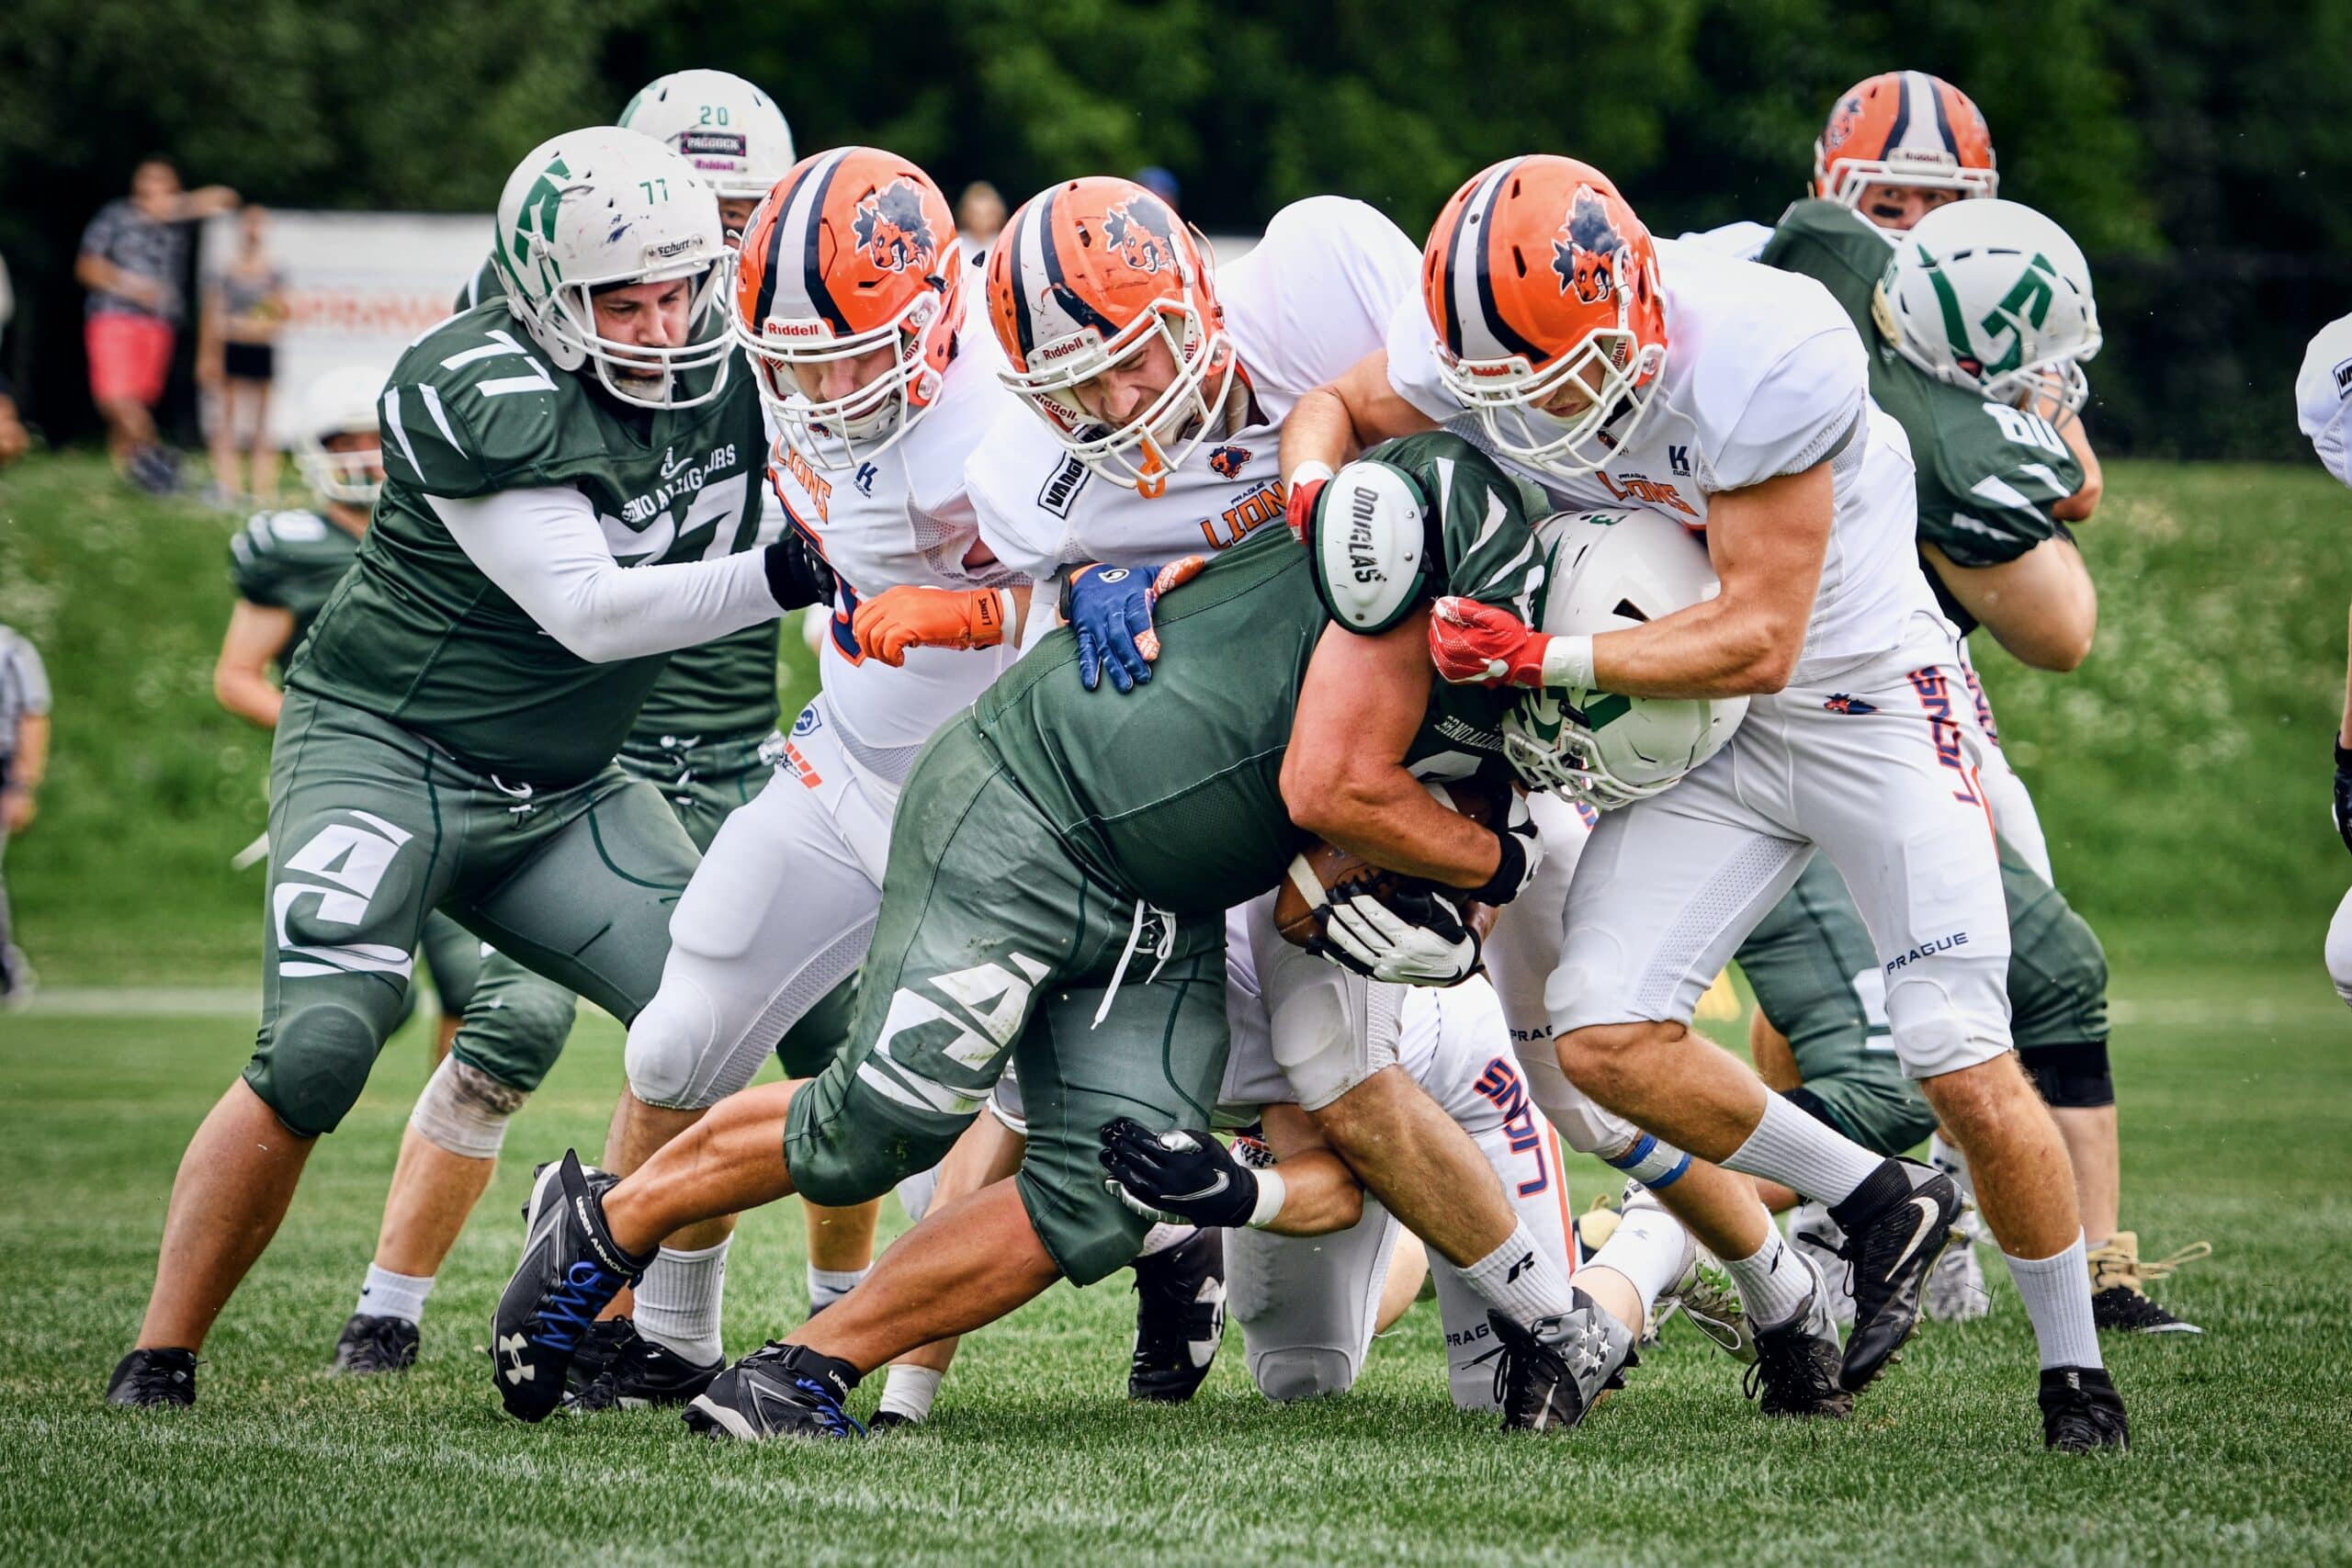
I will be demonstrating the editing workflow on this image of an American football game. The editing will be done in the Develop module of Zoner Studio.
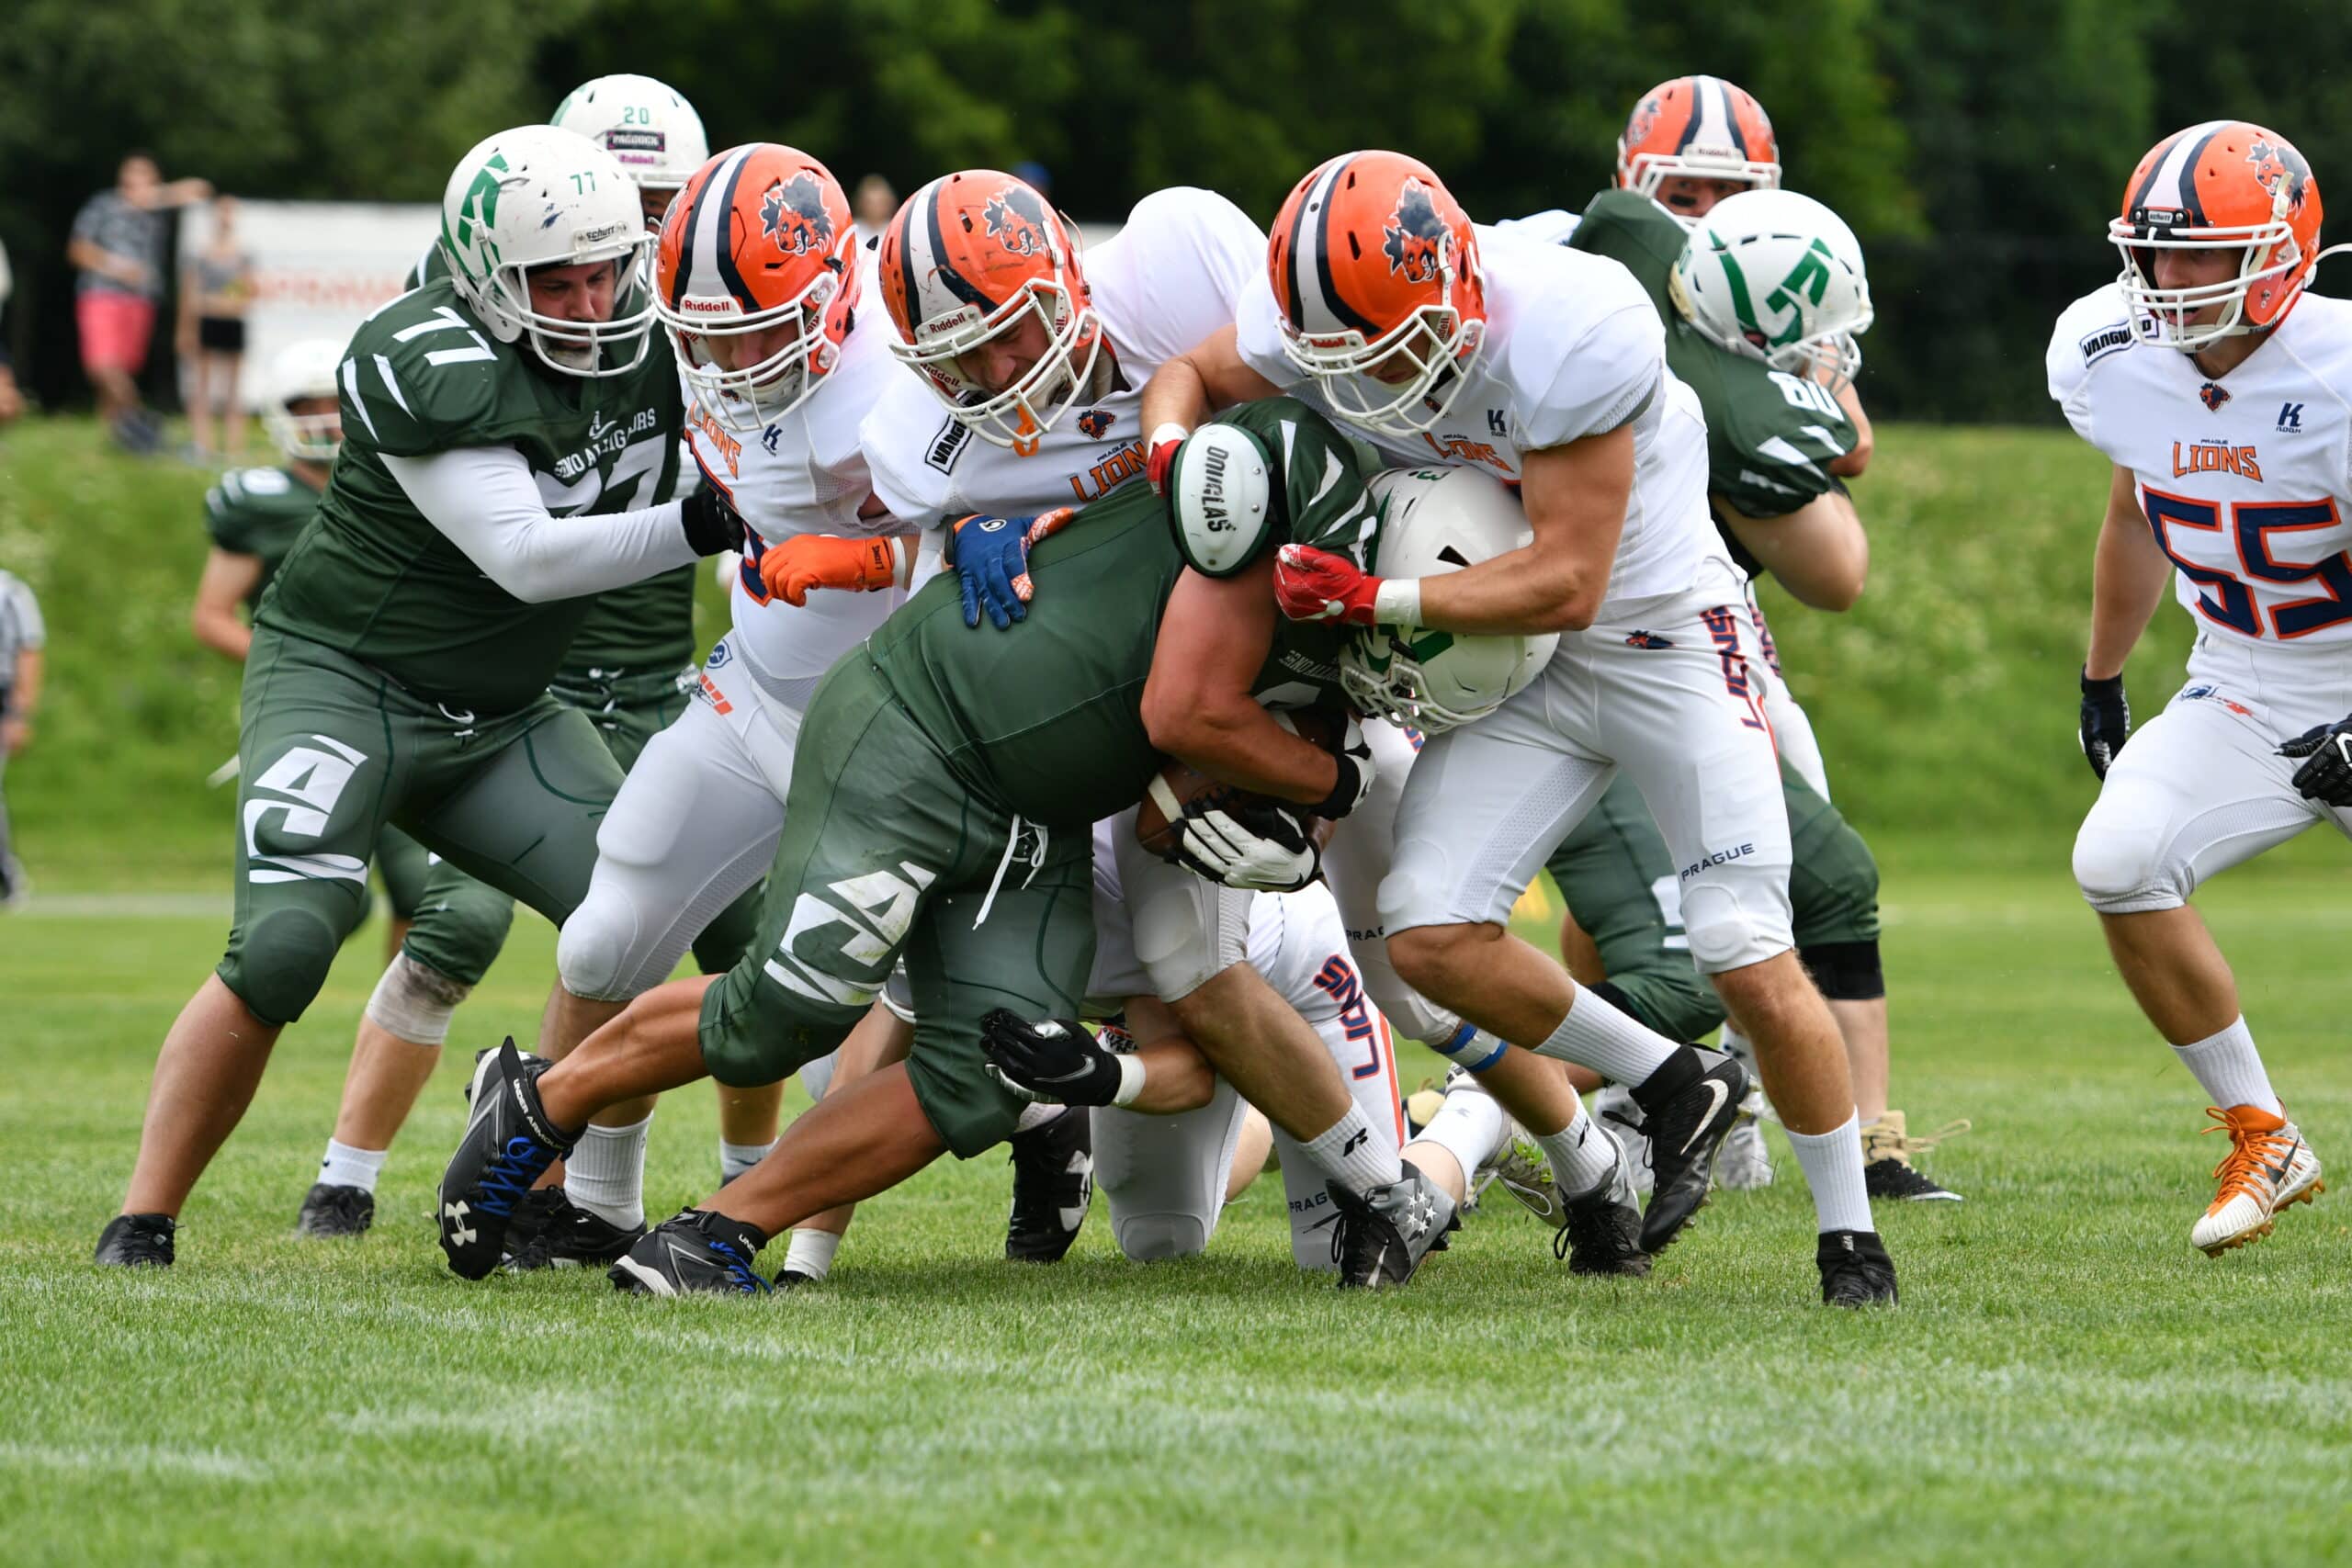
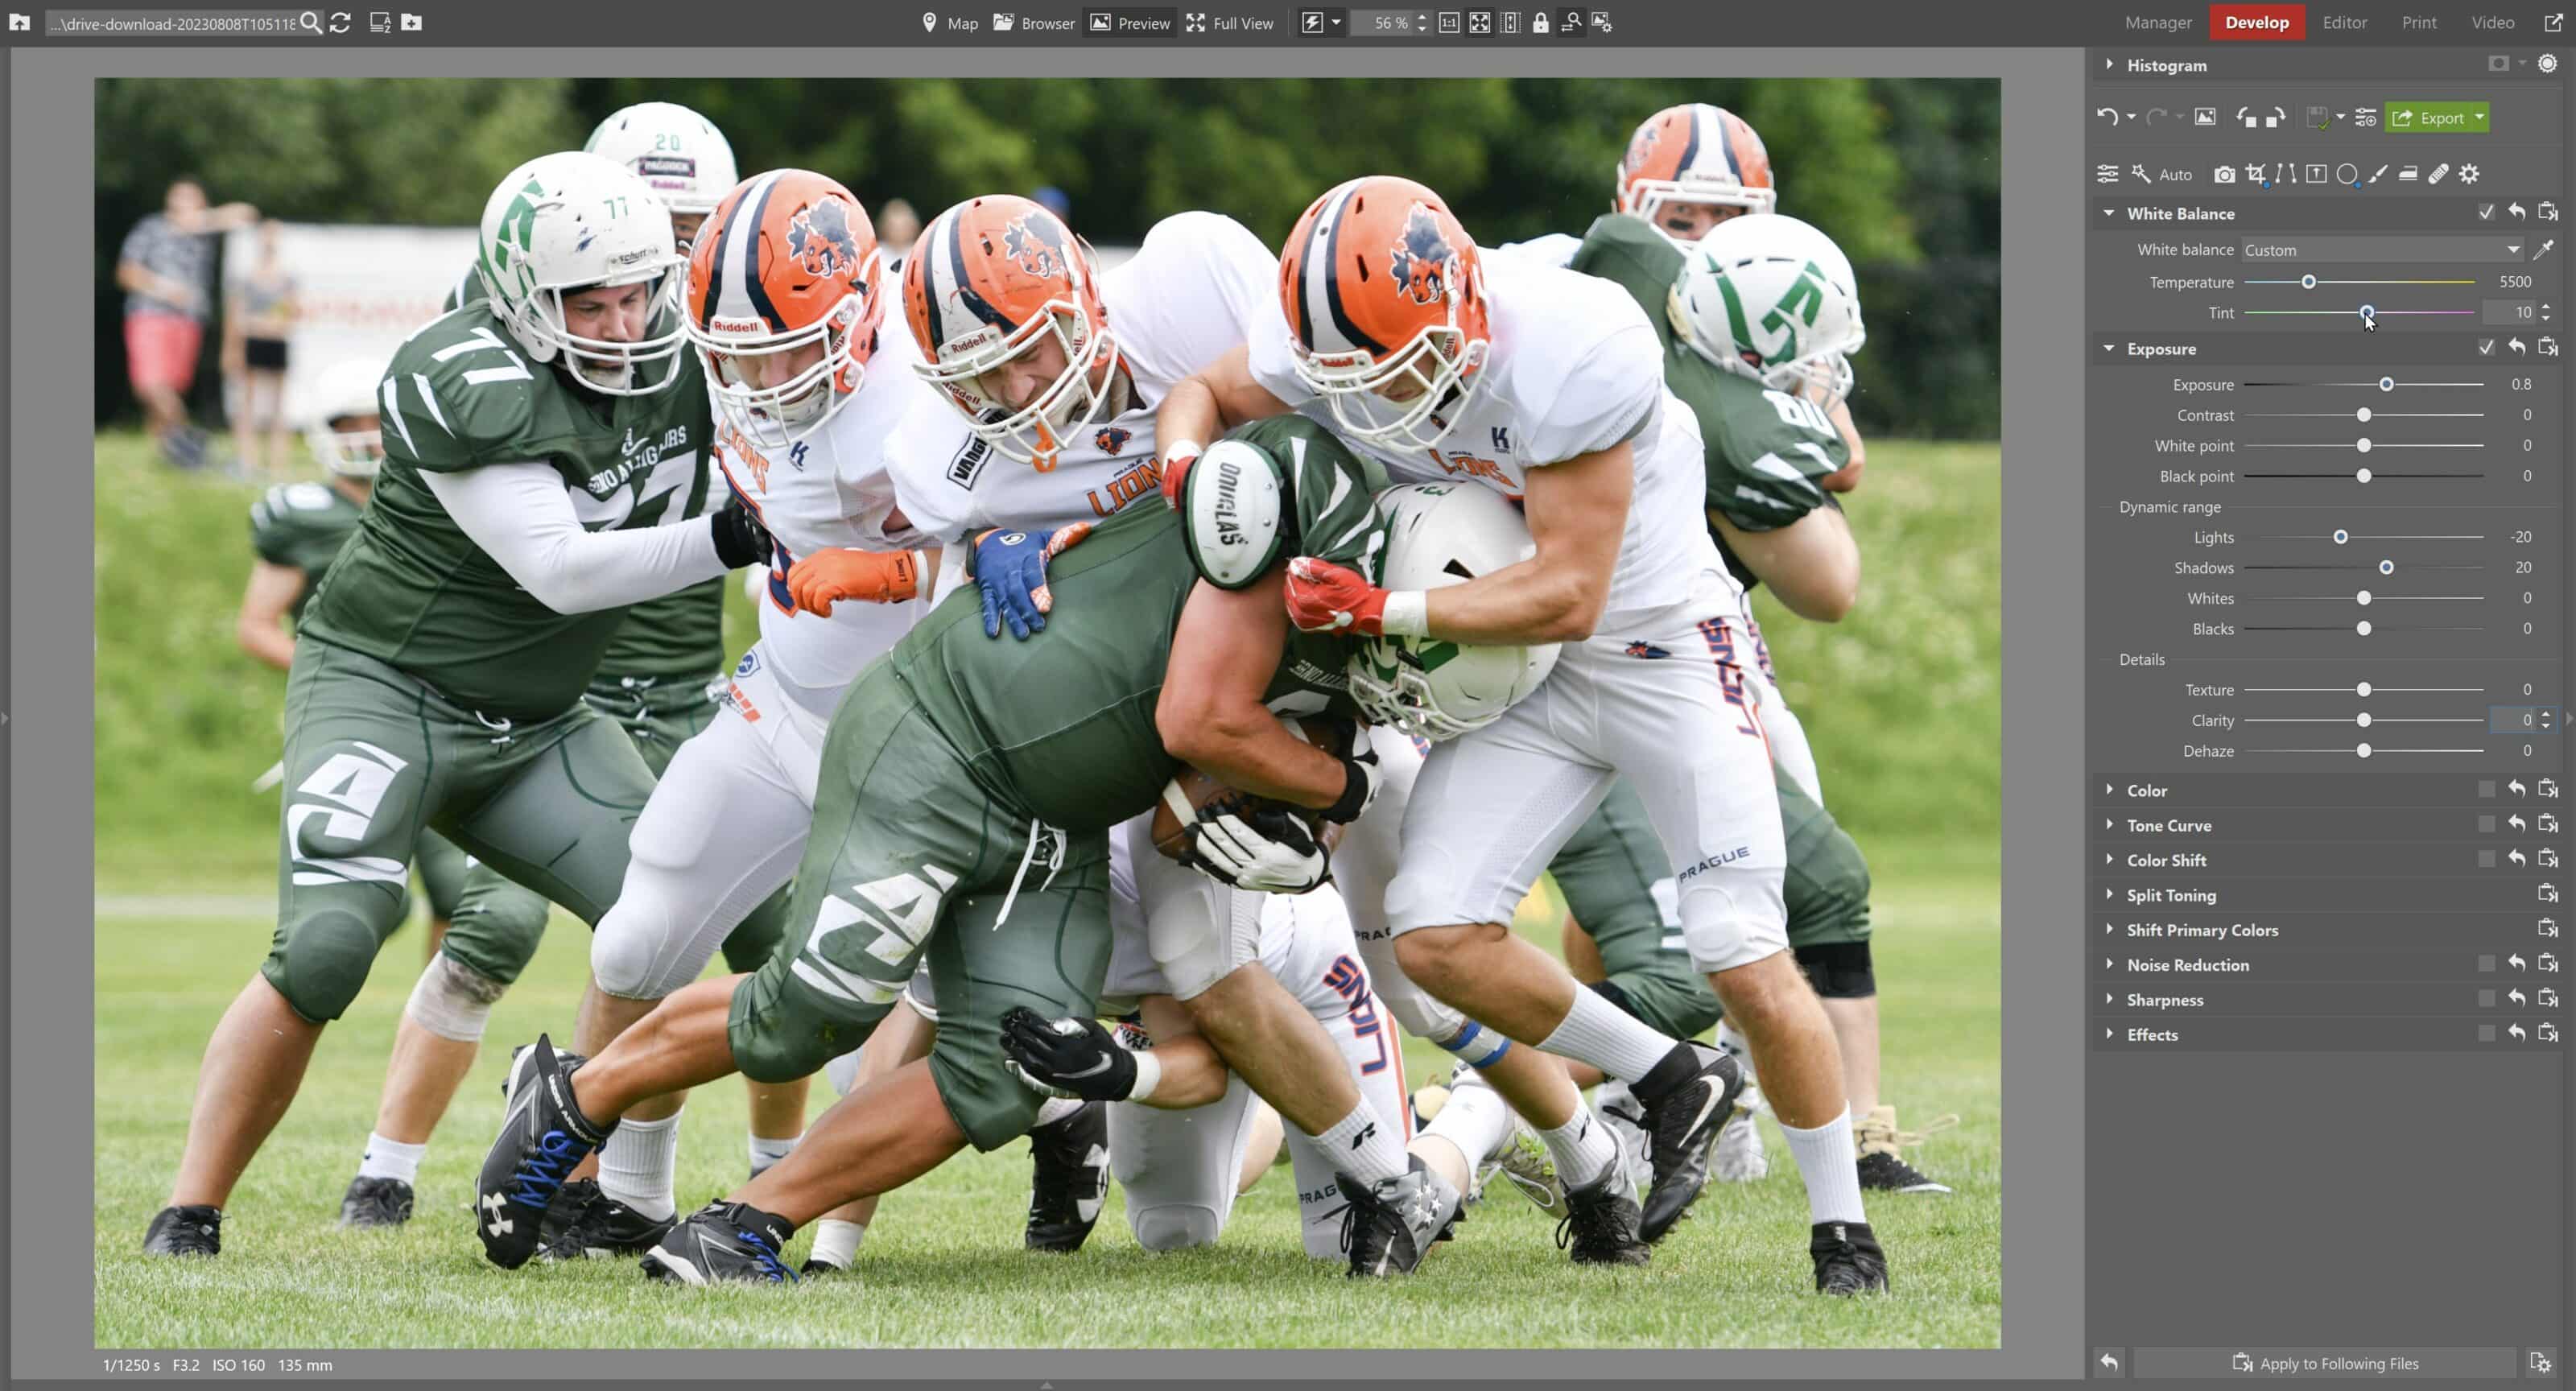
At first glance, the image appears somewhat underexposed. I would also like to slightly crop the bottom of the photo. I crop the image using the Crop and Rotate (C) tool. Next, I make subtle adjustments to the image’s brightness using the Exposure settings group in the right panel. I also slightly brighten the shadows and darken the highlights.
The settings for Lights, Shadows, White point, and Black point depend on several factors. If your photo has bright light resulting in overexposed areas and harsh shadows, then try to partially eliminate this by darkening the lights and brightening the shadows. But be careful. If your image contains large dark areas, such as the players’ jerseys, then brightening the shadows will affect these parts of the image too. Generally speaking, black colors will be transformed into washed-out shades of gray.
When increasing exposure, it is a good idea to check the overexposed areas using the Blowout (Shift + O) function. I’m personally more inclined to brighter images – they look better when printed out too. Also, a note for beginners – be sure to lower the brightness of your monitor from its maximum value as this makes the image look brighter than it will on paper.
Edit using curves
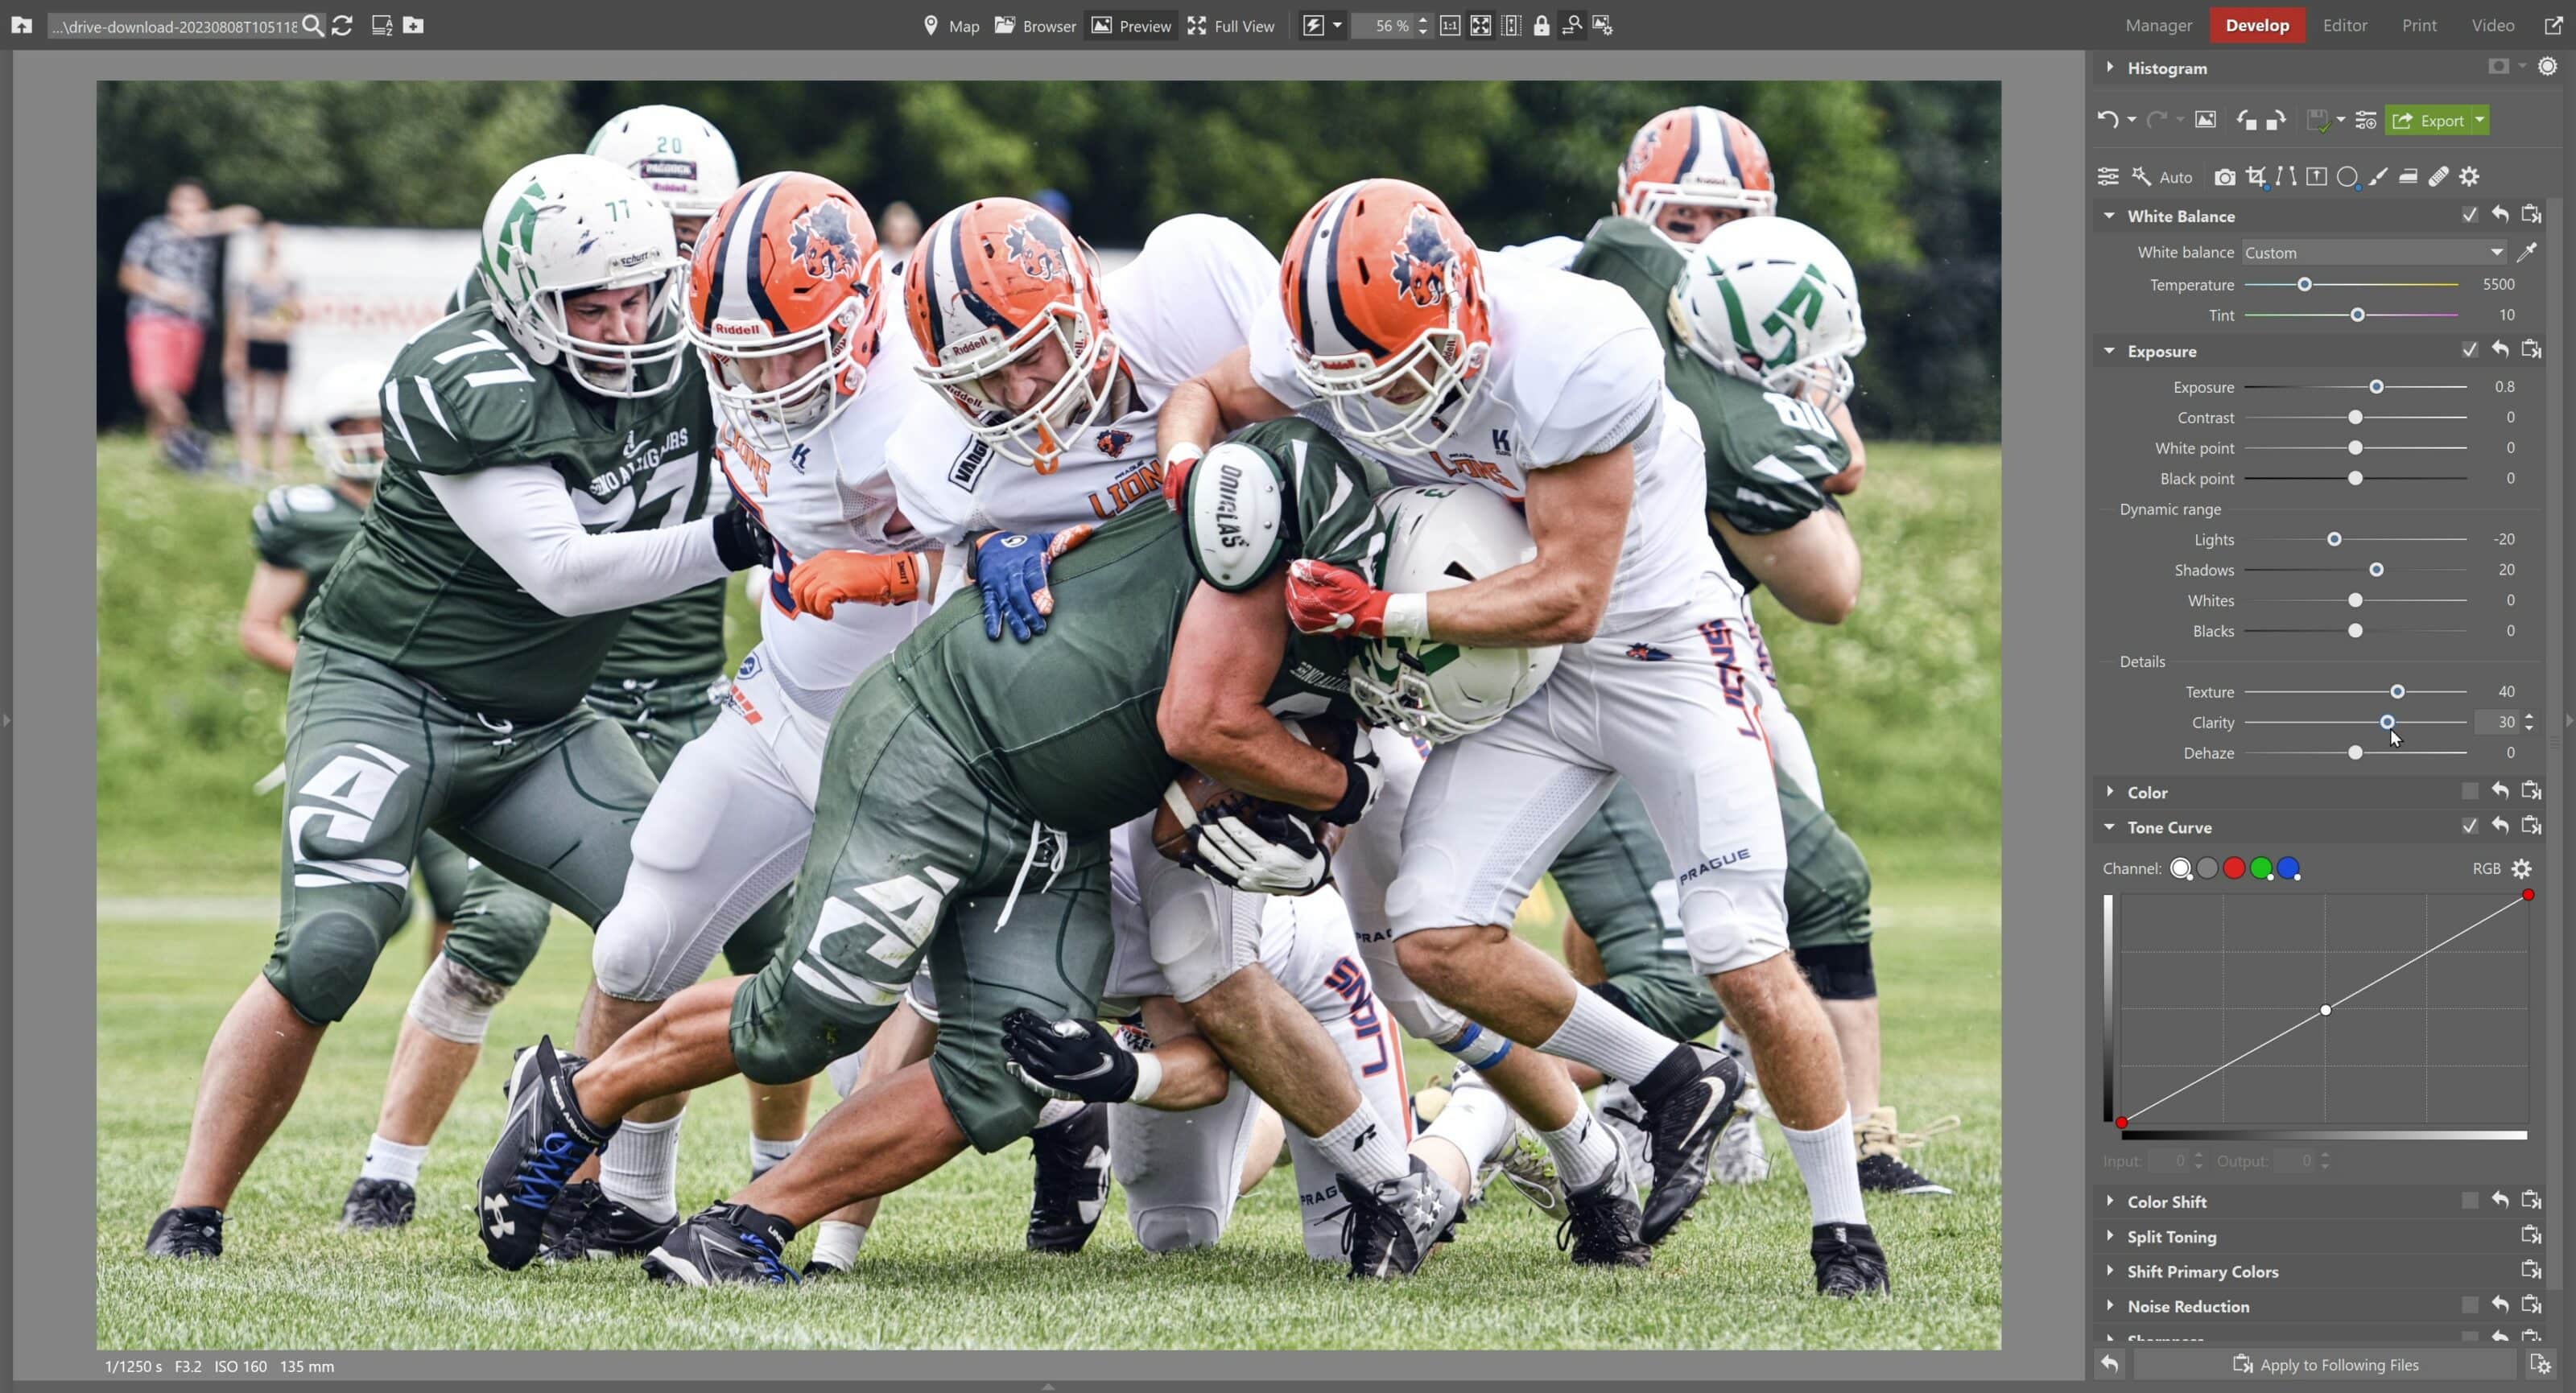
After adjusting exposure, I jump right to Tone Curves. Here, I combine editing using curves with adjustments to the White Balance, Tint, and Exposure sliders.
TIP: If you don’t want to work with curves, the Split Toning function in Zoner Studio works just as well, if not better, for color work.
Again, we are doing subtle adjustments. I slightly decrease the black and white point using the RGB curves which adjust brightness. RGB curves are not to be confused with the commonly used S-curve for increasing contrast. You can make similar adjustments using White point and Black point in the Exposure settings group.
I slightly lower the green midtones in the green color channel due to the coloration of the grass. In the blue channel, I slightly pull up the dark areas of the photo to shades of blue because I like to have a hint of blue in the shadows, but it depends on everyone’s individual taste.

Adjusting color and dynamic range
Once I’m happy with the exposure and white balance settings, I continue down the panel to Details. In my opinion, sports photography should be at least somewhat dynamic. I increase Texture and Clarity. I want the effect to be noticeable, but not over the top.
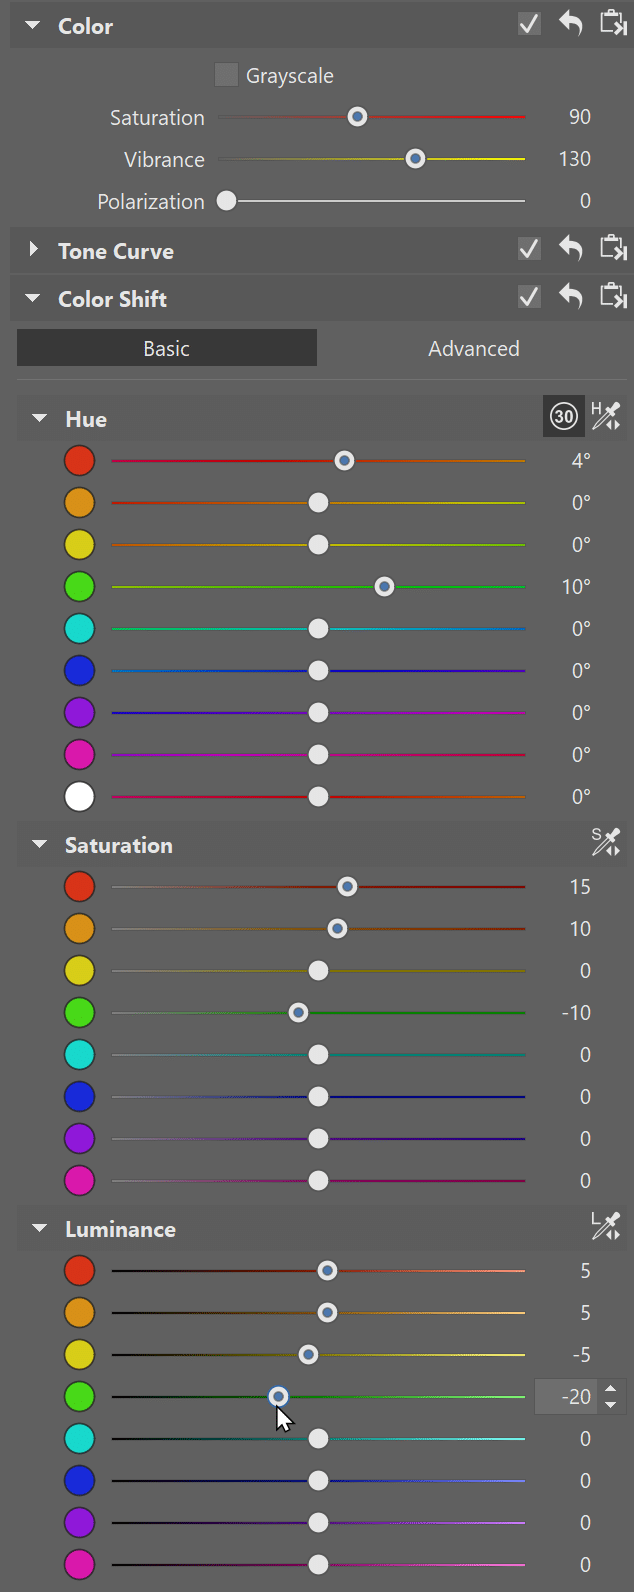
In the Color panel, I adjust the saturation of the image just a bit. I prefer to lower Saturation and increase Vibrance. This amounts to a type of “smart saturation“ by bringing up only those areas of the photo that aren’t already very saturated. You‘ll get a more balanced result this way.
Now is when the fun begins. Use Color Shift to play around with individual colors’ hue, saturation, and luminance. If you have time, you can change the photograph to almost beyond recognition. However, as already mentioned, this is not our goal for reportage photography. For this reason, I make only minor adjustments.
Tools for local adjustments
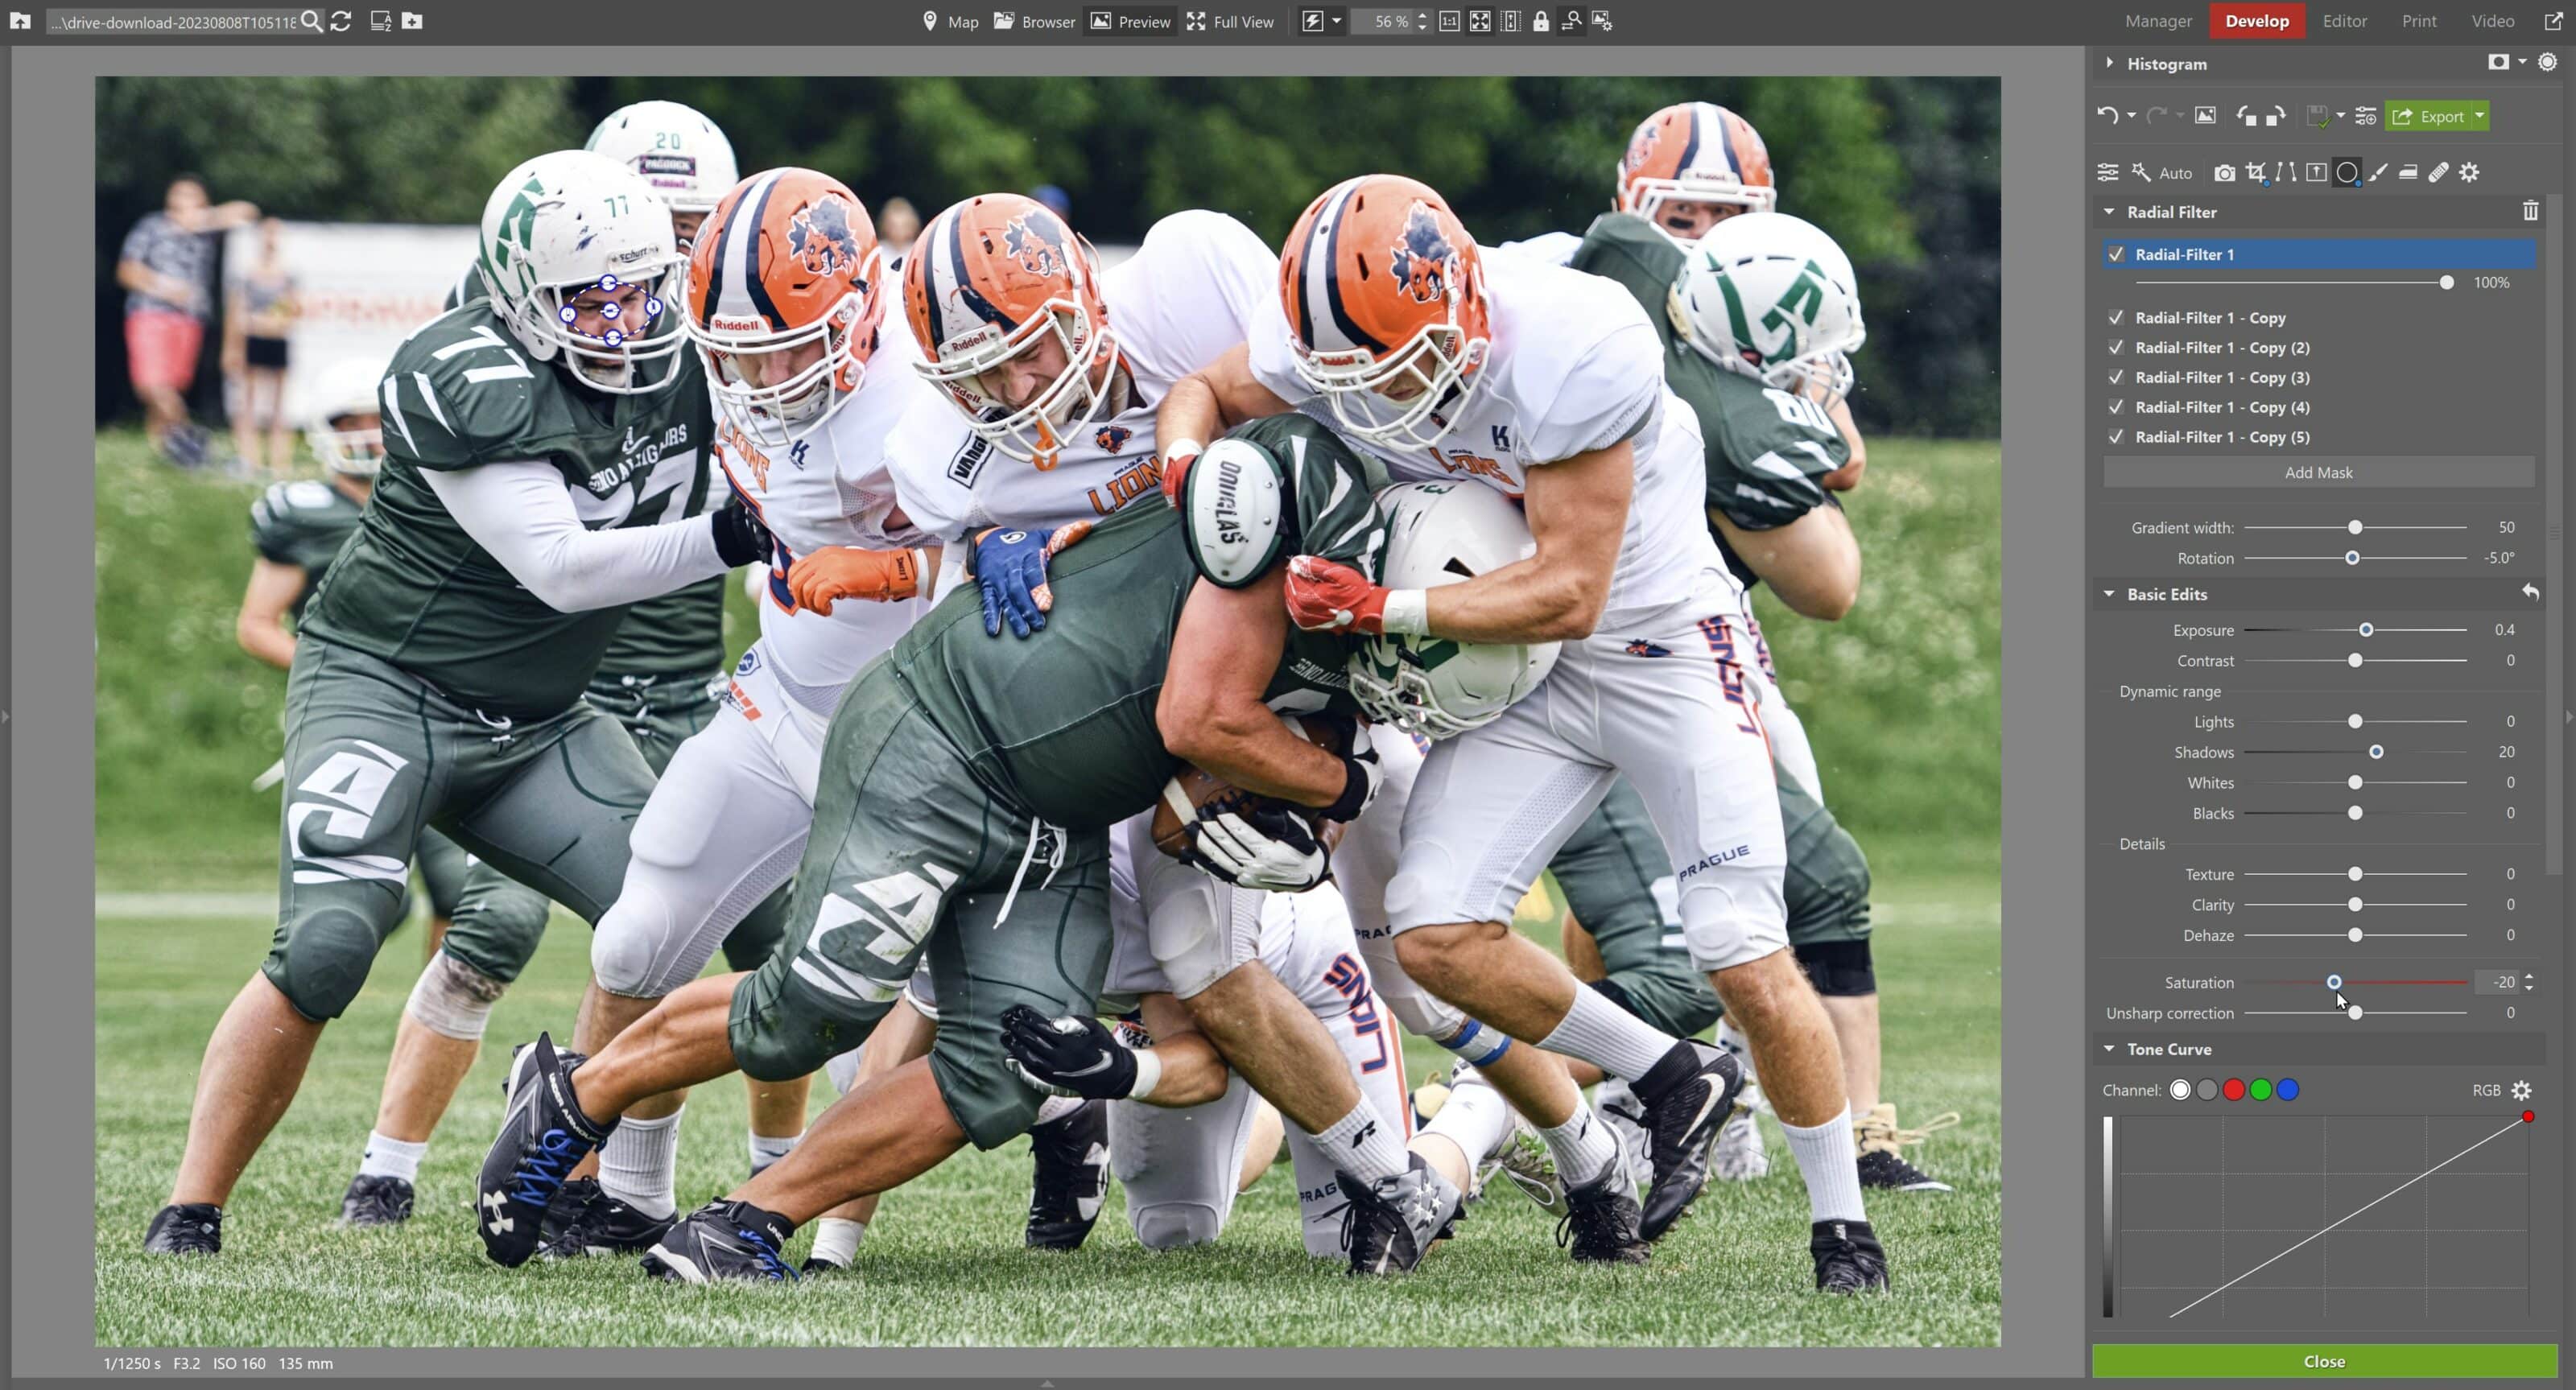
Generally speaking, I mostly use two types of filters. I use the Gradient Filter (G) for working with the upper or lower parts of the image and the Radial Filter (R) for editing specific parts of the image.
Since I increased the saturation of the orange colors, the players‘ complexion is overly saturated and something needs to be done. Also, the players‘ faces are darker due to their helmets. I will make slight adjustments using the Radial Filter (R). Of course, you can also use the Filter Brush (B) for more precision, but I find the Radial Filter (R) saves time and works in most cases.
When the main subject is properly exposed, you’ll often find the sky and clouds overexposed. Use the Gradient Filter (G) to darken these larger areas. In my photo, this wasn’t an issue, so I left this step out.
Noise Reduction, Sharpness, and Effects
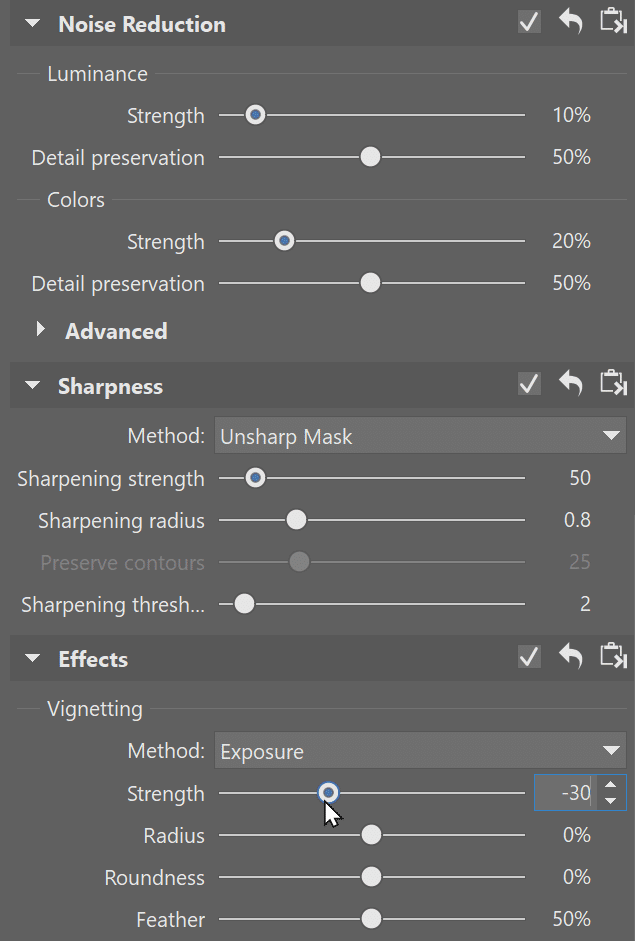
The Noise Reduction function is often my best friend. While I would love to shoot everything at ISO 100, this is not possible for sports photography. Fortunately, the football game took place outdoors on a summer afternoon, so noise wasn’t a major issue. However, with indoor sports, it’s something you will have to deal with. I slightly reduce noise, sharpen, add vignetting to the image, and am done.
The final photograph before and after editing looks like this:
Our photograph before and after editing
The options for experimenting with your sports photography are endless. It’s also important to toe the line and find a place where your photo benefits from editing without taking it too far. Every photographer’s perception of where this line lies is different. It comes down to the client – if they are happy, then all is well. I highly recommend adding your signature or logo to protect your images and make them recognizable not only to you but to your viewers as well.
