3 Practical Examples of How to Edit Car Racing Photos
The article is over 5 years old. The information in it may be outdated.
![]()
We are working on its update. In the meantime, you can read some more recent articles.
Photographing motor sports is not at all just about capturing buzzing bikes and cars. At races, you’re also taking background portraits and reportage photos, for example, and some of those pictures are closest genre-wise to landscape photography. But when it comes to editing, you’ll still be spending the most time on the main heroes—the racing vehicles. And that’s what I’ll be exploring in this article. I’ll be using three examples to show you the edits that are most commonly needed to make your racing photos shine.
One thing I like about editing motor sports photos is that you don’t have to be afraid to make bold edits. In this genre, you definitely don’t have to hold back on vibrance, saturation, and above all clarity. Here all the things I’d never dare push hard on in a portrait are not just allowed—they’re desired.
When you’re producing pictures for any kind of reportage work, speed of delivery is important, and that’s why I mainly work in the Develop module in Zoner Studio. And this module is also where I’ll be making my edits in the examples here.
Example #1
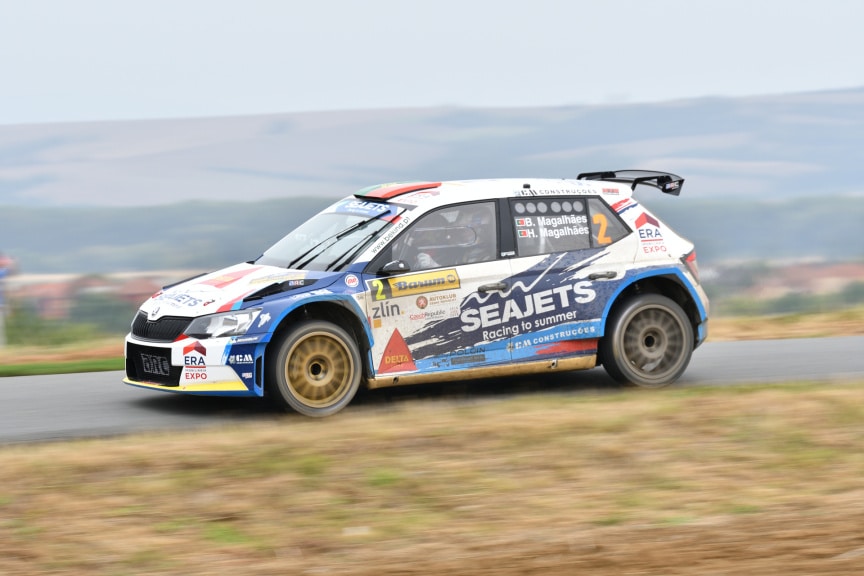
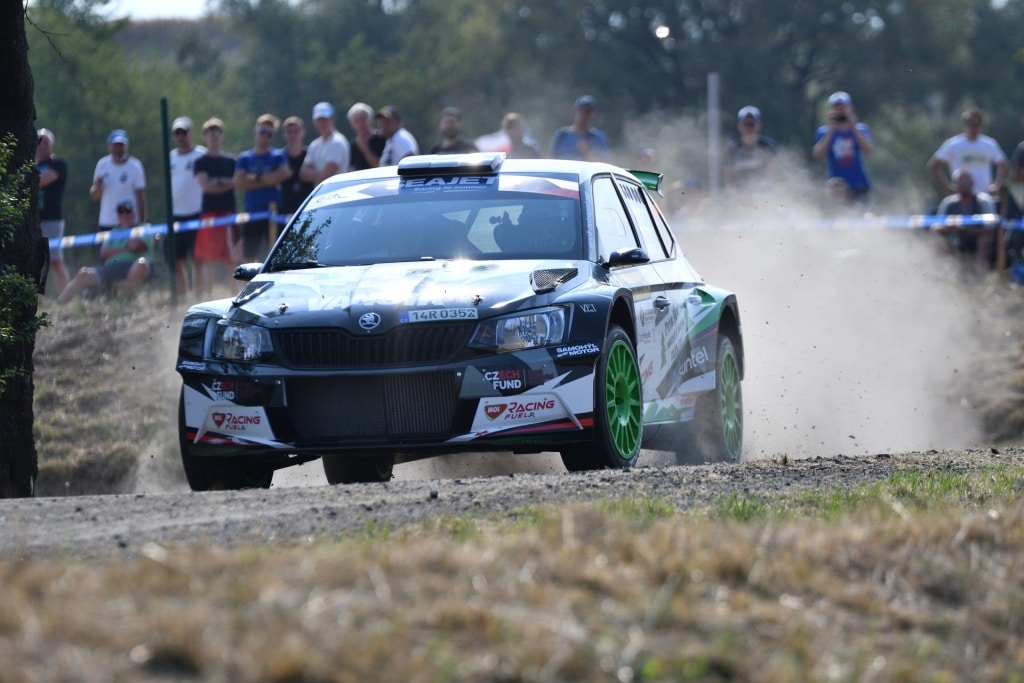
My first picture was taken at the Barum Rally in Zlín, Czech Republic, and it makes use of panning. You can tell at first sight that this photo is tepid and desperate for several basic edits.

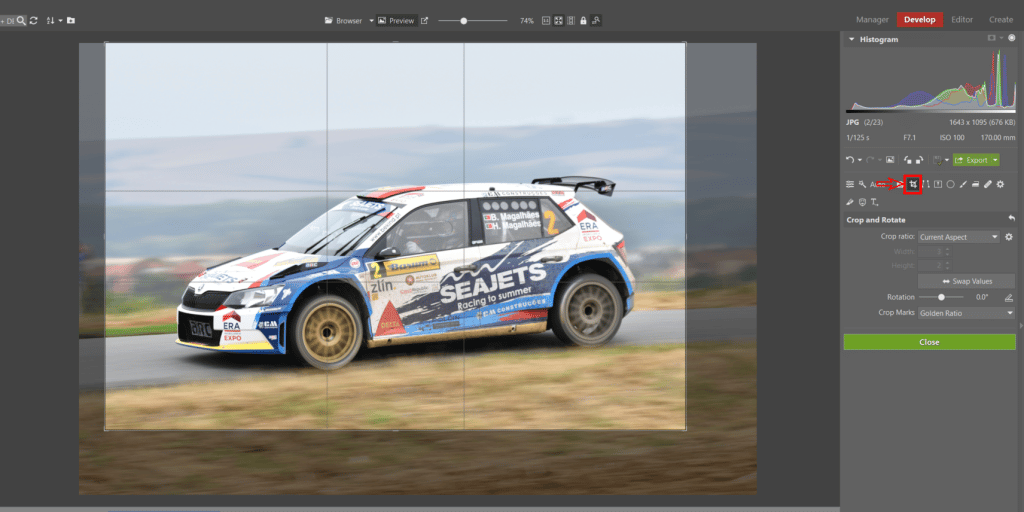
Start With a Crop
The first important thing to note is that you’ll often be cropping your racing photos. Either because the high speeds didn’t give you time to create a composition that precisely matched what you wanted, or because your lens has a short focal length. This applies for the majority of sports, and the need for a crop definitely is no reason to panic.
Thankfully, not much needs to be cropped away for this photo. All I did was remove the bottom part and eliminate the part at the left edge with the person in it, since it could have been distracting. I definitely recommend that you maintain a photo’s aspect ratio when cropping, since otherwise there’s a risk that you’ll create a non-standard ratio and that the photo will be unnaturally stretched during publishing. To crop a photo, use the Crop and Rotate (C) tool. When I’m creating a composition that has both things and people, I try to always have more free space in front of the subject than behind it, because otherwise it can create the impression that the subject is “running away from” the photo.
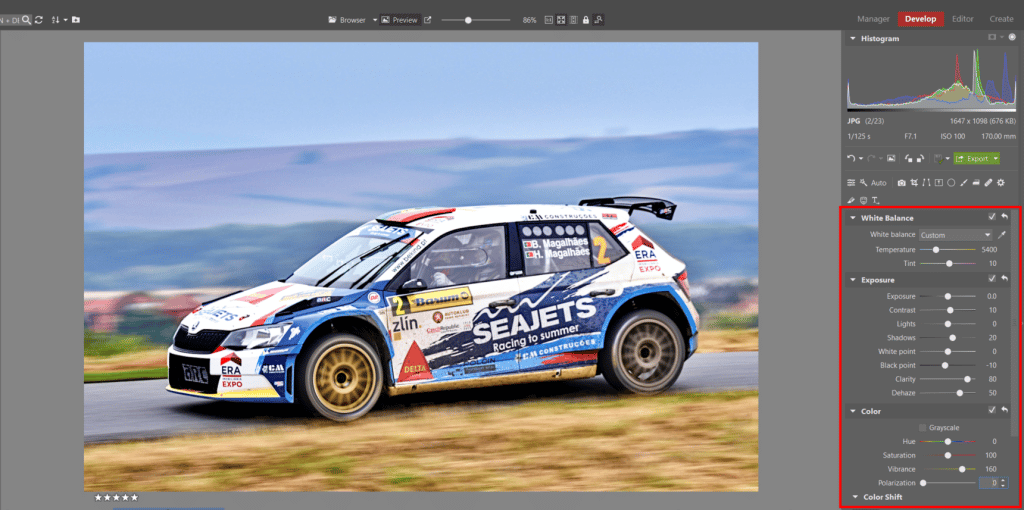
Playing With Colors
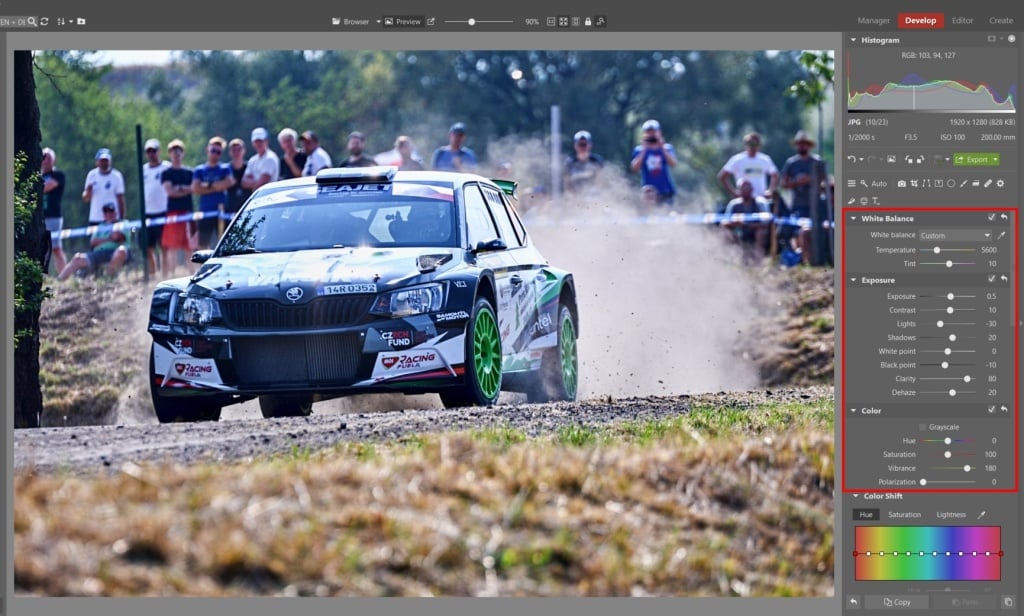
At this point in my work I use the controls in the White Balance, Exposure, and Colors groups, which are among the most important ones for basic editing. The original photo looks a bit yellowish-green, and so in the White Balance group, I slightly shift the white balance towards blue and the Hue towards purple. In the Exposure group, I add contrast and lots of Clarity, I slightly shift the Black Point, and I highlight the Shadows a bit as well.
Since it was a cloudy day, this photo suffers from a visible loss of colors and contrast. In this phase, I always decide whether to try to underscore this atmosphere by reducing Saturation or to grapple with it instead. I wanted to make this photo look a little bit bolder, and therefore I used a fairly high Dehaze setting. For the same reason I also set a fairly high Vibrance under Color. If your racing photos demand adjustments to hue, saturation, and lightness separately for the individual color channels, you can do this in the Color Shift controls, but for this photo here, it’s not very necessary.
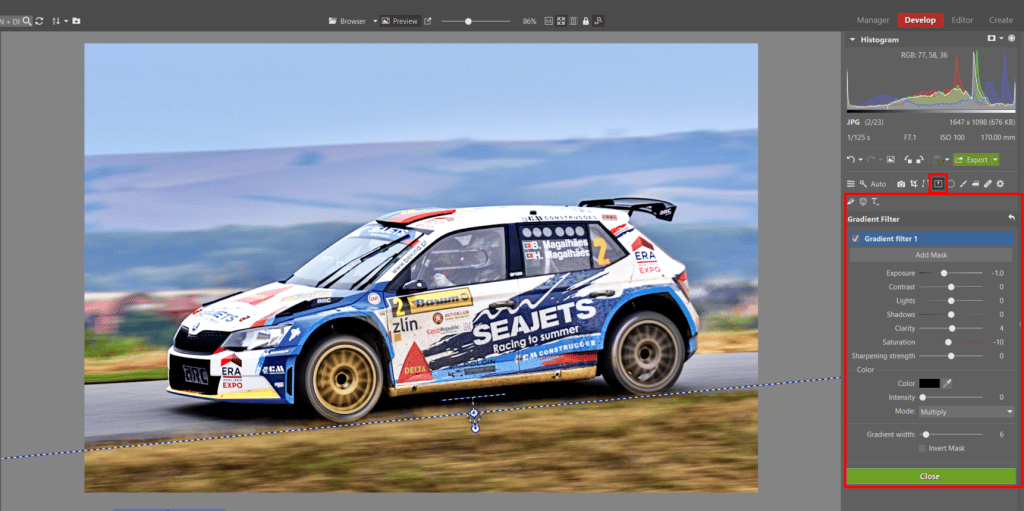
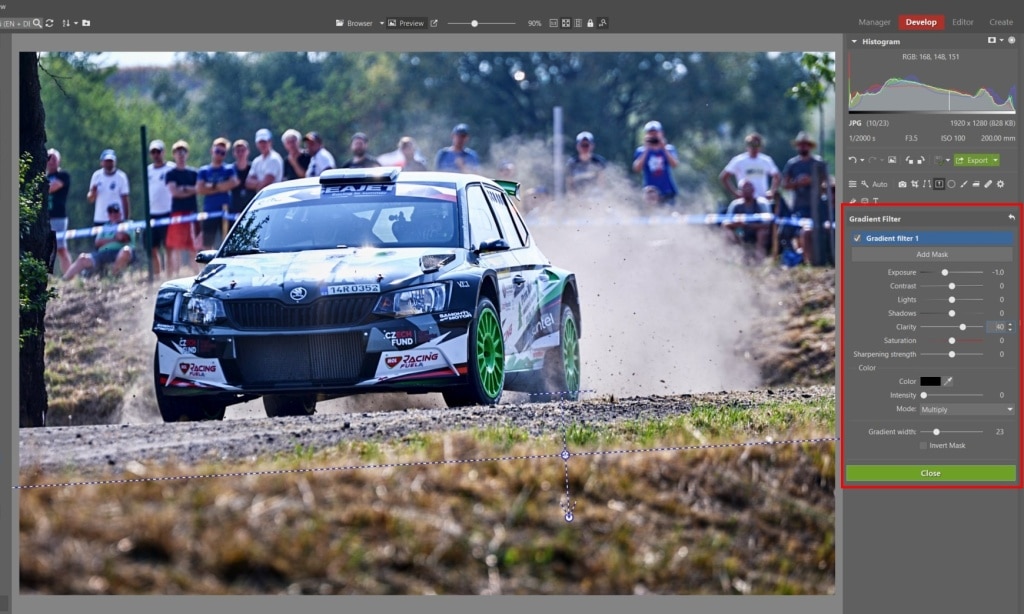
As my next step, I want to darken the picture’s bottom portion slightly, and the Gradient Filter (G) is the ideal tool for this. I use both the Gradient Filter and the Radial Filter quite often—the latter sometimes even in place of traditional vignetting. I do so because this lets me lighten or darken a picture’s edges without doing anything more. In this picture, I’m reducing the Exposure and Saturation for the bottom area to get a darker look.
At this point I could also edit the photo using curves editing, but that’s not really needed, because most photo characteristics can be configured more conveniently using the sliders in the Exposure group. I personally use curves whenever I want to spice up a photo’s contrast (using what’s called an “S-curve”), while also wanting to be able to adjust the photo’s light and dark areas separately. I also use Curves when I want to tint a photo or play around more than usual with its exact color settings. For example, when a photo feels too green, I drag down the green channel, and so on.
A Few Final Adjustments
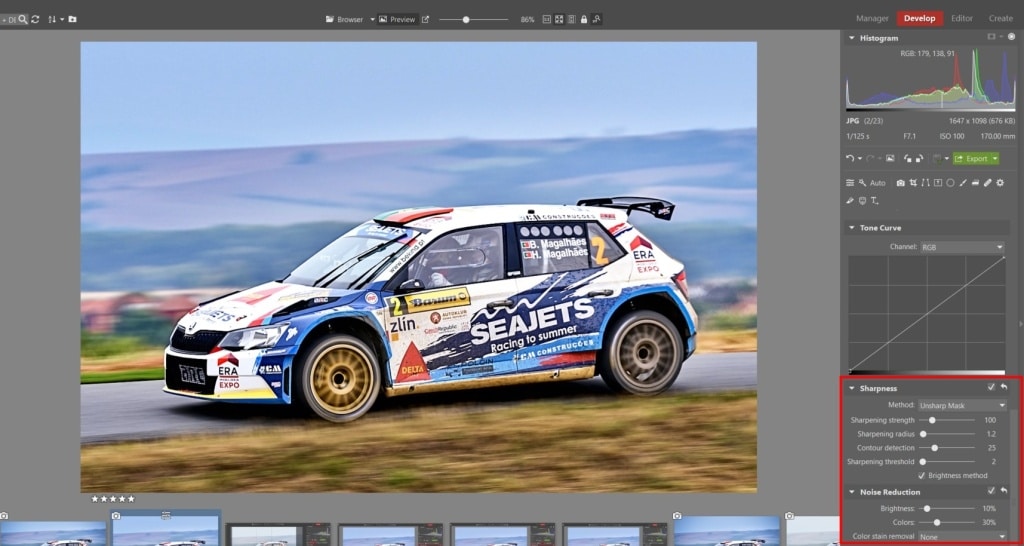
I then move on to the Sharpness group. Here I typically only touch the Sharpening Strength setting, which I usually set to around 100, leaving the other settings at their original values. Even though it’s not absolutely needed, I also always set at least a little noise reduction in the Noise Reduction group.
I always use a lower value for brightness than for color. The amount of noise reduction you should set for a photo depends on that photo’s ISO value, how much you needed to overexposure the shot, etc. You can also try playing with the advanced settings, but I don’t use these much for reportage photography.
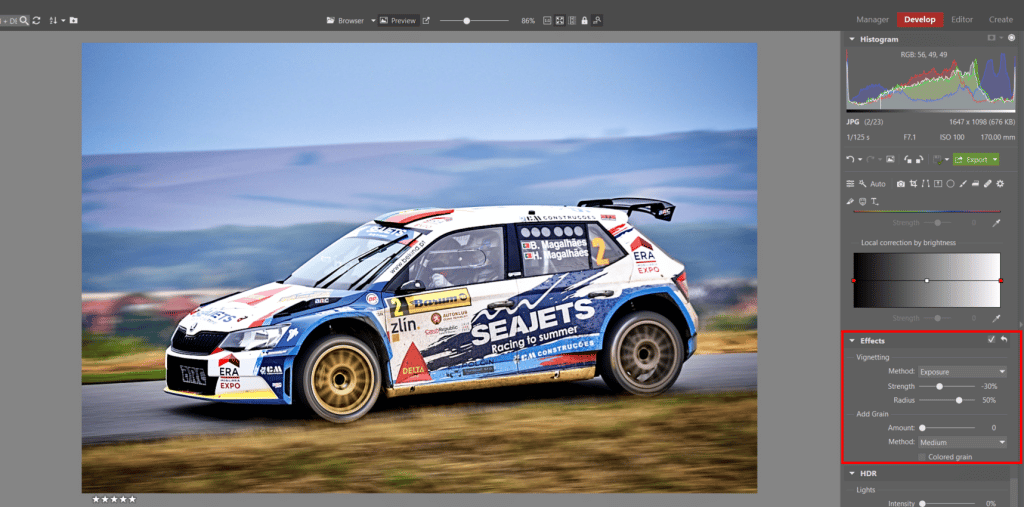
As my last step, I add a little vignetting in the Effects group to emphasize my subject. The use of vignetting is a frequent topic of debate, but I do use it (and the Radial Filter), and gladly.
Example #2
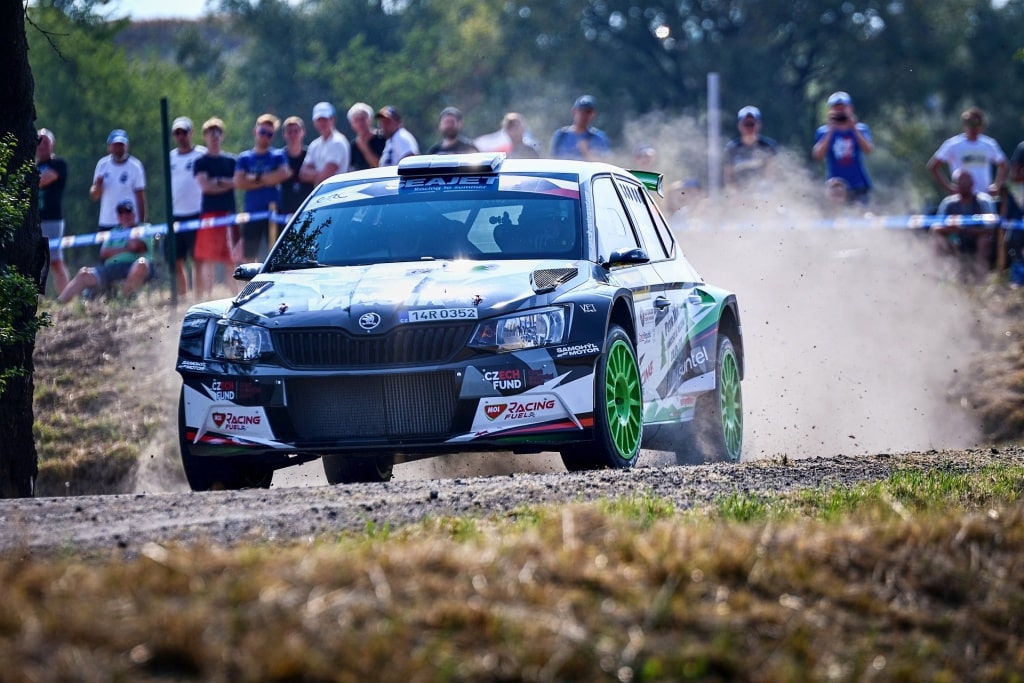
For the photo I’m using in my second example, I broke the rule that I mentioned in the introduction—I have more space in front of the subject than behind it. But I broke it deliberately, because I wanted to keep the stream of dust behind the car, and show a bit of its underside as well.
My basic edits here are very similar to those in the previous example. I make a minor crop, I set White Balance, and then I set Exposure and Color.
Here once again I darken the bottom of the photo using the Gradient Filter, and I also take the opportunity to increase the Clarity.
Another thing that I’ll adjust is a portion of the windshield, which isn’t very visible due to a reflection. The Filter Brush (B) is a good choice for making this kind of local edit.
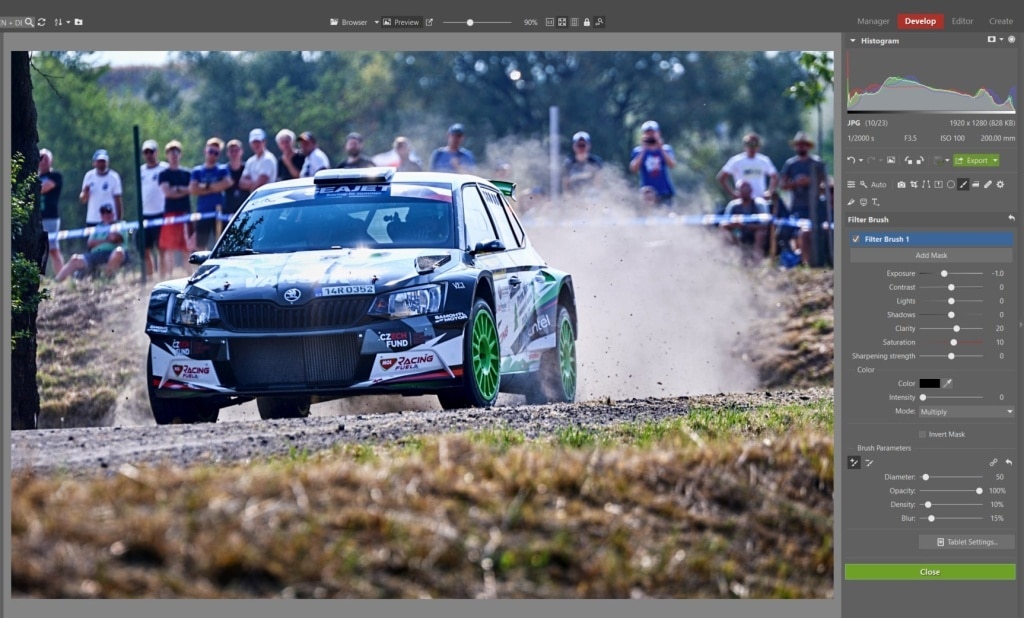
Even though my application of the Filter Brush to the windshield isn’t very visible in this particular photo, in other photos it can help quite a lot. This time around I’ll be highlighting my subject using the Radial Filter (R) instead of vignetting.

I’ll wrap up by doing the exact same kind of sharpening and denoising as before once more.
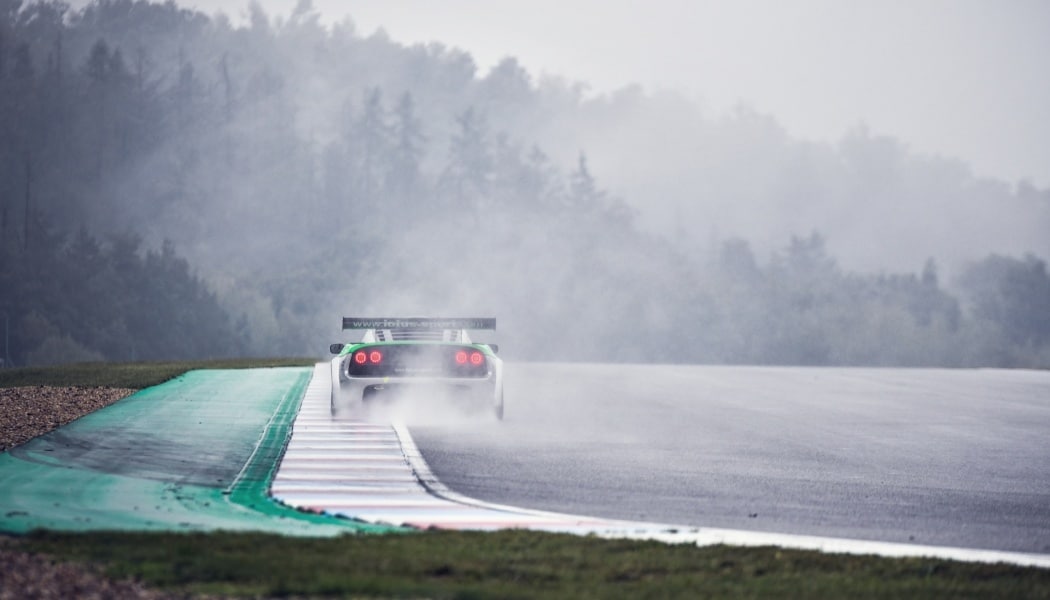
Example #3
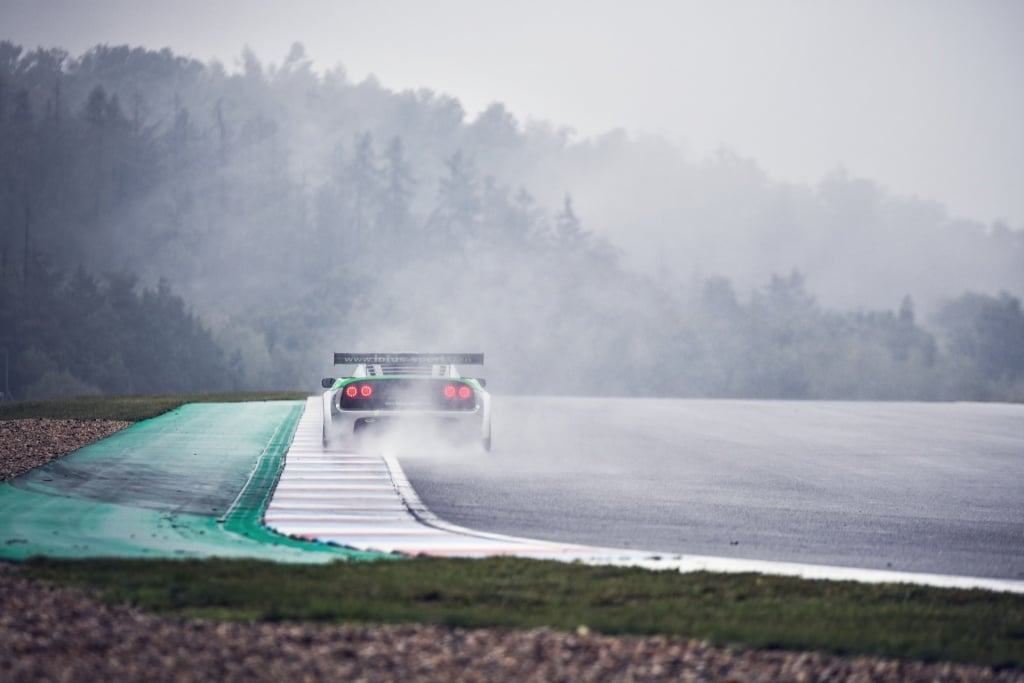
In my third and last example, I’ll show how there are also situations where a less colorful and less striking edit can be better instead. Here I’m more interested in capturing the atmosphere than in taking the best possible picture of the car. When you shoot in weather like what you see in this photo and you go on to use an edit like this one, your goal should be to emphasize the feeling of cold during the races, the poor visibility, and the rain.

Just like in the last two cases, I’ve made some basic edits with the White Balance, Exposure, and Color settings.
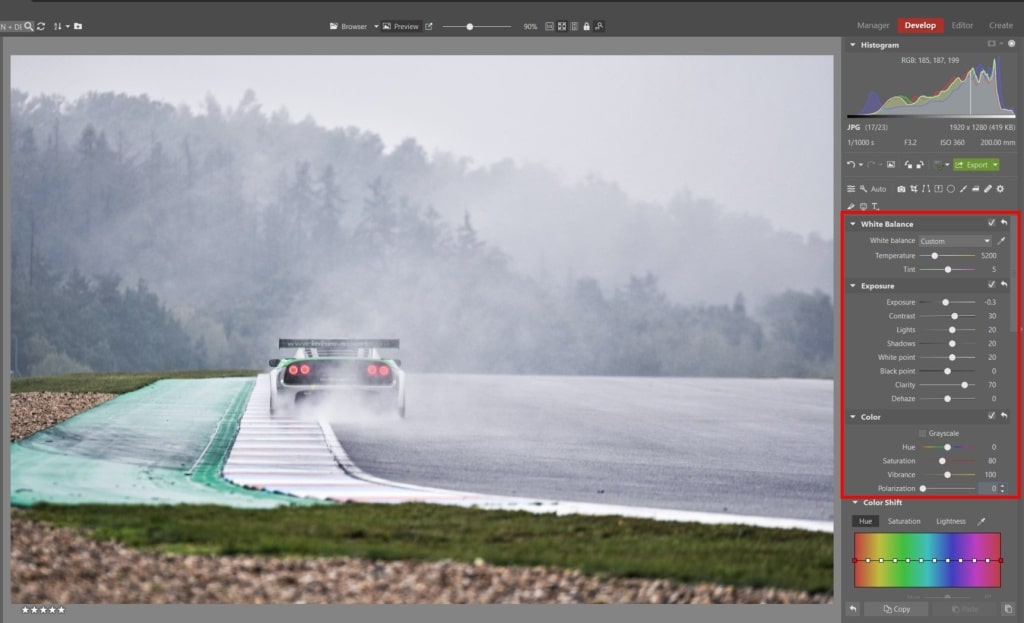
I’ve shifted the White Balance toward blue-violet and reduced the Saturation to give the picture a colder feel. Even though I wanted to get a lower saturation for this photo, I also wanted to emphasize certain parts of the car, like its lights, and parts of the green-red racing track. For edits like these, it’s good to use Color Shift in the Color group and regulate saturation strictly just for the colors you’re interested in—so in my case, the green and red tones.
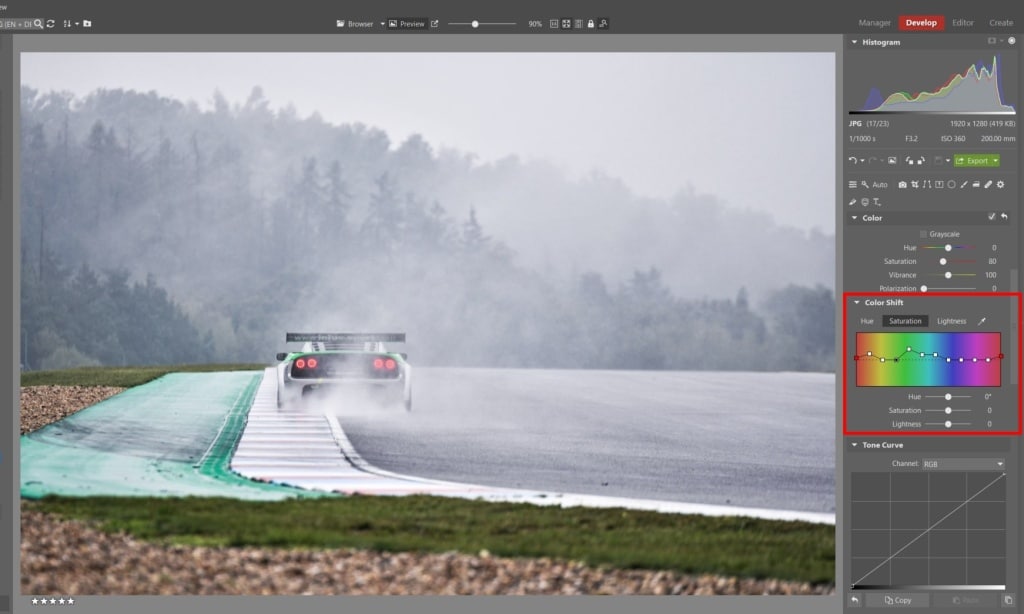
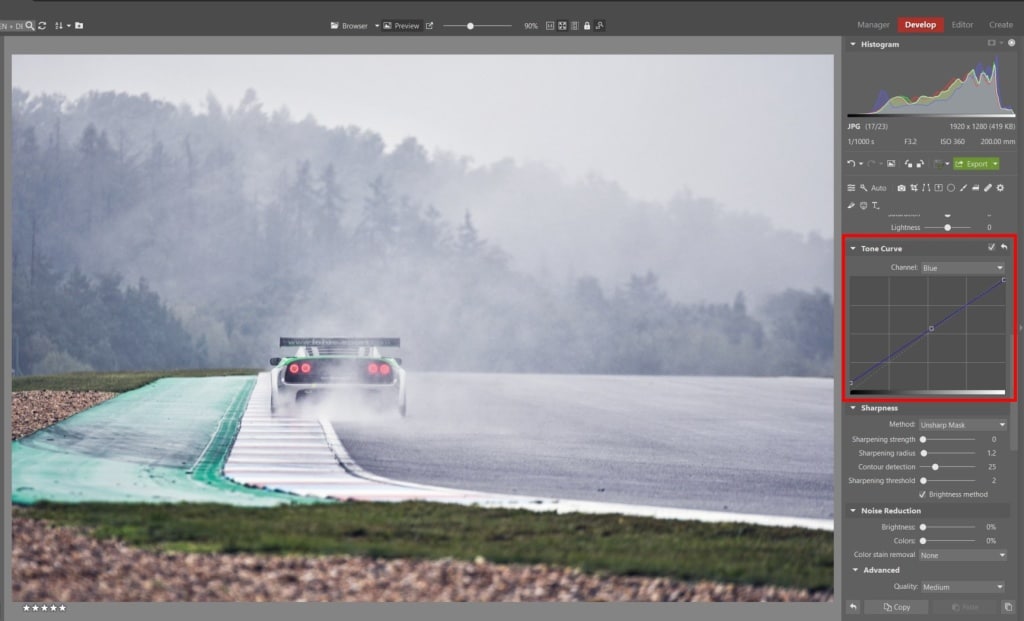
I also wanted to highlight the blue tint in the dark and light areas, and suppress this same tint in the light areas. I used the controls in the Tone Curve group for this. I chose just the blue channel from the list and shifted the coloring the way I wanted.
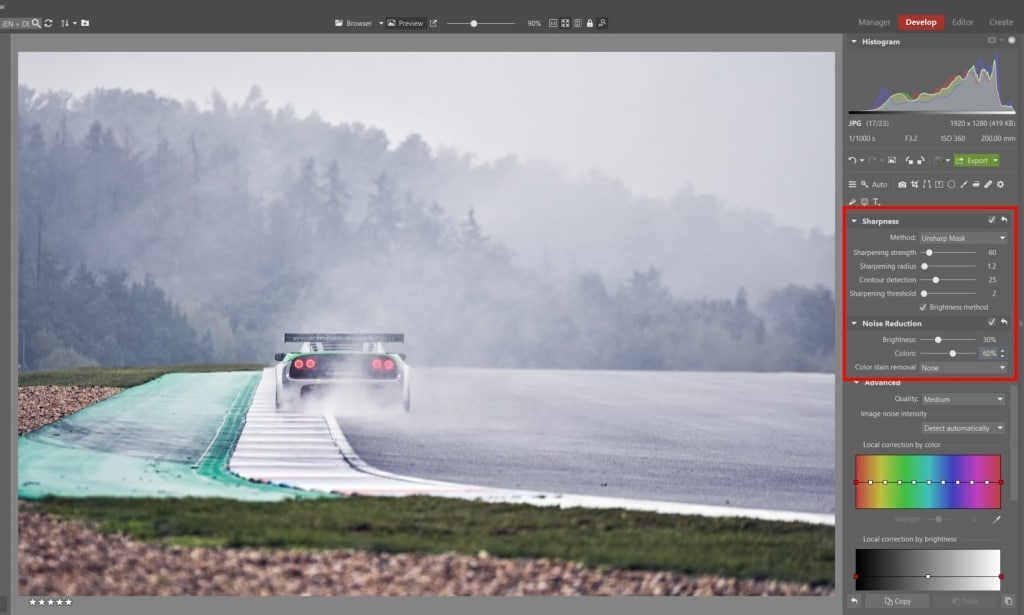
In the next step I once again sharpened and denoised the photo. This time I didn’t try to get a perfectly sharp photo. Not just because it’s not even possible through all the mist, but also because it would have harmed the photo’s atmosphere. So I set the sharpening to a lower value, while meanwhile actually increasing the denoising.
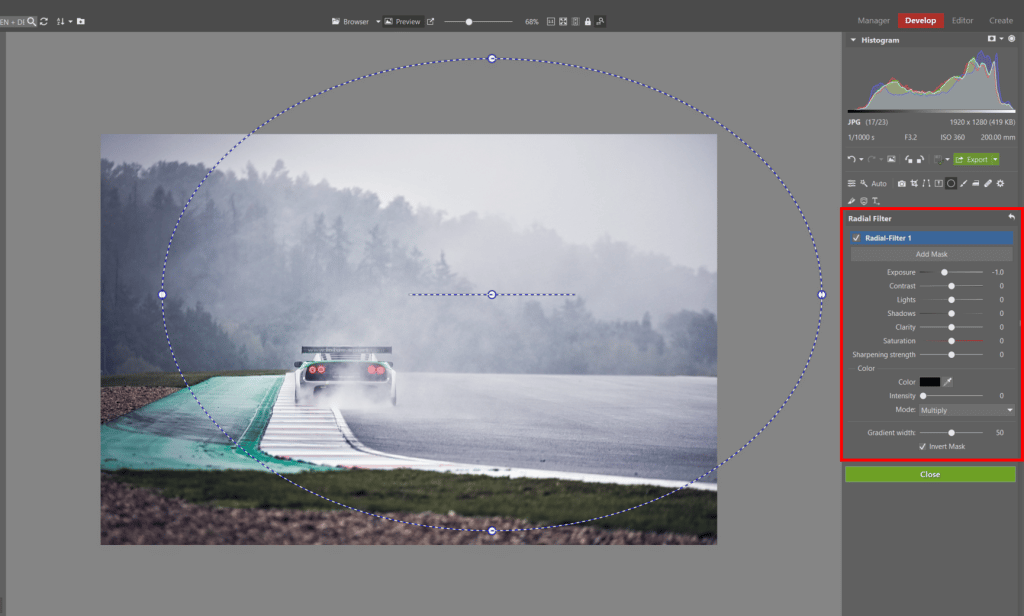
In the last step I wanted to once again emphasize my subject, but I didn’t want for the white sky to turn dark because of vignetting, and so I used the Radial Filter instead and positioned it based on what I needed for this picture. And with that, I’m done.

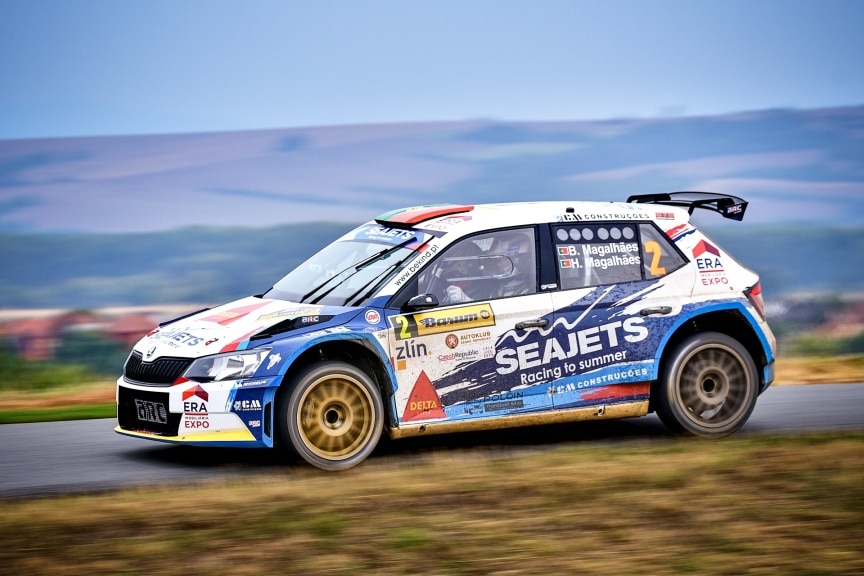
As I wrote in this article’s introduction, all of these edits are truly simple and fast. The Develop module offers a wide range of overall approaches, and through this brief illustration, I wanted to show you one of the strategies that you can use in your own work.
Download Zoner Studio, and you can try this approach out for yourself today.
William Ford
What camera settings are best for car races?