Fog and the Different Ways of Photographing It
Fog is a dear friend for every photographer, since it transforms daily sceneries into grand spectacles. Its appearance should evoke an impulse to grab your camera and head out to take pictures. The following tips should help you to utilize your fog photography skills to the max.
There are classic fog photos that everyone has seen before, but there are also alternative approaches you can take. I’ll show you how to find them. I’ll also focus on shot composition and tips on how to make the shots easier.
The Different Ways to Find Fog
Many people I know find cold and damp weather with thick fog simply depressing and would rather take a day like this off. I, on the other hand, welcome such weather. I grab my camera and head out to take photos whenever I see fog from my window in the morning. Depending on the situation, I use one of several approaches.
The first is “randomly” driving through the landscape and stopping wherever I find a potentially interesting scene. I take a stroll through the surroundings and seek some possible shots. Sometimes I come back with a photo that exactly matches my vision after just ten minutes. Other times I get nothing after half an hour of walking. When I get bored of one scene, I get back in my car and go look for another.

Canon 5D Mark IV, Canon EF 70-300/4-5.6 IS, 1/5 s, f/5.6, ISO 100, focal length 95 mm
I use a different approach when I’ve already picked out an interesting place. I go straight there, and I’m quite capable of spending a few hours there just waiting for the right shot conditions. Why? Well, over time fog changes its shape, and it’s entirely possible that it will offer a great scene for a split second and then change back into an uninteresting cloud for a long time.
In this case I liked the first photo the most, but the others will surely also find a use somewhere. Try comparing these pictures that I took at the same place but hours apart. I shot them at 6 AM, 7 AM, and 8 AM respectively.
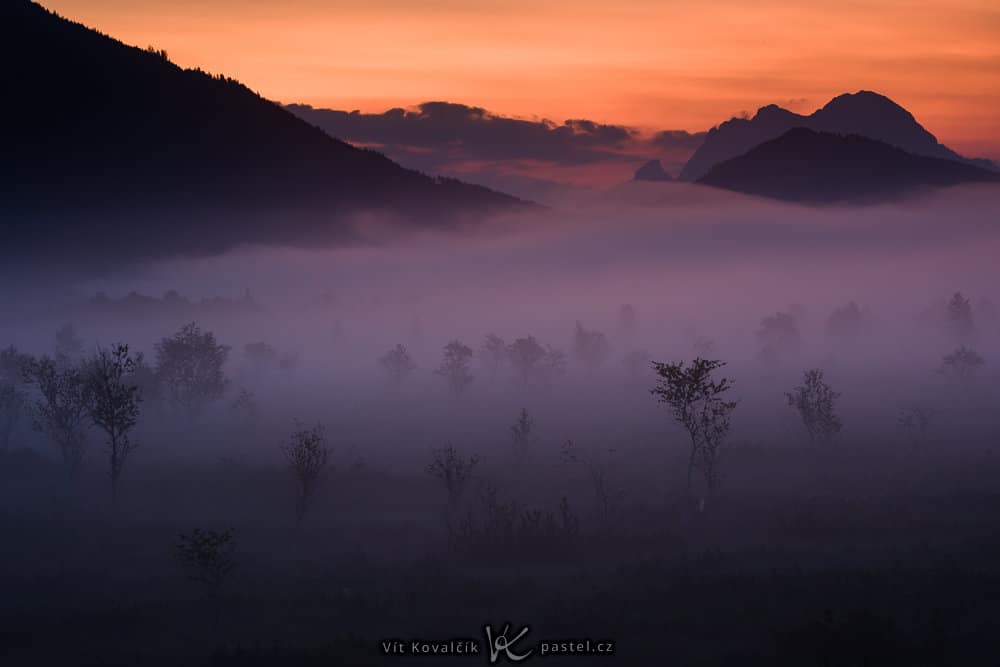
Canon 5D Mark IV, Canon EF 70-300/4-5.6 IS, 1.6 s, f/16, ISO 100, focal length 100 mm

Canon 5D Mark IV, Canon EF 16-35/2.8 III, 1/250 s, f/16, ISO 100, focal length 20 mm
Canon 5D Mark IV, Canon EF 70-300/4-5.6 IS, 1/200 s, f/16, ISO 100, focal length 100 mm
As you can see, you need to take a tripod with you when shooting fog in the very early morning, since the first exposure was over one second long. But after the sunrise, there’s enough light hitting the fog for a shorter, tripod-free exposure.
Don’t Be Afraid To Shoot From Above
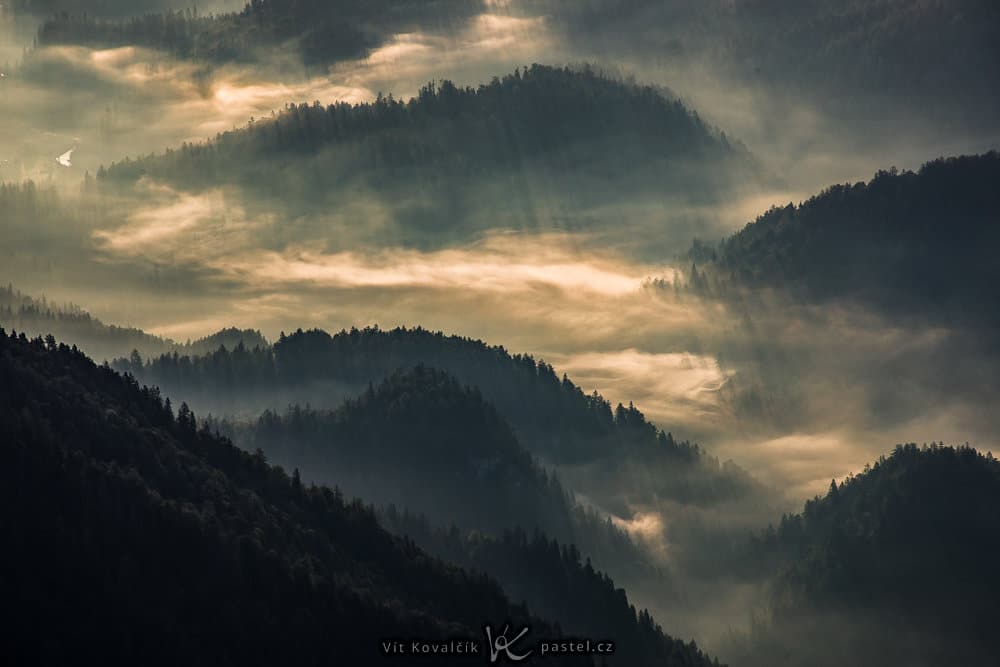
While the scenery when you’re level with the fog might be quite nice, pictures shot from above are even more breathtaking. The most important factors here are the position of the sun and the amount of fog. The following four pictures were taken during a sunrise, over the course of half an hour. They each look quite different:
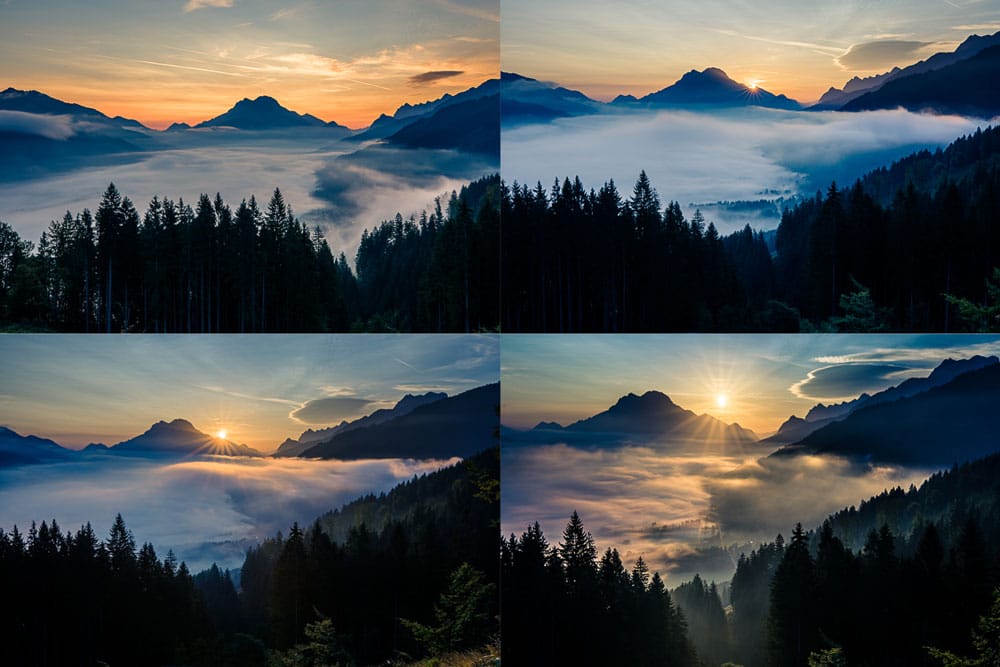
Canon 5D Mark IV, Canon EF 16-35/2.8 III, 1/13 až 1/1250 s, f/16, ISO 100, focal length 35 mm
However, if you’re shooting with the sun directly facing the camera, it’s better to know how to take and edit photos using HDR. All of the pictures above were produced using this method, which means that each one actually consists of three to five differently exposed pictures joined together.
Telephoto Lens and Capturing Details
I recommend also taking a telephoto lens with you when you’re scavenging for foggy photos. It can help you capture every single detail when you’re standing high and looking far. There are usually lots of details to choose from; many times I feel like a kid in a candy shop who can’t decide where to start.
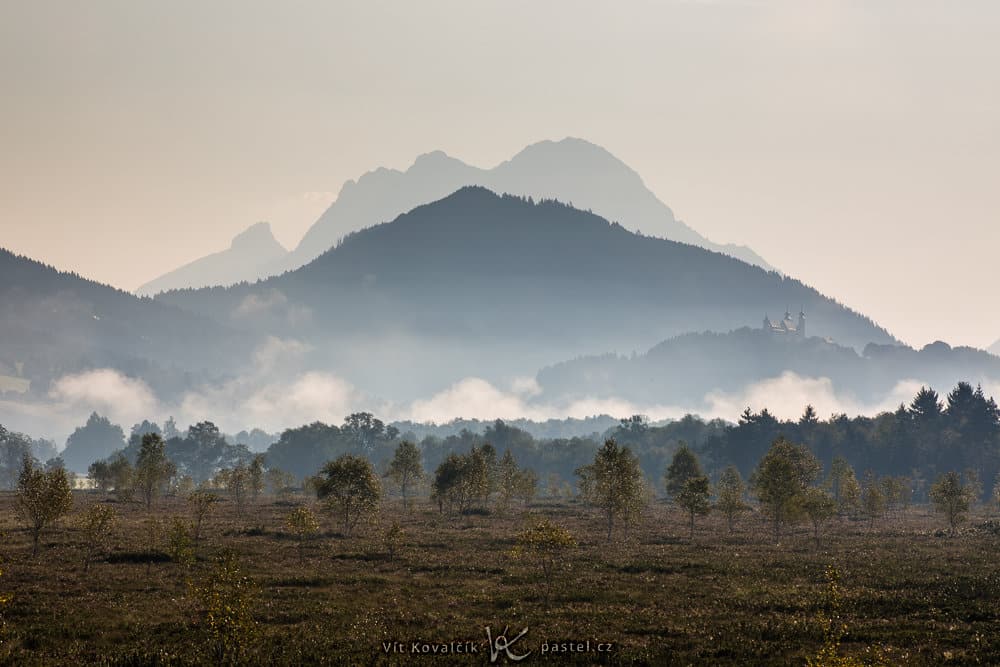
The closeups are usually very small parts of the big picture; for example I shot the preceding photo from almost the same position as the panorama below. The original closeup depicts a small space that’s located somewhere around the center of this picture:

Details don’t have to be miles away from you to be considered details. The meadow from the beginning of this article also offered similar possibilities. Really I only used the high focal length to repress the perspective and so that I wouldn’t have to include unwanted aspects of the surroundings (there was a road beyond the right edge of the photo):

Canon 5D Mark IV, Canon EF 70-300/4-5.6 IS, 2.5 s, f/9, ISO 100, focal length 300 mm
Inside the Fog
But let’s walk back into the fog. You can ideally harness its ability to gradually hide distant places in compositions with repeating elements such as trees alongside a road.
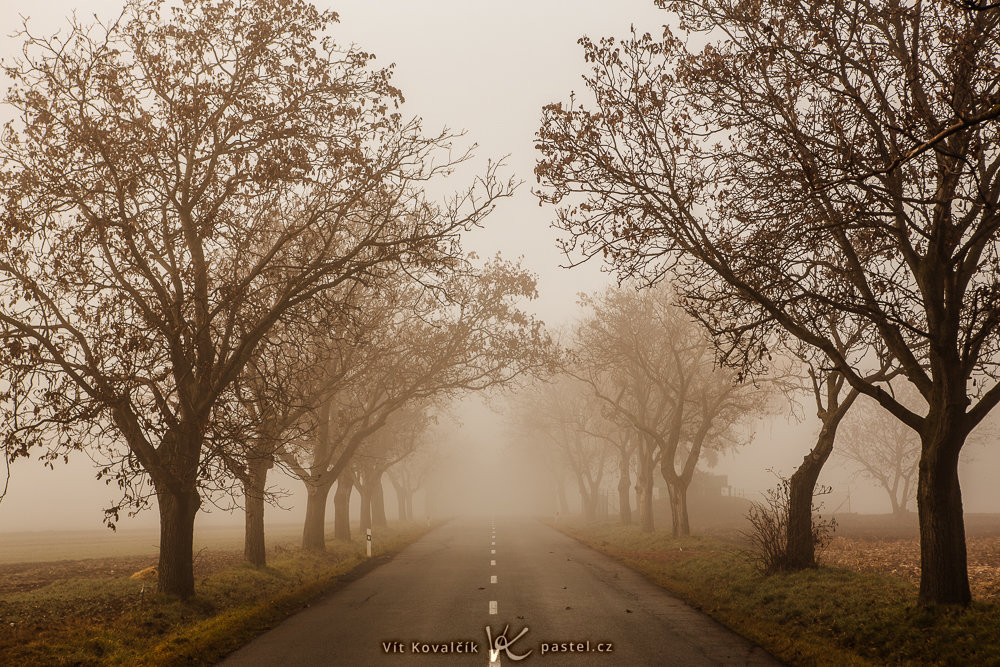
Canon 5D Mark III, Canon EF 24-70/2.8, 1/200 s, f/5.6, ISO 100, focal length 70 mm
It’s even easier to depict details thanks to this very same effect. That’s because the background nearly disappears, while the detail right before you becomes much more prominent.
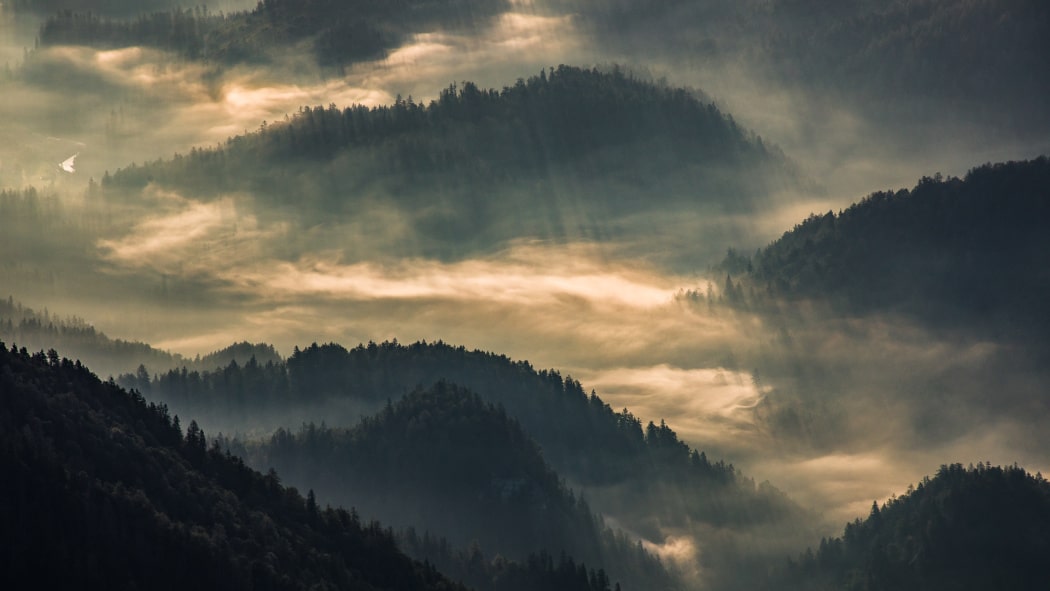
Sunlight filtering through the fog also has quite a nice effect. It temporarily make the whole scene seem more dramatic.
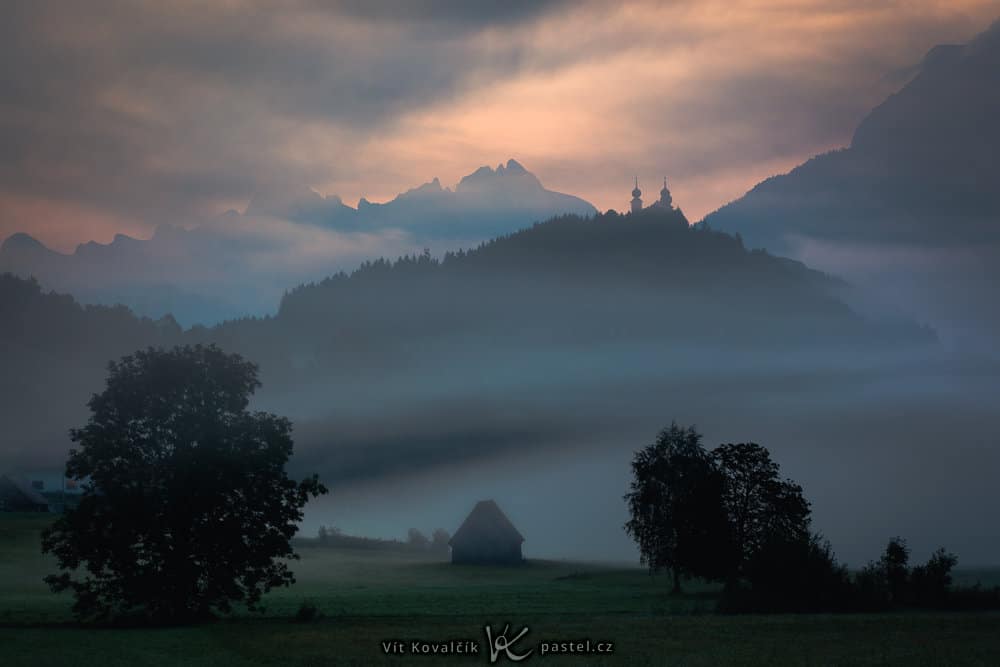
Canon 5D Mark IV, Canon EF 70-300/4-5.6 IS, 0.6 s, f/13, ISO 100, focal length 130 mm
And when the fog starts to weaken, it’s very easy to capture singular rays of sunlight breaking through it.
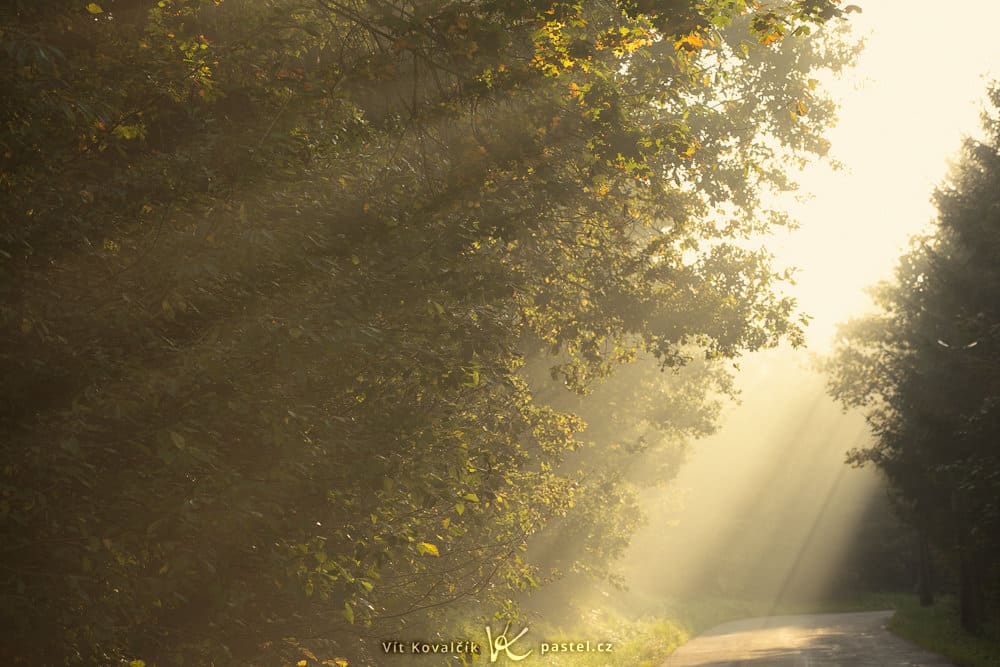
Canon 5D Mark II, Canon EF 70-200/2.8 II, 1/3200 s, f/5.6, ISO 200, focal length 140 mm
Fog in the City
When you combine fog with a city’s streetlights, you can create a scene with a completely different feeling than the nature photos above. You might even get a pleasant surprise in the form of an interesting spot that you’ve been passing by every day and just never noticed before.
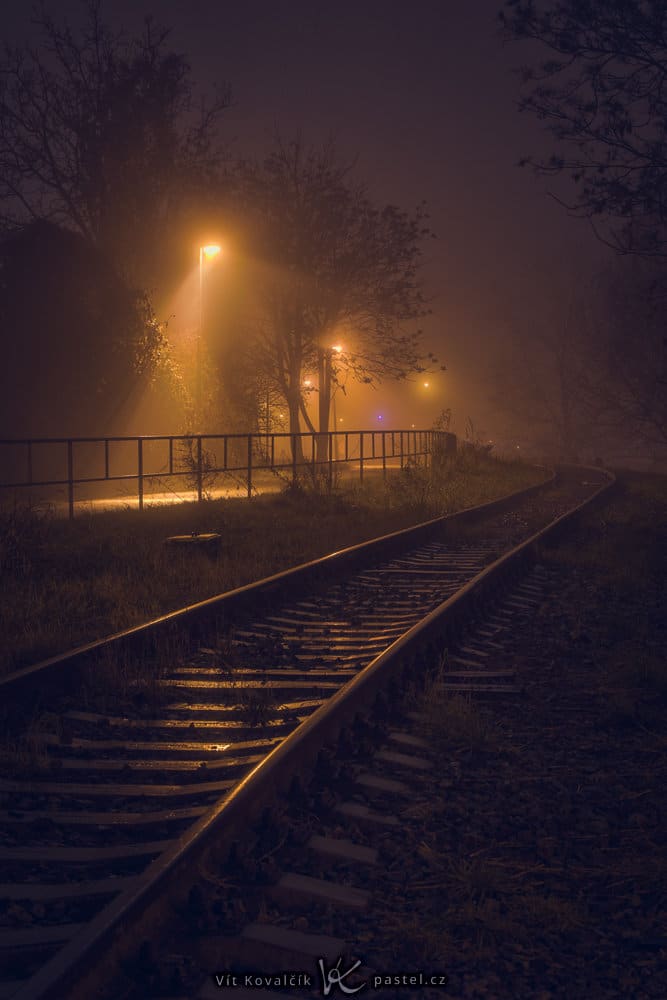
Canon 5D Mark III, Canon EF 70-200/2.8 II, 15 s, f/13, ISO 400, focal length 70 mm
Residential areas also bring another bonus: people. Not many people like to go out in foggy weather, but that just makes any lonely figure you happen to catch in your photo all the more special.
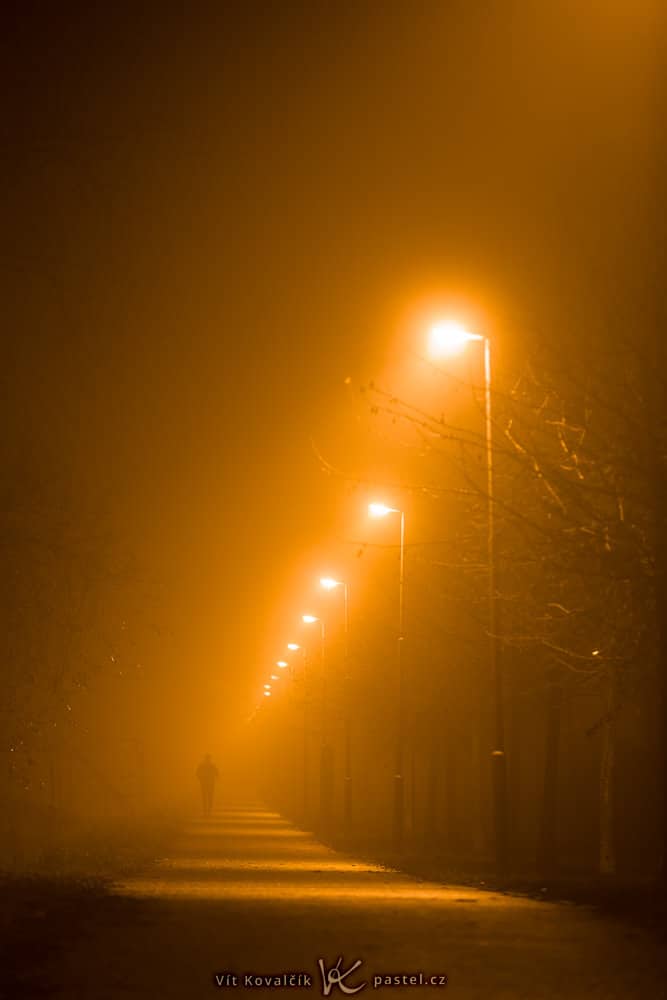
Canon 5D Mark III, Canon EF 70-200/2.8 II, 1/6 s, f/2.8, ISO 800, focal length 175 mm
You can also take photos when all the street lights are off, since with some added fog even the most usual of views turn dreamy and mysterious.
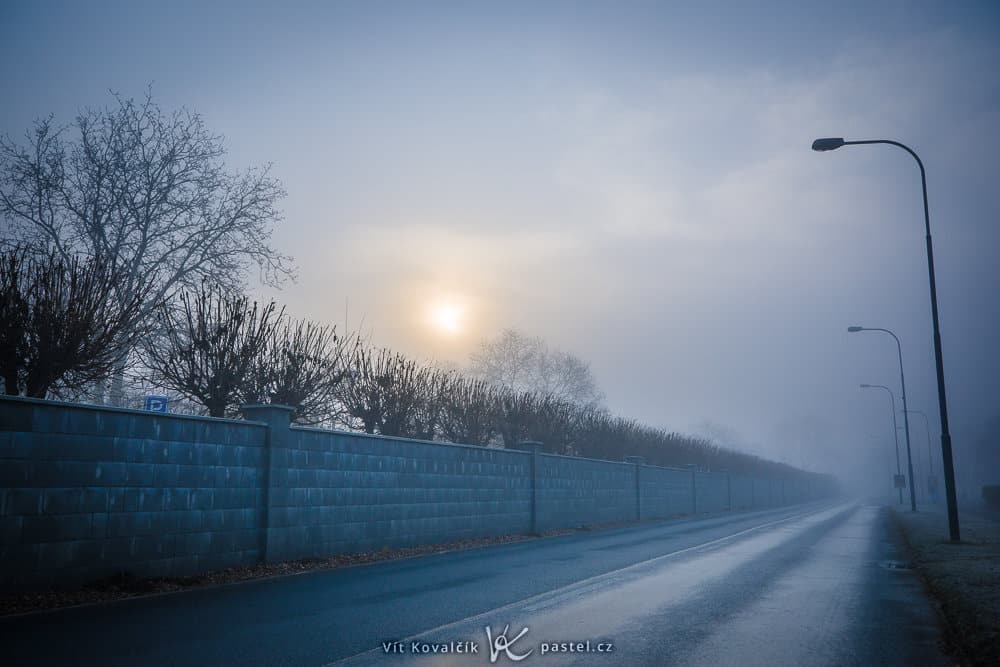
Canon 5D Mark IV, Canon EF 16-35/2.8 III, 1/640 s, f/4.5, ISO 100, focal length 35 mm
Don’t Be Afraid of Fog
Fog won’t hurt you, so don’t be afraid of it. You just need to put on some warm clothing, and a stroll through the fog turns into a nice experience that will give you a new view of everyday places. And of course new photos too.
Shooting in the fog also brings the thrill of unpredictableness. You never know when it will end, where it will end up, how it will evolve, or how much you’ll find in it. But that’s all part of the adventure.
Are you interested in learning how to edit foggy pictures? Read the article Your Step-By-Step Guide to Photographing and Editing Foggy Landscapes.
There are no comments yet.