How to Do Macro Outdoors: 3 Steps to Better Macro Photos
Macro is very tempting when you’re starting out in photography. But it can also be a real challenge. It’s actually one of the most technically challenging genres. Especially when you’re working outdoors and have to fight the wind and more. So join us for a look at how best to tackle outdoor macro photography.
Write up a photography plan before you head out. Besides listing the equipment you’ll need, it should also state what you want to focus on. This will typically be for example “flowers” or “insects.”
Macro Gear? You’ll Want a Tripod and a Softbox
For macro photography, you need a lens that can zoom into the range from 1:1 to 30:1. If you choose a lens with a smaller maximum magnification such as 1:3, instead of macro you’ll “just” get photos of details—closeups.
You can light your photos’ subjects using, for example, a reflector. But the best option is an external flash with a softbox. Still, if you don’t have one, that’s OK—you can make your own simple and very effective DIY softbox at home.
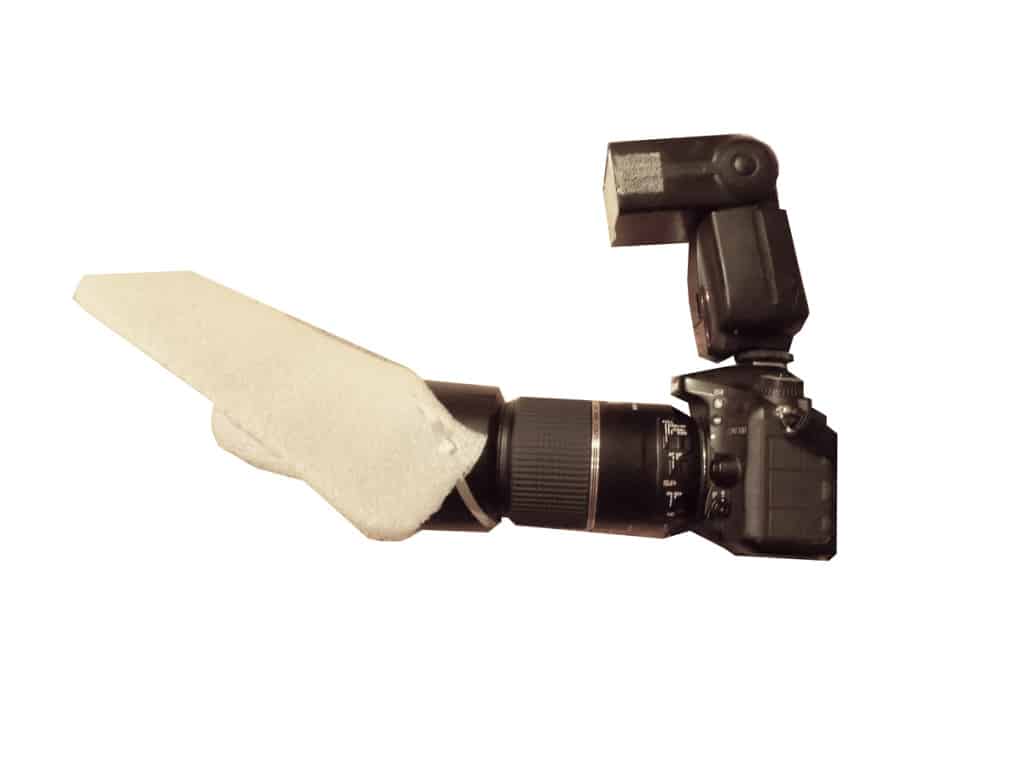
A tripod is one piece of equipment that you definitely shouldn’t leave at home. It can be demanding to work with, that’s true, and you’ll need some experience to use it well, but on the other hand it’s how you get perfectly sharp pictures.
Still, if you don’t have this equipment, once again don’t despair. There are also alternative ways to try out macro photography.
Eliminating Unwanted Factors
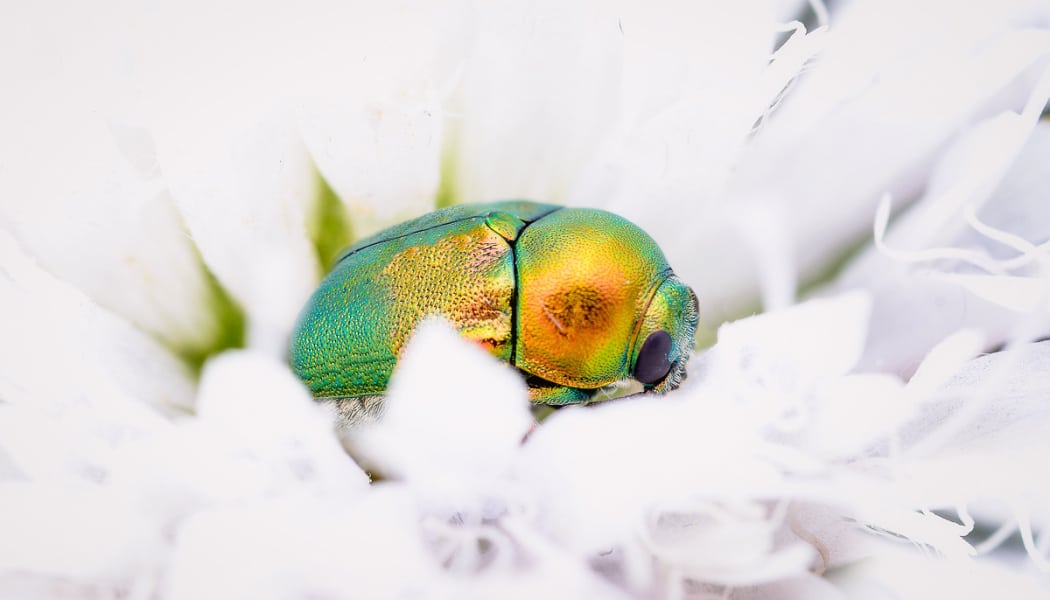
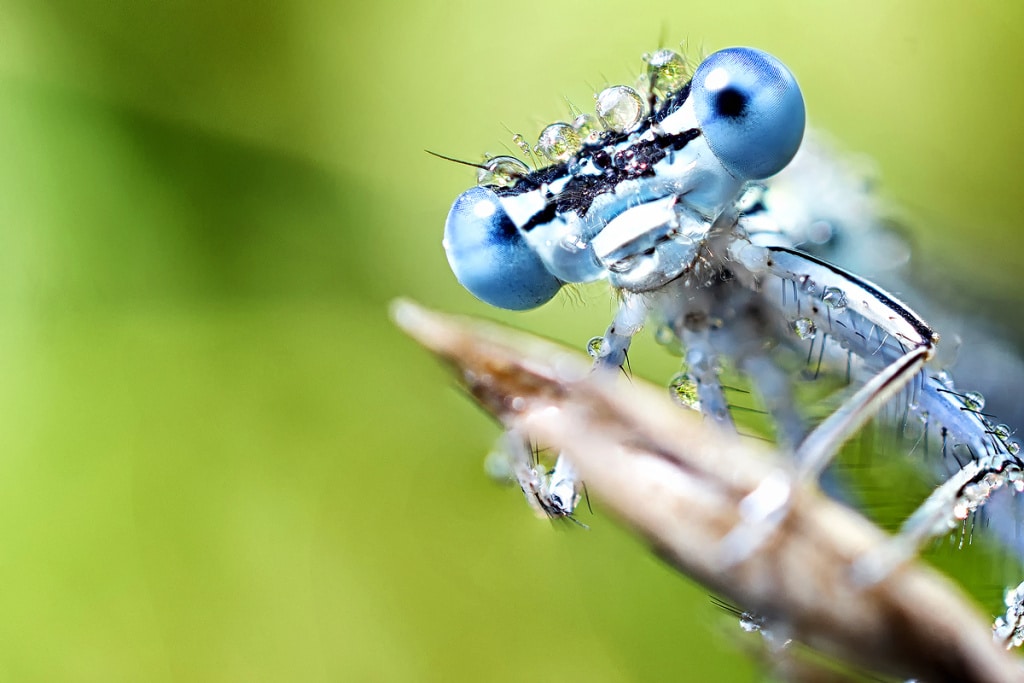
There are several factors that will influence your final results when you’re taking pictures outdoors. The most common problem is with photographing insects—they move or even fly away. To eliminate this risk, take your pictures in the early morning. Then the insects will still be sluggish after the low night temperatures.
There’s also a little-known (but effective) trick for not scaring off insects. It’s enough to approach the insect with your camera already placed against your eye. Insects really do react better when your face is covered. Also, having your camera up to your eye will force you to move slower, which will calm them too.
Another factor that influences your final picture is the wind. To calm it down, try creating a wind wall in front of your subject. This will save you from blurry pictures.
An ordinary umbrella can work the same way. Just watch out that the light passing through it doesn’t tint your photos.
Camera Settings for Macro Photography
Camera setup is nothing to overlook. For example when you’re using a flash or a tripod, I recommend that you turn off lens stabilization.
Don’t raise your f-number too much; otherwise, you’ll get diffraction that will soften your subject. Roughly f/16 is a good limit for macro. If you want to get more depth of field, don’t tighten the aperture beyond that; try focus stacking instead.
You’ll want to keep your ISO around 100. That way your pictures will have a minimum of noise. This is important, because noise is exceptionally visible in macro, and it also heavily disrupts both your overall detail and individual details. And all of this is very important for macro photography.
Macro Exposure: Use Aperture Priority or Go Manual
Normally you’ll want to use aperture priority, since it’s easier than manual. Your camera will respect the aperture you set and calculate an appropriate exposure time on its own using its exposure meter.
But if you’re using focus stacking, you’ll have to switch to your camera’s manual mode. If you use automatic mode in this situation, or semi-automatic modes like aperture priority, then each picture will be exposed a little differently, and so there will be significant color differences among them.
So when you’re shooting with focus stacking, set the aperture and time by hand. Don’t change the values you set from picture to picture; that way, you can be sure that each source photo will have the same colors.
Try not to scare away insects while photographing them, of course. But at the same time, try to find an interesting angle, to get the most interesting pictures you can. And if an insect happens to stay still, don’t be afraid to experiment and try out as many shots as possible.

There are no comments yet.