The 6 Most Frequent Macro Photography Mistakes

Macro photography is one of the most technically complex types of photography. That’s because it brings many difficulties related to everything from light to focusing to merging shots. Let’s take a look at the most common macro photography mistakes, unravel how they arise, and learn how to avoid them.
Most common macro mistakes can be divided into two areas:
- Light
- Sharpness
But, especially for out-of-focus pictures, there can be other causes too. Usually they lie in the photographer, who used a bad focusing technique or didn’t know how to hold the camera.
The 1st Mistake—Using Light That’s Too Bright
Let’s start from the beginning—light. It’s the most important aspect of macro photography. No matter whether it’s natural or artificial, you need to know how to work with it.
Many beginners use the built-in flash. Now, this isn’t directly a mistake. The mistake is to rely on the flash alone and not work with the light further. This gives you very sharp shadows and high contrast, degrading the photo.
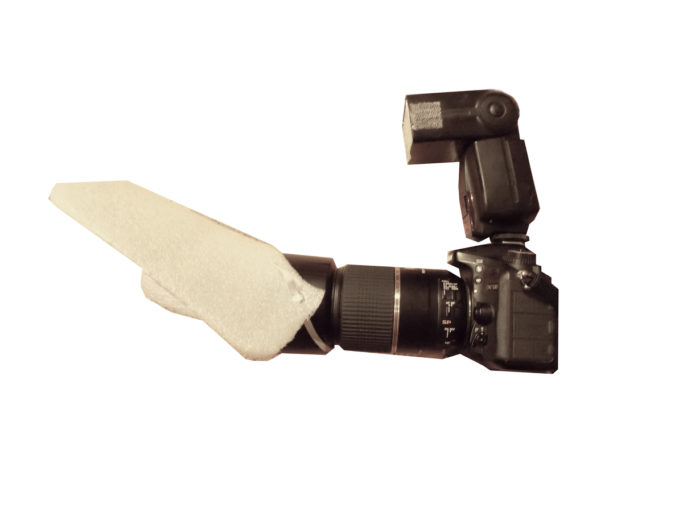
The solution is simple—you just need to attach a small white box or half a ping-pong ball on the built-in flash. These help you to get diffuse light. You can use the same method even for external flashes, just with different materials.
For more information on work with lighting when shooting macro photography, read the article Why and How to Diffuse Your Light in Macro Photography.

The 2nd Mistake—Holding the Camera Wrong
One of the most common causes of out-of-focus images is holding the camera wrong. Often your hand slips, you jostle the camera, and your pictures comes out blurry. Or you just have shaky hands.
In that case, holding the camera better will really help you out. One typical technique that can keep your camera stable looks like this:
- Hold the lens in one hand.
- Hold the camera’s body in your other hand.
- Lean your elbows against your stomach.
- Press the shutter while breathing out.
If all that’s not enough, increase the ISO and shutter time if you can. However, remember that raising the ISO will also increase noise.
Even though it’s easy to deal with noise in Zoner Photo Studio (you can learn how in our article on noise removal), it’s often better to use a flash. This will enable you to use settings that will let you hold the camera in your hand without the picture coming out blurry. Just don’t forget to also use a light diffuser.
The 3rd mistake—Bad Autofocus
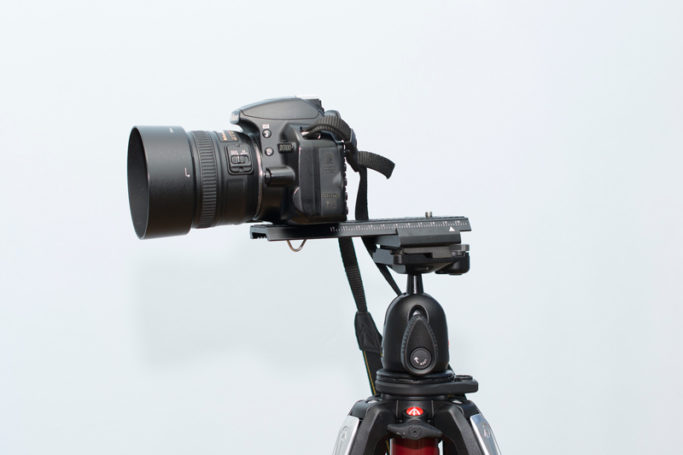
Even if your camera is laying steady on a table or tripod, your picture still may not be sharp. Usually this happens because of a bad focusing point. This might not be your fault; your camera or lens may be the culprit. That’s why it’s better to focus manually when it comes to macro photography.
But there still are situations where you have to use automatic focus. In those cases, set the focus on a single point. That means AF-S mode for Nikon cameras and One Shot for Canon cameras. That keeps the camera from jumping from one focal point to another, so you can be sure that it truly is focused on one point.
If your camera lets you switch control over focusing from the trigger to a button on the back of the camera, definitely take advantage of that. That will give you better control over focusing.

Watch Out for Back and Front Focus
Sometimes you might do everything as well as you can, and yet the picture’s point of focus in the wrong place. Most likely your equipment is betraying you with a “back and front focus” problem. Back and front focus means exactly what it sounds like—focusing just in front of or behind your preferred focal point.
You can solve this problem on Nikon and Canon cameras by using the dot-tune setting, which lets you fine-tune the focus on any lens however you want.
The 4th Mistake—Closing the Aperture Too Much
One of the most common beginners’ mistakes when it comes to macro photography is using a very high f-stop—an aperture that’s too tight. It usually comes with good intentions, since for a lot of photographers a tighter aperture means more focus.
But sometimes too much is too much. Since the aperture is smaller, the hole the light must go through is smaller too. While traversing the hole, it bends and is shadowed by the shutter blades.
Simply said, the more you close the aperture, the more you soften the image that is transferred to the camera sensor, resulting in an unfocused photo. So it’s better to only use apertures up to f/16. Still, the quality of the lens and the sensor’s lens-quality requirements are also important.
The 5th Mistake—Bad Photo Merging
Almost every macro photographer will turn to photo merging at some point. But you can also run into a problem here: the source shots may not always tie into each other correctly. That forms blurry spots that make the final picture look bad.
To eliminate this mistake, use a focusing rack with an shift of 0.5–1 mm or more. That gives you more fluid shifting and saves time that you’d otherwise spend retouching blurry spots. Then you just add finishing touches in Zoner Photo Studio using layers.
The 6th Mistake—Oops, It Moved!
While it’s often not your fault if your subject moves, it’s still something that you can largely avoid. That’s why I’ve also included it in this list.
You will mostly encounter this when taking pictures of living insects. You have to accept that if you’re shooting out in nature, and not dead specimens back at home, movement is always a possibility. To minimize this risk, shoot early in the morning. That’s when insects are still stiff and are rarely moving.
It’s also good to use a panel or an umbrella to keep the wind from moving your object.
If you’re photographing at home, remember to always keep the photographed insect specimen or jewelry as stable as possible. Personally, I take macro photos at home only at night and only when I’m home alone. That way I can be sure that my subject won’t be affected by vibrations caused by someone walking around the apartment!


There are no comments yet.