Make It Gritty. Make It Harsh. Make It Low Key
Just as some edits and lighting styles give you a soft-feeling photo, the opposite exists too. Meet the opposite of High Key. Meet Low Key… and learn to create harsher, grittier photos. You can use it for photos of senior citizens, photos of manly men (often the same thing!)… and even for nudes. Read on to find out how to create Low Key photos.
You may have already heard of Low Key and High Key photography. First a bit on Low Key in contrast with High Key. While High Key photography emphasizes bright tones and lacks deep shadows, Low Key seeks to drown in darkness.
High Key photography is used to emphasize softness. High Key photos are very bright and are dominated by light tones. They have no strongly dark areas. High Key photography is great for things like fashion photography, where it distills models’ faces down to their contours, removing distracting details and letting rich, full lips dominate. Ideal for advertising.
We’ve already taken a look in an earlier article at How to do High Key. Today we’ll be focusing on how to make a photo Low Key instead.
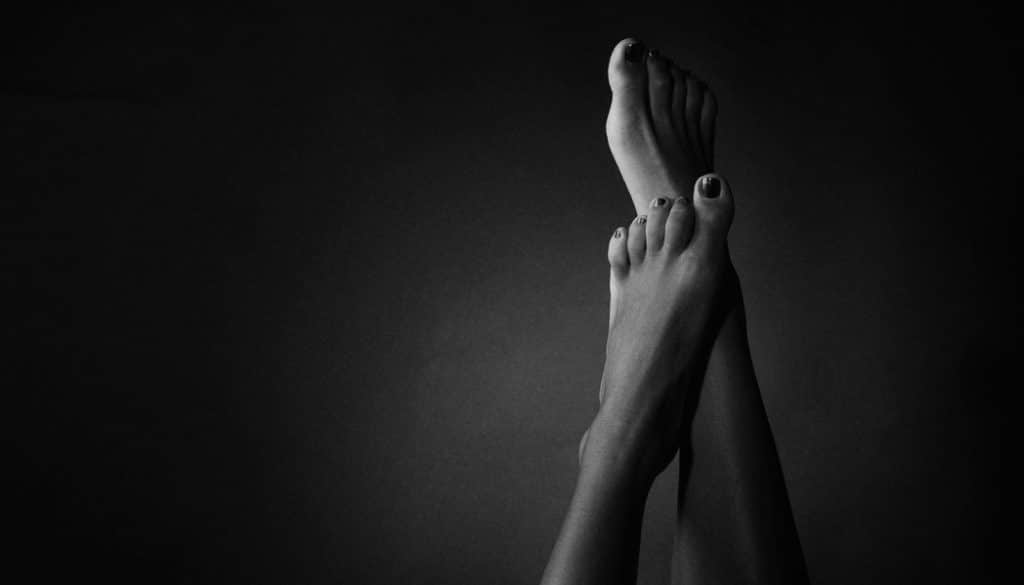
Where’s It Useful? Portraits And Nudes.
Low Key’s hallmarks include a predominance of dark tones and a strong contrast between lights and shadows. This technique is nothing new—many old-school film-photography masters utilized it.
Low Key is mainly used in portrait photography. But you’ll also see it used for nudes. You can use this technique to create an impression of hardness or rawness… or the harshness and grittiness we mentioned in the title. That’s why Low Key is most useful for portraits of men and senior citizens. But it also works wherever you need to emphasize sharp faces or hard bodies.
On a different note—you can also use Low Key to underexpose a product and then light up just one part, for example the part that best sells the product.
Backgrounds
The background’s the key for Low Key photography. A matte black background is ideal, because it reflects no light. This is good because any background-reflected light in Low Key is “parasitic light”, that is, unwanted light—light in the wrong place.
Also keep in mind that your subject should not stand too close to the background—otherwise the background may end up being illuminated, ruining the whole photo. It’s good to maintain a certain distance from the background and focus on the subject alone.
Light
For greater effect and emphasis in the photo, try to use hard light—that is, direct, unreflected light. No diffusion, no softboxes. This highlights contrasts, making it easier to later shape the picture the way you want.
But again, take care to keep light from reaching the background, because with an illuminated background, you won’t have the jet-black look you’re aiming for.
However, if you want to make the photo feel special, then you can illuminate the background after all: you can illuminate a tight circle using a snoot, which is a cone-shaped attachment for your flash.
When setting up lighting for Low Key portraits, it’s good to use backlighting, which creates a pleasant glowing outline around your model. That outline separates them out from the background. But this is not a hard-and-fast rule.
Backlighting is as simple as it sounds—light your subject from the back. Generally you’ll want to light from the floor upwards, to keep the light from shining straight into your camera. Choose a lighting angle that keeps the above-mentioned glowing outline nice and thin.
Editing in Zoner Studio
After taking the shot, adjust it slightly in Zoner Studio. Fine-tune the contrast, straighten out the lines, and if needed retouch away the faults.
You likely have your own favorite photo editing techniques. You’ll definitely want to know what RAW is and how to develop RAW photos, as well as what to fix immediately during development.

Then you’ll need to convert the photo to black and white. (For this, use Edit > Grayscale or press Ctrl+G to show the Grayscale controls.)
Work with Color Channels
In our article on High Key photography, we recommended working with the red-channel controls. But here we recommend working with the Custom option, which gives you much more freedom and control over the conversion.
For your Low Key effect, try to suppress bright and soft gradients. You need to squeeze the light out of the red channel, which brightens skin. So drag the Red slider down to zero.
Meanwhile drag the blue slider up to 100 or even higher, as this also helps to darken red tones. Skin is rich in red tones, so you’ll mainly be darkening skin.
Then use the green channel to fine-tune contrast, and lastly click Apply to save the photo.


Film Grain
You can add a finishing touch if you’d like by simulating grain in the photo to make it look more like black-and-white film. Try the method described in our article on creating black-and-white pictures.

Low Key dates back to film photography, so don’t think of yourself as experimenting, but as honoring the classics. Just keep in mind that good Low Key isn’t easy—you need to be careful with lighting and with the psychology of light. So don’t give up if you don’t immediately get it right.
There are no comments yet.