How to Photograph Concerts
Concert photography is among the more demanding genres, but it’s also among the more rewarding ones. It takes a little practice, but bringing great photos back from a concert in addition to a great musical experience means twice the joy. And I want you to have that joy, so I’ll be showing you a few tricks for taking great concert photos.
In this article, you’ll learn how to move around at a concert and where to stand. I’ll also recommend gear and show you the right camera settings. Because “concert” is a very broad term, and it’s almost impossible to cover everything from clubs to festivals in a single article, this time around I’ll be focusing on taking pictures in music clubs.
Where to Stand and How to Move
The right position to shoot from actually largely depends on your camera’s optics. If you prefer to use long lenses, you can enjoy peace and comfort fairly far away from the stage without needing to work your way through the crowd.
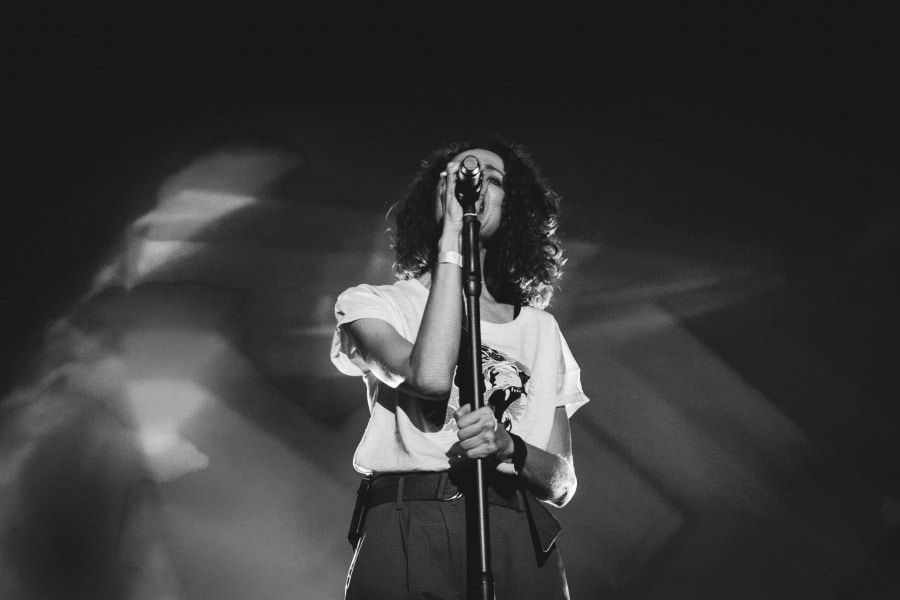
But if you’re like me and you want to avoid the flat perspective that a long lens causes and capture the atmosphere from close up, your only choice is to struggle up as close to the podium as possible. The opinion that closer is better has a fine pedigree dating back at least to Robert Capa’s “If your pictures aren’t good enough, you’re not close enough.” Although Capa photographed military conflicts, with a little exaggeration you could say that concert photography is not all that different.
“Zooming with your feet” brings with it the need to watch out for a few important things. Above all, you have to closely watch your camera and yourself. During your struggle through the crowd, some willingness to push and shove will come in handy. You’ll have to accept that not everyone will be happy if you block their view or take the spot that they themselves fought for. I recommend that, while you’re piercing your way through, you hold your camera above your head and facing forward. That will protect it from collisions. It’s also good for you—most people will make way for you right away when they see your camera.
TIP: While taking your pictures, keep one eye in the viewfinder and use your other eye to watch what’s happening around you. If you find yourself in the “pit,” above all try to maintain your stability. You can do that by spreading your legs and bracing your body. You’ll mainly get good use out of this advice at rock and punk concerts. Besides excited fans, you should also watch out for flying drinks. Be prepared to protect your gear at all times. Humans aren’t bothered by a little beer bath, but electronics usually are.

Shooting From the Stage? Only With Permission.
Taking your pictures while standing directly under the stage is ideal—you’ve got all the events right in your hands. If there isn’t a cordon between the musicians and the public, you’re halfway to victory. But it’s even better to be able to get right up onto the stage. This kind of good fortune is something you can have either in very small clubs where nobody is guarding the stage, or when you’ve got accreditation, and the organizer and the band are allowing you onto the stage.
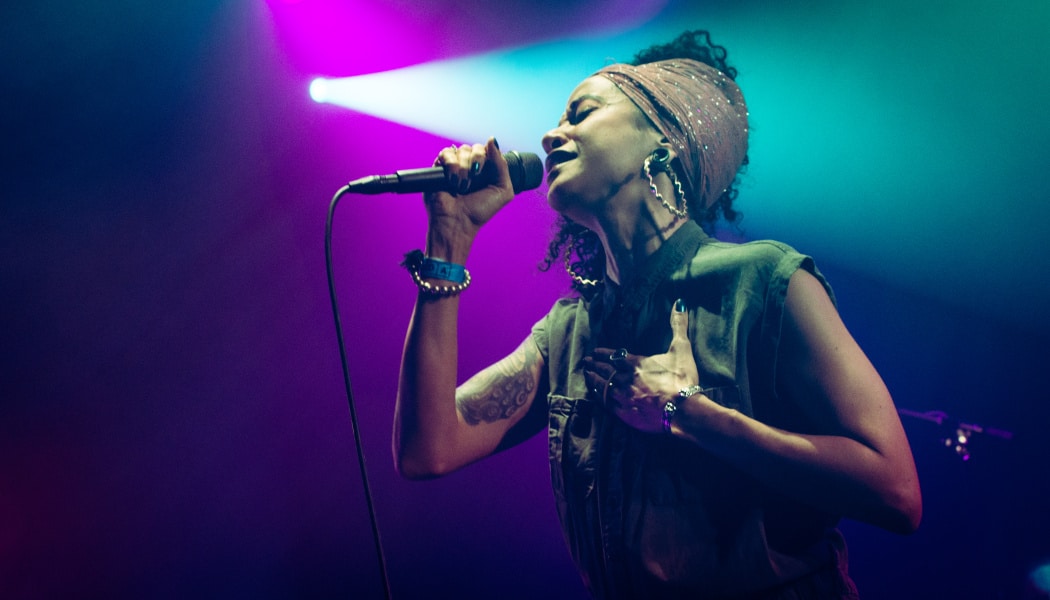
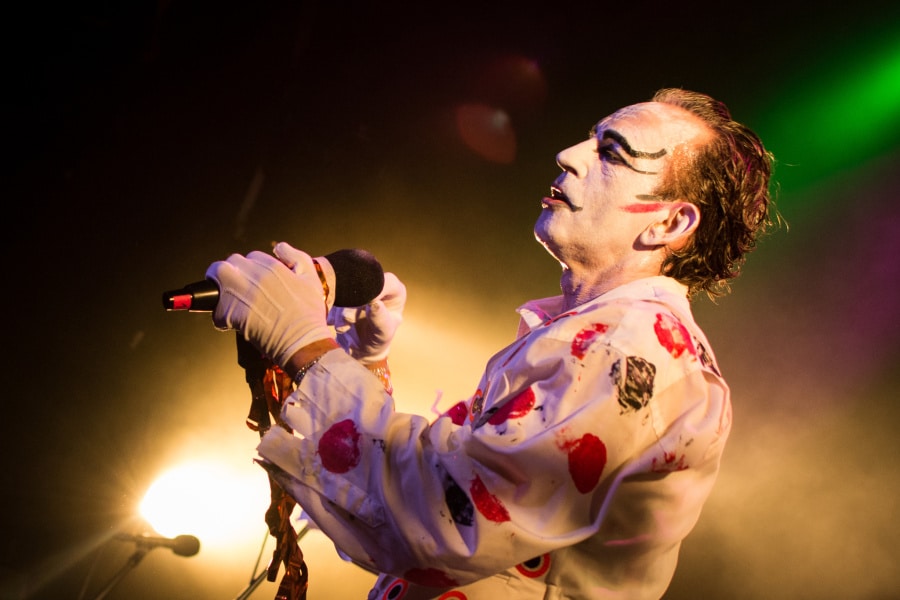
Taking your pictures right on the stage will let you capture the events in a way that nobody else in the audience can see them. Personally, I consider concert photography to be a genre on the border between reportage and portraiture. Being close enough is very important for me.

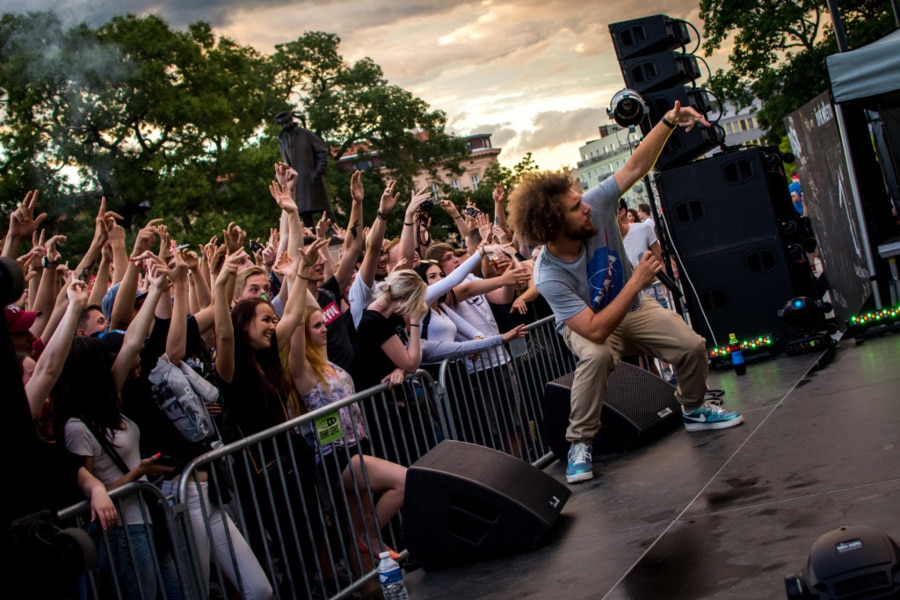
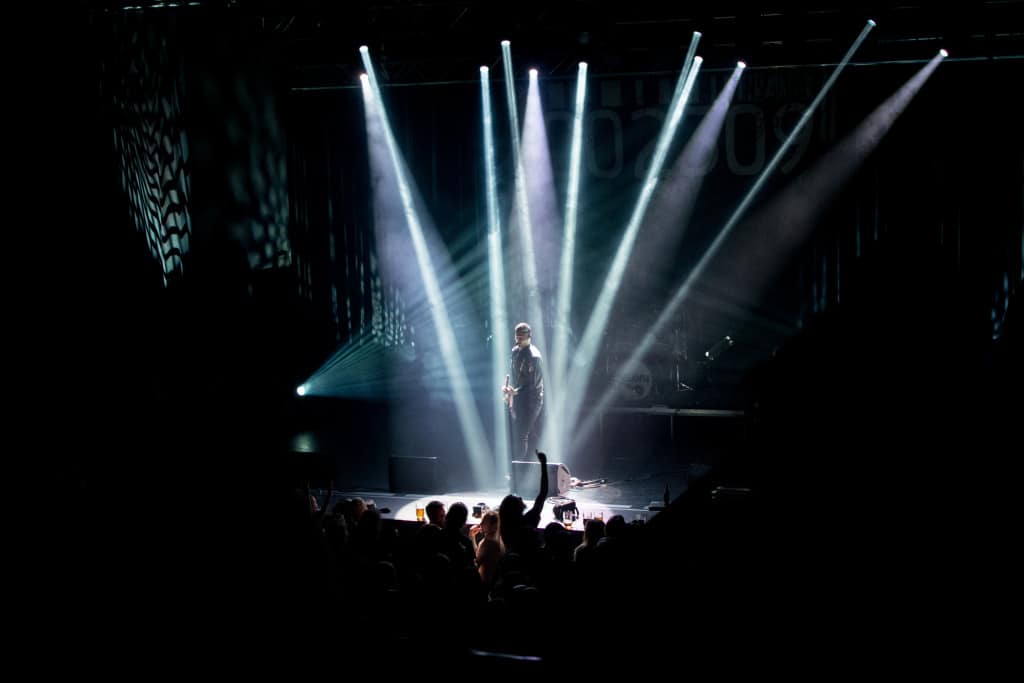
Don’t forget that a concert isn’t just about the band, it’s about the audience too. Getting them into the frame will give your photos a bit of a different dynamic. So don’t just point the camera at the band; think about a good way to capture their interactions with the fans.
Taking Pictures under Weak Light
A lack of light is a frequent source of trouble. In fact, it’s the problem that you’ll likely be struggling with the most often. Even if the club has a well-lighted stage, you might still run into trouble. Keep in mind that even the club’s very best lights won’t ensure lighting that’s as stable as e.g. the afternoon outdoor sun.
And naturally it depends on the lighting design for the given concert—you can run into concerts where most of the floodlights are turned off and the lighting technicians only turn on one weak light on the stage, which doesn’t offer you many ways to be creative. If they’re turned on the fog machine on top of that, you’ll have trouble with focusing, and there won’t be much there to see in your picture.
Or maybe the picture will be brimming with colors, but due to the weak lighting, you’ll still be struggling with a lack of light. Often you’ll encounter point lighting that, while it’s pretty to look at, leaves everything drowned in darkness outside of the shafts of light.
Don’t forget that you’re basically photographing an action scene that’s taking place on the stage. And that has consequences:
- You need a short exposure to capture the motion,
- Due to the weak light, you also need to set a high ISO,
- That means more noise.
Noise and How to Deal With It
It’s worth considering whether you should really treat noise as something important. Most photographers try to eliminate noise from their photos completely, but a few don’t worry about it at all. In my opinion, a certain amount of noise has always been a natural part of concert photos. But all the same, too much noise does “kill” a photo. So you should primarily try to prevent it, but keep in mind that even pictures with a mild graininess can have pizazz and don’t need to be thrown away immediately.

A photo’s technical purity definitely isn’t the only indicator of its quality. Its contents, energy, emotions, and many other elements are important as well. Try to squeeze a maximum of image quality out of your photos, but don’t forget to use your taste and intuition as well, besides just technical parameters. You don’t need to go over every photo at 1:1 zoom with a magnifying glass in your hand.
Now let’s take a look at how to minimize noise. You’re at a major advantage here if you own a camera with a full-frame sensor. These cameras let you set high ISOs, and thus short exposures, while still keeping noise under control. Overall, full frame chips have far less noise than APS-C. You’ll suffer a lot more nerves with the latter. I’d definitely recommend that you use a fast lens, as it will help you significantly in dealing with the reduced amount of light. The more light is let onto the chip, the lower an ISO you can use.
Noise and Black and White
There’s one well-known old trick for masking noise, and that’s conversion to black and white. We’re all accustomed to black-and-white grain in photos from back in the film days, where it was ever-present. So after conversion, the ugly noise in a color photo often becomes something that’s desirable and attractive. Your audience may then not even notice that all you’ve done is to turn lemons into lemonade.
Still, always consider carefully whether you’re truly improving things with this approach. I don’t recommend overusing it; not every photo is a good candidate for black-and-white conversion. And you should definitely cast aside any mantras that you have on the order of “the fewer colors the better.” That generally isn’t true.
I recommend that you only use black-and-white conversion when you have some artistic goal that the conversion would serve. You should know in advance what you want to achieve with your black-and-white take, what you want to highlight, and why. If all you want to do is to mask noise, that’s not a good enough reason for this conversion.


Not like this. Here the composition and the light are similar, but because of the color projection in the background, this picture has less contrast than the previous one. Converting it to black and white cuts away an interesting element—the detailed colored background. The photo loses its magic. Always think hard before choosing black and white! Band: Puding pani Elvisovej
What Camera Settings and Parameters?
Even if you’re using a camera with a lens speed of 1.8, that doesn’t mean it’s always optimal to use an f-number of 1.8. Meanwhile most lenses provide the best quality at a tighter aperture (e.g. f/4 to f/8, depending on the type and manufacturer). When possible, don’t go around with the the f-number set any less than two or three steps above the minimum (at least f/2.2 to f/2.5). Also, at the lowest f-stop, you’re working with the smallest depth of field. Then even the slightest movement towards or away from the lens (it can even be mere inches) can remove your subjec from the focal plane. For photography at music clubs, raising the f-stop can often be a luxury, but if you can do it, then do it.
The focusing speed of your lens is also very important. Scenes will often be full of motion, with very little time for focusing. It’s also good to choose lenses that have reliable autofocusing even under bad light. I recommend focusing on the center point, which tends to be the fastest.
During a concert, you have to be able to change your camera’s settings very quickly. Otherwise, you can miss out on interesting pictures. So you have to know your camera well and know how to work with it quickly and by heart without taking your eyes off the viewfinder.
As I’ve already implied, you should always keep your ISO as low as the situation allows. But keep in mind that your ISO should ideally also be high enough to let you shorten your exposure to no more than /160 s (when the action on the stage is slow) or even to no more than 1/250 s (when it’s fast). Keep in mind that sometimes a large amount of noise is just the price you have to pay for a sharp image that’s free of motion blurring.


Getting Faithful Colors
I’ve had the best luck with leaving white balance set to Daylight (maybe with the exception of very “intimate” lighting with a single incandescent bulb). This setting will give you faithful colors in the vast majority of lighting situations at concerts. Shoot to RAW, of course. That way you can still shift the white balance after you’ve taken your pictures and smooth out any problems.
Using semi-automatic modes like aperture priority or shutter priority will help as well. Then during quick action on the stage, you can e.g. use shutter priority, set a speed of 1/250 s, and let the camera take care of the rest. But I personally actually avoid semi-automatic modes. I prefer to have all of my settings fully under control, and so I shoot exclusively in manual mode. As for fully automatic mode… at concerts, forget about it. It won’t give good results, and it will also frequently trigger the internal flash.
Speaking of which, with so little light, you might be tempted to trigger the flash yourself. I don’t recommend it. You’ll be blinding the musicians and the other concert-goers, and also ruining the concert’s lighting. Learn to use the concert’s own lighting to your advantage and forget about a flash—be considerate.
Floodlights and Lighting Technicians
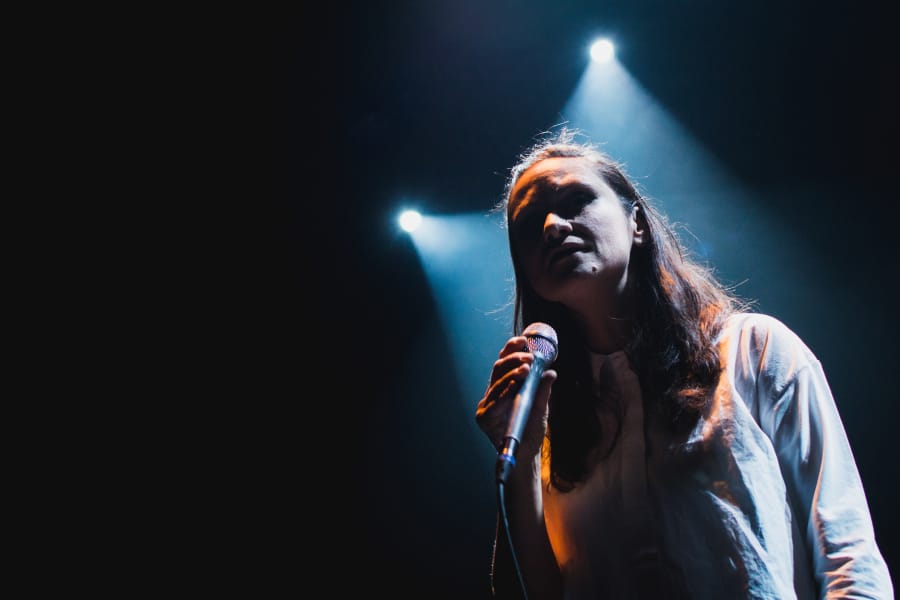
The lighting technician does a good half of a concert photographer’s work for them. They’re the photographer’s most important partner. They’re the ones who decide how easy or hard a shoot will be. I’ve already talked about not having enough light; now I’ll talk about the other possible lighting situation—enough, or even too much light.
Naturally a lighted stage is something you won’t encounter very often. But when you do, it offers you some pleasant possibilities:
- lowering your exposure time,
- lowering your ISO and thus noise,
- using a higher f-stop and thus getting more sharpness and better detail.

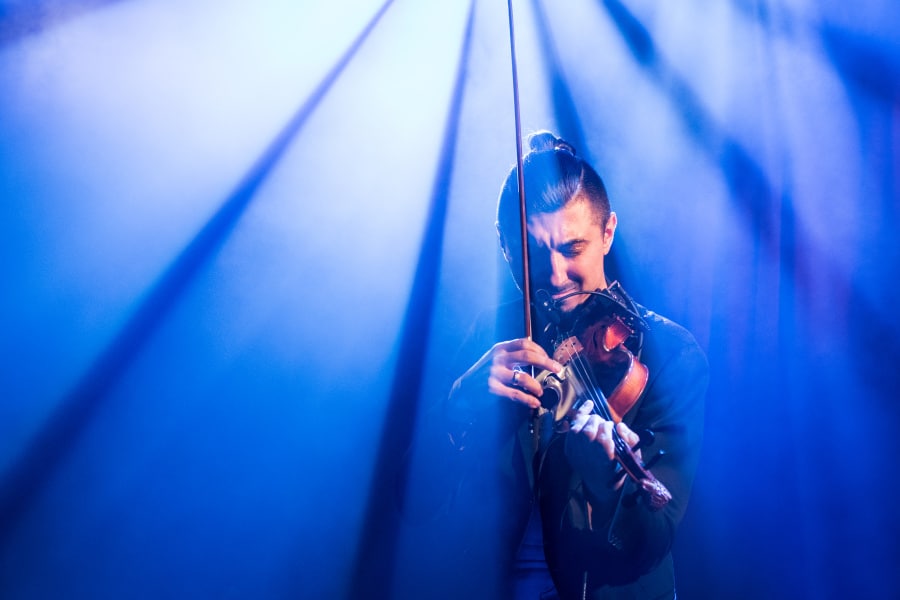
It might seem that photographing strongly lighted concerts is problem-free. But even here there are some problems that can come up and that you’ll have to deal with. They’re basically about the light’s color and intensity. The lighting can also blink too much, or single-color “flat” lighting can be combined with smoke effects.
Naturally, the strong intensity of light from floodlights causes overexposed spots—blowout. You correct for these by lowering the ISO and exposure time, and raising the f-number.
The situation surrounding lighting color is a bit more complicated. When a stage is strongly lit with a single striking color, that leads to ugly colored blowout and a loss of contrast and detail. You can also expect unaesthetic colored blotches.

Dealing with this situation isn’t easy. Often you’re essentially stuck just waiting for the lighting to change. You can work on the problem in post-production by changing the RGB histogram curves and drawing down the individual color channels, but the result will never be 100% perfect.
The sensors on cameras from different brands have different levels of sensitivity for the individual parts of the color spectrum. Nikon cameras, for example, have trouble with capturing scenes that are lighted in red, while they deal with blue noticeably better. For Canon, the situation is precisely the opposite. Keep this in mind and check to see how your camera’s chip behaves here. That will make your work easier later on.
I’ve already mentioned problems with blinking lights. If they change at too high of a frequency, you need to be careful to press the trigger at precisely the moment when the lights are how you need them. Sequence shooting definitely helps here. Set up your camera, focus, and fire off a series of shots. If none of them are worth choosing, try again.
With stroboscopic lighting, things become even more complicated. Since these lights blink so quickly, it’s hard to photograph the flashes instead of the dark. But you can try. I recommend that you delete the useless dark shots in the sequence right on the spot, or otherwise you’ll be bringing home lots of junk material.
Still, most of the time, sufficient and impressive stage lighting is preferable. A talented lighting technician with good equipment is able to create a beautiful scene that provides a great environment for your pictures.
Watch out for lasers! That may sound like a warning from sci-fi, but the danger is real. Laser beams cutting through fog at concerts are a treat for the eyes, and they look like they’re harmless. But they’re actually a hidden threat for both your eyes and your camera chip. If a laser shines straight into your camera’s lens, it can irretrievably damage the sensor, and your eyes as well.
Have No Fear
Even though concert photography is a bit harder than it may seem, it’s a lot of fun. With a little practice, you’ll be leaving concerts with not just a good musical experience, but great photos as well.
How have your concert photography experiences been? Be sure to share them with us in the comments.
There are no comments yet.