How to Remove Fog from Your Photos
Haze, fog, and smoke are frequent tools for creativity. But there is such a thing as too much of a good thing. Too much haze, and your photo loses contrast… and is basically left with nothing left to see. Luckily, you can often remove or reduce haze in post-processing, and it’s not even hard to do.
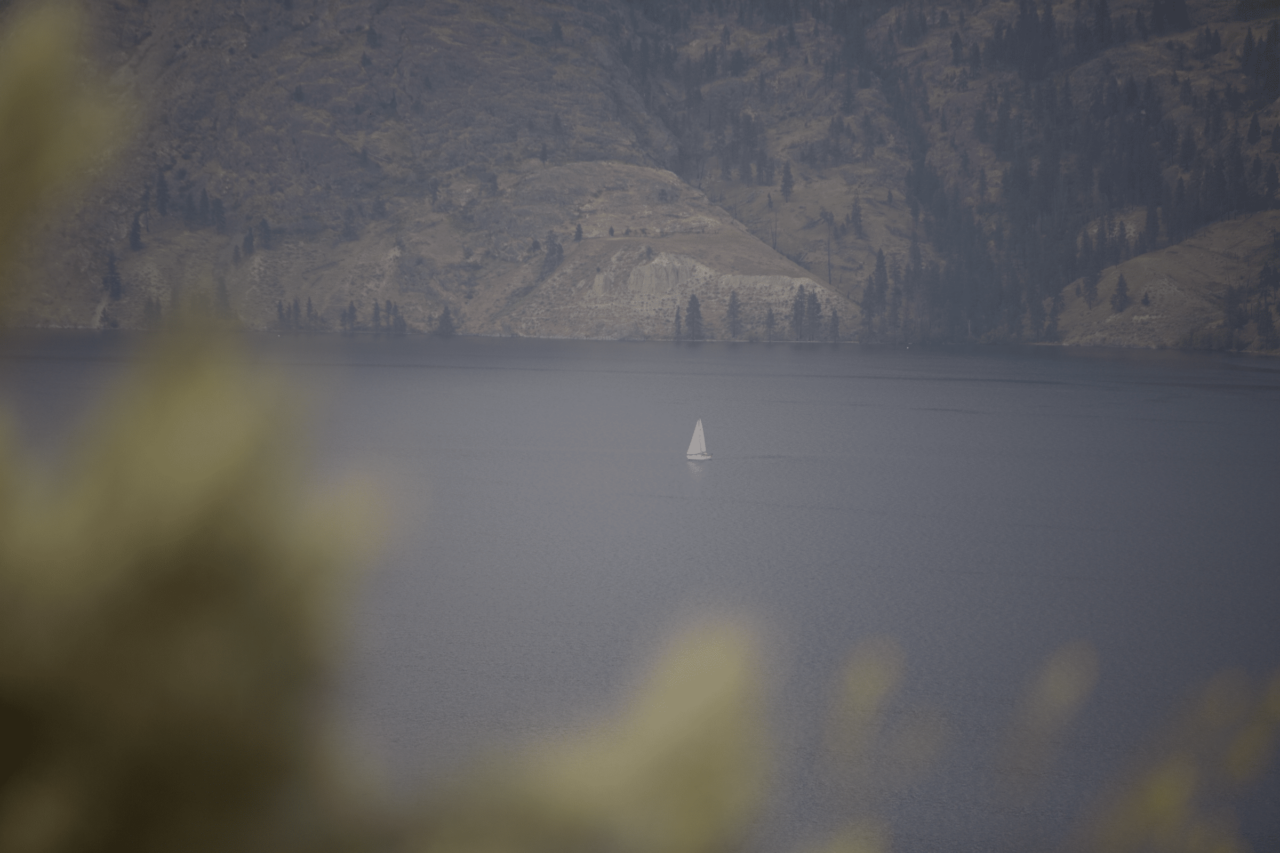
This photo was taken on a foggy January morning. The fog was so thick I could barely see past my outstretched arm. This photo definitely has atmosphere, but it’s kind of boring. It’s short on image data—especially in the dark parts. But just darkening the photo won’t be enough, because that will just make the haze darker and grayer.

Using Zoner Studio, you can reduce haze, fog, smoke, and mist quickly and easily. Come take a look at which tools to use for this in the Develop module—Zoner Studio’s place for non-destructive edits.

The Dehaze Function
Zoner Studio introduces a new function for removing haze. It has a simple foundation: it detects and eliminates foggy, smoky, and other faded parts of a picture. Raising the Dehaze value will draw out a lot of detail.
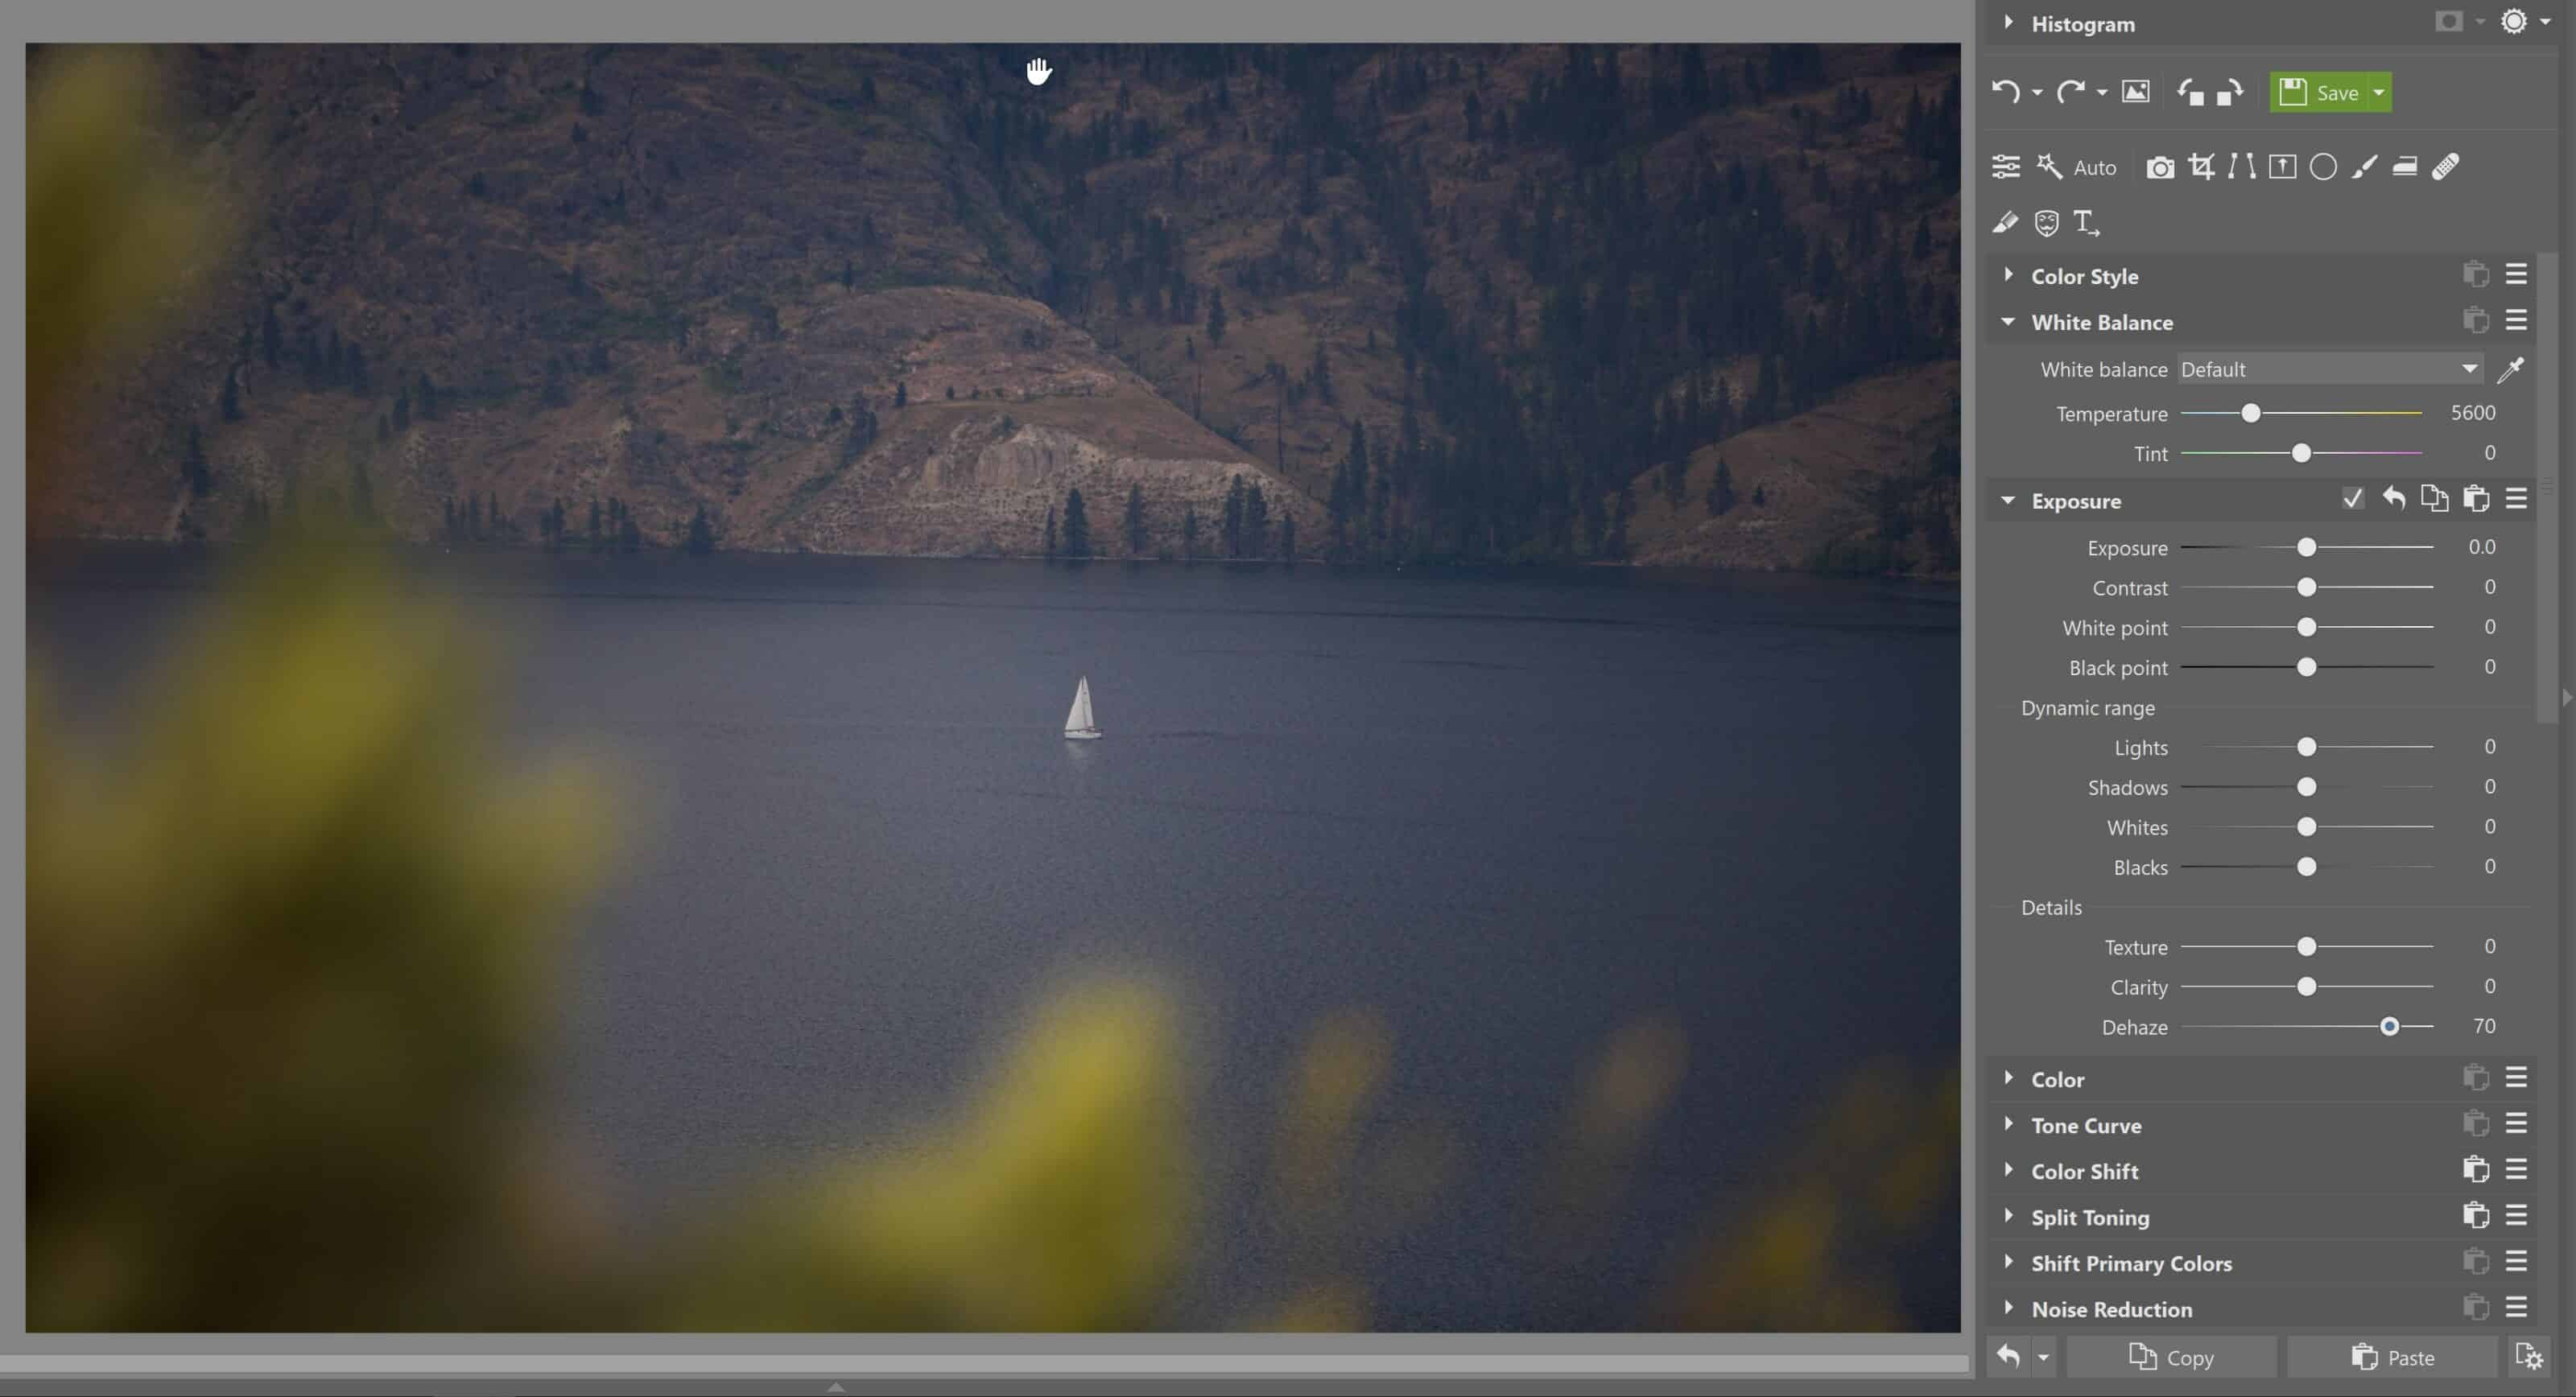
Exposure Tools
This picture is now slightly less foggy. I can further improve it by working with the other tools under Exposure. I’d go and add contrast and lower the black point. That will draw more information out of the photo’s dark parts (the left side of the histogram). Then I’ll wrap up by raising the values for the white and black point to make the haze more white than gray.

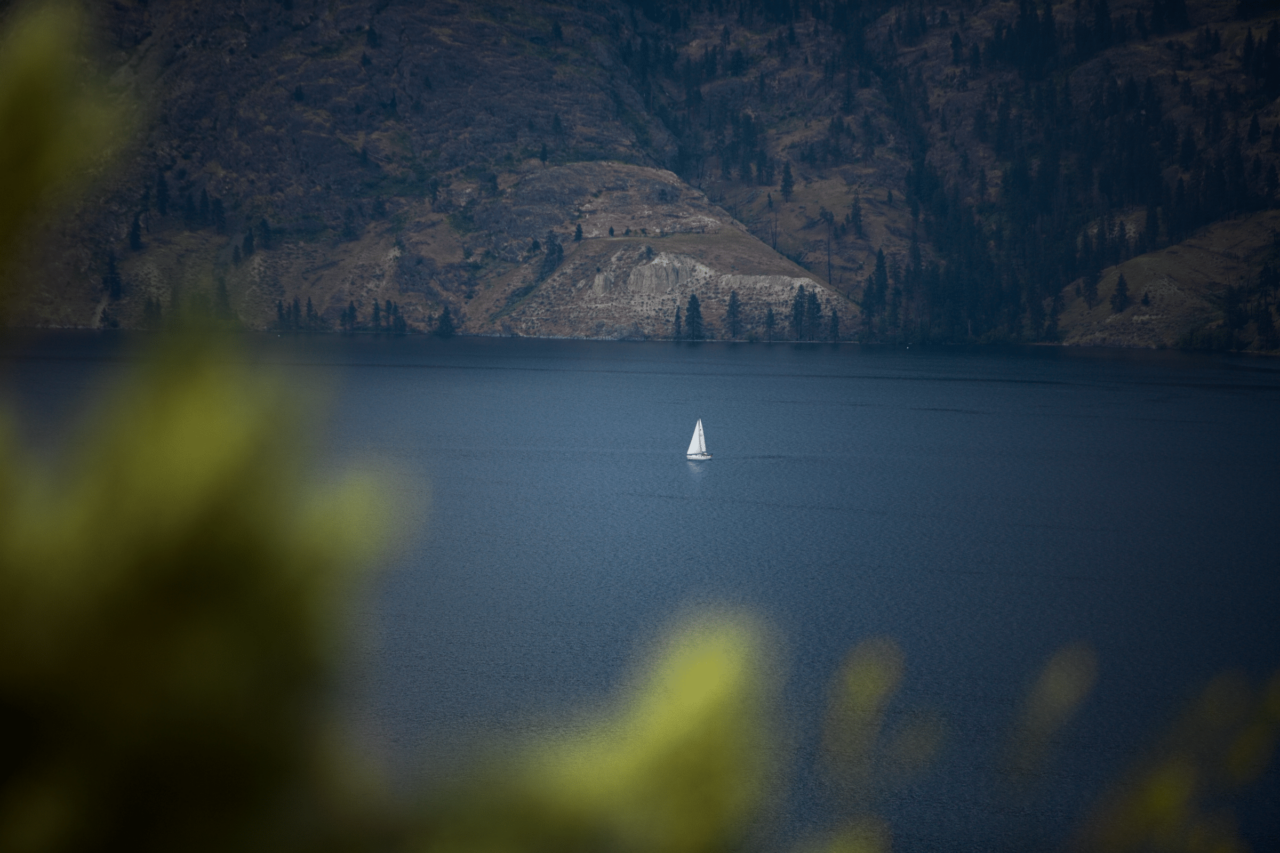
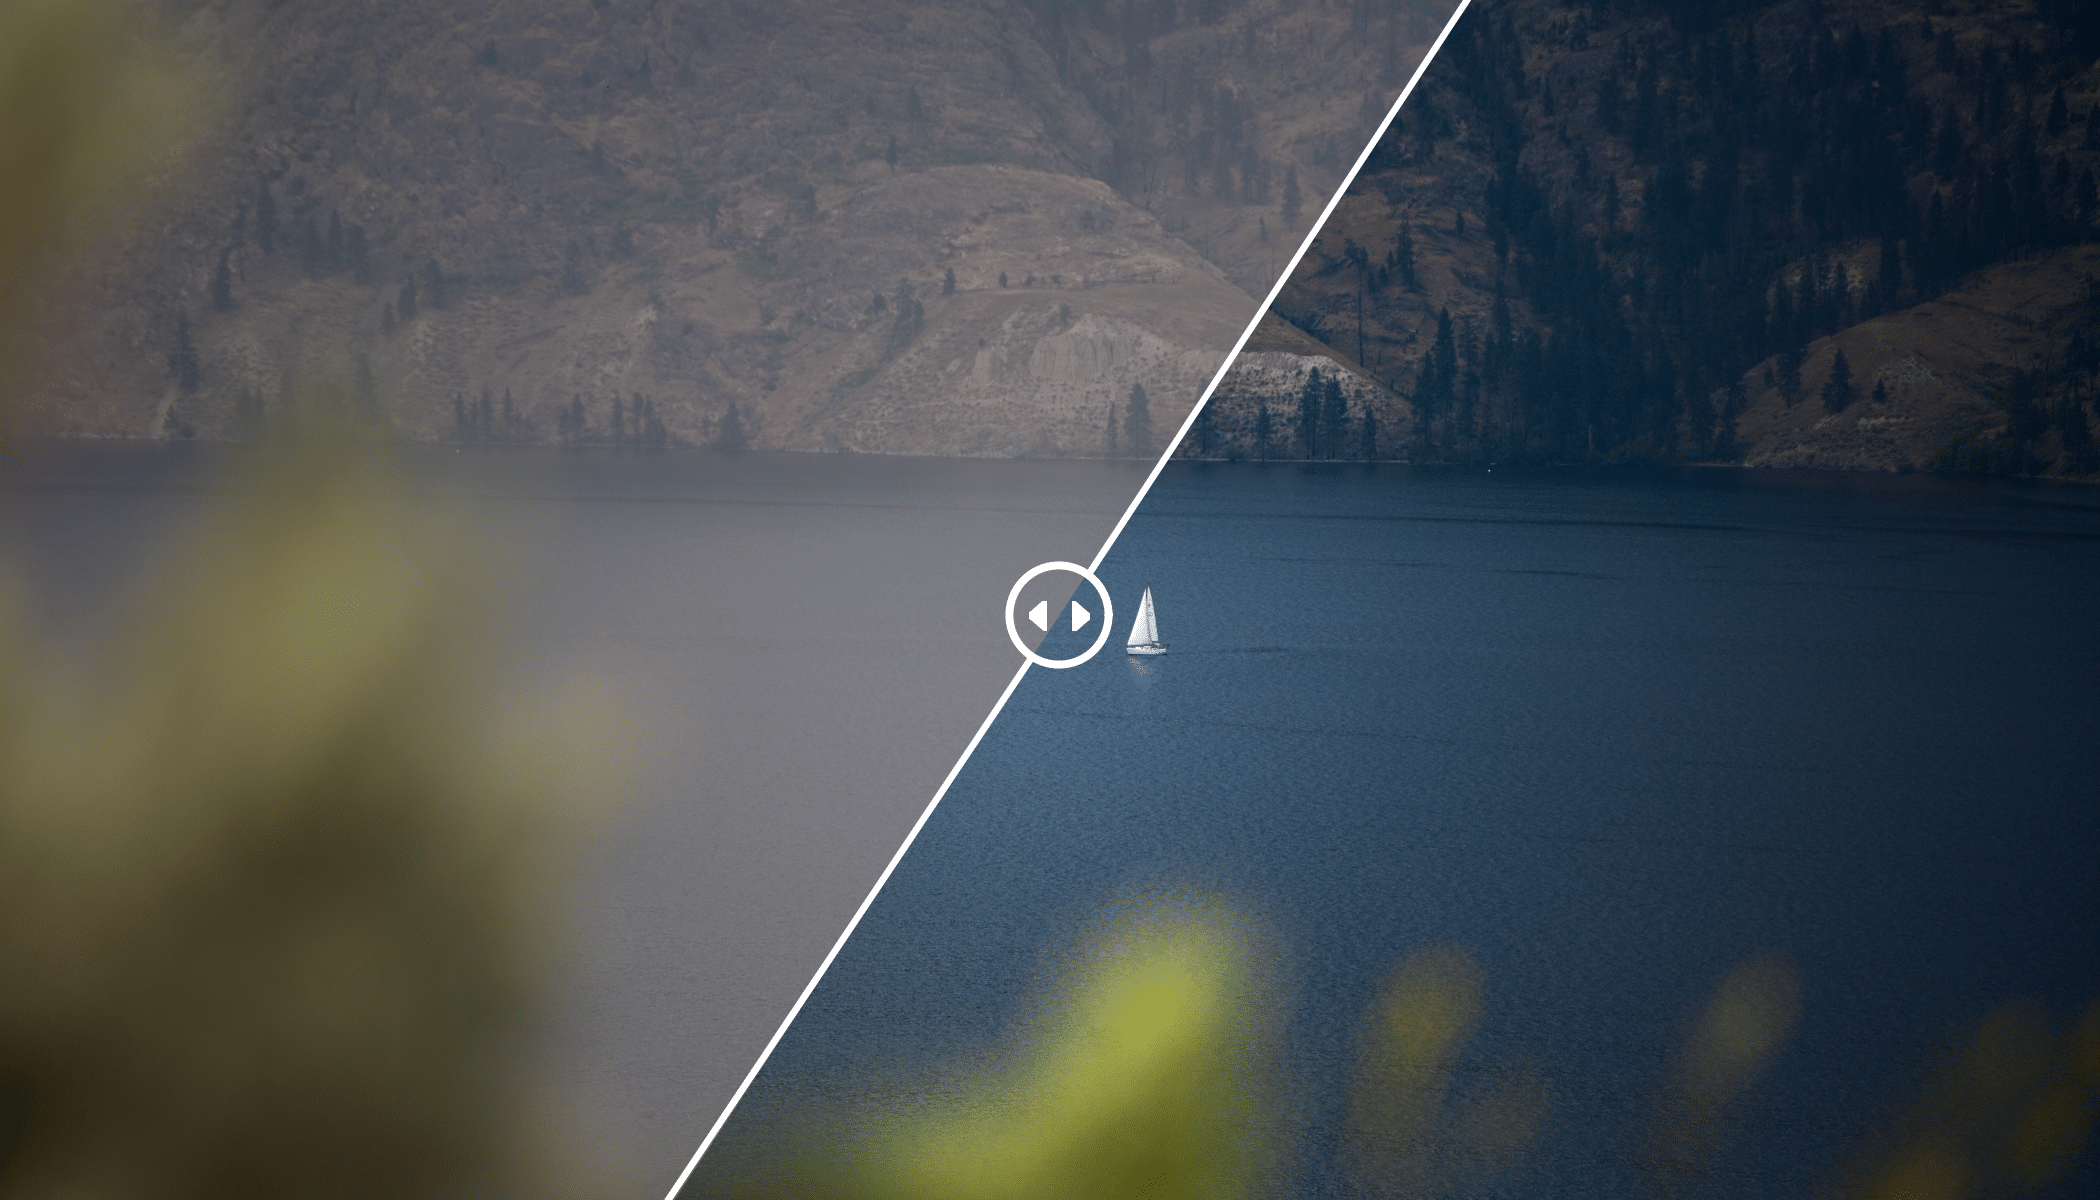
The original and the edited version.
Hazy Photos Aren’t Bad Photos
Mist or smoke can give a photo a mysterious atmosphere, because the less we see, the more we imagine. But there has to be an interesting foreground, or else there’s no foundation for imagining the background. And that’s where the exposure tools in Zoner Studio come in—for building that foreground.
Eric
Great article, but would have been more helpful to know how to achieve this effect in Photoshop or other mainstream photo editing software. Cheers.