Improved video editing in Zoner Studio: Edit your videos quickly and easily like a pro
The majority of cameras and phones can shoot video in addition to taking photos. Some moments are better captured in motion. However, separate videos may not tell the whole story. For this reason, it’s better to make a video montage. This can be done quickly and easily using Zoner Studio. The newly enhanced video editing functions make it all a piece of cake.
Zoner Studio is software primarily designed for editing photos. Still, its functions for video editing are constantly being improved. In this article, we’ll summarize how video editing in Zoner Studio works and what options it has to offer.
Basic video settings
Step-by-step setup:
- Open your videos folder in the Manager module and go to the Video module
- Create a new project
- Choose your video’s resolution. The default is 1080p with an aspect ratio of 16:9. This is the most common video setting.
In the video editor, the timeline and preview are in the middle. The filmstrip is at the bottom, and the video settings are on the right.
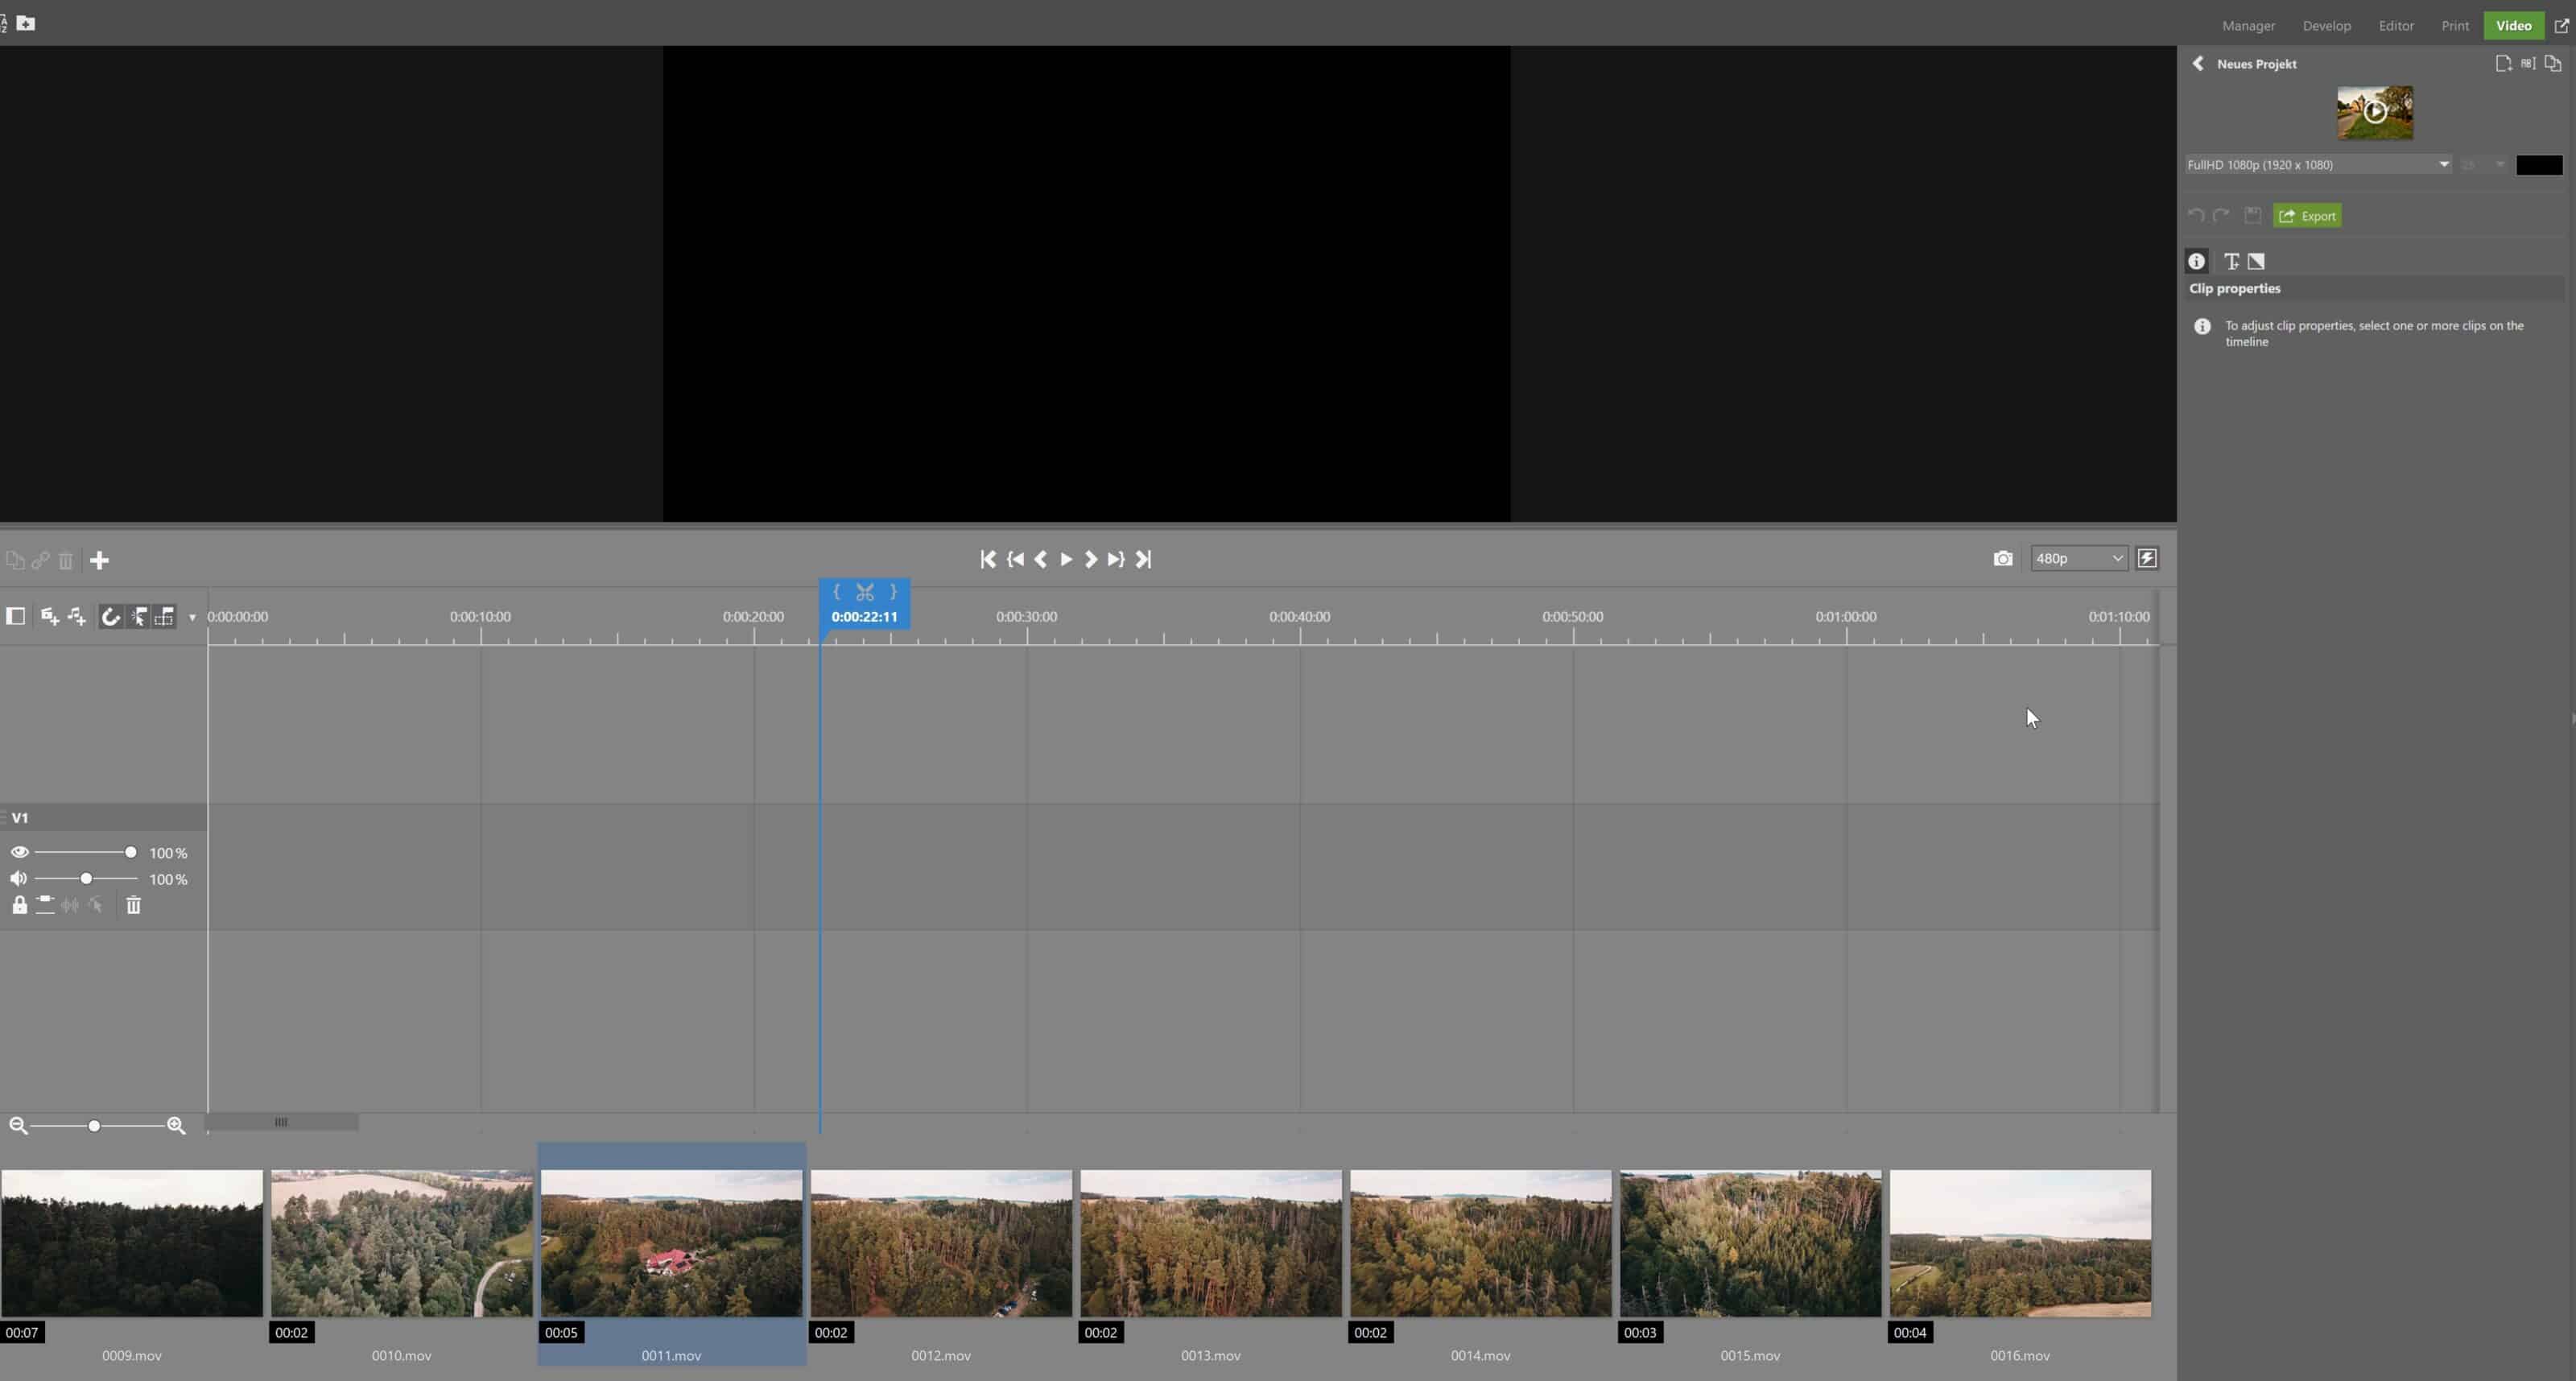
Add videos
Start by dragging videos from the filmstrip to the timeline. For faster workflow, you can select all the files (Ctrl+A) and drag them all at once.
Start editing
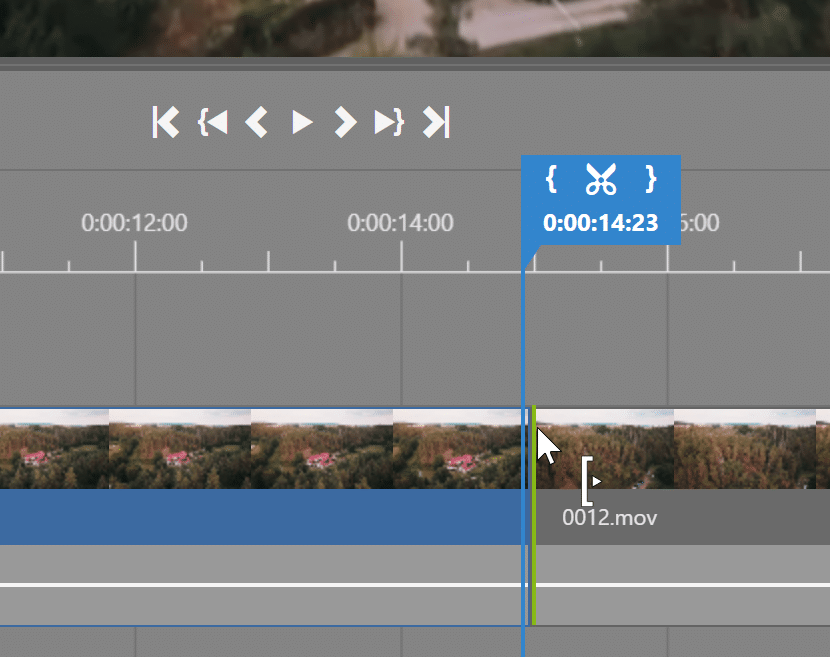
To trim clips, drag the bar from the edge toward the center, just like when cropping photos. When the clips are next to each other, a gap forms. If you don’t want a gap, hold the Shift key when trimming. The clips will be “attached.” To split up clips, click between the clips and press the C key, or use the scissors icon.
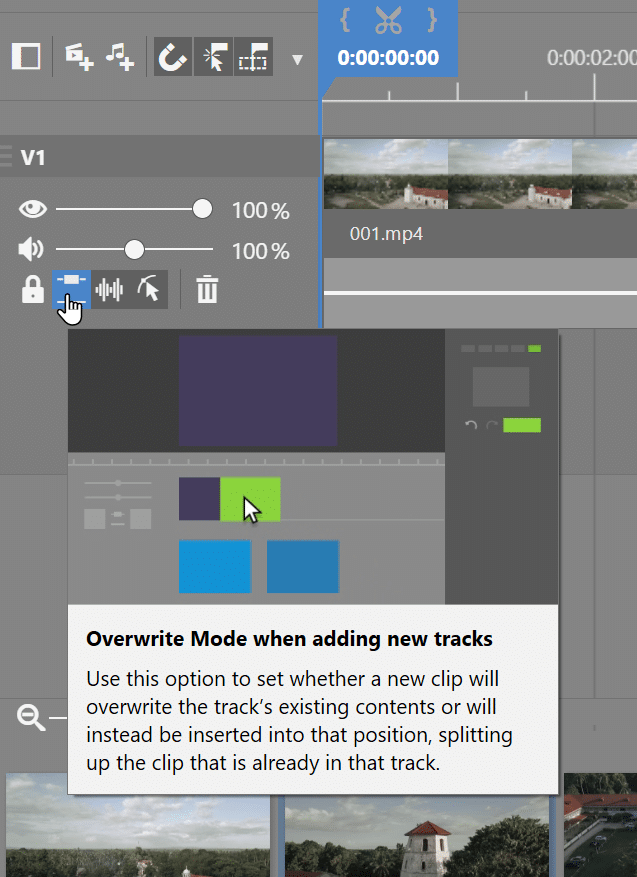
Move video clips along the timeline by clicking and dragging. If you drag while holding the Ctrl key, the clip is copied. If you drag a clip over another clip, it depends on whether you have Overwrite mode enabled. You either overwrite or move the bottom clip. By default, overwrite is disabled. You can enable it using the icon to the left of the timeline, or by pressing the Alt key.
Edit video just like photos
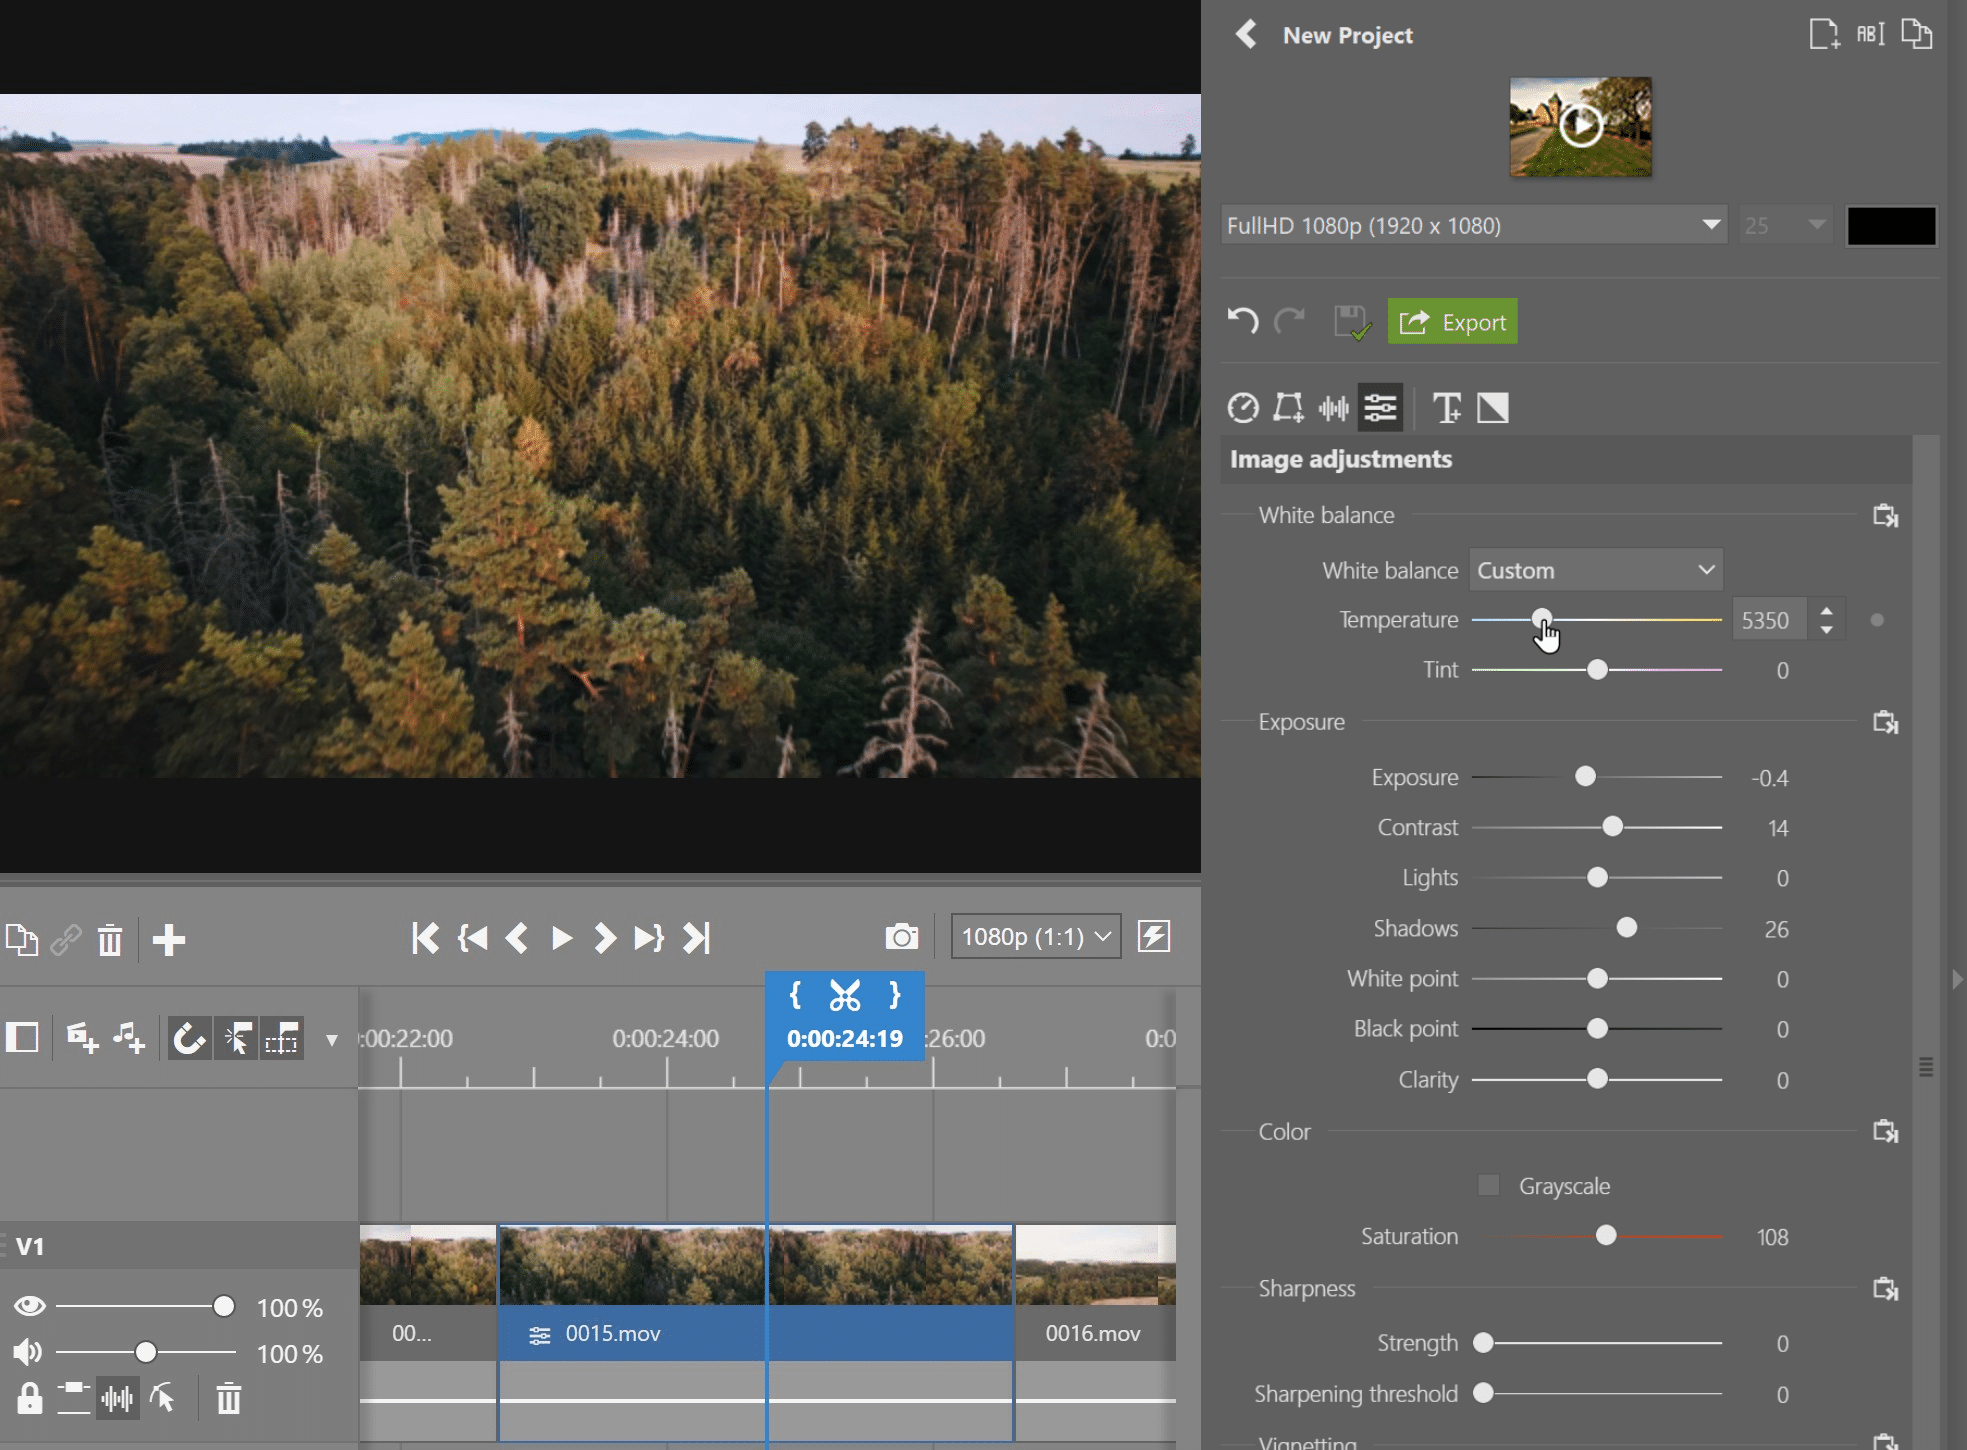
When shooting video, you may try to set exposure as best you can. But the camera doesn’t automatically assess the scene the way you would like. For this reason, the Video module has tools like those you’ll find in the Develop module. From White Balance to Exposure tools, and Saturation to Grayscale. You can use the copy icons to transfer all of the image settings from one clip to the next, so there is no need to redo adjustments for similar footage.
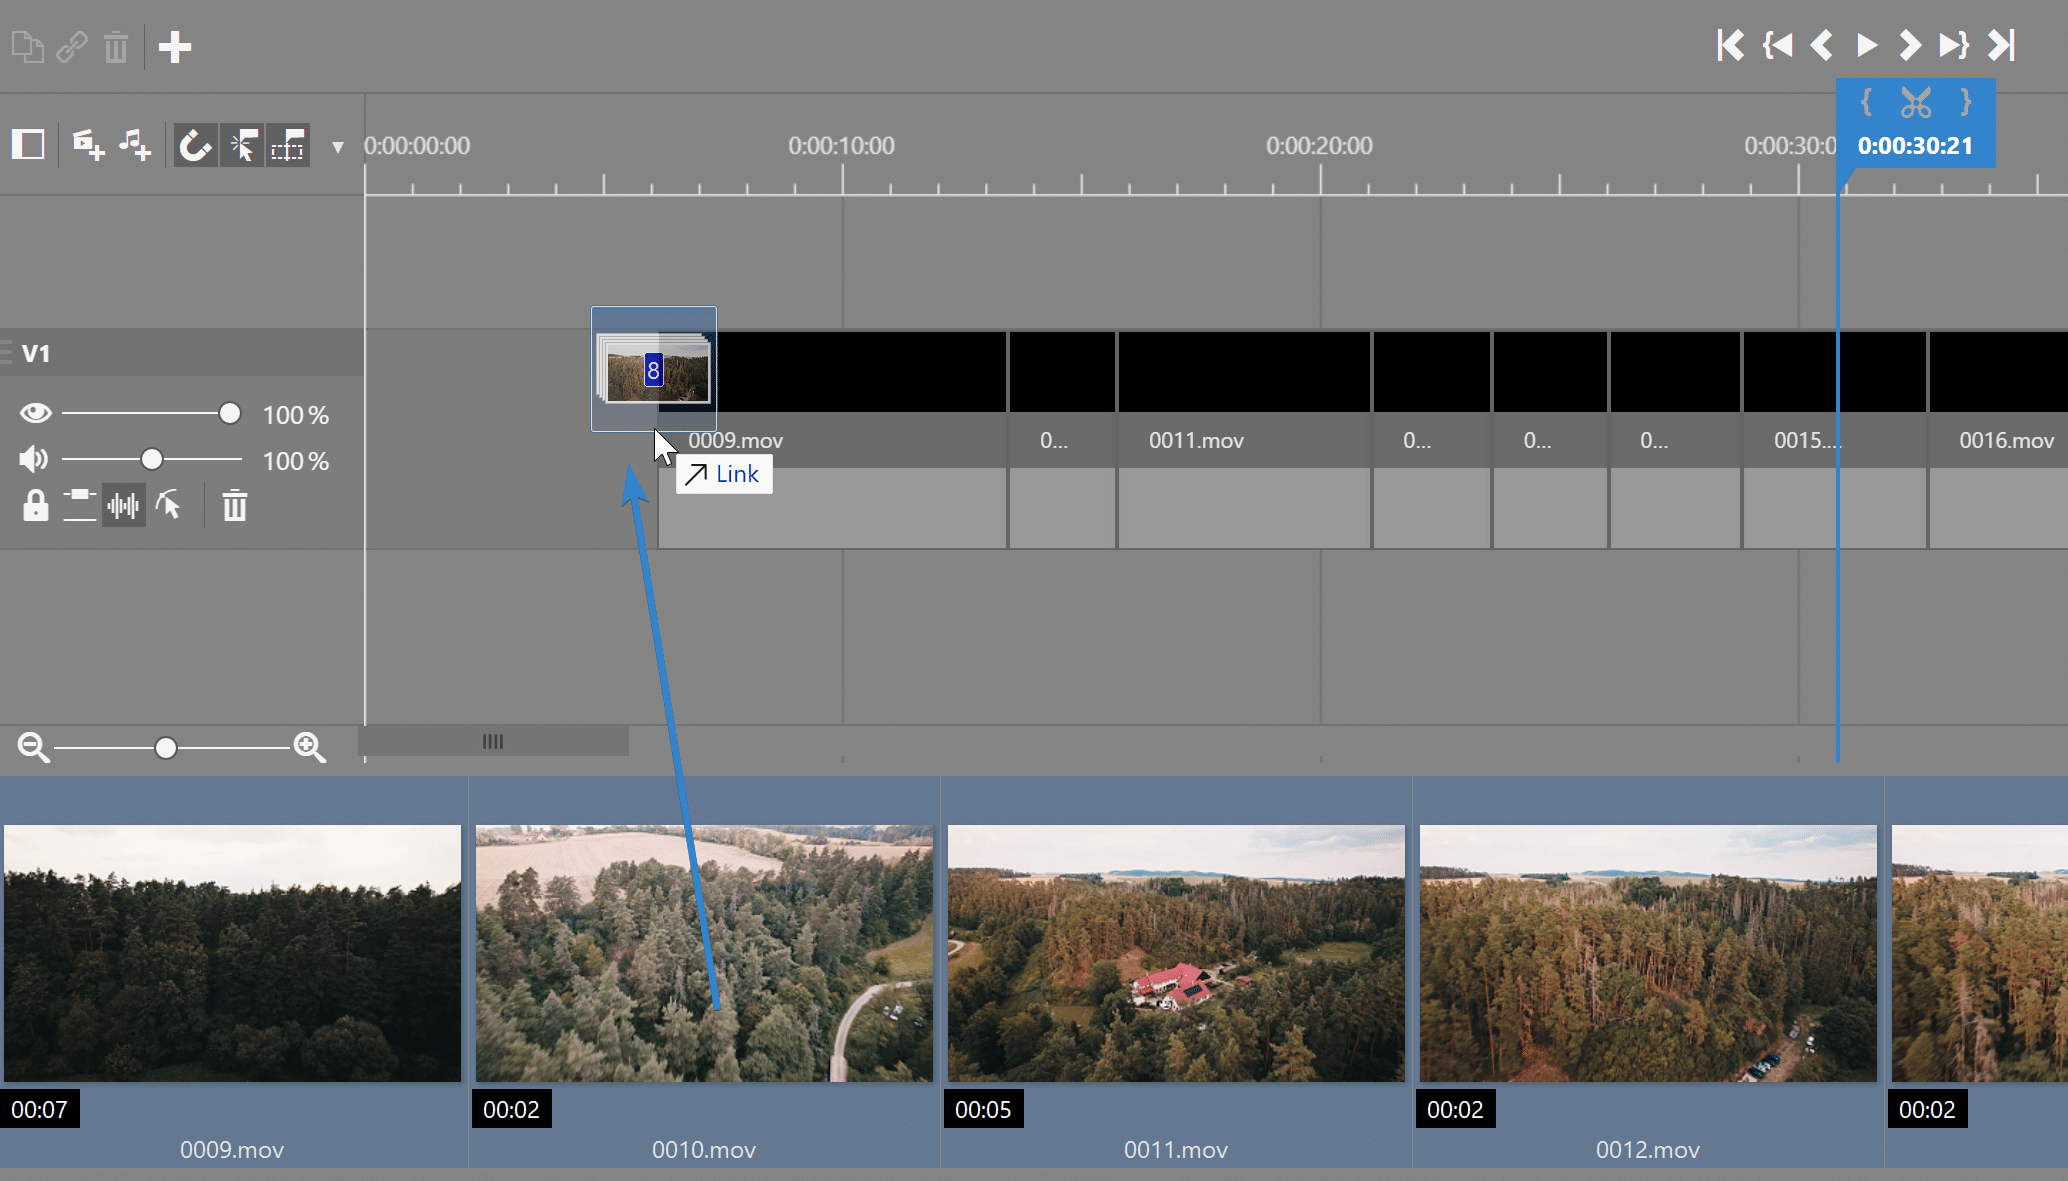
Working with multiple tracks
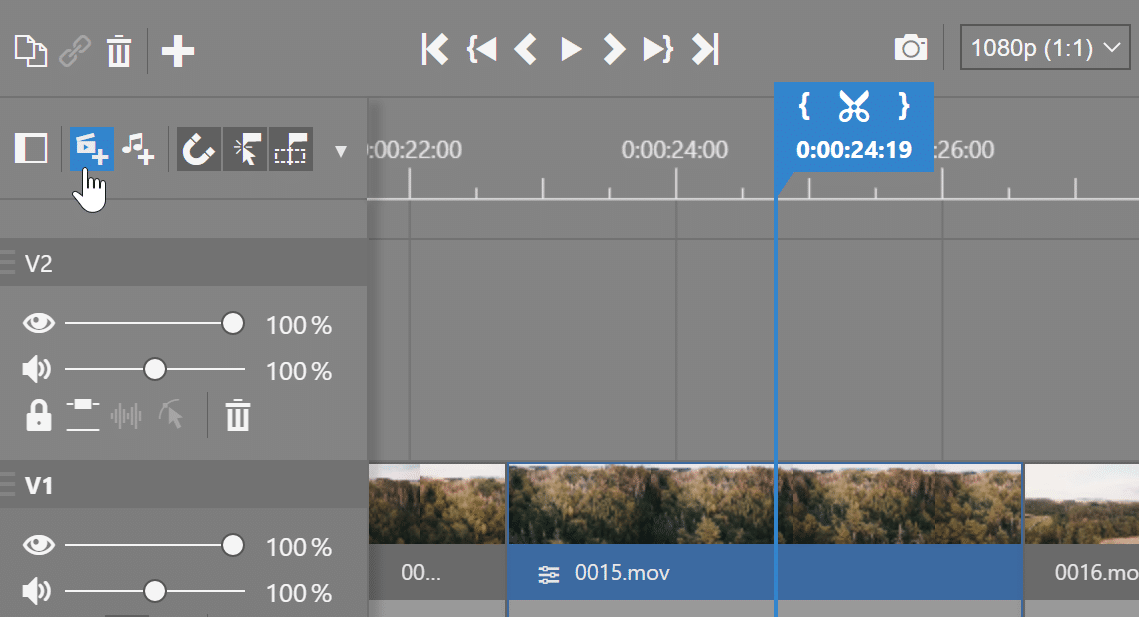
The ability to overlay a video on top of another video makes it easier to edit multiple tracks. This opens up new possibilities for doing video overlays, adding text, or merging two clips together. To add a new track, click Add video track in the left editing panel. Or, more simply, by dragging the clip to the gap above or below the timeline. You are automatically notified that a new track has been created.
Add music or text
Add music to video clips the same way you add videos and photos. Drag and drop audio files from the filmstrip. If your audio files are stored in a different location than your videos, then you can find them in the Navigator in the left side panel.
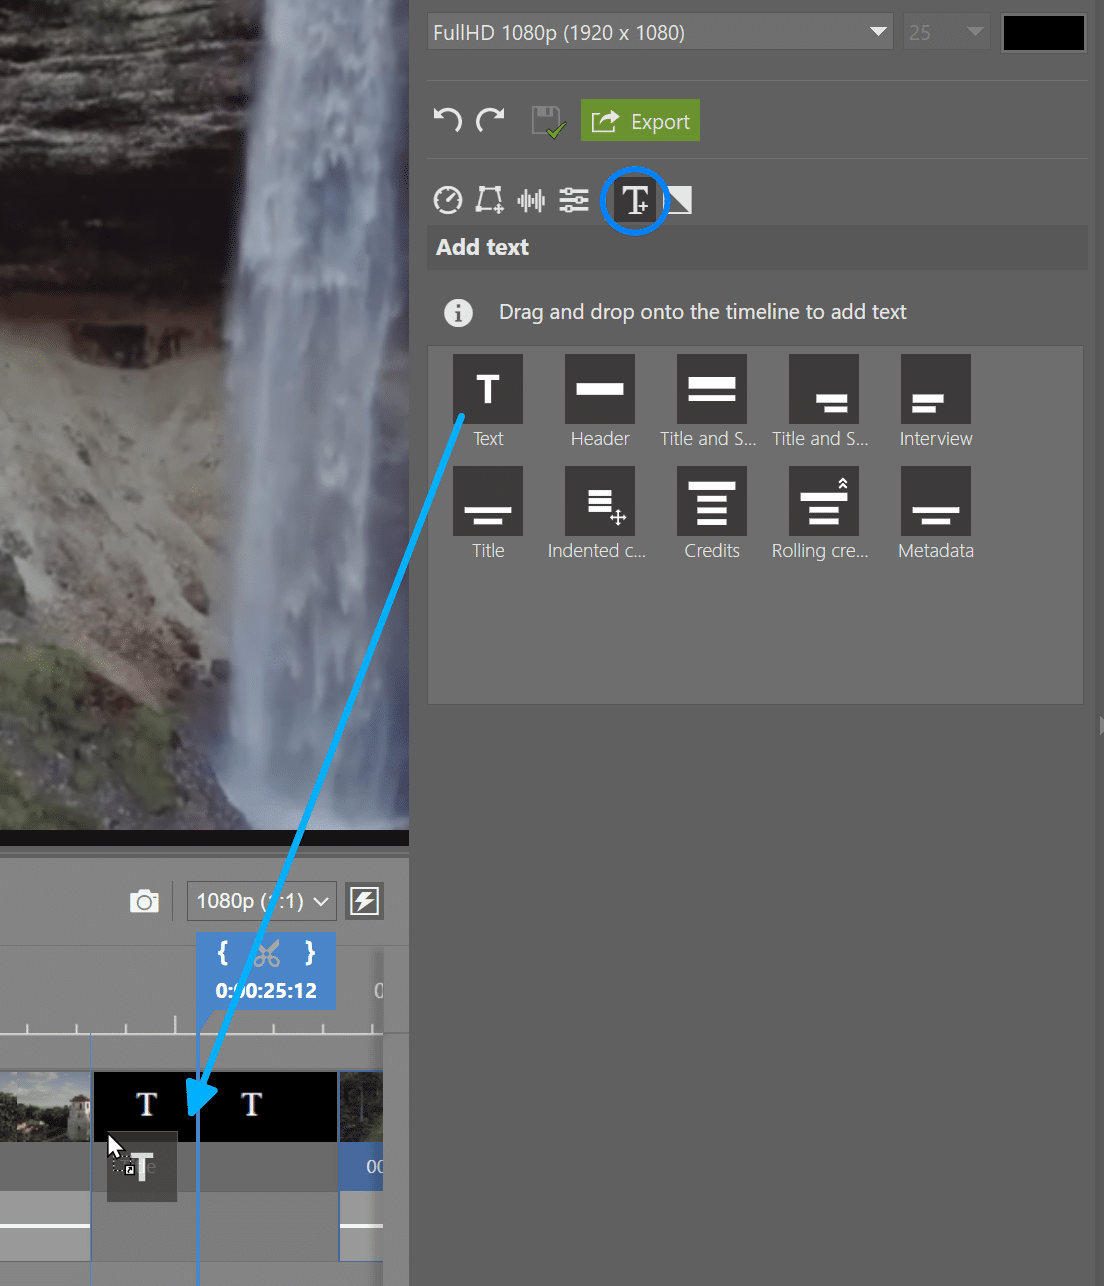
Add a text box by dragging it from the right panel. The text editing tools open and you can adjust the text size and color. You can also use the Text padding settings to move the text to best fit your video.
Add transitions
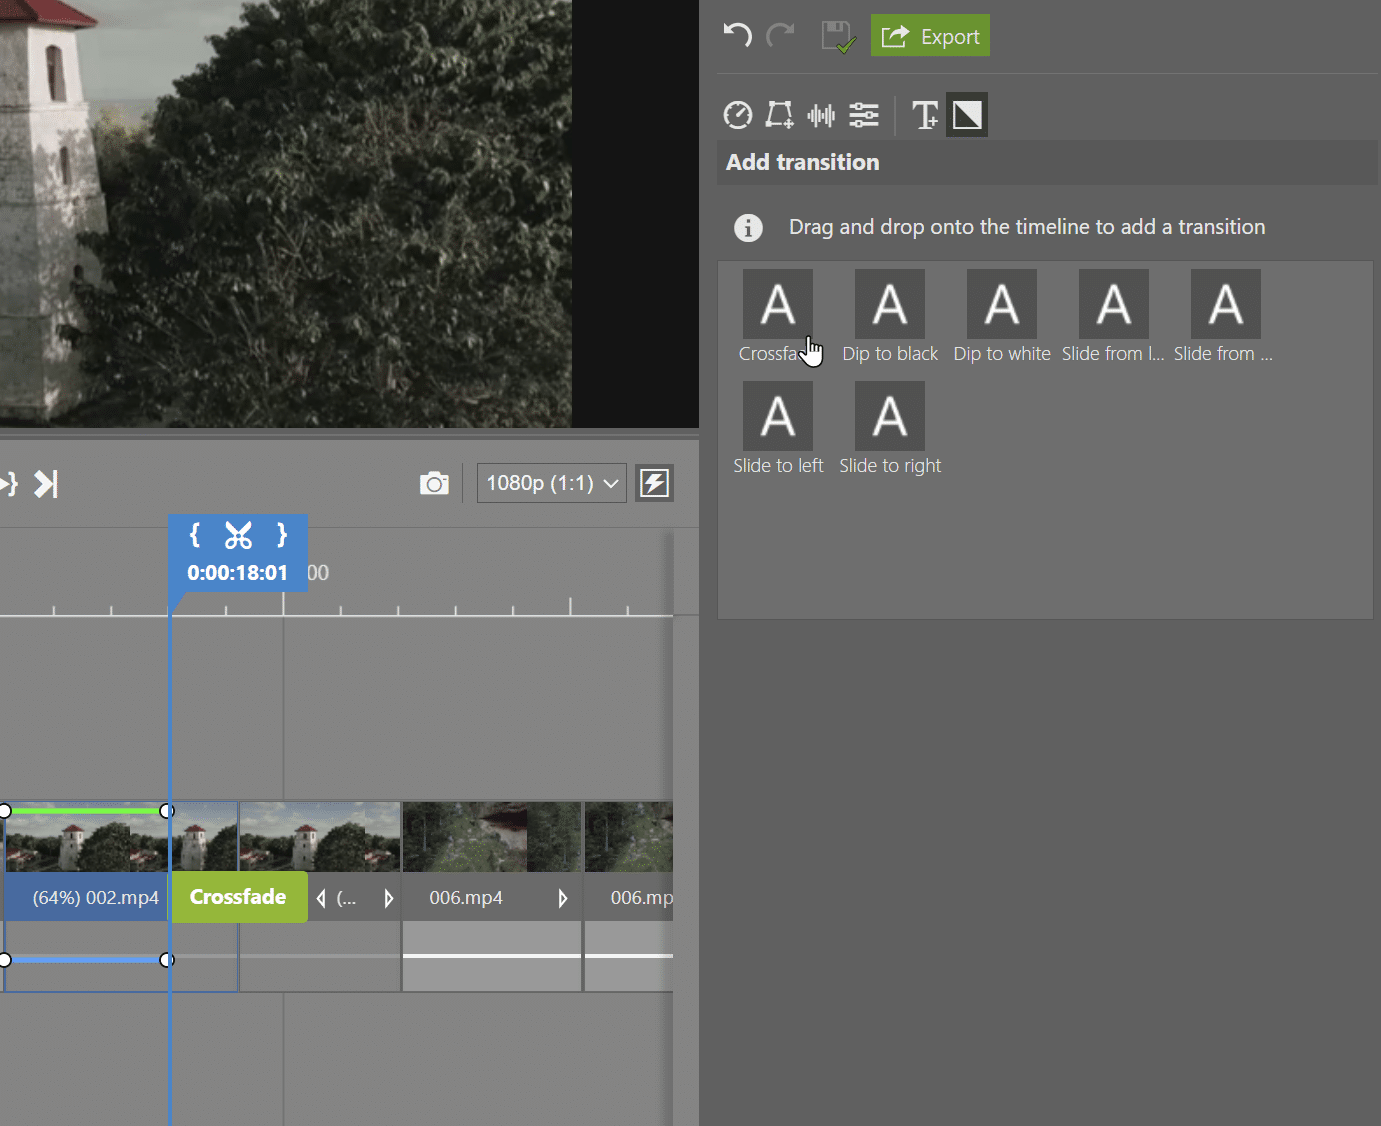
A fast and clean cut is usually your best choice. But some video footage is better shown using creative transitions. You can add these transitions between clips by dragging them from the right panel, just like you would with text. You can change the length of the transition by clicking and dragging from the edge just like you change the length.
You can change the visibility of each clip. A green line will appear at the top of the clip.
Learn | The green line that indicates the clip level is enabled using the arrow next to Add audio track, Snap, and Automatically select clip under playhead.
Use clip levels to manage your clip’s visibility. You can adjust it by double-clicking to add points, as well as changing the levels on both sides. You can also use it to create a smooth fade transition.
You can use this function for audio tracks, marked with a blue line. Control the volume by adding points to the line and then moving them.
Transform clips
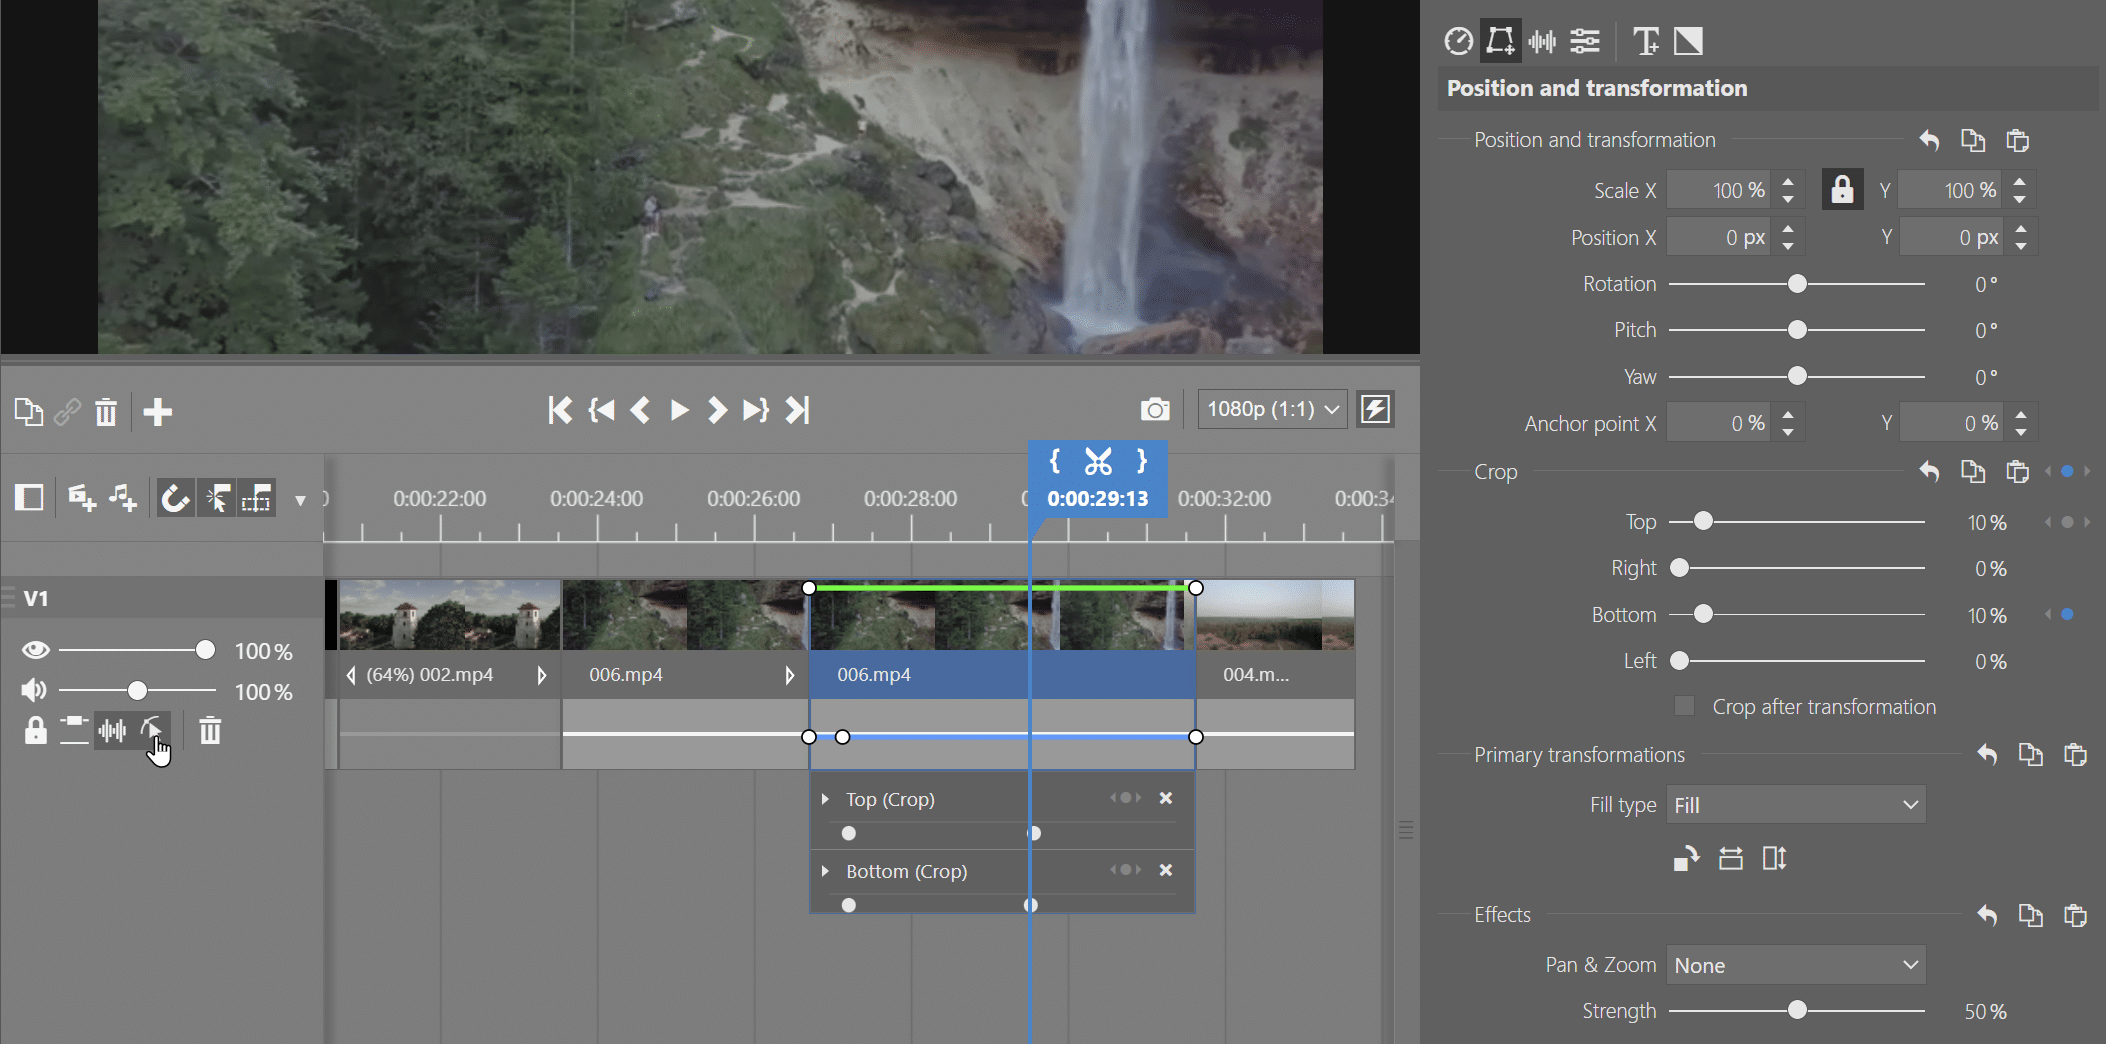
You can find functions similar to those in the Editor module in Position and transformation. You can move clips around the screen, crop, yaw, and more. To transform videos, you want to have the Show Keyframes function enabled. This allows you to accurately time the transformations you are using exactly where you want them in the video.
If your photos or videos don’t have an aspect ratio of 16:9, you will want to use Primary transformations and Fill type where you choose if the video should Fill, Fit, etc. the space.
- Fill is for when you want to use up the space and don’t mind if the image is cropped
- Fit is for when you don’t want to risk your image being incorrectly cropped
Keyframes
Using keyframes opens up possibilities for more advanced video editing. Keyframes allow you to freely set different clip properties at different points in the video. This may sound pretty abstract. But all it means is that, for example, you can place text at the lower left corner and later in the timeline, at the top right corner so it appears as if the text gradually moves from one corner to another.
We’ll demonstrate keyframes using a popular effect where the top and bottom edges of the video gradually narrow, creating a cinematic look. You can do this by clicking the dot icon to the right of each setting which indicates a point on the timeline with that value. Click the dot, adjust the setting, move to a different spot on the timeline, and change the setting. These changes will occur seamlessly.
Control clip speed
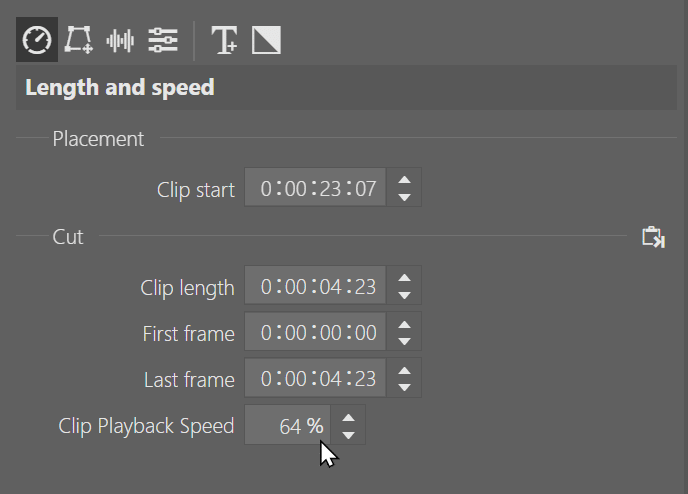
Slow down or speed up video clips by adjusting Clip Playback Speed. You can find this under Length and speed. You can also find the option to cut, which may seem redundant if you already do this on the timeline. For example, you can adjust the length of clips at the same time if they are all selected. That means that with even hundreds of photos on the timeline, it’s not a problem to shorten or lengthen their duration simultaneously.
If you are not finished yet, but need to step away from the project, your video in progress is automatically saved. Next time it is opened, you can pick up where you left off.
If you’re all done, press the Export button and save the final version of the video.
Don’t be afraid to take and edit videos!
Let’s face it, even if you are mainly a photographer, knowing how to edit a simple video is a useful skill to have.
Download Zoner Studio free for 7 days and start editing your first video today!
There are no comments yet.