Learn How to Shoot Products on a Tabletop
You don’t need to rent a studio, look for a big room, or own expensive equipment. You can work your way into product photography by photographing small objects. It will also give you a chance to practice your work with light. You just need a few common props that you probably already own.
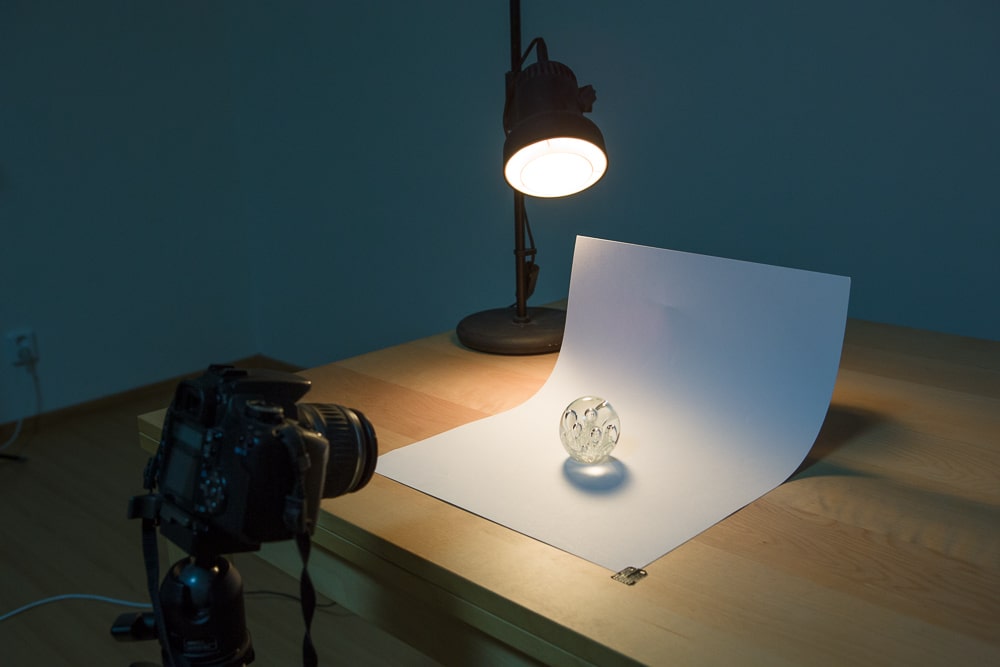
There’s more to photography than just people and landscapes. Many ideas can be implemented on an ordinary table. No, they’re not macro—they’re less tricky than that. The minimum you need to improvise a mini-studio is just a sheet of paper, a small lamp, and a camera with a tripod. And something to photograph. In the process, you’ll get to refresh your knowledge of the basic principles for work with light in photography.
Canon 350D, Canon EF-S 18-55/3.5-5.6, 1/25 s, F5.6, ISO 100, focus 41 mm
Paper Is Your Background
Let’s start with the paper. It will serve as your background. The bigger the sheet, the better. Larger sheets let you work with a bigger scene or use a shorter focal length (and thus wider scenes). An A3 sheet, or even the Legal size used in the US, is enough for small objects singly or in small groups, but for larger objects, you need a larger sheet.
The paper is bent so that no folds are visible anywhere, and so looking at the photo, you can’t see where the “floor” ends and the “wall” begins. That gives us a visually-endless background. Weight the paper or temporarily tape it to the table.
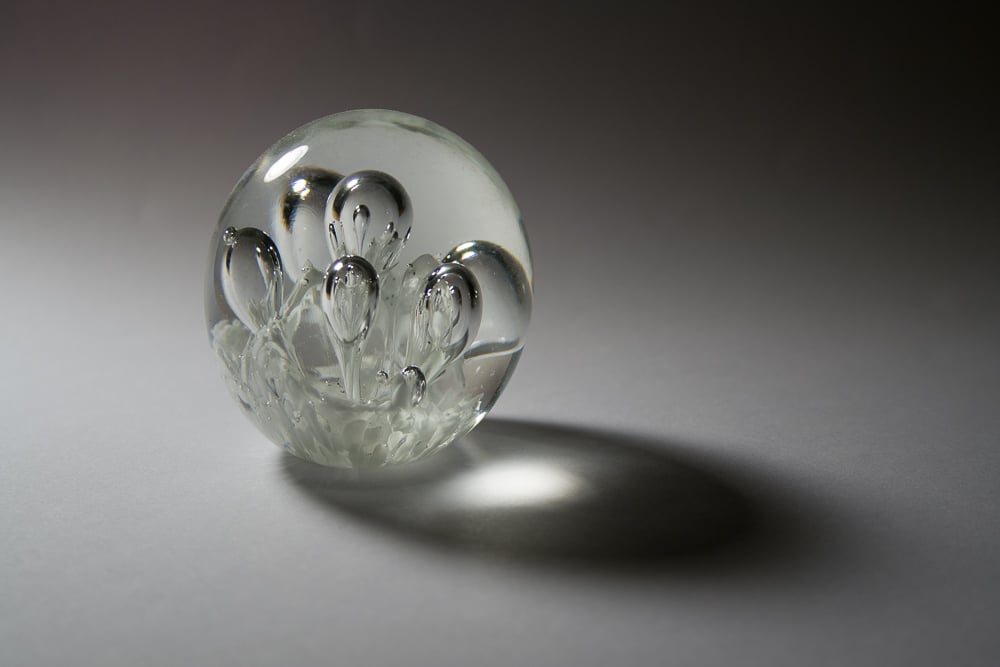
Canon 350D, Canon EF-S 18-55/3.5-5.6, 1/15 s, F8.0, ISO 100, focus 33 mm
Even though I used a white sheet here, the sky’s the limit—use any color you need. Black will let you create very dramatic scenes, while colored backgrounds feel happier.
Which Light Source to Use
There’s a wide range of options here. Don’t be afraid to use any source you have at hand, no matter if it’s a remotely-fired flash, a desk lamp, a bike light, or a keyring penlight. It’s all usable!
The only problem with weak lights is that you need darkness around them for their effects to be visible. (This is true even for desk lamps.) If you’re reading this article just after it was published, you’re in luck—long winter evenings are ideal here.
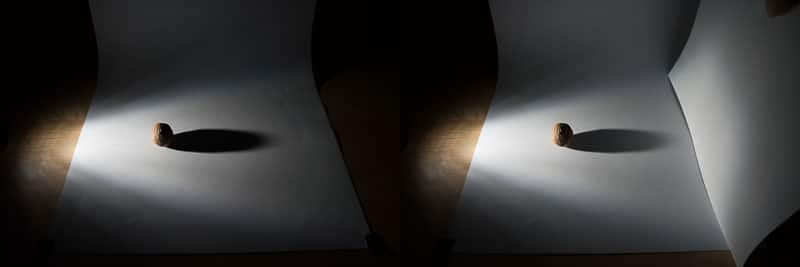
Lights have other properties to work with besides their strength. And if they don’t fit the job, you just use another light. While desk lamps generate their light over a large surface, producing soft shadows, handheld lamps tend more to be point light sources that produce very hard shadows.
But it’s easy to convert one into the other. To get harder shadows from a lamp, place it farther from the subject. Meanwhile to turn a point light into an area light, just put a sheet of paper in front of it, diffusing the light. This does shade the light, too, but you can solve that using just a tripod and a longer exposure.
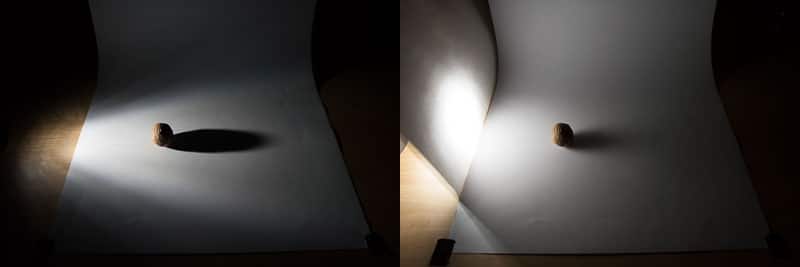
In the right-hand picture above, you can see how the light fades quickly with distance. To prevent this, move the lamp or the paper away from the scene—darkening it even further, but making this fading much more gradual.
The Equipment List
Just a tripod. Short, isn’t it? There are two reasons why I keep stressing the use of a tripod. The first was mentioned just above—with weak lights you need long exposures so that the camera can capture the scene clearly enough.
The second reason is reproducibility. When photographing objects, you generally will be fine-tuning their position, light placement, and other factors in the scene until everything is to your liking. That generally includes taking a picture, double-checking it, and shortly afterwards taking others that are gradually better than that first one. You can even inspect the pictures on your computer immediately if the camera is connected to it (either via cable or wirelessly via camera wi-fi, Eye-Fi SD cards, etc.).
You’ll practically always use your camera’s manual mode, to give you 100% control of everything. It’s also useful to set a specific white balance, so that the camera doesn’t re-guess the white hue on each shot, since that can leave you with different colors in each picture.
If your mini-studio is extremely mini, then aim towards the longer focal lengths, so that the boundary between the background and the rest of the room does not jump out at the viewer. But sometimes a lens’s minimum focal length gets in the way here. Then you need to use the best lens that you have in this regard.
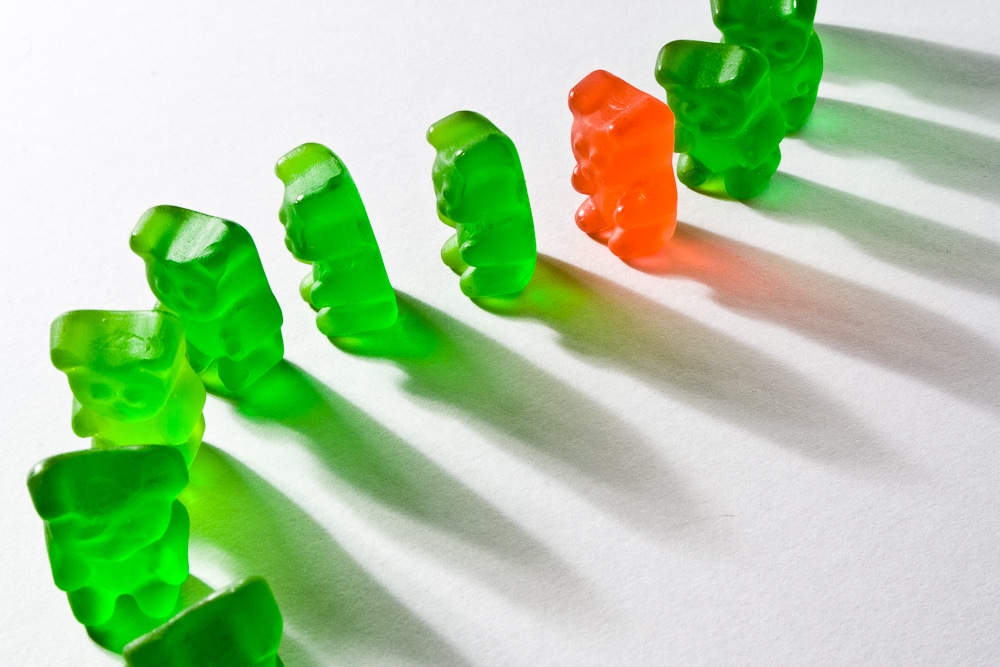
Because you’re photographing small objects, you can expect a small depth of focus. This can be used to benefit a picture, but if you need everything to be in focus, then you need a very tight aperture. However, if you have a good tripod, this should be no problem.
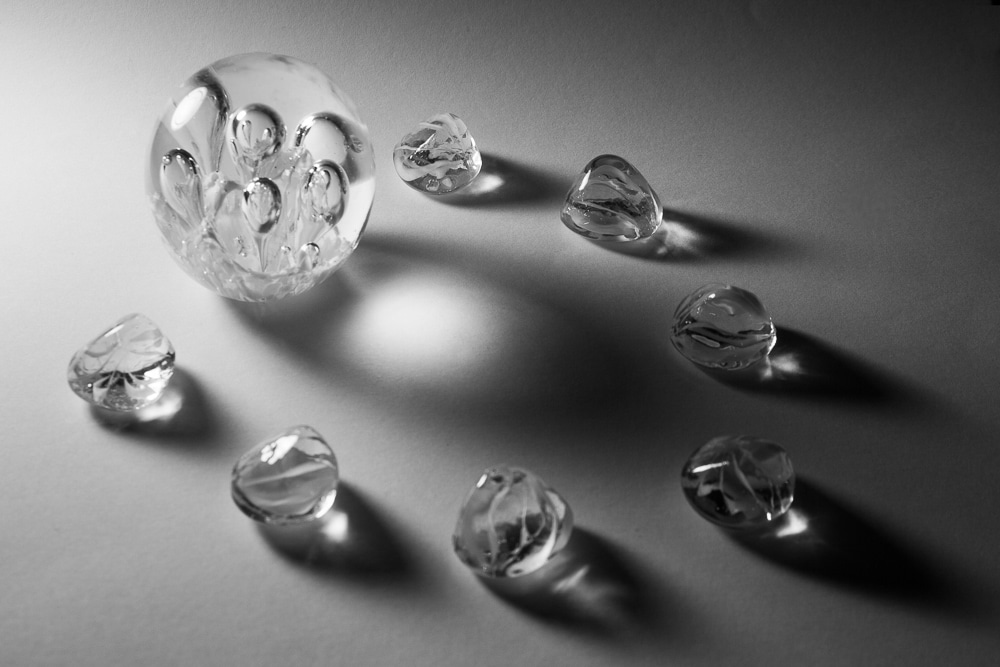
Canon 350D, Canon EF-S 18-55/3.5-5.6, 1/5 s, F5.6, ISO 100, focus 42 mm
Tips and Tricks
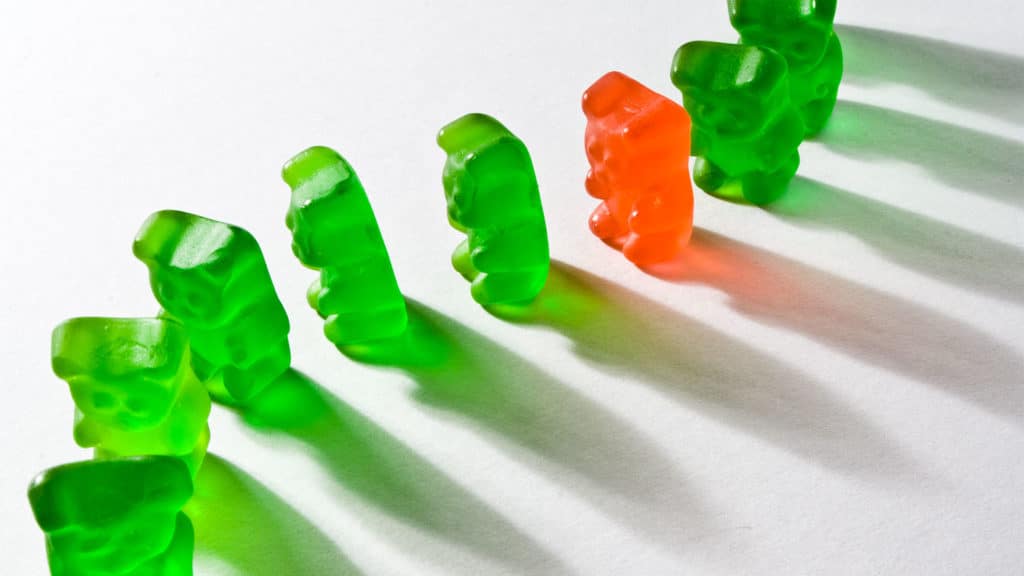
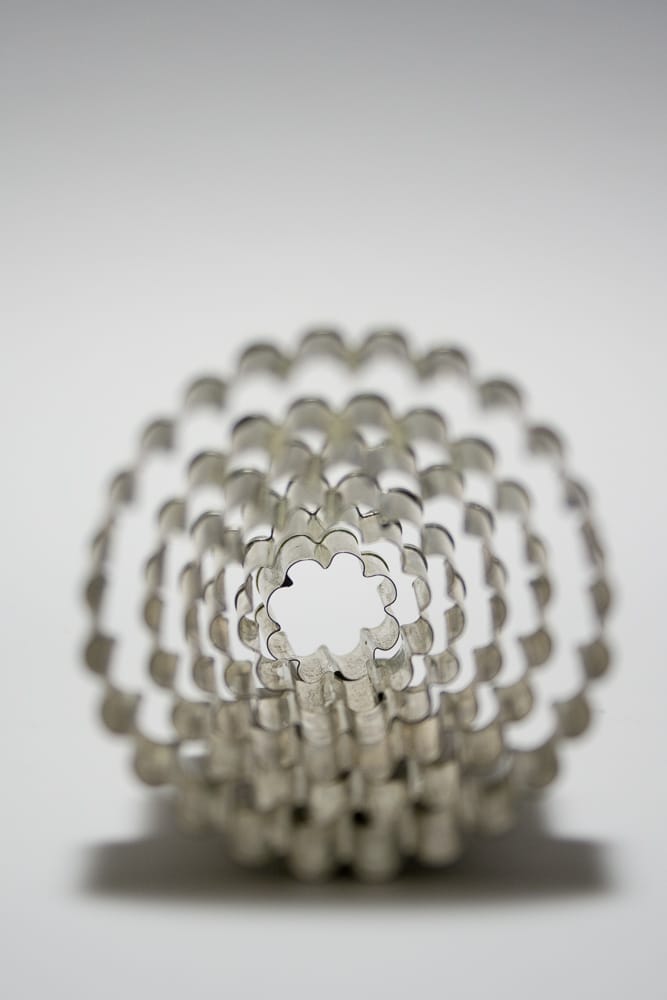
Keep in mind that even when you’re photographing objects, the rules of composition still apply. For example in the following picture, you can see a golden ratio, a diagonal line, and repeating elements with a broken rhythm.
Canon 350D, Canon EF-S 18-55/3.5-5.6, 2.0 s, F29, ISO 100, focus 54 mm
There’s much more that you can do with light beyond what we’ve shown above. If it shines on a place where you don’t want it, you can always partially shade it with cardboard, a pile of books, or practically anything.
You can also recolor the light with e.g. colored plastic film, but watch out—lights can be hot, and then the plastic can end up melting or sticking to the bulb. Leave some space.
For some scenes you can also use multiple light sources. But remember that even though they seem the same, not all lights have the same whites, and so when using multiple light sources, it sometimes won’t be possible to get correct white balance. If the difference is too visible, then the only solution will be to convert the resulting picture to grayscale.
Even if you only have one light source, you can still have two. To create a second, weaker and more diffuse source, place a piece of white paper in the scene. This will reflect the original light, helping to brighten otherwise-dark shadows. It’s a sort of little brother to the photographer’s classic reflector sheet.
Don’t Be Afraid to Experiment
The above just covers the basic possibilities. There’s nothing stopping you from trying out much more and doing various experiments.
In the next article of this series, we’ll take a closer look at product photography and cover how it all works with more equipment, as well as typical solutions to the problems awaiting product photographers.
Parthography
Simple and effective article..
Zoner
Thank you. :)