Learn the Basics of Layers
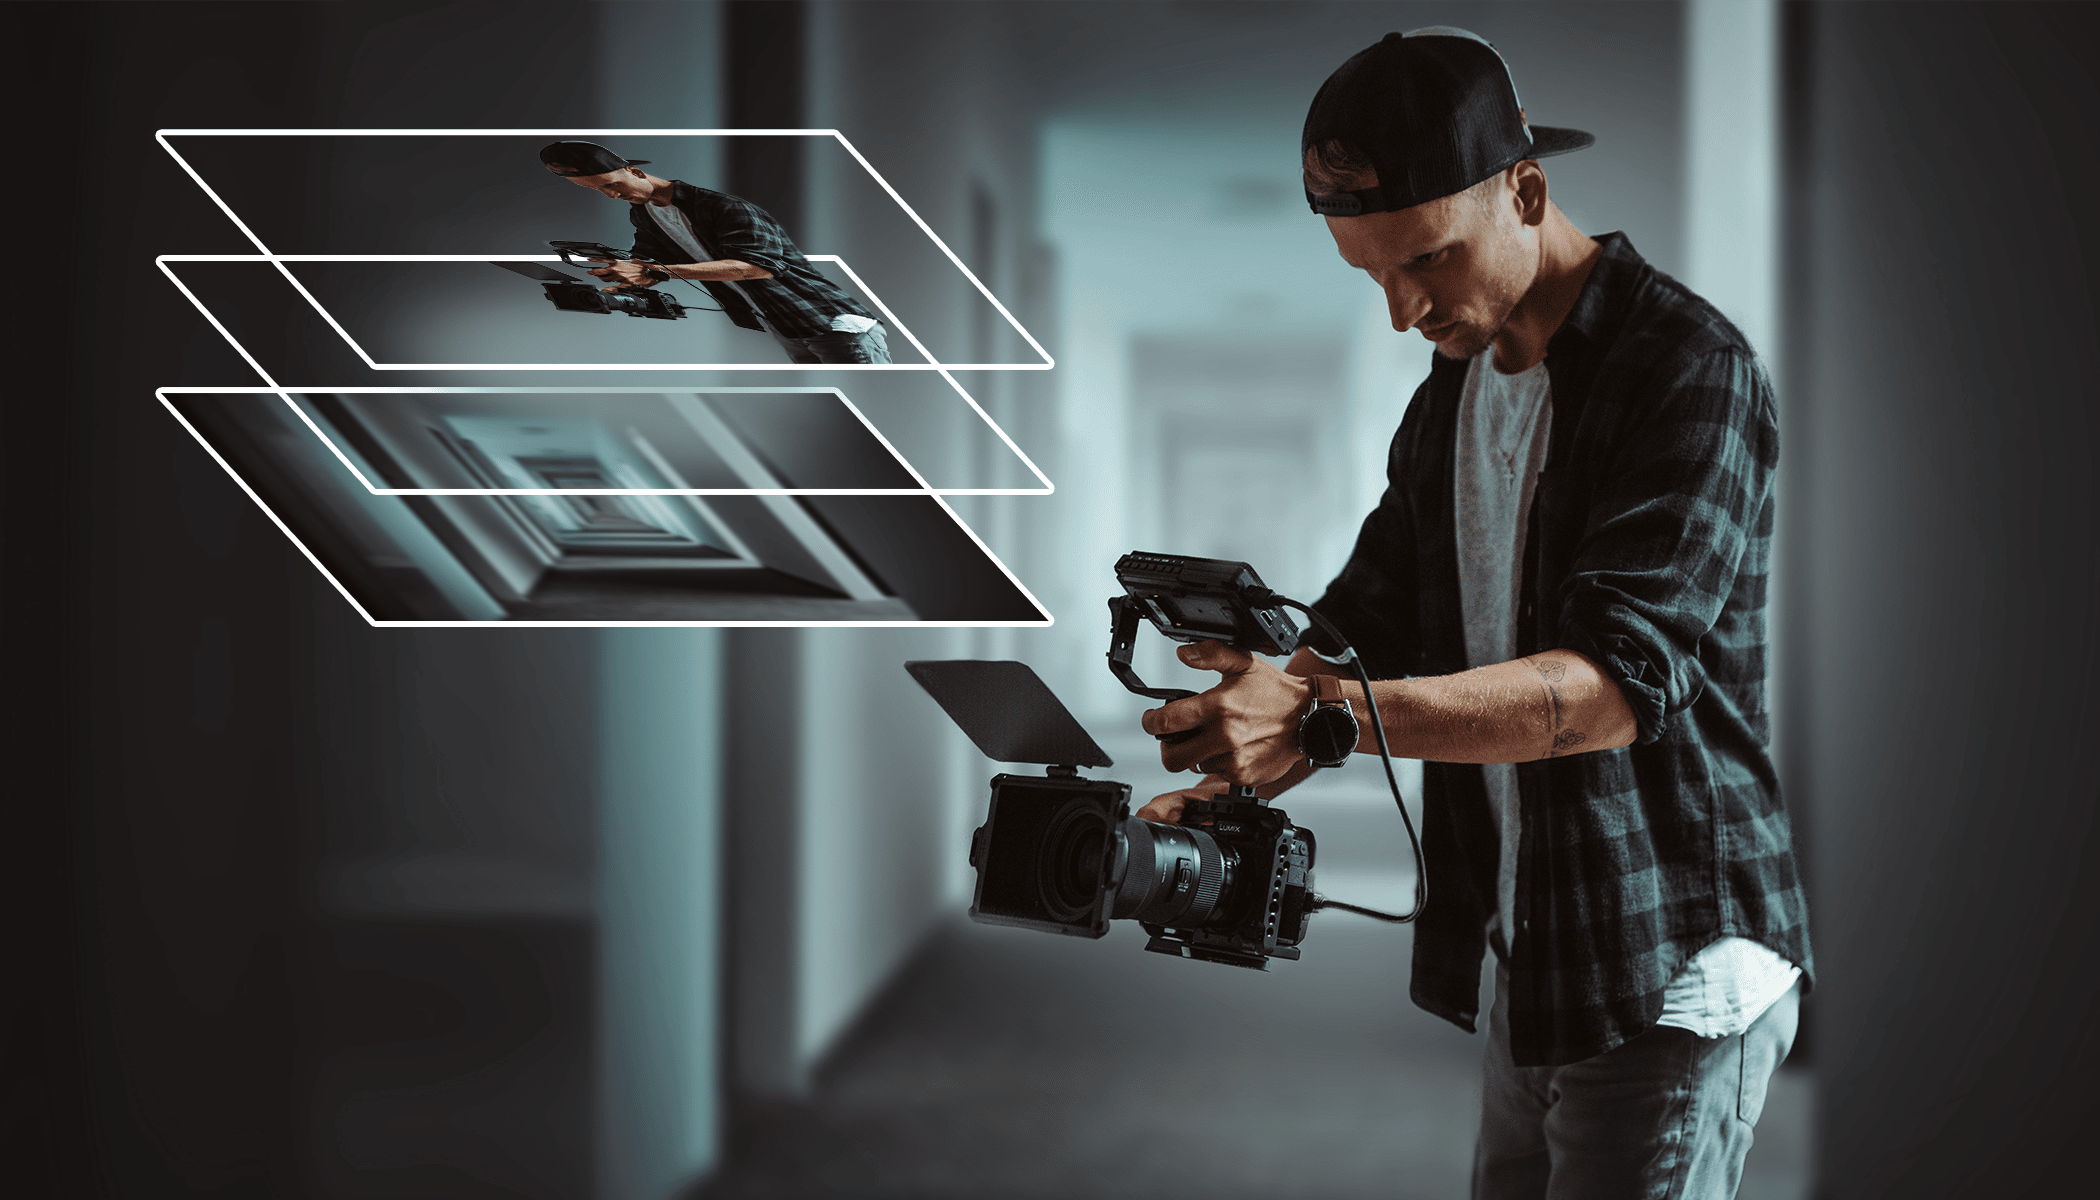
Stack different pictures together or try different photo editing tricks risk-free. These are a few examples of how layers in Zoner Studio can help you. See how to work with layers and try our suggestions for everyday photo editing.
Zoner Studio makes working with multiple layers easy. Layers can be edited as you wish and they remain accessible and independent of one another, even when accessed at a later time.
The many uses of layers
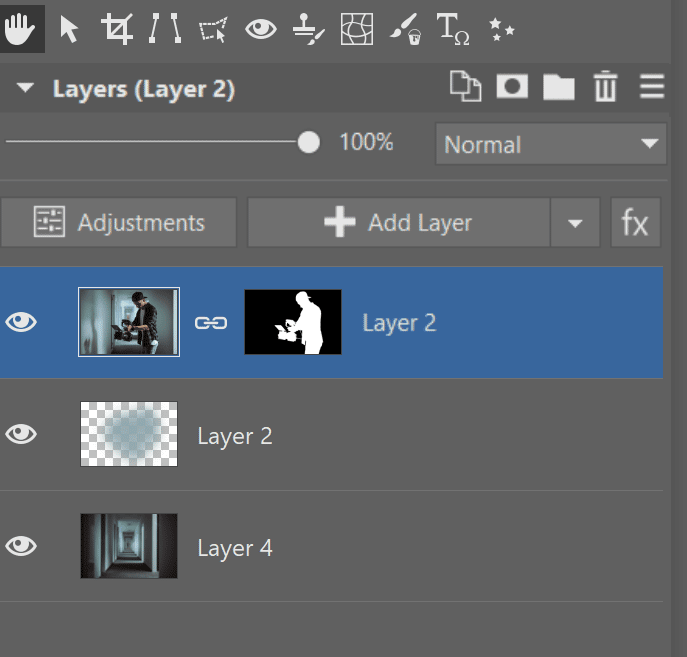
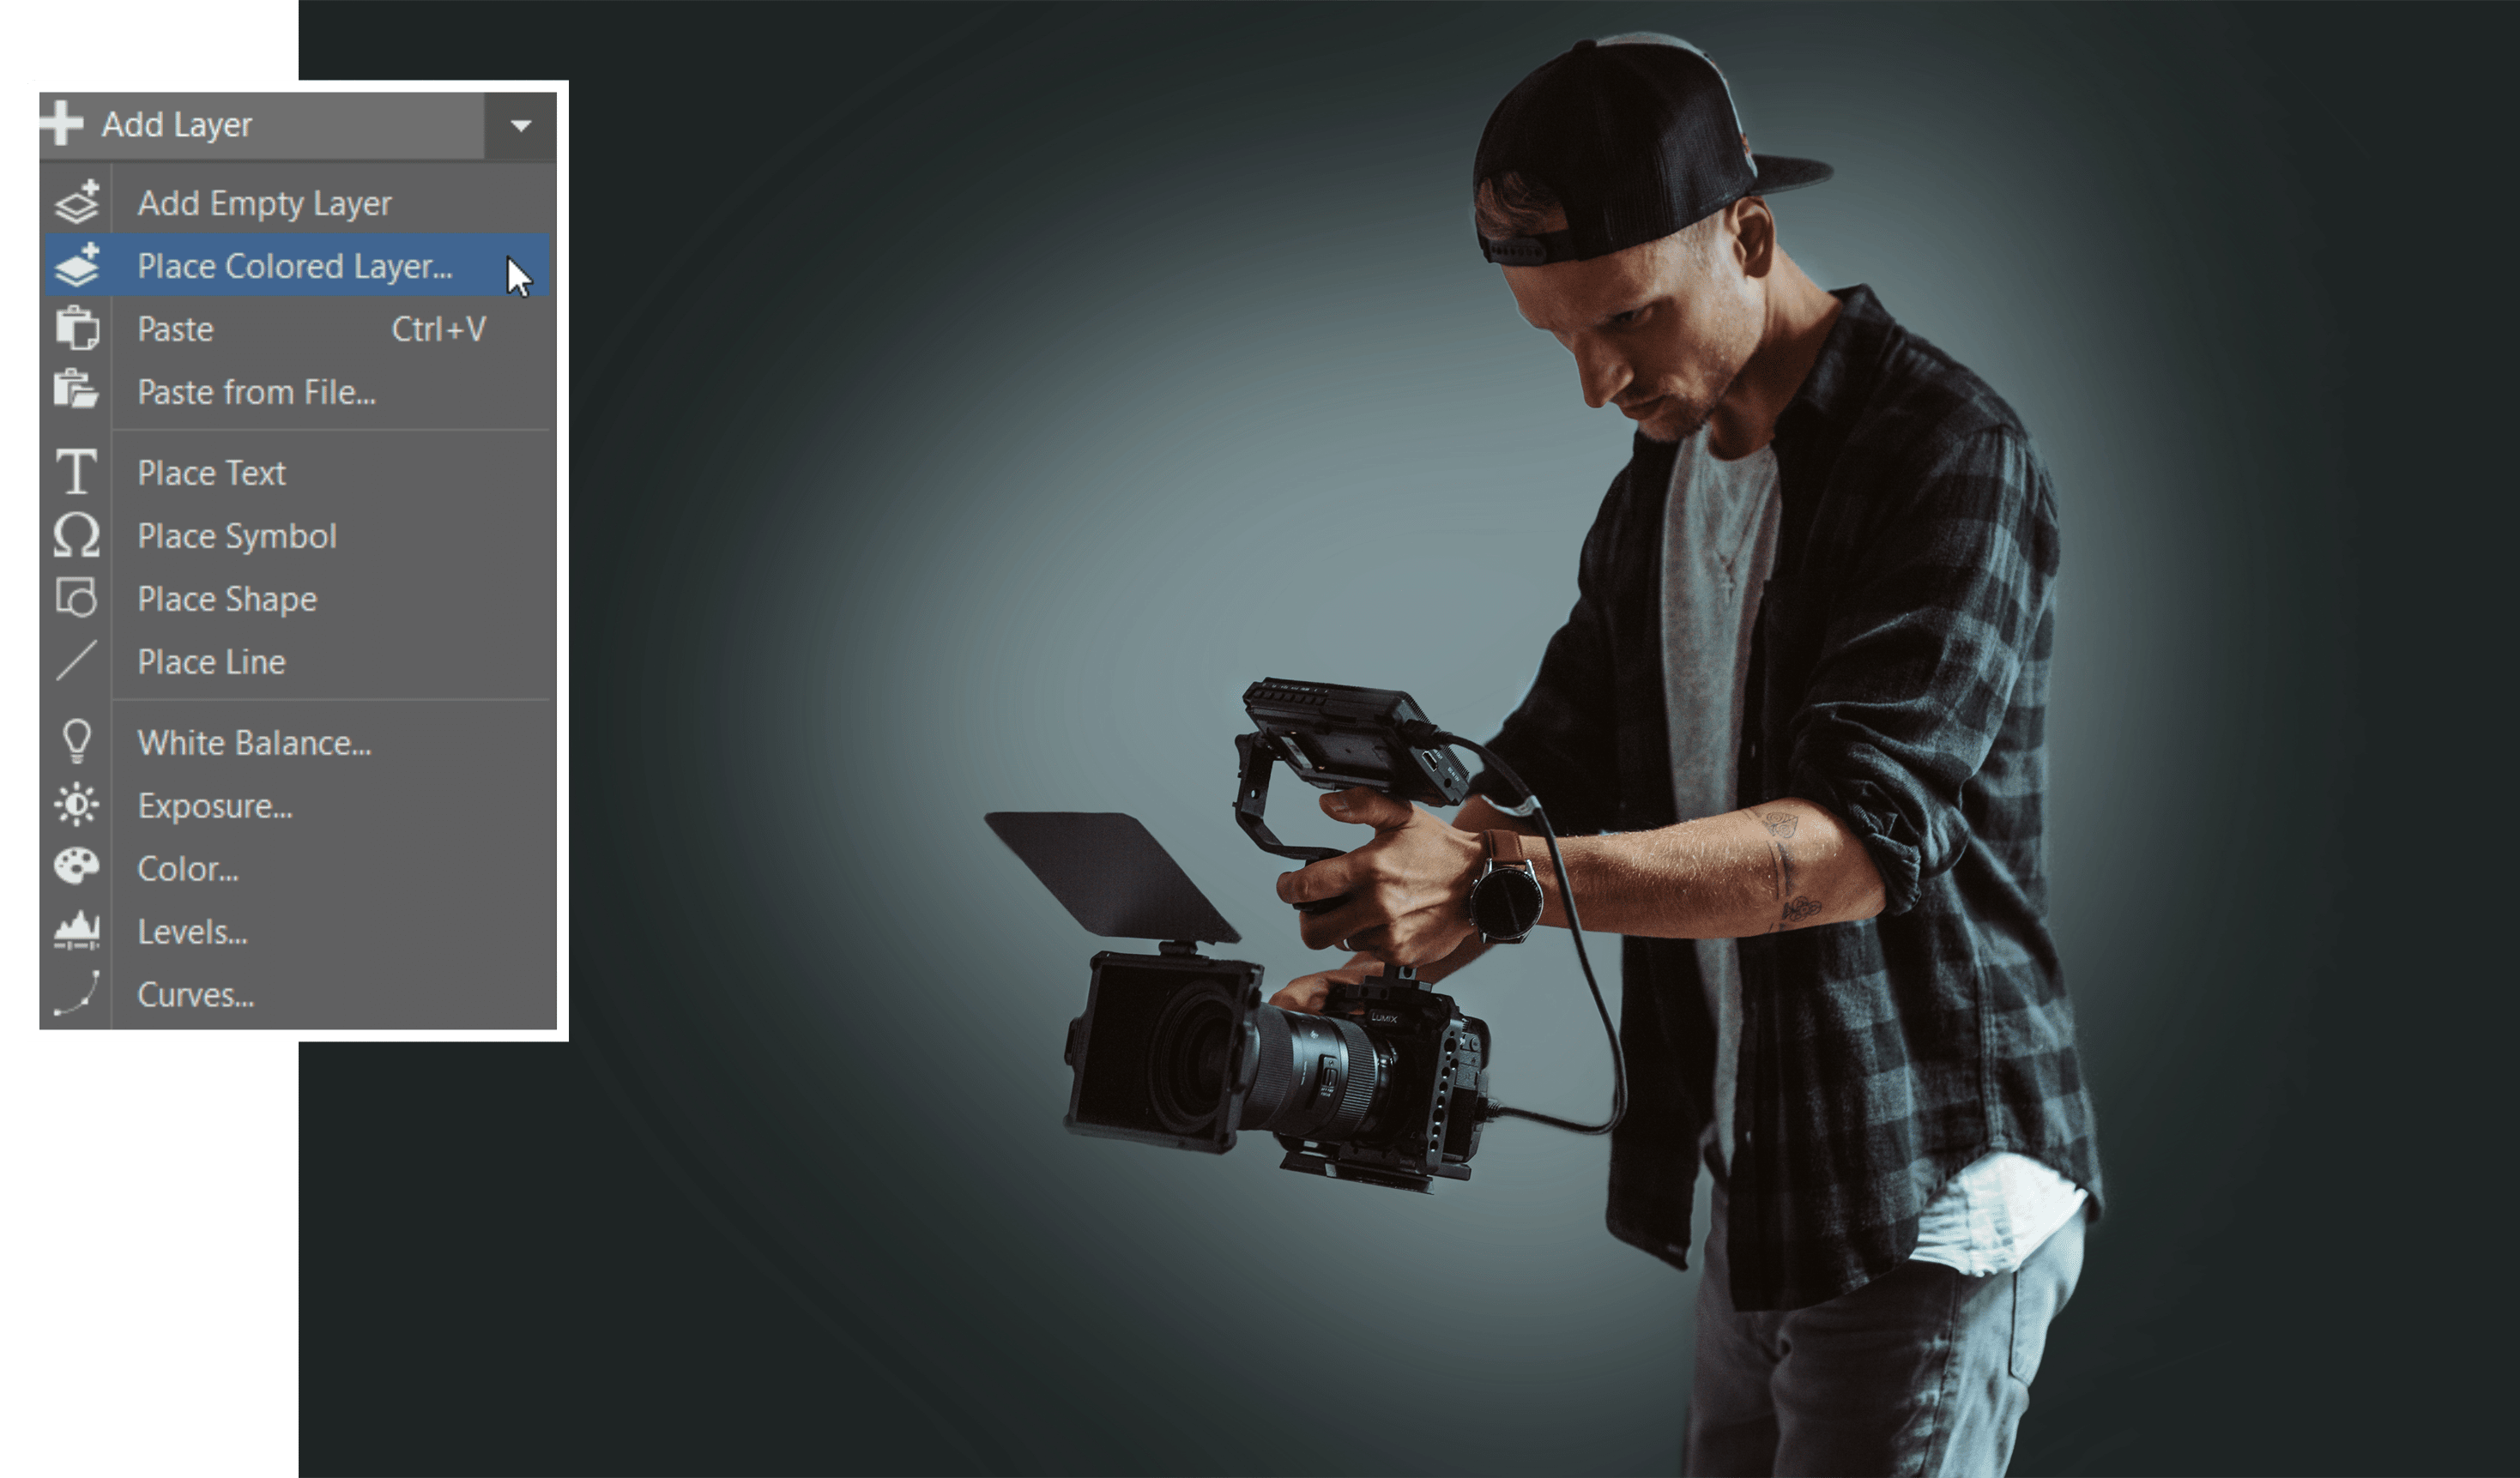
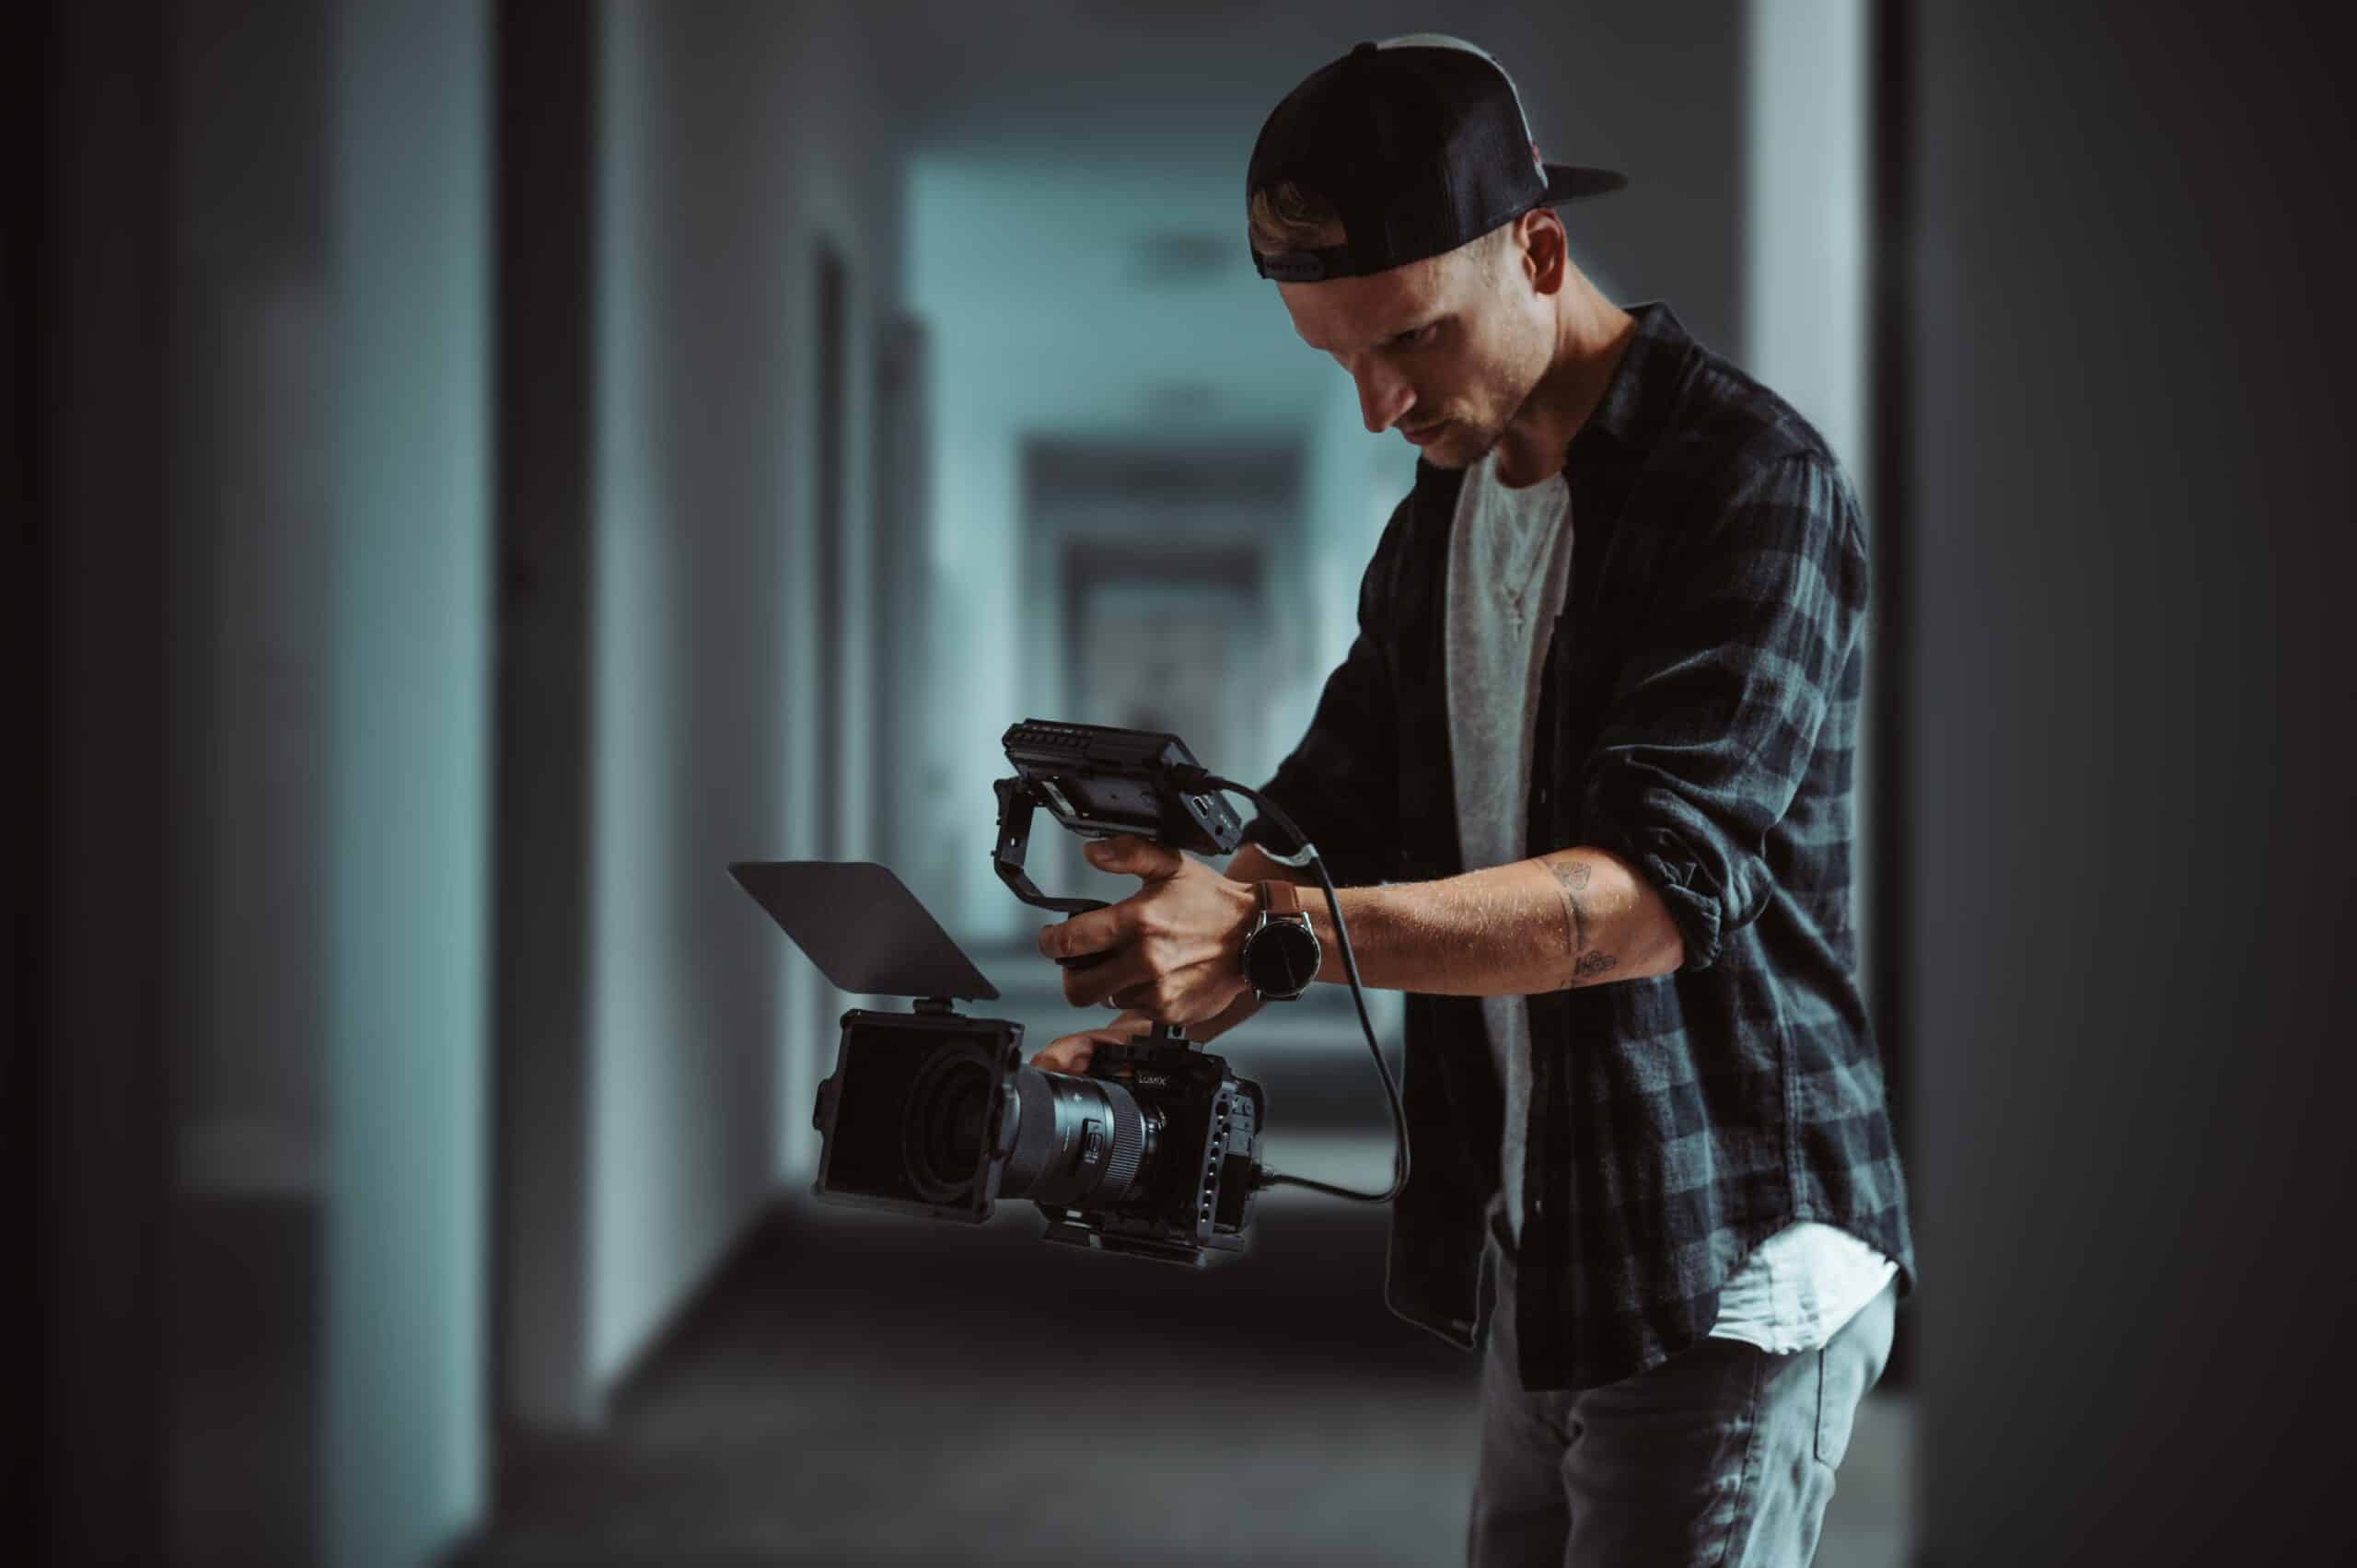
A common editing operation is stacking images. Each element of the image is its own layer. For instance, a landscape in the background, a new sky in another layer, a newly-added castle on a hill in another layer. Or, as in the following example: subject, fog, background, each in their own separate layer.

You can also use layers when working with a single photo without adding extra elements. Layers come in handy for editing because they offer the option to undo changes and allow various color or brightness adjustments.
Another popular use for layers is for graphic design, including making posters, holiday greeting cards, or invitations.
Basic operations with layers
The most common functions are found in the Layers settings group in the right side panel of the Editor module. Separate layers are stacked on top of one another.
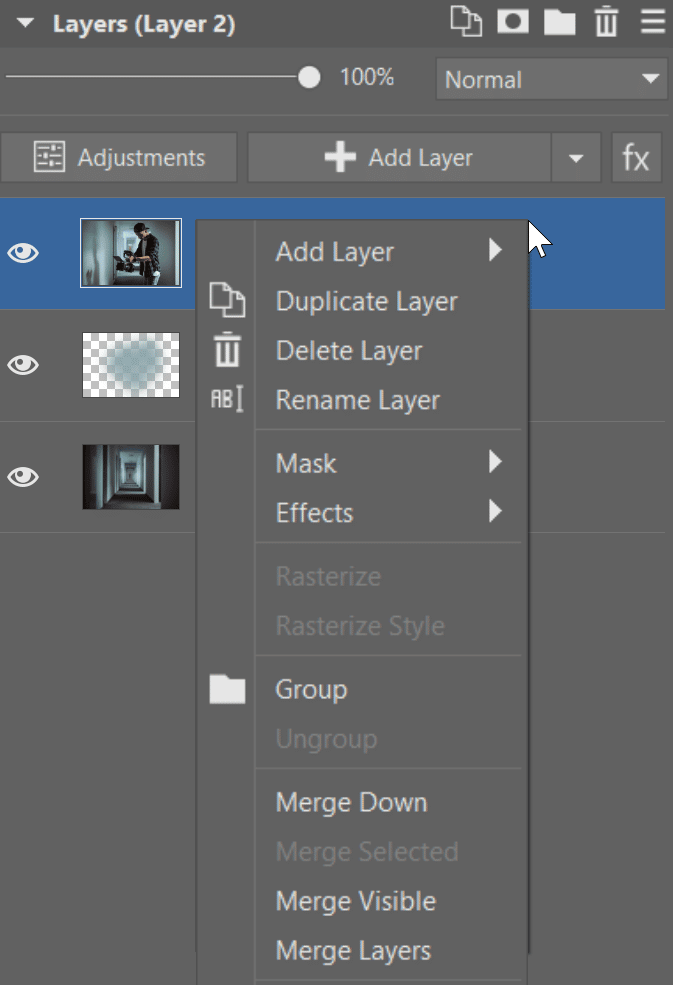
After right clicking the layer or using the Add Layer button, you can do the following:
- Add a new layer over the currently selected one. The new layer can be empty or pasted from a file, or it can include text or symbols (more about that later).
- Delete Layer when you no longer need it.
- Duplicate Layer, especially if you are going to try different color adjustments and don’t know if you will like them.
- Rename Layer to keep your list of layers organized. Instead of “Layer 1, 2, 3, …” you can have “Background” or “Title.” You can also rename a layer by double clicking its name.
When working with multiple layers, their order is very important – the top layers cover those below them. The order can be easily changed by dragging and dropping: click and hold the layer and drag it to where you want it.
Each layer can be set to visible or hidden. Set them by clicking the eye icon next to the picture of the layer.
To reduce the number of layers without needing to delete any, there are the Merge Down (merges the current layer with the layer below it), Merge Visible, or Merge Layers functions. The last two functions merge everything on the screen into a single layer. They differ in that Merge Visible leaves the layers that were hidden for further editing, whereas Merge Layers removes them completely.
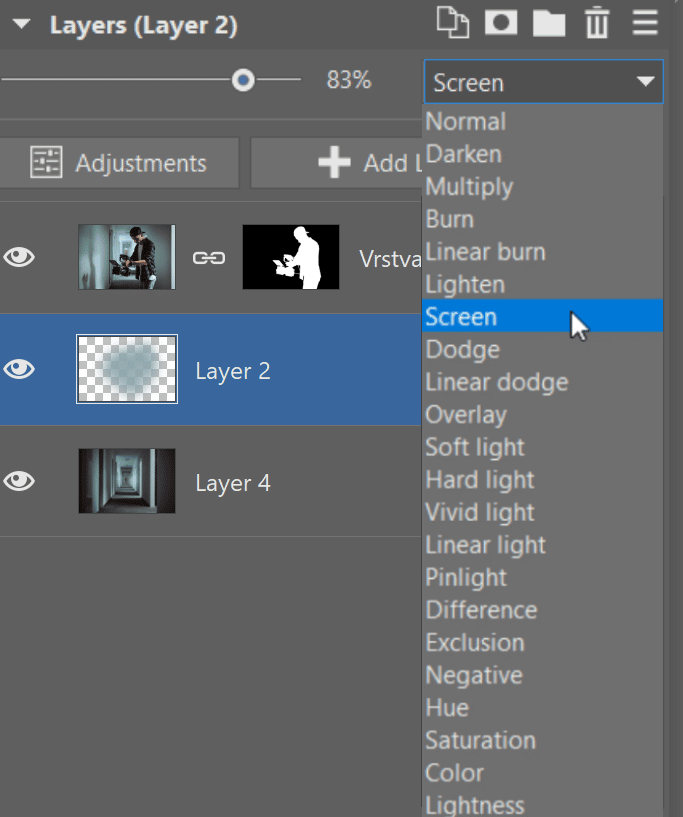
Each layer can have its transparency changed with the Layer Opacity slider. You can also set the way the color of the layers below is changed, depending on the specific Layer Blending Mode. There are so many options that we’ve written an entire article dedicated to the topic of blending modes.
Types of layers
In addition to standard image layers, you can use the Editor module to work with layers of text, objects, or symbols.
These layers can be added using the Add Layer drop-down menu.
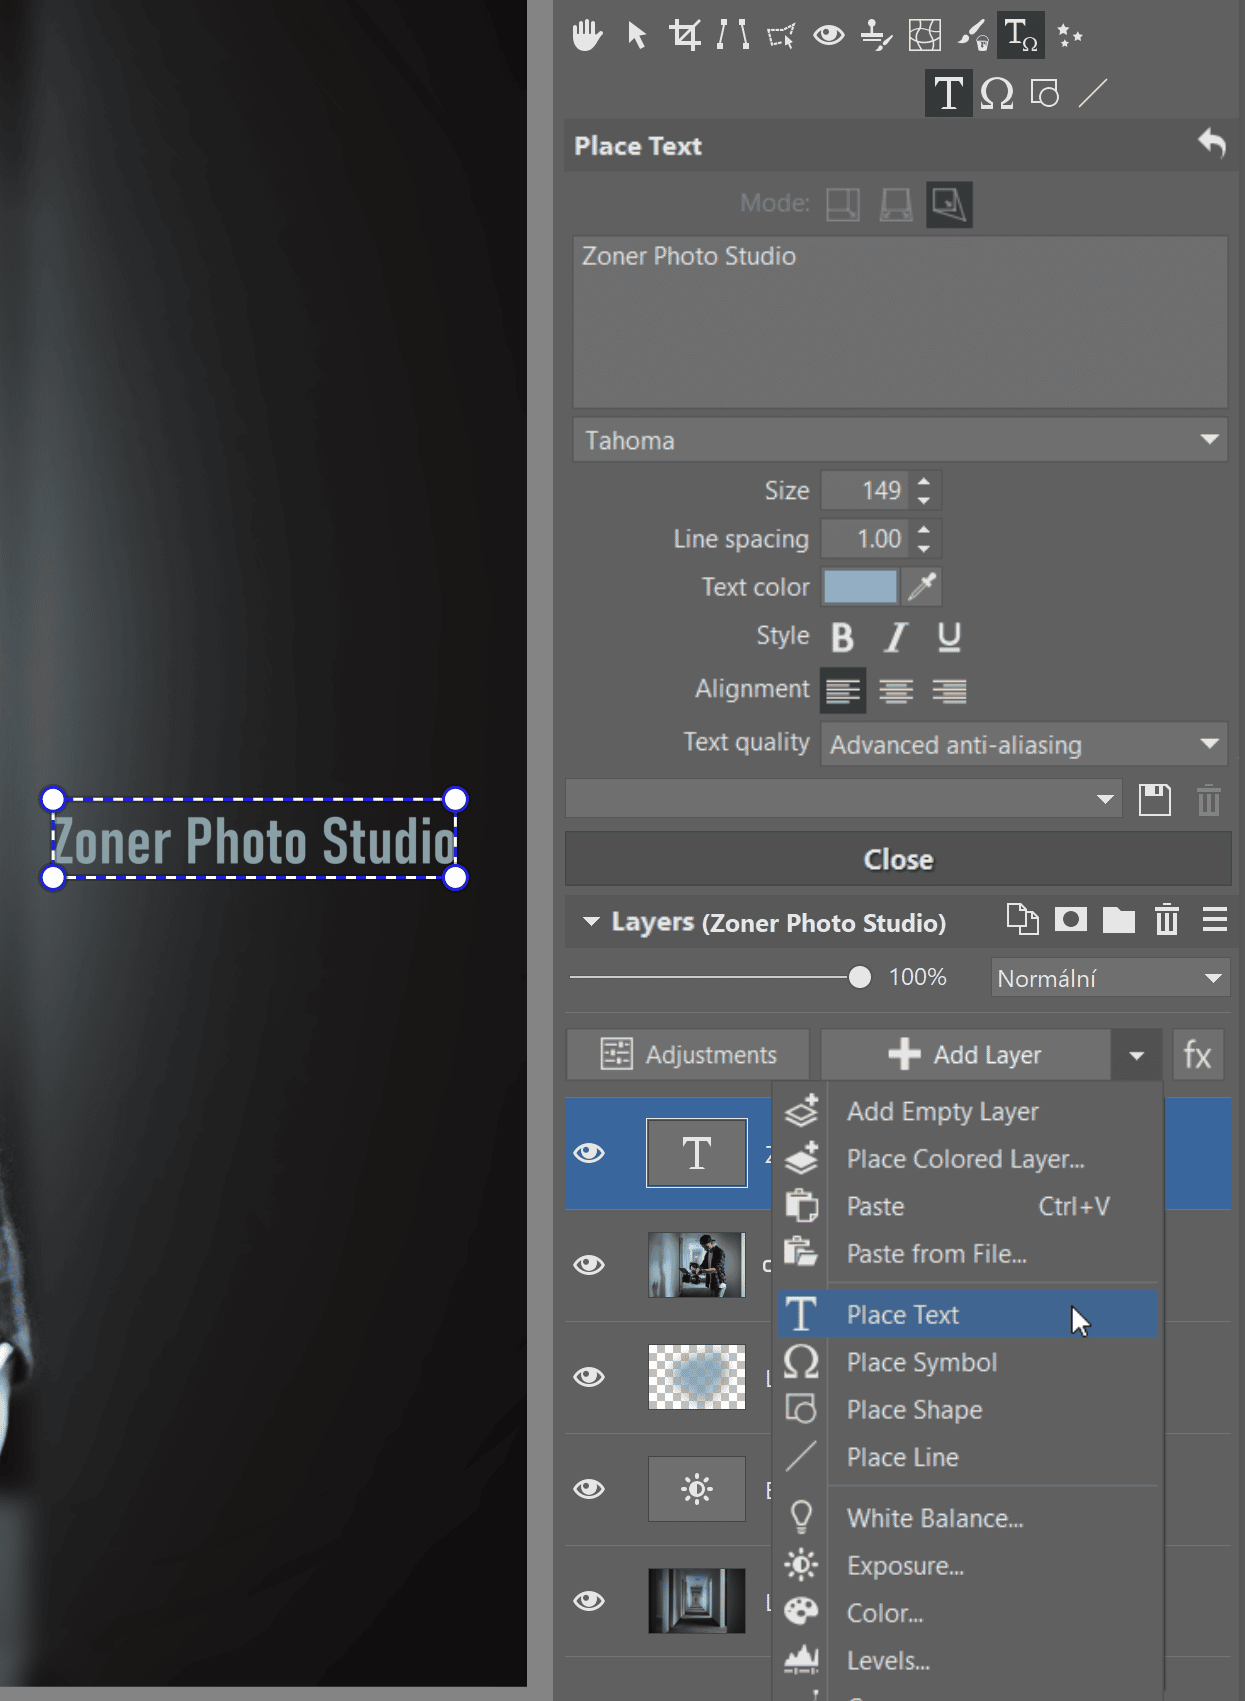
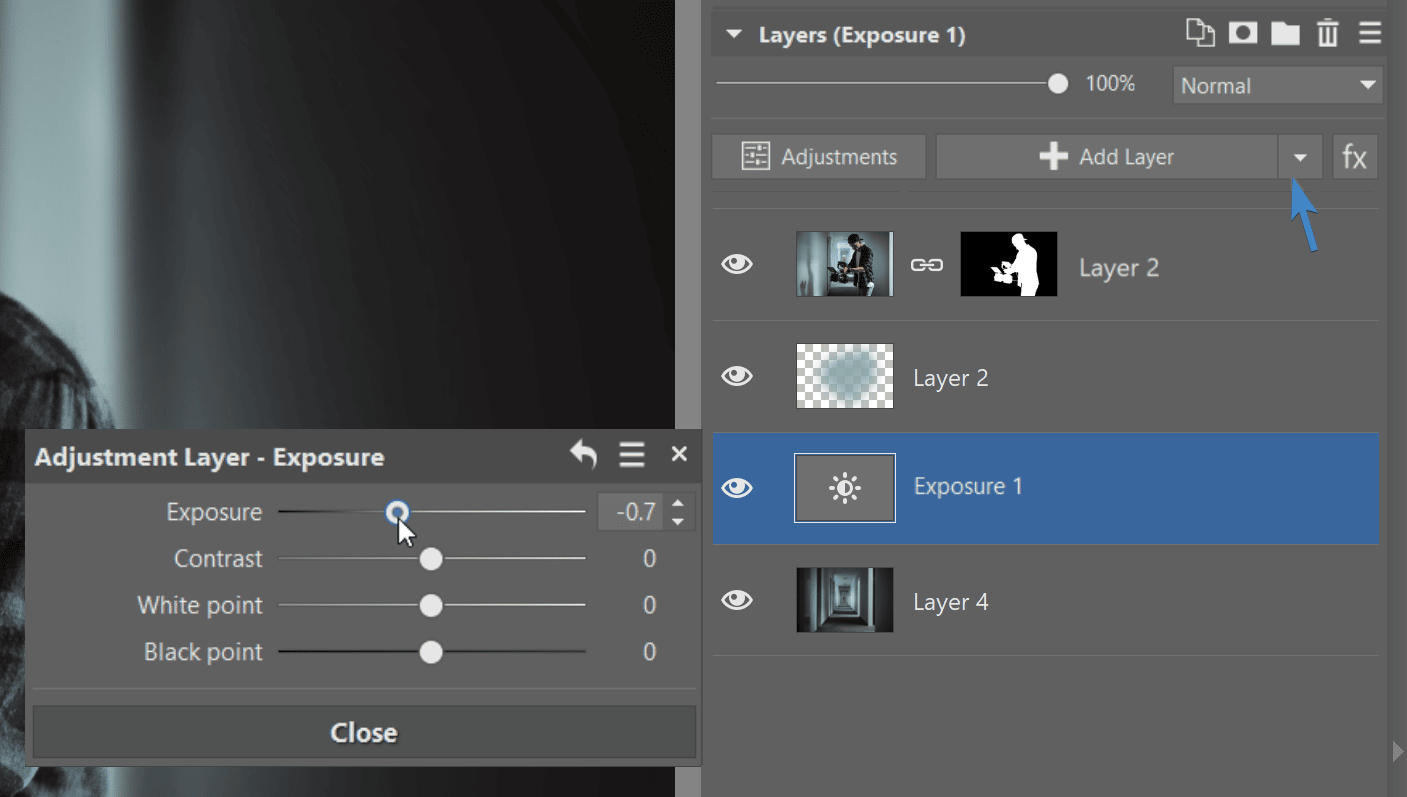
Another type of layer is Adjustment Layers. These work in the same way as basic adjustments, except they are part of a separate layer and impact all layers below it. They are useful, for example, if you want to darken everything below the main subject.
Masking
Masking layers is a key function for advanced editing. You can add a mask to each layer to determine which area of the mask should be visible, semi-transparent, or completely hidden.
TIP: We’ve written an entire article dedicated to masks: My First Mask: Your Guide to Layer Masks in Zoner Studio.
In other words, the layer itself remains completely intact. You just make it temporarily transparent in certain areas.
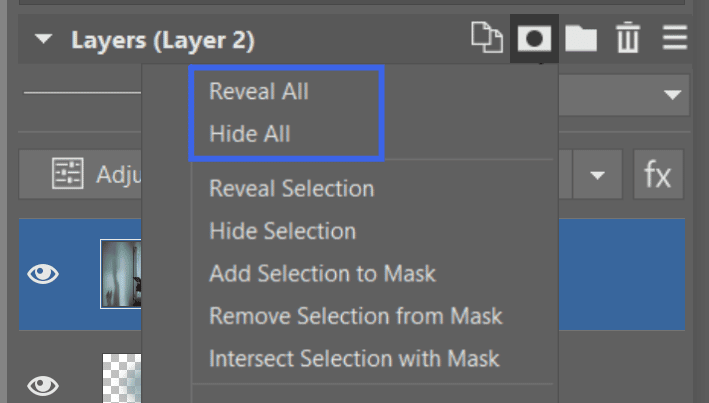
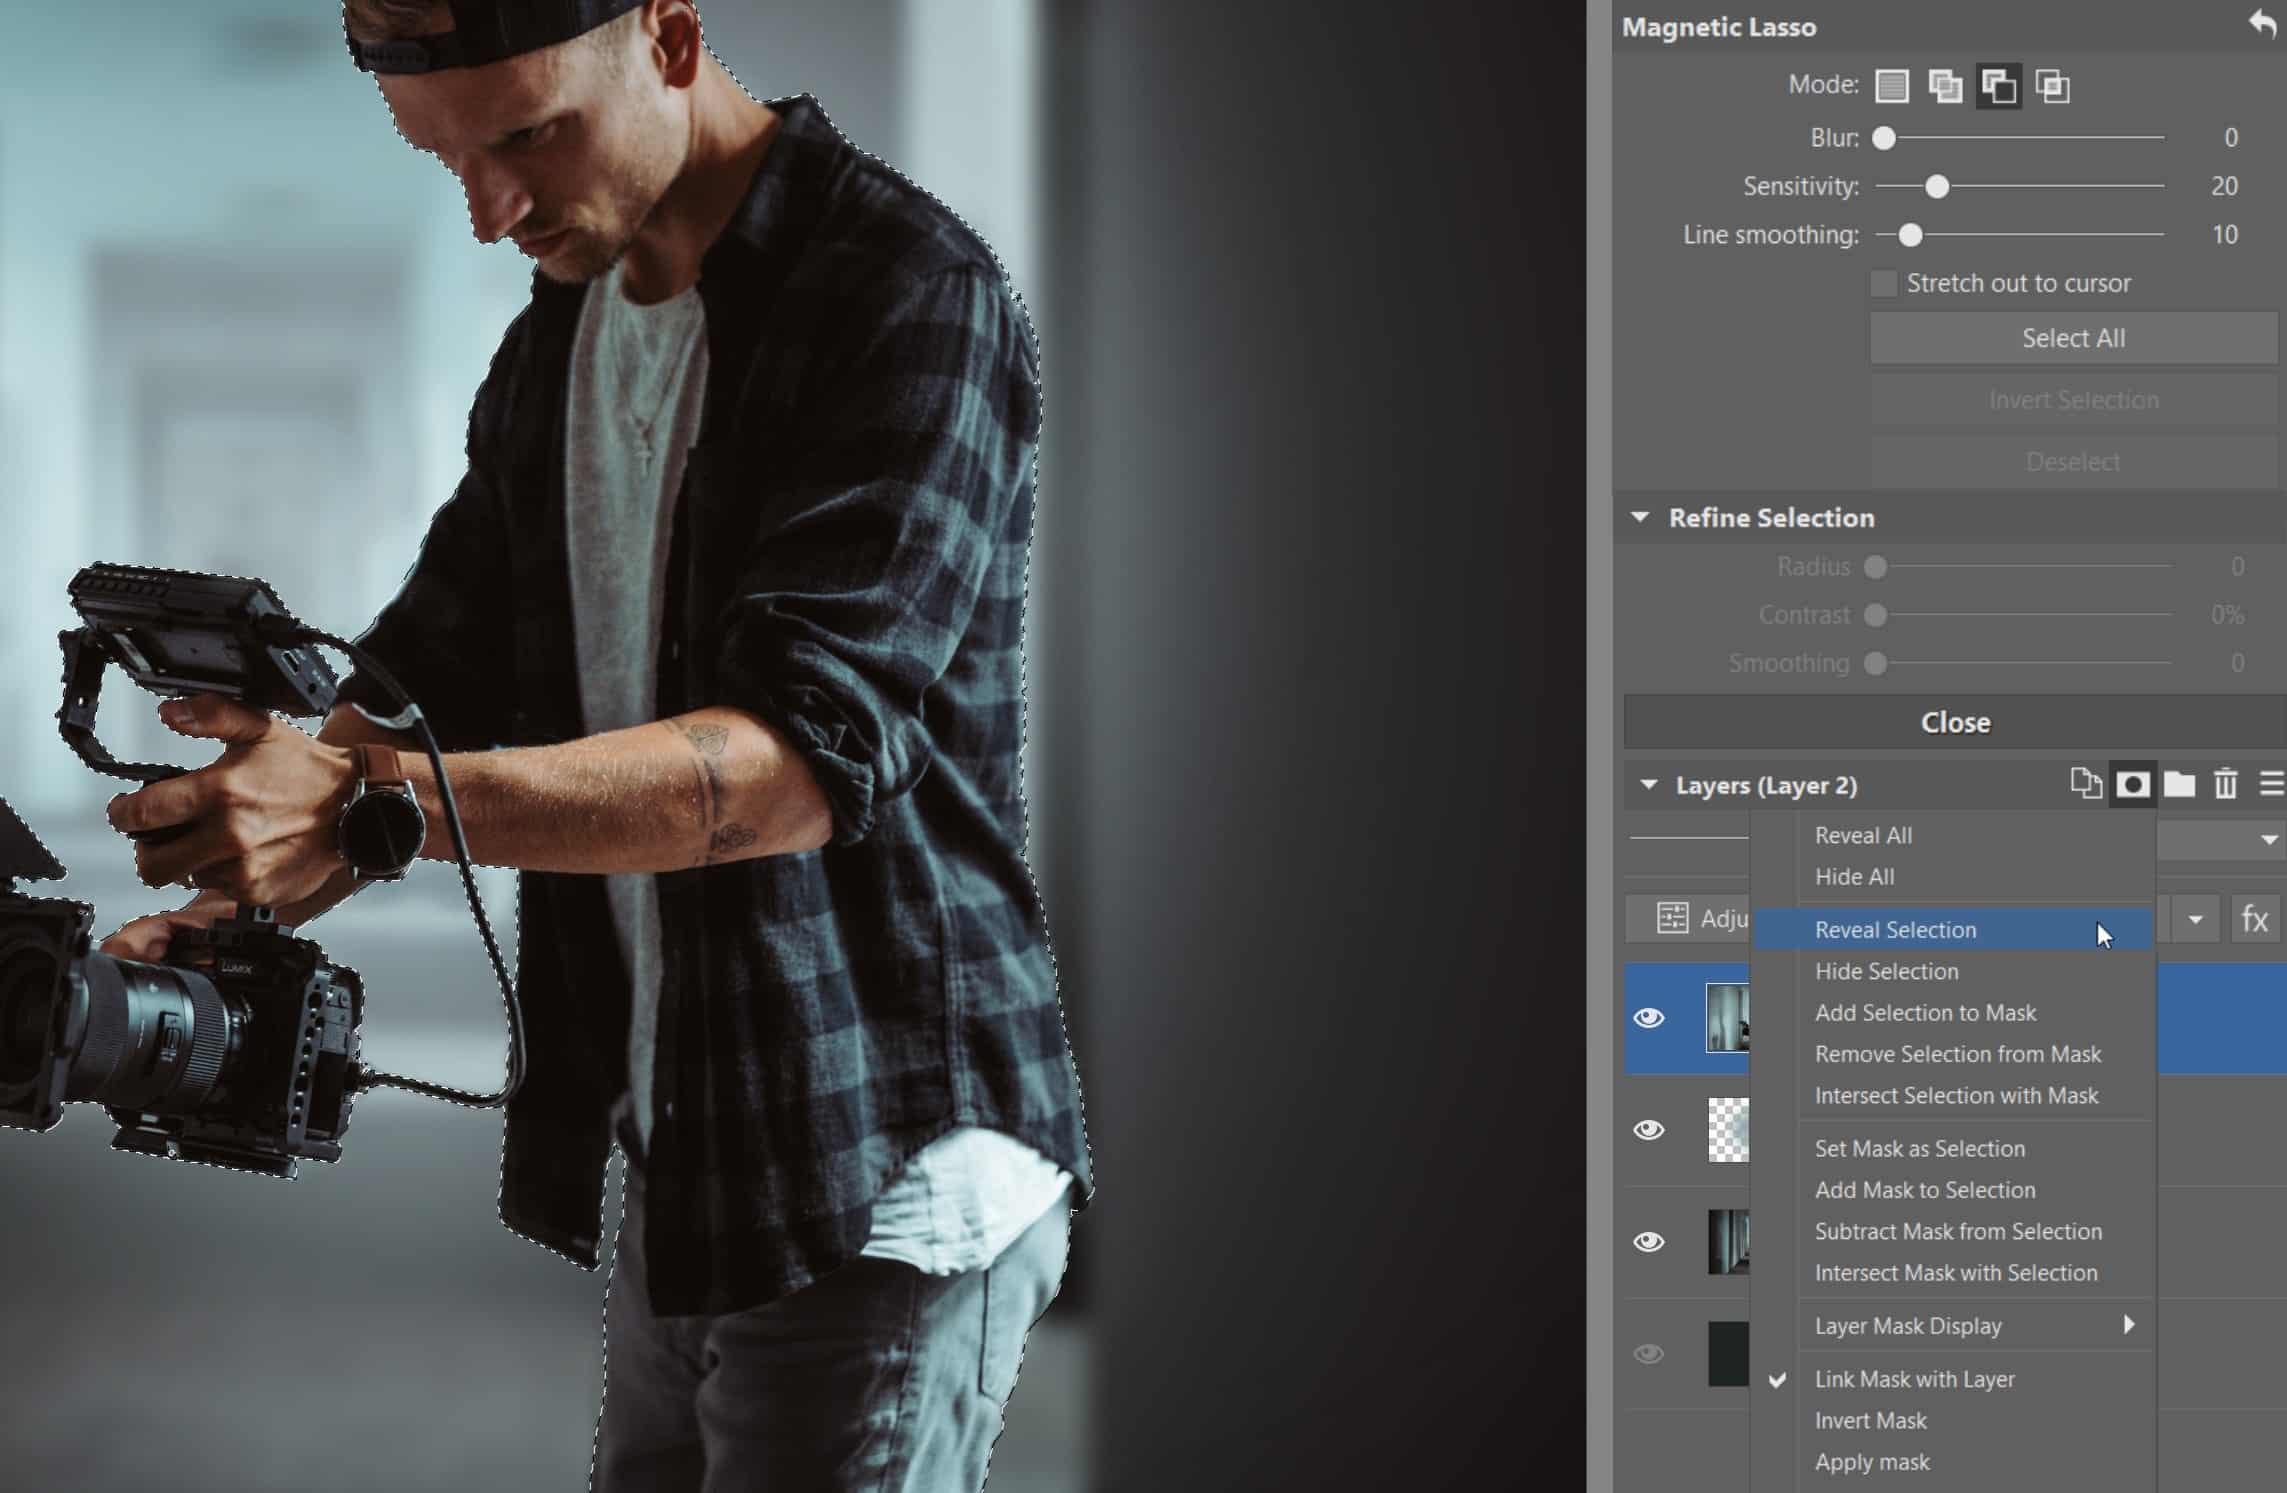
To create a mask, click the Mask icon in the Layers settings group. Then, choose Hide All or Reveal Selection.
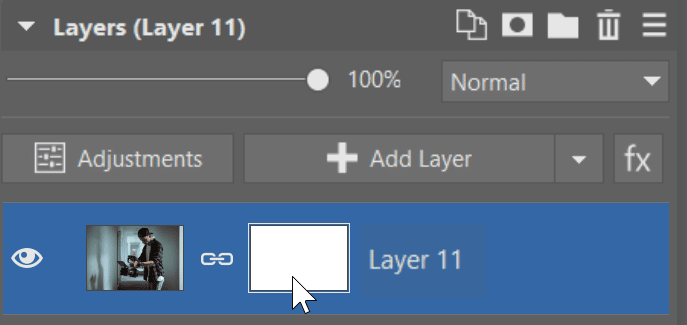
You can think of the mask as a second, black-and-white picture for the respective layer. The white color in the mask is visible, while black indicates complete transparency or a “peephole” through which the layers below are visible. The shades of gray correspond to the different degrees of transparency.
Even if you can’t see the mask, you can still draw in it, fill in selected areas, or use all the usual operations such as curves or blurring. Simply click on the mask in the layers panel to make a frame around it and all other tasks are performed only in that mask.
You will mostly use the Brush (B) tool to hide or reveal the mask by painting white or black. Any shape can be painted in the mask.
In order to make the mask more precise, use selection tools and paint in the selected area with the brush. For instance, create a selection using the Selection Brush (Shift + Q) or Magnetic Lasso (A) and then make this selection more precise with Refine Selection. Paint the selected area using the Brush or click Mask – Reveal Selection.
Move and transform layers
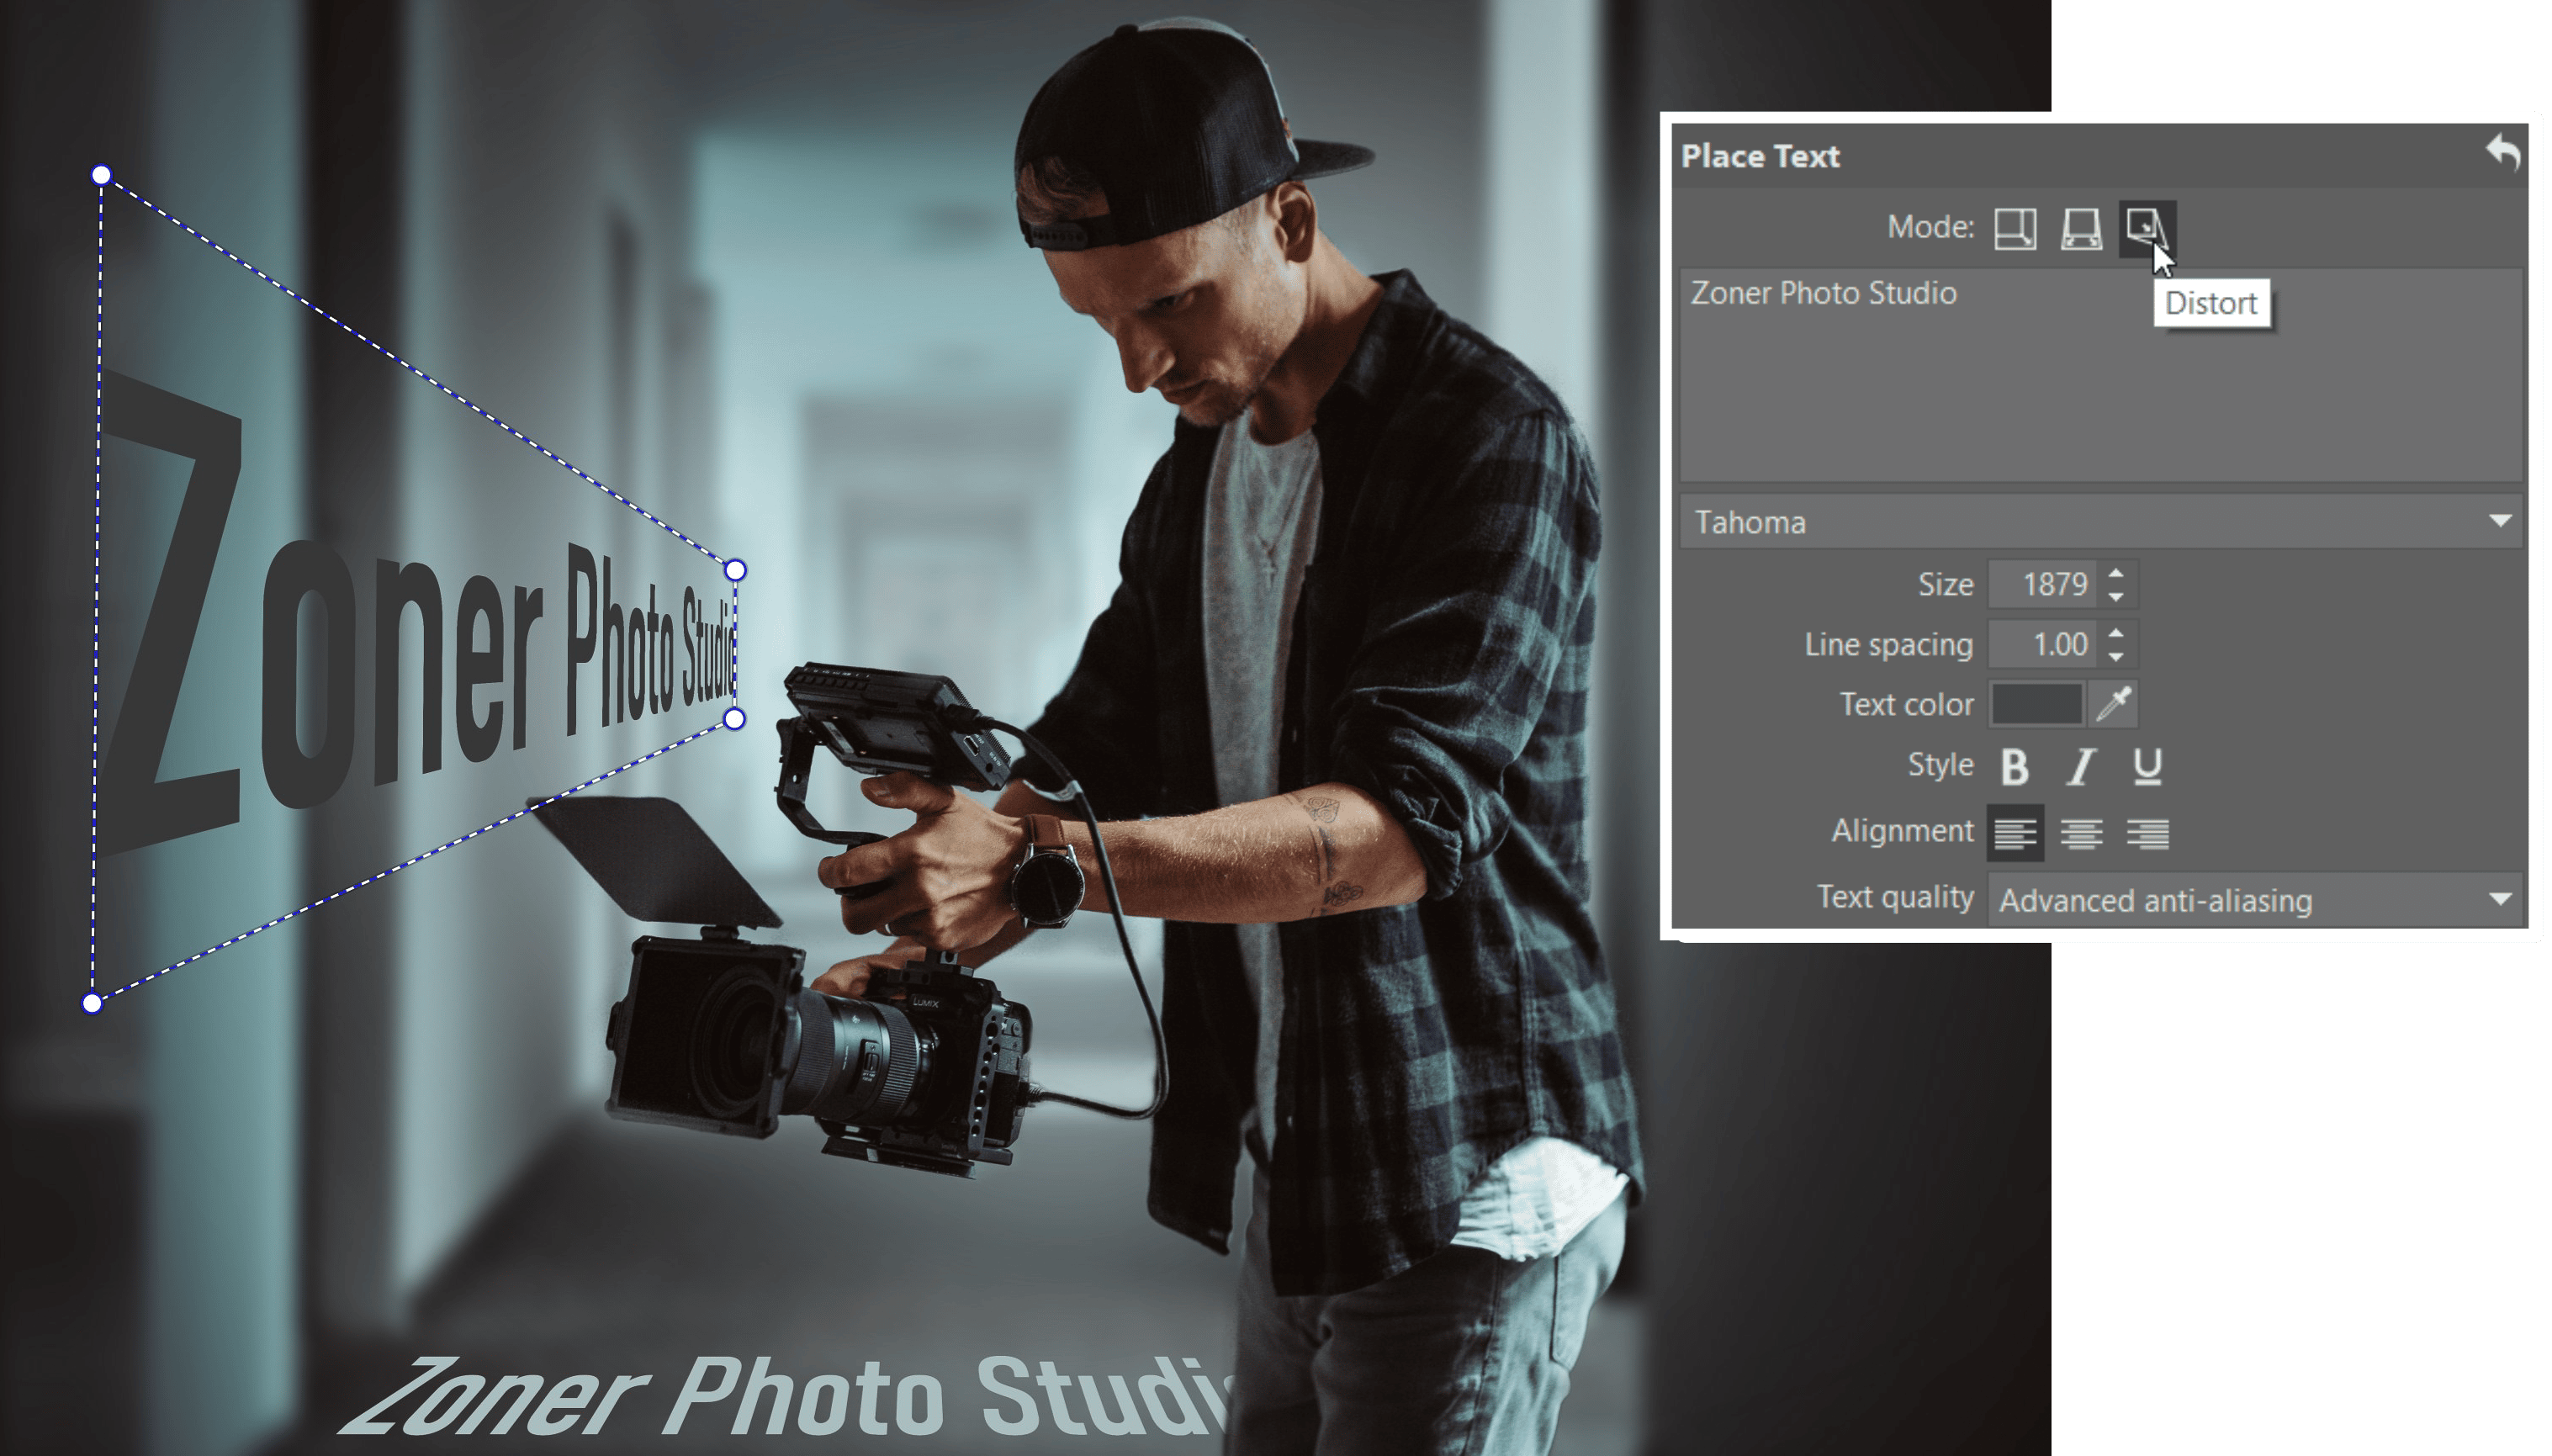
You can move and rotate objects divided among several layers using the Move and Transform tool – the arrow icon in the toolbar or the V key. In addition to the Move and Transform tool, there are Resize, Perspective, or Distort modes. This allows you to place an object into another scene.
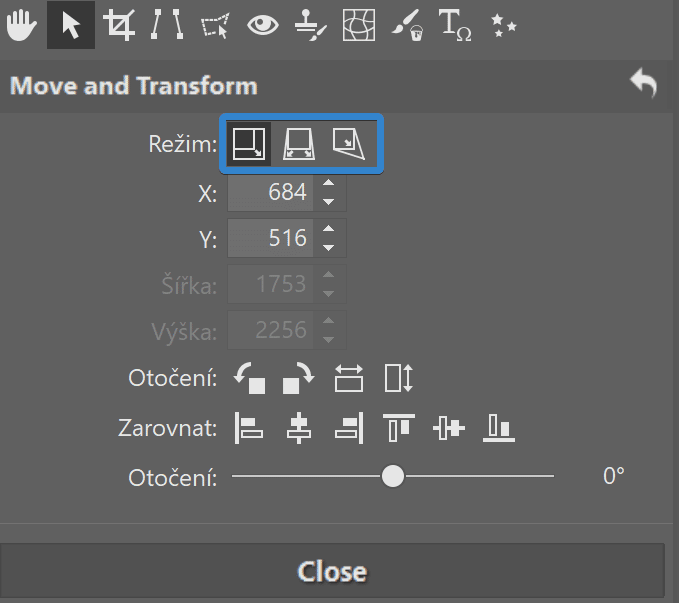
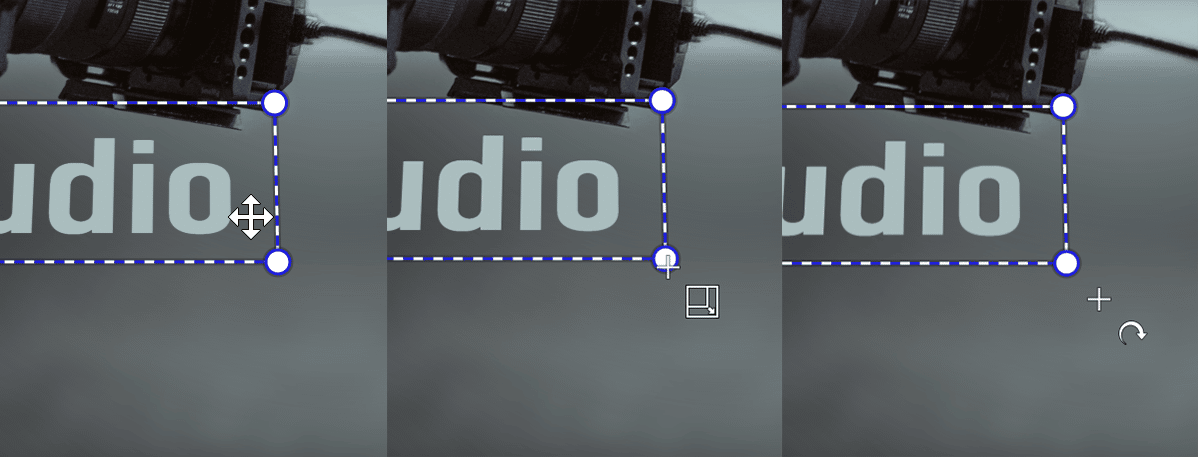
The basic mode for Transform is Resize. It offers three functions, depending on where the cursor is.
- Hover inside the layer to move the layer
- Drag the corner to resize
- Move the cursor outside the layer to rotate the layer
Caution! Every change recalculates the layer’s pixels. Too many changes can harm the image quality. After excessive shrinking in particular, a large number of original pixels are lost. If you make the layer bigger again, you will not regain the original image data.
Make duplicates while editing
When doing practically any editing, it’s a good idea to adopt the following procedure: First, duplicate the current layer. Then, perform the editing on the duplicate. The new copy can be hidden and later compared to see the differences between the original and edited version.
If you don’t like the new version, there’s nothing easier than deleting the top layer. If the effect is too drastic, you can make the new layer more transparent using the slider. Or, create a mask to darken certain areas to locally cancel out the effect.
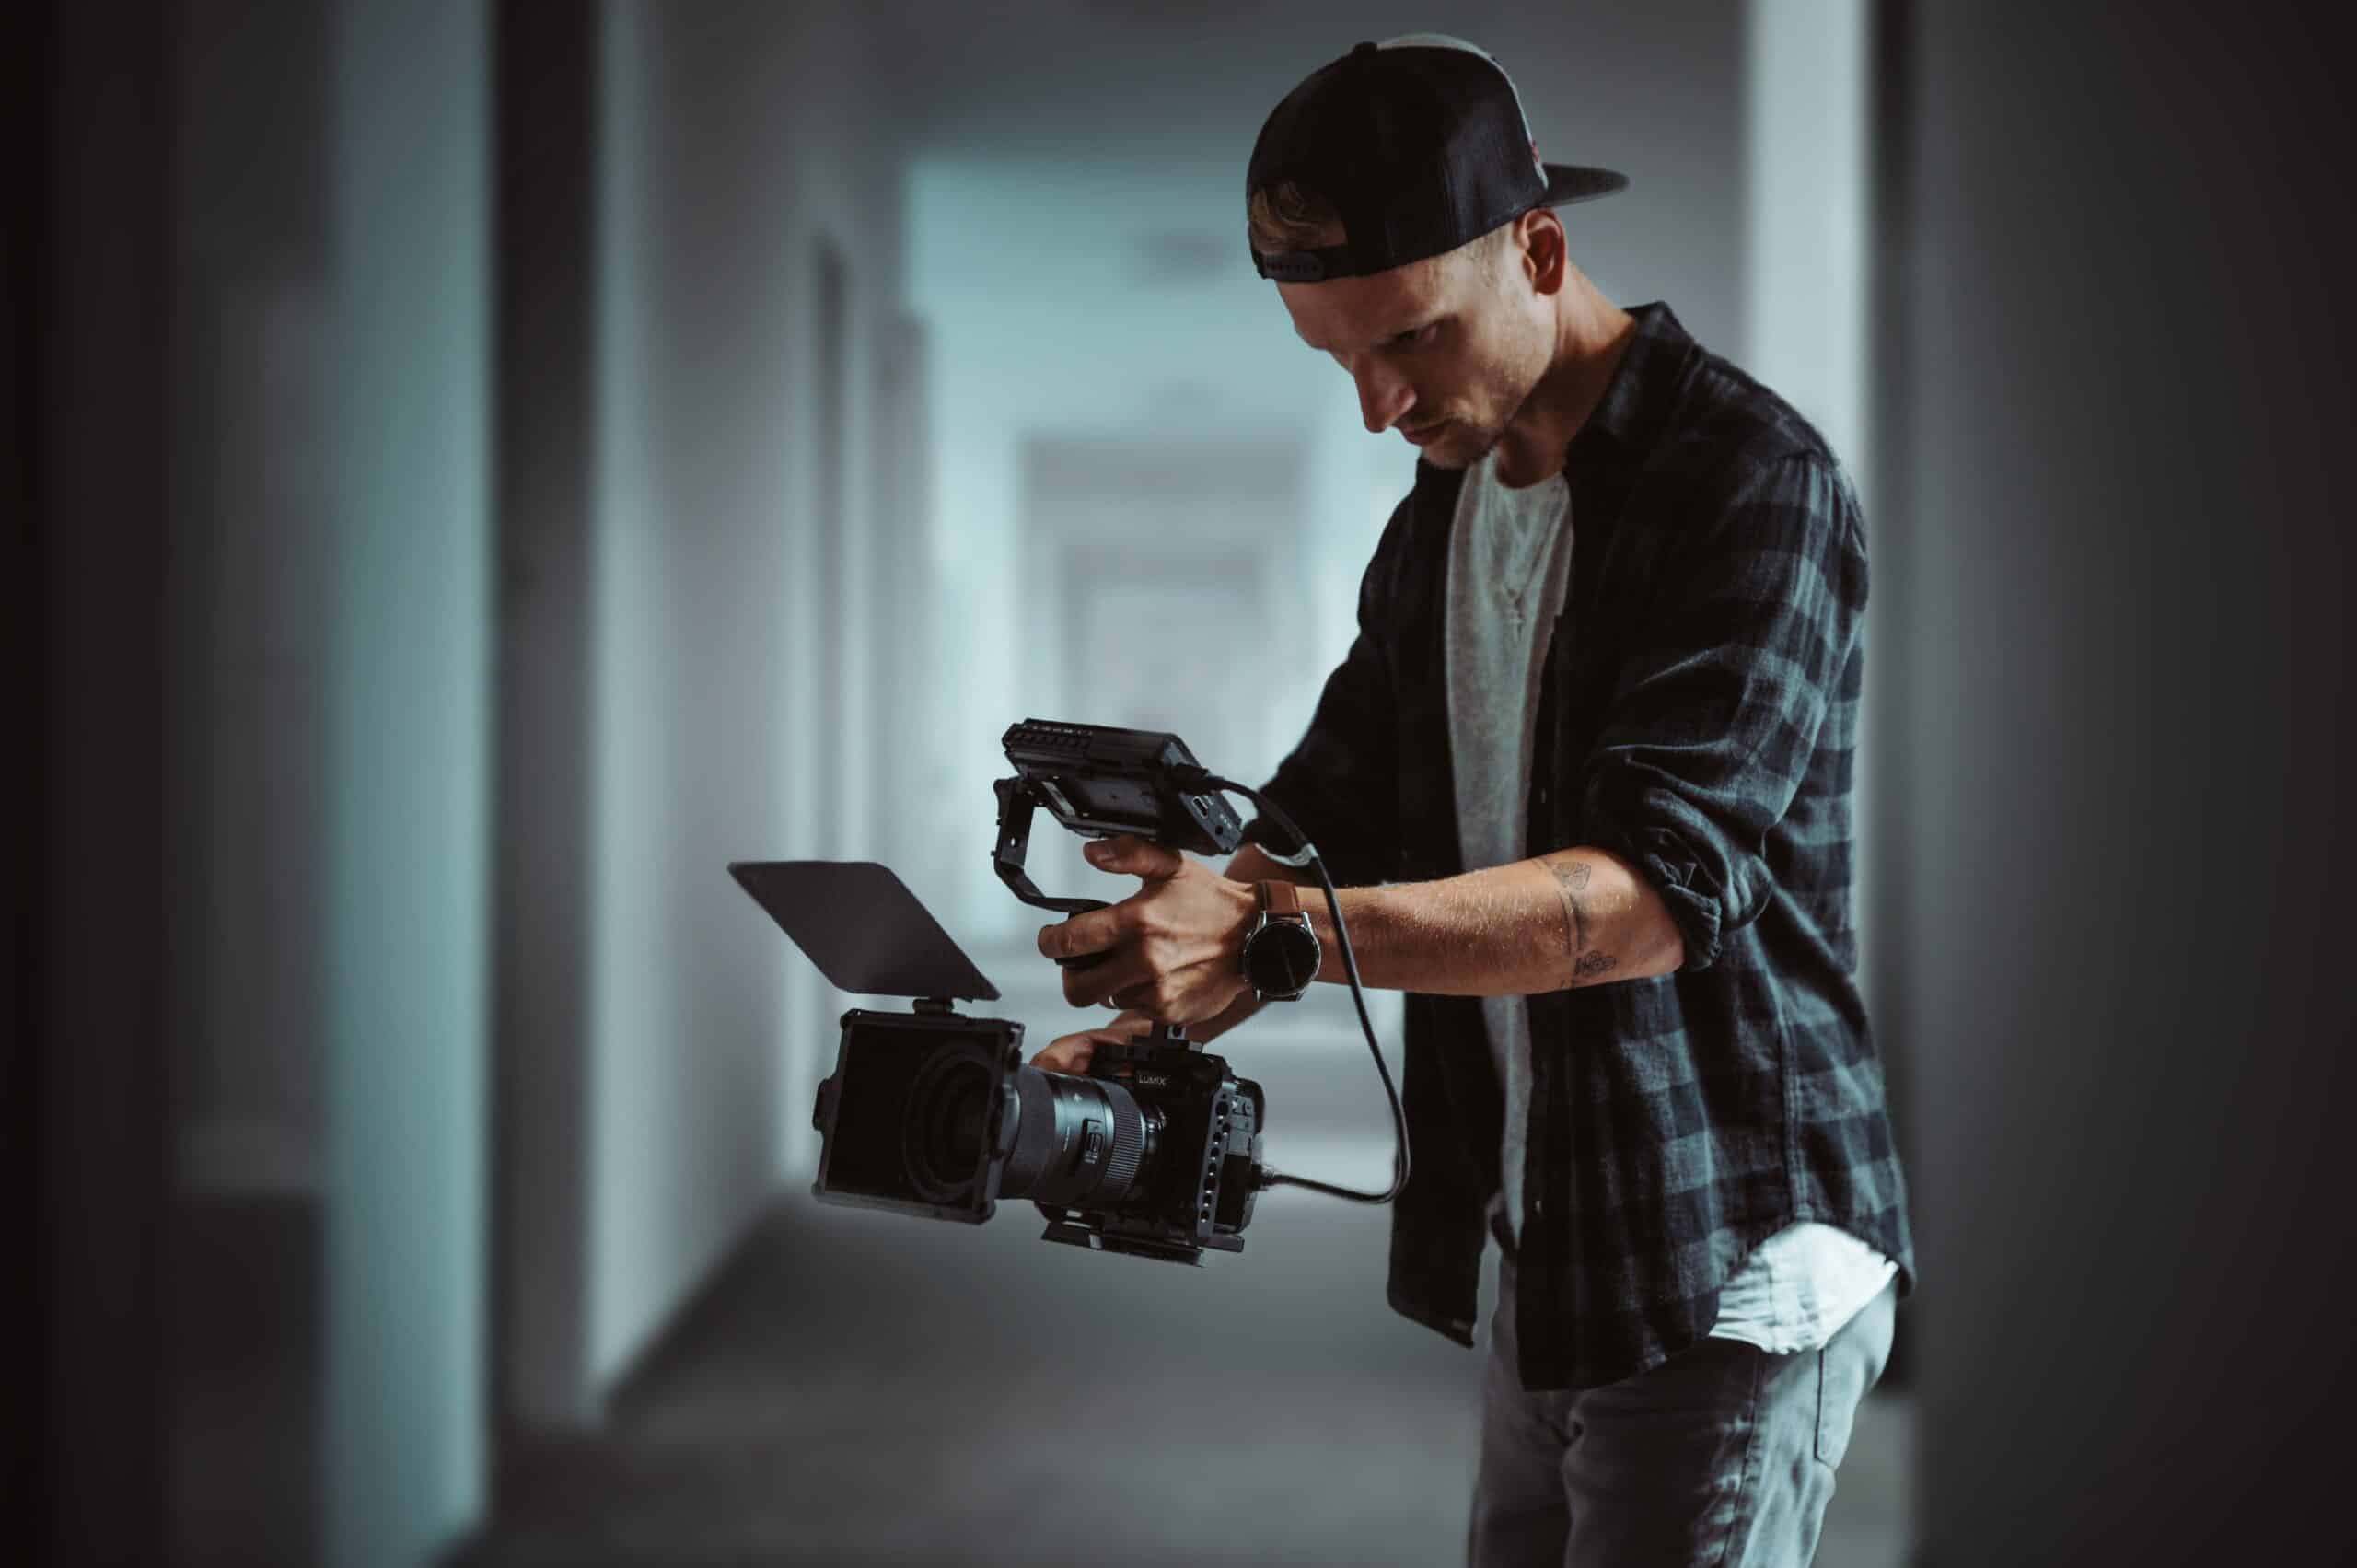
By separating the foreground into a separate layer, haze can be added between these layers to emphasize the subject and help it stand out. (We created the haze effect by painting with the color brush at maximum blur).
Saving your layers project
If you have several layers created and you want to come back to editing later, choose the *.Zoner Studio format for saving. You save the project with its separate layers and any work in progress won’t be lost.

A powerful tool
Layers make advanced photo editing possible, though their use isn’t all that complicated. In this article, we’ve walked you through the basics which, when used in combination, make a good jumping-off point. These can give you some great results.
Try working in layers and see for yourself. Download Zoner Studio free for 7 days and learn how to work with layers and masks. Good luck and have fun experimenting!


George
Interesting to an extent. I shoot in raw.and I need to edit in raw, at the highest bitrate. I do have zoner, lightroom and elements and silky, and gimp… So technically, I need to know if your layer editing converts into jpg or stays in raw, and actually does something useful, and marketing features are meaningless for me. For me quality is the most important issue. This is one reason I have a 40 inch 4k monitor, and a full frame and a medium format. Edits can take me ten minutes to 4 hours each photo. Also, I dislike cloud editing, as I am reluctant to put photos I paid for, on cloud servers.
Zoner
Hello George,
Thanks for your questions! Editor does not convert a picture to JPEG while opening the picture. Pictures are only converted to JPEG when saving to JPEG. While you are working on the picture, it has a 48-bit color depth, which you can preserve by, for example, saving to the TIFF format.
Regarding cloud editing – Zoner Photo Studio does not use cloud editing; it is software for work with photo files on your hard drive.
For further questions, you can also contact our technical support via support@zoner.com.