Light in Motion: Photographing Cars Using Long Exposures

Car light trails are one of the most popular subjects for long exposure photography. They can transform an ordinary road into a dynamic image filled with lines and movement. In this article, we explore where and when to photograph cars, how to work with composition and shooting height, and how to simplify the shooting process using the right camera settings. Finally, we look at tips for post-processing using photo editing software.
In this article, we discuss:
- what time of day and what type of light are best for car light trail photography
- where to shoot from to get images that are dynamic and have depth
- how to work with the composition of roads and intersections
- when one shot is enough and when it’s better to blend multiple exposures
- how to combine light trail photos in Zoner Studio
- how to stay safe when shooting
Since light trails require very long exposures, often tens of seconds, your chosen location needs to be sufficiently dark. Usually, shooting just after sunset or before sunrise is enough, even if it’s not completely dark yet.
Late autumn and winter are the best times for photographing car light trails. The sun sets earlier, so darkness arrives while traffic is still heavy, often as early as 5 PM. Of course, you can also shoot in summer. But after sunset, you may need to wait much longer for enough cars to pass in certain areas.
Depending on how late you shoot, the surrounding landscape will be more or less visible. When shooting in cities, it also depends on the street lighting. Because conditions vary and shooting takes time, it’s difficult to estimate how dark the surroundings will appear in the final image.
Don’t worry too much about this during your first attempts. But if you want to strike the perfect balance between car trails and the landscape or cityscape, it’s worth returning to the location a second time—after you’ve planned the location precisely, fine-tuned the timing, and taken into account the street lighting.
Viewing height
Light trails photographed at car level are usually not very interesting. The lines tend to merge and converge in a narrow corridor in the center of the image.
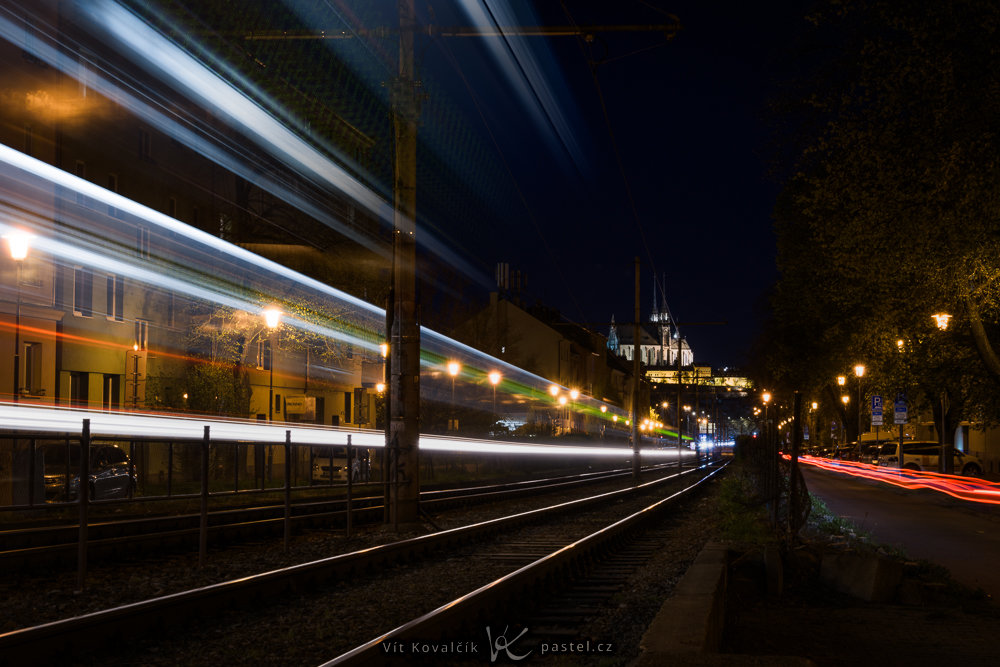
There is one exception: if you’re close enough and there are taller vehicles among the cars, such as trucks, buses, or trams. Their lights are spread over a larger area and can create impressive lines that work well with perspective. Public transport also has the advantages of predictable timing.
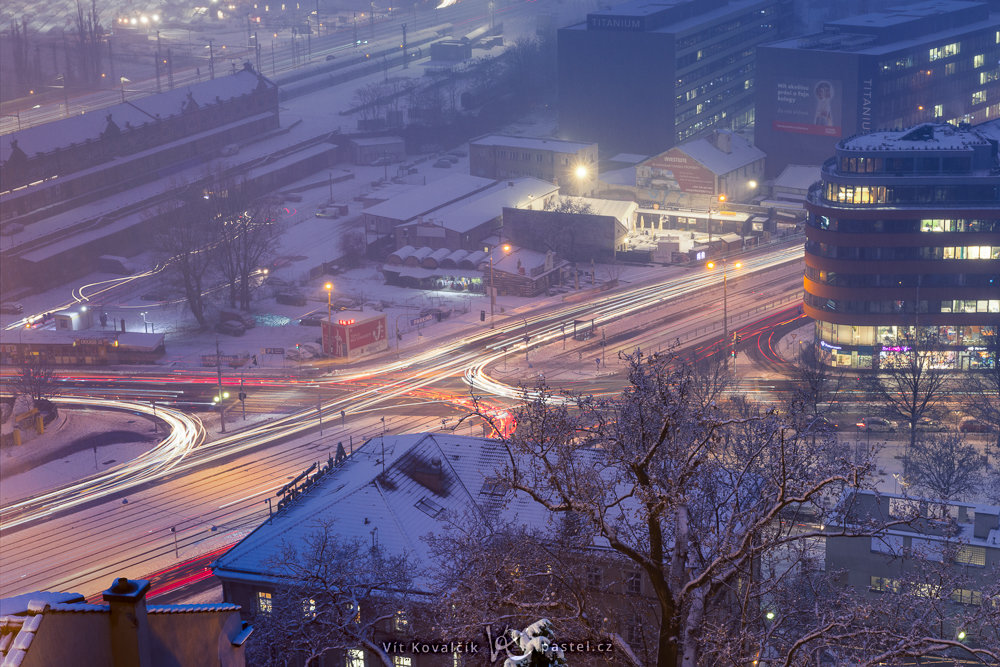
In general, it’s best to photograph traffic from higher vantage points. Bridges, terraces, or views from windows are ideal. Sometimes hills or other changes in terrain can also be used. Everything has its pros and cons.
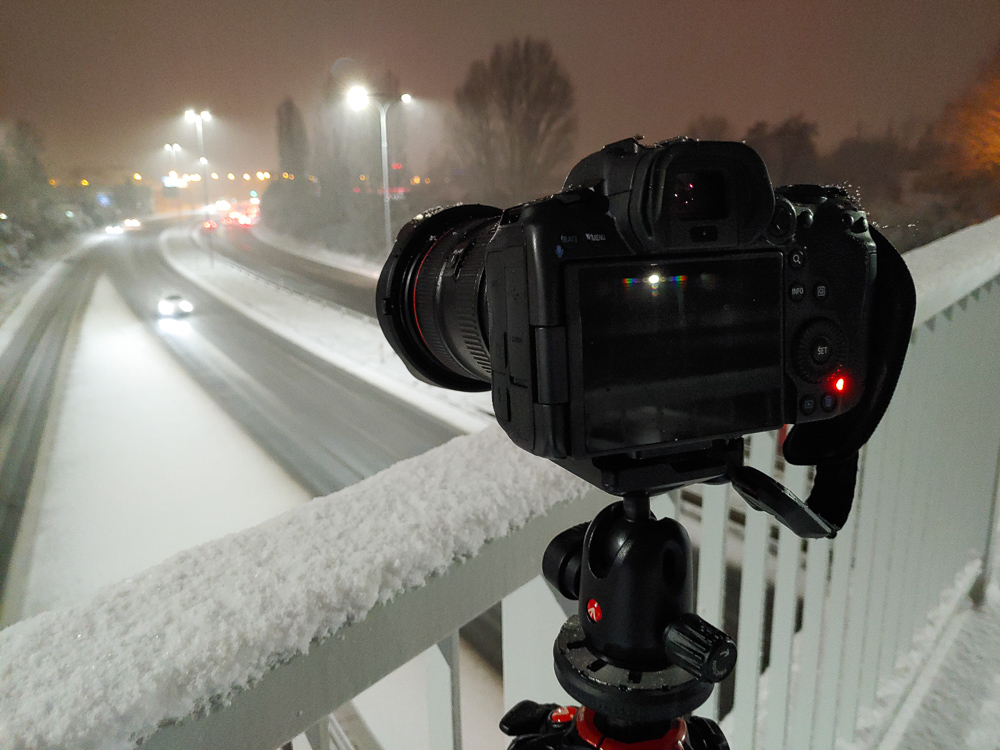
Bridges, terraces, and overpasses are often close to traffic, but your movement is limited—you can only move just a few steps to the right or left. In addition, traffic can cause vibrations, so even with a tripod, the photos may not turn out perfectly sharp. This applies to road bridges and even more so to pedestrian bridges. If possible, try to shoot when you’re alone on the structure.
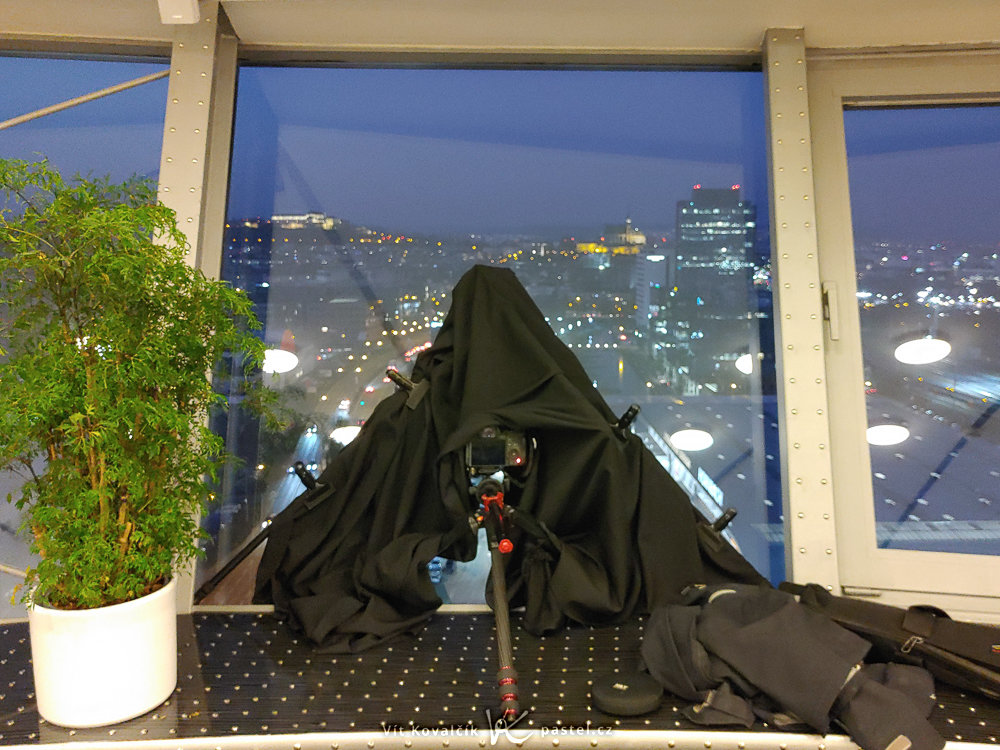
Shooting from windows is more comfortable but usually offers a more limited view. You may also be forced to shoot from behind a closed window, especially in winter. In this case, you need to deal with interior reflections and light reflecting off the glass, which can duplicate strong lights in the scene. Dark fabric around the lens, or a simple “black tube” held against the glass, can help reduce reflections.
If you shoot from a hill or a tall building, you usually avoid these issues. However, you’ll be further away from the flow of traffic, which can result in calmer, more distant images.

Location and composition
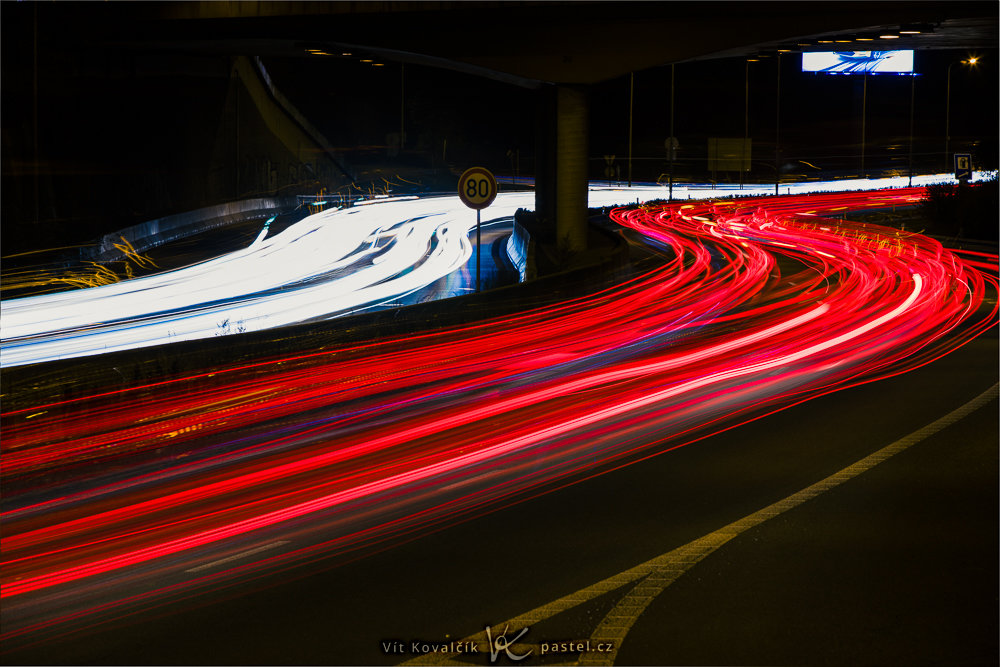
Some aspects of light trail photography can be influenced well in advance during planning, especially the shape of the road. It’s worth taking photos near more complex intersections and overpasses which can bring movement from multiple directions into the frame.

The problem with many intersections in open terrain is that while they look great, there’s often no higher vantage point nearby. But even then, there’s no reason to worry. Roads without intersections can work very well, too.
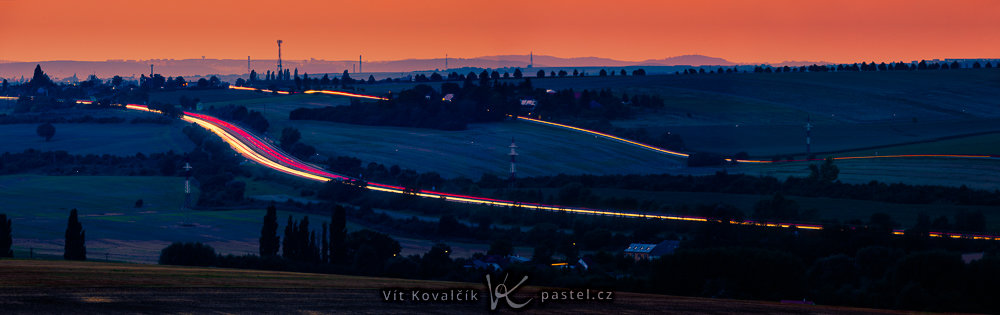
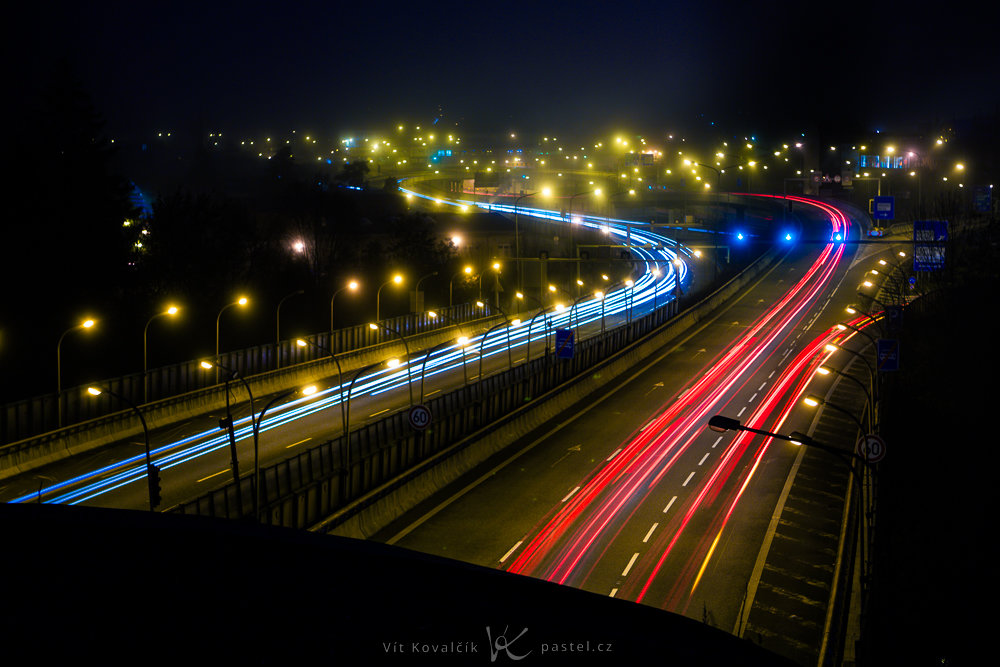
S-shaped roads are especially rewarding in terms of composition. Other curves also work well for light trails.
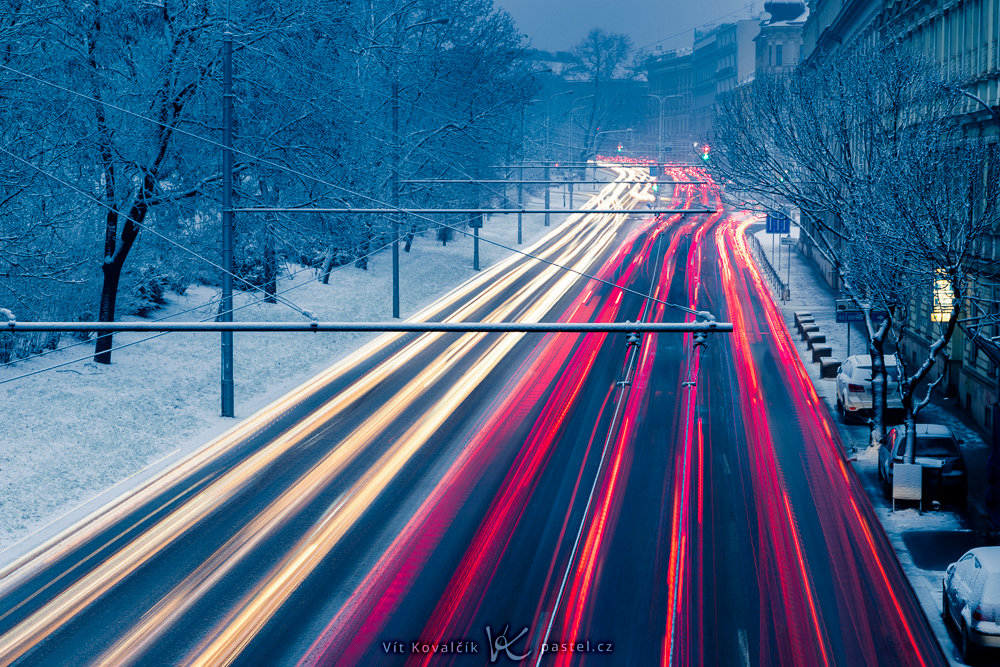
Even a straight road can work beautifully. Depending on where you place your camera, there are two main options in terms of composition. One option is symmetry, which requires a shooting position directly above the road.

The second option is to shoot from the side so the cars create diagonal lines across the frame.
Consider post-processing in advance
I have a good reason to talk about post-processing before shooting tips. While shooting, you already need to decide how you’ll process the images and adapt your approach accordingly.
The simpler option is to capture everything in a single shot. In that case, use a long exposure, typically between 10 and 30 seconds. Timing is often crucial, such as pressing the shutter just before the cars enter the frame.
For slightly more advanced photographers, combining multiple images is another option. Timing becomes less critical, but camera stability is essential. The camera can’t move, even slightly, which means using a remote shutter release or phone app instead of pressing the shutter button on the camera body.
You need to take a large number of images and then combine them. I recommend at least 10, but you can easily take several dozen. This gives you more options and you can select only the best ones.

Shooting tips
Bringing a tripod definitely pays off, or at least placing the camera on a very stable surface. A wall, railing, or even a trash can can work in a pinch.
To prevent camera shake after pressing the shutter, a remote shutter release is useful. In some cases, a self-timer is enough, since the camera starts shooting a few seconds after you press the button.
Expect long exposures in the tens of seconds. This means using the lowest possible ISO and a higher f-number. The exact settings depend on the ambient light and whether cars are shining directly towards you or from the side. It’s useful to take a few test shots on location and check if they’re not too dark or overexposed.
Manual mode gives you greater control. In automatic or semi-automatic modes, a passing car can influence exposure metering, causing the next shot to differ significantly in brightness.
Editing car light trail photos
If you’re working with a single shot, standard adjustments are usually enough—contrast, color saturation, and fine-tuning exposure.
More advanced editing comes into play when blending multiple images. In Zoner Studio, start by making basic adjustments to one image in the Develop module, then copy those settings to the remaining photos.
Next, switch to the Editor module and load the selected images as separate layers. Select all layers and set their Layer Blending Mode to Lighten. This keeps only the lighter parts of the upper layers visible—namely, the car lights—while the dark background remains unchanged.
A major advantage of this method is the ability to turn individual layers on or off, or to apply masks and remove parts that don’t fit into the final image.
We created most of the photos in this article this way.
Safety first
No matter which shooting or editing method you choose, always put safety first—both yours and that of others. Standing just a few meters from passing cars is uncomfortable, and traffic below you won’t be happy if a filter or even lens falls from a bridge.
With a bit of common sense, everything can be handled with car, and you’ll come home with impressive photos full of light and motion.
FAQs
What shutter speed should I use for light trails? Most often, shutter speeds between 10 and 30 seconds work well. It depends on how heavy the traffic is, the ambient light, and how many trails you want in the image.
Can light trails only be photographed in winter? No, but winter and fall are more practical. It gets darker earlier, while traffic is still heavy. You can also shoot light trails in summer, but you usually need to wait longer.
Do I need a tripod? Yes, or at least a very stable base. Long exposures aren’t possible without solid camera support.
What if my photo is overexposed? Lower the ISO, stop down the aperture, or shorten the shutter speed.
Is it better to take one shot or blend multiple exposures? For starting out, a single shot is easier. Blending multiple exposures offers more control but requires careful shooting with a tripod and more work in editing.
There are no comments yet.