Photo Story: Windmill with Night Sky
You have chosen the right location, kept an eye on the weather, planned the perfect composition, and have experience shooting and stacking hundreds of night sky images for the result to be effective. However, at home, you may discover after it’s all done that something didn’t go according to plan. Luckily, you still have post-processing to work magic on these images. For me, these unexpected issues cost me almost two hours of post-processing.
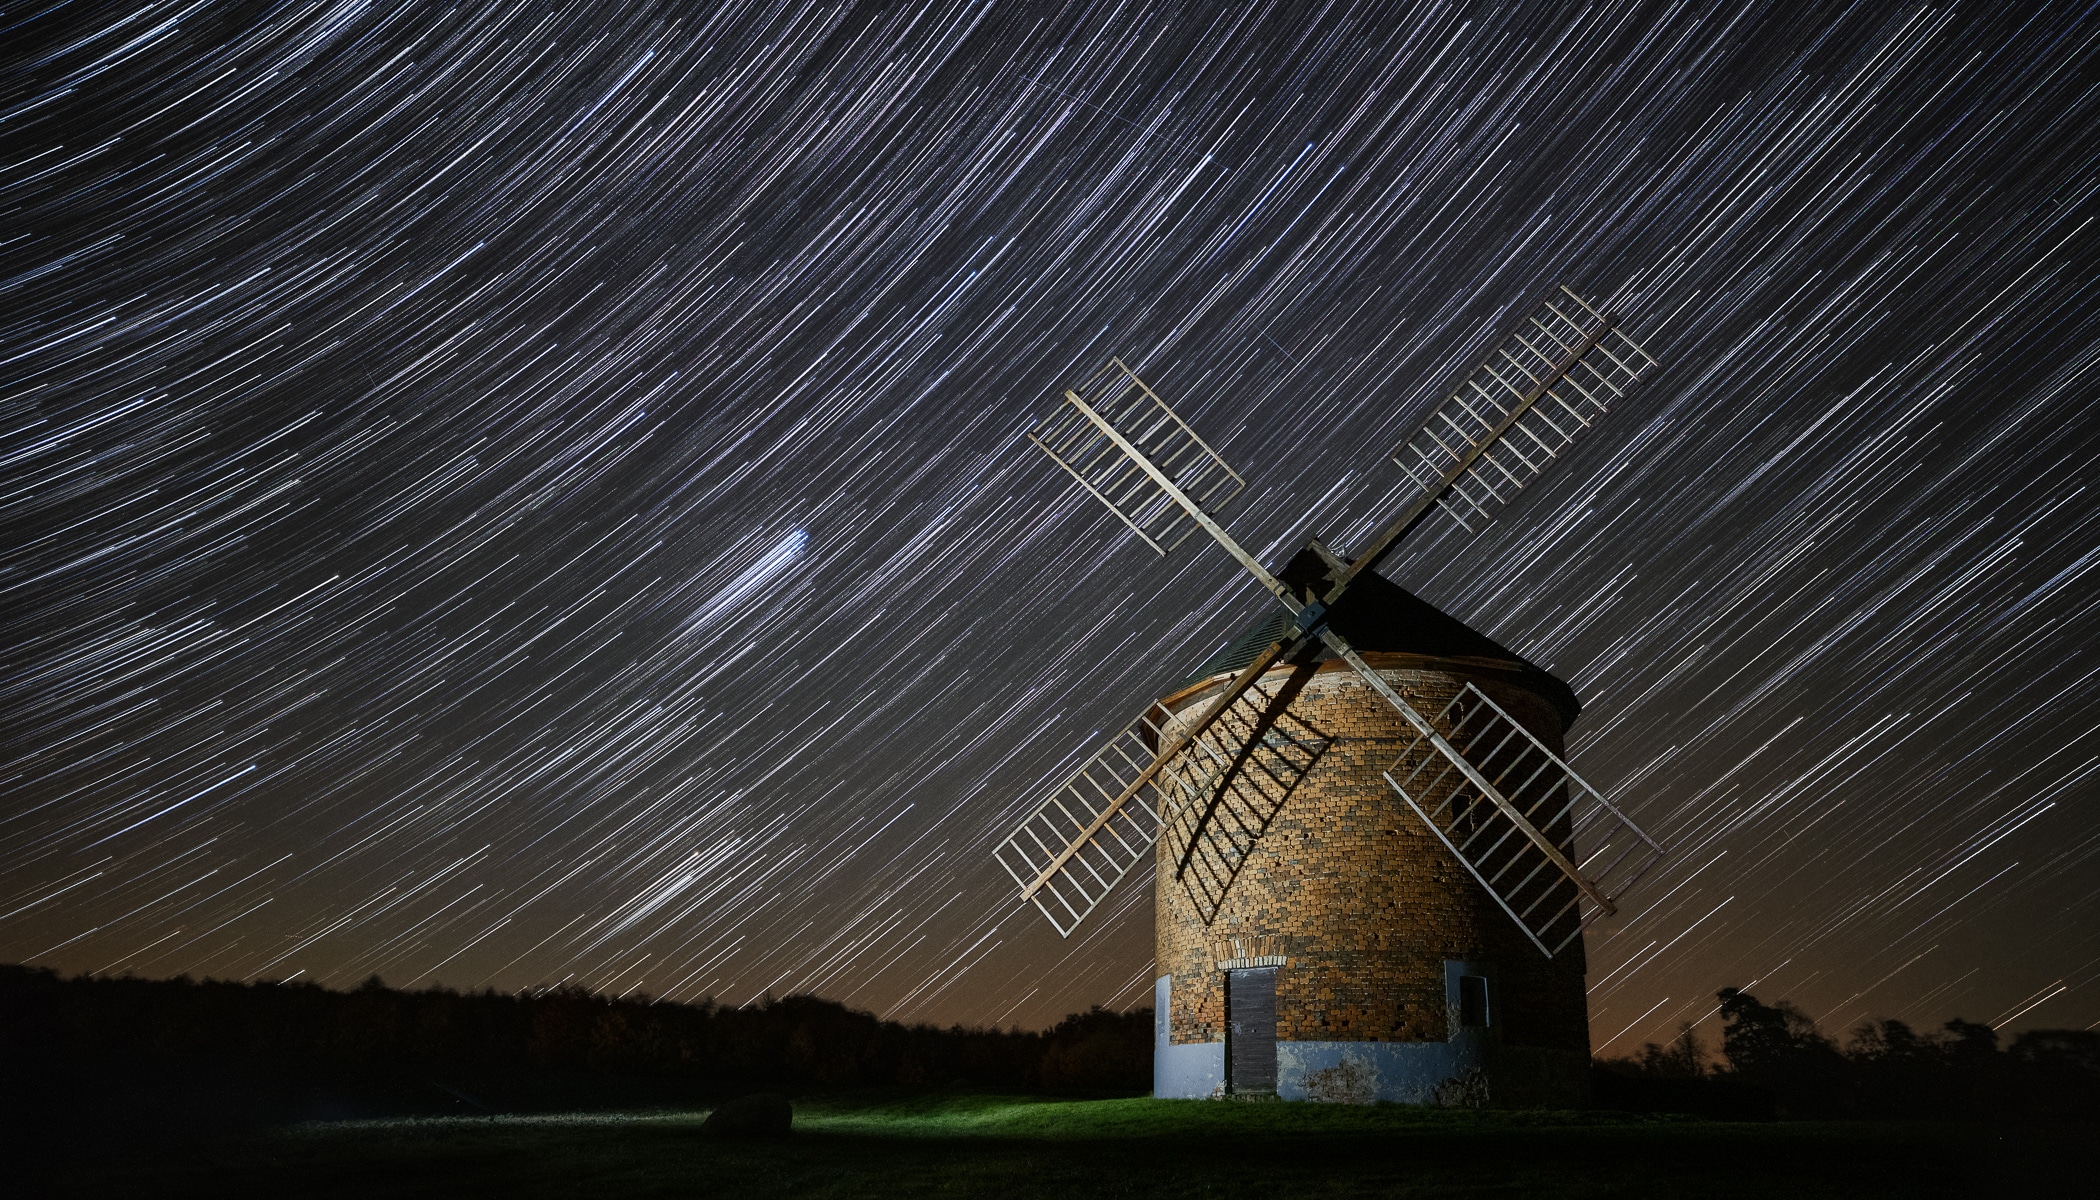
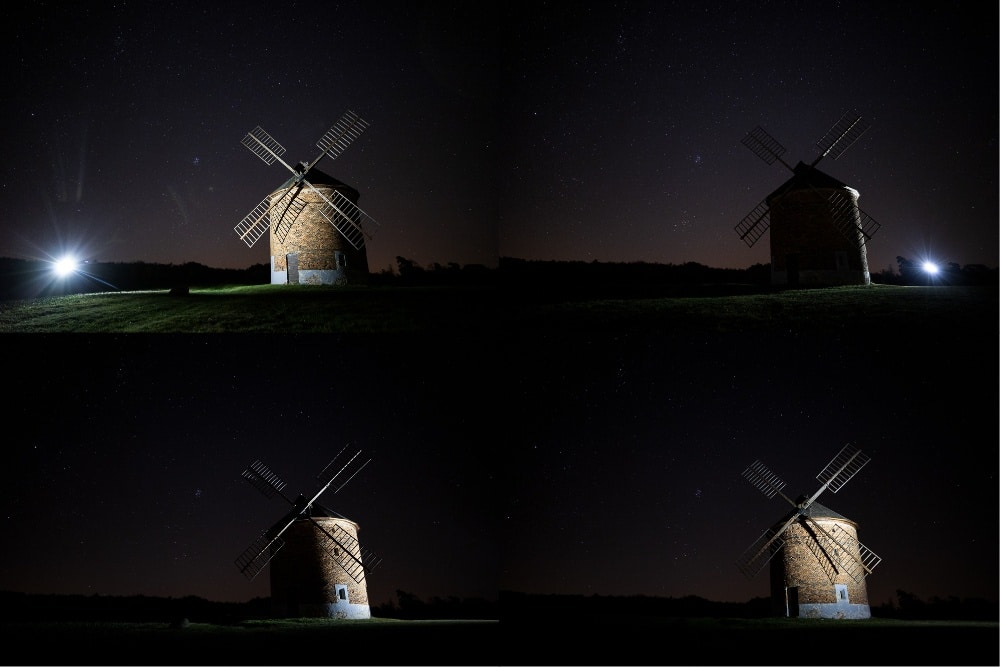
Today’s story is about a photo of the popular, and more importantly, photo-worthy Chvalkovice windmill in Southern Moravia. The goal was to capture the windmill by night with a starry sky in the background, including star trails. If I could get the stars to blend in with the blades of the windmill, the result would be even more spectacular.
Planning
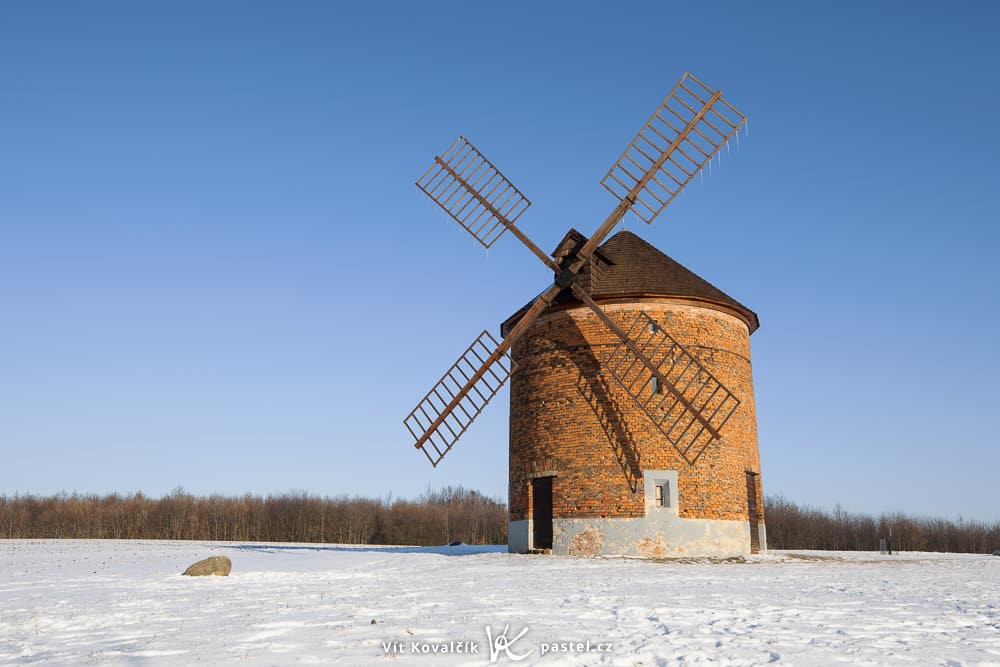
The key is to choose the right location. I had visited the location several times during the day, so I had a good idea of what it involved and didn’t need to take too many risks in my photo taking.
The second most important factor is the weather. The sky essentially needs to be crystal clear. Otherwise, a single passing cloud in the scene will cover the stars, resulting in a dark spot and the star trail will be interrupted.
It’s also preferable to shoot on a moonless night. This is because compared to the darkness of the surroundings, the Moon is very intense. If the Moon is in the shot, it may complicate things. Having the Moon at your back shouldn’t be a problem, but it limits you when it comes to finding the right composition.
The basic concept of the shoot
The rotation of the Earth makes the stars move along the sky during the night. One of the main decisions I had to make was whether or not I wanted to show this rotation in the picture. I chose to show the rotation which led me to the following method.
Some would suggest using a long exposure of tens of minutes to capture the movement of the stars. However, there are several caveats:
- This type of exposure captures the stars, but the foreground is lit up by nearby street lamps and is extremely overexposed. This could still be solved by using one of the HDR techniques, but at the cost of many complications.
- If an object, such as a car, appears and momentarily blinds the camera, the entire photo is ruined.
- If the camera is moved for any reason, there would be a trace of this issue.
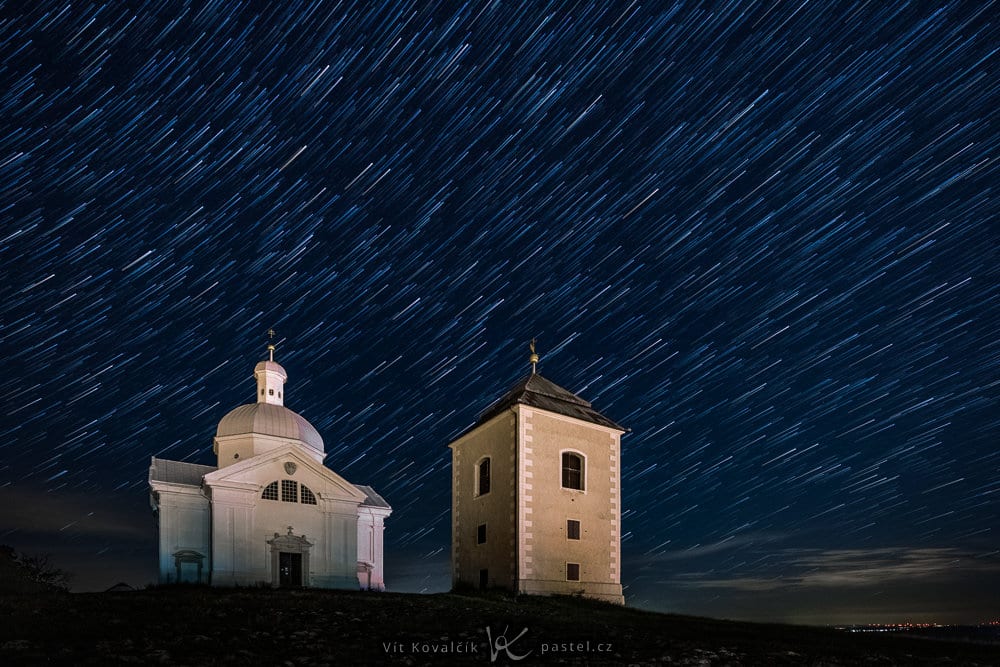
- The star trails will have an abrupt start and end. This isn’t necessarily bad, but in this case, I wanted something different.
For these reasons, I opted for another method:
The camera will let you take a large amount of relatively short exposures of single-digit to tens of seconds. Then, there are several image stacking applications that specialize in night images.
Some of these programs are also able to cover up the “gaps” in star trails. So even if some of the images are ruined, it’s easy to get rid of these images in post-processing. The program calculates the movement of the stars and can compensate for missing seconds or minutes in the middle of the star trail.
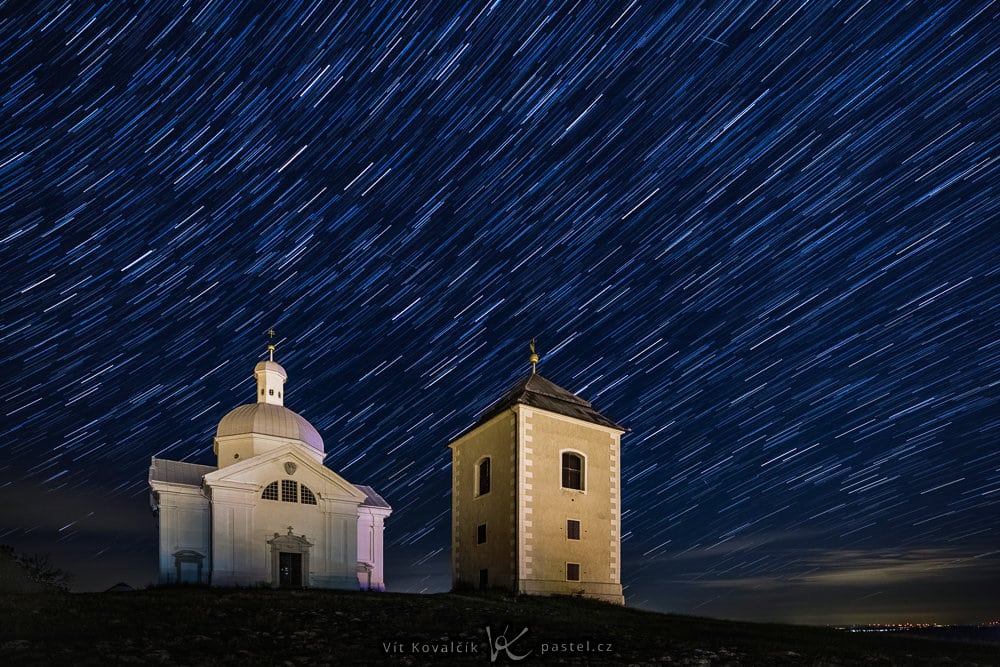
There are also alternative methods for image stacking available. One of my favorites is known as comet mode (also referred to as motion effect). Images are used with progressively lower and lower intensity, so the star trails don’t come to an abrupt end but gradually fade into nothing.
Shooting in practice and additional lighting
The foundation for the entire method is a tripod or other stable support. Since the wind was strong that night (the windmill was clearly built in the right place), for increased stability, I tried not to extend the tripod legs, keeping it low to the ground.
Then, it was only a matter of letting the camera shoot four-second photos for 20 minutes and the foundation was complete. The result was over 300 images similar to the one below.

Only that’s not all. The windmill is not lit up at night so the most light it gets comes from the nearby town or any cars that happen to be passing by. With longer exposures, even light from traffic several kilometers away can be captured. However, this is an issue the photographer has no control over and can have any number of consequences.
That’s why I let the camera continue shooting even after collecting enough shots and went around the windmill with a flashlight, illuminating it from different angles. While I didn’t want it to be evenly lit up, I planned to choose the best angle of light or two and incorporate it into the final image.
Some photographers also take a series of images with the lens cap on for later processing. Some applications can later the characteristics of the digital noise and reduce it. I usually forget this part, so I didn’t use it this time either.
Now everything is done. It’s time to go home and get some sleep. Then, get ready to put everything back together.
Post-processing
There are many specialized programs for stacking night images. Some are paid, but many are free. Some of my favorites are Sequator and StarStaX. I used Sequator this time around.
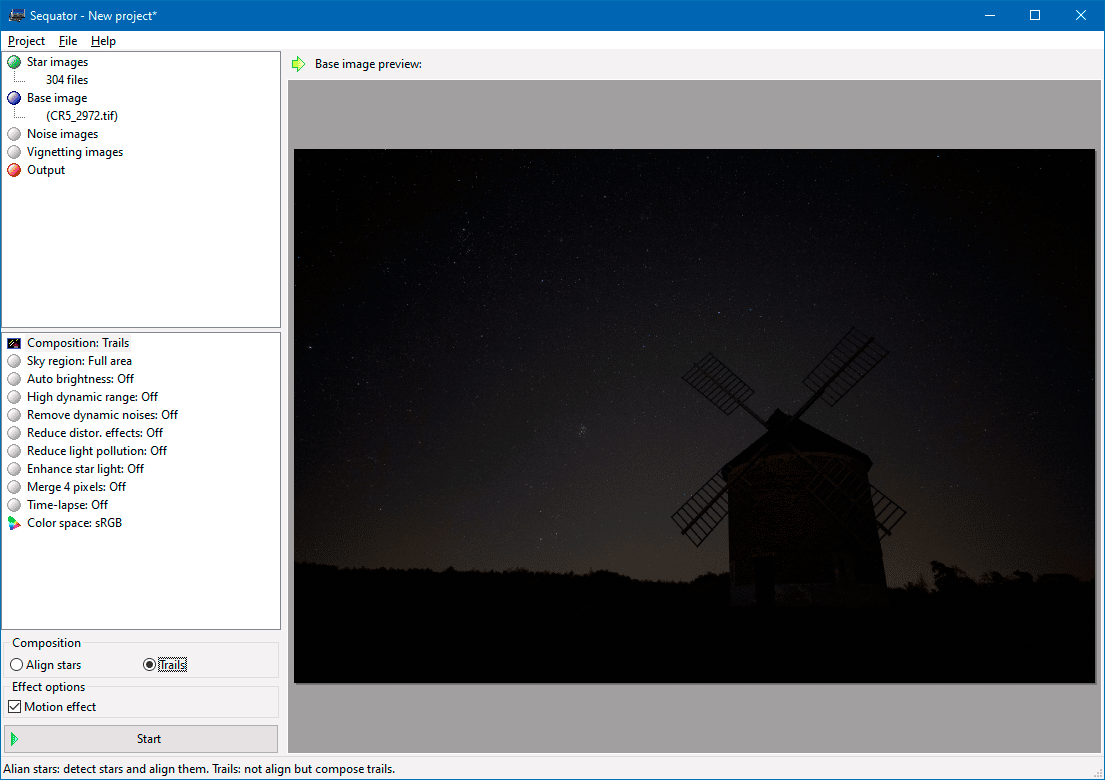
I won’t go into specifics about setup here, but in this case, we generally don’t need anything complicated. There’s no star alignment or manual marking of the background. Simply stack one image over the other (set Composition to Trails instead of Align stars). Of course, this could be done manually using basic editing methods and playing around with layers, but 300 layers would take up a lot of resources on your computer. It’s much faster to just load the files into a specific application that is made for this purpose and do everything automatically.
Stumbling blocks
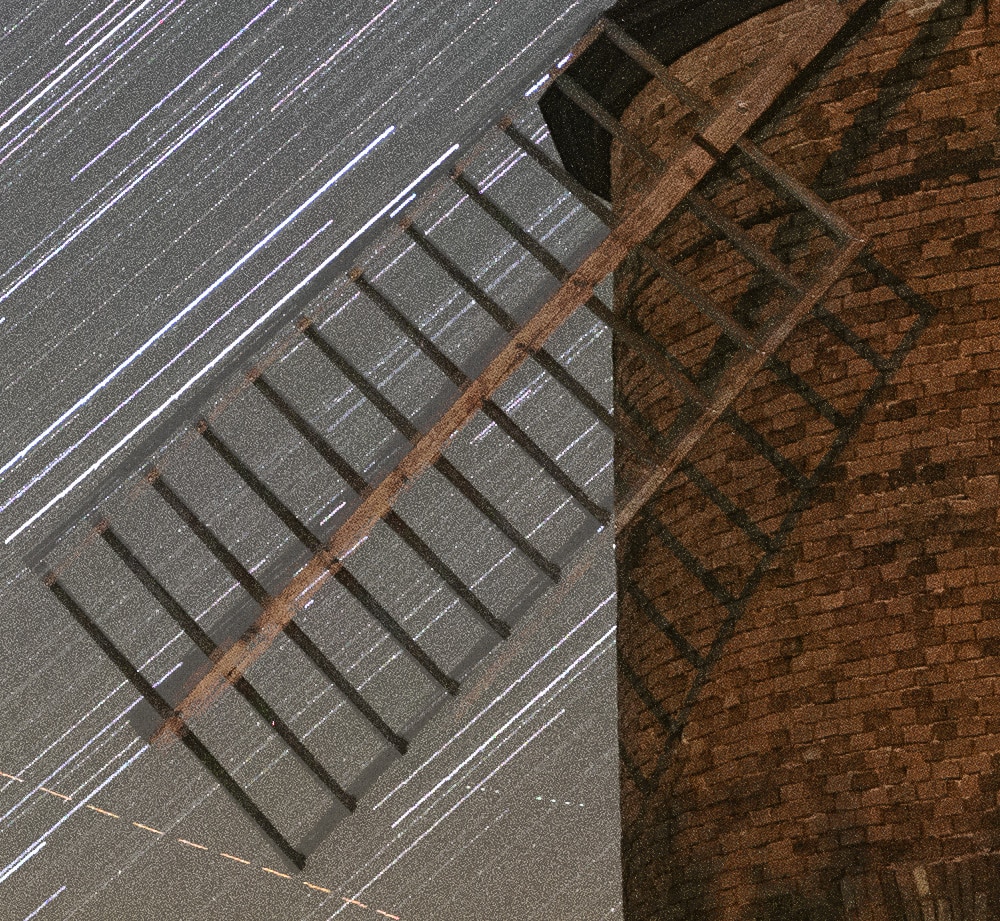
However, there’s one more big “uh oh.” The blades of the windmill moved about 20cm due to the strong winds during the shoot. The stacked image appears blurry and the position of the last lit-up image doesn’t fit with the foundation. This means an automatic blending mode such as Lighten can’t be used.
Time-consuming masking and retouching
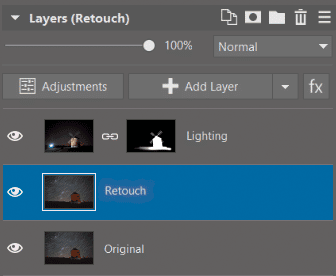
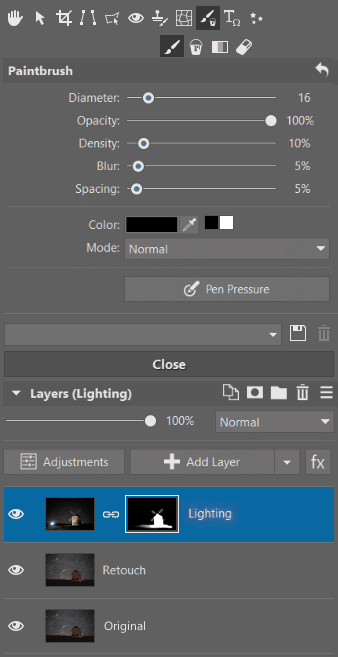
In the end, I opted to combine the resulting star composite with the photo lit by flashlight in the Normal blending mode, creating a mask for the illuminated image in Zoner Photo Studio X. I retouch the visible issues in the second layer by cloning the stars.
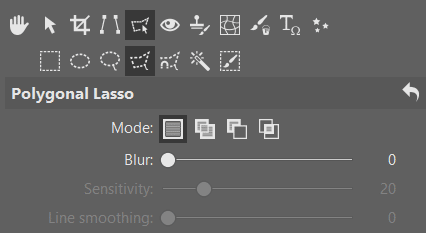
There are many ways to help you create a layer mask. The Polygonal Lasso is a useful selection tool because it allows you to add to the selection or subtract from it. The resulting selection is then used for painting black or white in the mask.
Still, there are many places where I reached for the paintbrush to carefully tweak the mask in detail.
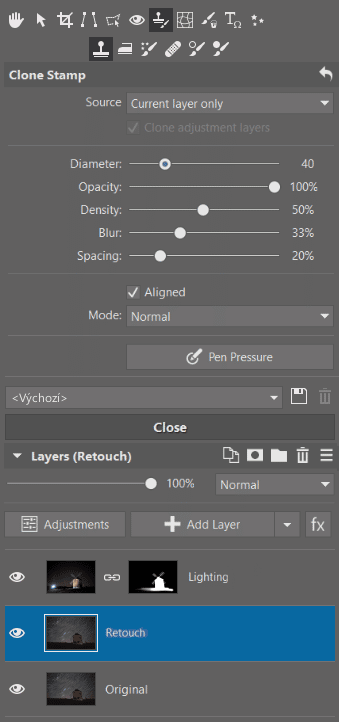
As soon as the blurry parts of the windmill blades were revealed this way, it came time for the Clone Stamp which I used to fix the problem areas.
Separate foreground and background
This method is time-consuming, but it has one big advantage: The windmill and sky are in two separate layers, so any light or color adjustments can be limited to just one layer.
I used this to increase the background contrast and darken the foreground. The very precise mask also allowed me to brighten the overly dark parts of the windmill blades. The final image also has its perspective aligned in order for the windmill to appear straighter.
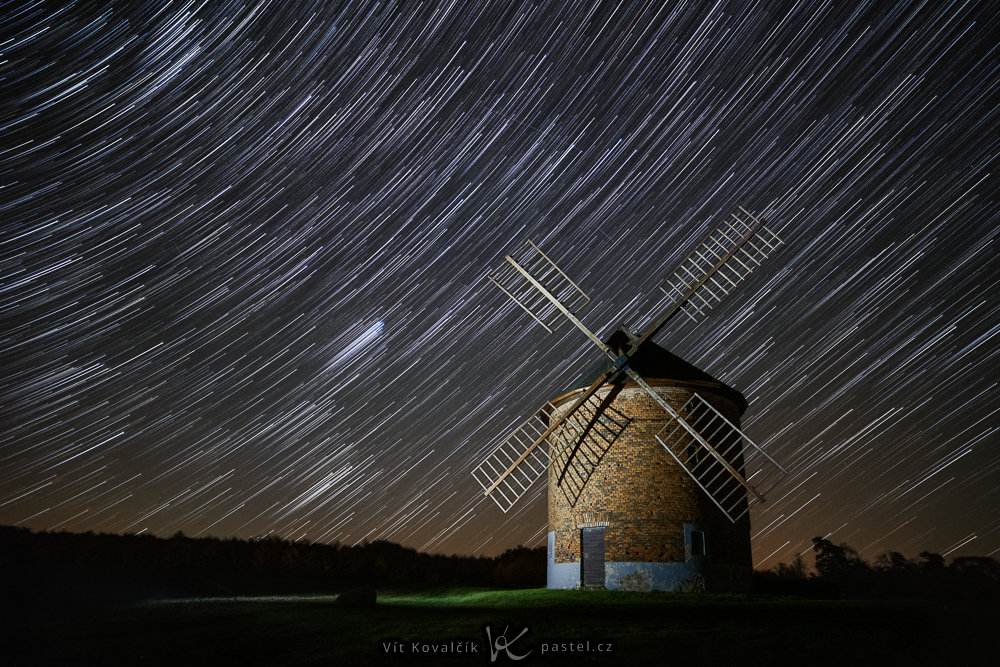
Per aspera ad astra
“Through adversity to the stars.” Even though everything didn’t end up according to plan, the result was able to be salvaged and I am happy with how it turned out. Next time, I’ll try focusing my camera on something a bit more stationary.
There are no comments yet.