3 Tips on Shooting Portraits Against the Light
Taking pictures against the light doesn’t have to mean ruined photos. Not at all. It can give you some very impressive portraits. And all you need here to keep from ending up with an unusable picture is a little skill. Take a look at the right way to shoot a portrait against the light.
Some readers may be surprised at this, but: I actually like shooting against the sun. For example at weddings I may even sometimes arrange a group of people against the sun—to the consternated cries of some of the guests. On the one hand, yes, they’re right. Taking pictures against the sun can leave you with unusable results. But when you know your camera’s limits and possibilities, you can work with this situation.
Why It Pays to Shoot Against the Light
I’m not saying that it’s the best possibility for every situation or that it’s the only way to shoot. However, taking pictures against the light offers you two undeniable advantages:
- The people in the pictures won’t tend to squint and grimace as they would when you’re shooting in the opposite direction.
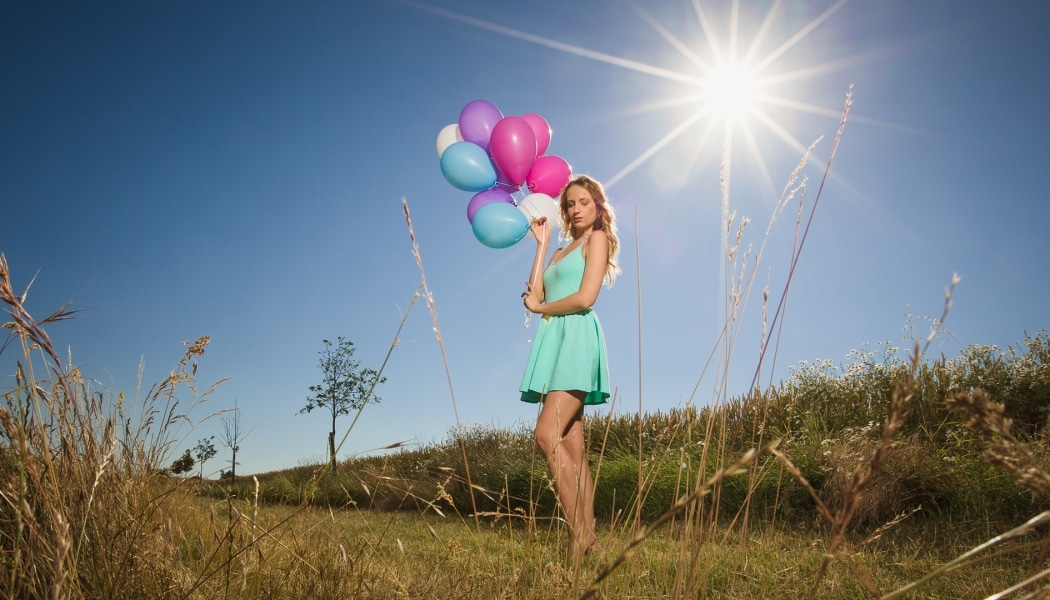
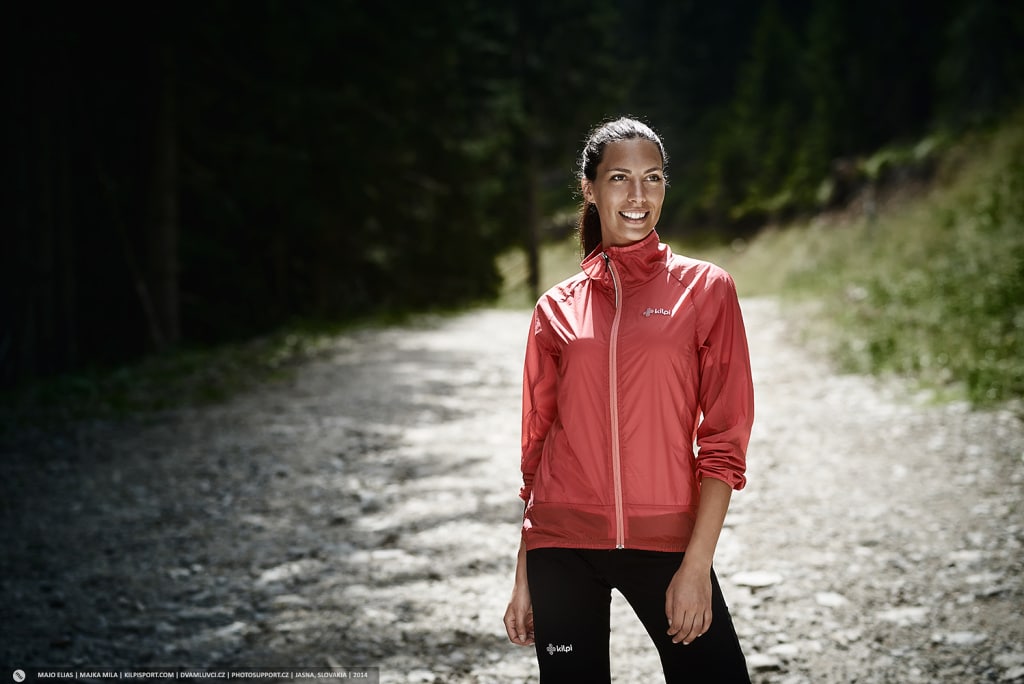
- And what’s more, the light will form an “aura” around them and their clothing from behind, optically separating them from their surroundings. This effect is striking for subjects who have light hair.
Meanwhile, you often don’t have to have the sun in the frame. It’s enough to have it high over their eyes and also above your picture.
Canon 5D Mark III, Canon EF 70-200/2.8 IS II, 1/160 s, f/2.8, ISO 100, focal length 142 mm
The Catch When Shooting Against the Light
The scene’s enormous dynamic range will stand against you. It’s hard for your camera to register both the light background and your dark subject. Depending on whether or not you have exposure metering active and on your photographic style, backlighting can typically mean one of the following two things:
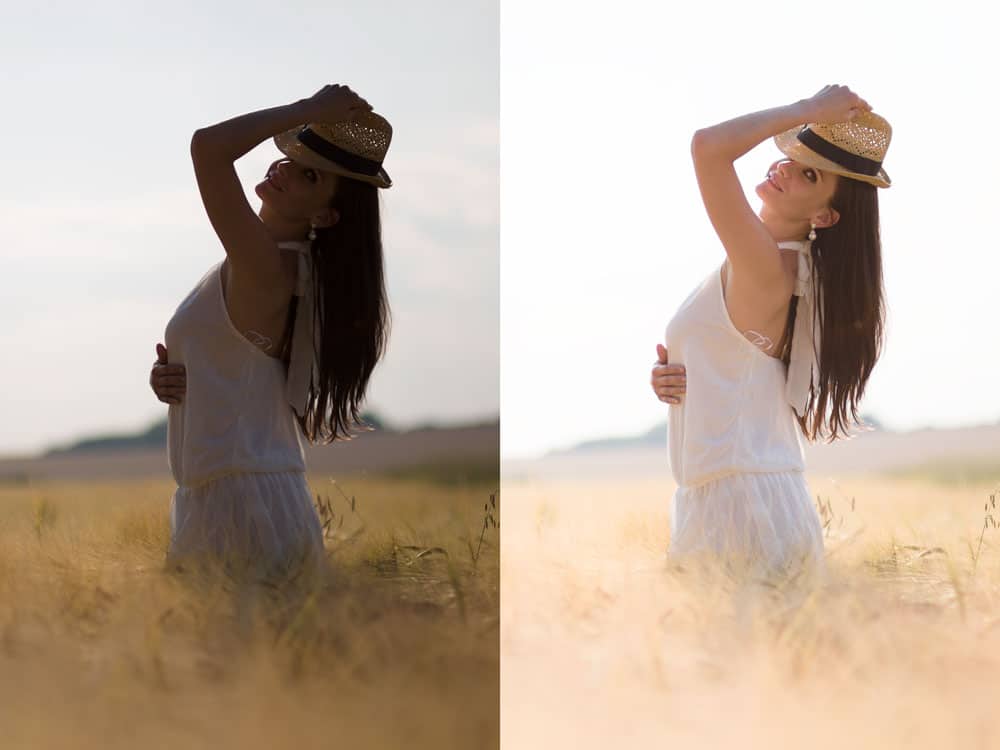
It’s hard to blame the camera’s automated systems for not resolving the problem. Even if only because no ideal solution exists. In the photo on the right, the model is nicely visible, but the sky is overexposed to the point where it’s lost detail that you won’t get back on a computer. The left version is better in that respect. All of the picture’s information has been preserved—but this photo can’t be used without an edit. Because of this, many people will not prefer this version.
Basically nothing between these two variants makes sense to consider. An in-between version with “only a little loss of detail” in the sky, where the model is still dark, is less practical than either of them.
You can also decide that one of these two variants is ideal for your aims. This is of course possible, and in some cases it’s the best available solution. But there are other ways to work when you’re shooting against the light.
Tip 1: Find a dark background
There are several possibilities for getting the pictures you want when you’re shooting against the light. Often for example it pays to look around your surroundings and find a dark area to use as your background. Because you’re shooting against the sun, almost everything will have a shadow cast in front of it. So this shouldn’t be an unsolvable problem. A forest or any other kind of greenery makes for a great background here.
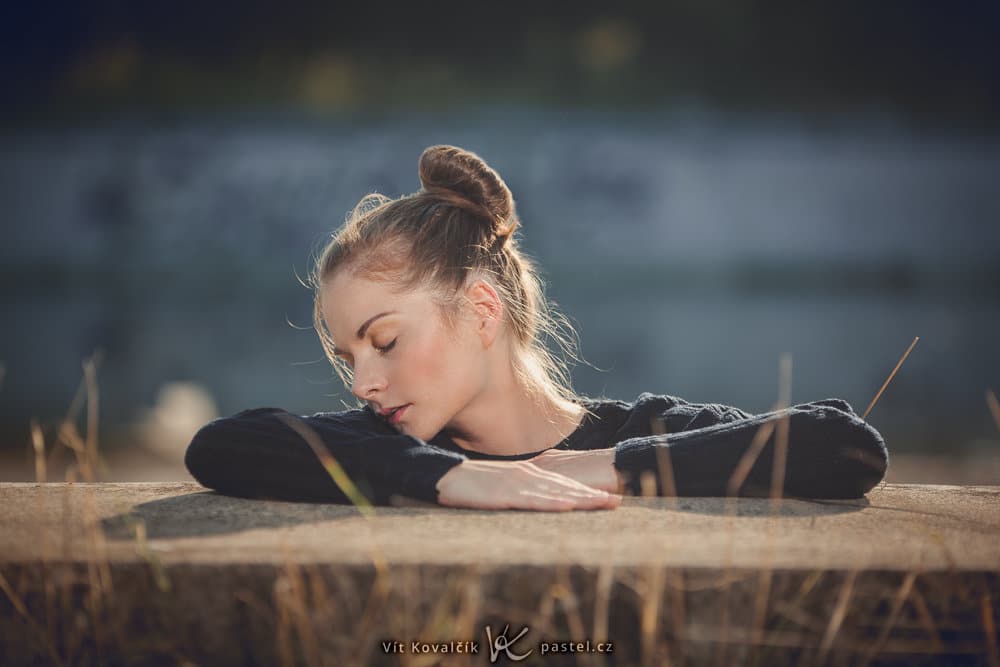
Notice in the following photo that while the background is shrouded in its own shadow, the subject is in still far enough in front of it to be outside of that shadow. So the sun is still shining on them.
Canon 5D Mark III, Sigma 50/1.4 Art, 1/640 s, f/1.4, ISO 100, focal length 50 mm
This solution gives an impressive photo. There will be a light aura in the model’s hair, and it looks even more spectacular against a dark background. Also, the automatic exposure measurement will stop having such enormous problems and take pictures with relatively correct exposure.
But it also depends of course on what’s in front of the model. Precisely this factor will influence their lightness. Here it was light, sunlit sand that helped a little to light the model from the photographed side. And that’s where my second tip comes in.
Tip 2: Take advantage of a light source shining against the sun
With or without a dark background, you get the best portraits here when you can light the subject from the visible side in some way.
There are more options than you might think. You’ll either help yourself out by bringing an accessory (a reflector or a flash), or you’ll find some suitable object that reflects sunlight back at the model.
Reflector
A simple reflective sheet for reflecting light when shooting portraits. It’s fairly inexpensive and easy to find in a variety of sizes.

Photographers love reflectors, but these have the disadvantage that you need an assistant to hold them. For that reason I only use them on exceptional occasions. But they do their job without problems.
A Strong or Weak Flash
My favorite approach is a remote external flash (like the Nikon SB-5000 or Canon 600EX-RT, but also their Chinese alternatives) or a battery-powered flash. You don’t need an assistant when using them; a tripod is enough. But it can’t be too windy. A strong wind will blow down your equipment.
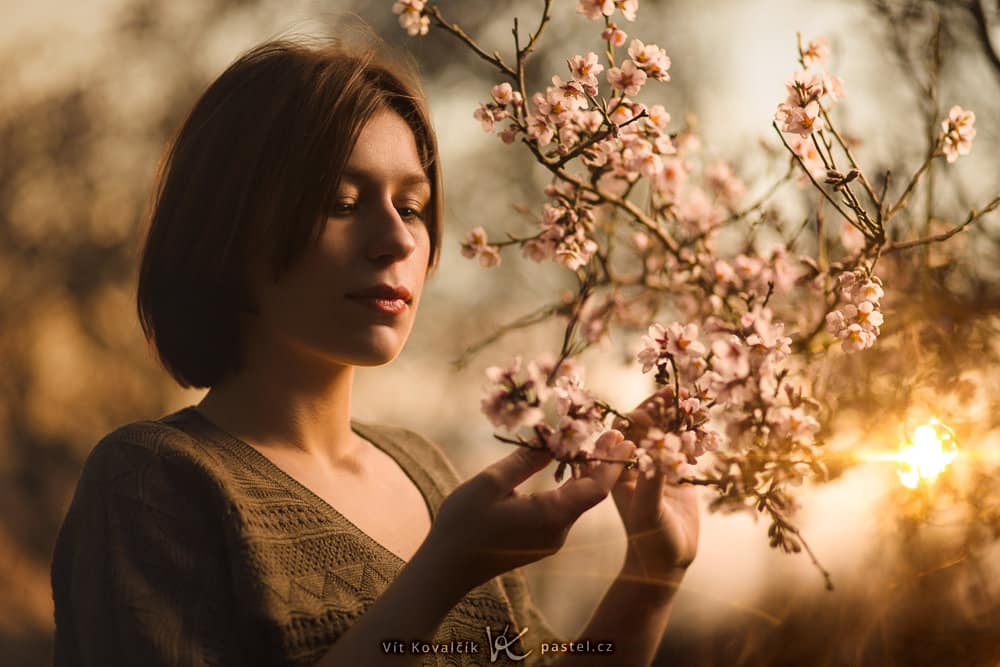
Canon 5D Mark III, Canon EF 85/1.8, 1/200 s, f/1.8, ISO 100, focal length 85 mm
The “backstage” picture here shows how this shot against the light was created. The flash is inside of a softbox that softens its light. I used the same exposure as in the previous photo. So it’s good for you to be able to see how everything except the sky would have been dark if there hadn’t been an artificial light source here.
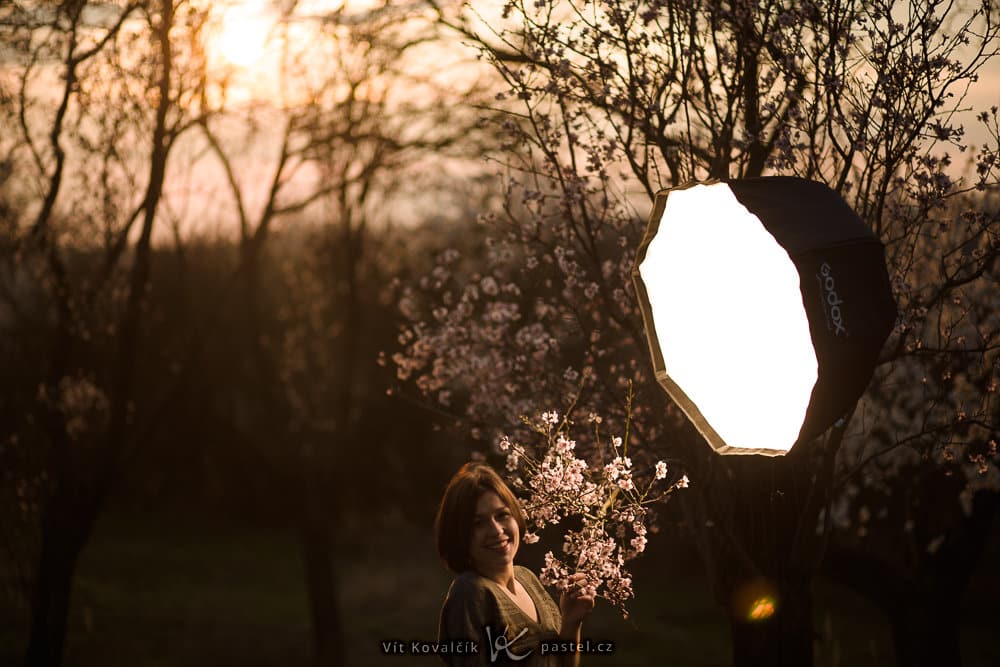
Canon 5D Mark III, Canon EF 85/1.8, 1/200 s, f/1.8, ISO 100, focal length 85 mm
During a sunset you also don’t need much flash output. So you can get by even with a small flash. With a strong battery flash, however, it’s not a problem to shine it from a larger distance through a similar softbox (which will also reduce its output) even during an intense afternoon sun.
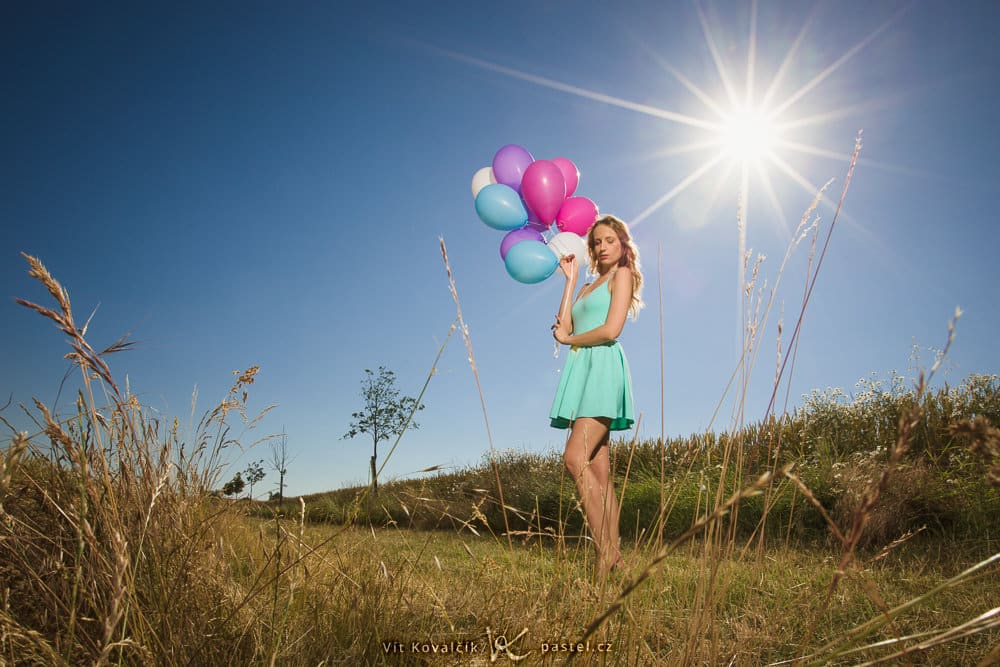
Canon 5D Mark III, Canon EF 16-35/2.8 II, 1/200 s, f/16, ISO 100, focal length 16 mm
A Reflection from a Nearby Object
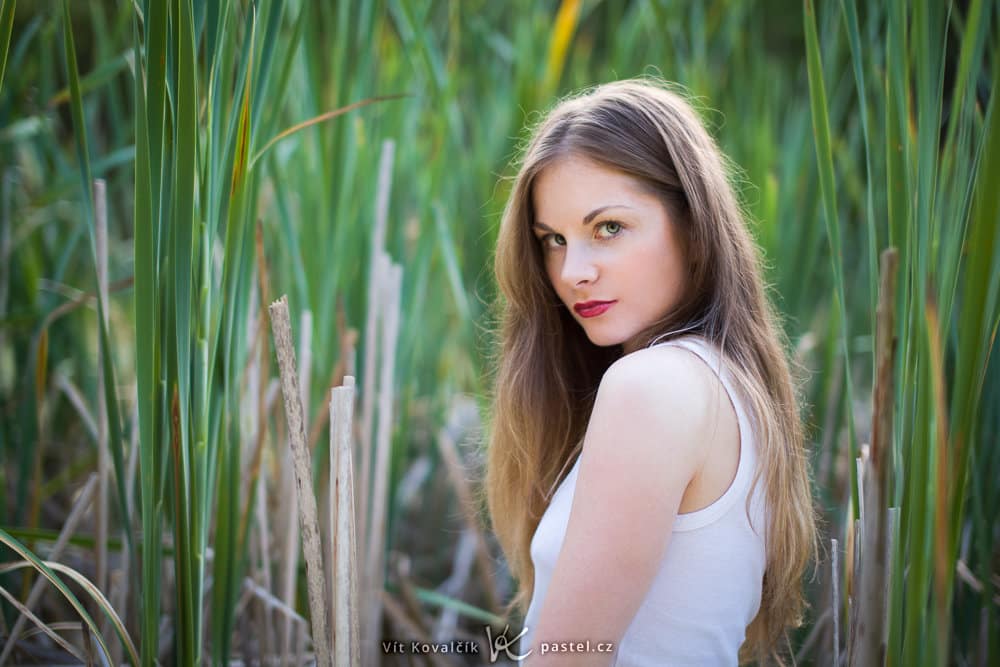
In the city there are buildings everywhere to reflect the sunlight, and they work as giant sources of diffused light. But you can also seek sources elsewhere. In the example there’s a model by a pool that is surrounded by lightly colored, light-reflecting tiles. Because of these the girl isn’t very dark. In this case the sun is more on the right, but it’s still not shining into her eyes.
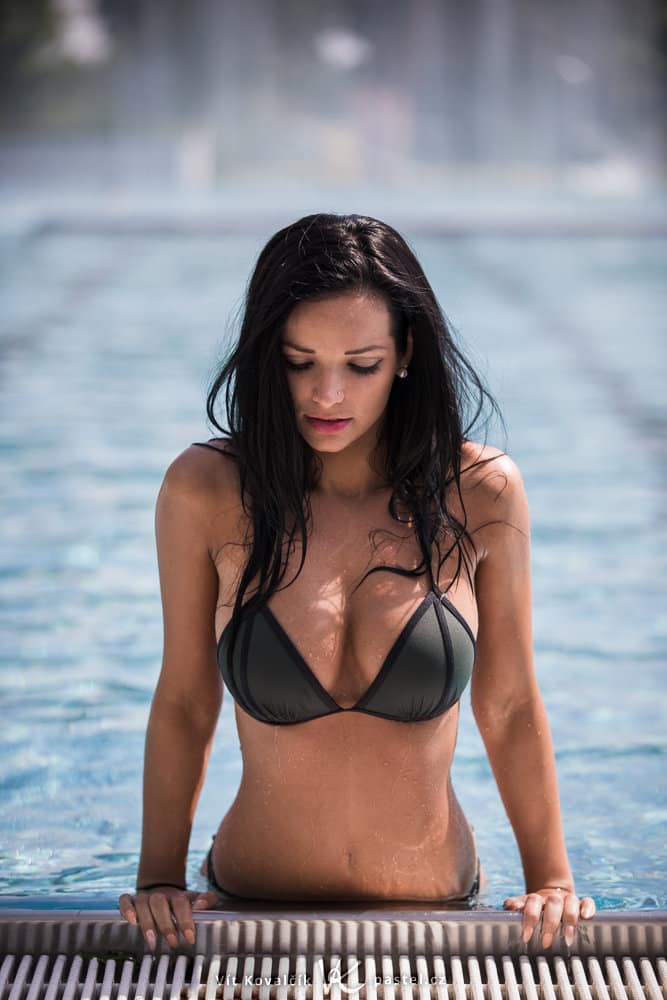
Canon 5D Mark IV, Canon EF 70-200/2.8 IS II, 1/1250 s, f/2.8, ISO 100, focal length 110 mm
Tip 3: Take your pictures in a way that lets you use local brightening on a PC
The last option is to brighten the portrait on a computer. In Zoner Photo Studio you can use the Selection Brush to precisely select which areas to brighten more and which less. You can make this work easier by utilizing a drawing tablet.
To brighten well on a computer, you have to take a source picture that’s dark enough that there won’t be any significant blowout (overexposed areas) on it. The ideal state will resemble this picture here:
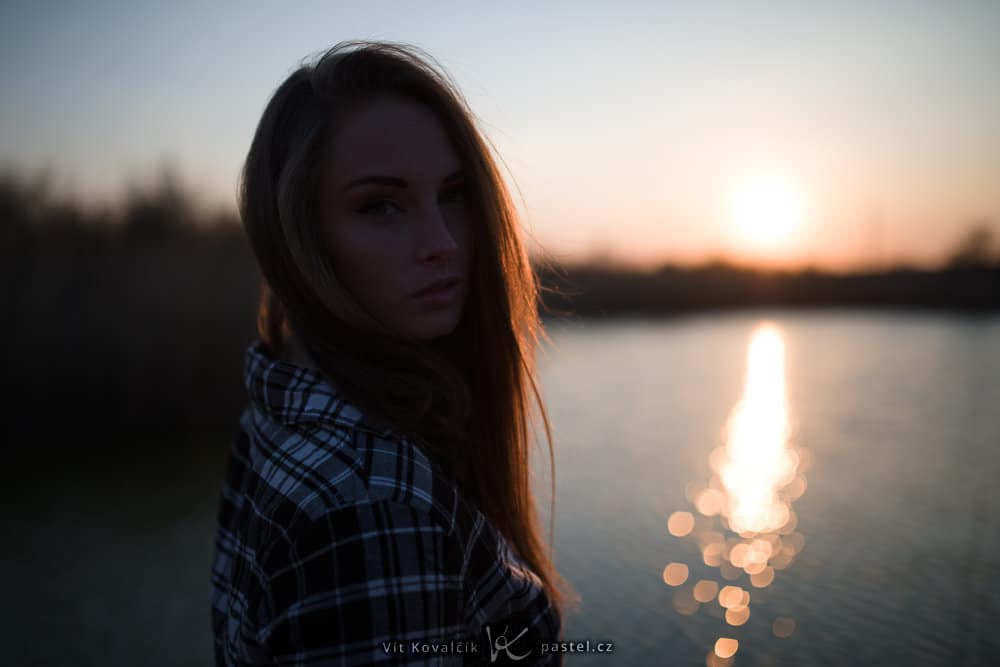
Canon 5D Mark IV, Sigma 35/1.4 Art, 1/3200 s, f/1.4, ISO 100, focal length 35 mm
and here’s the result after brightening this picture:
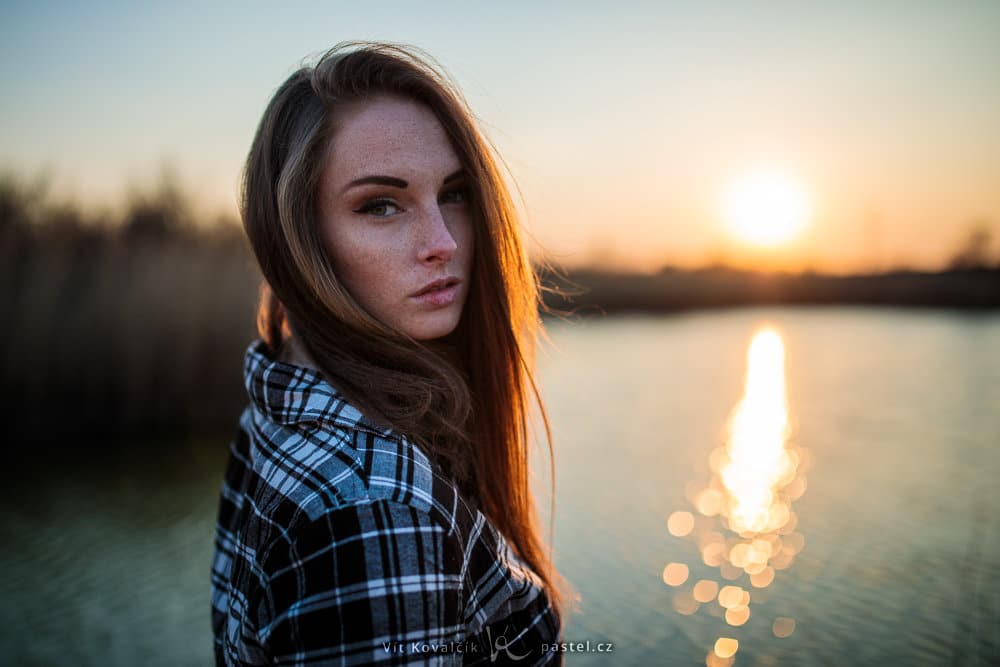
Canon 5D Mark IV, Sigma 35/1.4 Art, 1/3200 s, f/1.4, ISO 100, focal length 35 mm
The disadvantage is that after you take your picture, you can’t see very well on the camera display what you photographed.
Another problem is that brightening will increase the noise. So this approach will test the limits of your camera. Cameras with a high dynamic range will be at an advantage here—especially full-frame DSLRs and mirrorless cameras, such as the Nikon D810 or Sony A7R III, or the Canon 5D Mark IV, even though it’s a bit worse in this respect.
But even cameras with smaller sensors shouldn’t be disregarded. You can also take pictures against the light that are brighter than in my example, and that will immediately cut down on the noise. Also, if a low resolution is going to be enough for you, for example for Facebook publishing, you can brighten even smartphone pictures this way, and nobody will notice.
Test Your Eyes and Your Camera
In the situations I’ve described, it’s best when you know in advance what you can get away with on your camera and how dark of a picture you can still brighten successfully. And if you know how to reveal the surrounding scene as well and imagine where the sunlight will be reflected, you’ve won. But these are skills you can’t just train on a computer. You have to get out there and take pictures.
There are no comments yet.