Slimming in ZPS X? Use the Liquify and Facial Features Tools

Who wouldn’t want to lose 30 pounds in 5 minutes or get a pain-free nose job? We can’t help you with that in the real world, but in photos, you can whip up just about anything you want in Zoner Photo Studio X. Try the Liquify and Facial Features tools introduced in the spring update and learn how to enhance faces and bodies.
The latest update to Zoner Photo Studio X adds a couple of completely new tools for editing faces. Artificial intelligence lets these tools automatically recognize faces and every part of those faces. That speeds up your editing considerably, and in combination with other deformation tools, you can edit anything you want.
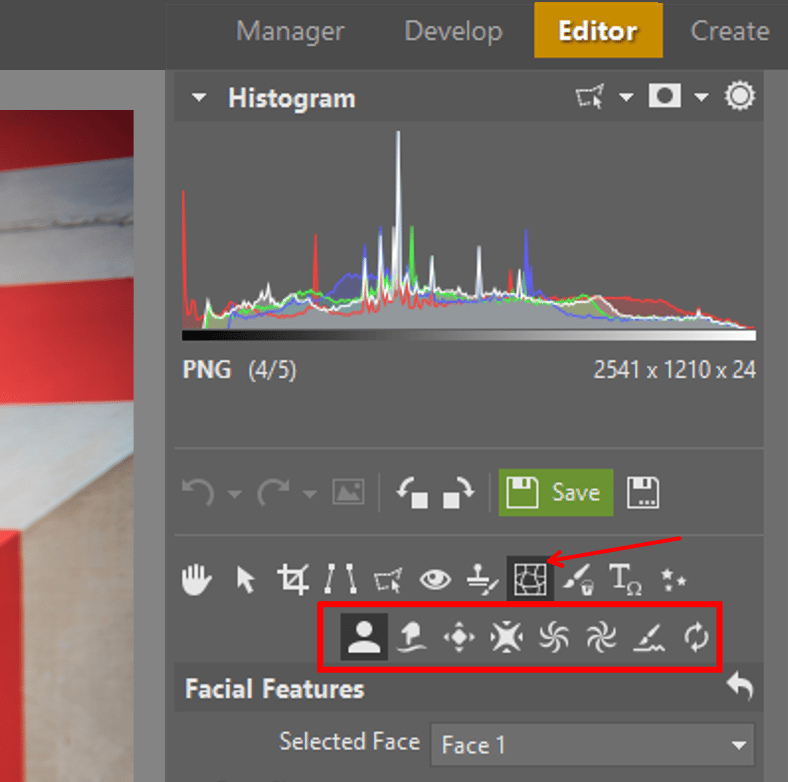
A New Look for the Deformation Tools
You’ll newly find all of the deformation tools together with the Facial Features tools in one place. Start up Zoner Photo Studio X, open up your photo in the Editor, and go to the Liquify group in the right panel. It contains several tools for different types of deformations.
The first of these tools is Facial Features (Shift+X), which uses artificial intelligence to automatically detect all the faces in a photo, no matter whether they’re facing head-on or to the side, and offers a number of ways to improve faces’ shapes. The other tools are for manual deformation. Use them to shape bodies or manually fine-tune parts where the automated face adjustments weren’t enough.
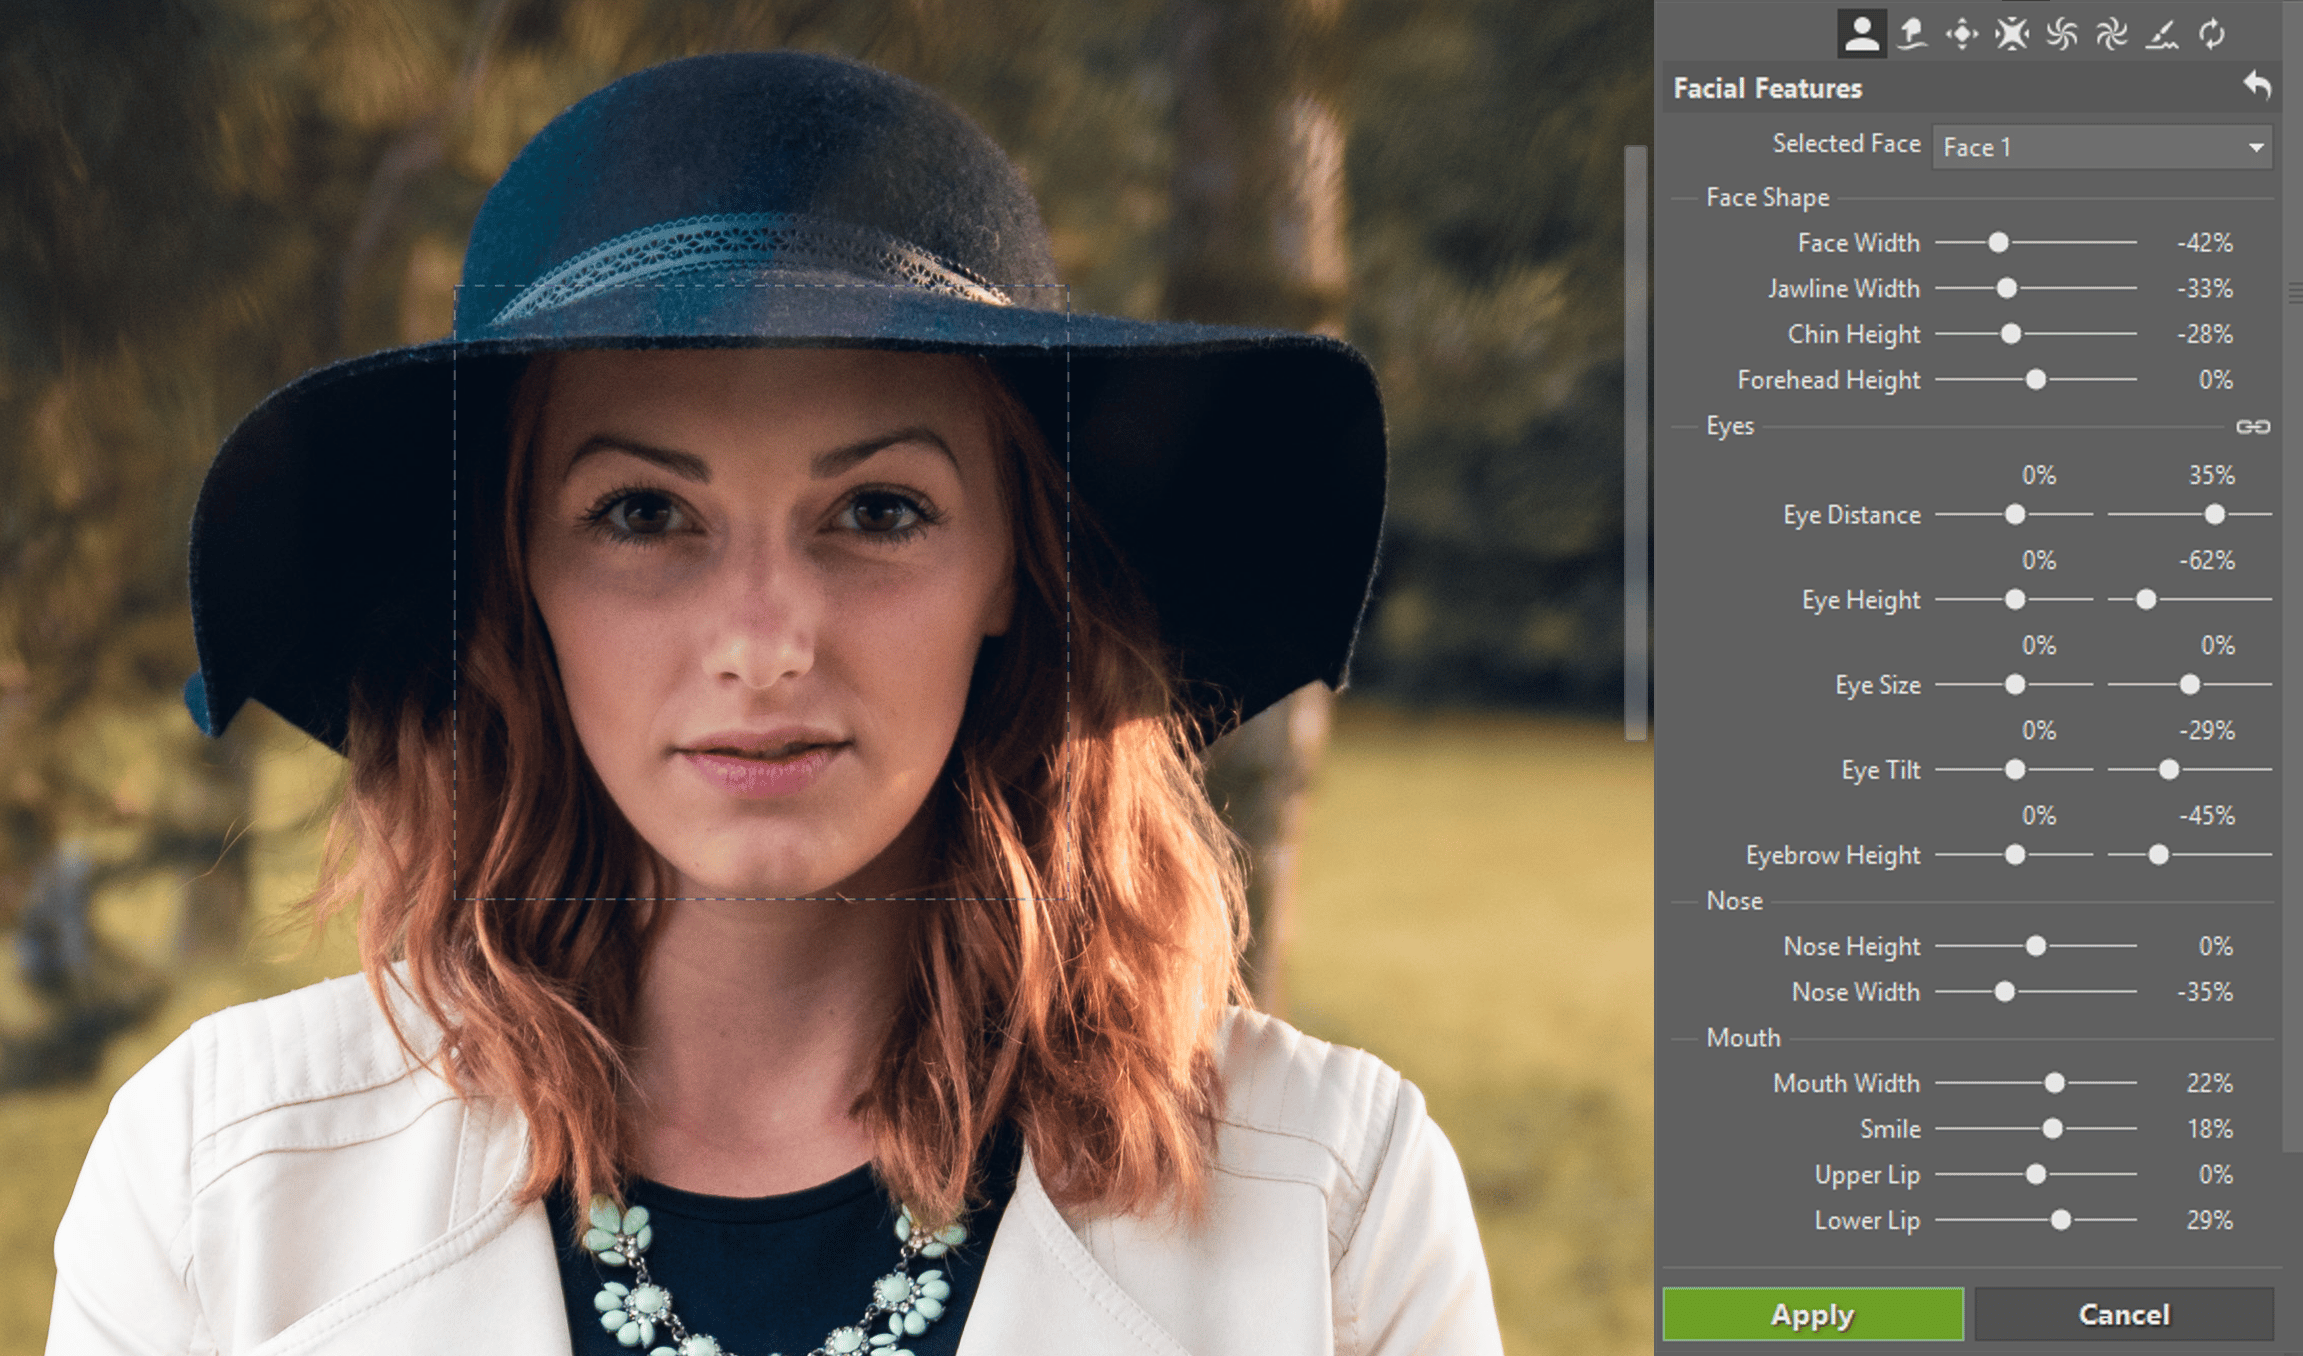
Select and Edit the Face
Do you need to edit someone’s face? Just click on it or use the option to edit all if there are multiples faces in the photo. Edit the cheeks, eyes, nose, and mouth one by one.
It often looks best if you make the cheeks wider to make the face look thinner. Adjust both of the eyes at once before adjusting them individually. Only after that, if you need to, use the icon at the top to turn off simultaneous editing of both eyes. Try to ensure that your size and placement make the eyes look as similar as possible. Use the width set to shrink a person’s nose; feel free to add a smile if you need to, to make the photo feel more positive.


A photo before and after face editing. (Photo credit: JoliFOTO)
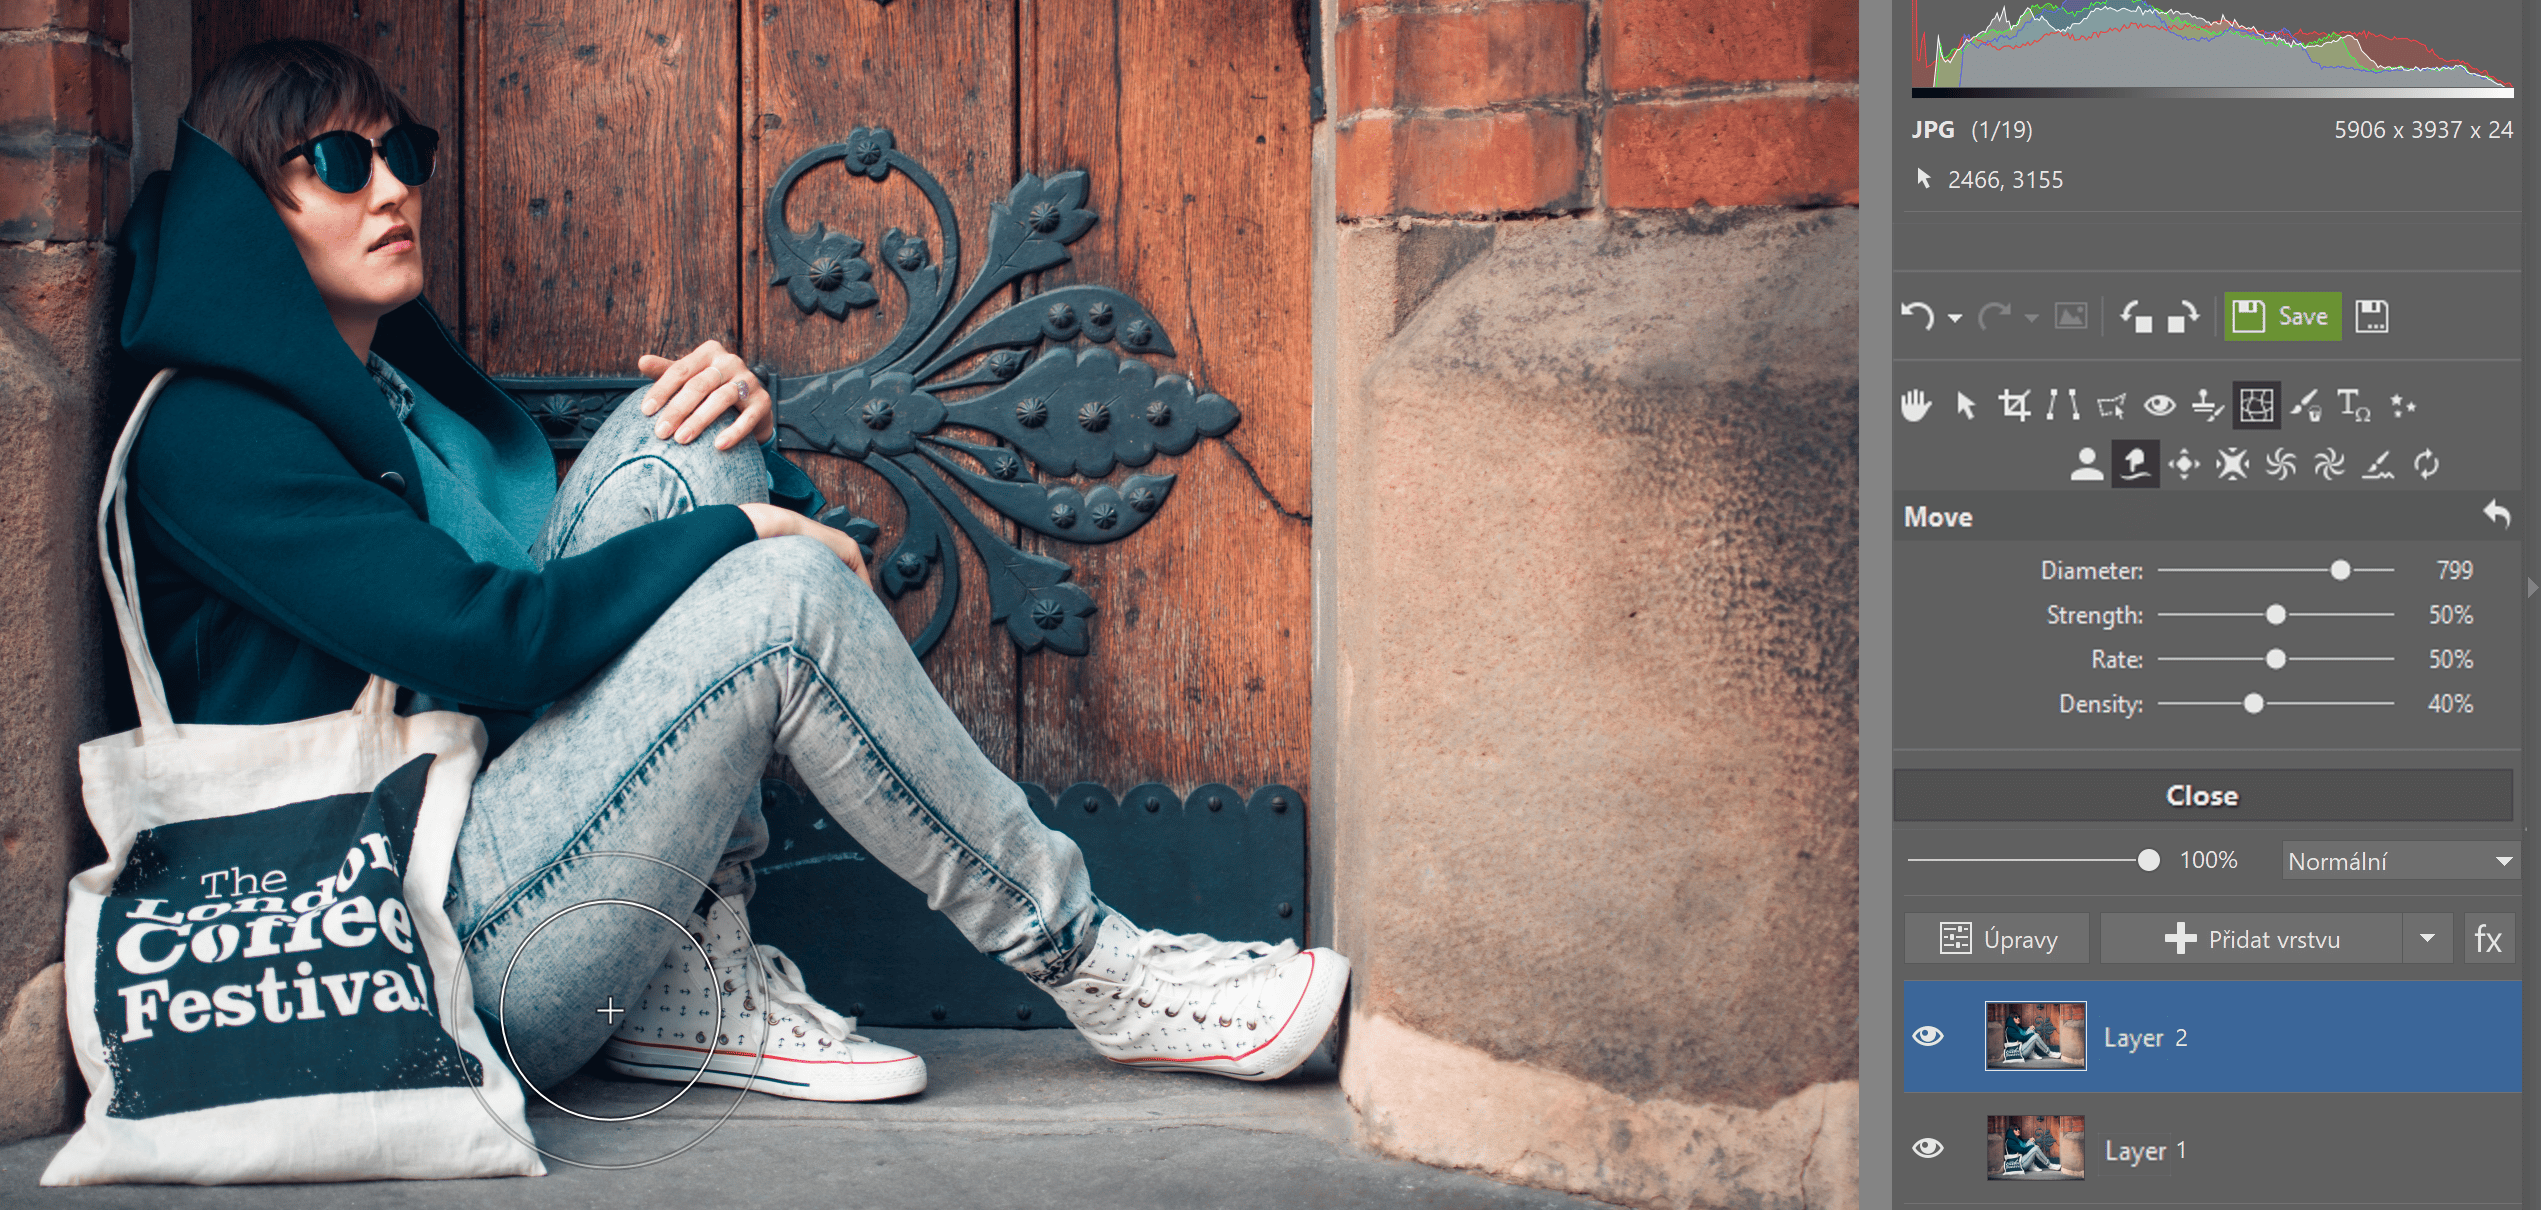
Adjusting the Shapes of Faces
Most often you’ll be using Move tool, made for shaping or slimming of people’s bodies. Just click and drag to shift the edges of their bodies into the middle. Always use a radius that makes the part that you’re shifting roughly the same size as your brush.
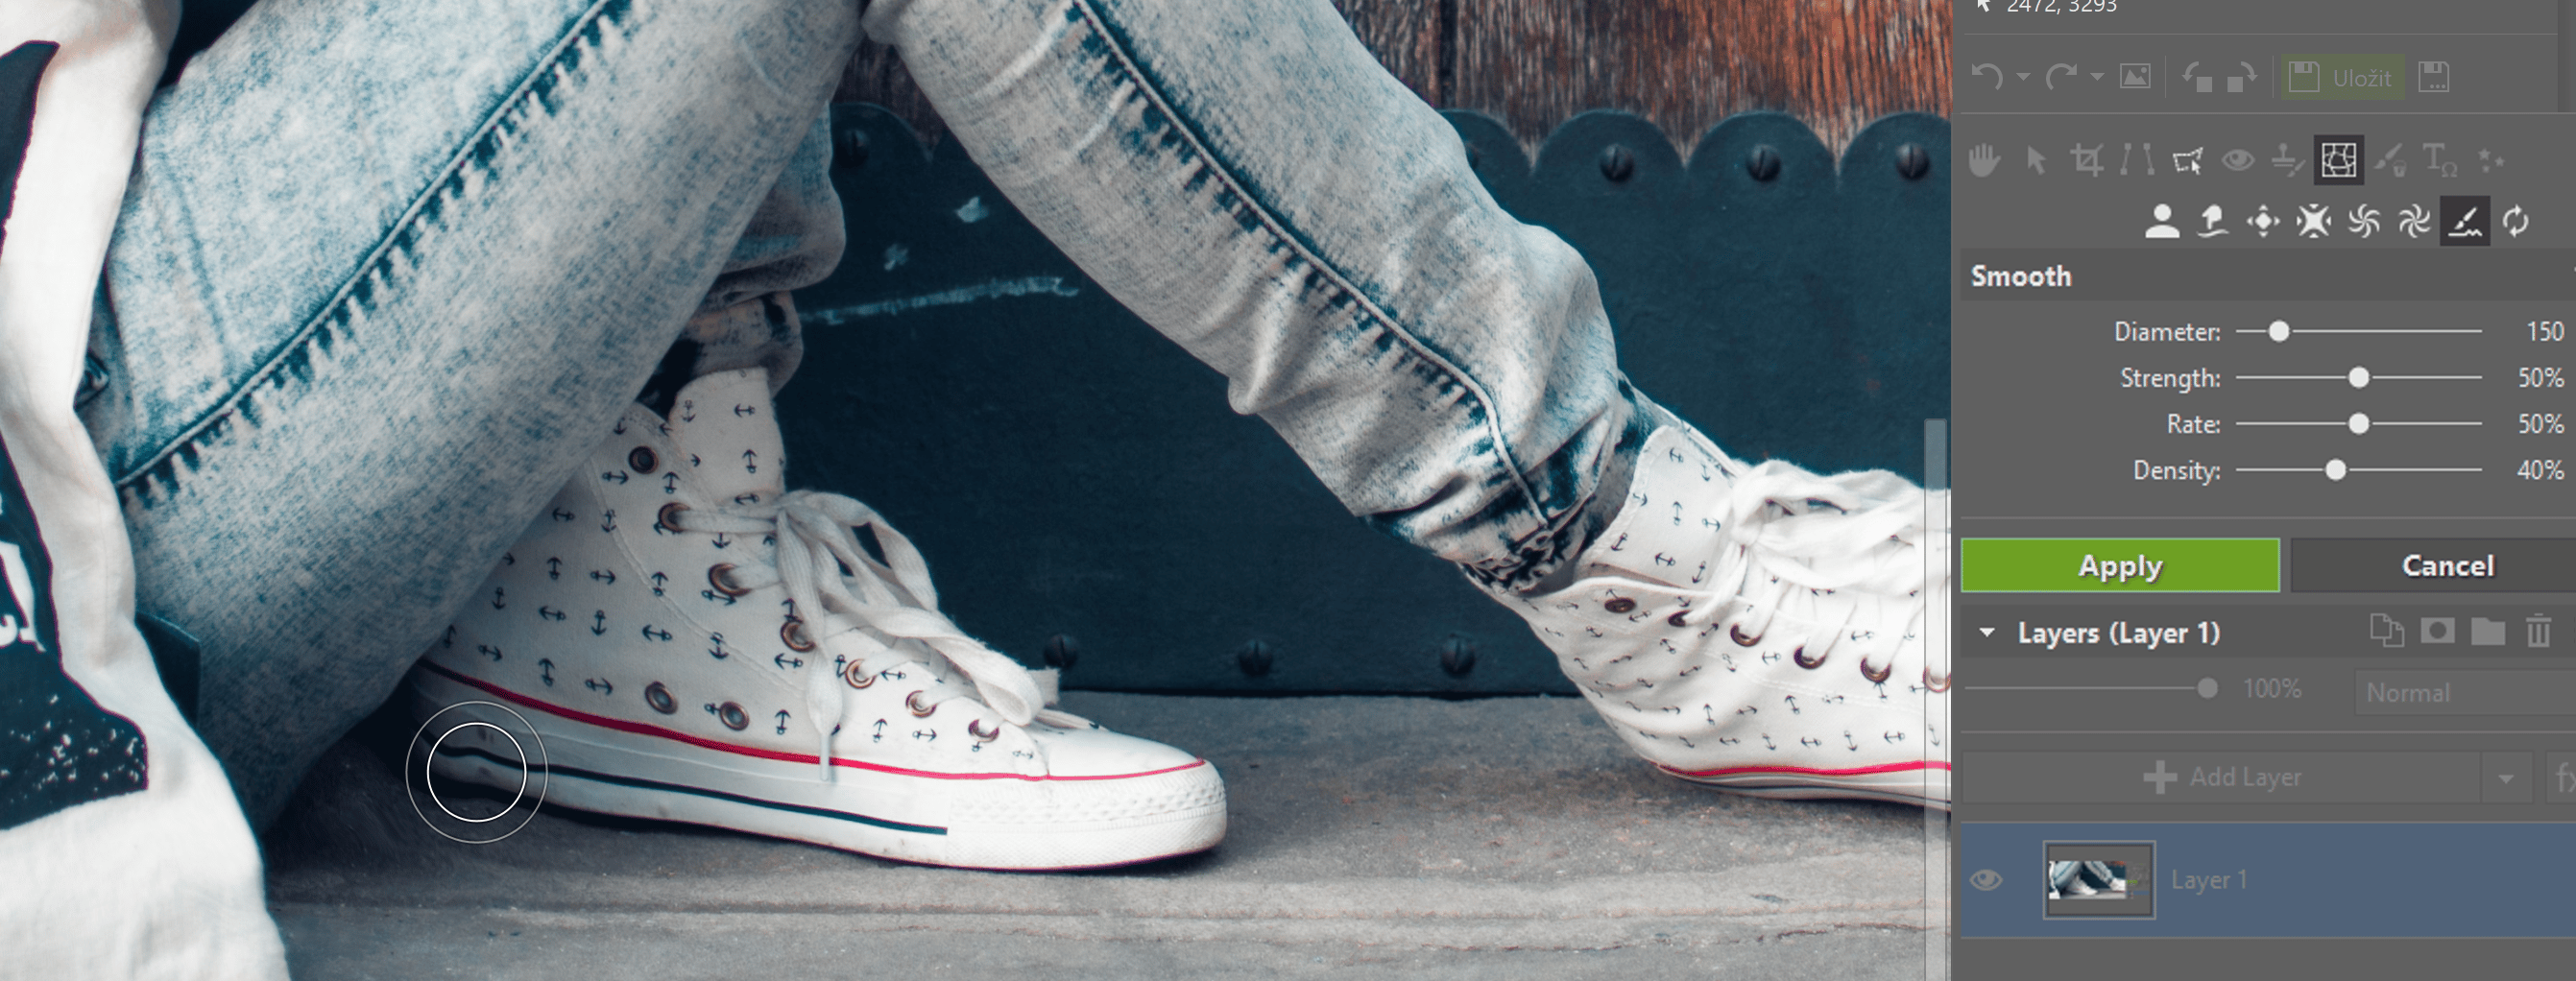
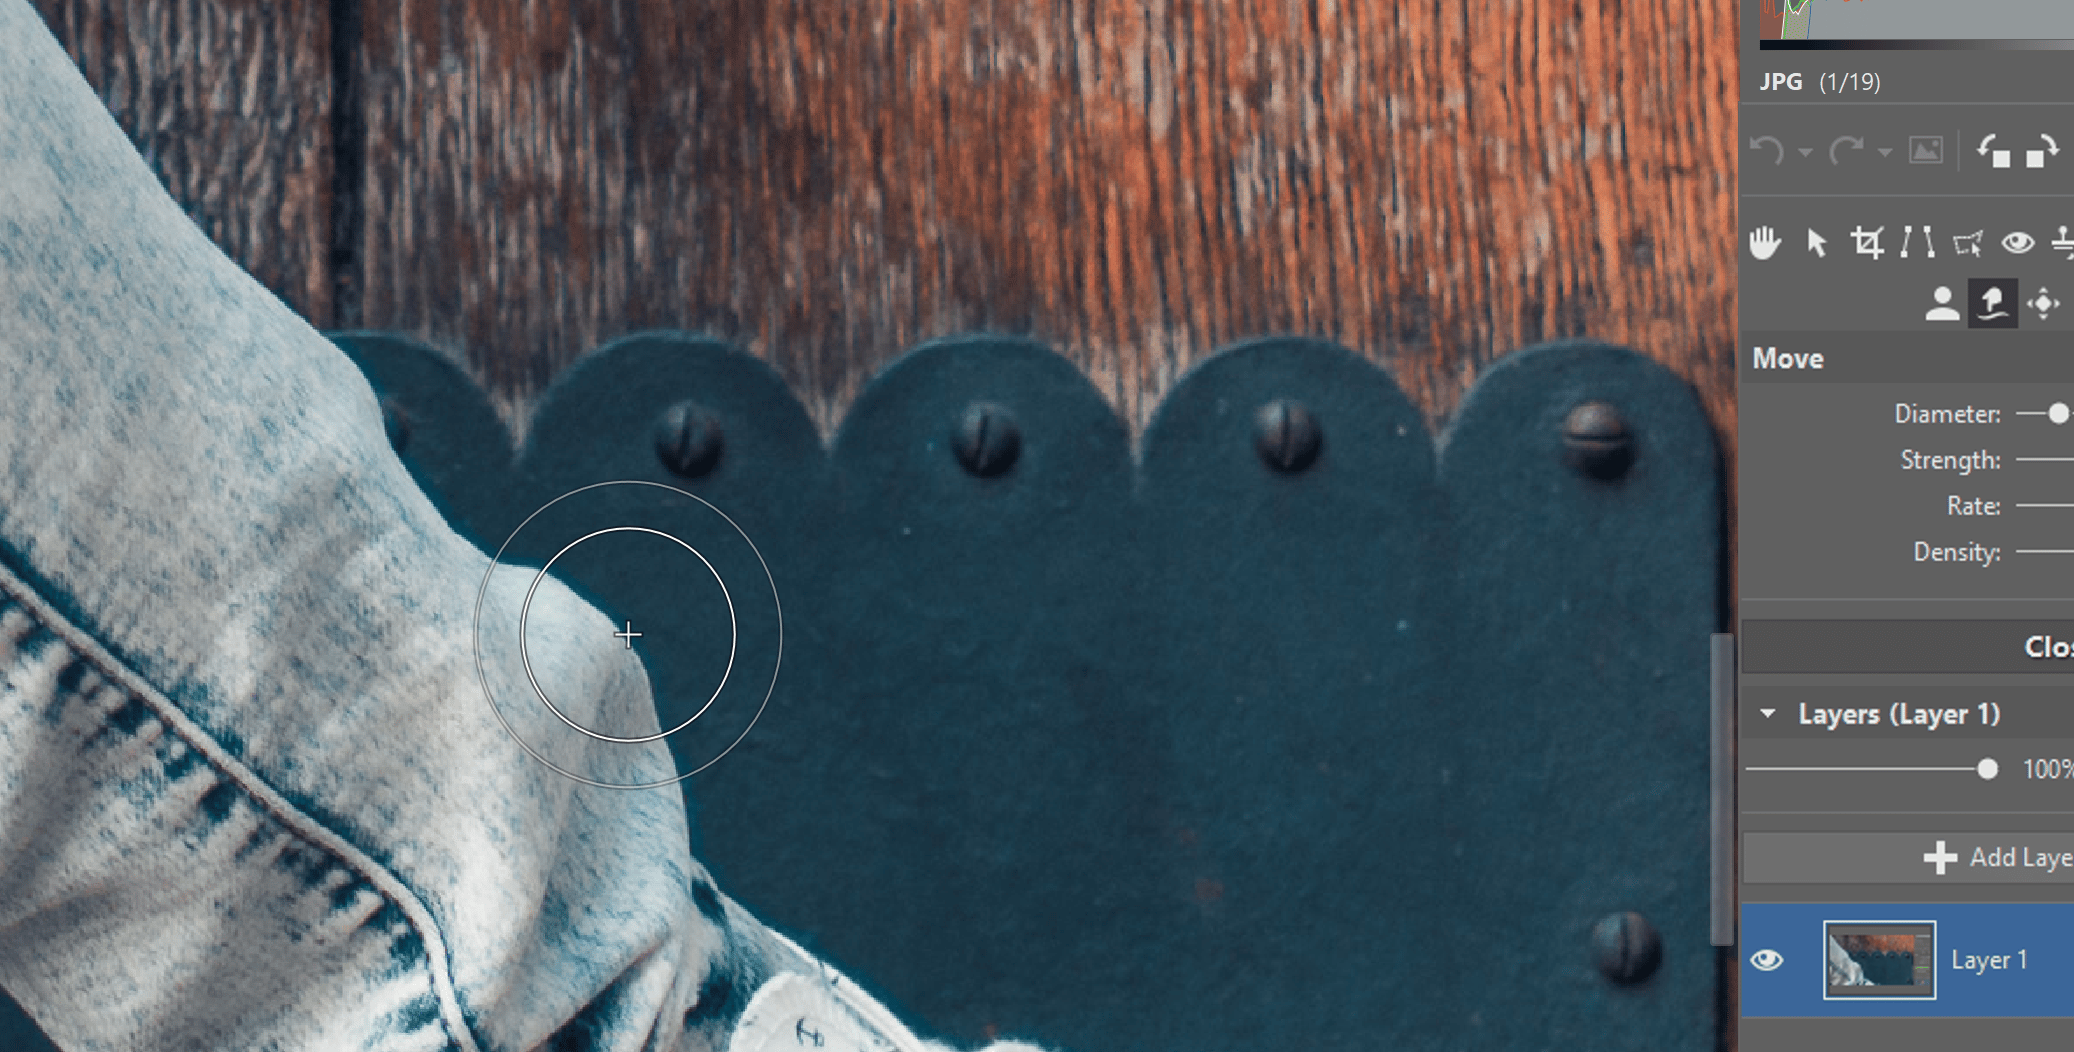
Keep an Eye on the Surroundings
One frequent beginner’s mistake here is causing visible deformation of straight objects close to someone’s body. If the tiles behind a person are suddenly wavy, everyone will notice that. So don’t just adjust people’s curves; adjust the lines around them too.
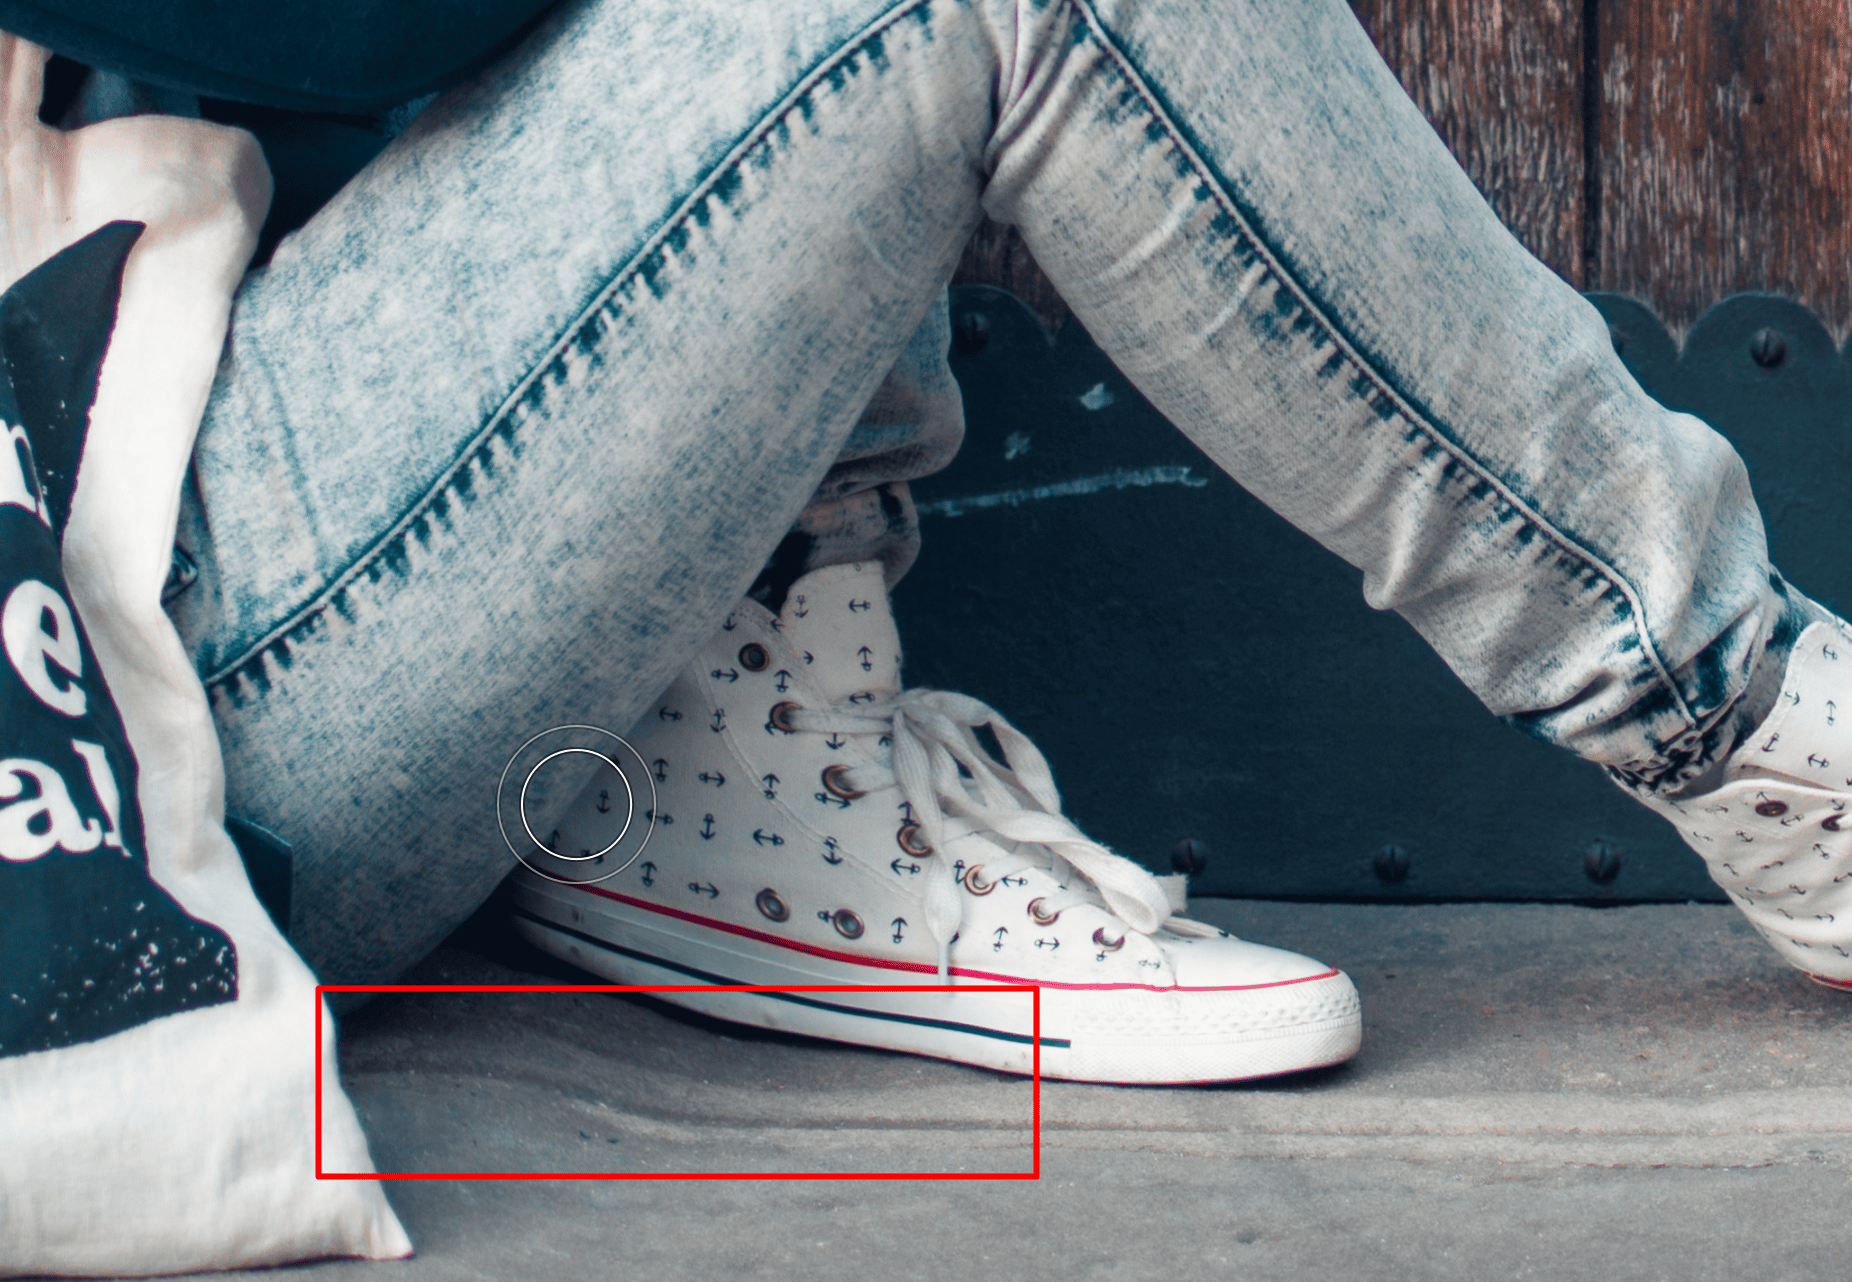
Use the Smoothing or Restore tools for this adjustment. Smoothing adjusts the image towards a more natural look, while Restore restores a given effect back to its original form.
To restore the shape of a floorboard, use Restore because you need to get its original shape back. But to straighten a crooked shoe, use Move and then Smoothing, because you don’t want to move the shoe back to its original location; you just want to straighten the waves that were created in the straight parts.
Straightening Clothing
Most clothing looks naturally wavy on people, creating various creases when deformed that can damage the overall impression given off by a picture. If it seems that a t-shirt, etc. is sticking out in several places, adjust it just like you would adjust a body—with Move. Here again, try to use a reasonable brush size.
Other Tools
There are several other tools to be found in this category. Use Stretch and Shrink when you need to resize a specific area in all directions. For example when you’re increasing hair volume or shrinking ears that are too big.


A photo before and after this type of edit. (Photo credit: JoliFOTO)
Moderation in All Things
In any case, don’t overdo it with your deformations. Even though you can almost always achieve a perfect edit with enough time, don’t forget that your result has to look believable. Download Zoner Photo Studio X, try it free for 7 days, and test the deformation tools on everything you can think of!
There are no comments yet.