How I Struggled to Deliver a Cliché: Fruit in Water

To prepare for today’s article, I put together a type of shot that’s been done a thousand times before. Why? To show off how difficult it really is. Today I’ll be showing you step by step how my friend and I experimented with underwater photos of fruit. My hope is that my experiences will help other photographers try the same. So get out there and pick (or pick up) some fruit!
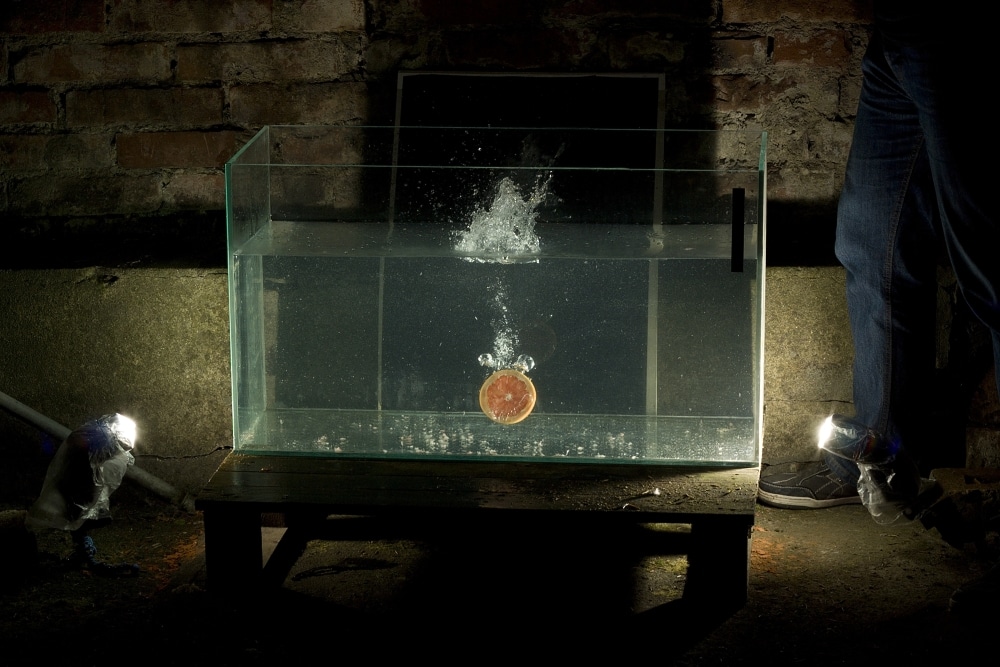
I chose fruit on a black background for the sake of simpler composition. (With a white background, I’d have had to handle the dark reflections in the bubbles.) Thus originally I had wanted to take all the pictures in a darkened kitchen. Unfortunately after a few attempts with a small vase, where our kitchen began to resemble a water park, my assistant and I had to move the experiment outside. Meanwhile, we dug a 250-liter aquarium out of my basement.
We were aware that daylight would not be bright enough to be able to freeze the water’s motion, so I brought a system flash to aid me (for more on these, see our external flash article), as well as a radio-based remote trigger. By the way, don’t forget to protect your electronics if you do similar experiments yourself. It doesn’t take the ocean or even a swimming pool to cause enormous water damage to your kit. And so to keep my equipment safe (well, and to prevent reflections), I chose a long lens—a Canon EF 75–300 4.5–5.6 III.

I switched my camera into manual mode, so that I would have the scene under control. The core plan was to eliminate surrounding daylight, get a dark background, and illuminate the submerged fruit with my flash.
The best way to darken daylight is to use a short exposure time. But since I was using a triggered flash, I lost the option of using speeds shorter than my camera’s synchronization time. (For technical details on this problem and ways to approach it, see this article.) Thus I had to settle for an exposure time of 1/200 second. But that setup works well enough. I don’t have to worry about blurring of the fruit, because the sensor sees it under illumination for only a very short time (the length of the flash).
Using the aperture I governed the focal depth so as to keep the submerged fruit sharp while also keeping any smudges, reflections, and imperfections of the aquarium’s glass outside the focal plane. When adjusting the aperture during your own work with submerged objects, you may appreciate this calculator for focal depth, that is, for the range of distances in which objects in the picture are sharp. In my case, a focal depth of about 11 cm—ideal for the sizes of the fruit and the aquarium—corresponded to an aperture of f/9.0 at a distance of 1.5 m (the lens’s minimum focal distance).
I also regulated the strength of the external flash so that the fruit would have good visibility while reflections off of bubbles would not be overexposed.
If you decide to do similar experiments of your own, then I can recommend using a tripod. It will eliminate unsharpness caused by camera shake and make it easier to focus: you’ll just need to focus once (on the fruit held in the water) and turn off autofocus.
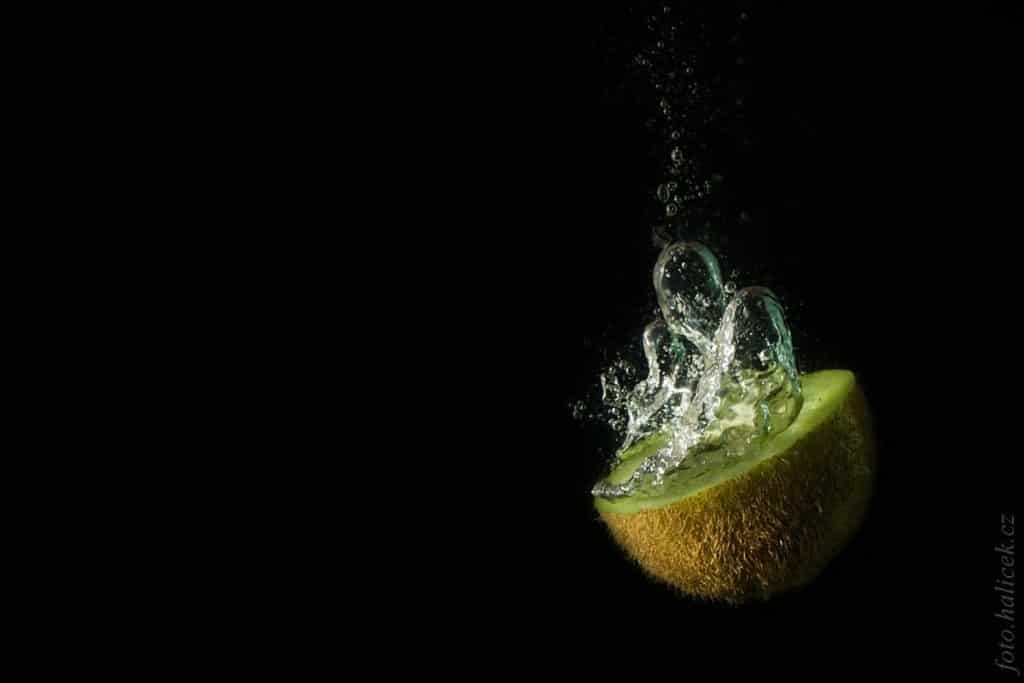
During my experimentation, I didn’t use zoom much, because my assistant’s hand was sending the fruit into the water differently each time, and the fruit was sending off different bubble patterns each time. I was prepared to have to crop the photos heavily in postproduction.
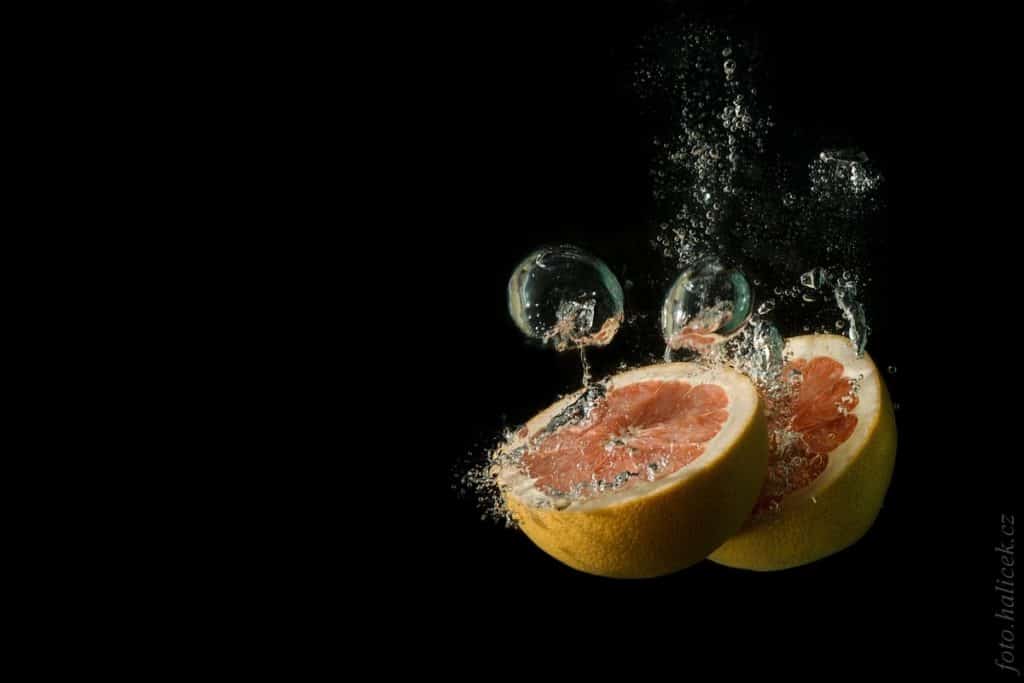
I had to repeat the experiment many times—the varying strengths and angles of submersion and rotation brought up a different scene of sinking fruit and bubbles each time. We got our best results using halved round fruit and using fruit slices, thrown like frisbees.
Overall the experiment taught me that even a subject as “banal” as fruit thrown into water can take significant effort and preparations, with no guarantee of good results. But on the other hand, it was also a pleasant spicing-up of a few summer weekends that helped me keep cool and refresh my knowledge of the rules of exposure.
Ever tried it yourself? Then write in to us about your successes in the comments beneath this article.
- A smooth-walled aquarium
- Assorted fruit
- One or more external flashes
- A plastic flash cover
- A black background
- A radio- or cable-fired flash trigger
There are no comments yet.