How to Add a Lens Flare to Your Photos (And Why to Avoid It)
The article is over 5 years old. The information in it may be outdated.
![]()
We are working on its update. In the meantime, you can read some more recent articles.
Lens flare in photos, including artificial lens flare, is fairly popular… though not with everyone. A lens flare can add life to a photo, giving it a story or energy. But it can also ruin a photo. Here we’ll be showing you how to add lens flare to a photo—as well as where you definitely want to avoid it.
You’ll get lens flare quite often when your camera is pointing towards the sun. In those cases you can practically be sure that your picture will be overexposed.
But sometimes the sun isn’t in the spot where you’d like to have it, and so it’s easier to add a fake sun to a photo using edits than to spend time waiting for the sun to reach the right spot.
Even I have quietly used this effect before, for example to add a lens flare to a photo in our article on the Golden Hour. And I think the result holds up, even if it is a photographic deception.
So in this article I’ll show you how to use Zoner Studio to easily add lens flare to a photo.
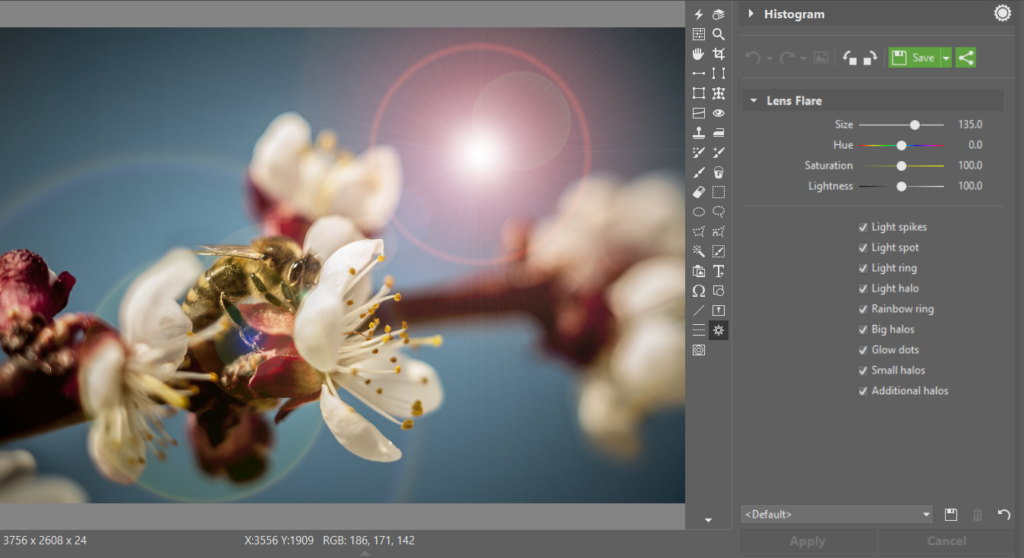
There are two routes you can add a lens flare in Zoner Studio—the Paintbrush, or the Lens Flare function (Shift+R).
Via the Paintbrush
The Paintbrush is one of the easiest ways to add a lens flare to a picture.
But when you’re doing this, keep in mind that you’ll only want to do it to a photo that already has a hint of sunshine or reflections. Otherwise the photo will look “edited” right at first sight.
The photo that I decided to add a false lens flare to was shot looking in towards the sun, and so all of its outlines are glowing, making the sun’s presence obvious.
Here’s the approach to take for adding lens flare to a picture like this in Zoner Studio:
- Open the photo in the Editor and activate the Paintbrush.
- Then adjust its settings to give it the highest Blur value that still respects its size and coverage. You may well want to reduce its Density a bit.
- Set its Mode to Screen.
- Click with the Paintbrush in the place you need a few times, as needed. Above all make sure not to overdo the intensity. For this edit, less is sometimes more.
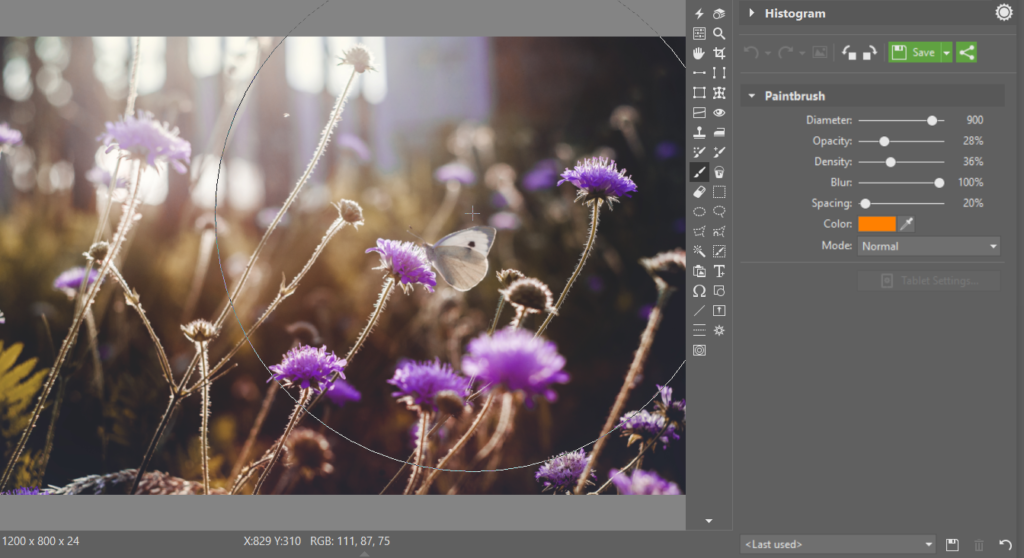
Here’s how the photo looks after applying the brush:
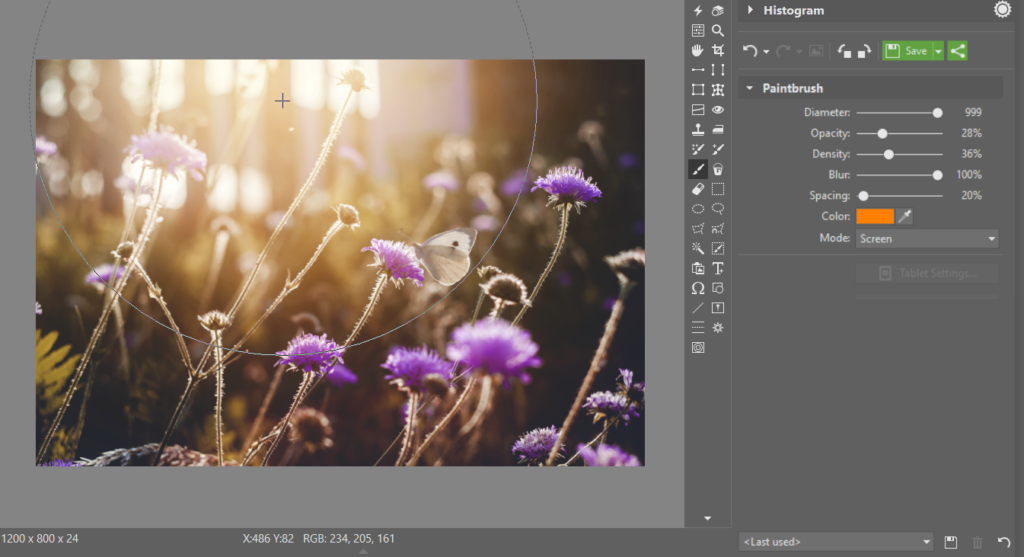
Our sample photo before and after our edit:

The Lens Flare Function in Zoner Studio
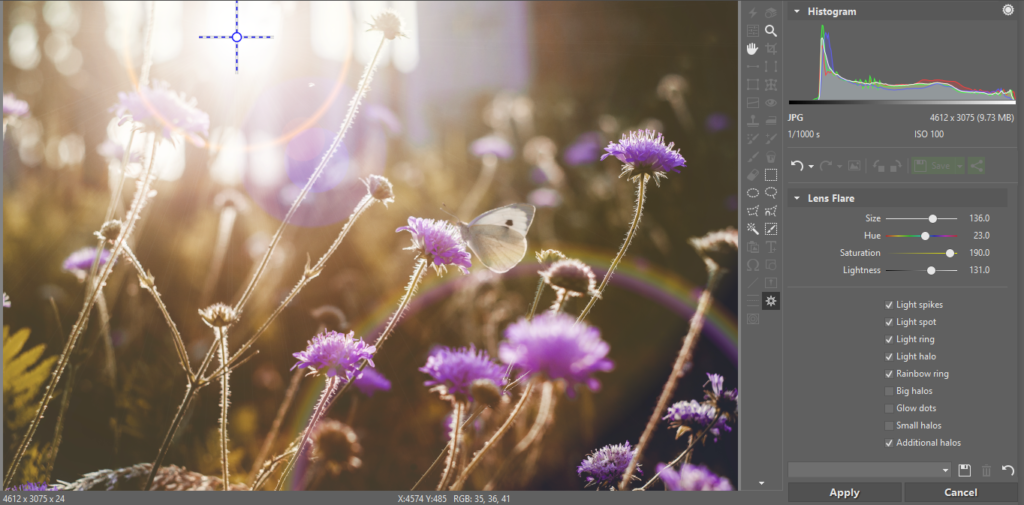
Besides using the Paintbrush, you can also create an imitation lens flare in Zoner Studio directly, using the Lens Flare function (Shift+R). Even though I personally prefer to use the Paintbrush for this, the Lens Flare function is simple and fast, so try for yourself to see what you prefer.
There are a lot of checkboxes available for this function. If you uncheck most of them, you get an effect similar to what you’d get with the Paintbrush. If all of the added reflections from all of the checkboxes are appropriate for the situation, then leave them, but be careful—your photo’s subject, and not the lens flare, should be the undisputed star of the show.
Pasting a Pre-made Lens Flare
You can also find, download, and paste in a suitable lens flare. There are lots of pre-made lens flares against black backgrounds available for downloading on the internet. But you do need to respect copyrights and look for lens flares that can be used freely.
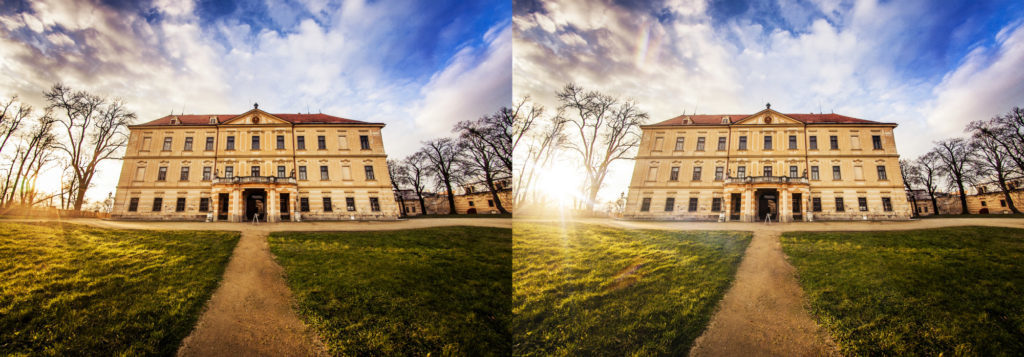
I used one of these pre-made lens flares when editing the photo below—the sun wasn’t shining as brightly in this photo as I needed, and so I emphasized it a little by adding the lens flare.
Use the Place Image tool in the Editor to add a pre-made lens flare.
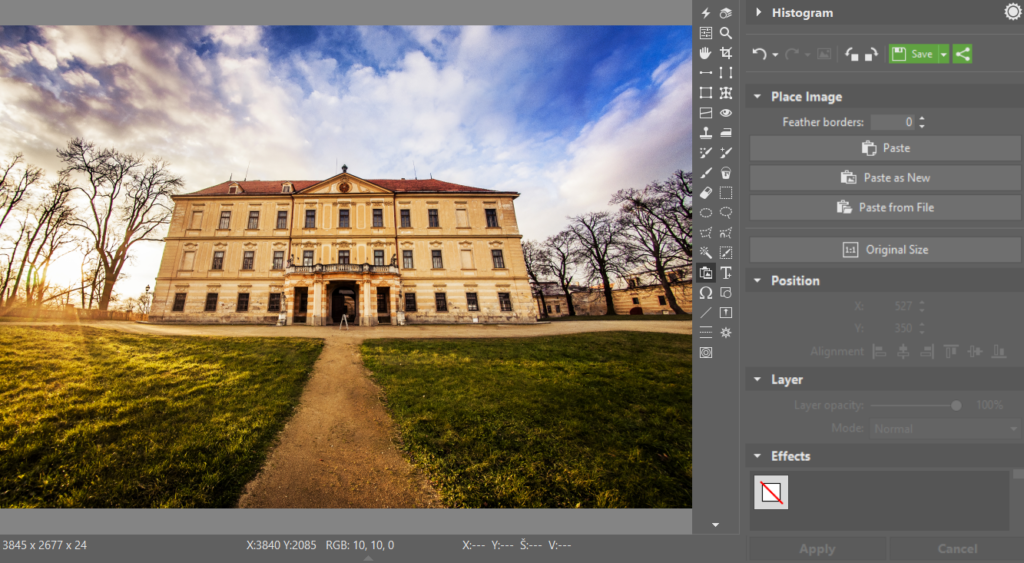
You can move the placed image around and adjust it to look the way you need.
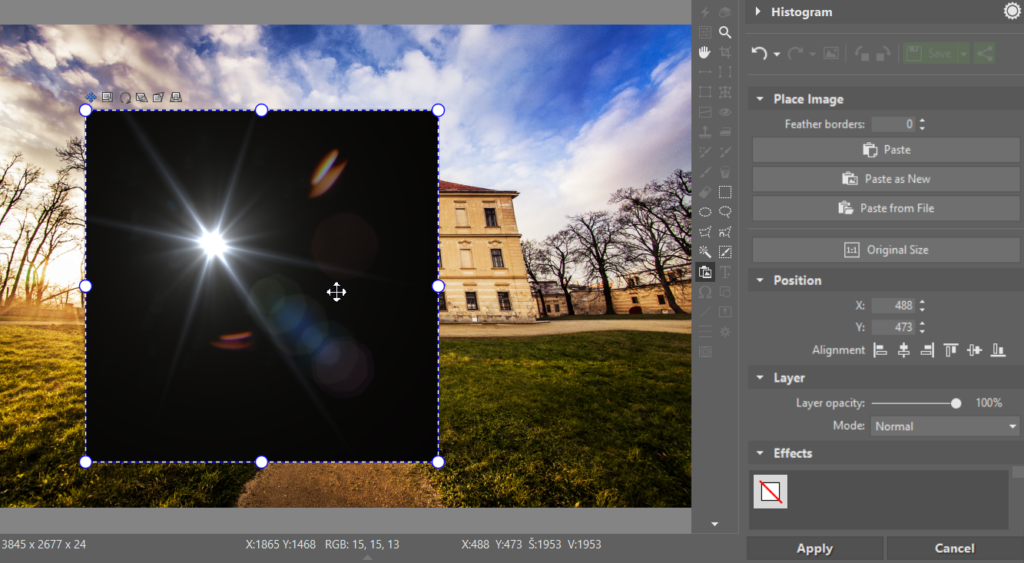
To make the black background disappear, set the blending mode (the Mode) to Screen.
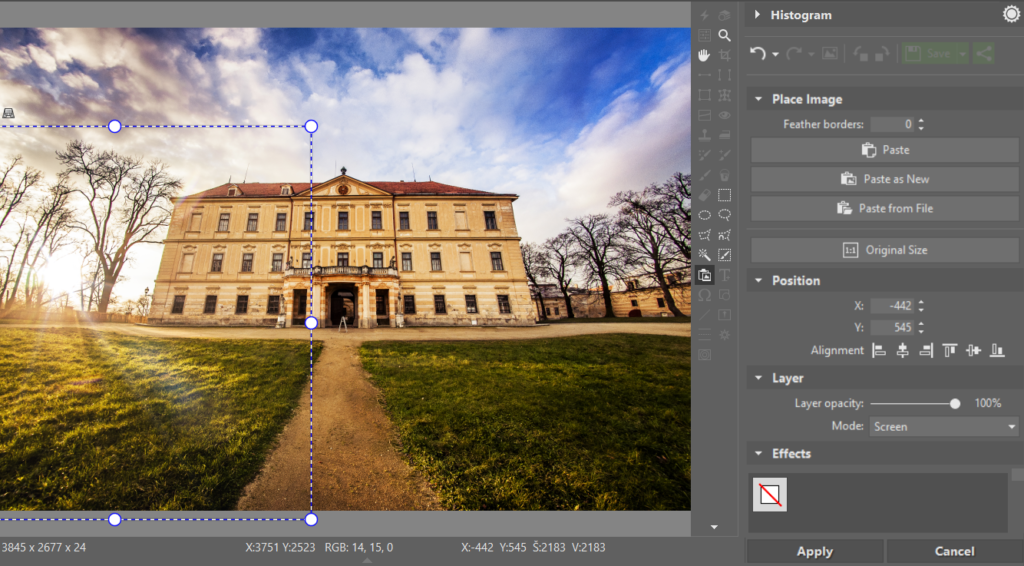
After transforming, e.g. stretching the lens flare, it’s good to also use the Paintbrush method described above to add finishing touches.
Here’s how my sample photo looks before and after adding a lens flare in this way.
Don’t Use Lens Flare Everywhere
For beginning photographers especially, adding lens flare is a “rite of passage,” and just like HDR or local desaturation, it can be tempting to use it everywhere you can. I myself fell prey to this mistake early on. But you learn from your mistakes.
So always keep in mind that there are photos where this edit is just not right. For example the photo below is not what a good photo should look like. Not every summer photo is a sunny photo—and this one definitely isn’t. Also, a lens flare added in places like thick treetops, the walls of houses, or any other place where the sun normally would not be is quite simply a mistake.
Adding little fake suns to a photo can add life to it, but always keep in mind that this “small deceptions” like this aren’t methods for turning bad photos into good ones; they only help to improve a photo a little. Lens flare definitely should not appear in every picture you create.

Filip Brožek
Zajímavé. Můžete mi poradit jaký režim štětce odpovídá v CZ verzi “mode Screen”? Je to závoj?
Zoner
Dobrý den, ano, je to Závoj. Článek najdete i na našem českém magazínu: https://www.milujemefotografii.cz/pridejte-do-fotografie-odlesk-objektivu