My First Mask: Your Guide to Layer Masks in Zoner Photo Studio

Masks are among the most important tools for advanced photo editing, and yet many photographers have no idea they exist, causing extra work for themselves. Would you like to avoid this extra work? Read on.
Masks are closely tied to work with layers. If you’re no friend of layers, then read this guide to layers—then you’ll understand many of our tips and instructions much better.
If you haven’t worked with layers yet, read this article. Many of our guides and the words we use will make more sense afterward.
There are Masks, and Then There are Masks
In this article, we’re talking about layer masks. There is such a thing as selection masks, but those shares just about nothing but their name. (Selection masks help to precisely show the boundaries of a selection, e.g. when you’ve got a blurred selection.) This guide is devoted solely to layer masks, not selection masks.
What Are Masks? What Are Layer Masks?
Each layer in an Editor document has some kind of content. If it’s an image layer, those contents might be anything from a butterfly to a tractor. A layer mask tells the Editor which part of that image (that layer) should be visible, and which part should be hidden.
I’ll illustrate this with the example of a model that I want to put in different surroundings than the ones in which I photographed it. For simplification, let’s illustrate the needed part of the picture as white and the unneeded, unwanted surroundings as black.
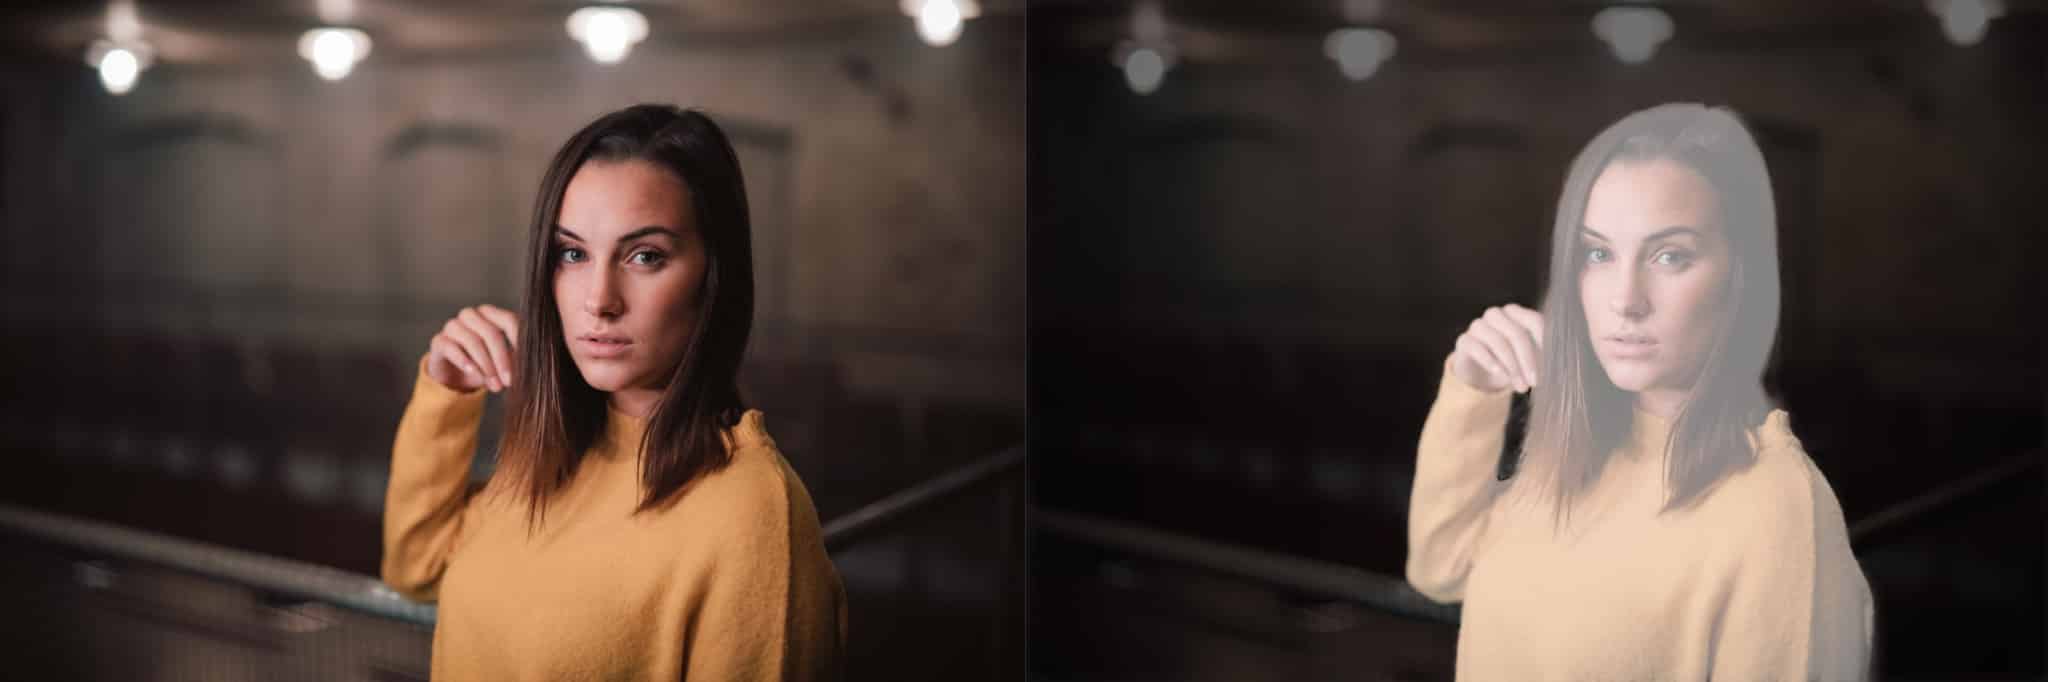
So my goal is to remove the background and to work with the model only. There are several ways to achieve this. (Later on I’ll discuss why to avoid some of them.) One suitable way is via masking, that is, creating a mask.
In Zoner Photo Studio and similar programs, the layer mask is represented as a black-and-white image, or more precisely a grayscale image. Each layer can have its own mask. In my example, I want to make the mask white in the places where the model should show through, and black in places with surroundings I want to hide.
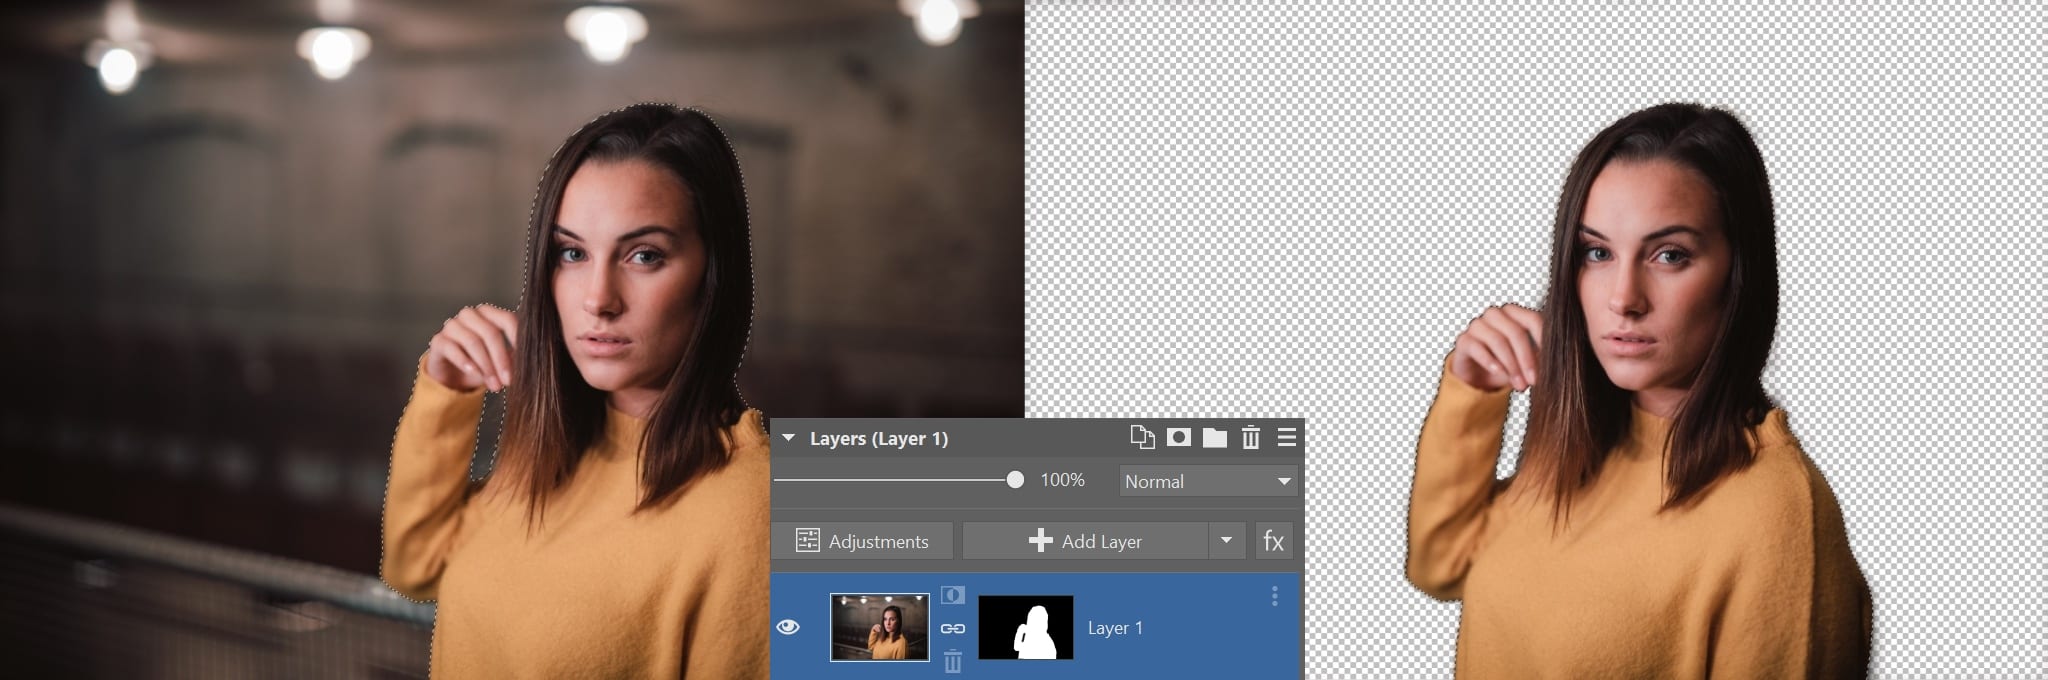
A specific example from the program might look like in the picture below.
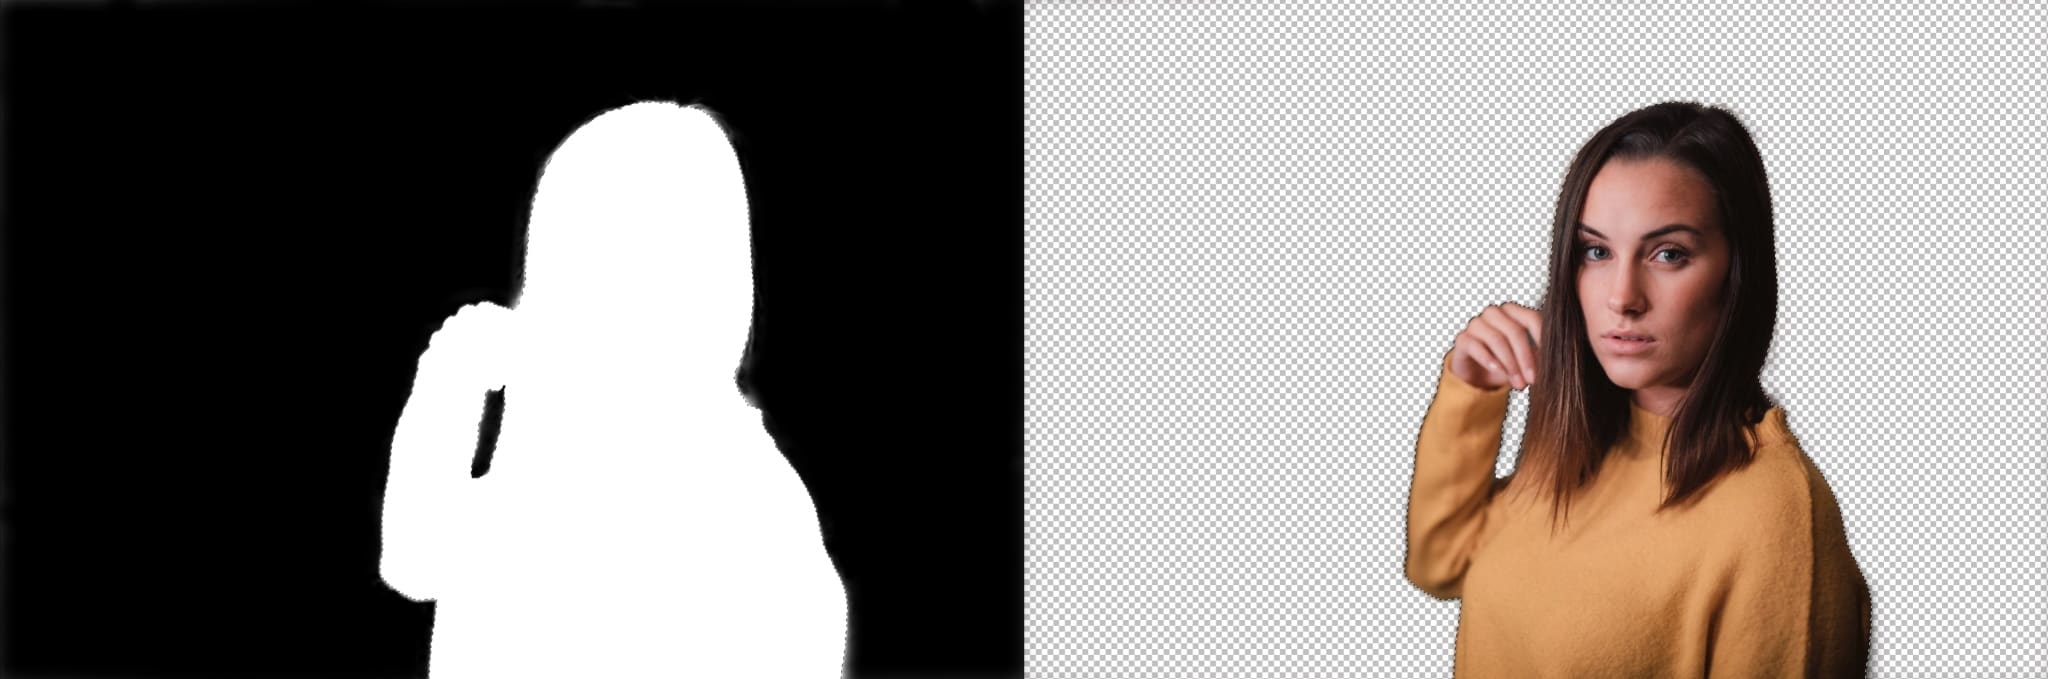
So layer masking means choosing which part of a layer to show and which to hide, and expressing this via a mask.
Why Even Use Masks?
You may have had the thought, “Why not just select the model with the Magic Wand or the Lasso and copy it to a new layer, or erase its surroundings with the Eraser?” The result would at first sight be the same.
But there’s one fundamental difference. A mask doesn’t damage the layer’s original image, so you can go back and change your edits at any time. For example, if I forget the model’s hair, I just go back and adjust the mask. Masking never affects the original image data—just what is and isn’t displayed. Erasing with the Eraser or copying a selection to a new layer is more permanent.
Not Just for Erasing Backgrounds
You can also use masking when dividing edits into multiple layers. It gives you more control over individual edits; you can deactivate them, reduce their opacity, etc.
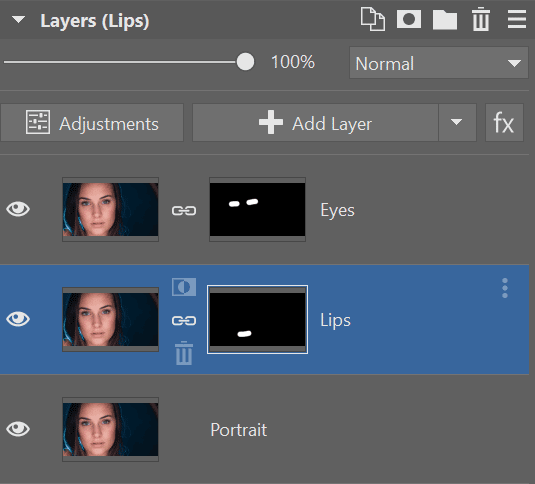
For example in a picture of a model, you can put eye edits in a separate layer by duplicating a layer, masking everything but the eyes in that layer, and editing that layer.
How to Create a Layer Mask in ZPS X
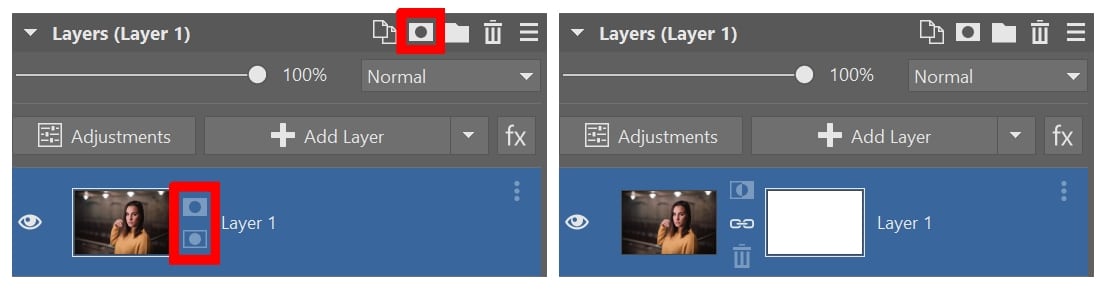
You can give any layer a mask in Zoner Photo Studio X. Just select the layer and then click the mask icon below the layer list at the bottom right (![]() ). This opens a menu for work with masks. Select the first item in this menu: Reveal All. There are several ways to create a mask. This one is the easiest for getting started. It tells Zoner Photo Studio that you want to assign a mask to the layer and “reveal all upon it”—that is, to fill it with white so it does not hide anything (yet).
). This opens a menu for work with masks. Select the first item in this menu: Reveal All. There are several ways to create a mask. This one is the easiest for getting started. It tells Zoner Photo Studio that you want to assign a mask to the layer and “reveal all upon it”—that is, to fill it with white so it does not hide anything (yet).
You can immediately see the effect of this in the layer list. Notice the thick white frame around the thumbnail for the new white mask. That means it’s active—you’re working with it. At any one moment, either a layer or its mask is active. Click a thumbnail to set this. This is important for your future edits.
How to Paint Onto a Mask
Now I’ll show how to edit a mask so it hides the unwanted part of a picture (in this case the grassy background). Don’t forget that during the following edits, the mask must be active—not the layer itself.
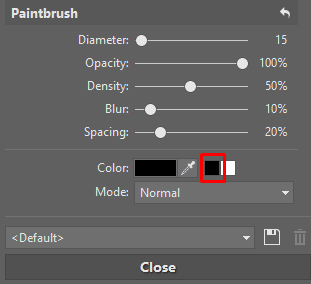
Your goal will be to paint in black over the parts of the picture you want to hide. Activate the Paintbrush tool, via its icon or the B key. Next to the brush’s Color setting, there are two buttons for going straight to a white or black brush. Click the black button.
Now just set a good brush thickness and paint in black onto the mask in the places that you want to have hidden. After every stroke, you’ll see the affected part of the picture disappear. The result is a lot like erasing. And yet the image in the layer is still there, untouched; you only told the program which parts of that image you don’t need right now.
Note how the black strokes on the mask thumbnail exactly match the hidden parts of the layer. If you ever overshoot, just set the brush color to white and paint over the places that you need to show.
How to Edit the Mask Using Selections
The brush isn’t always the best way to edit the mask. In fact, one specific way is much faster most of the time. That way is to make a selection within the image, and then convert that selection to a mask. I’ll illustrate this through a new example. I’ll use the magnetic lasso to precisely select the outline. Click “Reveal Selection” in the mask menu (![]() ) under the layer list. This creates a layer mask that reveals everything that was selected (white) and hides everything else (black).
) under the layer list. This creates a layer mask that reveals everything that was selected (white) and hides everything else (black).
Setting How the Layer Mask Is Displayed
Sometimes you may want to show the mask right over the picture, instead of just in the layer-list thumbnail. That’s why ZPS includes a quick way to show or hide the mask. The button for this is just below the “Editor” button at the top right.
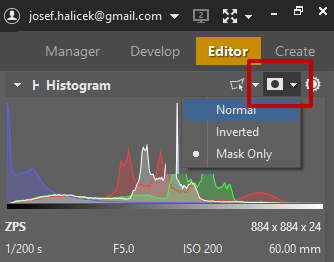
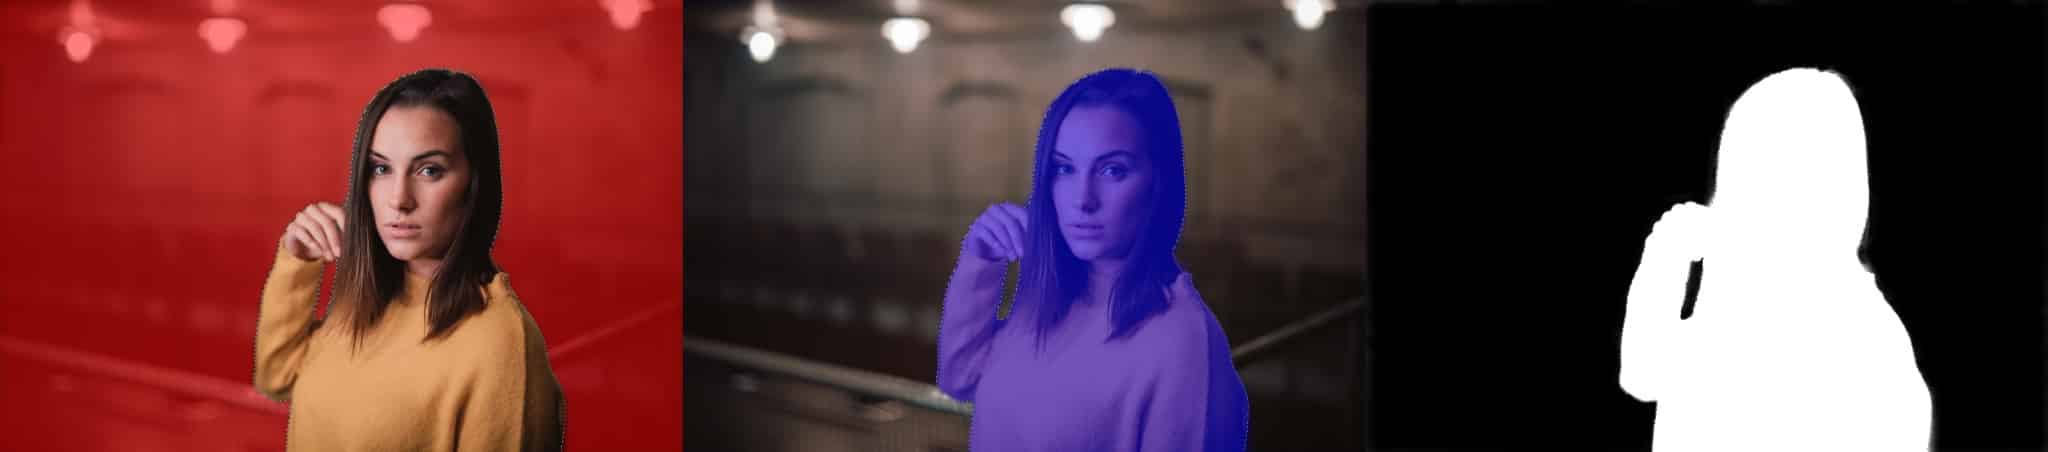
Click the mask icon (![]() ) to set whether or not the mask is shown over the picture. There are three mask display modes. Normal mode displays the areas hidden by the mask in red. (And leaves the rest of the layer visible.) Inverted mode displays the areas not covered by the mask in blue. It shows the rest of the layer as transparent. Mask Only mode shows the good old black-and-white image representing the layer. Click the mask icon to turn the mask display on and off; click the arrow next to this icon to change the mask display mode.
) to set whether or not the mask is shown over the picture. There are three mask display modes. Normal mode displays the areas hidden by the mask in red. (And leaves the rest of the layer visible.) Inverted mode displays the areas not covered by the mask in blue. It shows the rest of the layer as transparent. Mask Only mode shows the good old black-and-white image representing the layer. Click the mask icon to turn the mask display on and off; click the arrow next to this icon to change the mask display mode.
What I’ve Left Out
This quick guide explains basic terms and workflows. But there are a number of other workflows and tricks that can help you to really take advantage of layers and masks. We’ll take a closer look at these in other articles. But for the experimenters among you, here are two tips to try right away:
- Masks support grayscale, i.e. more than just pure black and pure white. The darker the mask, the more transparent the layer is beneath it. This gives you detailed control over the visibility of every part of a picture.
- You can draw on the mask with more than just the Paintbrush: gradients, fills, the Clone Stamp, etc.
There are no comments yet.