Blown highlights in your photos? Learn how to deal with them in Zoner Studio
Blown highlights (overexposed areas) are a common problem, especially for beginner photographers. The good news: they’re easy to avoid — if you follow a few rules while shooting and know a few quick corrections in Zoner Studio. Below you’ll learn how to rescue areas that are too bright or too dark in your pictures.
This text loosely follows the article How to avoid blown highlights in your photos, which explained what blown highlights are and gave general shooting and post‑processing tips. This time we’ll show concrete edits in Zoner Studio (the program’s editing module is shown in the manual as the Develop module). The problem can be helped by these tools:
- the Lights and Shadows sliders,
- the Gradient Filter (G),
- the AI Sky selection,
- HDR — exposure blending.
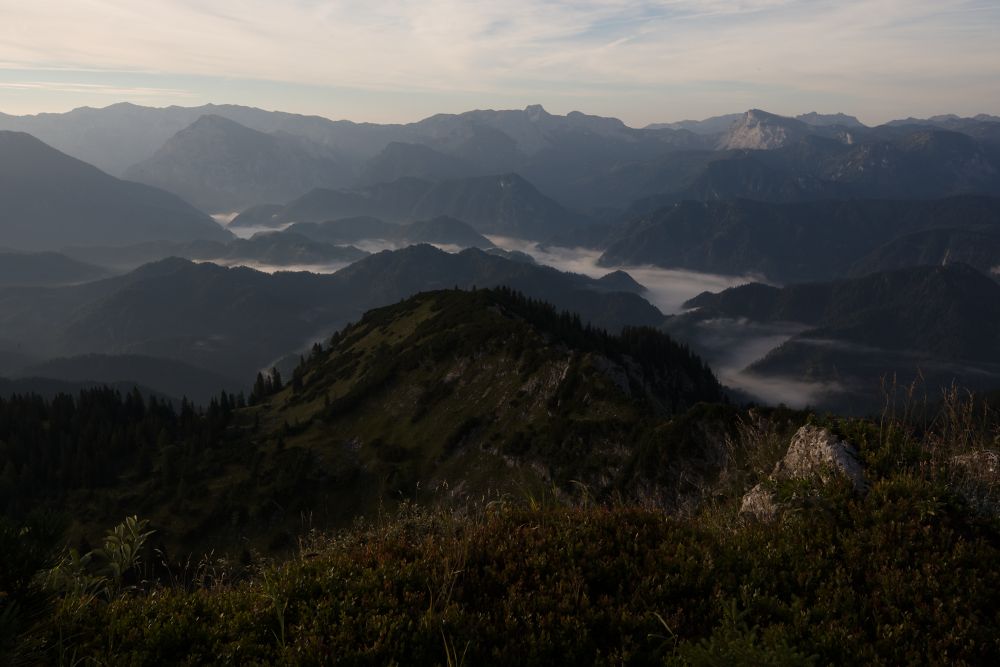
Start from an underexposed photo
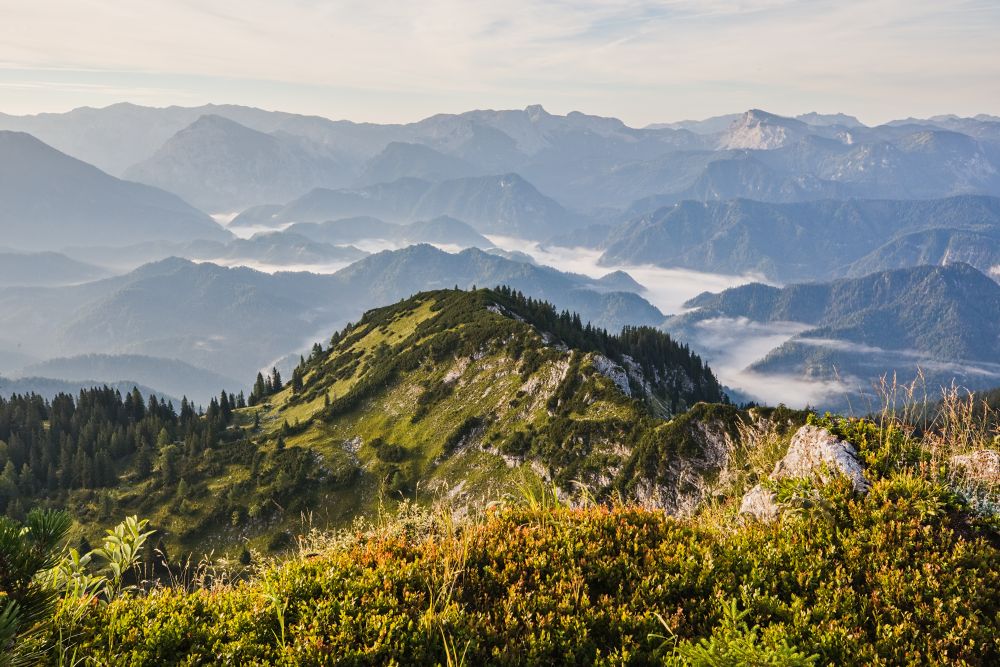
As we already said in the referenced article, you should start from a sufficiently underexposed (dark) RAW or high‑quality image. With such an image you can recover details; the final quality depends on the camera’s capabilities and on what you’ll use the image for.
For print you want the highest possible quality; small web images tolerate stronger corrections. Brightening increases visible noise, but in low resolution it’s often not noticeable.
Correcting blown highlights using the Lights and Shadows sliders
The first method is simple and very universal in the Develop module. The four main sliders we’ll balance are:

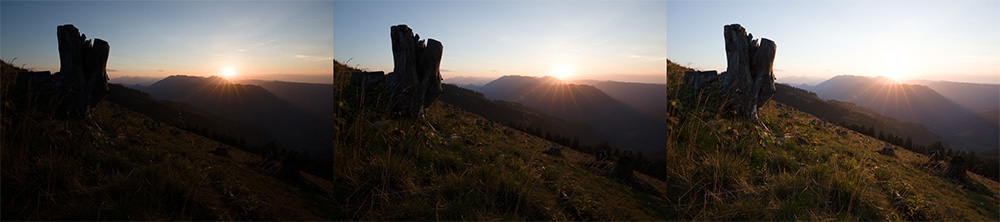
Start with Exposure. Use it to broadly brighten or darken the whole image. Increase Exposure experimentally to see roughly how much brightening you need — don’t worry about mistakes: in the Develop module you can always go back and change any slider.
If you brighten the photo a lot, the sky may blow out. That’s why you need the Lights slider: lowering Lights reduces only the strongest bright areas and so darkens the sky without losing all detail.
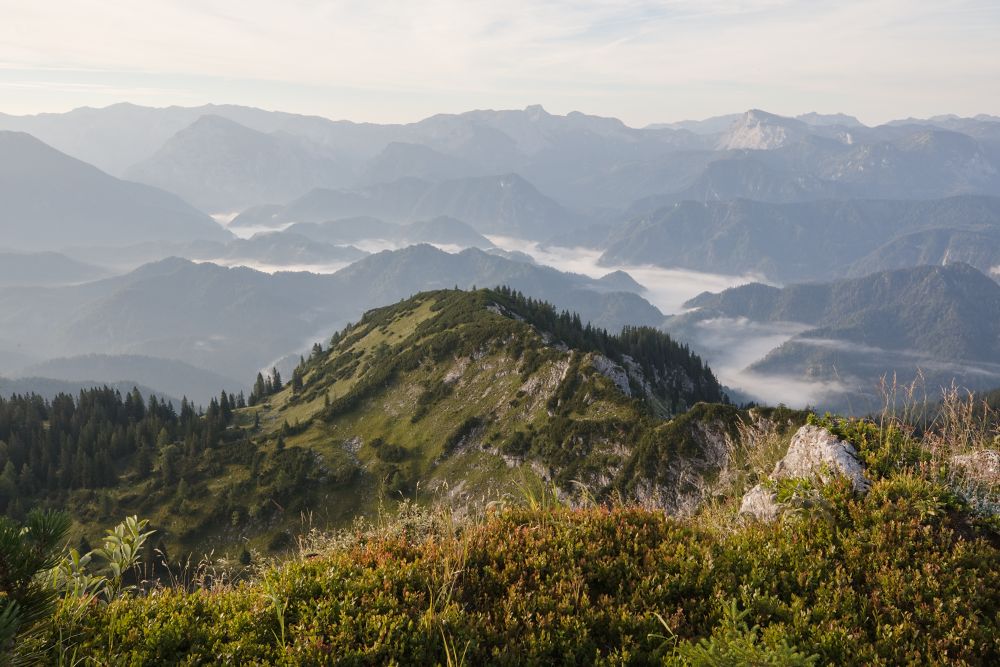
Now you’re getting a better result. Sometimes Lights alone isn’t enough for a very wide tonal range; that’s when you brighten Shadows. In extreme cases you might end up with Lights −100 and Shadows +100.
At this point the landscape is visible, but the image can look flat. A good trick is to raise Contrast. Bear in mind that increasing contrast also boosts color saturation — sometimes too much — which you can fix by lowering Saturation if needed.

From here it’s experimentation: choose the exact values that please you.
How to remove noise after brightening
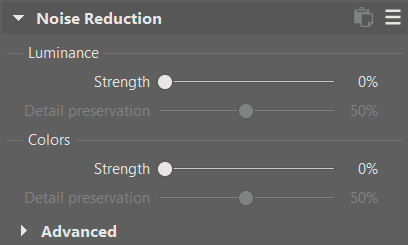
All brightening operations add up and make noise more visible. Always inspect a zoomed‑in view of areas that were originally dark — they will usually show the worst noise. If quality is unacceptable, try the Noise Reduction controls (Luminance and Colors) in the Develop module’s Noise Reduction section. For deeper study, read a dedicated article about noise reduction.
More believable results with a Linear Gradient
Fixing blown highlights only with Lights and Shadows is simple but can create unwanted light or dark halos around objects when sliders are pushed far from neutral. On some photos these artifacts are invisible; on others they look unpleasant or fake.
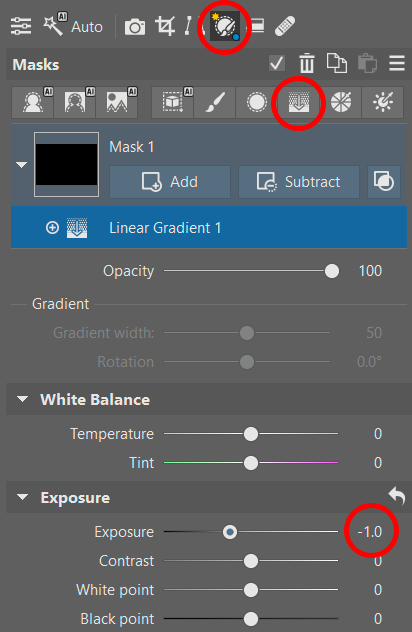
A helpful tool for shots with a relatively straight boundary between bright and dark areas (for example a level horizon) is the Linear Gradient. It’s ideal for landscapes with a straight horizon, but not for, say, a view of the sky seen through a window. Open Local Adjustments and choose the Linear Gradient. For starters, set its Exposure to about −1.
Drag the filter across the image with the mouse to draw the gradient; sometimes you want a sharp horizontal edge, sometimes a tilted, gradual one. The goal is always to darken overly bright areas.
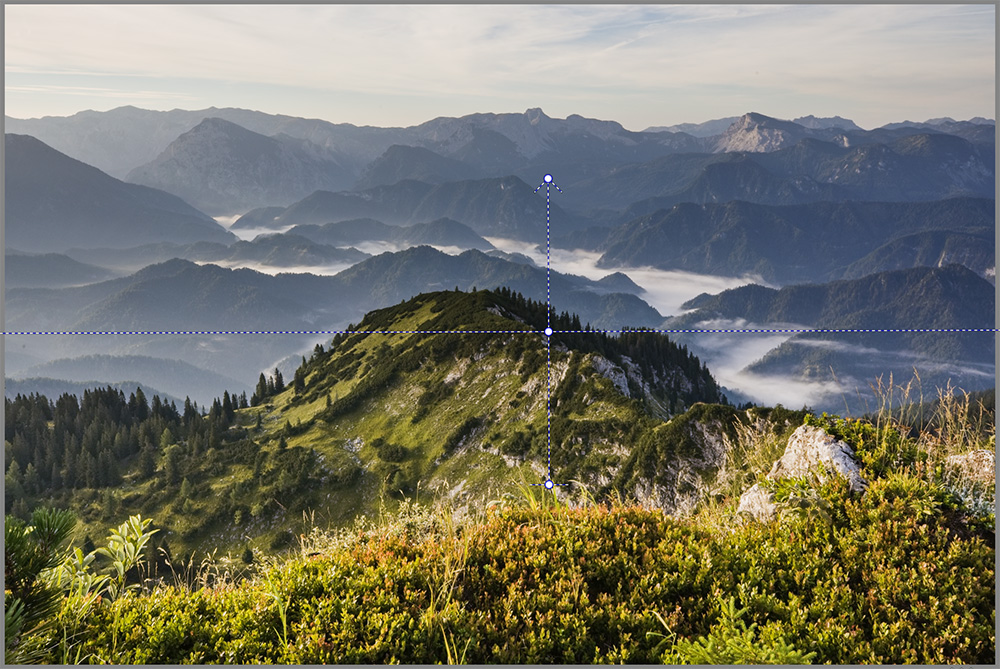
Because the gradient reduces the image’s dynamic range locally, you’ll usually need less aggressive adjustments with Lights and Shadows afterward.
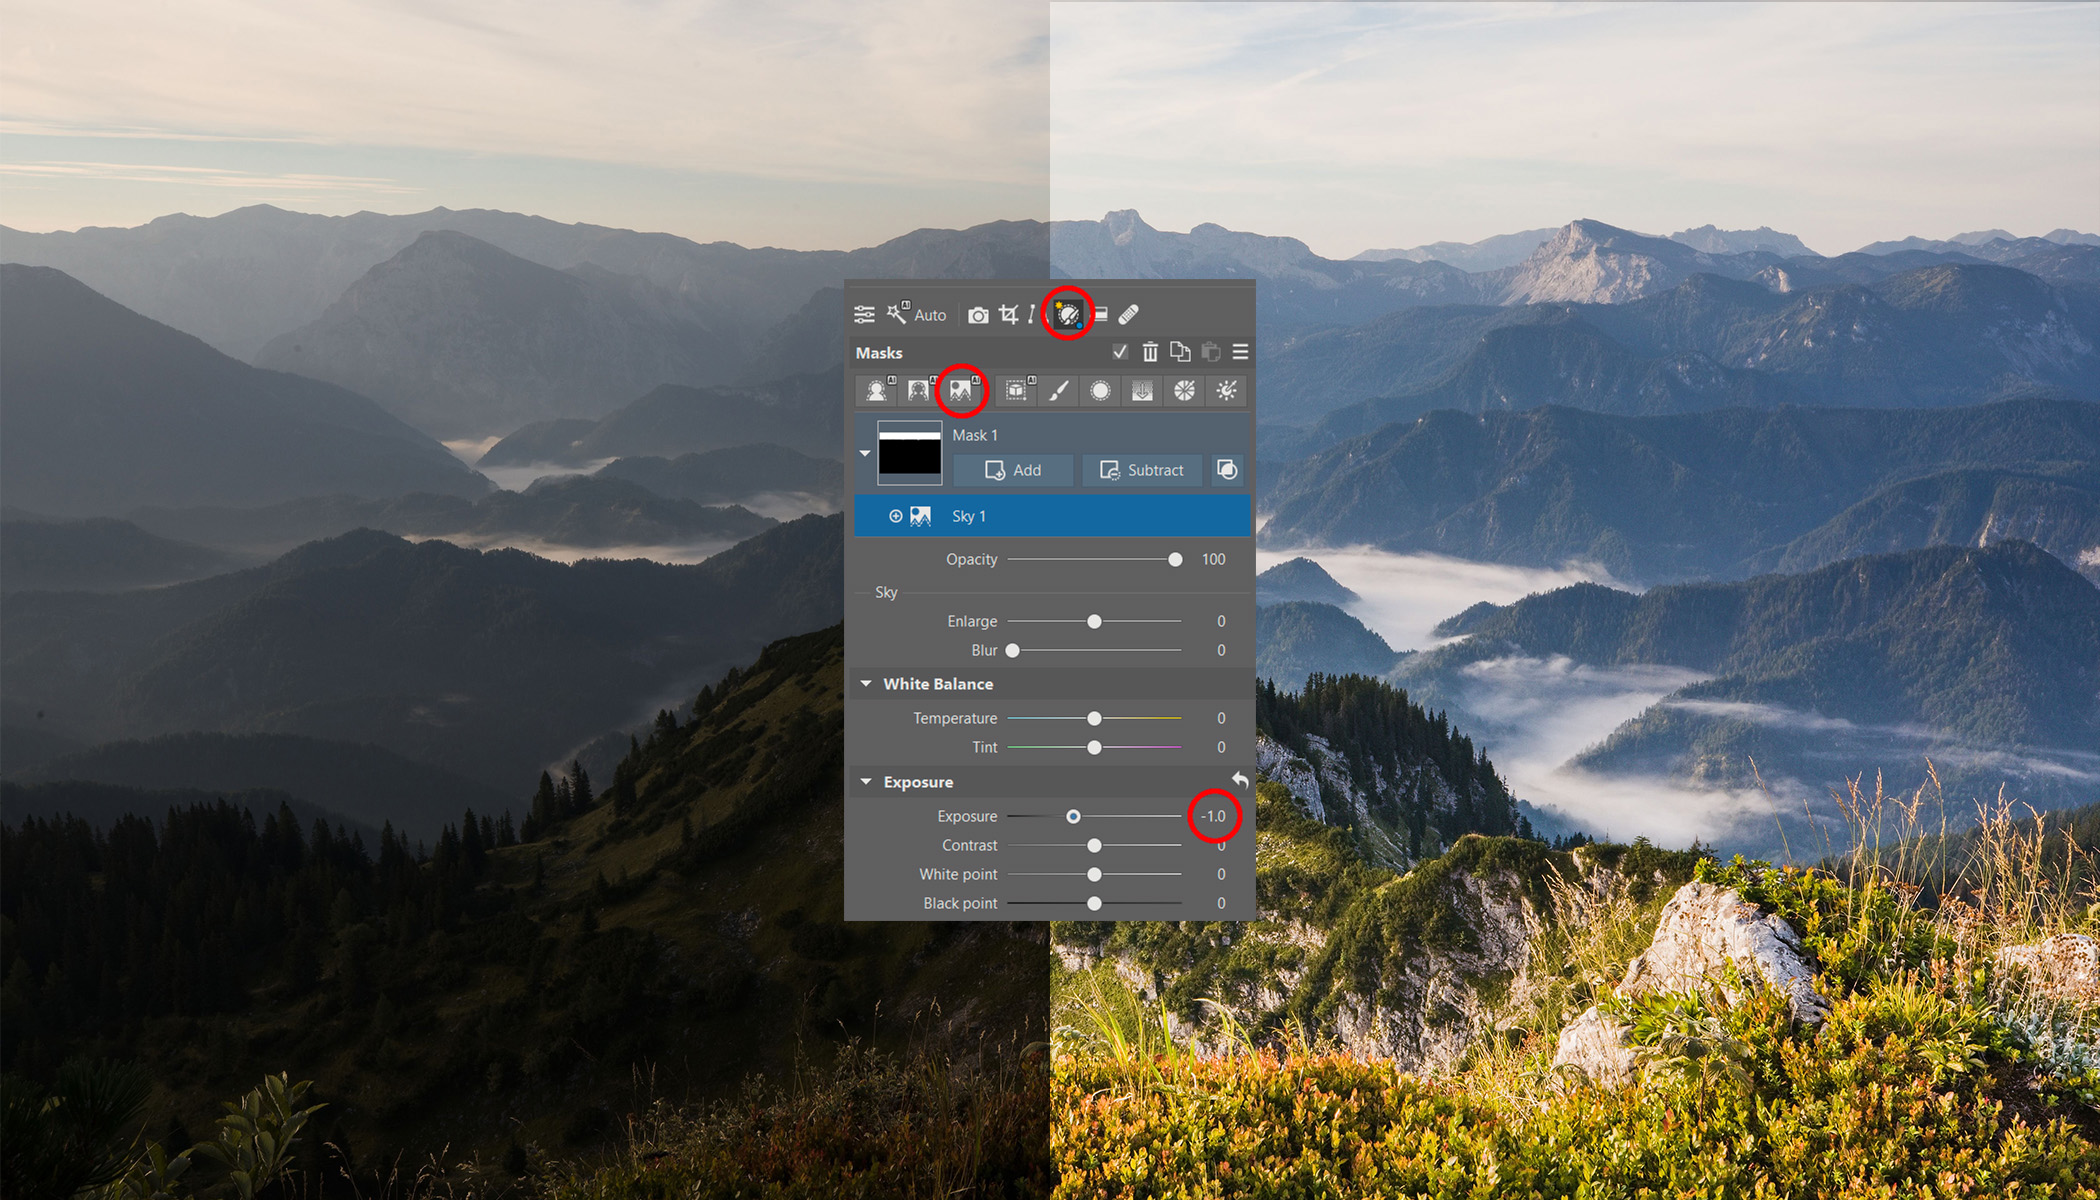
Modern approach: select the sky using AI
For images with a complex sky‑to‑ground transition it’s convenient to use the AI Sky selection and darken just the sky instead of a linear gradient.
Create the mask in Local Adjustments by clicking the Sky (AI) button, then lower Exposure or adjust other sliders.
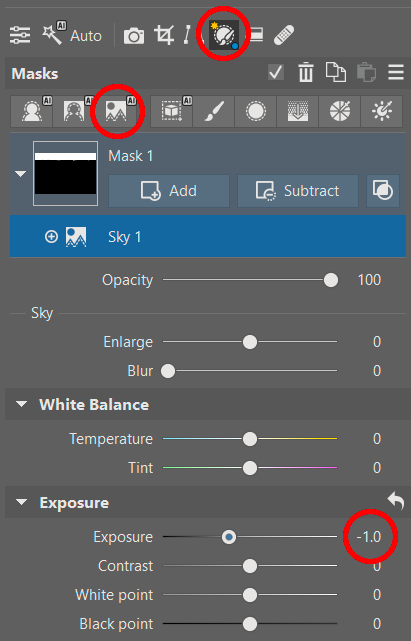
With a sky mask you’re not limited to darkening only — you can also change saturation, clarity, white balance, etc. The same approach works for other objects: pick the sky, then invert the mask (from the mask menu — three dots — choose Invert) to edit everything except the sky.
Be careful not to make too big changes with AI masks: it’s easy to make the sky noticeably darker than the foreground, which looks artificial. It’s perfectly fine to combine approaches in one image — a bit of AI mask, a gentle gradient, and some Lights/Shadows sliders — to get the benefits of all three.
Even higher quality by merging multiple exposures
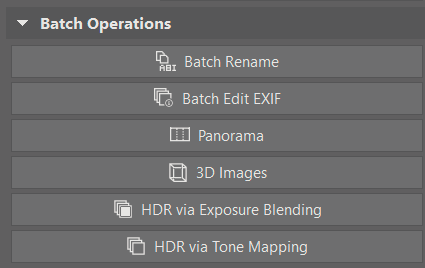
For static scenes (landscapes on a calm day) you can reduce noise further and improve quality in the problematic shadows by shooting multiple frames at different exposures and combining them.
Zoner Studio can take two or three such photos and merge them in the Manager module using HDR via Exposure Blending or HDR via Tone Mapping. Select the files (Ctrl+click) and choose the appropriate command from the Create menu. The software will perform automatic adjustments similar to those we did earlier, and you’ll get sliders to guide the algorithm.
If you prefer Tone Mapping over the earlier described edits, you can also apply Tone Mapping to a single image: in the Editor module open Effects → Tone Mapping.
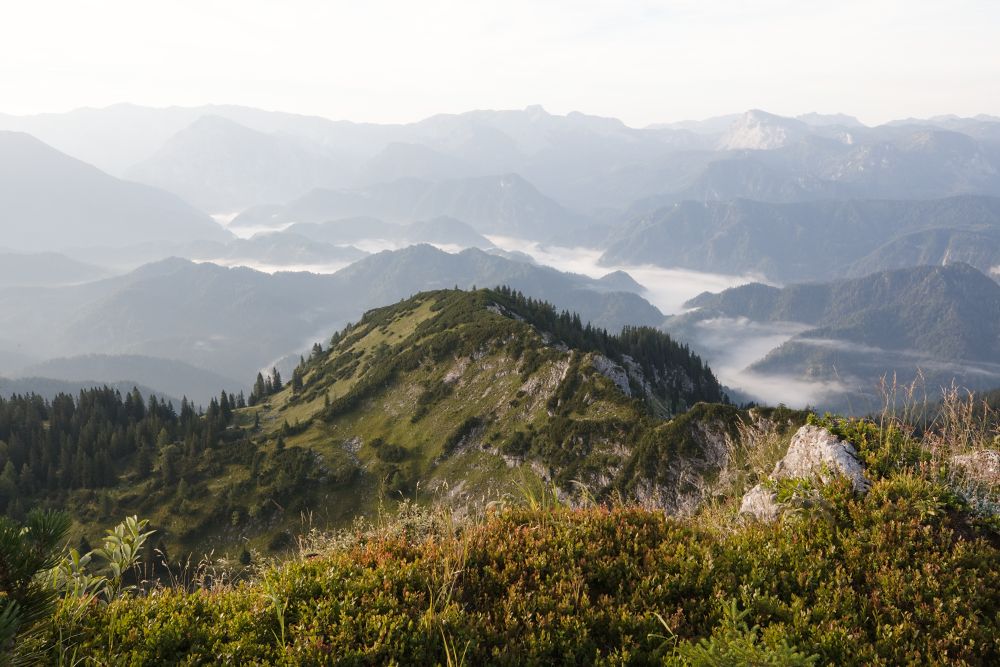
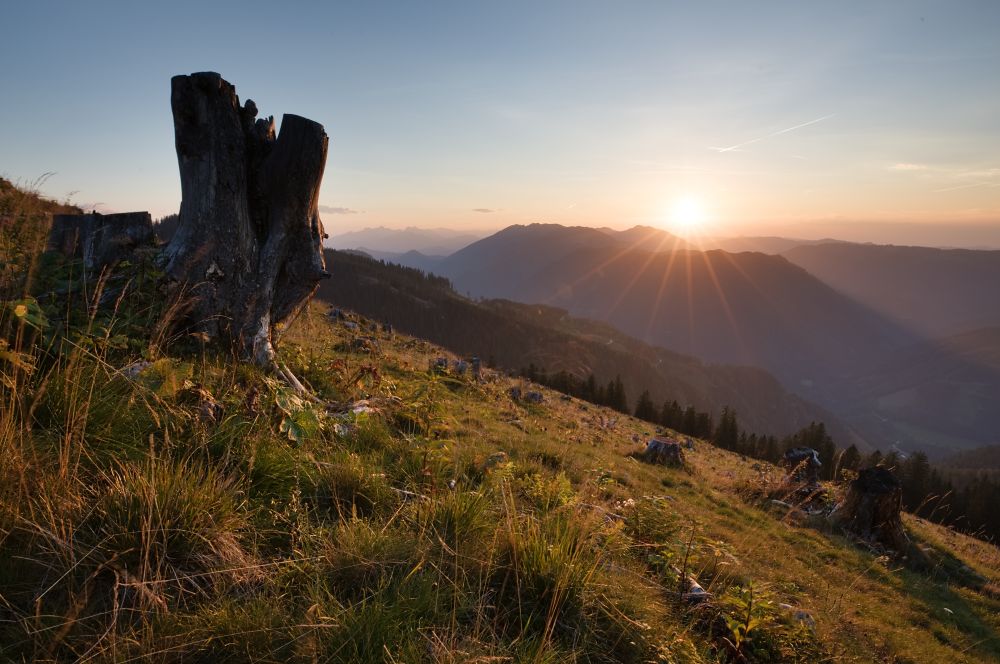
Lots of options — all simple
With a little practice you’ll do basic corrections in seconds and more complex ones in a minute or two. From an initially dark photo you can create a result you’ll be happy to show the world.
Download Zoner Studio free for 7 days and get rid of blown highlights once and for all!
There are no comments yet.