Bring Flower Photos to Life: It Takes Just 3 Basic Edits
The article is over 5 years old. The information in it may be outdated.
![]()
We are working on its update. In the meantime, you can read some more recent articles.
Vibrant and full of colors. That’s what professional flower photos look like. And your pictures can look the same—it only takes a few basic edits. Get to know them.
Every flower photo is a little different. But the basic edits are usually the same. From improvements to exposure and contrast, to livening up the colors, to sharpening.
But the start comes earlier…
Choose the Right One
With the right choice of photo, you can save a lot of time editing on your computer. When pictures are uninteresting or have bad composition, delete them right away, because not even the best edit will save them. Work only with pictures that respect the basic rules of composition.
Look over the photo you’ve picked for editing and think over what aspects you want to improve. That will significantly speed up your work.
Here’s my evaluation of the photo I’ve picked:
- The exposure is not ideal. The picture needs brightening, and it’s lacking contrast and detail too.
- I don’t like the colors.
- The photo could also use some sharpening.
Once you’re clear as to what about the photo you want to improve, get started with editing.
Exposure and Contrast
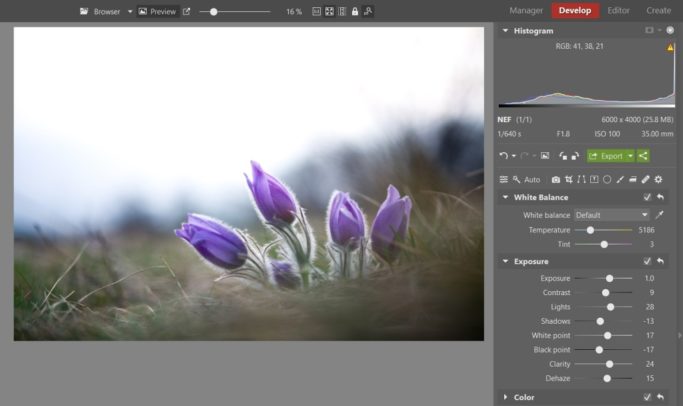
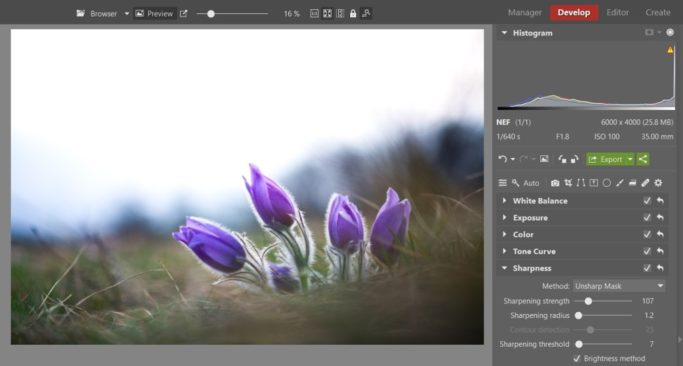
Every photo’s editing in Zoner Studio should start in the Develop module. Specifically, in the Exposure group. There’s the place for the most basic edits.
Start with the Exposure slider. With its help you can make a picture lighter or darker. Depending on what it needs.
Generally it’s also useful to add a bit of contrast. So add some using the corresponding slider.
If there’s blowout in the picture, reduce the Lights. Meanwhile you can use the next slider to lightly brighten the shadows.
For flower photos, it also pays to emphasize the picture’s details. Here the Clarity slider will help. It increases contrast around the contours in a picture. That makes it feel more alive.
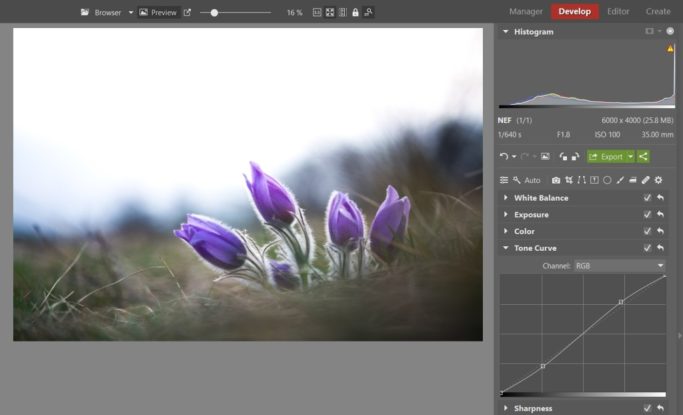
If you need to fine-tune the exposure and contrast, then take advantage of the controls in the Tone Curve group. Use them to set its tone curve to an S shape, emphasizing lights and darkening shadows. But don’t be afraid to experiment with these curves even further.
Fine-tuning the Photo’s Colors
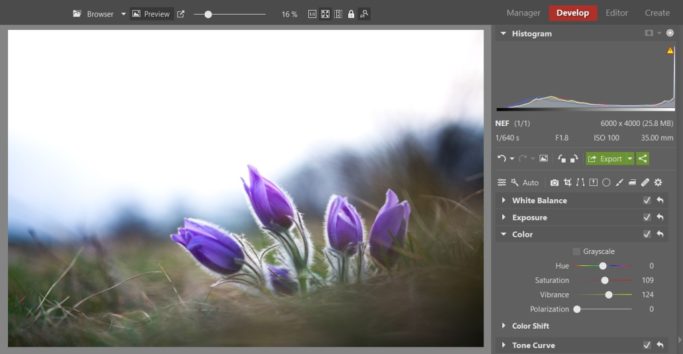
Professional flower photos grab attention with more vibrant and saturated colors. To give your pictures these, continue working in the Color group. Focus on the Saturation and Vibrance controls. Just increase their values, and the colors in your pictures will be more striking.
But stay away from changes to flowers’ hue. Don’t turn purple pasqueflowers red, or turn purple orchids blue. Adjusting the saturation and vibrance of their colors is entirely enough.
Sharpening a Photo
Before producing a finalized JPG of the photo by using Export, sharpen it. The sliders in the Sharpness group will help you here. Zoom in to a 1:1 view so that you have a good idea of what the sharpening is doing, and then set the Sharpening Strength.
Try to find a good level that makes the picture sharp enough without adding unwanted artifacts (distortion). If you’re having trouble with this, try adjusting the Sharpening Threshold.
Then you just need to create a finalized copy of the picture by clicking Export.
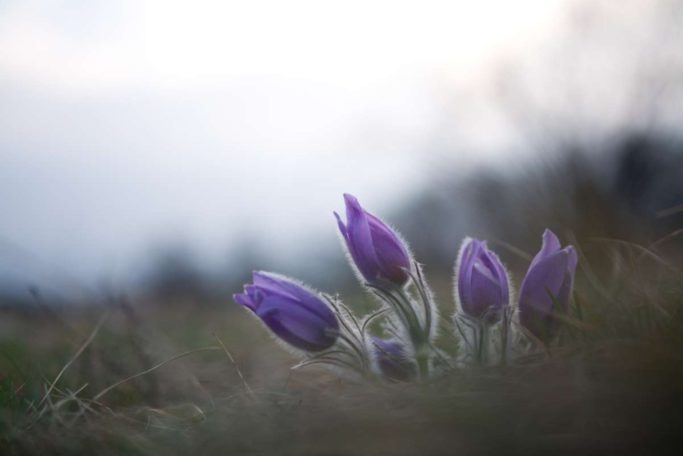
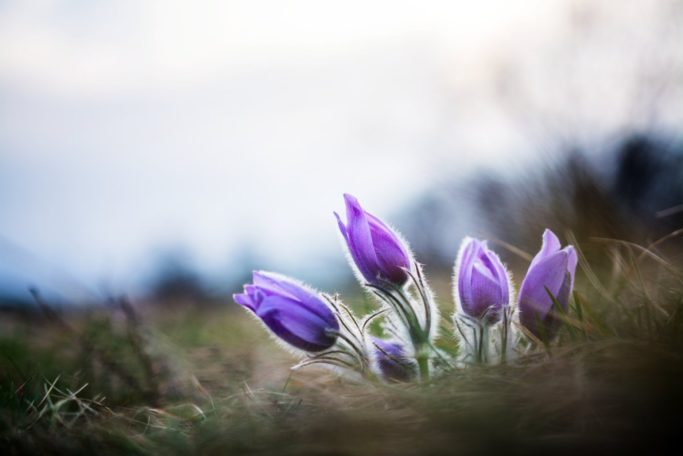
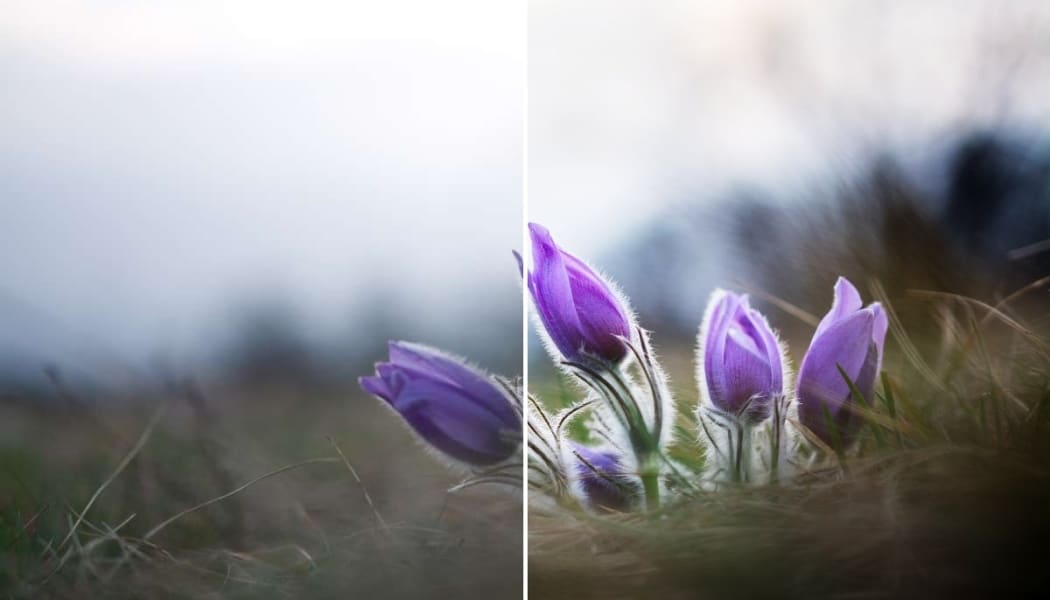
A comparison of the original and the final picture. The final picture is lighter and has better detail and contrast. The colors aren’t as grayed; they’re happier and livelier. The picture has also gained some sharpness.
It takes just a few steps to rid your photos of all of these ills. Try it yourself—download Zoner Studio, try it 7 days for free, and improve your flower photos. You’ll see that after a few basic edits, they look much better.

There are no comments yet.