Camera Backpacks
You can carry your camera equipment with you in a variety of carrying cases or bags. One of the most popular solutions is a camera backpack. There are plenty to choose from and there is one out there that suits just about anyone. It’s important to consider which features are the most important to you.
In the beginning, there was the camera.
On its own.
And it was easily carried.
In time, lenses, filters, flashes, and other accessories were added. All of a sudden, there came a need for a dedicated camera backpack.
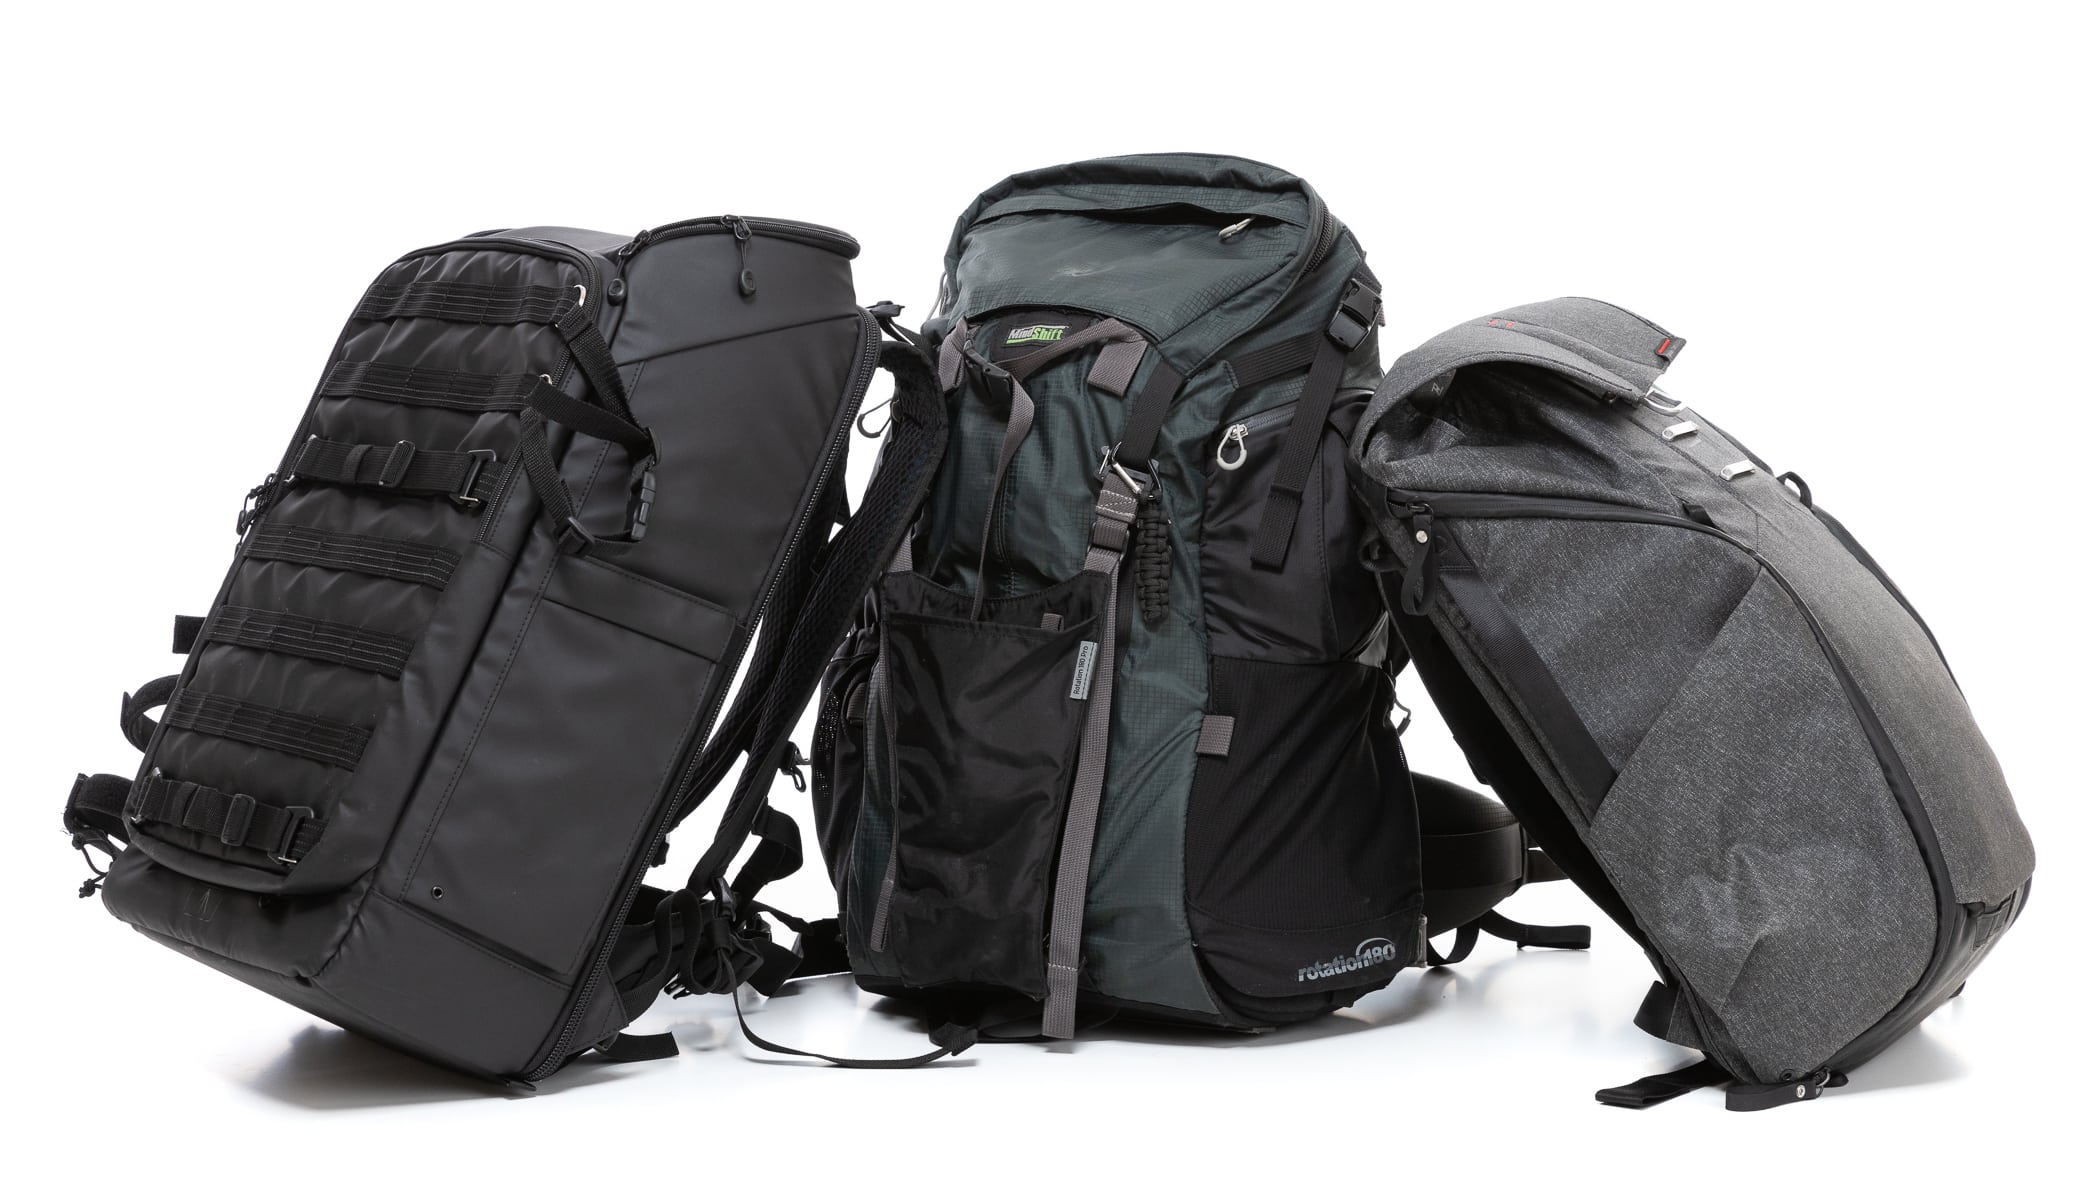
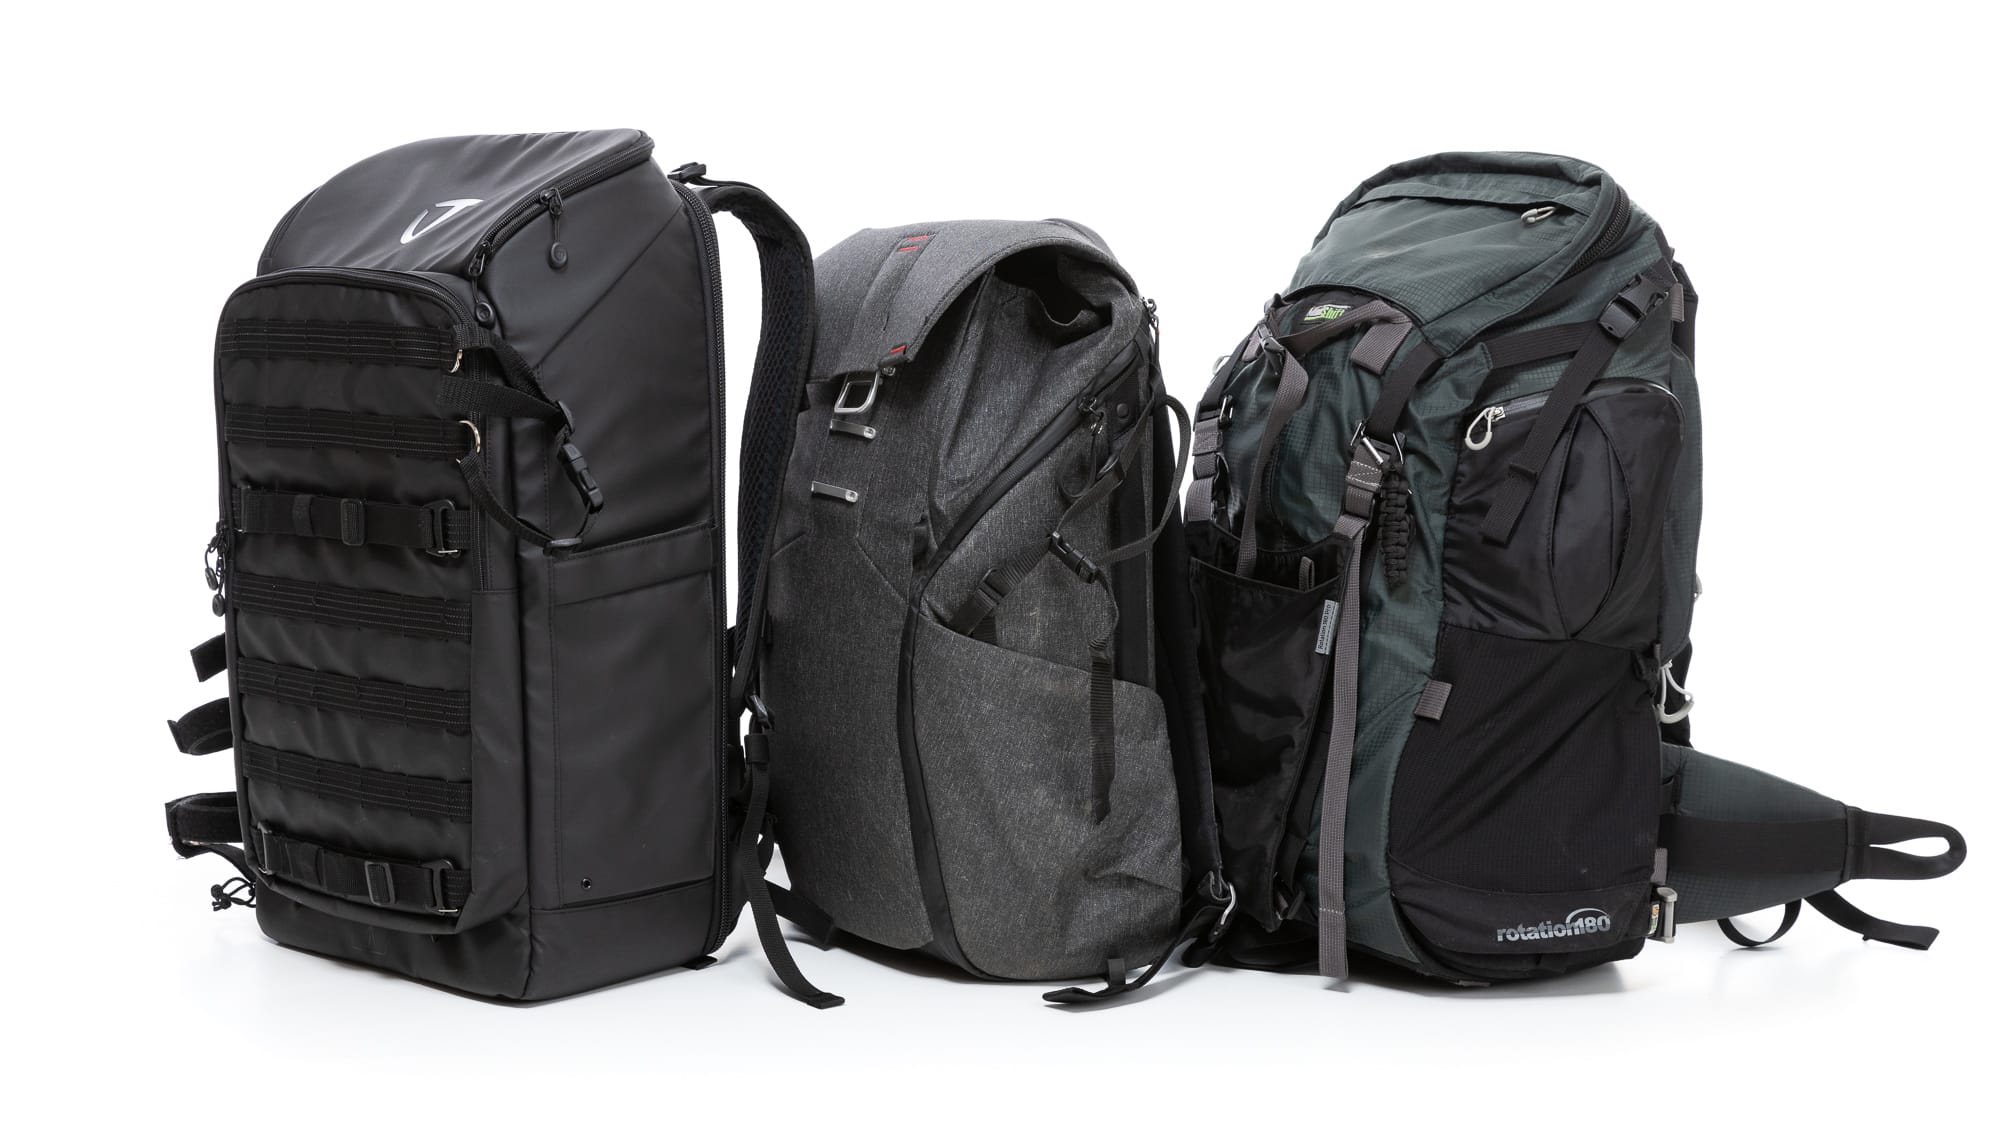
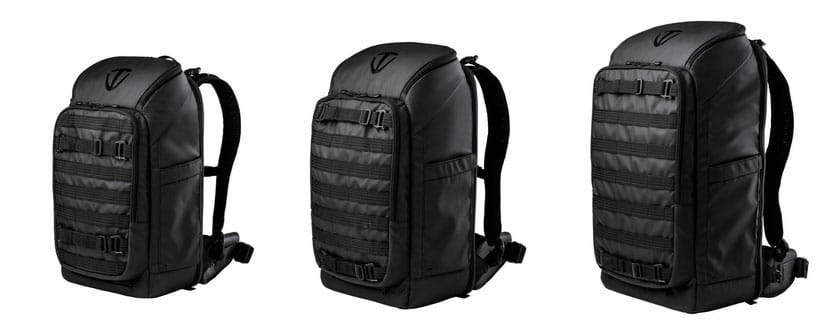
Three camera backpacks
I’ve gathered three backpacks that, while they have a lot in common, serve as great examples of the various options available. The three backpacks I will be using for illustration purposes in this article are:
- Tenba Axis 32L
- Peak Design Everyday Backpack V1
- Think Tank MindShift Rotation 360° 38L Pro
I purchased the Tenba Axis 32L recently and have had the other two for several years. When I had less equipment, I used other camera backpacks (from Lowepro, Kata/Manfrotto, and the now defunct German company Holst). As my demands for a camera backpack changed, I sold these.
I am well aware that the backpacks I’ve chosen are on the higher end of camera backpacks. However, you can usually find a budget alternative that might not have so many bells and whistles, but is cheaper and still contains everything you need.
Equipment access
The backpacks differ in many details, but the most important detail is: How do you get to your gear?
Ordinary, non-camera backpacks have a top opening, but when it comes to camera equipment, this is the least common approach. Cameras and lenses are heavy, so the most ergonomic option is to have them at the bottom of the backpack to lower the center of gravity. After that, the backpack’s design determines how you get to your gear. Some models combine various methods for accessing your gear.
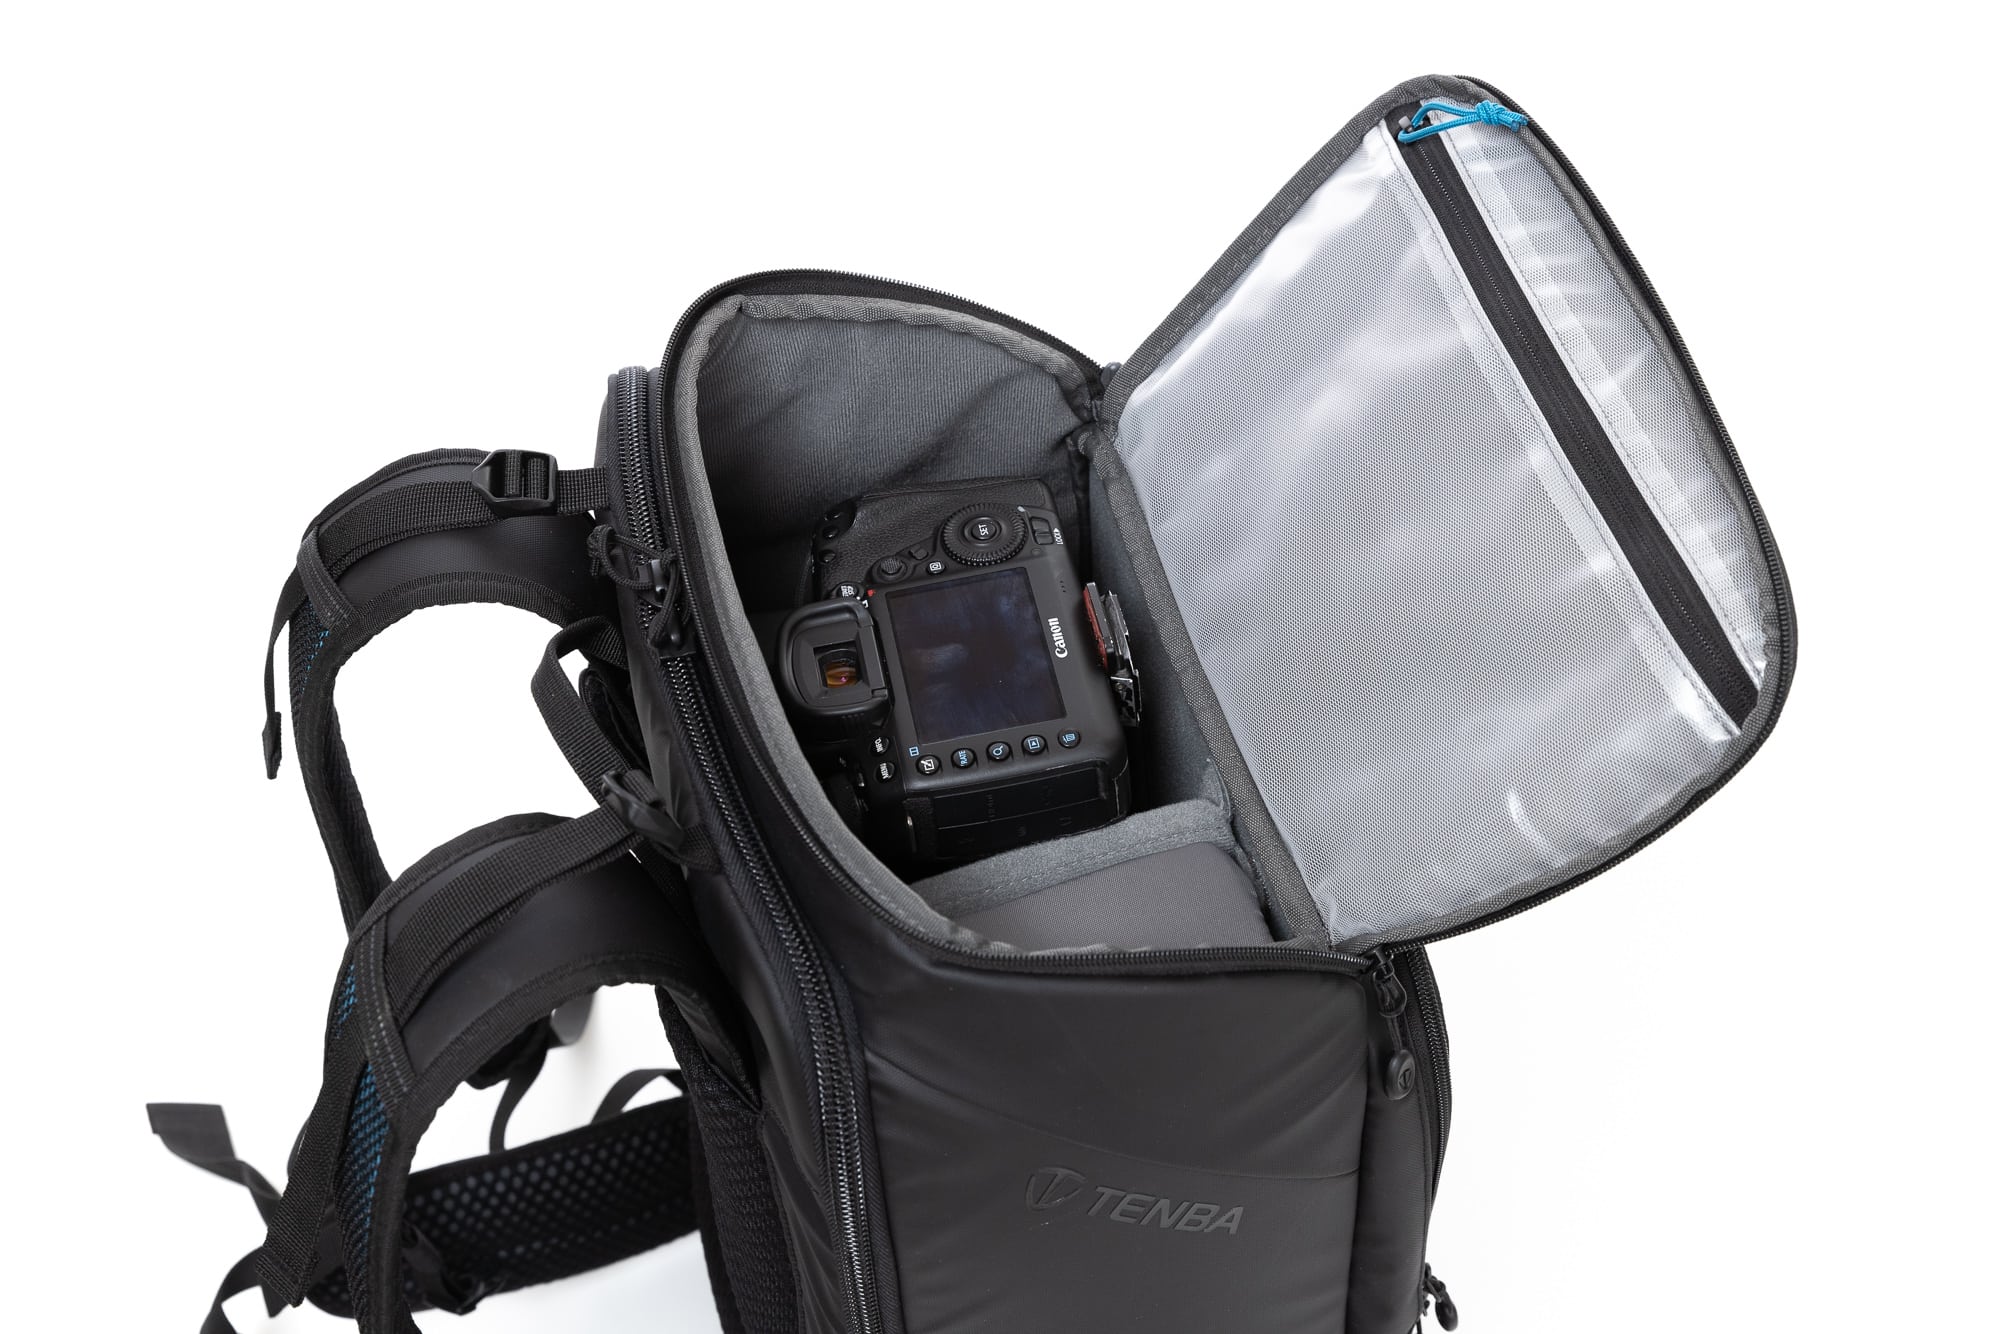
My favorite is side access. The backpack can be slung across one shoulder and when you unzip the side opening, you get to the camera without needing to put the backpack on the ground. It’s quick and easy and is helpful in less forgiving terrains. Depending on the specific type of backpack, you’ll find openings that are larger or smaller, as well as openings on both sides, or only one – almost always on the left. In these cases, the right flap is used as a tripod or drink holder.
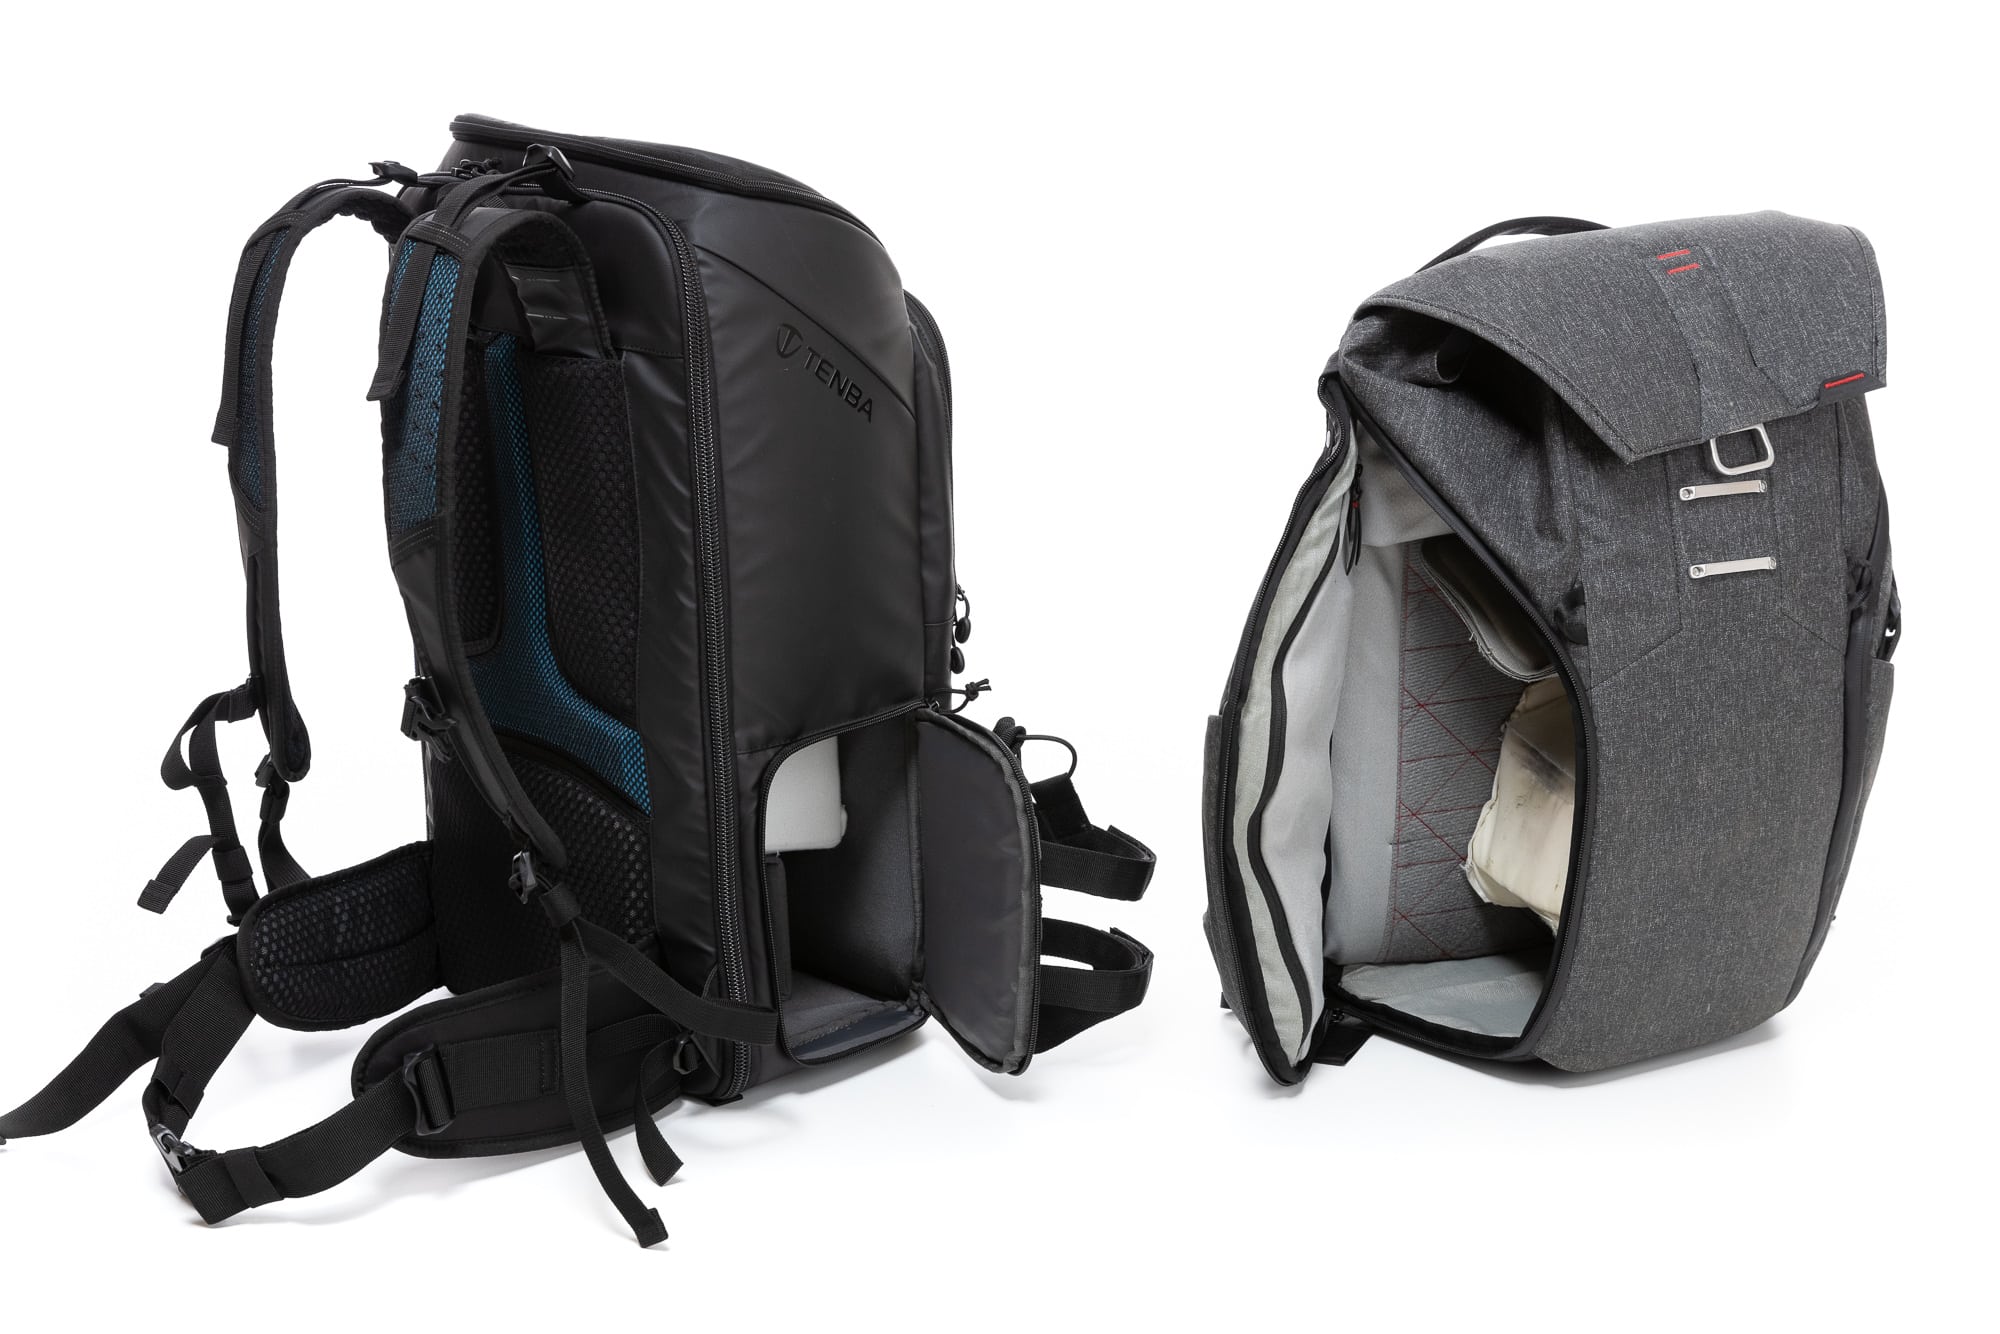
Back access is also common. In this case, the backpack must be placed on the ground with its front side facing down and the back partially or completely open. A huge advantage is direct access to everything inside the backpack without the need to rearrange.
A more dated option is front access. It has similar advantages, but one issue: Since you have to place the backpack on the ground, the bag’s backside (the one you put on your back/jacket) ends up on the ground. Backpacks are now available with both front and back access, so make sure that the backpack you’re considering uses an option that suits you.
The last, already mentioned, rarely-used option is top access. You’ll make use of this when you have gear that takes up the entire backpack or a gigantic telephoto lens that takes up a majority of the space. Sometimes, the top opening is just to access personal items and the photography gear underneath is separate and not accessible.
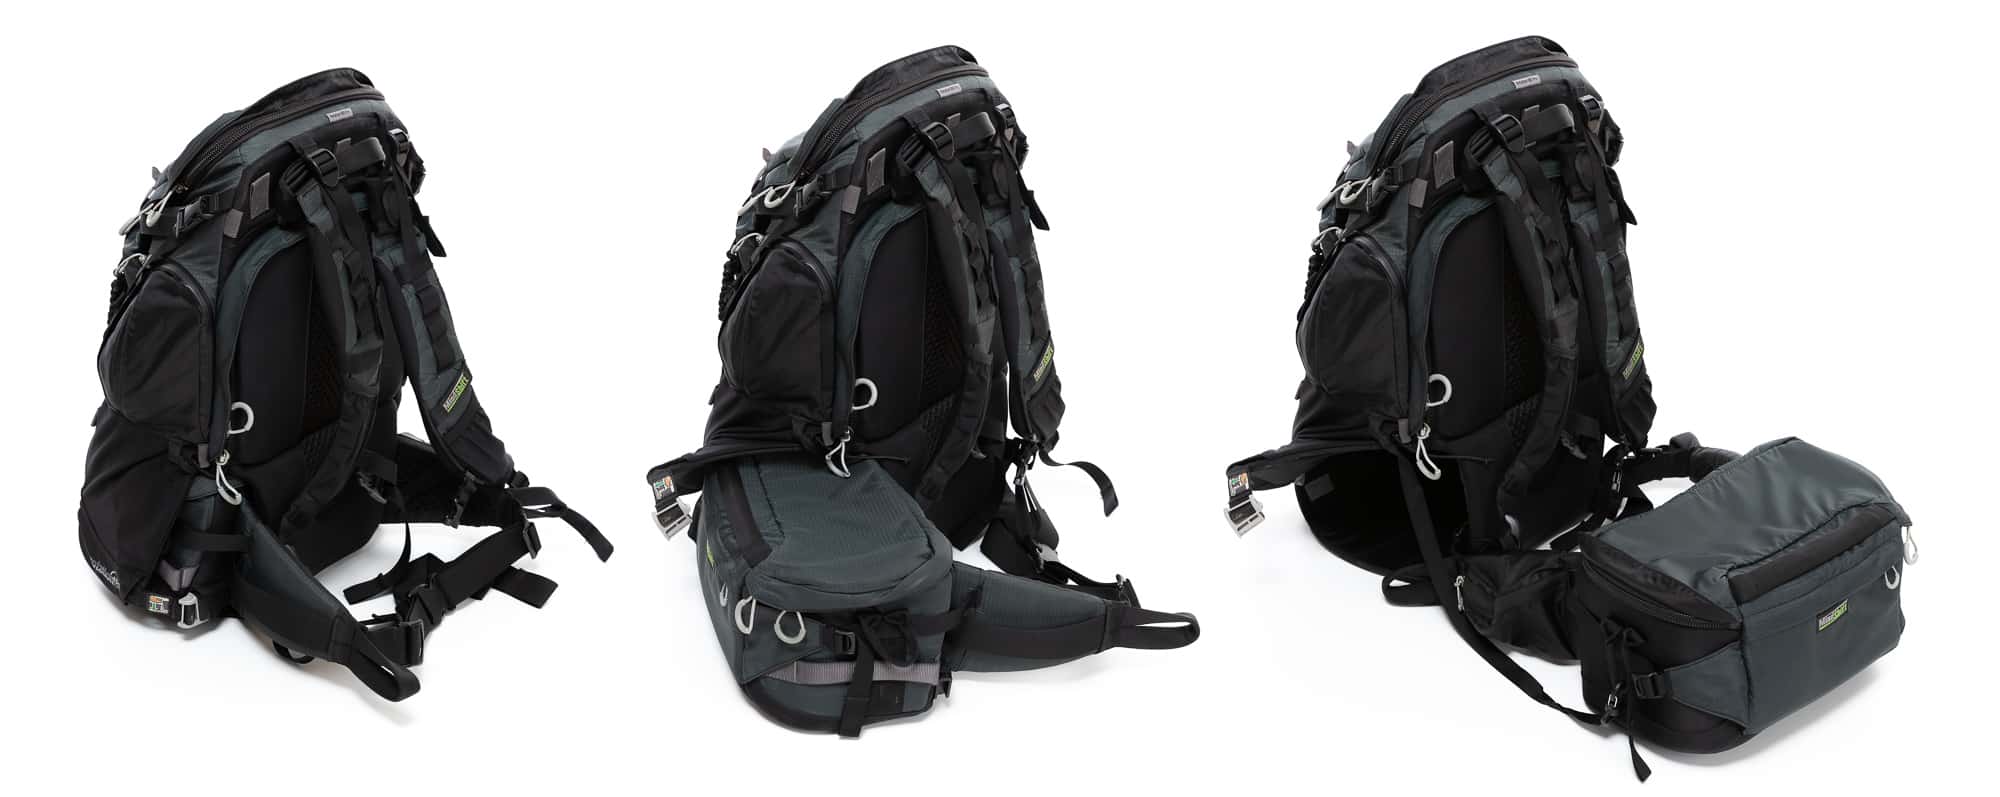
There are other solutions, a prime example being the Think Tank Rotation series, which uses rotating access. Part of the backpack wraps around the body like a giant fanny pack with your precious electronics inside. It’s a solution that works well and efficiently but is limited by its relatively small storage space. The fanny pack fits a camera body plus two additional lenses.
Amount of storage for camera equipment
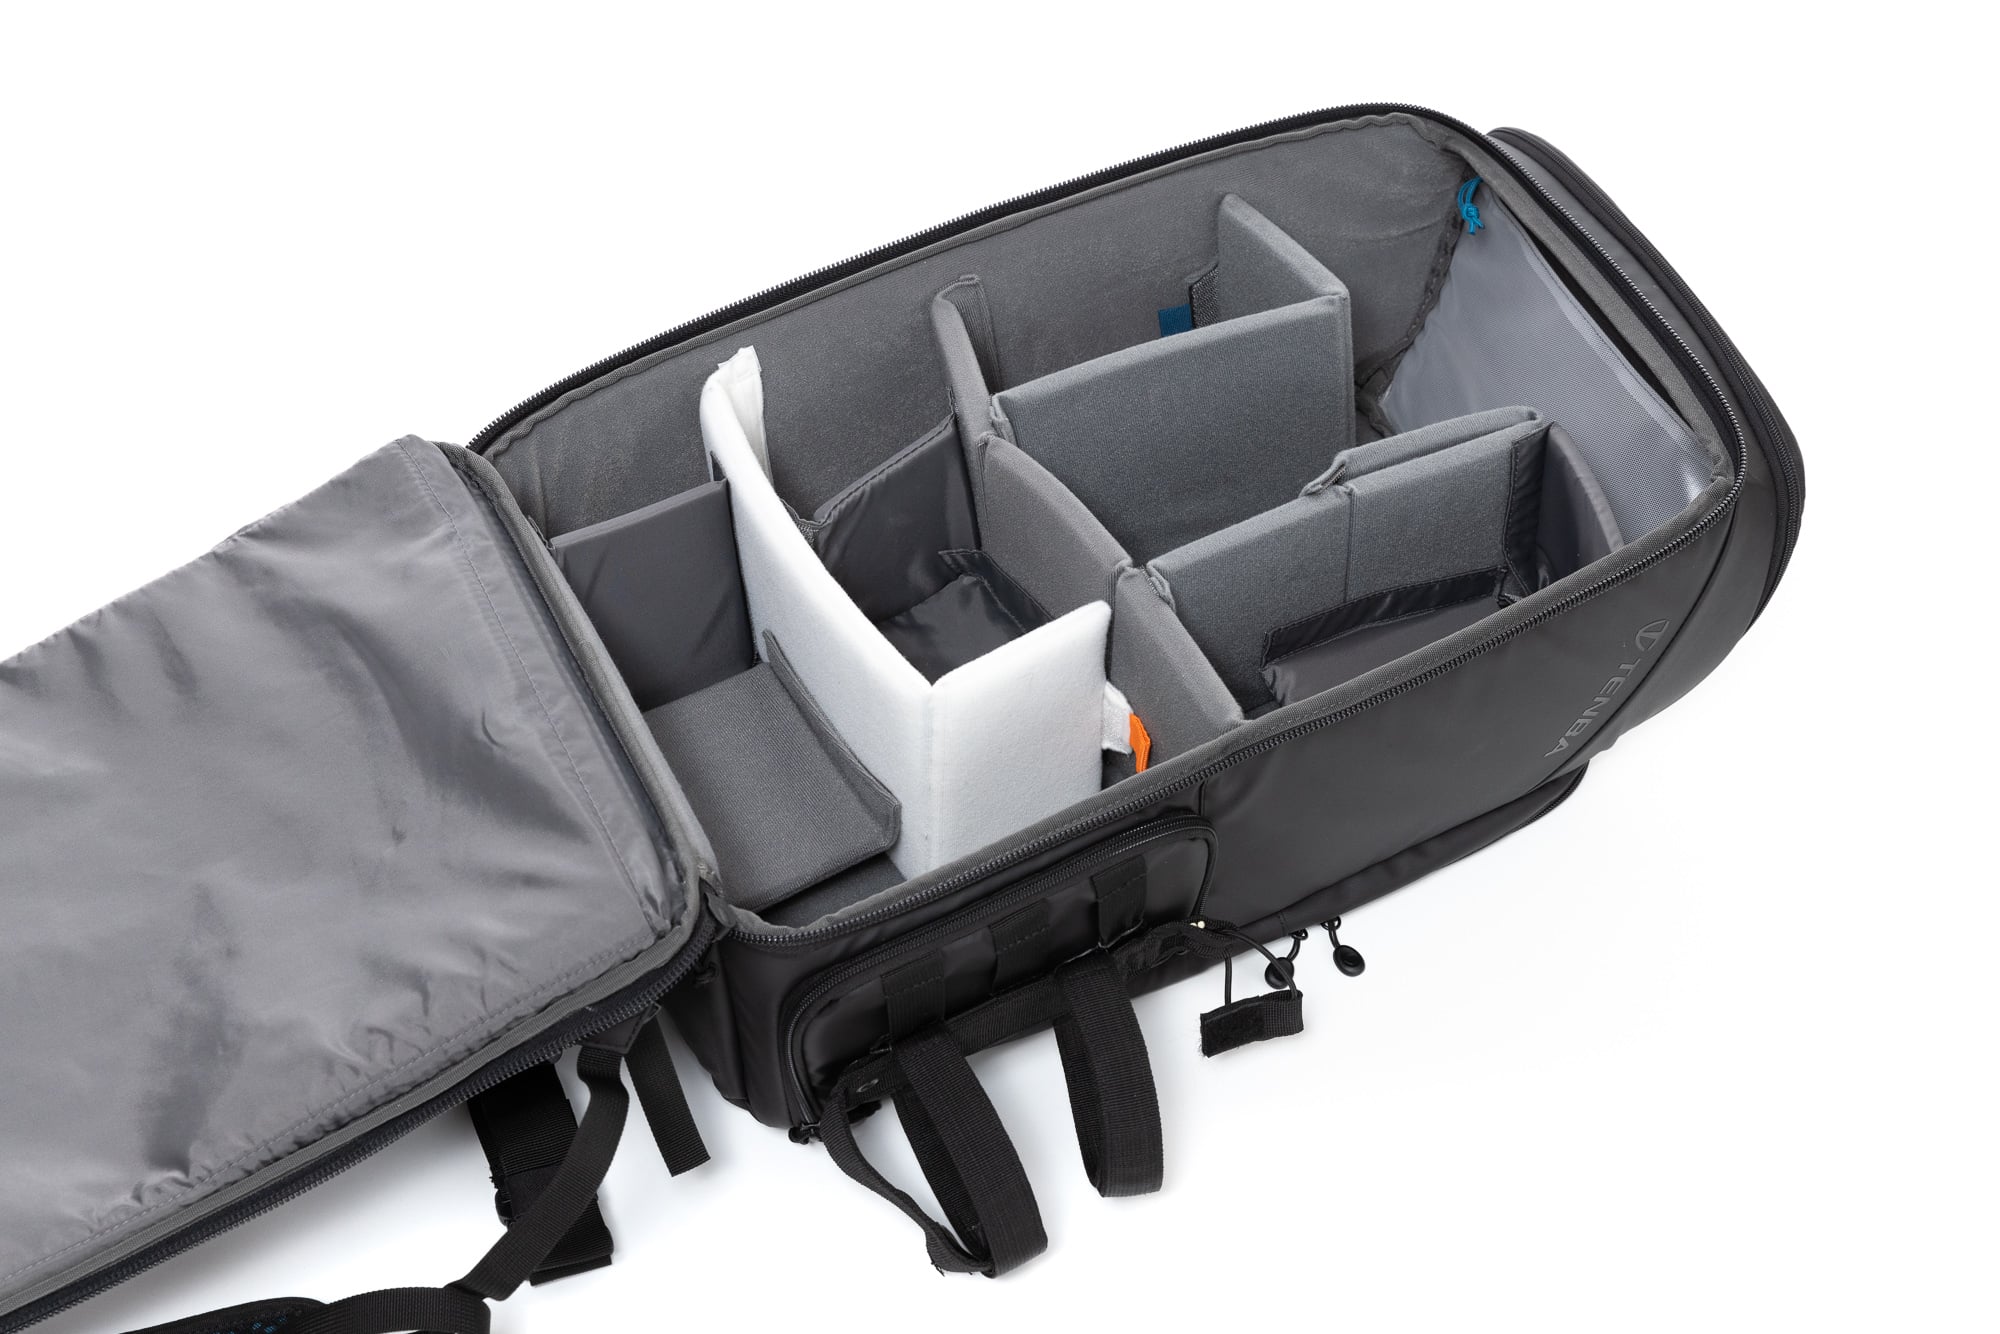
This brings us to the next key point: The volume of the backpack and its exact dimensions. Differently sized backpacks are simply suited for differently sized gear. It is very common to have a series of backpacks where subsequent models vary only in their dimensions.
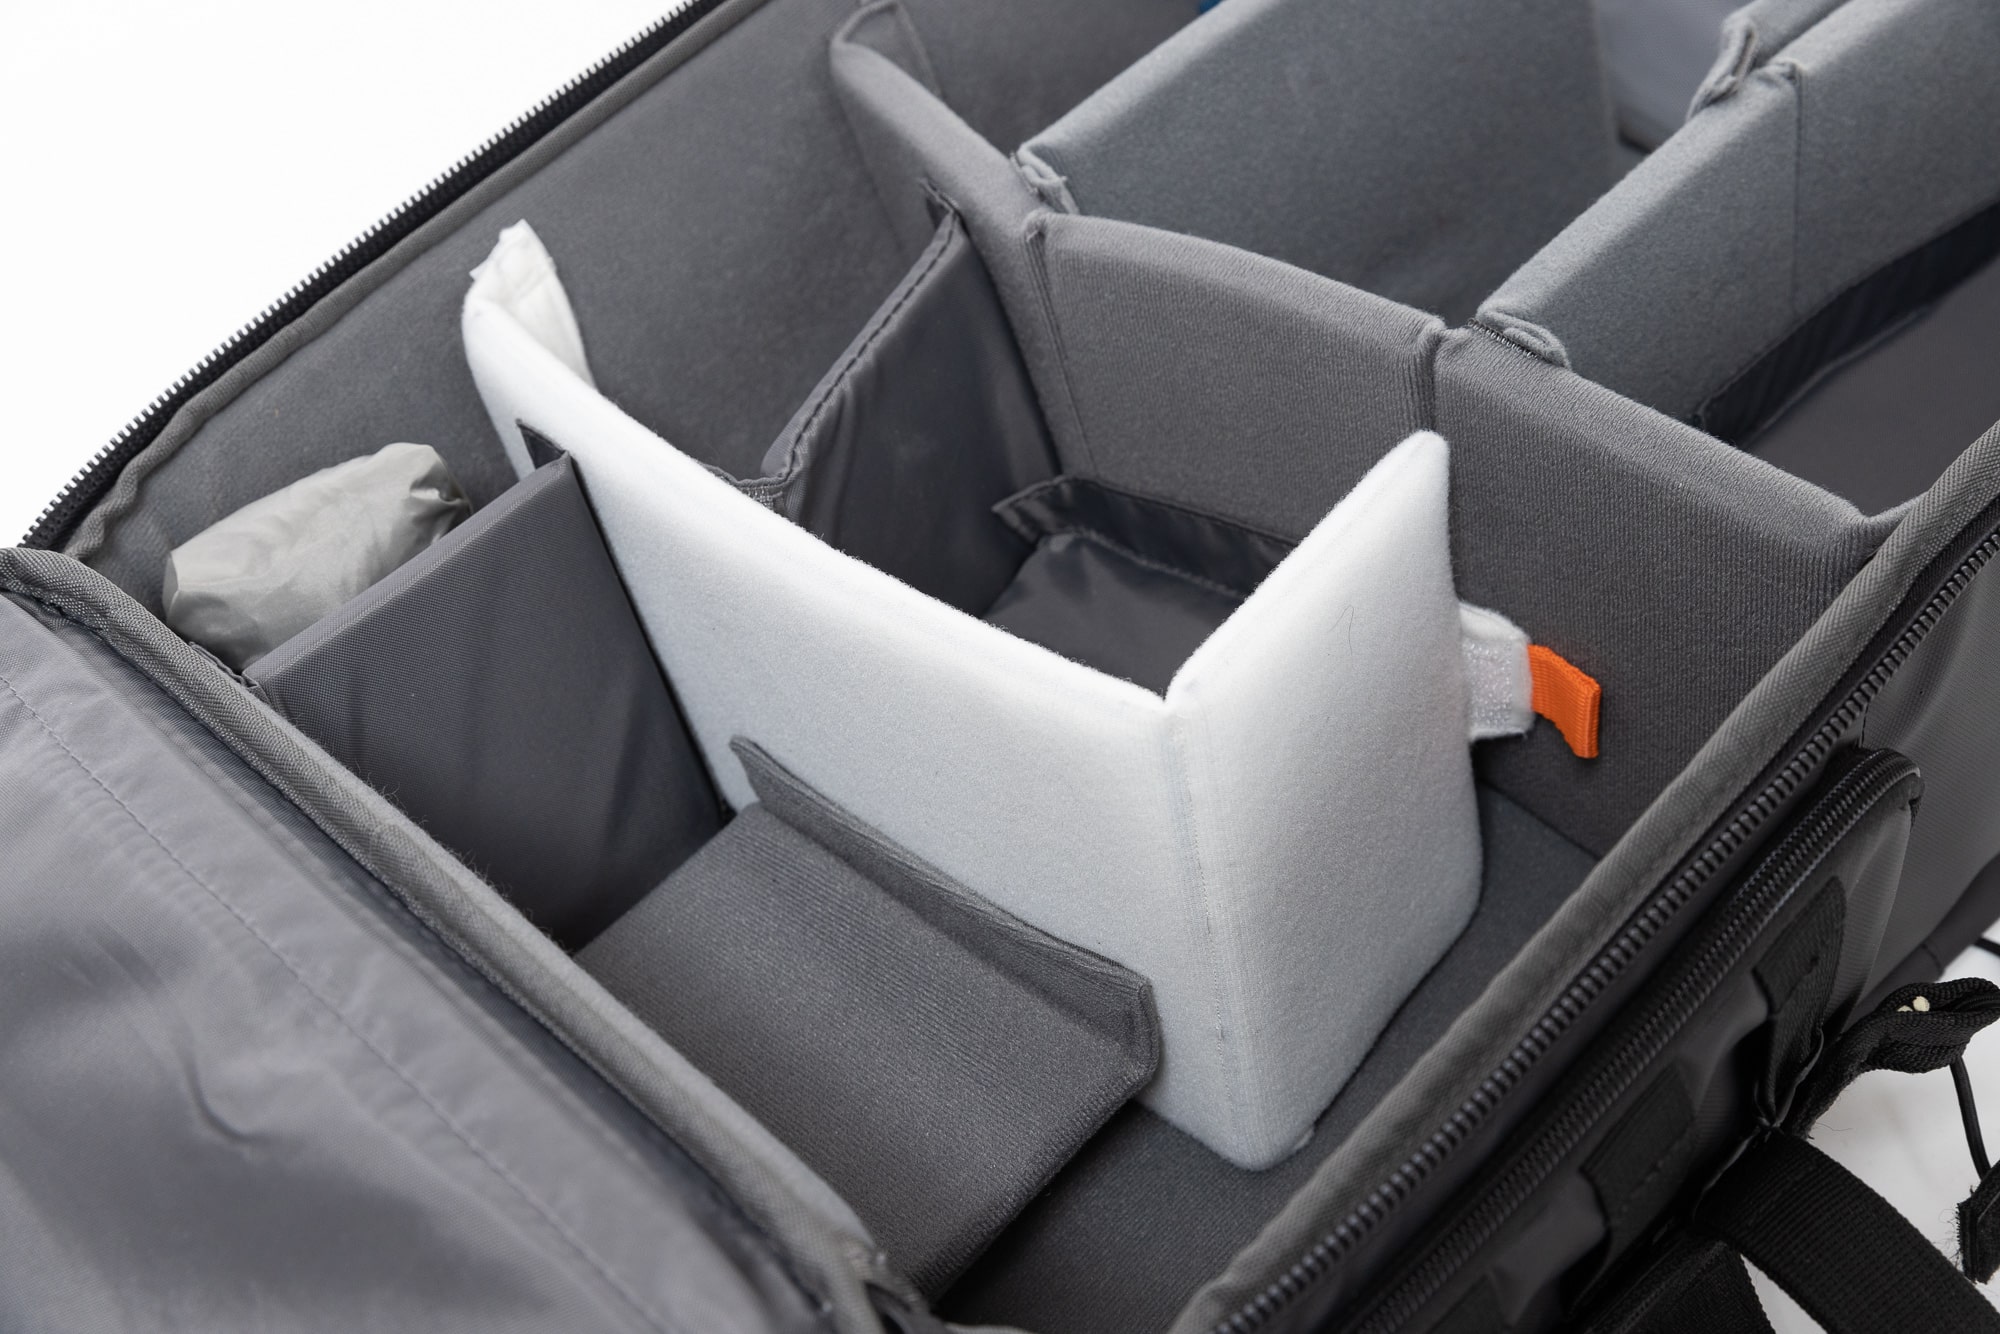
Adjust the inside of the backpack according to your needs. Velcro dividers are included and more can be purchased or made. My own formula is a plastic board wrapped in foam and fabric.
Storage for additional items
In addition to the size of the camera and lenses, it’s important to consider other items you plan to bring along with you. Will you be carrying food, a book, or spare clothing?
Some backpacks are able to be reconfigured according to your needs for each trip. Others have fixed separate compartments for photography gear and personal items. While this is a bit safer, it’s also a potential problem if you unexpectedly purchase another lens in the future.
You can usually find a dedicated laptop or tablet compartment, but it’s a good idea to make sure.
If you frequently fly, you need to check carry-on baggage limits.
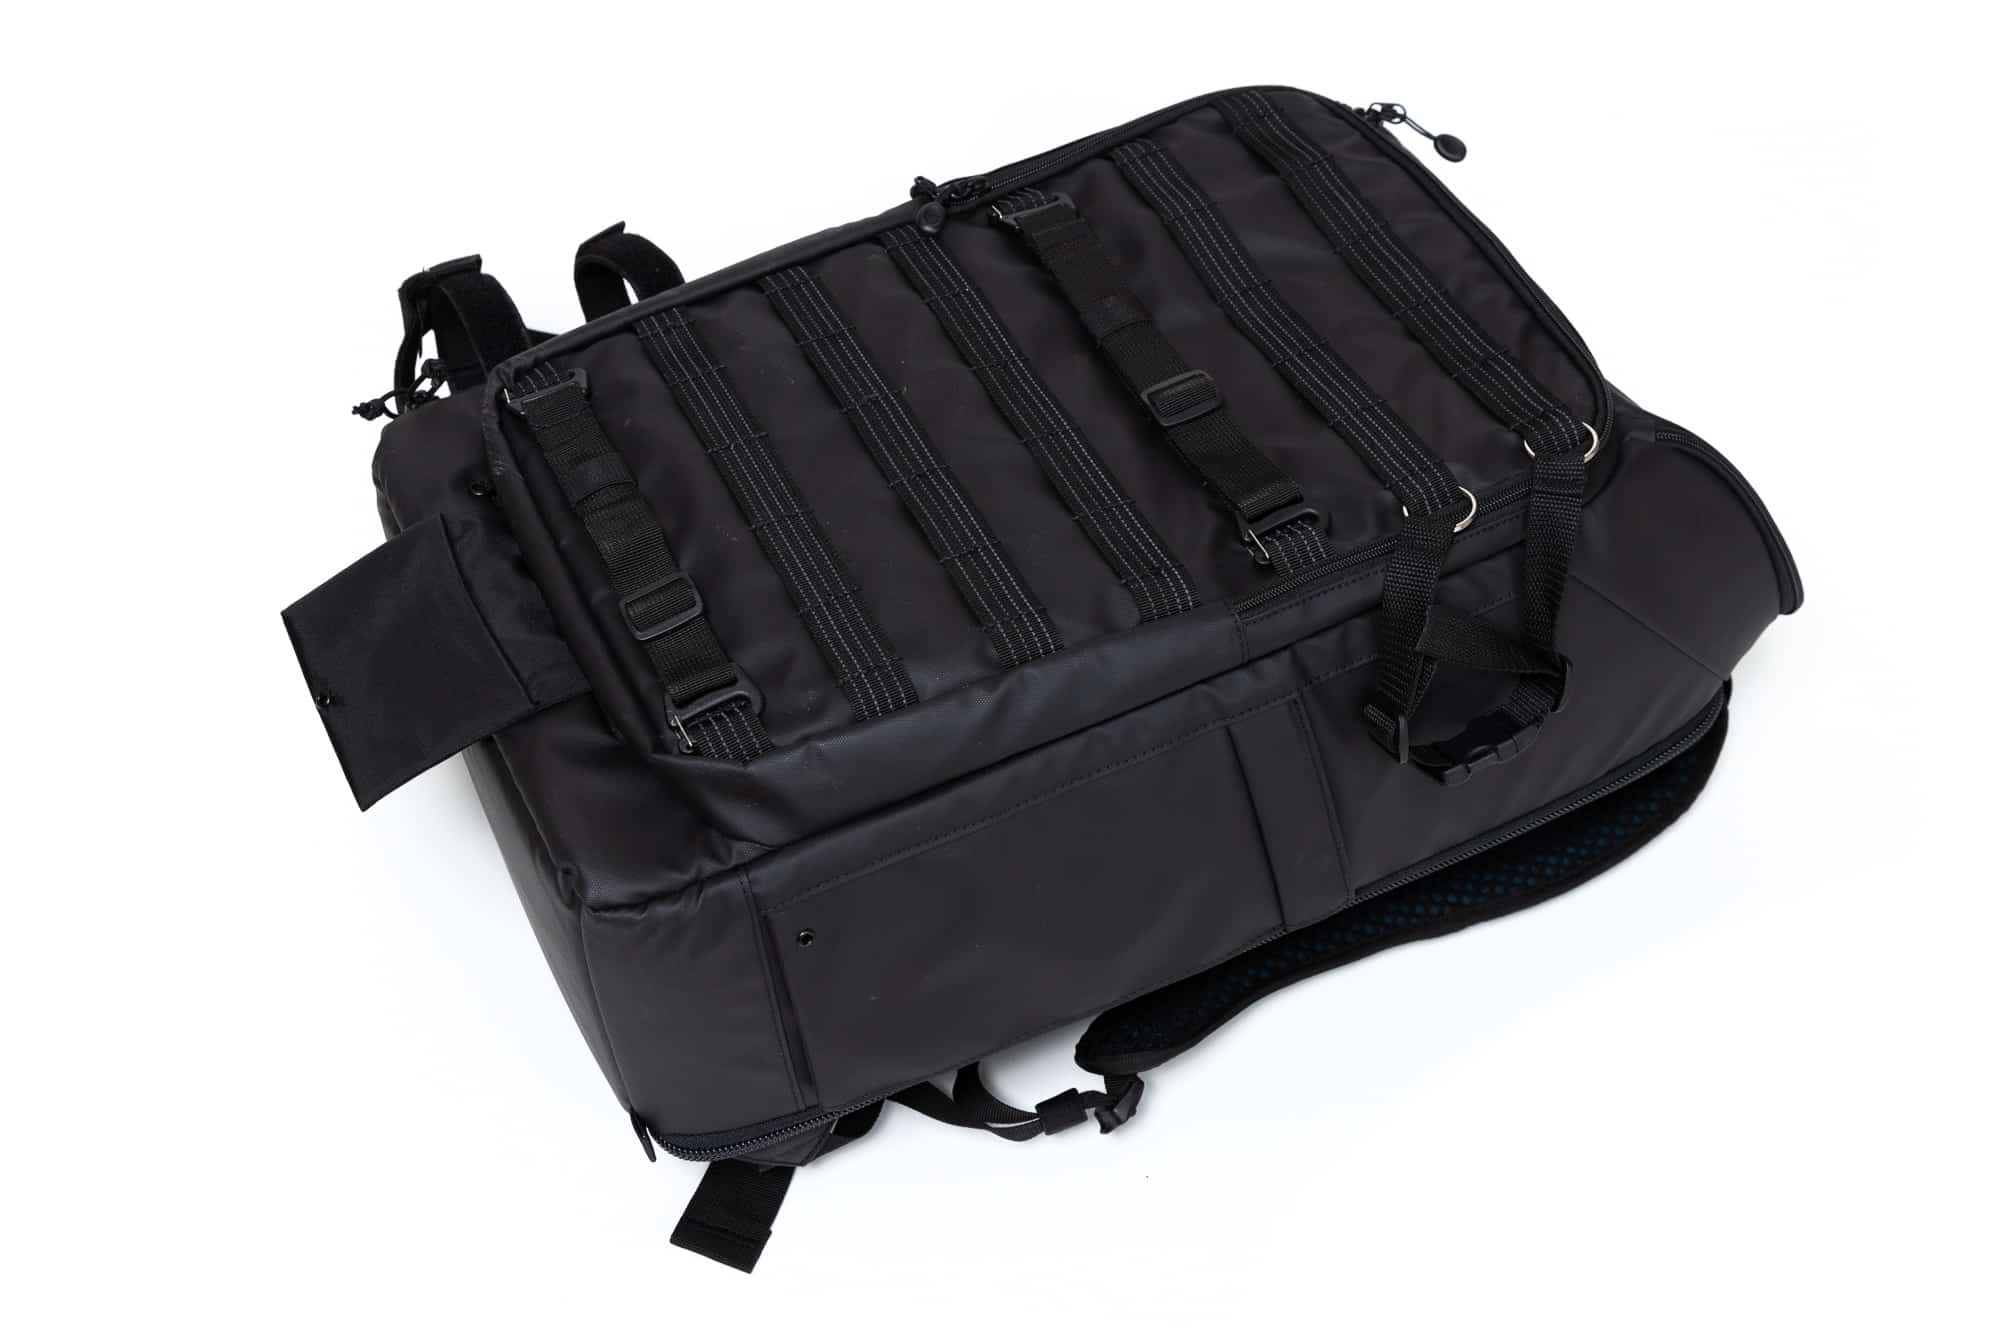
Attaching items to the outside of the backpack
A tripod and drink bottle are often attached to the outside of the backpack. A common obstacle is the side opening where some manufacturers don’t account for a drink bottle holder.
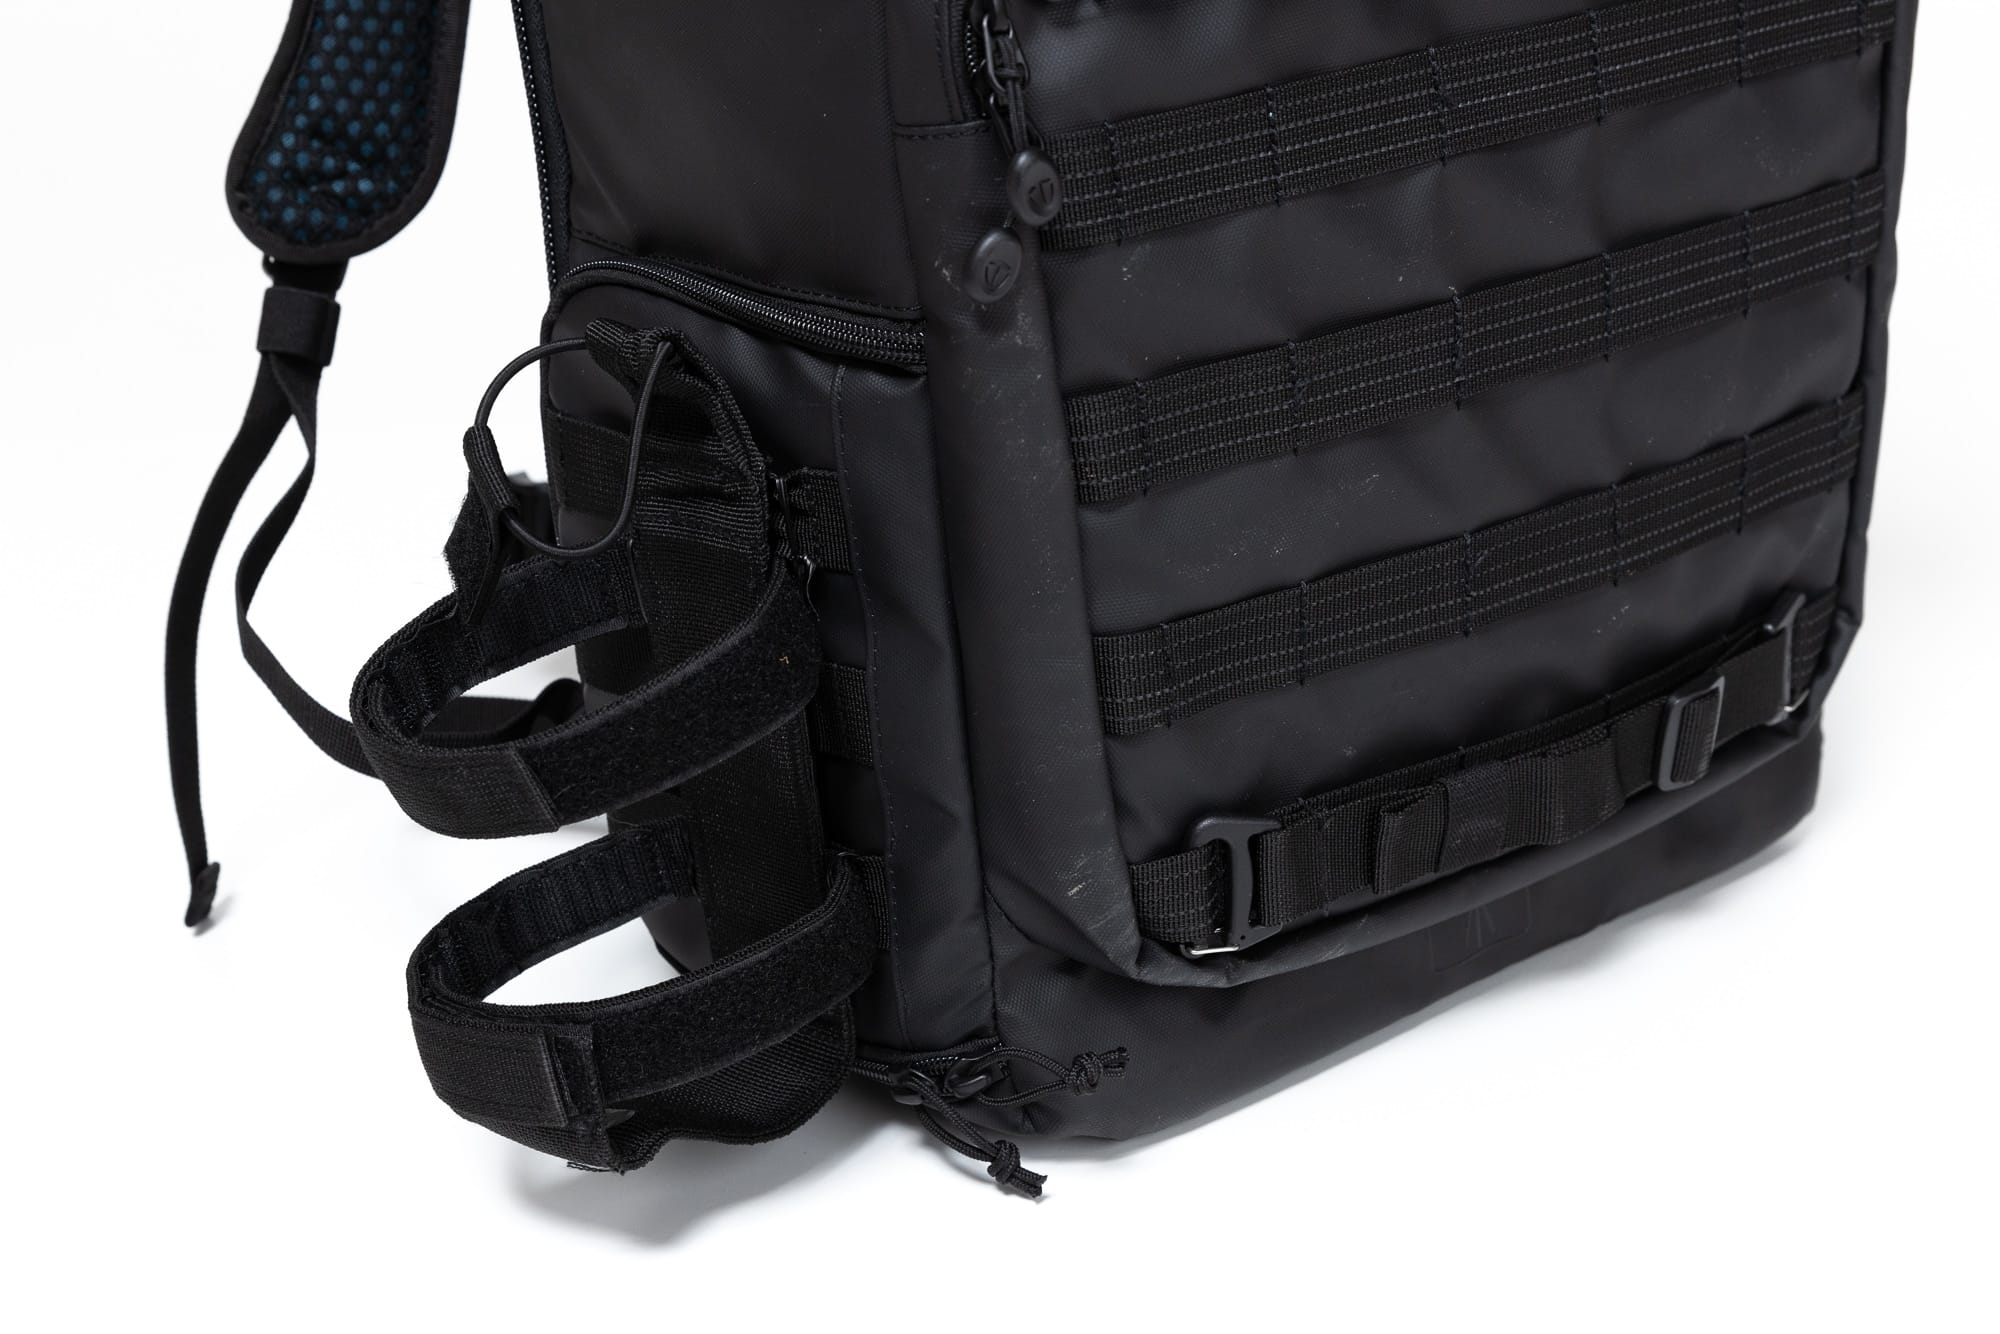
Also, while it’s nice to have the tripod and other items attached to the outside of the backpack (away from the back), it means you cannot put the backpack down on this side. Consider these factors before purchasing your backpack.
Weight and carrying comfort
While a lightweight backpack is tempting, the most important thing is that it fits you and distributes the weight properly. Designer pieces don’t tend to perform well in this regard and are uncomfortable after extended wear. On the other hand, backpacks designed for hiking have better shoulder and hip straps, the difference being the additional padding and various adjustment points.
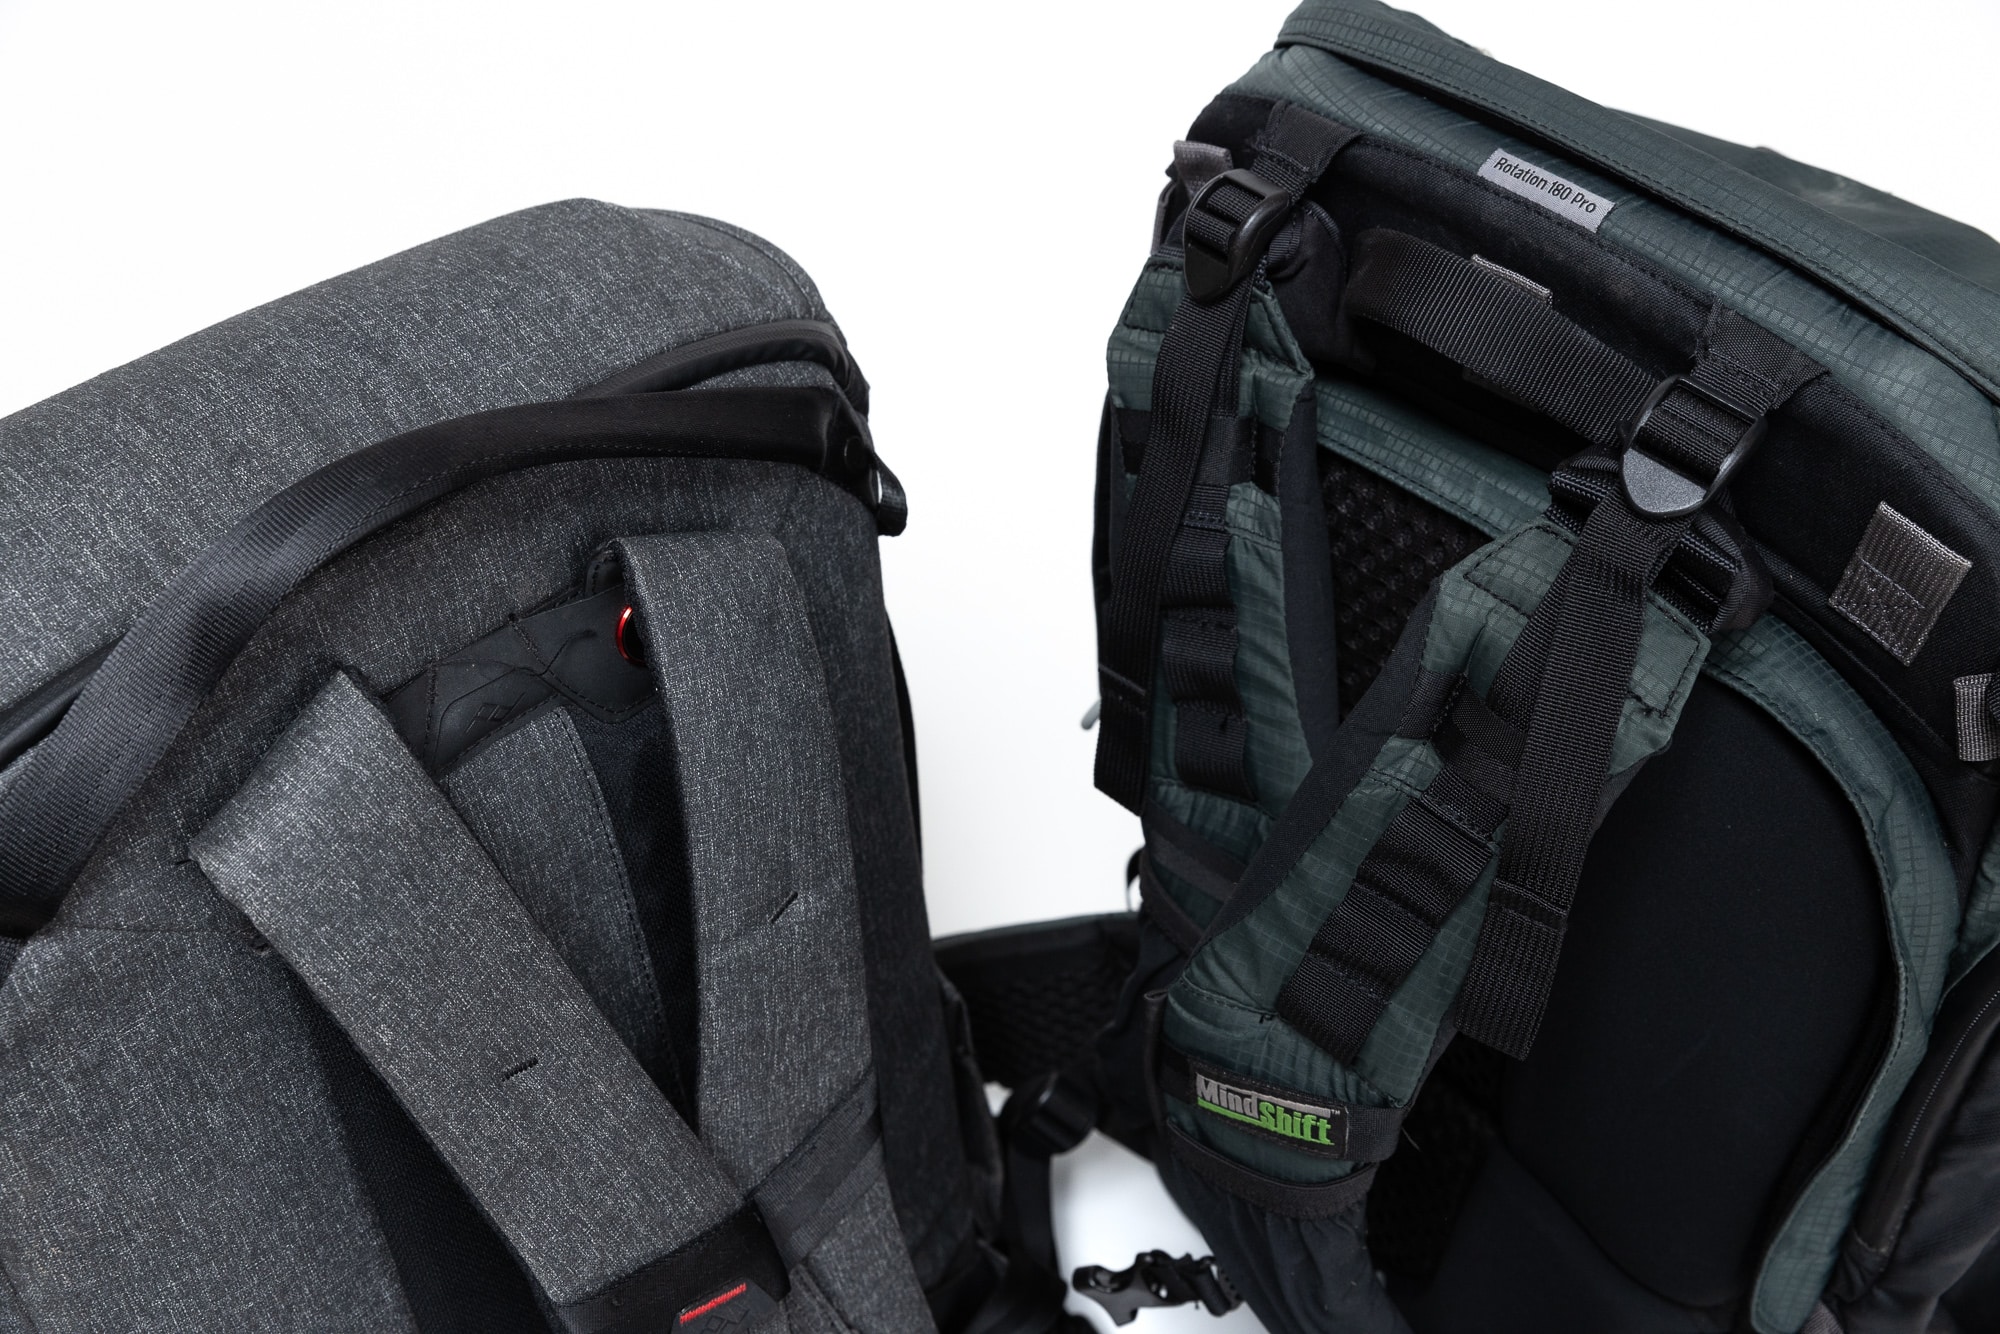
I personally don’t pay much attention to the weight of the shock absorbers anymore and just try the backpack on. For my height (193cm), larger backpacks that fit me at the hips and shoulders are better.
Additional features
Sometimes there are multiple pockets for personal items, sometimes there are even special compartments for a drone or a water pouch.
A rain cover also comes in handy for inclement weather. While the backpack’s nylon surface is durable, the rain will penetrate through the zippers. From my experience, even backpacks with rubber lining with a manufacturer’s guarantee that this won’t happen, have this issue.
Cost based on your chosen configuration is an important factor to keep in mind. Considering the frequent turnover of backpacks, it may be worth browsing some online resale sites. With some luck, you can snag a great deal for your chosen backpack.
The perfect camera backpack?
Unfortunately, it doesn’t exist. Even those that come with a high price tag. Each backpack offers a number of compromises that you need to learn to live with. With some practice, you’ll figure out what works best for you and what you need which will help when choosing your next camera backpack.
There are no comments yet.