Closed Eyes in Group Photos? The Editor Will Help You Fix Them
The article is over 5 years old. The information in it may be outdated.
![]()
We are working on its update. In the meantime, you can read some more recent articles.
Group photos are the sort of thing that can seem easy at first. You round people up into one place, you say “cheese!”, and you shoot ten pictures. But then back home on your computer, you learn that every shot has someone with their eyes closed. What do you do? You can’t retake the picture, and yet you also can’t send off a wedding picture where a third of the family is “sleeping.” Well, in Zoner Studio, you can re-open those sleepers’ eyes. We’ll show you how.
Don’t get mad at people who blink in photos. They can’t help it. It’s just something that happens sometimes, and often people do it without realizing it. Meanwhile, when you’re photographing large groups, people’s eyes in your photos are small, so you might not notice the problem on the display. Especially if you’re quickly photographing a series of groups, and maybe even doing it under sharp sunlight, where you can’t even see the camera’s display well. That’s exactly the sort of situation that you often have at weddings… and not only there.

Take More Shots
Of course, the easiest solution is to prevent the problem, and the best way to do that is to take more shots. When I’m shooting small groups, my minimum is two to three shots. And for my photos of all the weddings guests together, ten or more are typical.

Having more material gets rid of both sleepers and problems like motion blur and bad focus. (Because of this, it’s best to re-focus for each shot.)
Unfortunately, even then you’ll still encounter situations where, when you get back home, two out of the three shots you took have sleepers, and the third is blurred. Then the only solution left is digital editing.
You Can’t Combine Just Anything
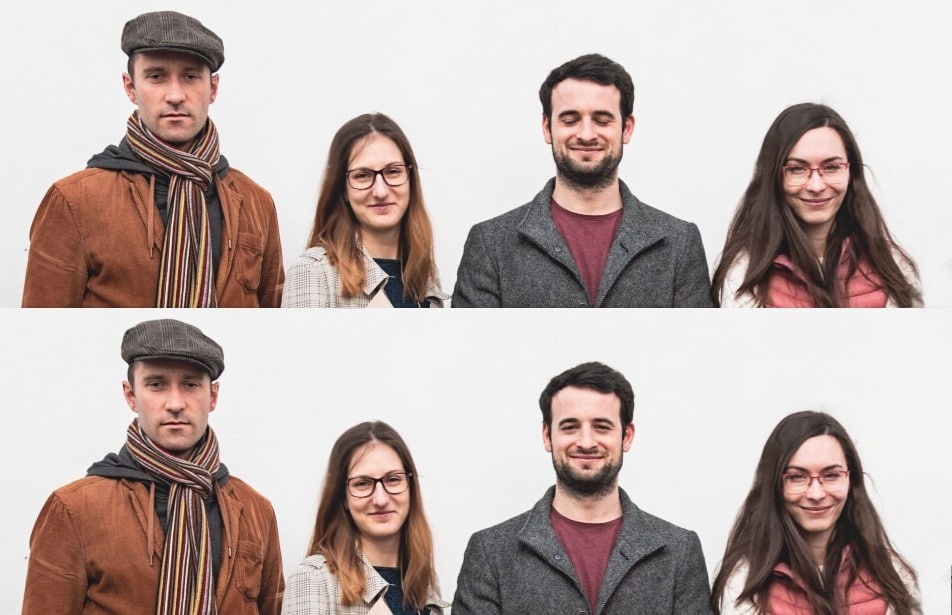
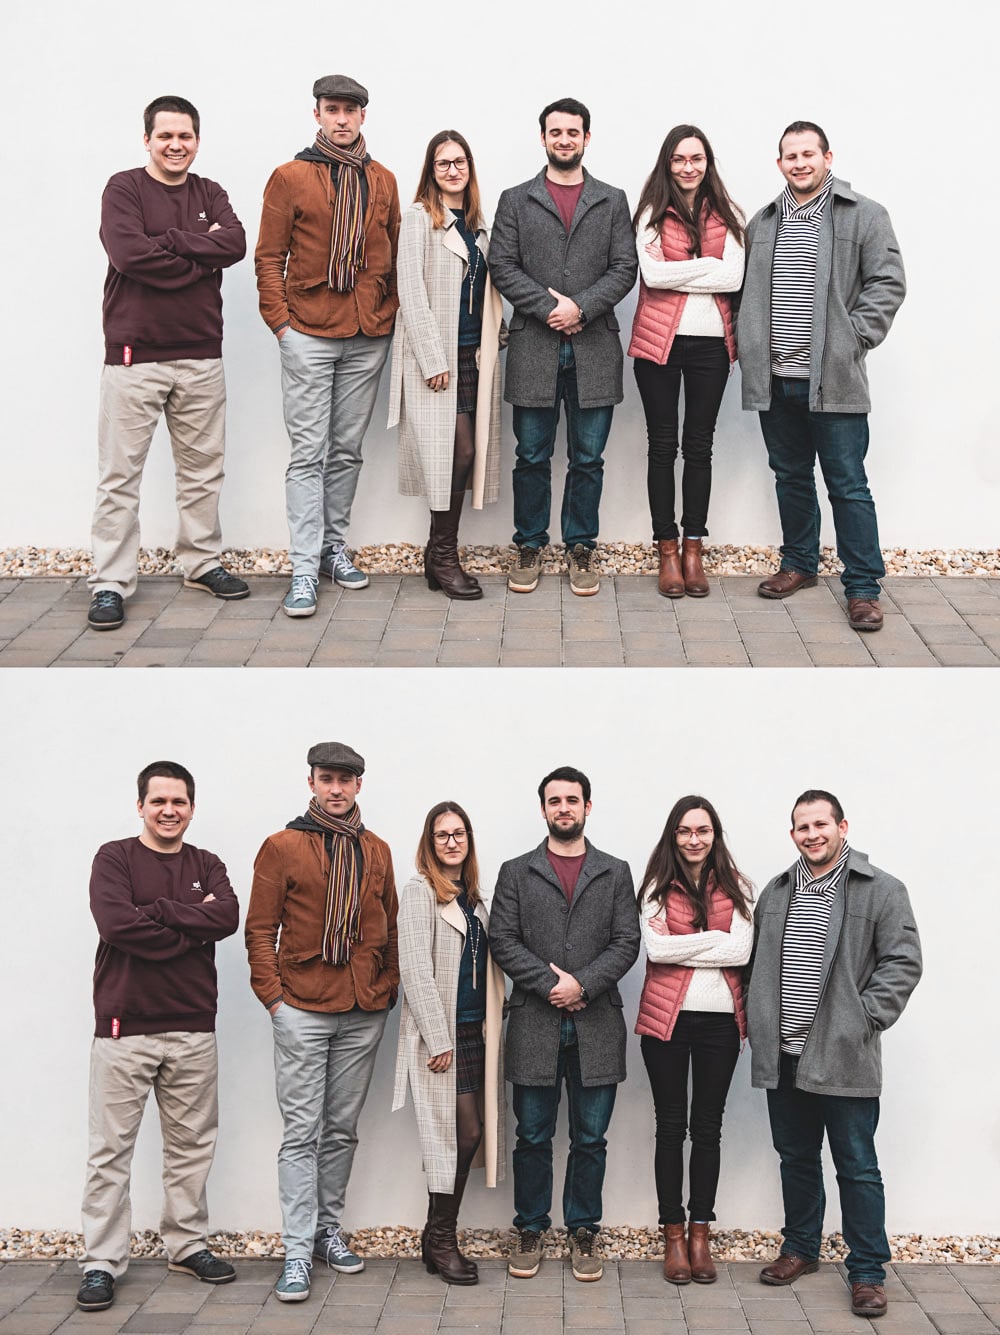
Well, you can, of course. But certain pictures are easier to combine than others. First, you’ll need to choose a “base” photo. Pick one where most of the people look good, even though there’s one person (or sometimes, unfortunately, several people) with their eyes closed.
To go along with this picture, you’ll need one where the “sleeper” has their head in a very similar position and has their eyes open. It’s not good if they have their heads turned in this second picture—let alone if the sun has risen or set in the meantime, which completely changes their eyes’ lighting. In that situation, it’s better to choose a different pair of pictures.
It’s unproblematic, on the other hand, if the pictures have different exposures and brightnesses. It’s also usually not a problem if you’ve changed focal lengths between shots, changing the size of people’s heads. This can still be fixed quickly, and even if you have to make their eyes somewhat larger (decreasing their resolution), generally nobody will notice the difference.
But this is all theoretical. You’ll likely actually have a series of nearly identical pictures taken during mere seconds, with nothing changing but the eyes.
Choose Pictures, Then Unify Settings
Let’s assume that as an experienced photographer, you’ve shot to RAW. Before starting the edits themselves, it’s good to unify the photos’ fundamentals in the Develop module. Above all you want them to have the same white balance settings.
You can make other changes as well, like exposure, contrast, and anything else at all… as long as you then copy these changes so they’re in both of the two photos that you’ll be using for the eye fix. (In the Develop module, use the usual Ctrl+C and Ctrl+V to copy changes.)
My example photos were taken with slightly different exposures, and so one of them is darker. Even this problem could be fixed in the Develop module, just by brightening one of them more than the other (and thus leaving different settings after all). But for my example, I decided to deliberately leave an exposure difference so that I can demonstrate how to deal with it in the later steps.
Open the Base Picture in the Editor
After these image corrections in the Develop module of Zoner Studio, move on to the Editor module. You’ll be doing most of your work there using layers.
Right when you first enter the Editor, the current photo is shown as Layer 1 in the layer list on the right.
Identify the person, or a person, with closed eyes, because that’s what you’ll be working on. My example has more than one of these “sleepers,” so I’ll be choosing one of them to start with.
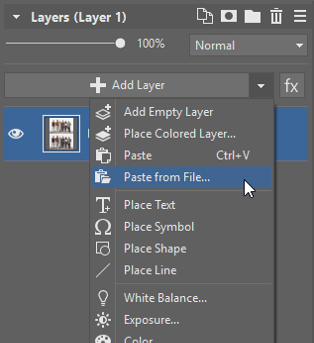
Paste the “Fixing” Photo
Then click Add Layer and choose Paste From File. Paste in the photo that you’ve chosen to use for the fix. That photo will immediately be shown as Layer 2.
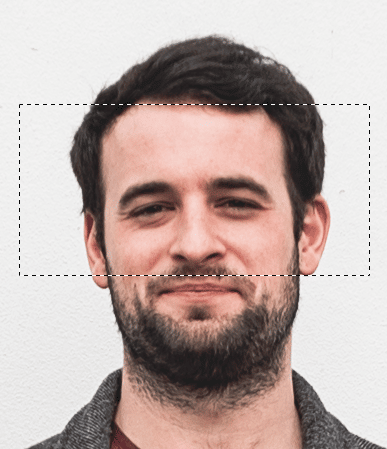
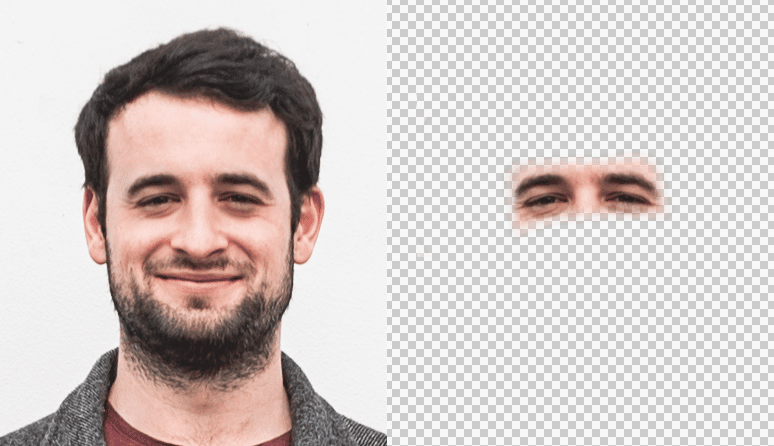
Selecting and Duplicating the Eyes
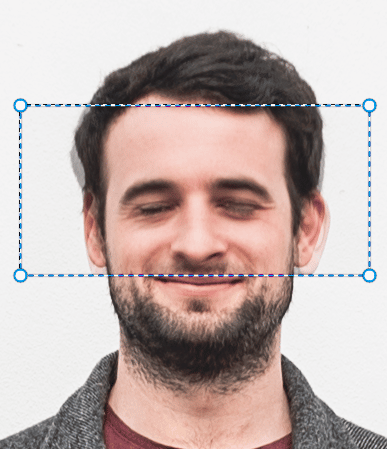
Now I’ll press M to activate the Rectangular Selection tool, and then select the person’s eyes and the area around them. It’s best to select a somewhat larger area then you think you’ll need, and then erase around its edges.
Then all that’s needed is to copy the selection (Ctr+C) and then paste it into the very same spot (by using Ctrl+Shift+V instead of the usual Ctrl+V, which would paste the selection into the middle of the picture).
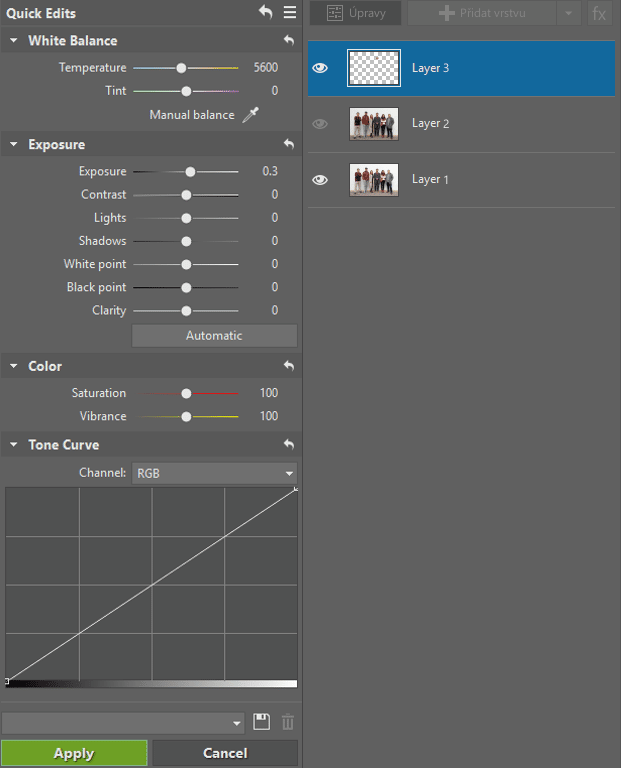
Now there are three layers: The original photo with the closed eyes (Layer 1), the second photo with the open eyes (Layer 2) and the open eyes themselves (Layer 3).
Now it’s time to cancel the selection by pressing Esc and to hide Layer 2, the middle layer, by clicking the eye icon next to the small layer preview picture.
Adjusting the New Eyes
The new eyes need to be transformed (moved, rotated, stretched/shrunk) and tinted to make them fit their surroundings.
The Move and Transform tool (V) is the best way to start. Minor shifts go the fastest when you use the cursor keys. And for very similar pictures, this is quite often all you need.
You can check that the new eyes fit well in their new location by turning this layer’s visibility on and off using the eye icon next to the layer icon. Or you can set the layer’s opacity to less than 100% so that you can see both the translucent top layer and the original content beneath it at the same time. But this can sometimes be more confusing than helpful.
When you find that the new eyes need to be shrunk or rotated, you can do that using the same tool, by clicking and dragging the marks at the edges of the selected layer.
If the new eyes also need to be brought closer to the base layer in terms of their brightness or colors, the simplest thing to do is to open Quick Edits (Q) and shift the appropriate sliders. Here I can most likely make do with shifting the exposure slider only (to fix the differing exposures I mentioned earlier).
Smoothing the Border
There’s one last step left. So far you’ve adjusted the fixing layer’s overall properties, but for it to truly blend into its surroundings, it still needs a “fading” border instead of its original sharp border. During this process, you can also choose which layer to keep and which one to make transparent.
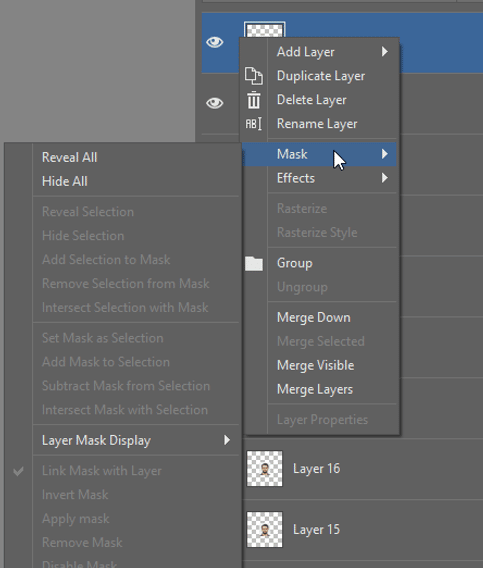
The steps are simple: Create a mask for the current layer by right-clicking on the layer icon and using Mask and Reveal All. The new layer mask will then be selected automatically, and so the drawing tools will draw into the mask rather than into the layer itself.
Then all that’s left is to activate the Brush tool (B) and set its Blur to 100%. That gives the brush a softer outline, and if you set the brush color to black, you can use it to erase the mask’s edges. If you “draw outside the lines” or make any other kind of mistake, you can just change the color to white and fix the problem spot.
Not Just for Eyes
You can use this technique to fix more than just eyes. In some cases, you can even correct a whole face or other body parts. It all strongly depends on the background behind the area you’re replacing. If there’s a white wall behind the people, like in my example, everything will fit well. But if the shot was taken in a park with trees around or with people walking by, that would make the edit extremely complicated.
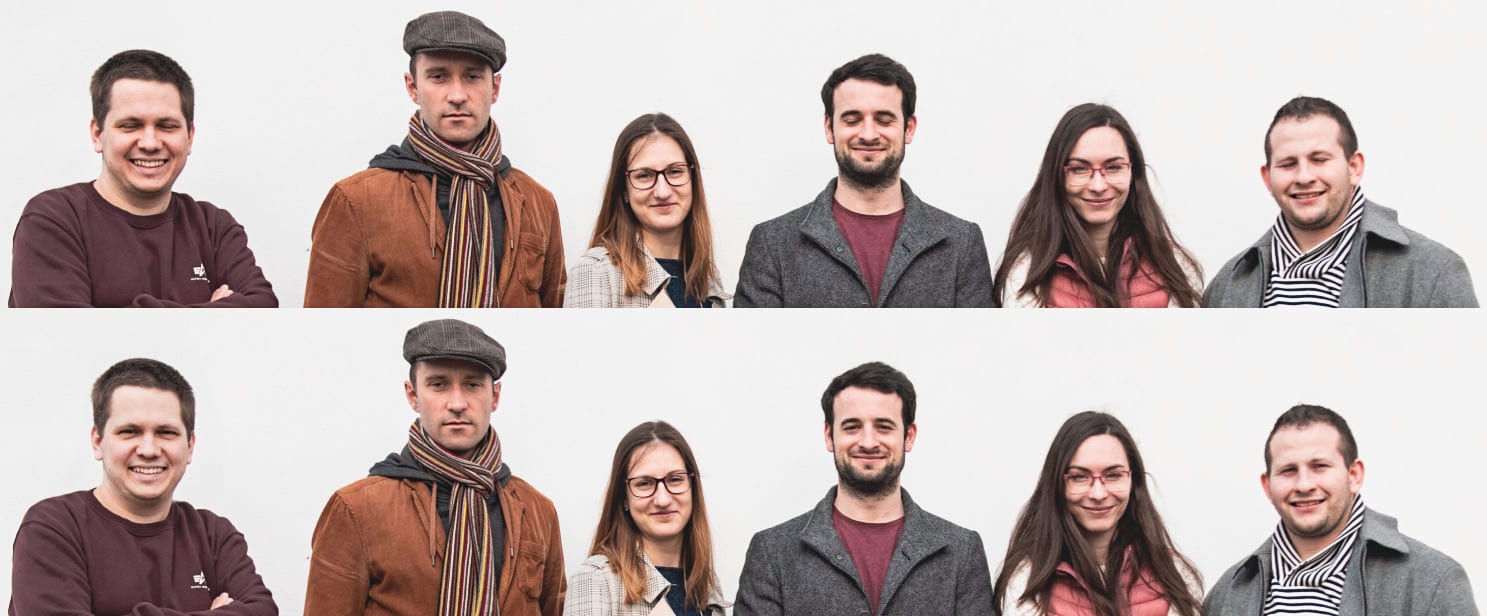
That Was Easy
Naturally, the best way to go is to have problem-free pictures out of the camera. But it’s good to know that if a problem does occur, it can be resolved easily. You can also use a similar approach for many situations like this, where you’re taking part in one picture and covering it with part of another. Just do a practice run now, and then when you need this skill in the future, you’ll be prepared.
Farman
Nice
Vit Kovalcik
Thank you, I am glad you like it!
Sumon
My phaar photo open eye pls
George David
Good