Color Shift: Get Absolute Control Over Your Photos’ Colors
The article is over 5 years old. The information in it may be outdated.
![]()
We are working on its update. In the meantime, you can read some more recent articles.
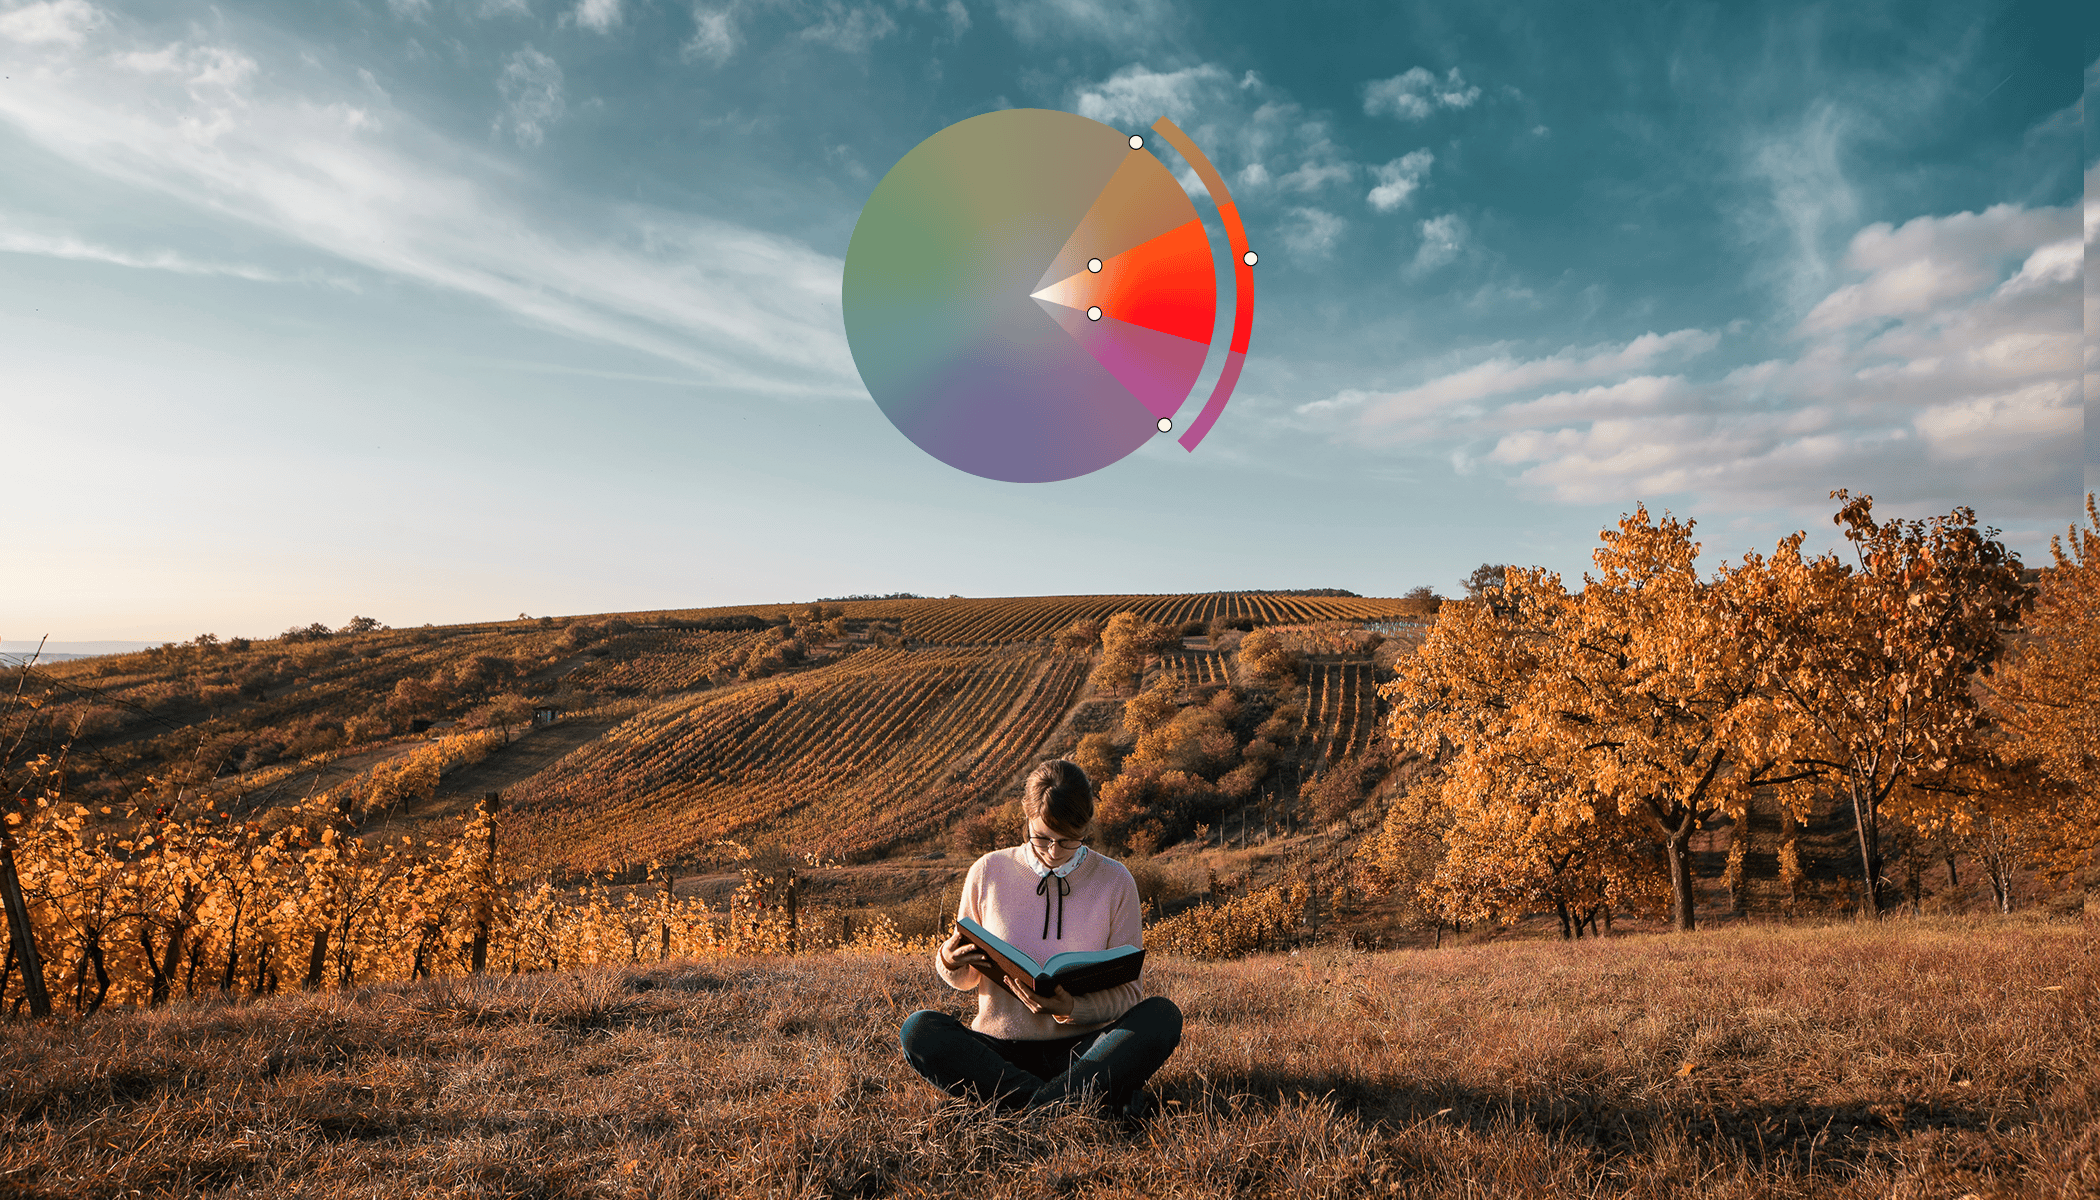
Color editing is among a photographer’s basic tools for standing out from other photographers and creating a signature style. Zoner Photo Studio X now boasts a wide range of possibilities for editing a photo’s colors. And the improved Color Shift is one of them. It puts you in control of a tool to make your color adjustments a snap. Take a look at how Color Shift works.
The Color Shift tool offers unlimited color editing possibilities. Whether you’re working in the simpler Basic mode or diving into Advanced color corrections, your editing possibilities are extensive.


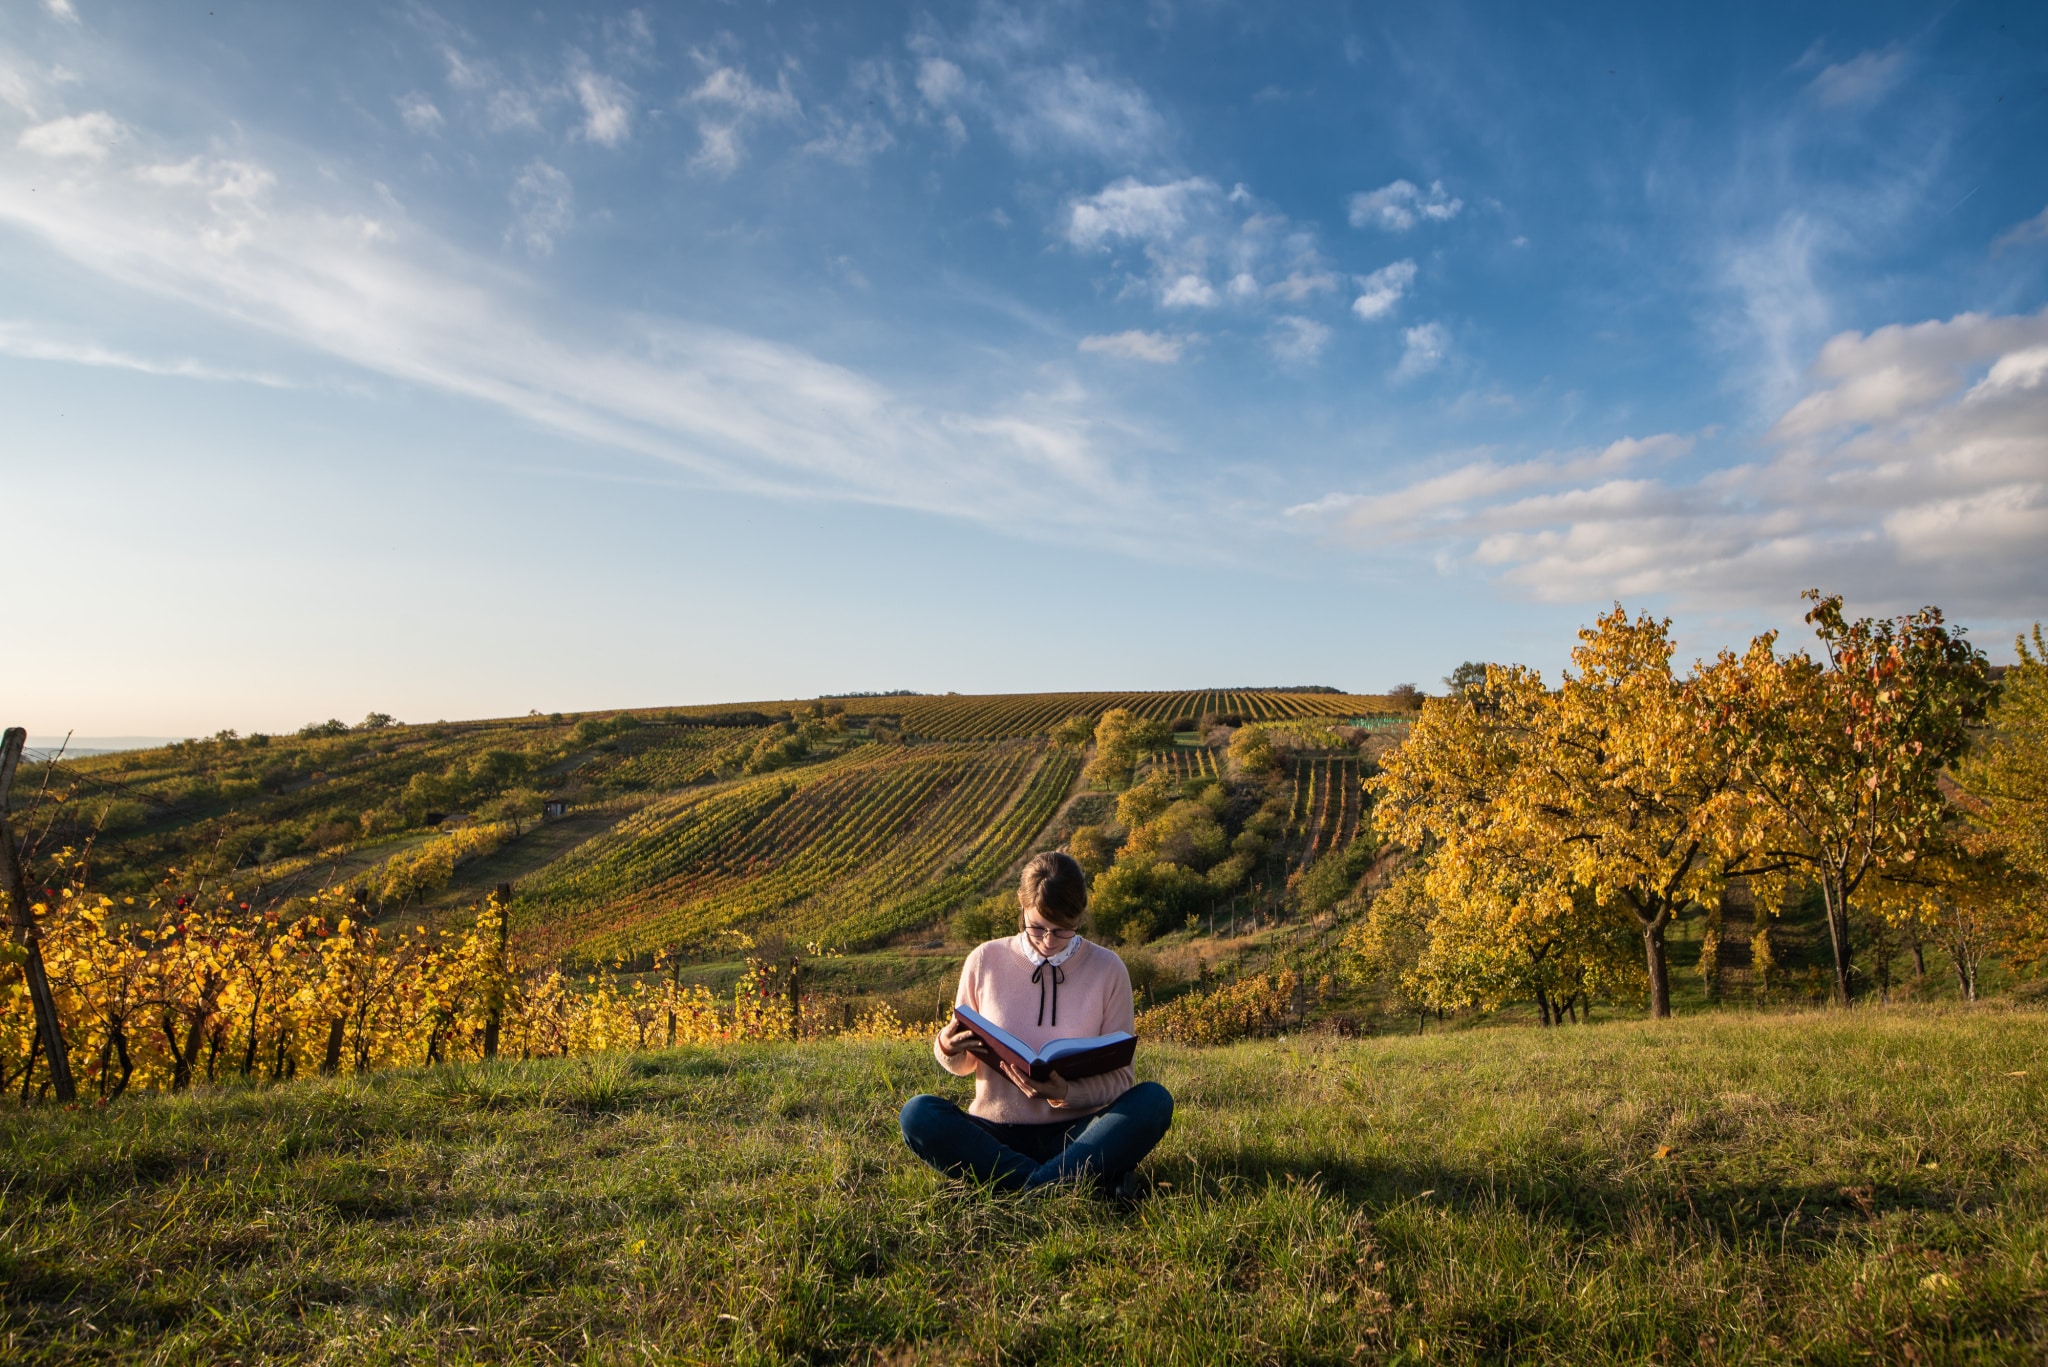
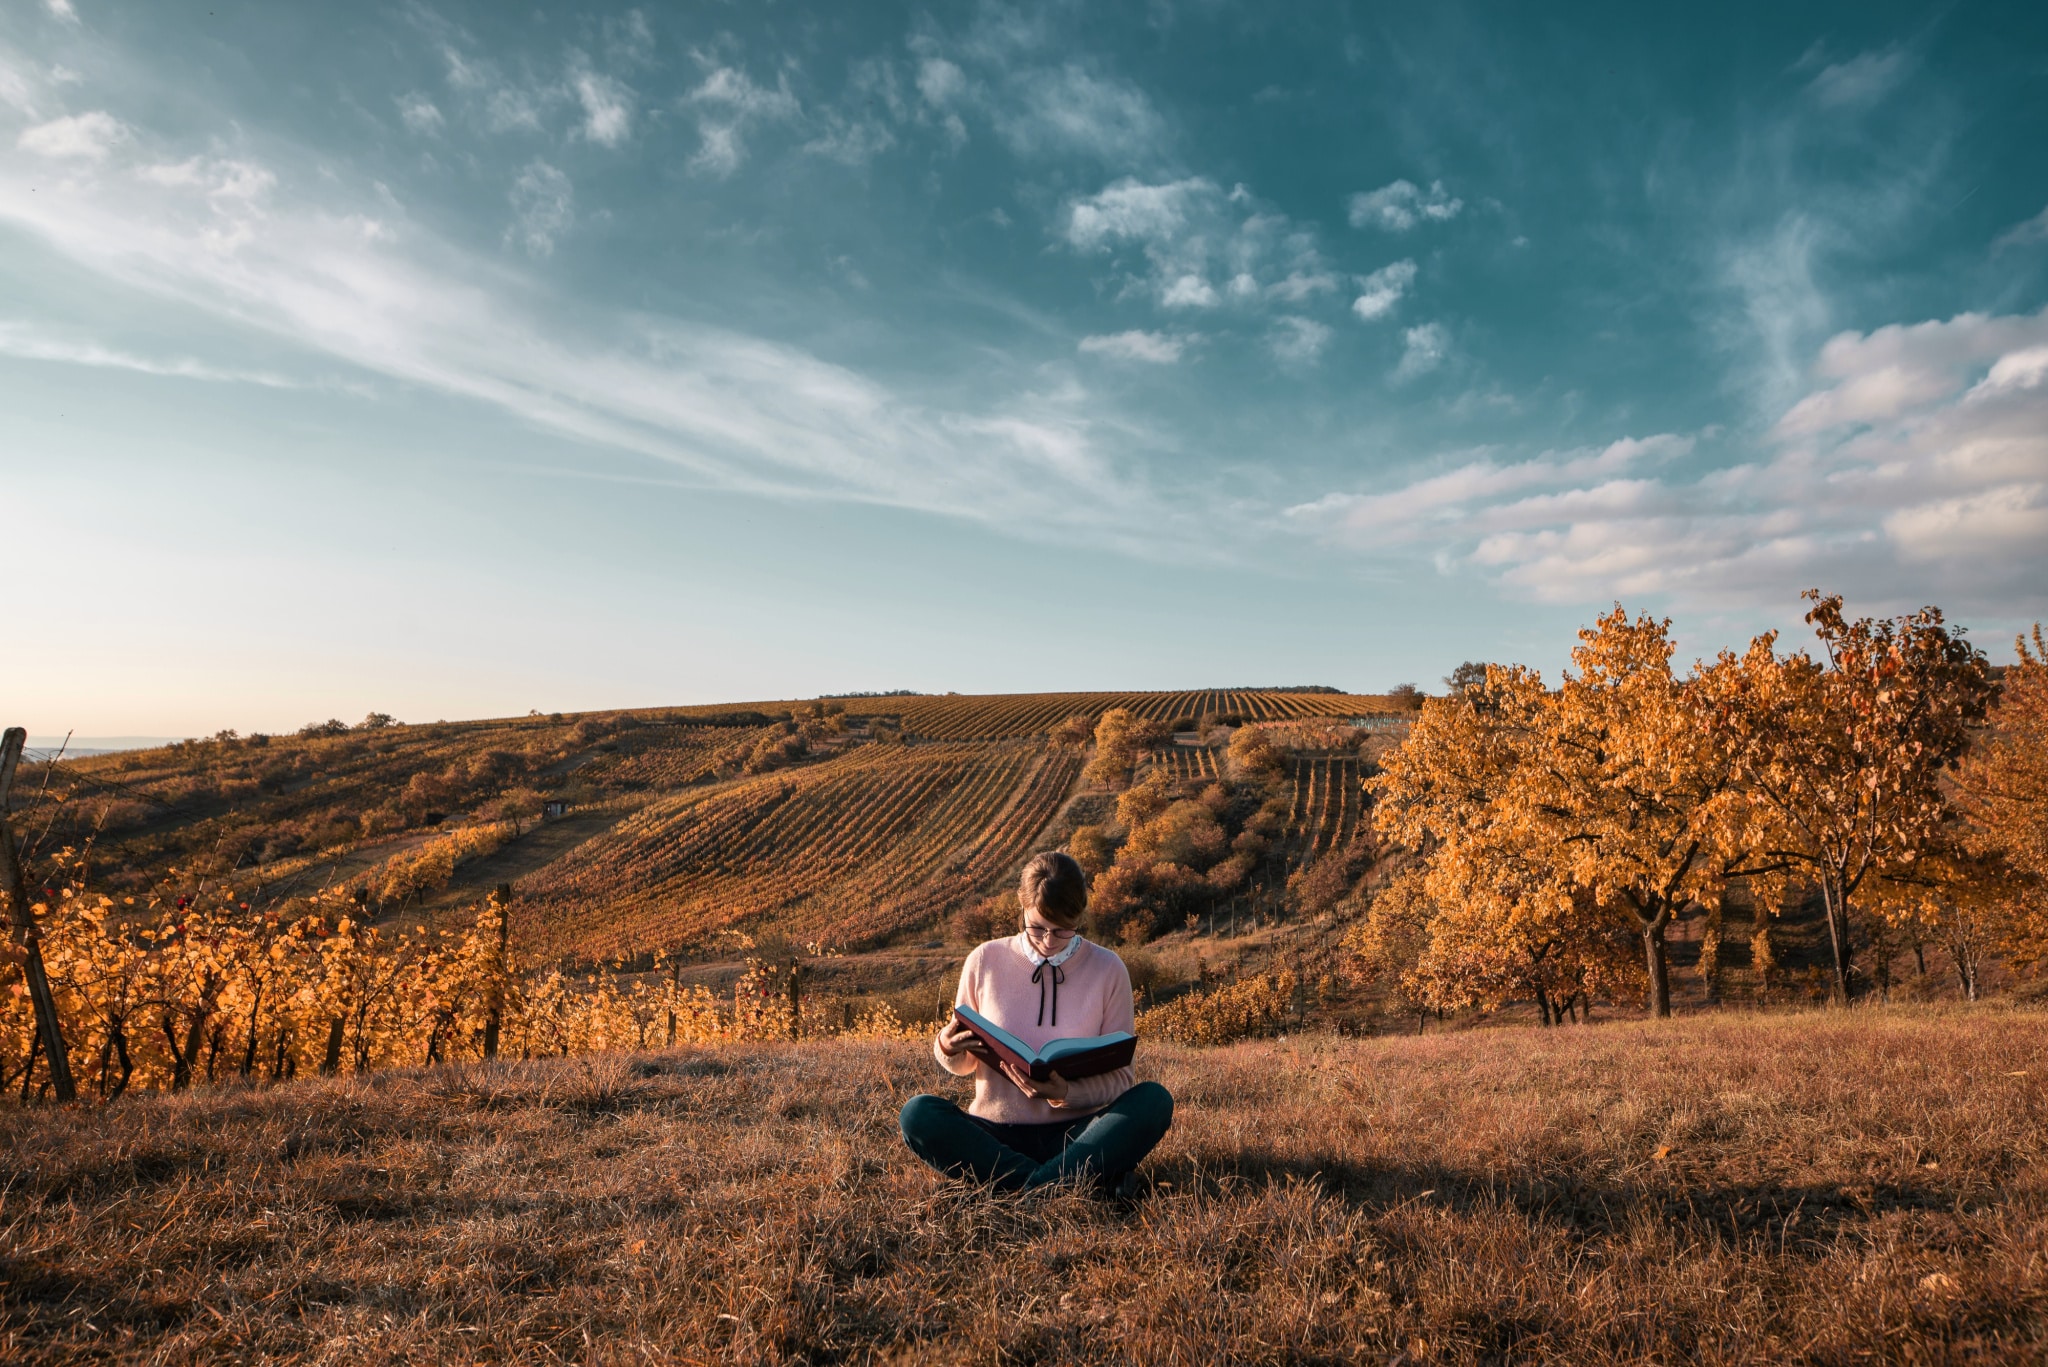
The photo before and after the edit.
Basic Color Shifting—A Quick Way to Shift Colors
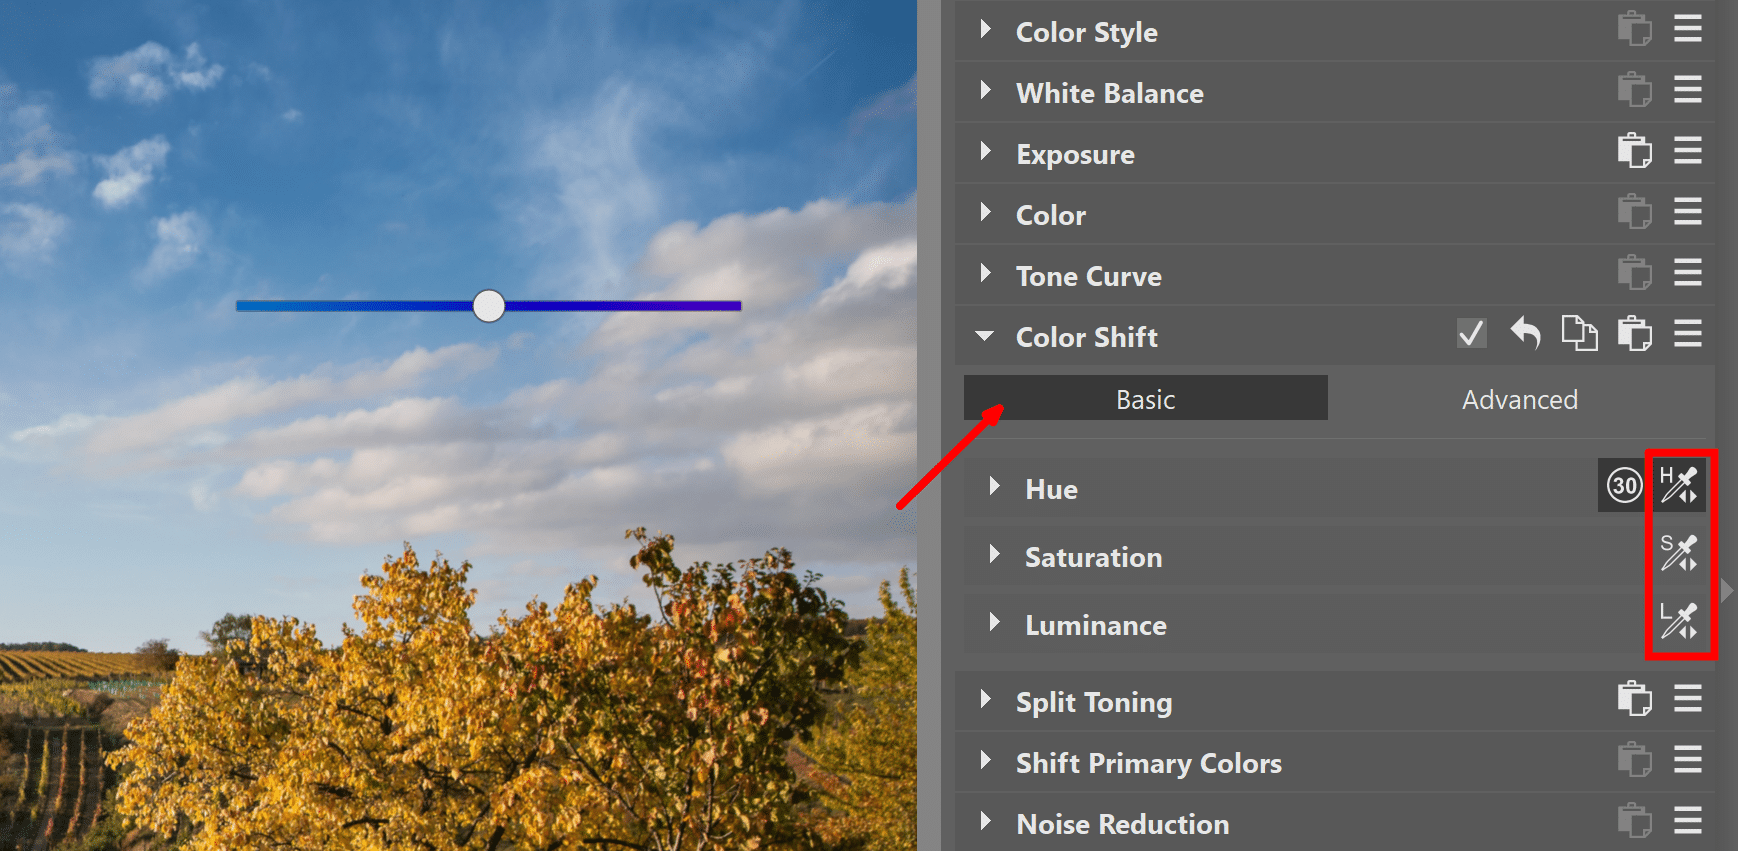
You’ll find the Color Shift controls in the right panel of the Develop module in Zoner Photo Studio X Let’s start with the simplest possible variant. The Basic mode has three sections—Hue, Saturation, and Luminance. But for a quick edit, you won’t even need to expand them. If for example you’re shifting the color of the sky, activate the eyedropper in Shadows and just click and drag right or left in the sky to change its hue. It works the same for Lights and Shadows. Try for example using the Luminance eyedropper and darkening or brightening the sky with a single click-and-drag motion.
When you’re working with a big batch of photos, you’ll appreciate this quick shifting because it will save you lots of time. When you happen to need more precise work with colors, you have several other options available.
For More Precise Work, Roll Them Out
The eyedropper is a smart tool that shifts more than just hue at once. It generally chooses hues based on the selected color and the neighboring colors to keep things looking natural. To ensure precise control over individual color shifts, just expand the Hue, Saturation, and Luminance controls. This way you will see what exactly the eyedropper has shifted and can fine-tune the shift more precisely if needed.
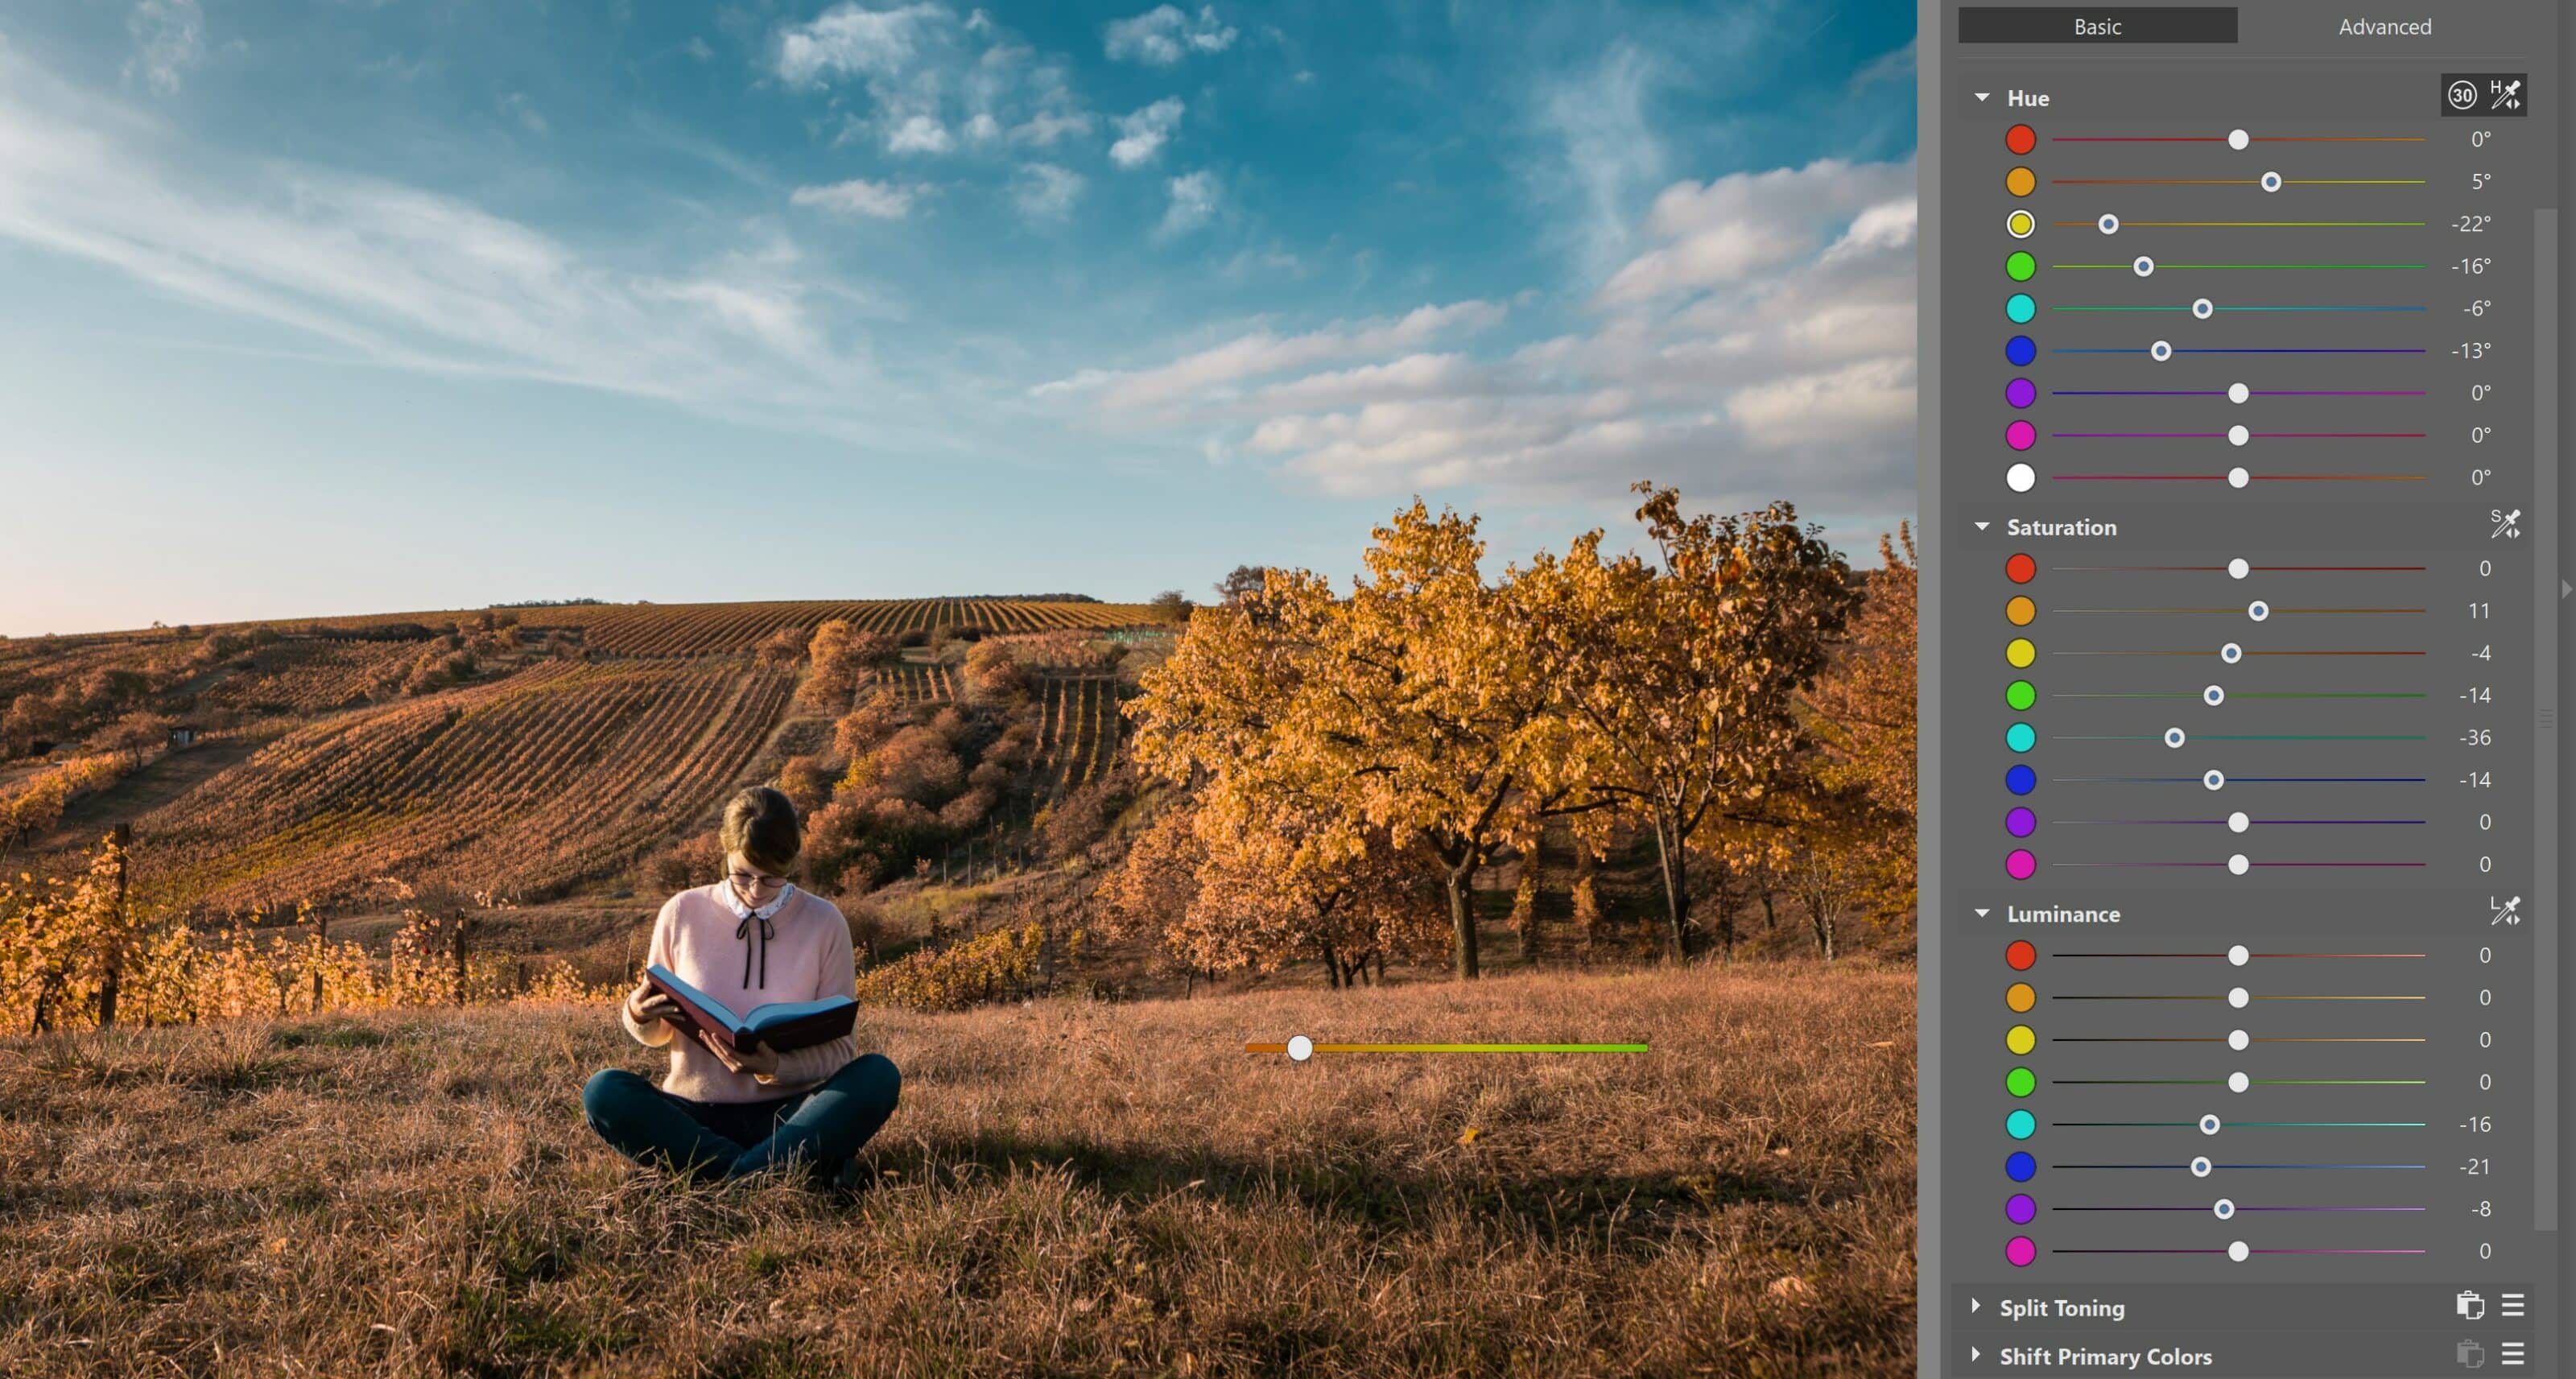
If you run the eyedropper over the photo, you’ll see the wheels for the individual hues being highlighted one by one. This can help you to get a better feel for a picture’s colors.
Range Limiting Protects You From Extreme Edits
Right next to the eyedropper, you’ll find a button that locks the color shifting into a limited range only. In most cases, this limited range is entirely sufficient. But in some cases, you can find that it is not enough and that you want to shift the colors more. Then it’s enough to turn off this limiter—then you can reach any point in the color spectrum.
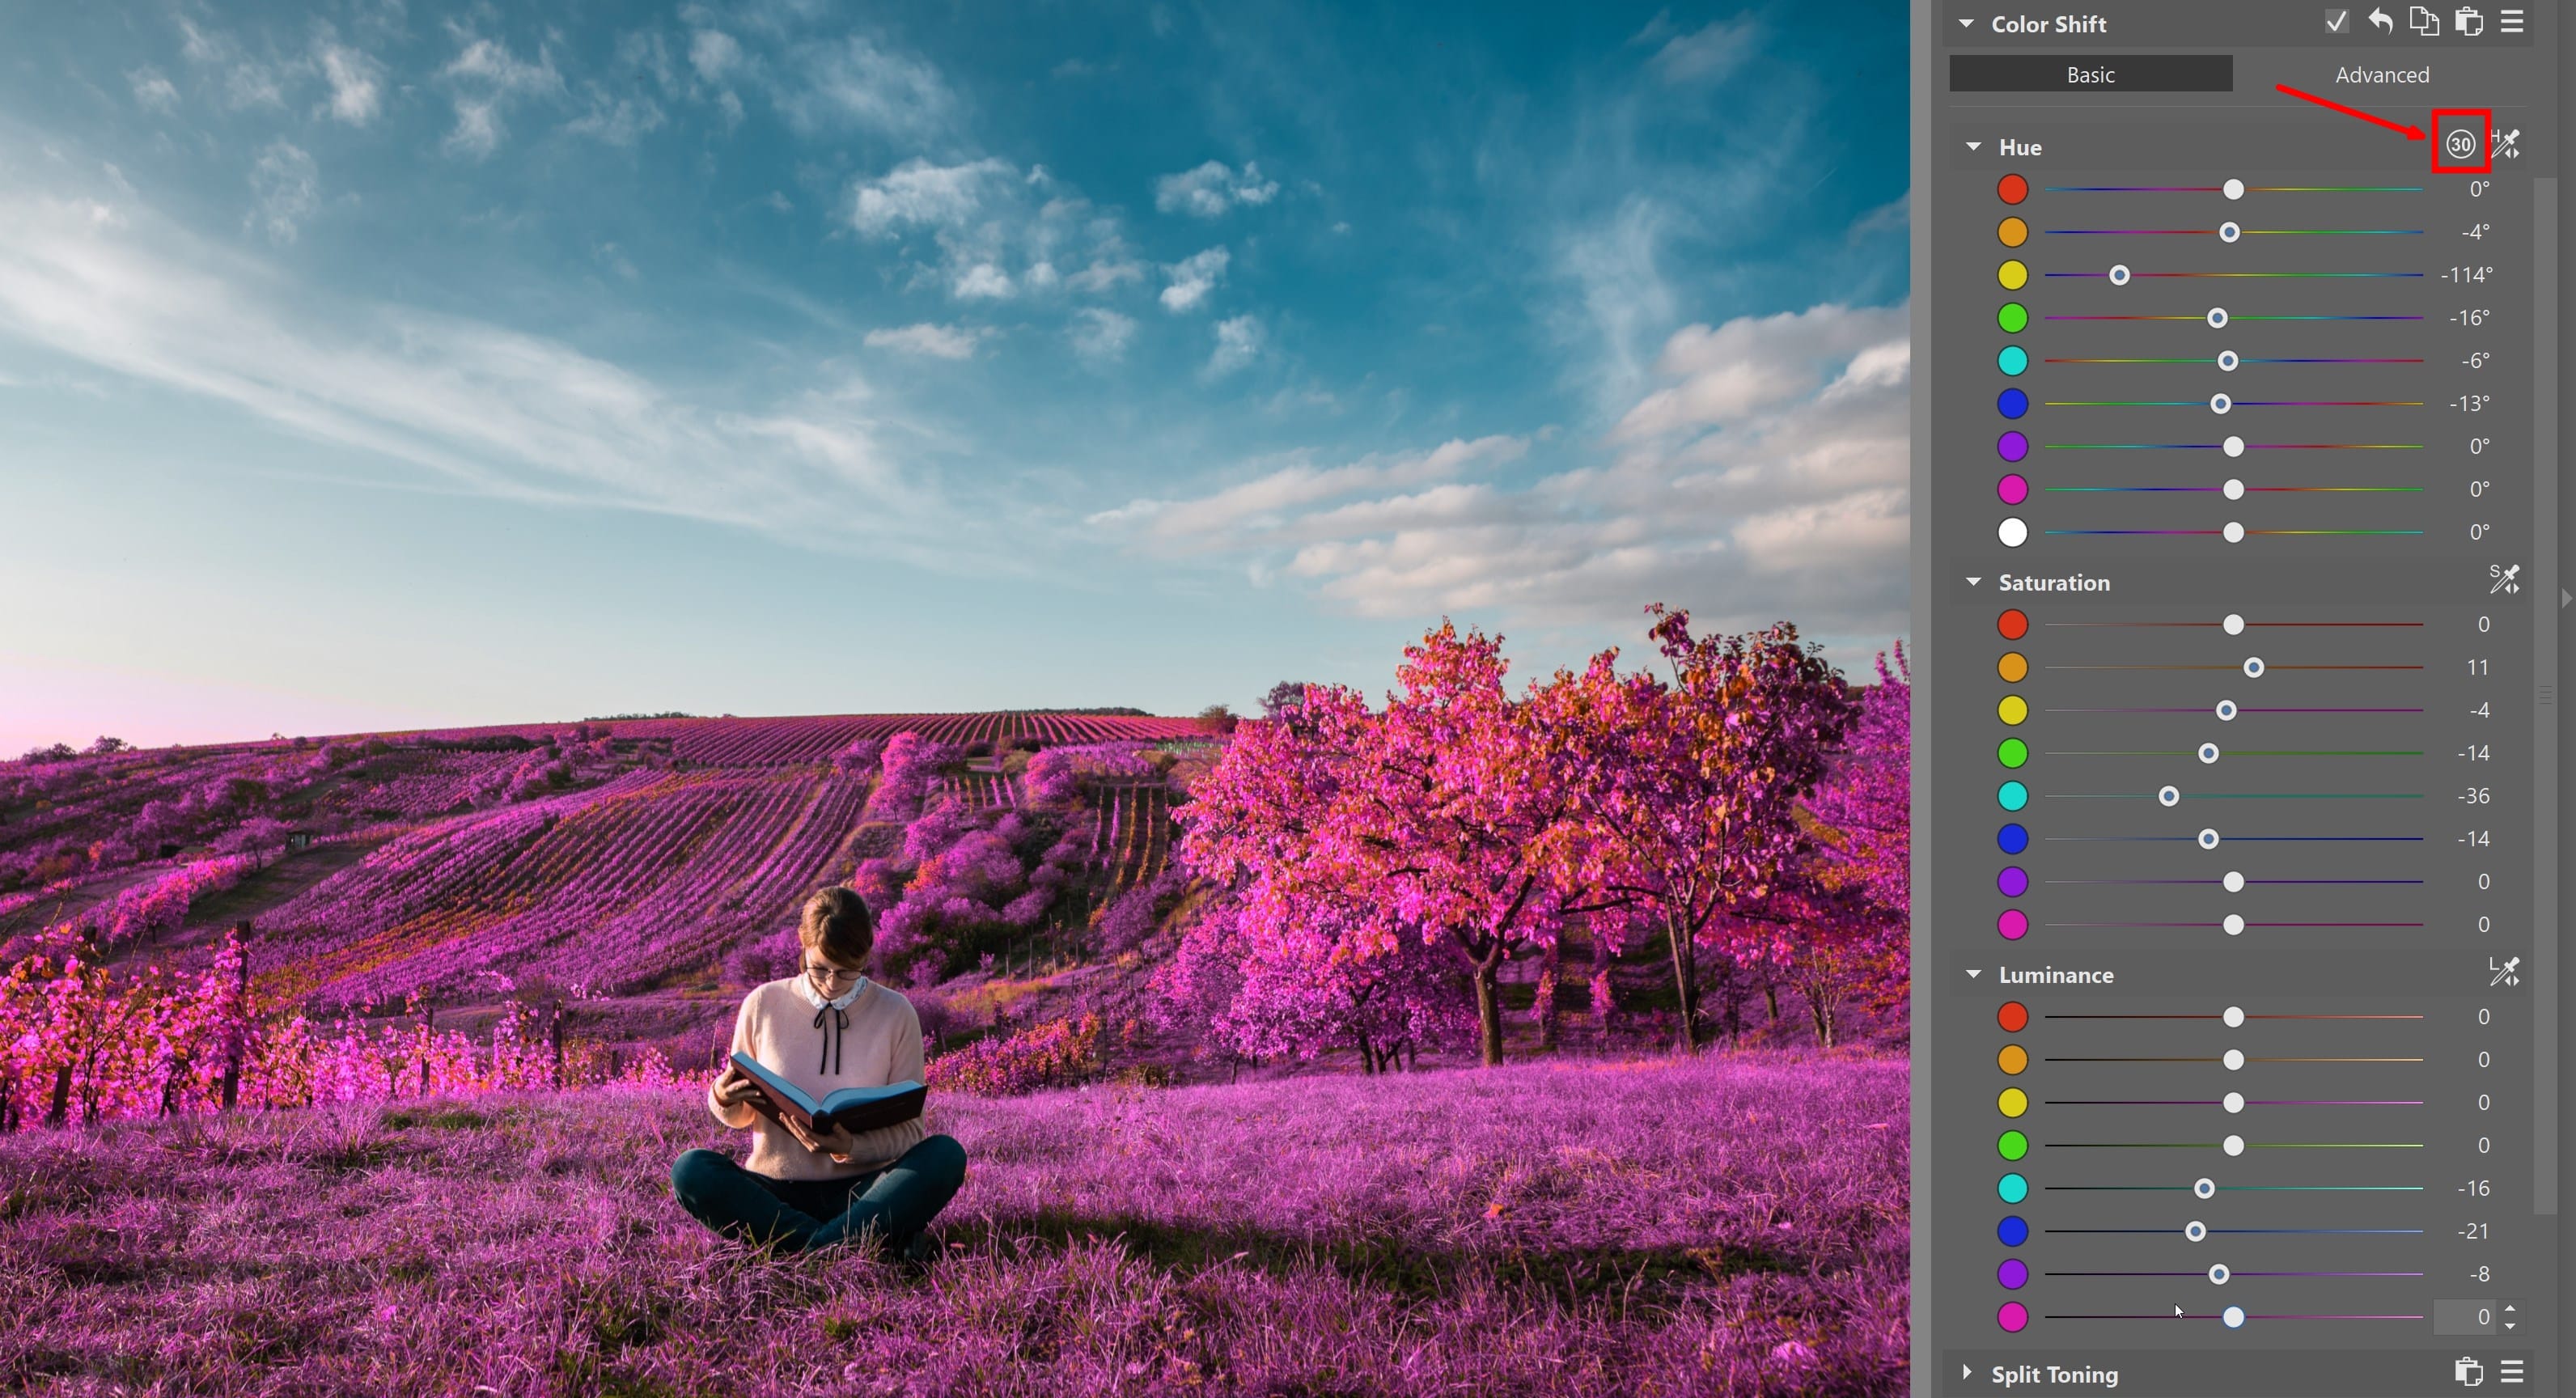
But remember that less is sometimes more. The picture above is not a good example of what you should typically be doing. But if for example you’re deliberately changing the color of clothing in a photo, unlimited shifting comes in handy.
Still Not Enough for You? Switch to Advanced Mode
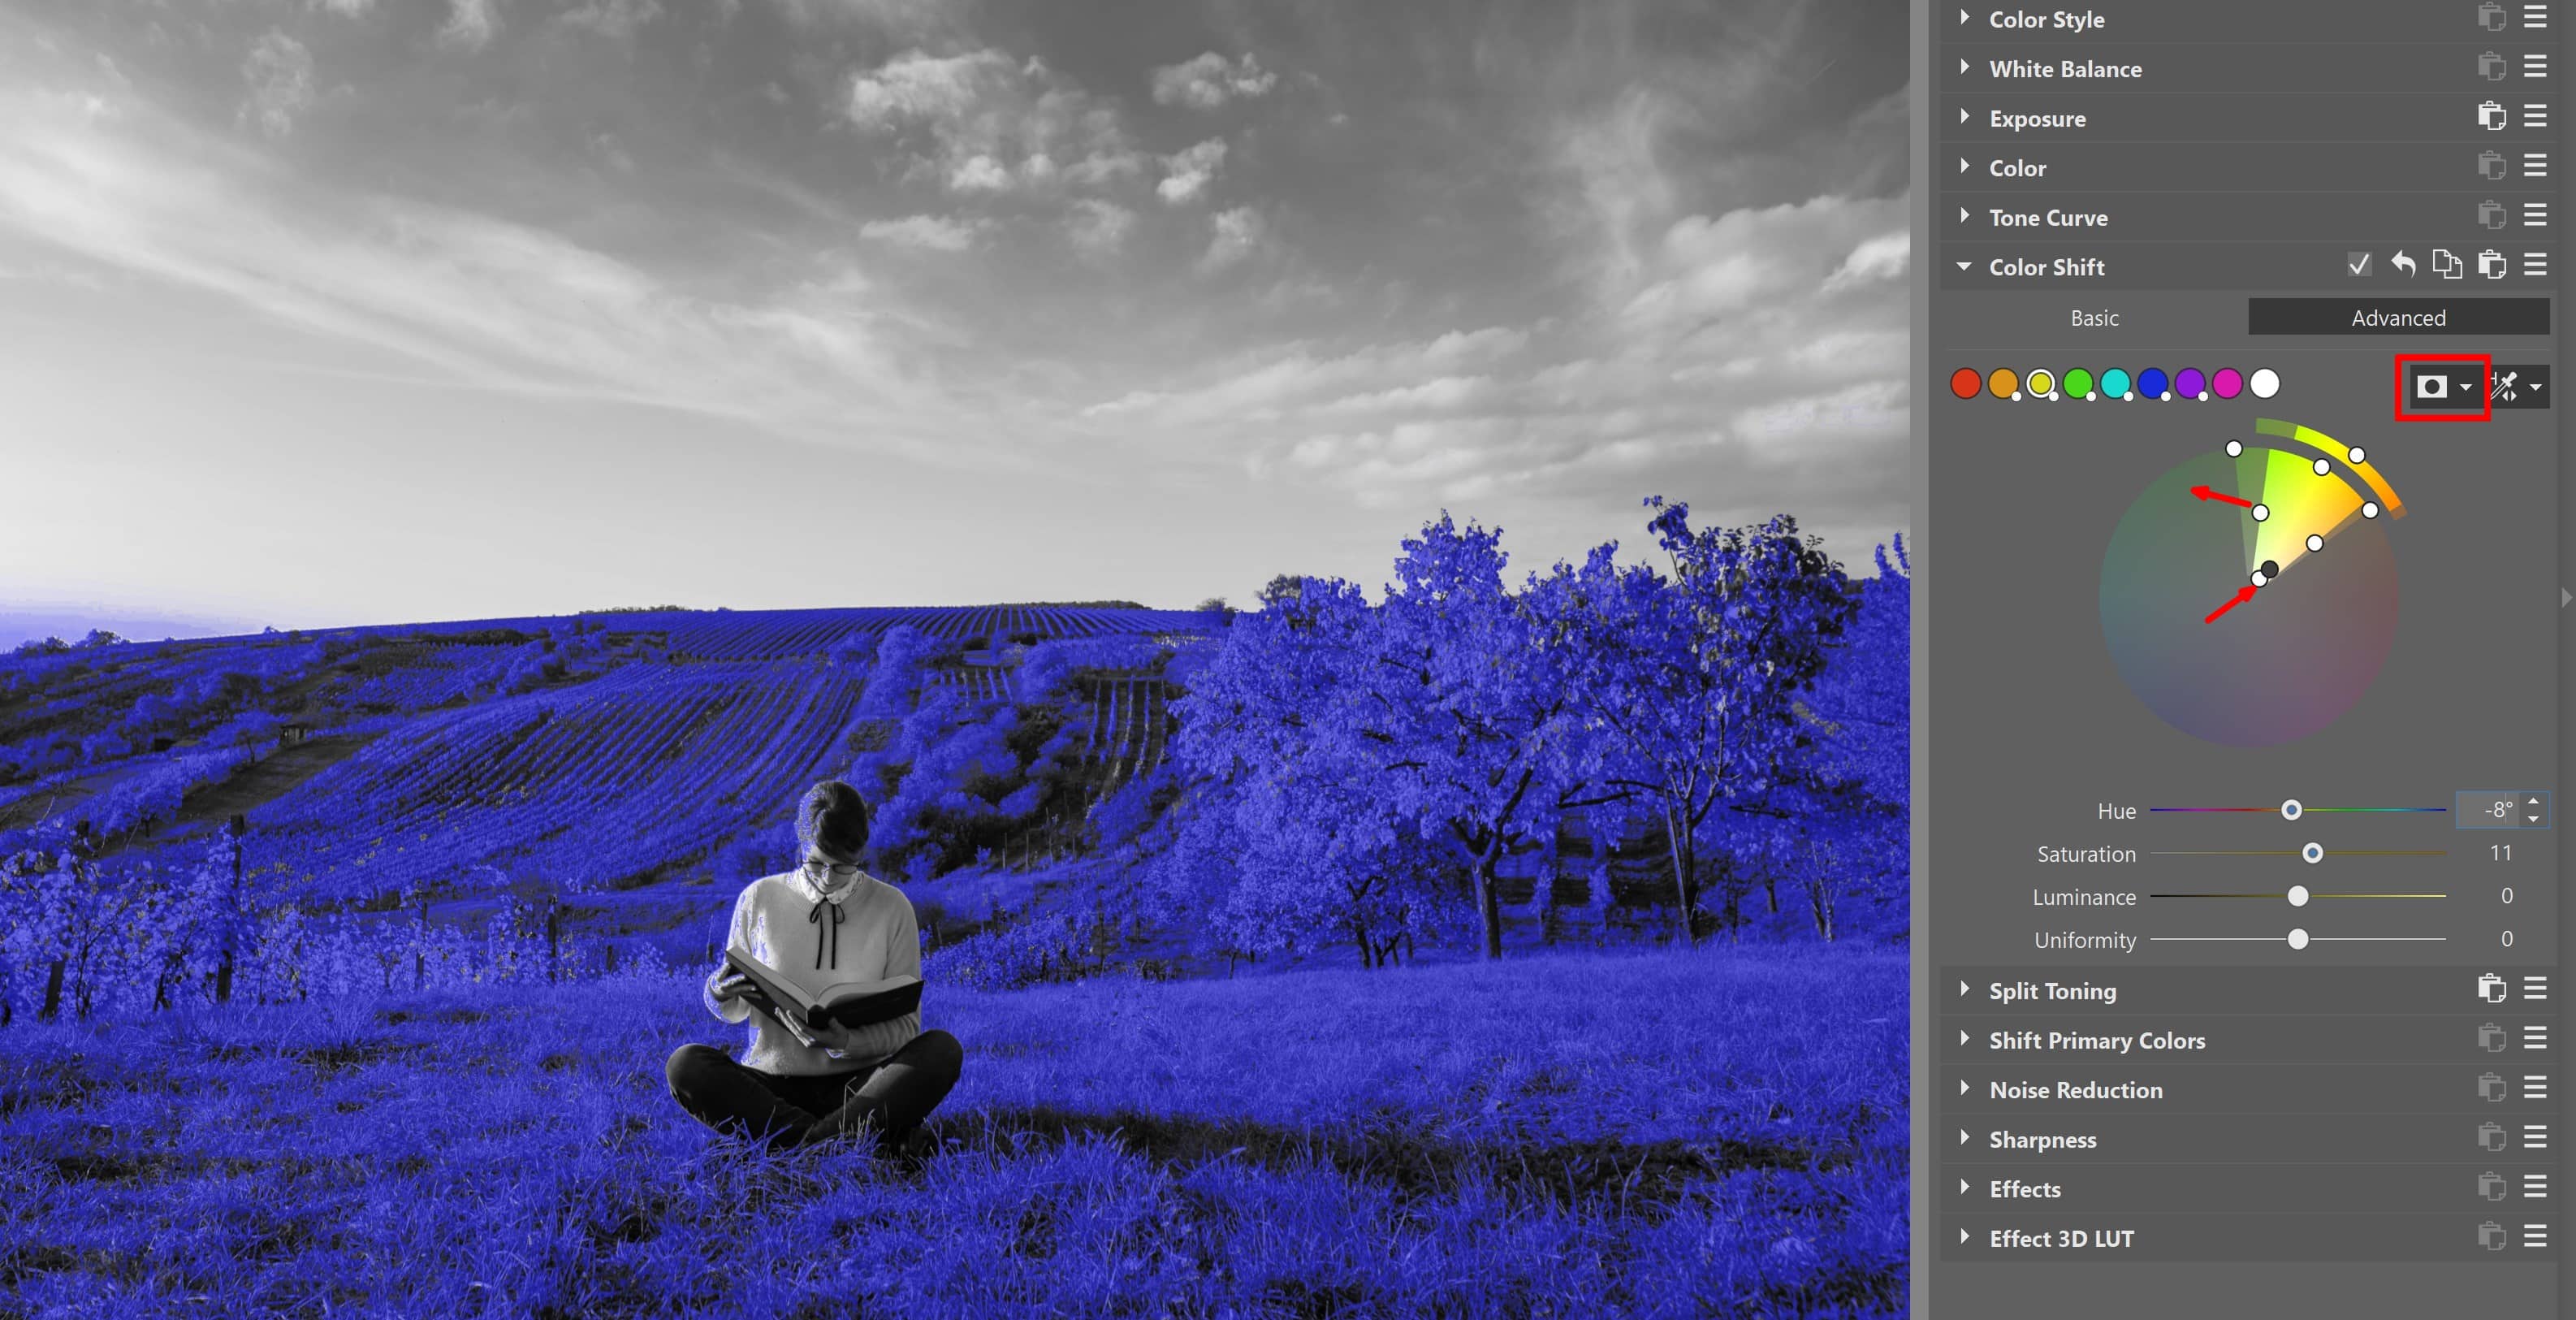
The main difference compared to Basic mode is that in Advanced mode, you’re not limited by any kind of predefined hues; instead, you can set precisely what part of the photo is affected. Just select the slice of the color wheel that contains the range of colors you want to change.
How does the color wheel here actually work? It’s simple—dragging around its circumference changes the hue. When you move from the centre out (or back inwards), you’re changing the saturation of these individual hues. The color wheel represents the entire color spectrum and you can find every hue at every level of saturation within it.
In practice this means for example that I can make edits like this one: I’ve selected the hue of the sky, but I don’t want to color-shift the less-blue areas that tie in to the white clouds. So I drag the center node outward:
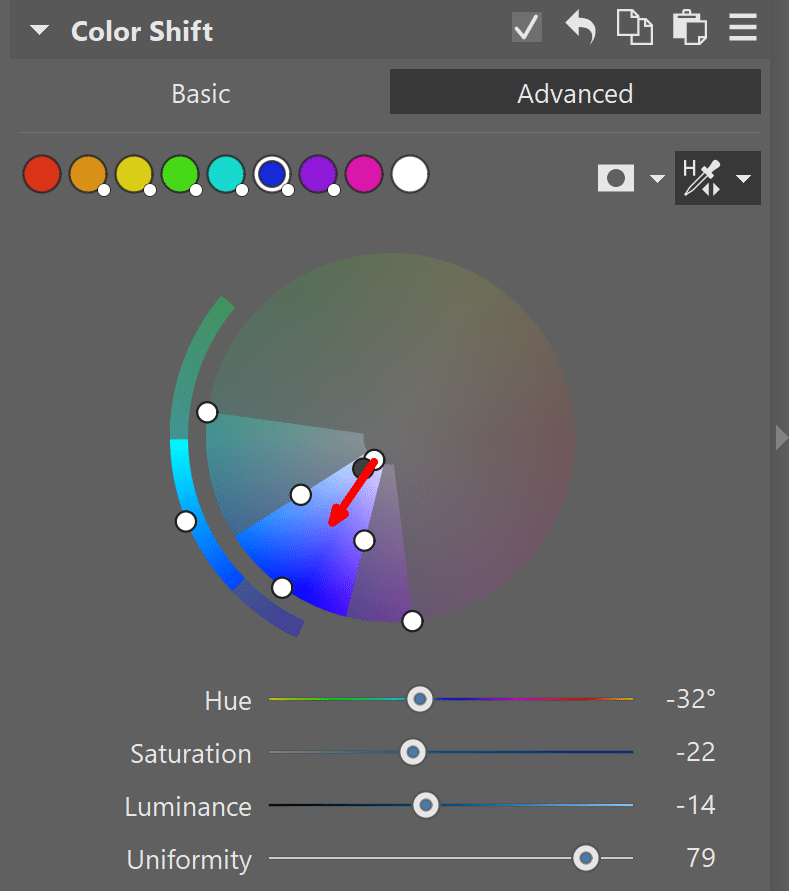
To change the hue, move the node on the outside of the wheel. You can also use the Hue slider at the bottom, but rotating the node is more intuitive, and you get a better look at the direction of your color shift:
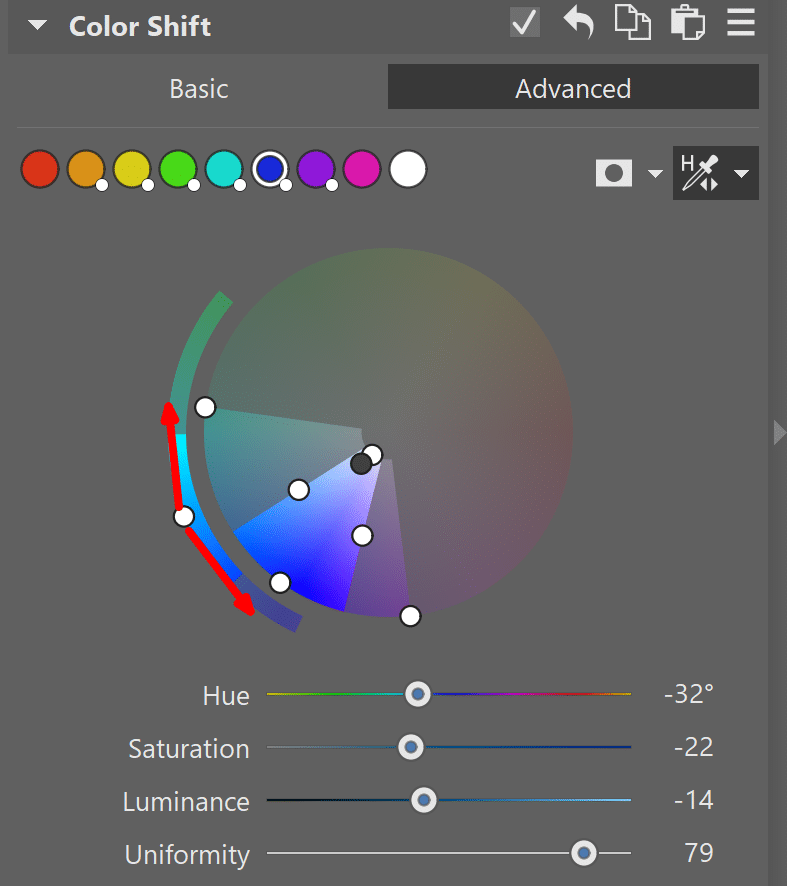
Use the remaining nodes to set how wide a range of hues is in your selection of colors to affect. The endpoints in the less saturated part of the slice govern fine transitions into neighbouring hues. Dragging them out wide gives you a milder transition. You generally do need to have some kind of transition, to prevent overly sharp borders between colors, and to make the edit look natural.
Uniformity Helps You to Unify the New Hue
The controls for Saturation, Luminance, and Hue are clear enough. You simply use these to change the selected color. But what does Uniformity do? Uniformity influences the new hue you’re creating. In other words, the one to which you’re changing your selected color. It’s able to unify the overall color range of this new hue into one hue by cutting away the edge values from the overall range.
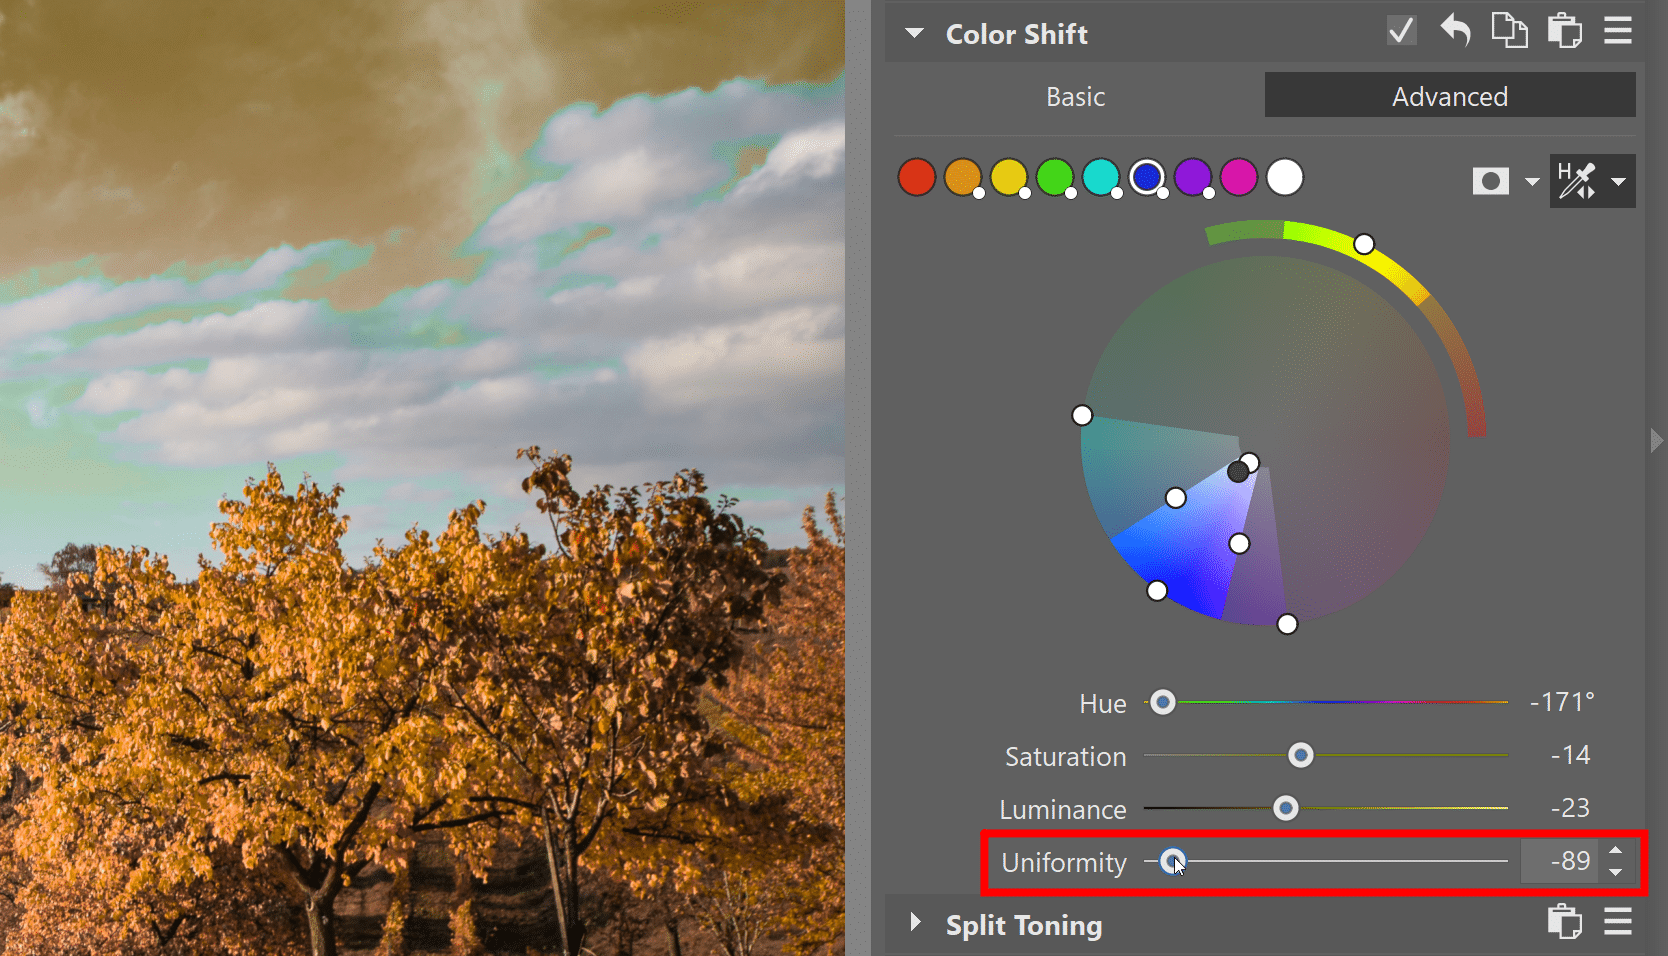
In my next example I’ve shifted blue by nearly 180 degrees and then discovered that in the places where the blue sky turns into clouds, some slightly different hues have remained and, due to the size of the shift, they’re drifting out to green. And Uniformity solves precisely this kind of problem. Because it suppresses the endpoints of the new color range—in this case, the ones that lean into a green tint:
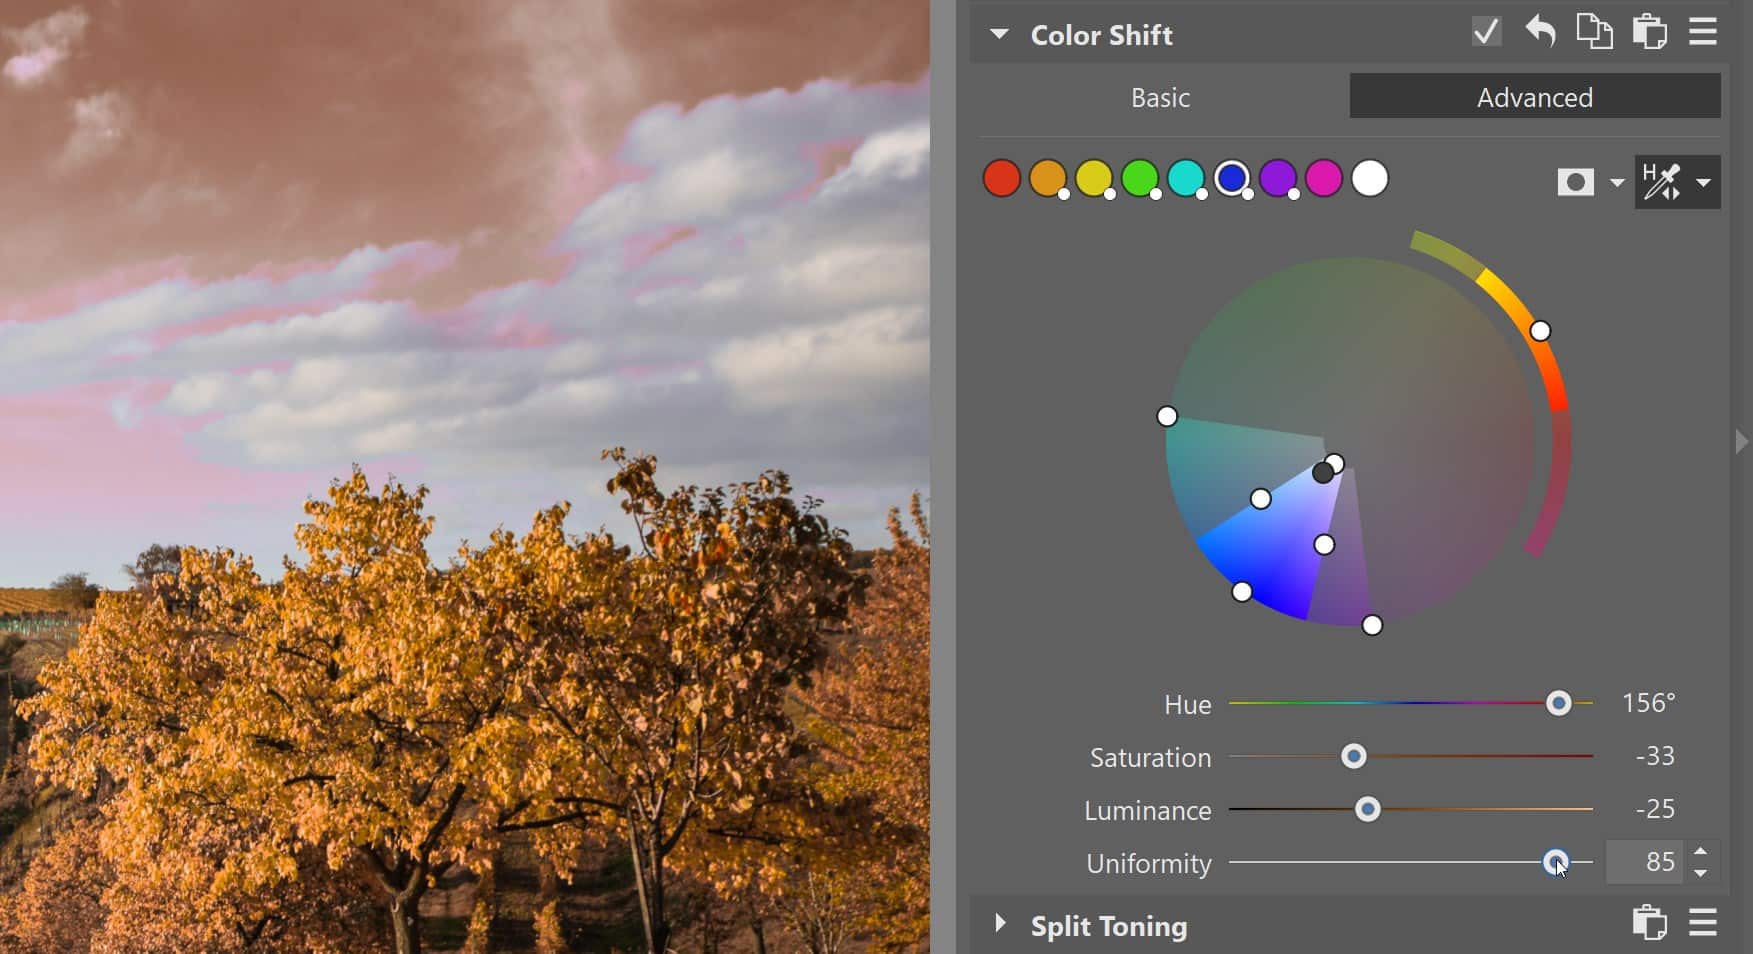
If you were to try to resolve this by just removing the light-blue areas from your selection, they would stay blue, and the result would not look good. But if you use Uniformity, the new hue is unified, and the unwanted green tint near the transition into the clouds is gone.
Really Tough Selections? You’ll Appreciate the Display Mask.
I’ve already described some very precise work with colors in the paragraphs above. During edits like these, it comes in handy to be able to see precisely what part of the picture you’re affecting. Turning on the display mask will help you here. The Show Mask button is located right next to the eyedropper. The inverted mask will probably be the most practical because it marks your selected hues in blue. As you’ll see in the next illustration, the selection in my example has missed several hues in the grass, while some hues overlap with the sky.
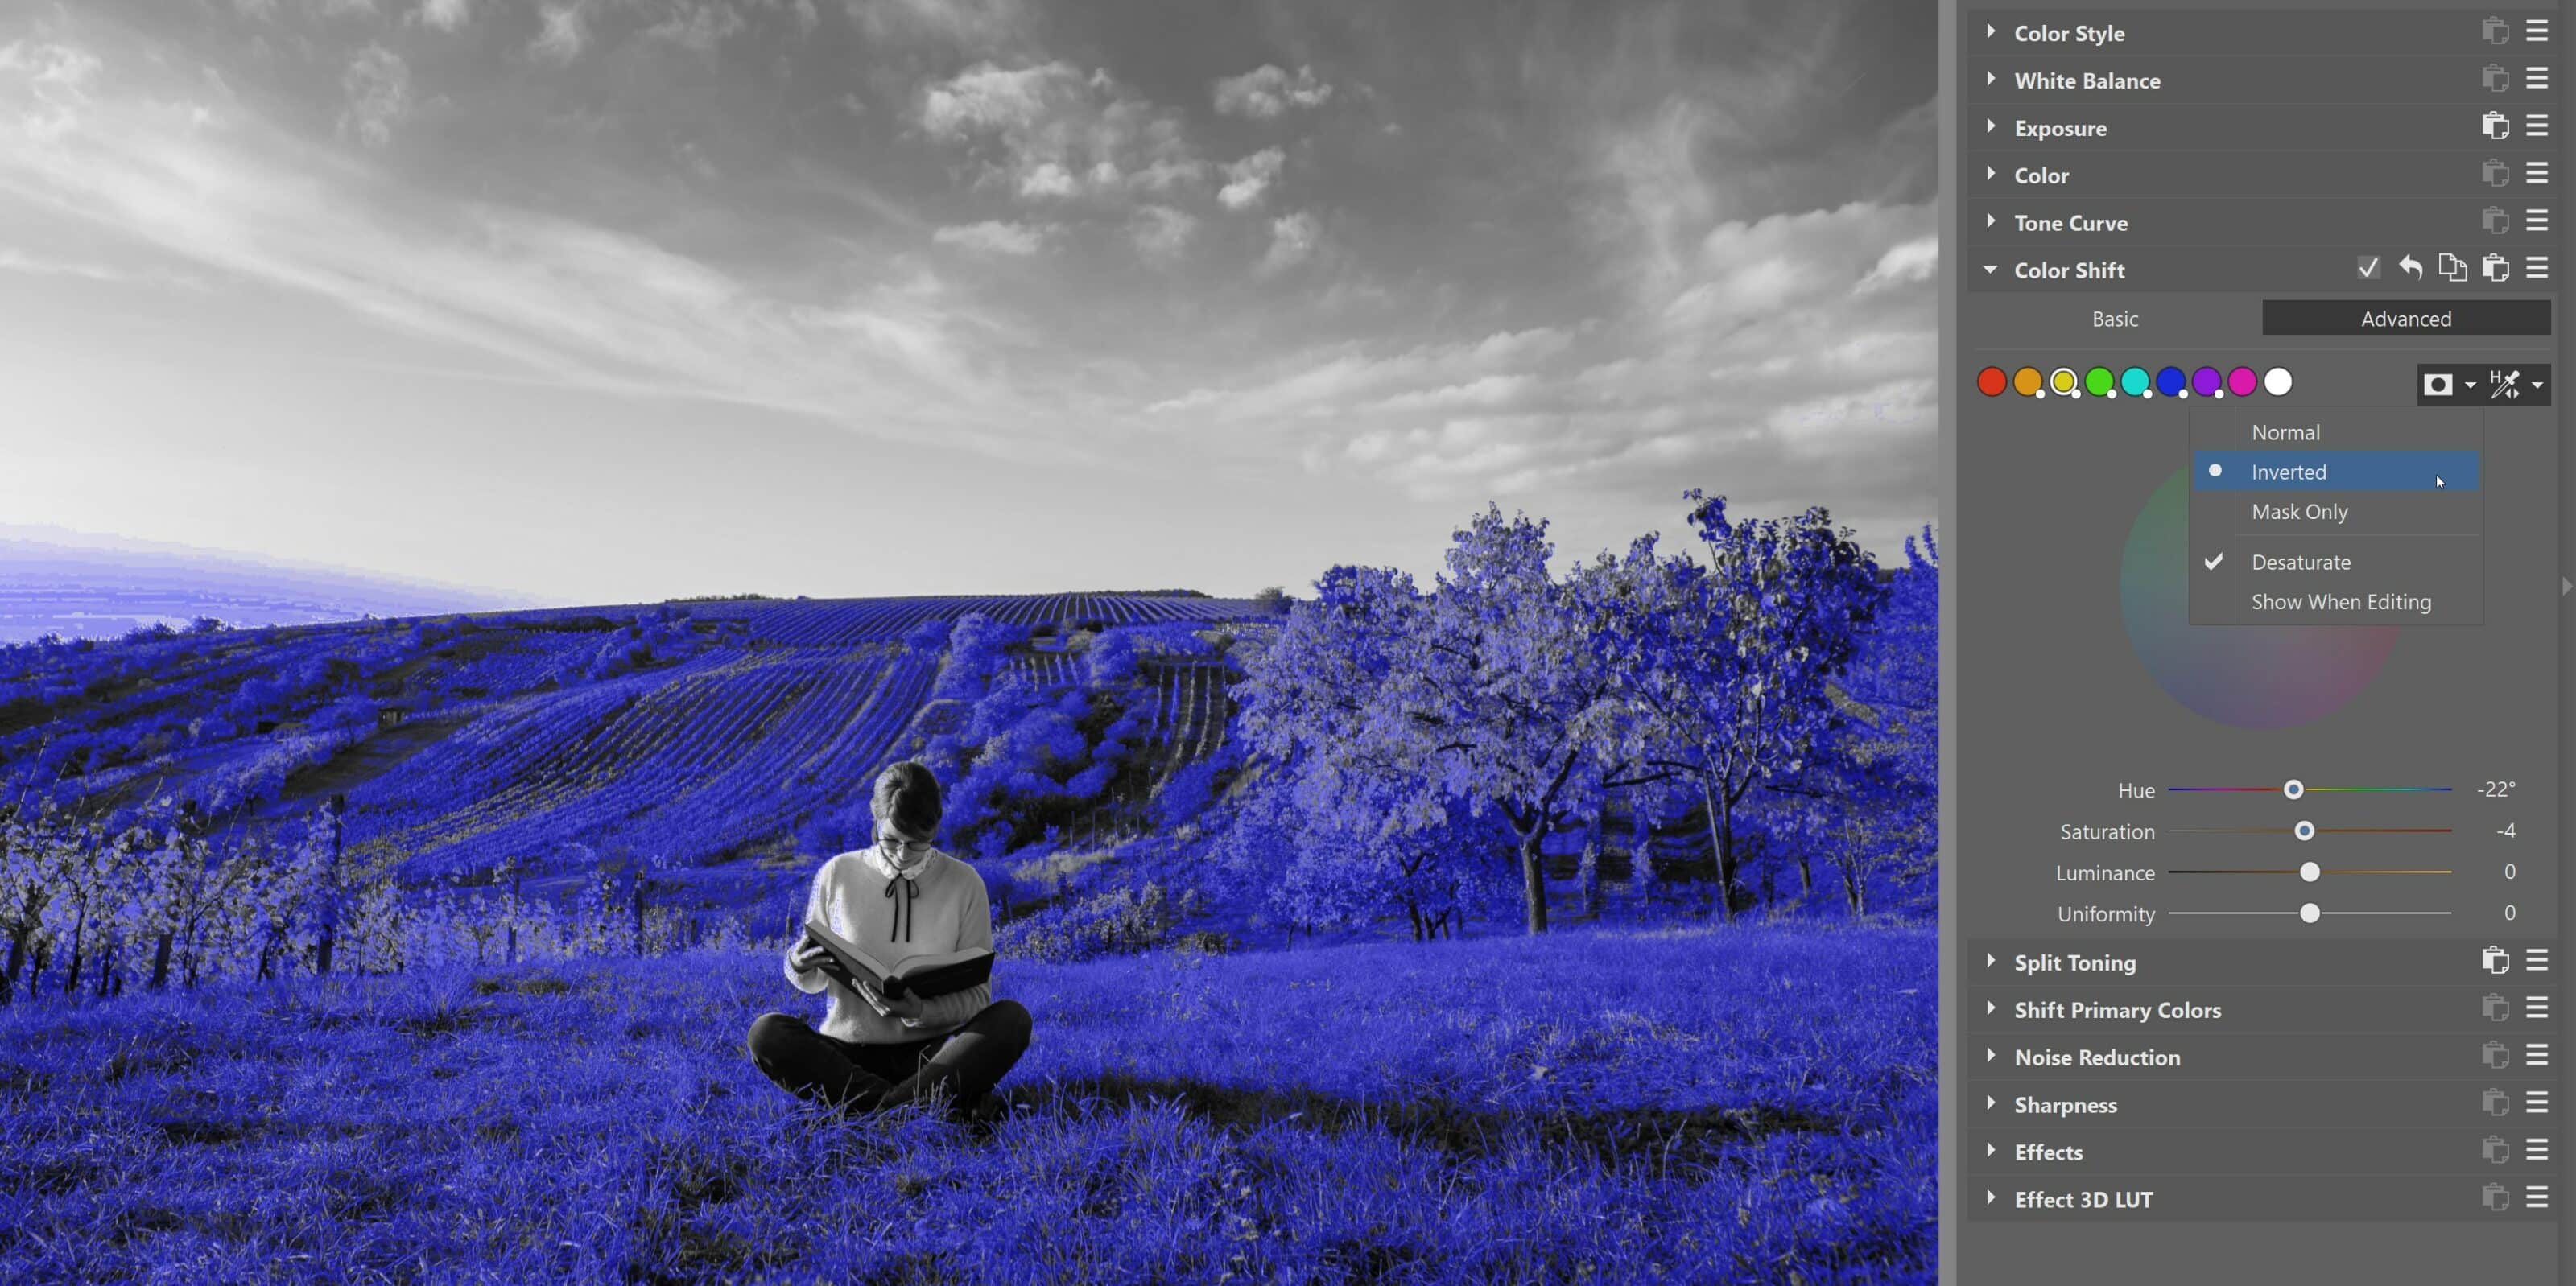
You can then fix the situation by shifting the nodes used for selecting the range of hues and saturation for the selected color.
Jump on board and grab the color wheel! Download Zoner Photo Studio, try it free for 7 days, and try out work with the new Color Shift feature.
Misty
Top of the page says 30 day free trial. Bottom of page and link says 7 days free trial. This discrepancy has made me stop and not install at all.
Eva Krusoftova
Hello Misty,
Thank you for your inquiry and for pointing out the error in the article. Thanks to you, we have corrected the mistake. It was a misunderstanding for which we apologize, and we believe that despite this, Zoner Photo Studio can offer you the best level editing for your photos.
We wish you a nice day.
Eva | Learn Photography by Zoner Photo Studio