Composition Rules—Practical Tips for Better Photos

When taking photos, it’s important to keep at least basic composition rules in mind since making adjustments later can get tricky. Fortunately, you don’t have to reinvent the wheel—Get inspired by tried-and-true composition rules. How can you apply these rules in practice, and what should you avoid when composing your shot?
There are several composition rules you can try in your photography. In this article, I focus on the most fundamental ones. I teach a Digital Photography course at the Informatics Faculty of Masaryk University and these are the same rules I assign to my students. I’ll also share common mistakes I often notice in photos.
While composition rules can improve your photos, they may not apply in all cases. There are exceptions to every rule. Let’s take a look at the most fundamental composition rules in photography.
Rule 1: The golden ratio
If I don’t have a specific vision in mind and simply want to take a picture of your subject, the golden rule or rule of thirds is the simplest option. Instead of placing the subject in the center, you position the subject at one of the four key points defined by the golden ratio. This shifts the viewer’s perception and makes the subject stand out.
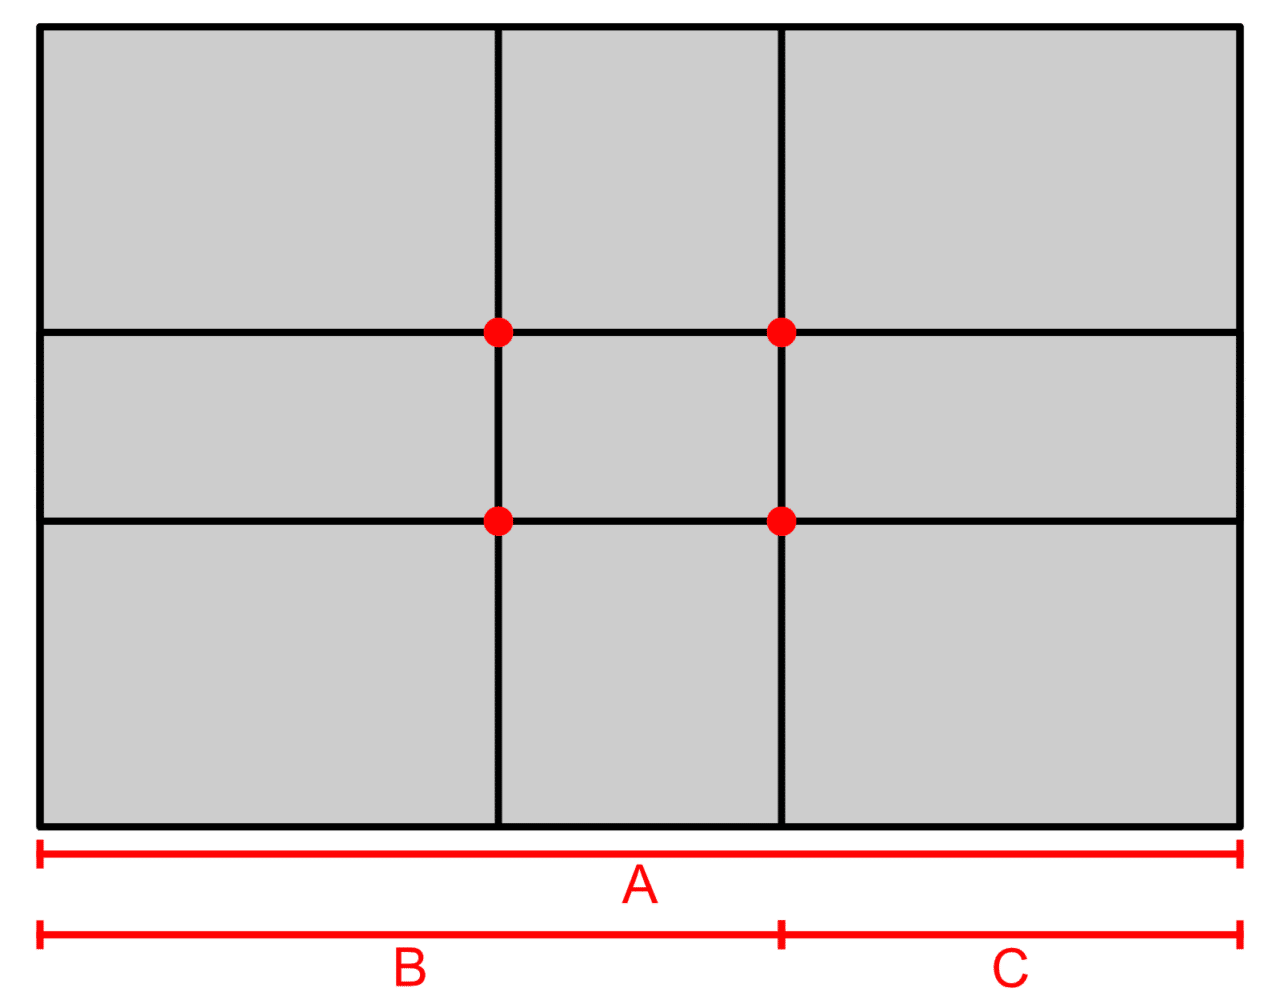
To simplify this, you can also picture the photo divided into thirds.
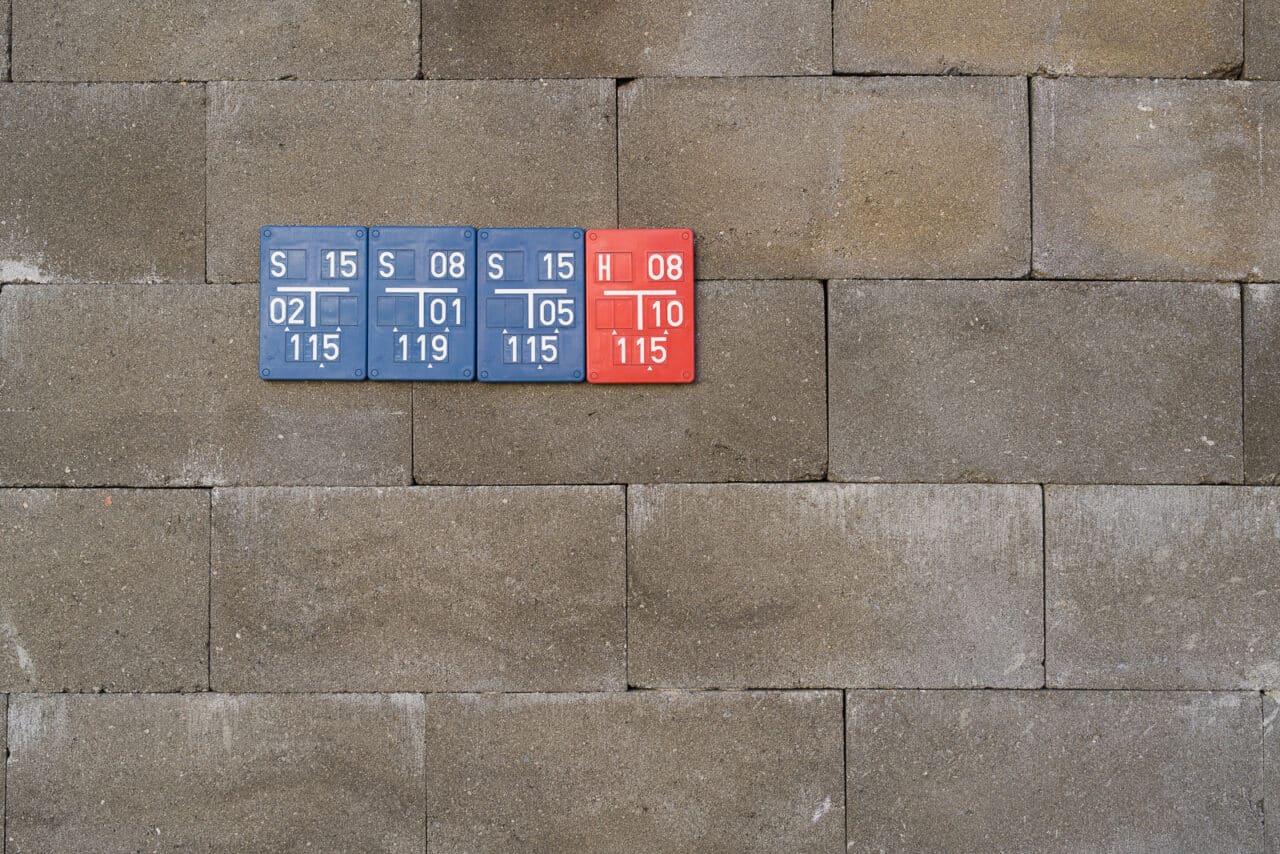
Sony A7R V, Tamron 35-150/2-2.8, 1/125s, f/5, ISO 125, focal length 35mm
This rule may seem straightforward, but don’t forget about the rest of the photo. Often, photographers are so focused on their subject that everything of interest ends up in the first third of the frame, leaving the rest of the image empty or unbalanced.
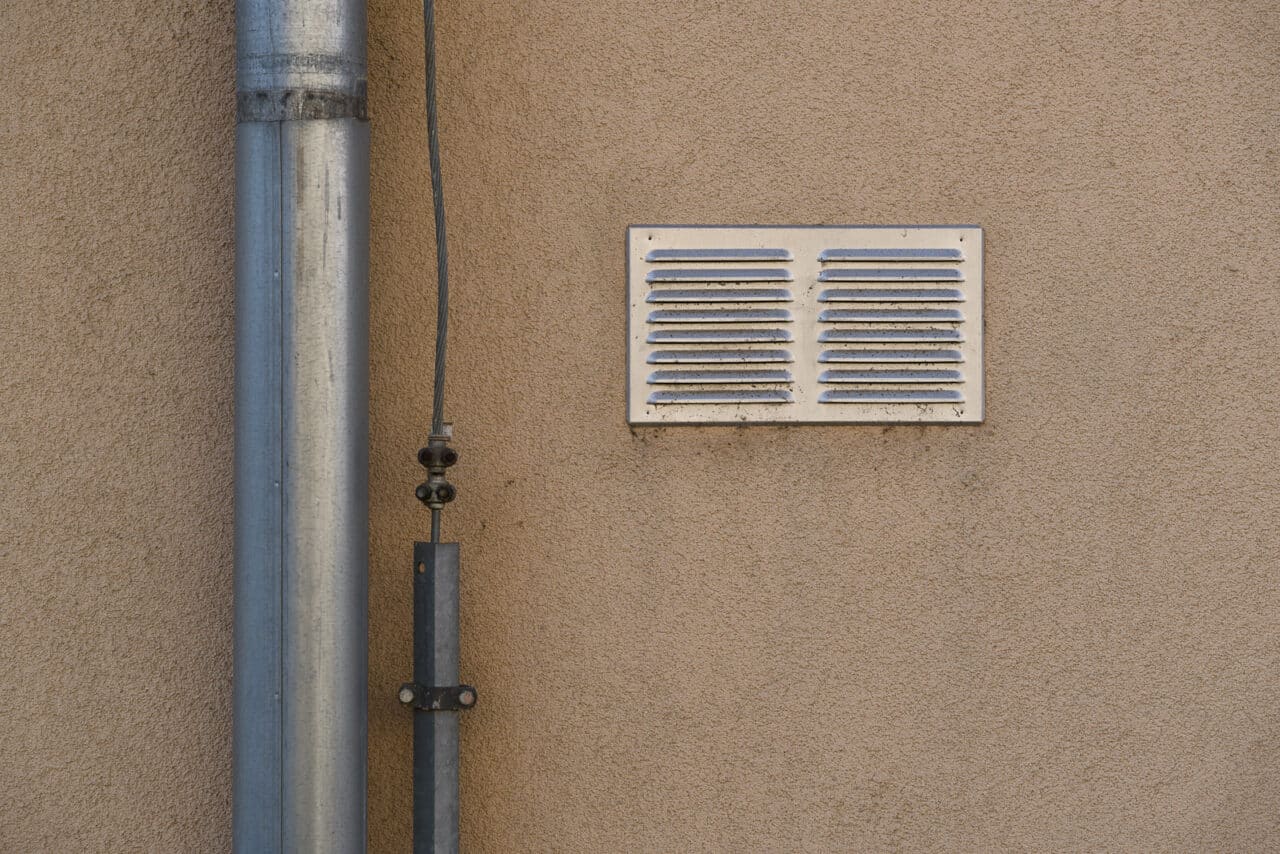
The vent follows the golden ratio, but the other objects are at the edges. In the second version, the vent is moved to the opposite side and visually balanced with the water pipe.
Sony A7R V, Tamron 35-150/2-2.8, 1/320s, f/5, ISO 125, focal length approx. 100mm
It’s important to position your subject carefully while also considering the background and secondary elements. This is easier to do with a telephoto lens. A telephoto lens allows you to select a specific background and blur it with a low f-number so the subject stays in focus while still following the golden ratio.

Sony A7R V, Tamron 35-150/2-2.8, 1/2000s, f/2.8, ISO 100, focal length 150mm
Framing
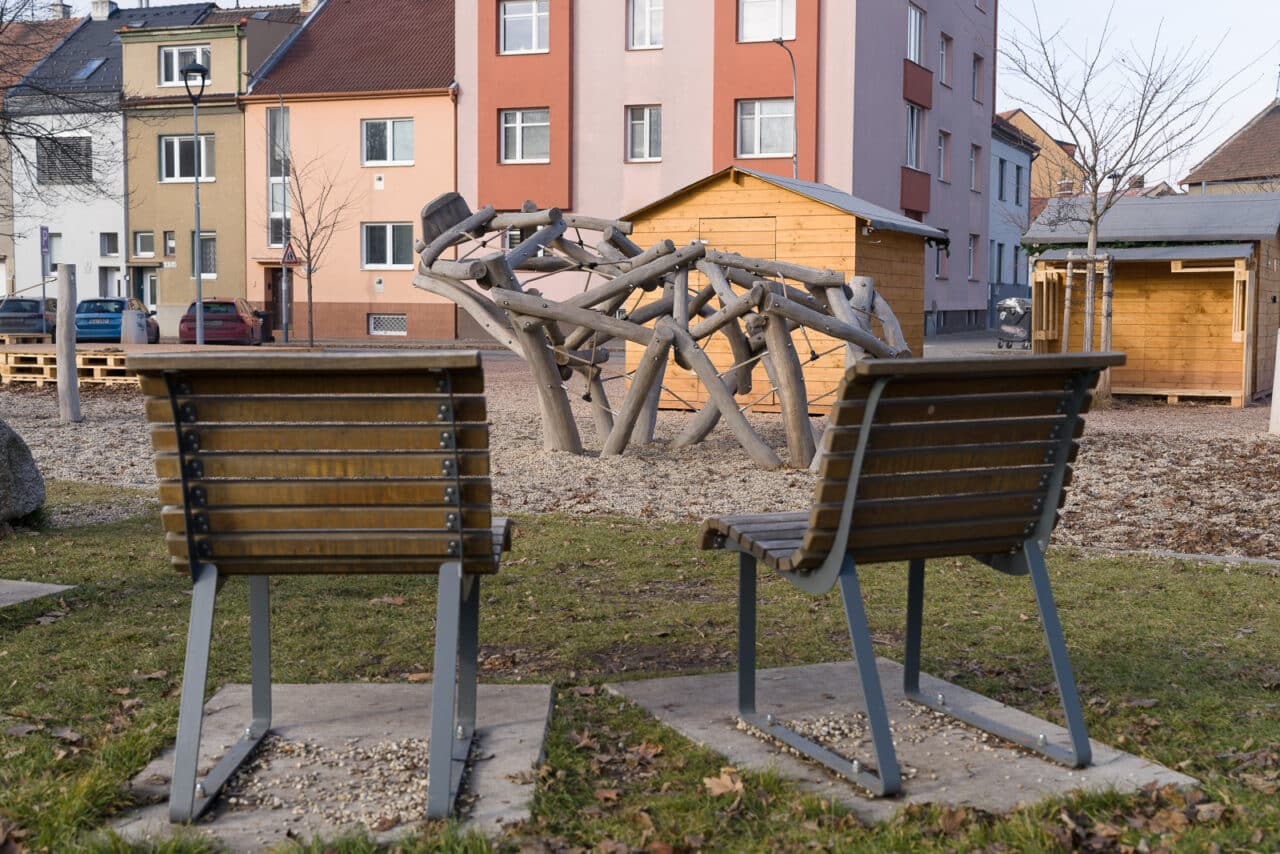
A photograph is inherently two-dimensional, but you can create an illusion of depth by using elements in the foreground to frame your subject. The frame doesn’t have to cover all four sides. Sometimes, a smaller object along the edge is enough to achieve this effect.

Sony A7R V, Tamron 35-150/2-2.8, 1/200s, f/3.5, ISO 100, focal length 123mm
When using this technique, keep in mind that the framing element should be close to the edges of the photo. If it’s too far inward, it can become part of the scene and create unnecessary visual clutter, making it unclear whether it’s an important element or distraction.
The playground equipment is framed by the benches. If the shot is too wide, the benches dominate the composition.
Sony A7R V, Tamron 35-150/2-2.8, focal length 91 and 43mm
A similar issue arises if the frame is too bright, colorful, or eye-catching, drawing too much attention away from the main subject. This can be corrected by using a low f-number (e.g., f/2.8, f/1.4) to blur distracting elements.
Diagonals
Diagonal lines can make your photo more dynamic. You can achieve this effect in one of two ways—By simply tilting the camera, or by using perspective to create natural diagonal lines.
A static vs. a dynamic version of the same shot.
Sony A7R V, Tamron 35-150/2-2.8, 1/125s, f/6.3, ISO 100, focal length 44mm

Sony A7R V, Tamron 35-150/2-2.8, 1/125s, f/11, ISO 160, focal length 150mm
Try to extend the diagonal lines throughout the frame rather than allowing them to end abruptly in the first quarter of the photo.

Sony A7R V, Tamron 35-150/2-2.8, 1/250s, f/7.1, ISO 100, focal length 24mm
Repeating elements and breaking the pattern
With the previous composition rules, the subject was arbitrary and we only adjusted how it was framed. However, capturing repeating elements relies on finding natural repetition around us. In urban environments, human activity creates repetitive patterns everywhere you look.

Sony A7R V, Tamron 35-150/2-2.8, 1/125s, f/10, ISO 800, focal length 129mm

Repetition is much easier to capture with a telephoto lens, which compresses perspective and brings individual objects closer together, making the pattern more pronounced.

Sony A7R V, Tamron 35-150/2-2.8, 1/125s, f/10, ISO 160, focal length 150mm
With a wider lens and more space between repeating elements, the first object of the series stands out more and can become a distraction. This also expands the frame, making it hard to control the composition due to unwanted background elements.
With a wide-angle lens, it’s important to control the edges of the image. Sometimes it’s possible to carefully remove distracting items. Other times it’s impossible.
Sony A7R V, Tamron 35-150/2-2.8, 1/125s, f/10, ISO 200, focal length 35mm
For a more impressive shot, it’s better to shoot at the level of the repeating objects as they gradually fade into the distance. It’s also effective to shoot diagonally.
A more static and dynamic version of repeating elements.
Sony A7R V, Tamron 35-150/2-2.8, 1/125s, f/8, ISO 200, focal length 150mm
A common mistake many beginners make is getting carried away by the beautiful things and shooting just a small part of the frame. For the greatest effect, you need to fill the entire space with visual elements.
While there is some repetition in the middle of the photo, the composition is much more effective when the repetition fills the entire frame.
Sony A7R V, Tamron 35-150/2-2.8, focal length 36 and 110mm
An advanced option is to include a distinctive element that breaks the pattern. This usually means you focus on this particular spot. A low f-number can also be helpful here.

Sony A7R V, Tamron 35-150/2-2.8, 1/320s, f/2.8, ISO 100, focal length 150mm
Leading lines
There are many ways to handle photos that fall into this category. There may be just one leading line that guides the viewer through the image. A single leading line, such as an S-curve, can create a strong visual path.

Sony A7R V, Tamron 35-150/2-2.8, 1/125s, f/6.3, ISO 200, focal length 63mm
Alternatively, multiple lines can converge toward the focal point of the image.

Sony A7R V, Tamron 35-150/2-2.8, 1/125s, f/10, ISO 320, focal length 63mm
The second category is particularly easy to get using an ultra wide-angle lens in the city. Due to the exaggerated perspective, a number of intersecting points appear, that all lead to a point on the horizon.
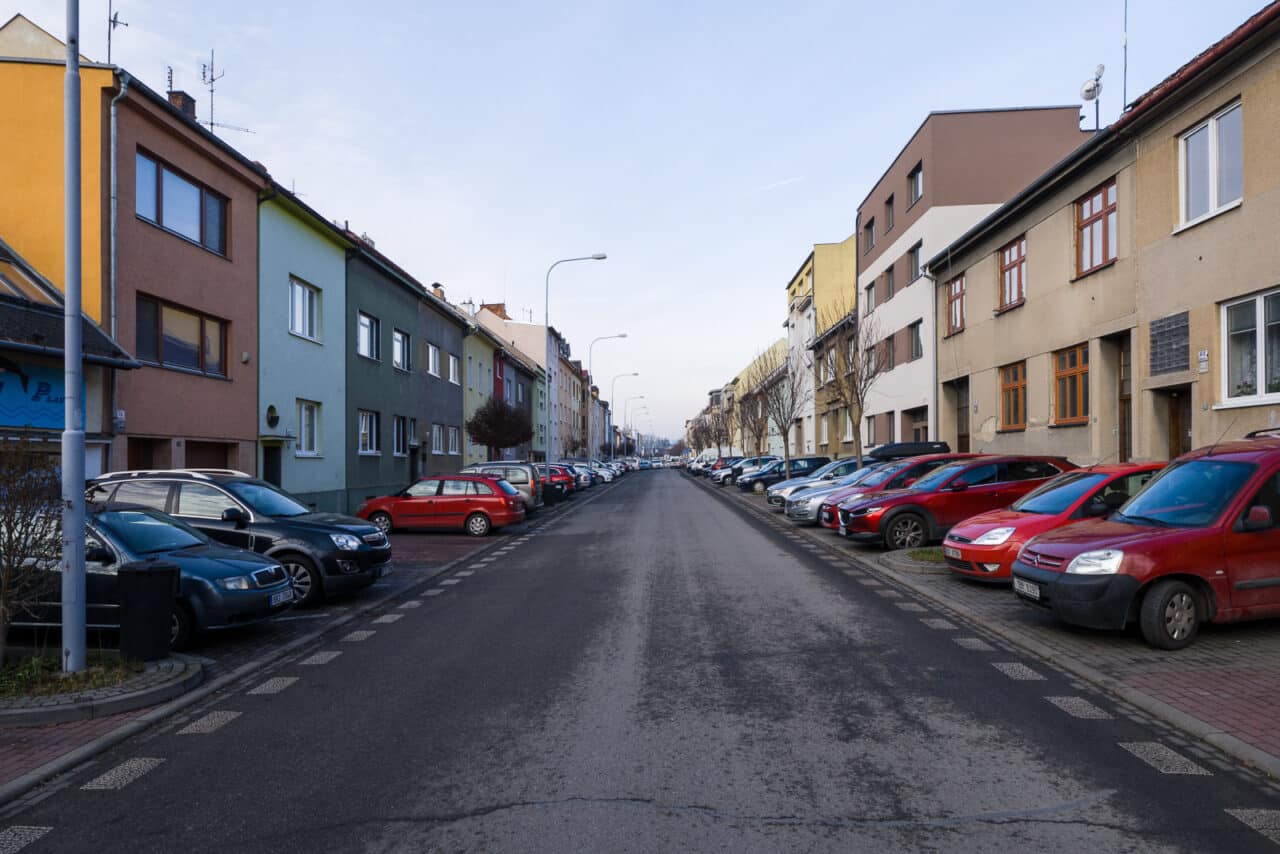
Sony A7R V, Sony 12-24/4, 1/125s, f/9, ISO 200, focal length approx. 24mm
Leading lines sometimes work. But other times, they are difficult and distract the viewer or have no purpose in the photo. Their use is largely a matter of feeling. It helps to follow the work of well-known photographers to help decide when to use leading lines.
Composition rules in moderation
These basic composition rules can be applied to many types of photos and they’re a great starting point. However, especially in documentary photography, rigidly adhering to every rule can introduce unwanted elements into your frame. Sometimes, a simple composition is more effective.

Don’t be afraid to break these rules if it improves the shot!
In conclusion, a special thank you to everyone who has made it this far. This is my 200th article on Learn Photography. I started writing in 2012, and I’m happy to see my work continues to find an audience!









There are no comments yet.