Expose to the Right – How to Get Less Noisy Pictures
Today’s article isn’t about composition or about what camera angle to use. It’s also not about wearing a swimsuit in winter. Instead it’s a trick that will give you less noisy pictures—in other words, better picture quality.
Camera manufacturers are always pushing the envelope of technical quality, and so today’s cameras combat noise very well. But anti-noise techniques are still useful, because you sometimes need to make large prints or make major changes to a picture’s color, and both of these really make noise stand out.
It’s a simple trick: Instead of your usual shot, take the lightest shot you can (the longest exposure you can) without getting blowout, i.e. loss of detail in the brightest areas. Naturally the initial photo won’t look too good. But it can be darkened on a computer, and that result will look just fine. Meanwhile, the darkening reduces noise, which is exactly what you wanted.
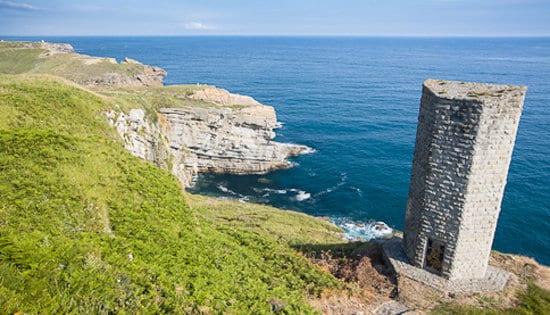
For illustration I’ll use two photos I took of the ruins of the lighthouse in Santander, Spain. I took them right after each other with different EVs:

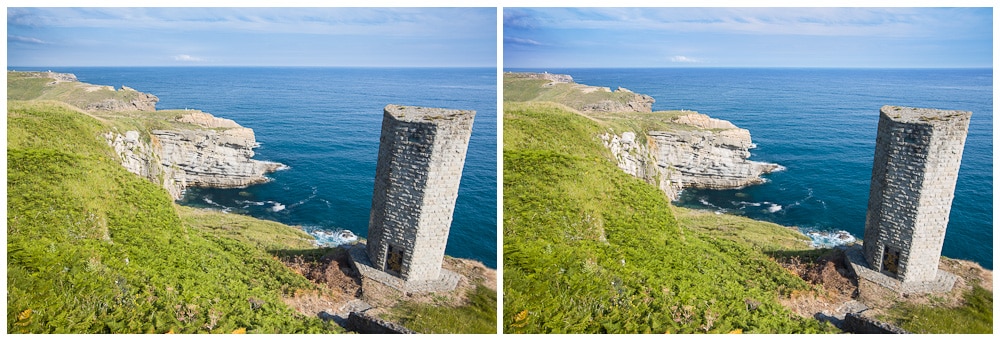
The first photo is lighter than it needs to be, and the second is even farther “to the right.” But I chose the second one for further processing! Of course for this trick you should check for major blowout before the picture even leaves the camera. To do this check, use the histogram, or use the camera function that makes blowout blink at you—it will have a name like blowout preview or overexposure check. Let’s take a look at the histograms:

The right photo is visibly pretty extreme. The left photo is OK; the right one is on the way to being problematic. But even still I knew that the blowout was not extreme, and that thanks to having shot to RAW I had a small reserve available at the edge of the histogram. Still, I kept the “left” photo on the card, just in case I’d gone too far with the brighter one. When I checked on my computer, the reserve turned out to be enough. Both photos look almost the same after editing:
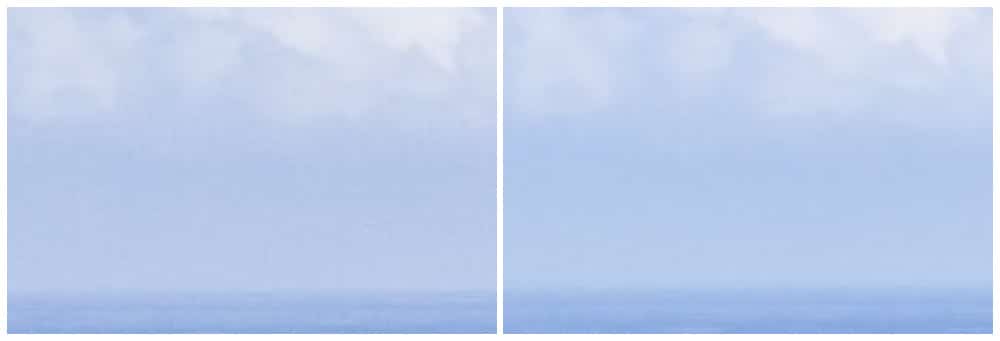
But there’s a difference in their details—in their noise levels. Noise manifests itself in different photos differently, but it’s usually most visible in the sky. You can see this when zooming in:
Of course, taking light pictures does have a disadvantage: When you want to show off your freshly-taken pictures to your friends right on the camera display, and all they see is a white haze, they’re going to think you’re a little weird.
One tip in closing: Personally I bracket all of my travel photos with three shots, each 1 to 1+1/3 EV apart. Out of each set of three, I leave the one whose histogram is “right on the line” and the one that’s one step darker. That second one is useful whenever the first one turns out to be too bright or e.g. blurry. I go through the photos at home and delete the unneeded one out of the pair at the end. Because of this I almost never lose out on a picture, and I get high-quality source photos quickly, which non-photographers travelling with me always appreciate.
There are no comments yet.