Fight Dirt and Dead Pixels

The article is over 5 years old. The information in it may be outdated.
![]()
We are working on its update. In the meantime, you can read some more recent articles.
There are lots of roads to ruined pictures. Dirt and sensor defects are two of them. How can you uncover and solve these problems?
Naturally I’ll be talking here about “easy-to-fix” problems, not the cases where the camera falls and breaks. For those the solution is simple, though not easy: visit a repairman, or the dump.
These easy-to-fix problems are dust specks on the lens or sensor, and dead pixels in the sensor.
Dust Is Everywhere
The largest amount of dust settles on the camera lens’s front lens, which is constantly exposed to external influences when you take pictures. If you use a UV filter or other filter, that merely moves the dust layer to another piece of glass.
If you use a camera with exchangeable lenses, then you will almost certainly eventually get dust on the rear part of your lens, and on the sensor too.
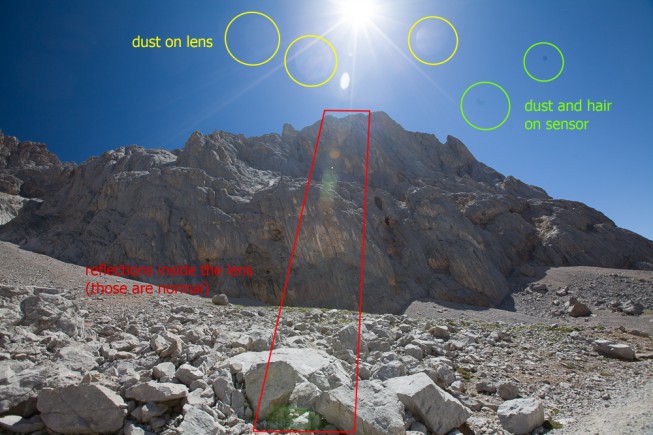
The reason for removing dust from time to time is problems like the one visible in this picture:
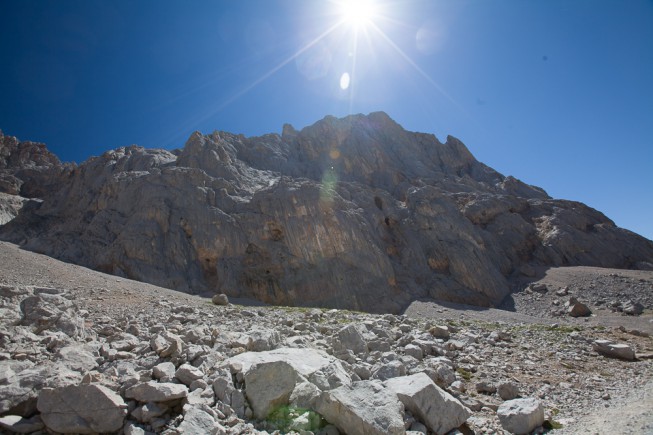
If you don’t see the dust yet, here it is one more time, labeled:
The sun shining into a lens illuminates dust specks, which then behave as extra light sources. Also, the unbroken blue sky mercilessly revealed the sensor’s imperfections. The F8 lens used made the effect even stronger.
You can also make dust visible by photographing light sources with very badly set focus. This makes the light expand and cover an enormous surface, giving a fingerprint of the lens. Thus in this case the black specks indicate dust on the lenses (instead of sensor dust as in the picture above):

Although these problems can be fixed in software, that means spending time with your computer instead of your camera. So it’s better to prevent them.
Testing Without the Sky
If you don’t have a blue sky available for testing, a white wall can be an equally good testing aid. I recommend deliberately focusing in front of or behind it and taking a picture with the largest available F-number, for example F22. Shaky hands are actually welcome here. They blur the wall into a monolithic patch of color, while not blurring dust specks.

Canon 5D Mark III, Canon EF 24-70/2.8, 13 s, F22, ISO 100, focus 64 mm
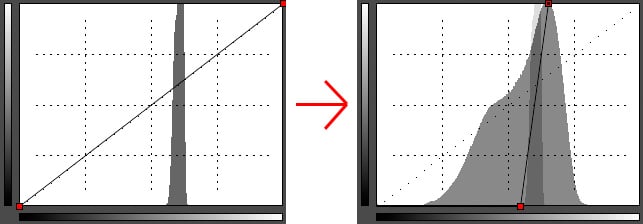
You can also get better dust highlighting using software tools such as the Curves tool in the Editor part of Zoner Studio. (You’ll find it in the Editor’s Adjust menu). Use Curves to get a picture like this one:
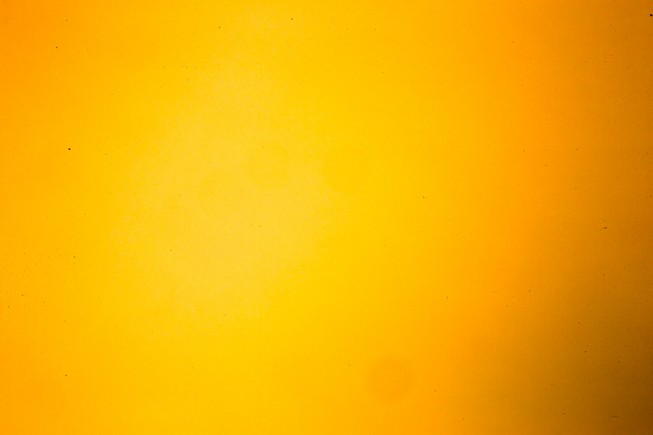
Canon 5D Mark III, Canon EF 24-70/2.8, 13 s, F22, ISO 100, focus 64 mm
I should mention how to actually do this trick. Do it by moving the endpoints of the histogram curve:
Cleaning the Lens
If your lens is dusty or has fingerprints, the simplest way to clean it is using a microfiber cloth. These are easy to find, and cheap, and they come in small camera-friendly sizes, making them great to have in your bag (which I recommend).

Even though I’ve read that the glass parts of a lens have a special anti-reflective coating that is easy to scratch, I don’t personally think that’s such a risk here. You shouldn’t worry that ordinary cleaning will scratch it. On the other hand, you should be careful if a grain of sand, metal shaving, etc. gets under your cloth during cleaning. Then you really can scratch the glass, so don’t apply pressure during cleaning unless you absolutely must.
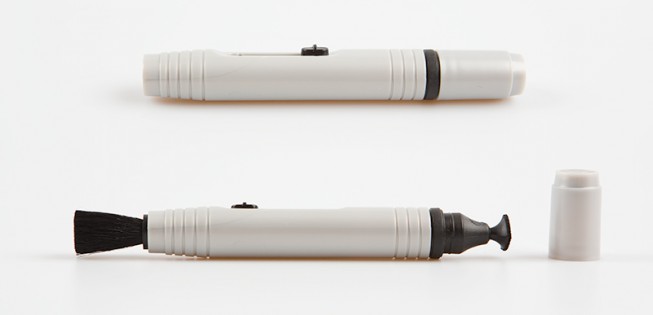
Another option here is the “lens pens” sold by several manufacturers. These are pen-shaped tubes with a retractable, fine-haired brush on one side, and plate with a soft coating on the other. Both ends can be used to clean away marks that stick fast to the lens. This tool, too, is one for your bag.
For the most delicate cleaning possible, there are air blowers: special rubber balloons, sold in photo stores, or—much more cheaply—in medical supplies stores (but these won’t look as “pro”). Their air blasts will however only clear away the larger dust grains, and they do nothing for e.g. greasy fingerprints.
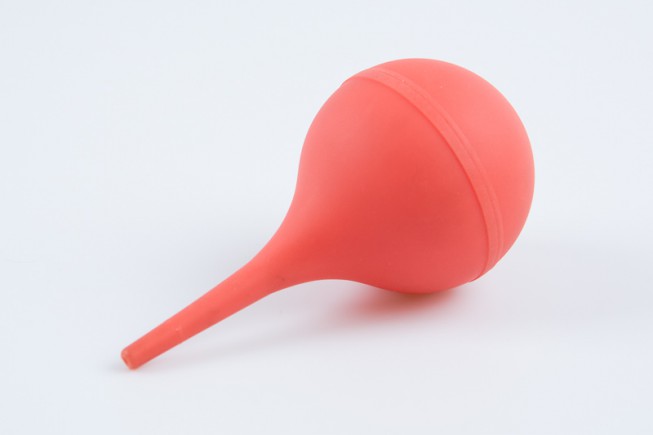
You don’t need to overdo cleaning. While we can sometimes see dust in photos, we usually overlook it. And actually, even a cracked front lens causes nothing worse than minor blurriness, as you can see on the LensRentals blog.
Cleaning the Sensor
Cleaning the lens is the easy part. Work on the sensor is much harder, and it is risky.
I’d like to start by saying that, in the picture of the wall, the sensor does not have serious dirt problems. This is an ordinary level of dirtiness, practically invisible in your photos. To make it visible, we needed a monolithic color, a ridiculous aperture (otherwise the dust would be blurred into the surroundings), and also extreme histogram curve editing.
If you feel your sensor looks dirty even when taking all this into account, the simple way to handle it is, again, using a balloon. This can blow dust onto other parts of the camera, but it’s not as critical elsewhere as it is on the sensor.
Even if you slightly dirty the viewfinder, the focusing screen, or for DSLRs the mirror, this generally won’t even be visible, and even if it is, it won’t affect your pictures. And if worse comes to worse, you can use Balloon Power again.
The Right Technique
Before starting cleaning, you should be in a low-dust environment (definitely not outdoors) and, of course, remove the lens. For DSLRs you will also want to tilt the mirror so that it does not get in the way. The typical way to do this is using the manual sensor cleaning item in the camera’s menu. Some cameras only let you use this option if the battery is sufficiently full, because battery energy is utilized to tilt the mirror away. If battery power suddenly ran out, the mirror would snap back, and if you had a tool beneath the mirror at that moment, the consequences could be unpleasant.
For air-blower cleaning, you should rotate the camera downwards, so that as much as possible, dust flies out through the lens hole.
Up Close and Personal
When all else fails, you can let the repair shop perform wet cleaning. Some photographers get such services free with the purchase of a camera.
If you’re brave enough, you can also get a cleaning kit and try it yourself. There are different kit types, with some containing a fine brush, a “stamp” for the dust to stick to, and/or a little “spatula,” wrapped in a soft cloth. You drip a special solution onto the spatula and use it to wipe the sensor.
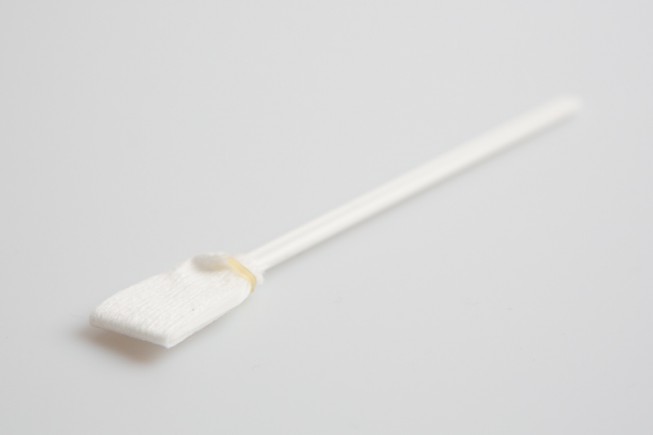
This is high-class stuff, so I recommend carefully reading the instructions for the given tool and checking that it is usable for your camera. By the way, despite all this talk here about cleaning the sensor, it’s not the sensor you’re cleaning. The sensor is covered in several layers of glass, ranging from 0.5 mm (Leica) to a full 4 mm (really! e.g. the Panasonic and Olympus Micro 4/3 cameras). But they can still have special coatings with various compositions, and so these cleaning solutions come in at least two kinds for different sensor types.
But you should only use this kind of contact-based cleaning when there’s no other choice. The big risk here is that you’ll end up adding more dust, or worse things, onto the sensor. If you work with your camera properly, then even if you use it daily and switch lenses often, you won’t need to touch the sensor for several years. However, dust can arrive suddenly.
Hot Pixels
…are spots on the sensor that give off their respective colors even when no light is falling on them. At today’s pixel counts—millions of pixels—practically every camera has them. They only differ in how visible they are.
Hot pixels are easy to ferret out using long exposures in complete darkness, or with the lens cap on as it is here:

Canon 350D, Canon EF-S 18-55/3,5-5,6, 30 s, F29, ISO 100, focus 35 mm
During normal photography hot pixels are practically harmless, but they stand out strongly when you use a high ISO value and/or a long exposure. This is especially a problem for astrophotographers.
You can eliminate them by shooting a black picture, which maps them, in addition to your target pictures. The black picture is used to subtract the hot pixels from the target pictures. Some cameras can take this action directly (they take two shots in immediate succession, with the aperture closed for one of them), but you can also easily do this manually on a PC.
Some cameras also contain a pixel remapping function, which takes a black picture, analyzes it, and turns off the hot pixels. Their colors are interpolated from their neighbors in future pictures, and the user doesn’t even notice.
For current Canon cameras (and perhaps Nikon too) there is also the following trick:
- Use the sensor-cleaning menu item, but don’t start cleaning;
- wait 30 seconds;
- turn off your camera in the standard way.
There are different theories among photographers about what happens next. Either these steps activate the pixel remapping function, or, according to some sources, during cleaning the sensor is electrically discharged to make it not attract dust, and it is recharged after the cleaning, “resetting” it and thus repairing some defective pixels.
Things might be similar with other camera makes, so try looking on the Web for similarly simple solutions if you run into trouble.
Prevention
Everything can be cleaned off, but it’s better to make cleaning unnecessary. For lenses, that means using lens caps and, of course, not putting your fingers on the glass. As for sensor dust, it mainly comes from exchanging lenses, so hold your camera pointing downwards for that. When outdoors, stand with your back to the wind.
Hot pixels are tougher to prevent, but they are a smaller problem unless you’re doing specialized photography.
In any case, take this article as information, not orders. You don’t have to try all these techniques right away.
If you don’t see any problems in your photos, then don’t worry about cleaning, and save your attention for the great photo opportunities that we’re sure are ahead of you!

TerryB
This is an interesting article. I’ve never ever come across dust on the front of a lens being reproduced in an image. And this is with 55 years of photography behind me. But then, I don’t shoot straight into the sun. My eyes are too precious for that. Also it is possible that internal focusing lens designs may be more prone as they can have a macro mode almost touching the front element, and in some cases it does! So, want to photograph dust on the front element? Buy one of these. :D)
Sensor dust is another thing, however, and is always a risk with interchangeable lens digital cameras, so I always take the utmost precautions when I do. Funnily enough, I never noticed this as a potential problem until a couple of years ago when I set out to record and compare the optical performance of my many film-era lenses on my Nex 5N. For optimum optical performance, I rarely, if never, shoot below f8 because of possible diffraction, but during all my testing I ran the full gamut of the available apertures of each lens.and it was when looking at those shot at f11 and smaller, that I noticed the dust blobs in the sky, and which got progressively and distinctly more noticeable at f16 and f22 where available.
Never going below f8 has meant I have been blissfully unaware that dust could have been an issue, especially as the 5N has an in-built dust removal option. Fortunately, dust is mostly only visible in areas of sky or plain colour, not so much in the more busy parts of an image although I would imagine in very large prints it may possibly be seen.
I am a little surprised, though, that you don’t mention Zoner’s healing tool, which I have found to be the quickest and best way to remove not only dust from digital images, but blemishes from scanned negatives.
Zoner
Thank you Terry for this comment, it is interesting to read about your experience! Yes, the ZPS healing tool is a great tool, thank you for the reminder, we will try to add it to the article, because it is definitely worth it.