Organize Your Photos: Assign GPS Coordinates
Most cameras and mobile phones can automatically assign GPS coordinates to your pictures. If your camera doesn’t have this function, or you need to manually add the location. You can do this using a simple function in Zoner Studio X.
It always comes in handy to have information about the location where your photos were taken. In particular with older photos, where you may not remember where you took them. If you are an avid traveler and take lots of pictures, location information is always beneficial for your photography.
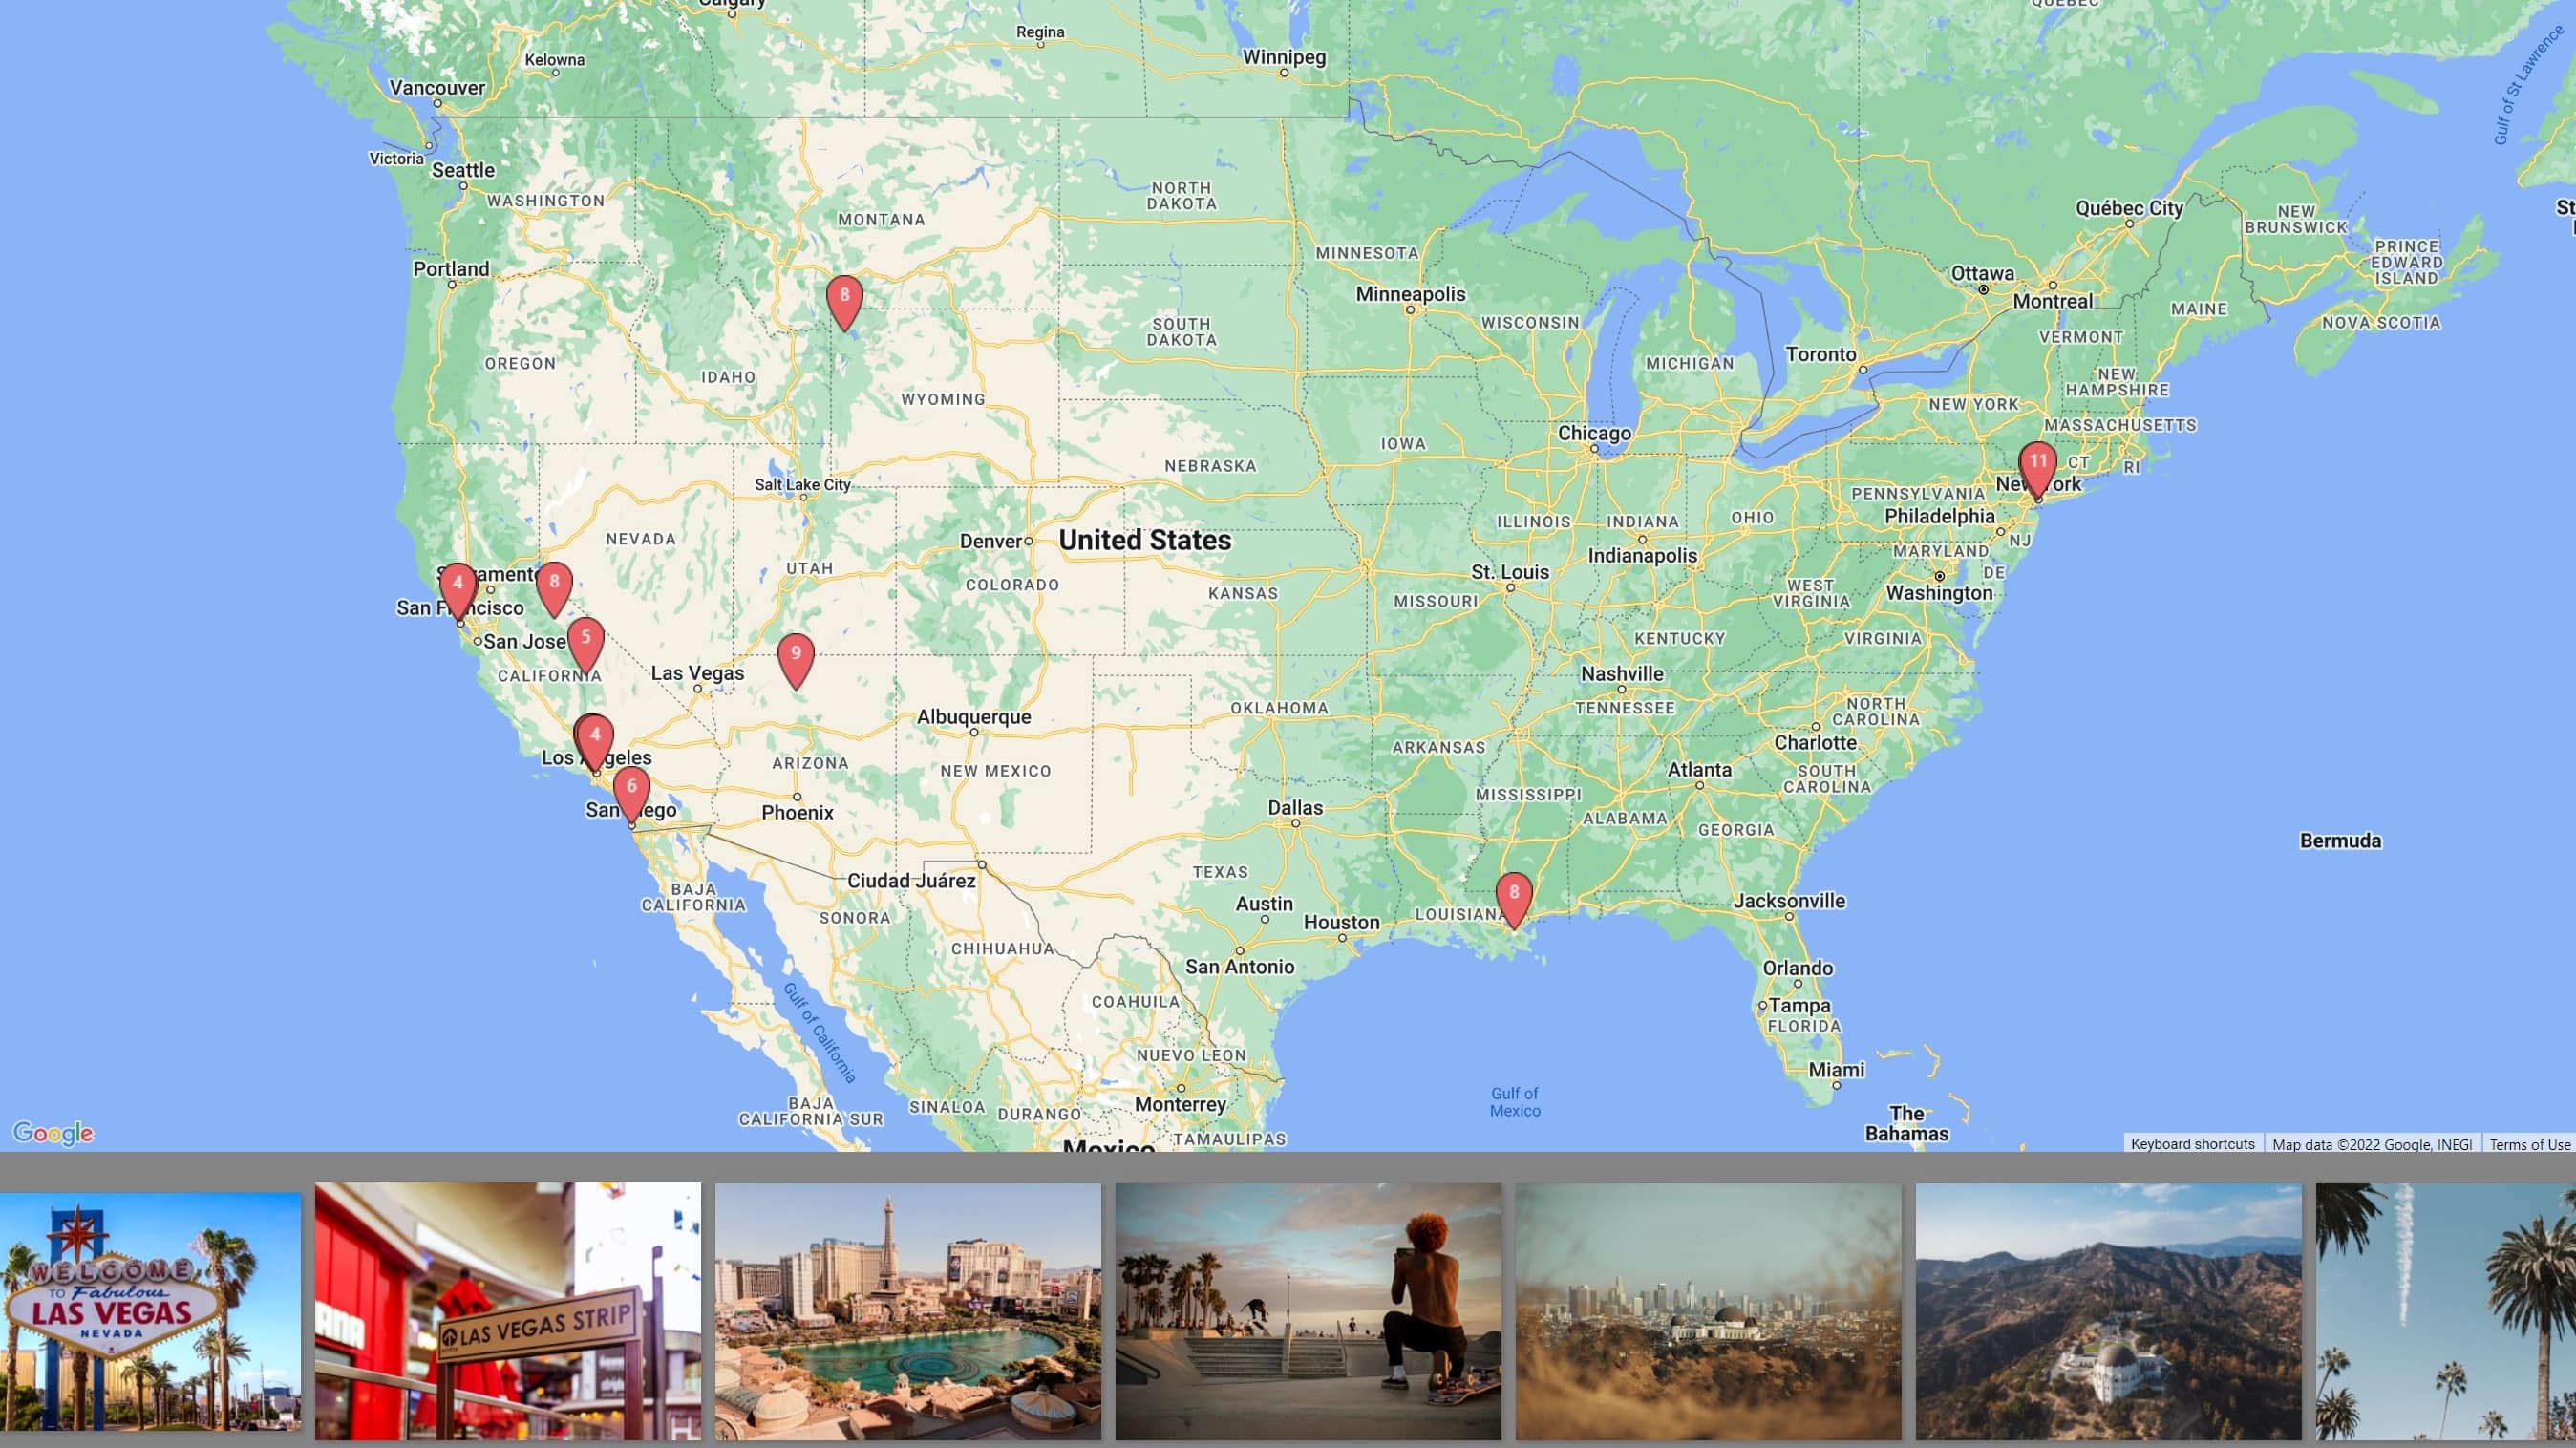
Display photos on a map
Photos with GPS information can be displayed on a map with the location and number of photos taken marked. When you hover over the location, you see one of the photos taken at that location.
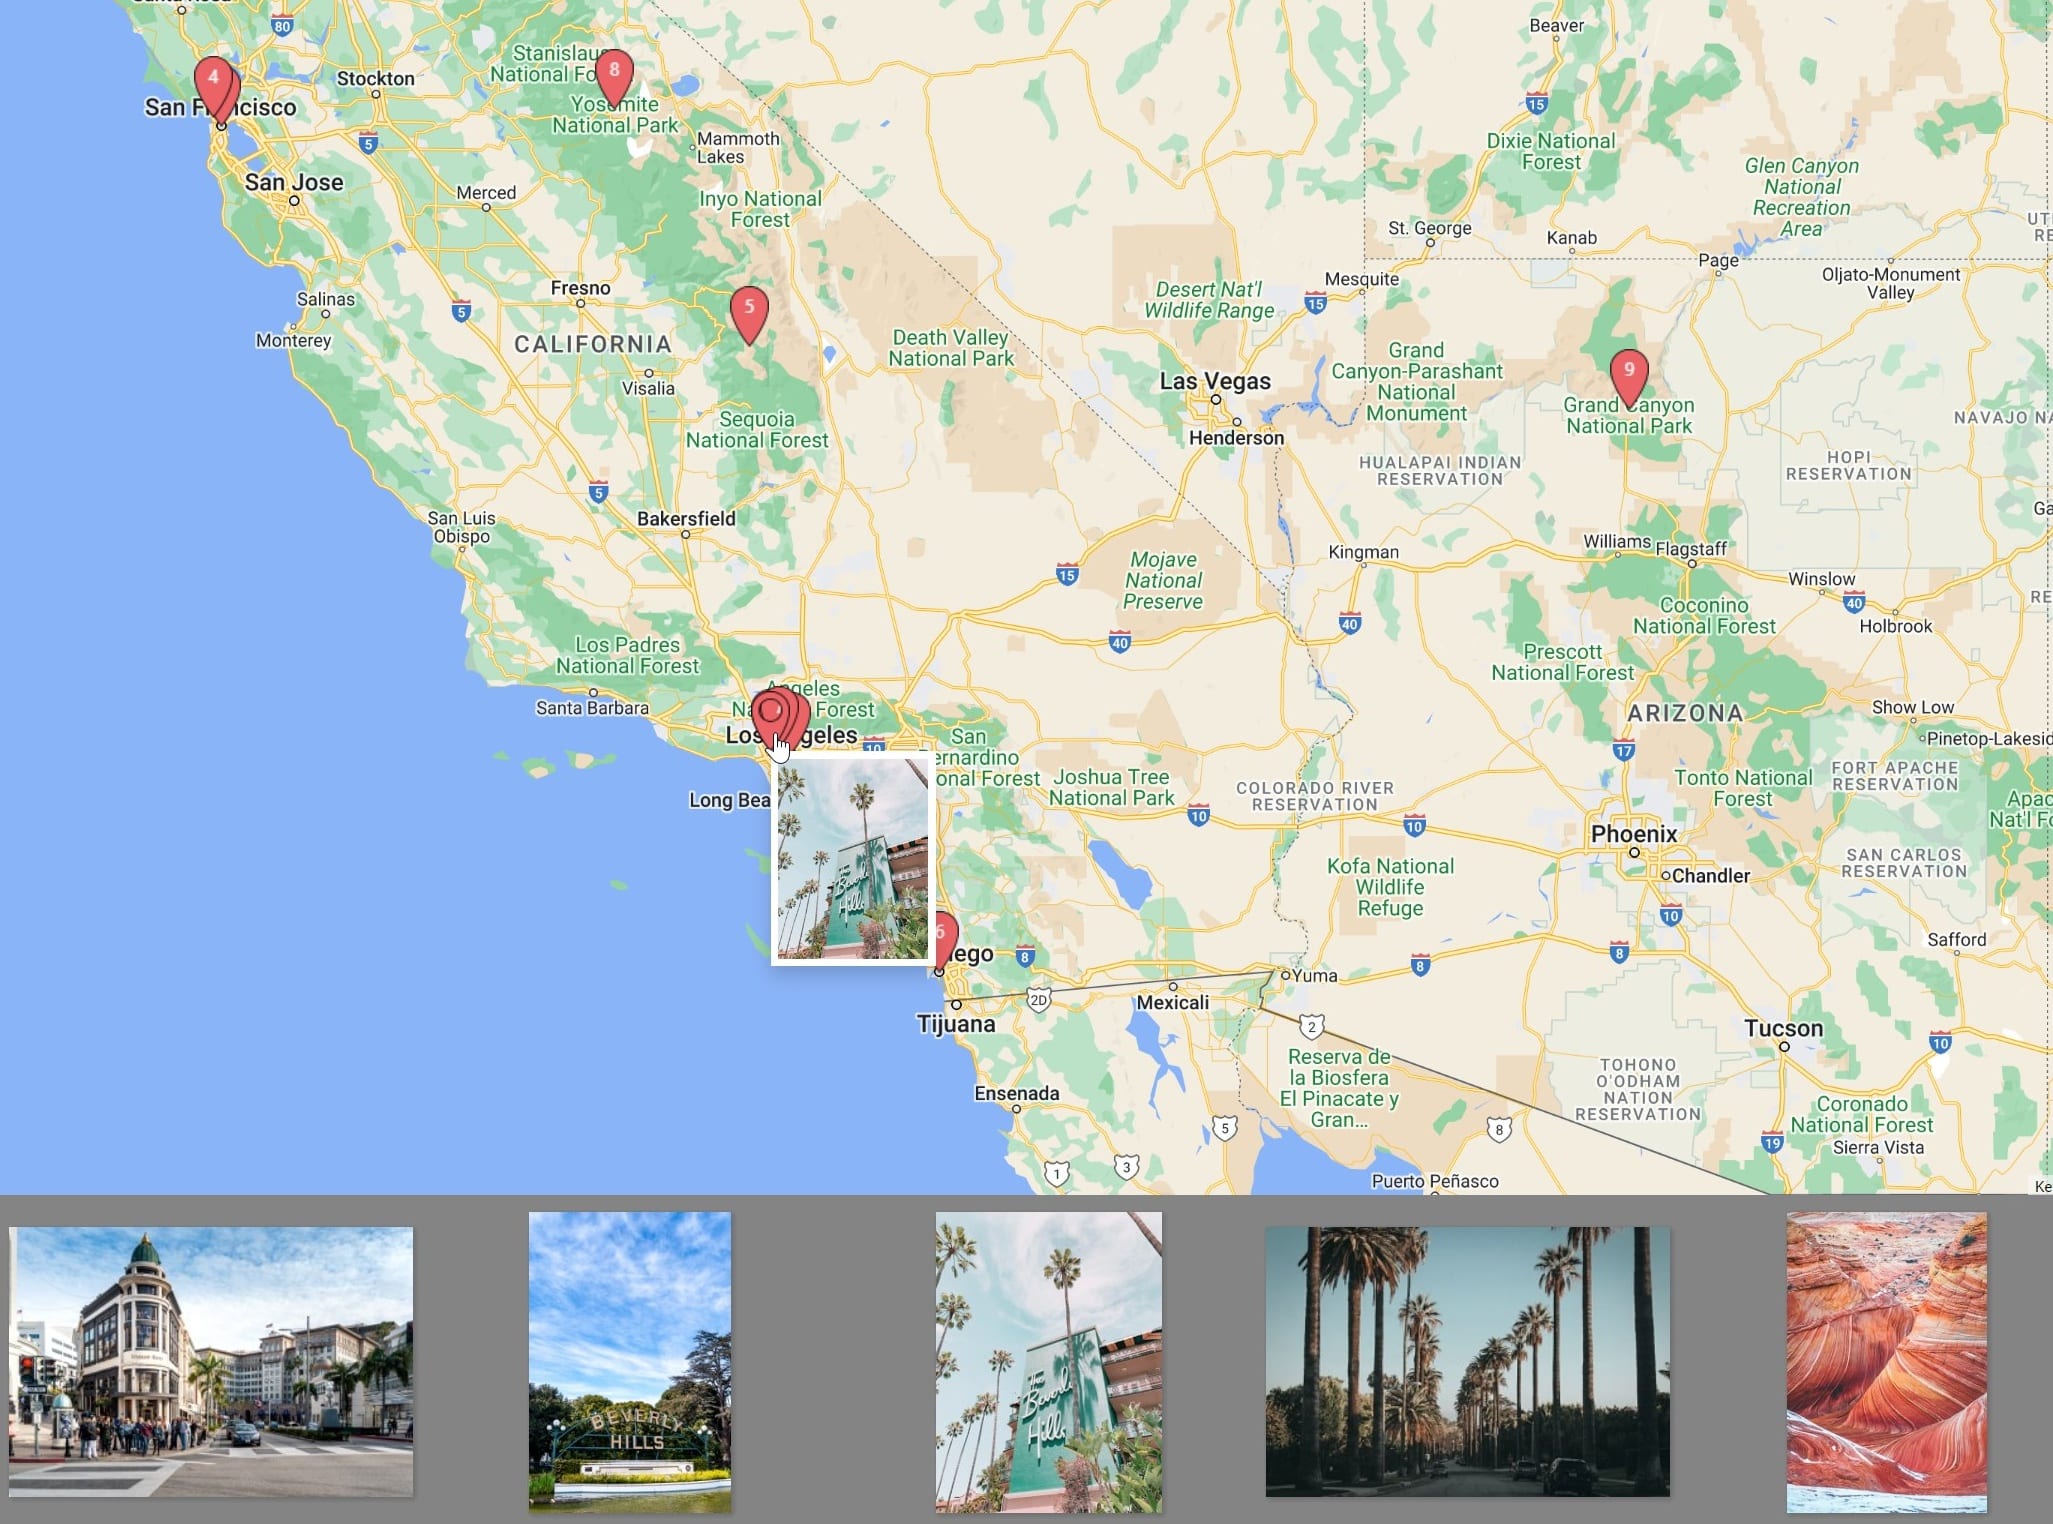

If you want to display multiple locations on the map that are close to one another and are included as one map point, increase the Marker Clustering distance.
Increase the distance between points using the Marker Clustering distance function, found in the top left corner of the map.
Manually assign GPS information to photos
You can work with your photos’ location in the Manager module. You can find the Map option in the top bar of the center screen. In Zoner Studio, you have three types of maps to choose from — Google, Mapy.cz, and OpenStreetMap.

You can find a specific location using the search box in the top right or by manually zooming in on the map. The search window is usually the fastest method. Type the name of the location just like you are doing a standard map search.
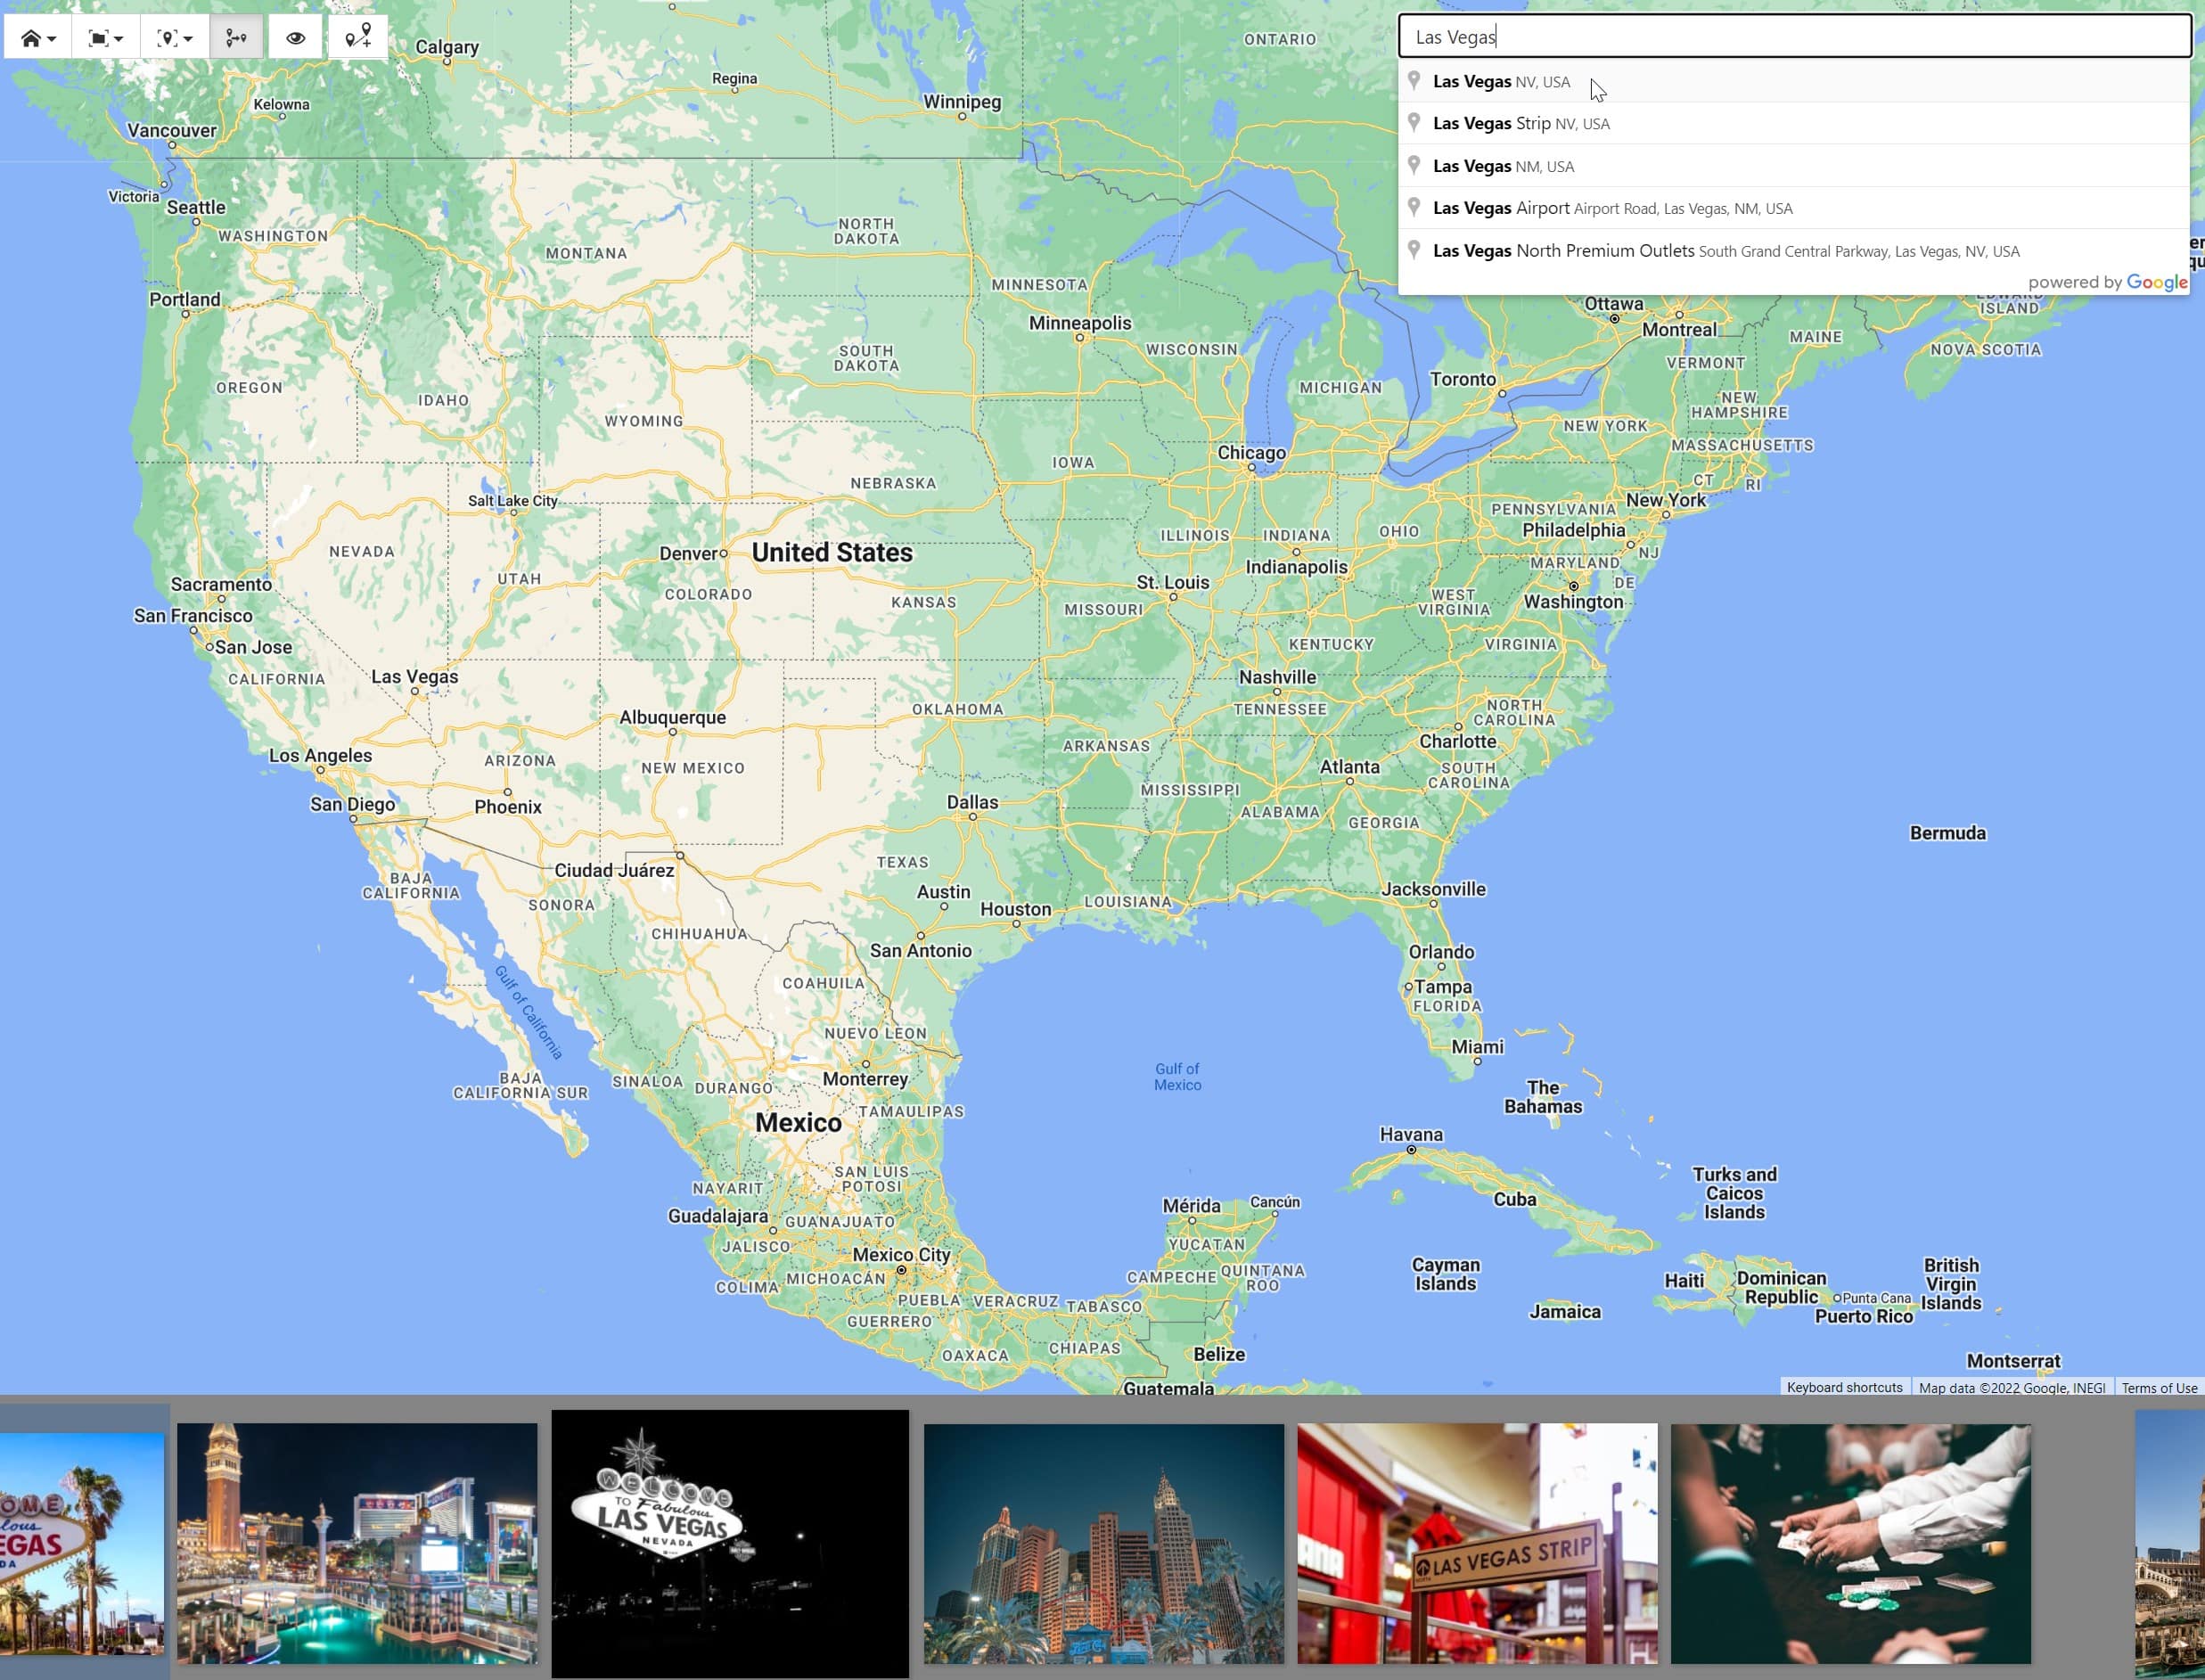
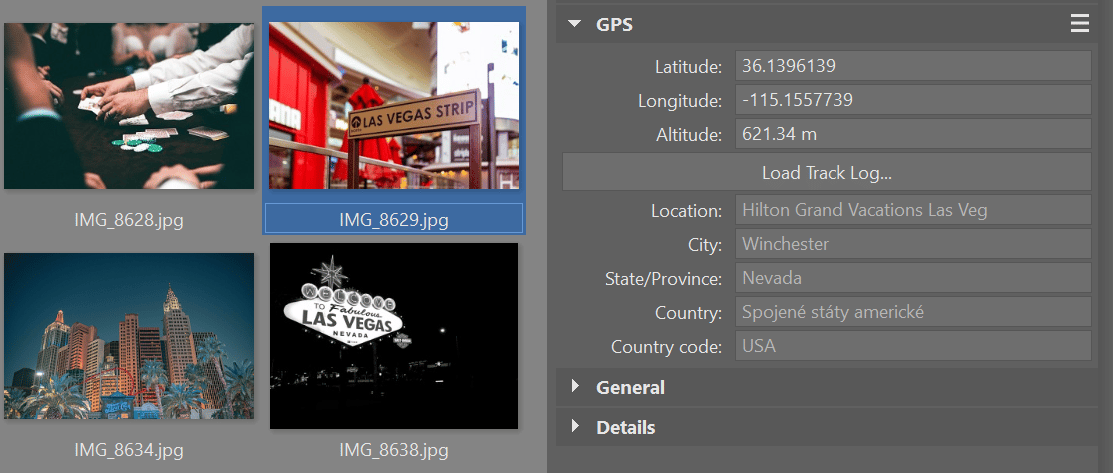
Then, it is very simple to manually add GPS information. After searching for a location, select all the photos in the filmstrip that you want to assign to that location. Then, drag and drop them to the map.
Assign GPS coordinates by dragging photos from the filmstrip to the map.
A pin is added to the map indicating where the photos were taken. After clicking the photo, you’ll see more detailed location information, GPS coordinates, and a map preview under GPS in the right panel.
Use location to search for photos
Whether your photos have GPS coordinates assigned automatically or manually, there will be a large amount of them as time goes on. Some trips will start overlapping. To keep some sense of order, you can expand each location, by country or specific location, in easy-to-view categories in the Catalog under the Location tab. You can find complete GPS information for all the photos you have in the Catalog. Using the Catalog is key for displaying photos by location.
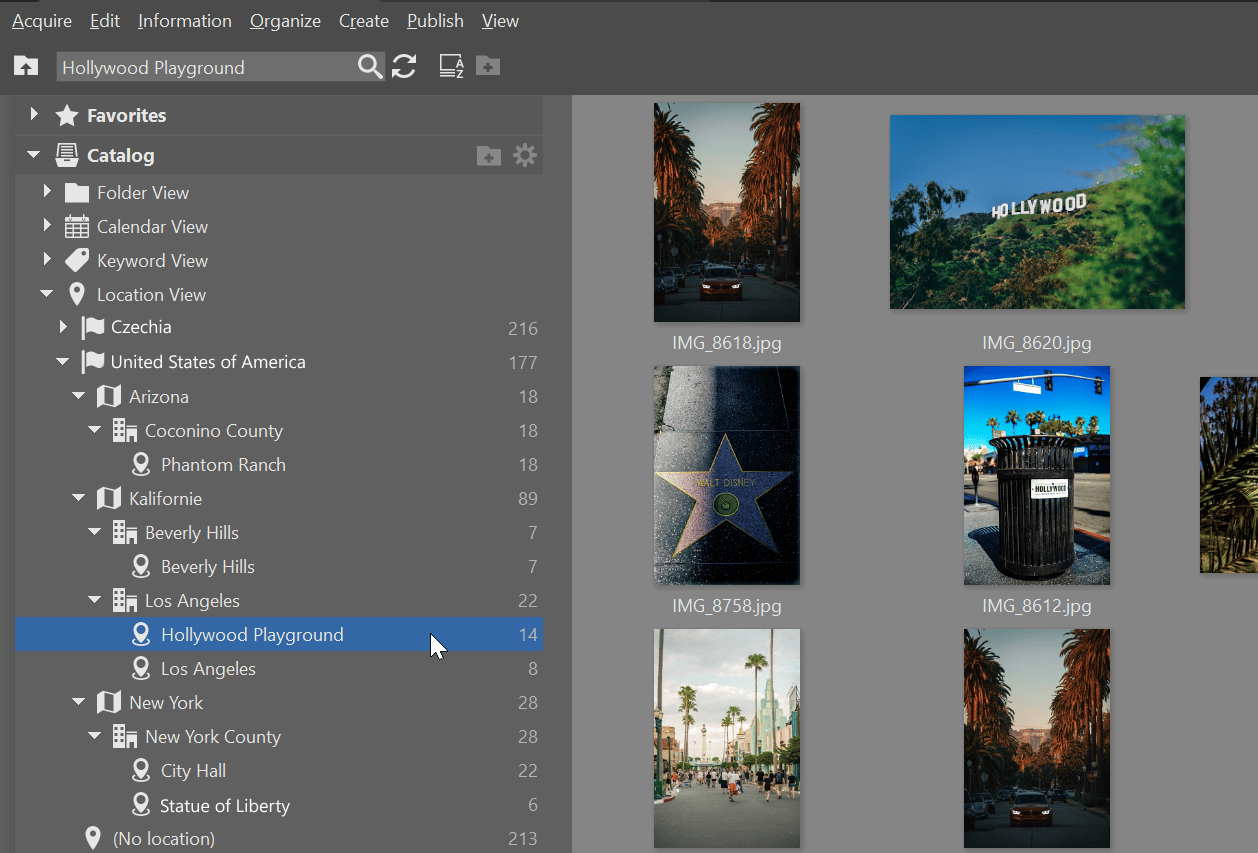
Displaying all the photos taken during multiple vacations at my beloved Jizera mountains is not a problem. Nor is putting together photos from different places in my hometown.
Automatically assign GPS coordinates using a tracklog
You can also assign GPS coordinates using a tracklog. You must use either a GPS data logger or mobile application that you activate to record your travels. Then, you can save it as a .gpx file. In the Manager module, open your pictures folder, and by GPS information click Load Track Log. Then find the exported .gpx data file on your computer and click Open.
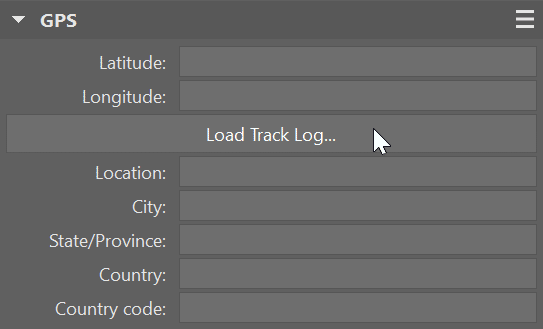
You’ll see a map with your path and a table you can use to assign data to your photos, which will be entered directly into the photo’s EXIF data.
Organize your photos
The main advantage of GPS coordinates is always knowing where your photo was taken. Since Zoner Studio allows you to add this information manually as well, you’ll never have to rack your brain for where certain photos were taken. Plus, the Catalog’s location view lets you quickly and easily organize and browse all the locations where you’ve taken photos.
Stephen Nicholls
When I go to the “Map” it always shows me the USA, ignoring wherever the photo GPS says. Can I set Europe as my “home” site rather than the USA?
Zoner
Hello Stephen, yes, you can set your own choice of home map view in Zoner Photo Studio X. To set the home site for the Map page, click the “house” icon in the Map view, and then click “Set Home View”.
Stephen Nicholls
That worked well. I still wish I didn’t have to zoom-in so many times – and that they stayed centre screen – to view exact locations of photos, but I’m sticking with Zoner, and enjoying it very much! Thanks for your help!