Guides for Editing Your Vacation Photos: How I Edited 3 Slovenian Landscape Shots
The article is over 5 years old. The information in it may be outdated.
![]()
We are working on its update. In the meantime, you can read some more recent articles.
A land full of mountains, waterfalls, lakes, rapids, gorgeous villages, and beautiful cities. You’ll even find a bit of the sea. Slovenia is a literal paradise for photographers, and doubly so for landscape photographers. I chose three photos that I’ll be using to show you how a landscape editing process can look. And I’ll also give you a few tips on where to go in Slovenia to get great pictures.
This year my wife wanted to be a hill-hunter on vacation, not a beach bum. And I also wanted to photograph hills and lakes and (finally!) a waterfall on our vacation, instead of the sea. Slovenia, meanwhile, is just about made for an active vacation. And for photo vacations too… and so our destination for a beautiful five nights in a tent was clear.
In this article I’ll be showing you photos from the three places in Slovenia that we liked the most. And I’ll reveal the camera settings (and in one case the phone-camera settings) I used when taking them. I’ll also illustrate how you can edit photos like these in Zoner Studio. These will be photos from the Zelenci natural reserve, the Great Kozjak waterfall, and the majestic Mangart mountains in Triglav National Park.
Zelenci Natural Reserve
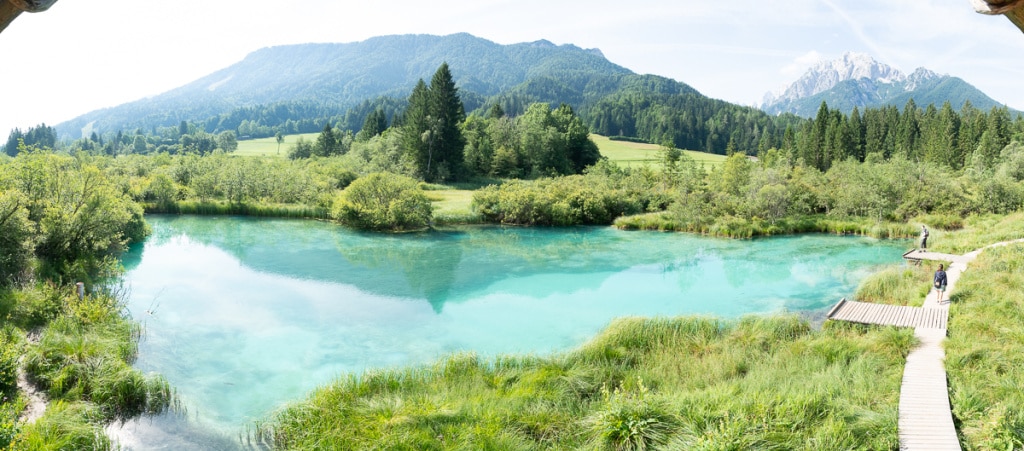
The Zelenci reserve is right next to Slovenia’s border with Austria. It covers 47 hectares and comprises several glacial lakes with crystal-clear water and small underwater volcanoes. In the morning hours it is a true oasis of calm. A person could easily sit there for hours silently watching the lakes and their surrounding countryside with its view out onto the peaks of Triglav National Park.
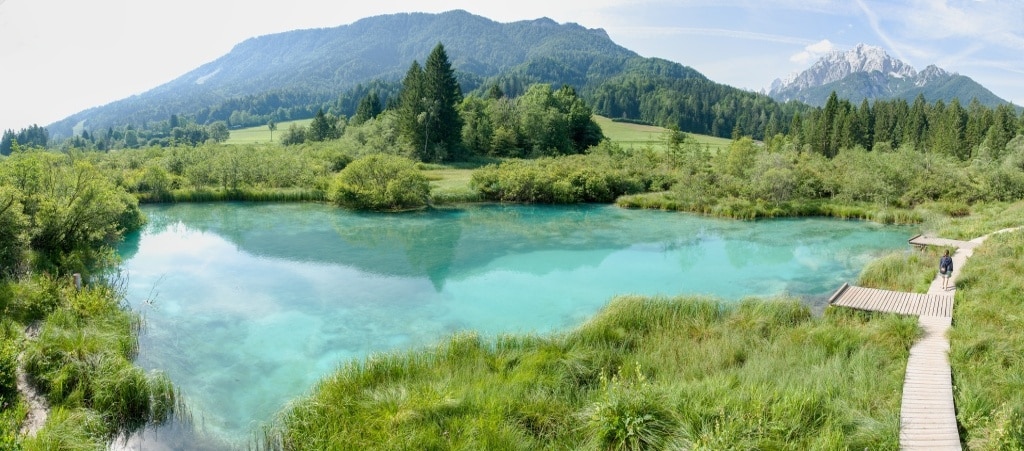
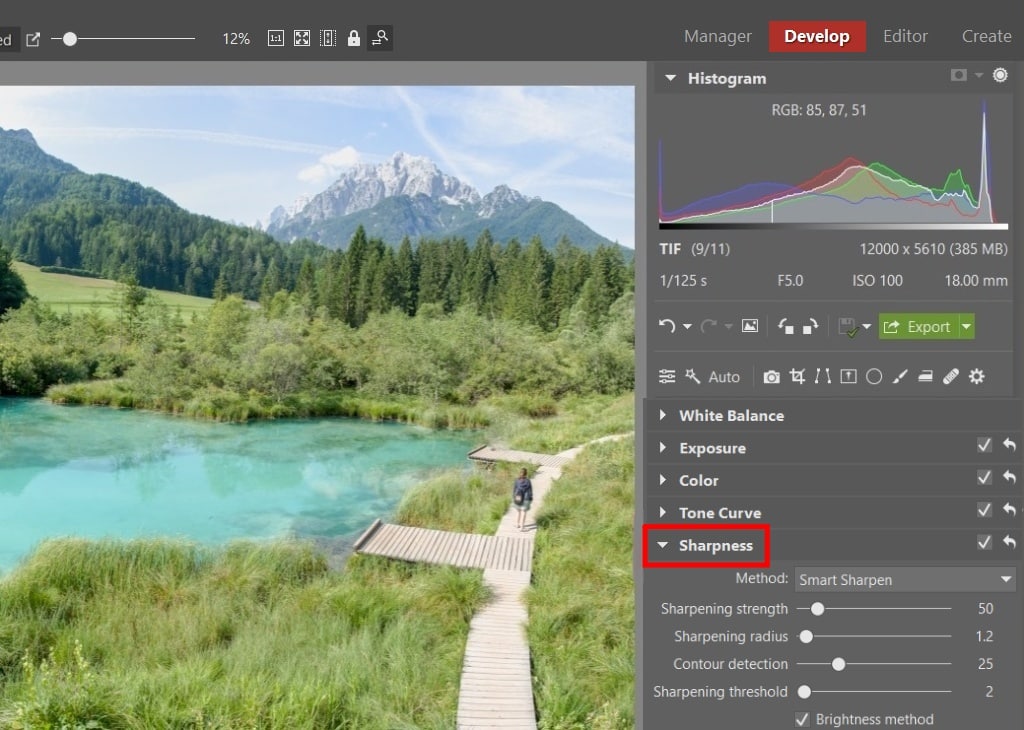
I would have preferred to have photographed the lake at sunrise, but I only arrived on the spot at 9:30, when it was lighted with slightly sharper light, although fortunately still from the side. I put my camera in manual mode and rotated it into portrait orientation. I looked over the entire scene through the viewfinder while watching the exposure meter. Based on it, I then set the ideal exposure values for the panorama I wanted: 1/250s, f/5, ISO 100.
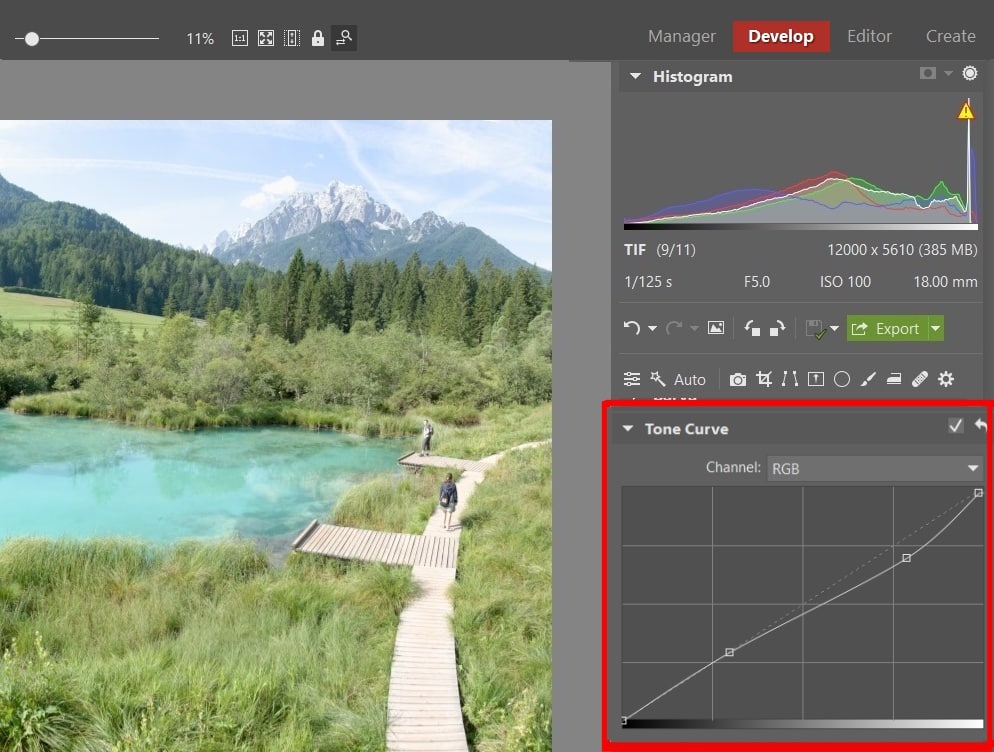
How I Edited This Photo
I started up Zoner Studio and assembled all eight shots into a panorama with a size of 12,000 x 5,610 px. I then opened the panorama in the Editor module. After that I used the Editor’s Clone Stamp (S) to remove parts of the wooden lookout tower that were left over in the top corners, as well as a man on the wharf.

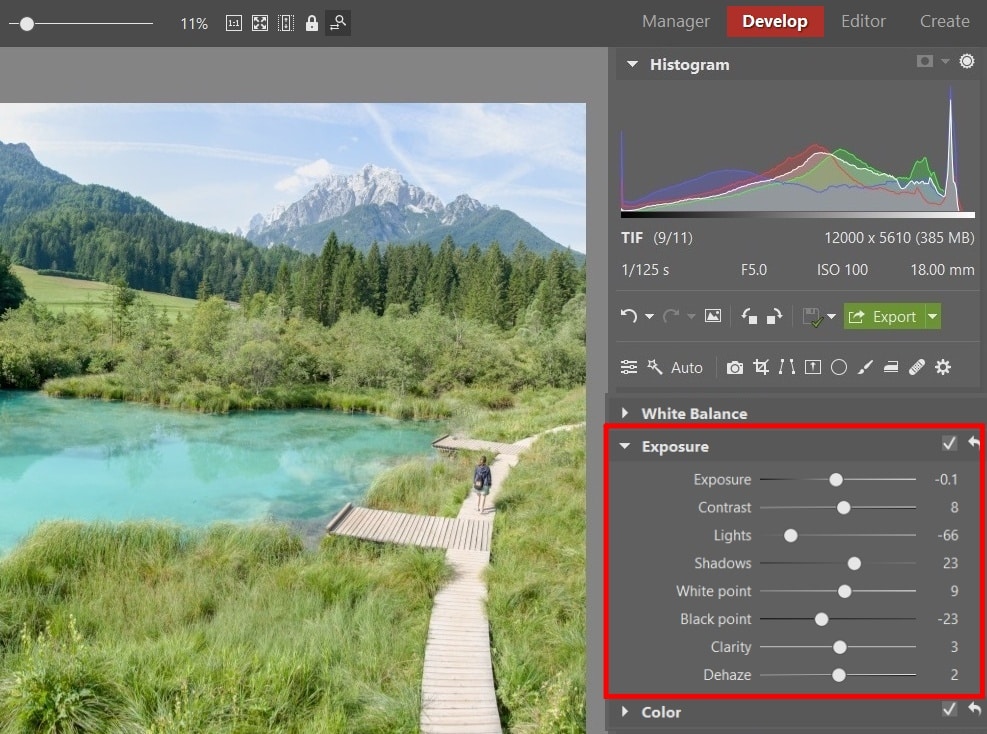
I made the rest of my edits in the Develop module. There I adjusted the panorama’s exposure using Curves and then fine-tuned things in the Exposure and Sharpness groups.

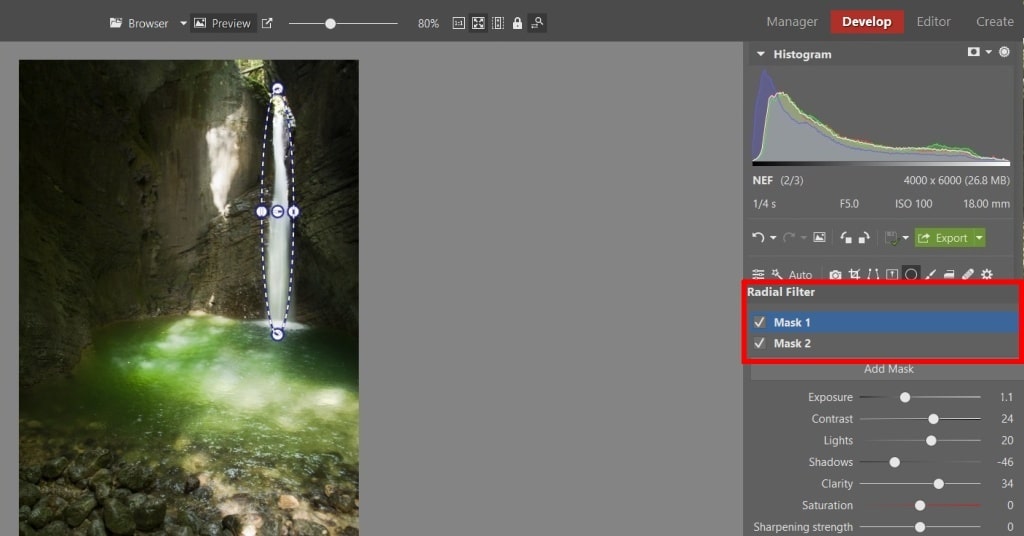
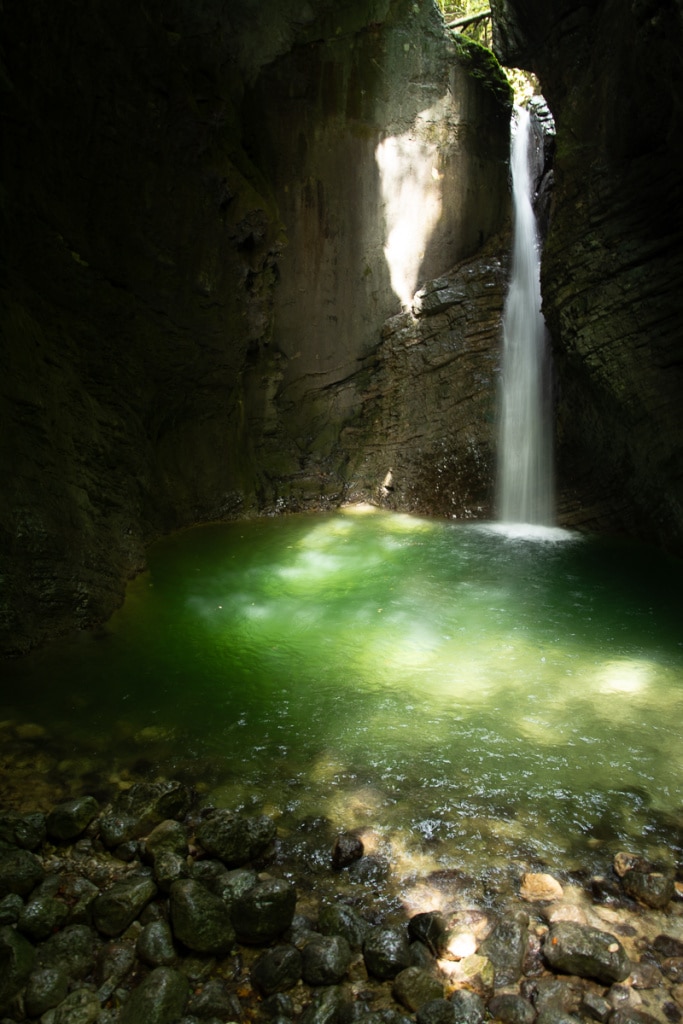
The Great Kozjak Waterfall
Photographing a waterfall had been among my goals as a photographer for several years. Fortunately, Slovenia is full of waterfalls, and one of the most beautiful ones was just a short way from the camp. It bears the name Great Kozjak. This waterfall is hidden inside of a cave, with a lovely little virgin forest in front of it.
Approaching this waterfall, I walked astonished, but still sought the best places for my upcoming shot. I found two. The best place is right in front of the rock that’s itself in front of the waterfall. The only problem is that you have to wade your way to this spot through waist-high icy water, and you need a tripod. The other spot is directly on the lookout footbridge about six meters above the rocks across from the waterfall.

I fought my way to a place by the railing on the footbridge and watched the waterfall, which was alternatingly in shadow and sunlit along with the lake. I switched my camera into shutter priority mode and set it to f/5 and ISO 100.
My camera calculated 1/4s as the best speed for the picture. The footbridge was small and full of people, so there was no room to set up my tripod. I leaned my elbows firmly against my body and waited for the sun to light up the waterfall again. My waiting was rewarded twice in total and I managed to take eight shots, with one of them turning out sharp.
When you’re taking pictures in places you don’t know well, it’s mainly important to wait for the right conditions and pick the best spots. That will make your job easier. Above all, don’t shoot in automatic mode and definitely not with the built-in flash; you’d lose any control over the results.
How I Edited This Photo
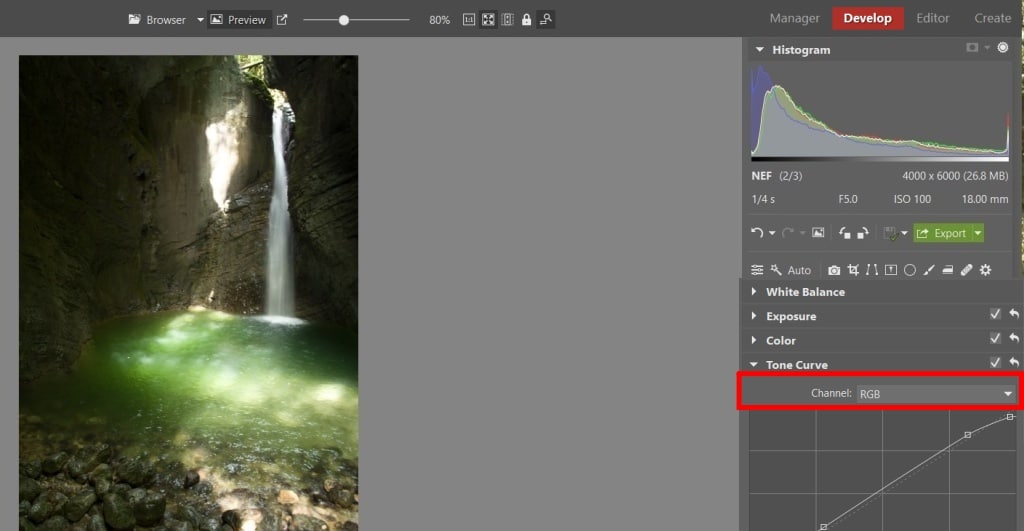
I made my first edits in the Develop module via the tone curve, which I used to draw out the shadows and slightly mute blowout.
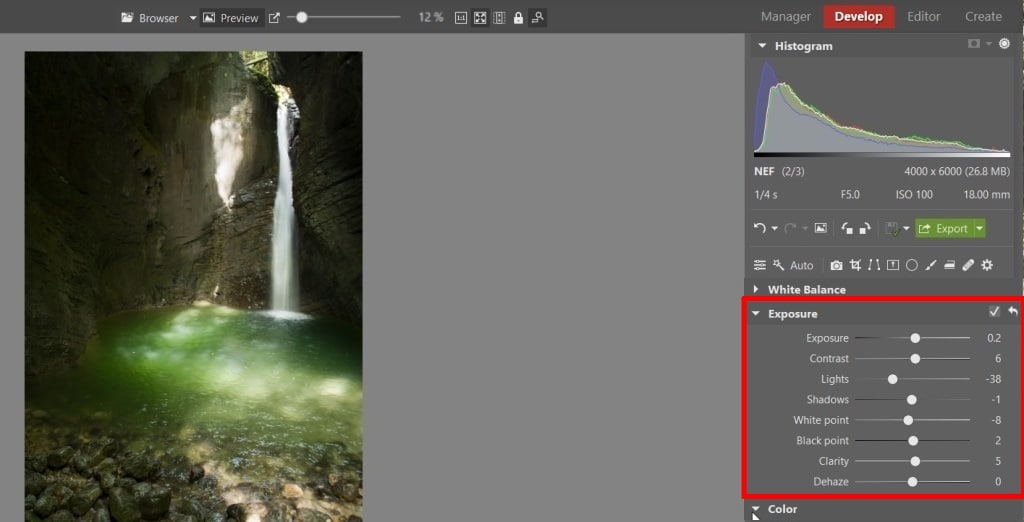
I adjusted shadows and lights using the sliders in the Exposure group, where I mainly muted the distracting blowout on the cliff beside the waterfall.
In the end I lightened the waterfall using the Radial Filter (R), in order to emphasize it. I likewise used the radial filter to highlight the play of lights on the surface of the water in front of the waterfall.
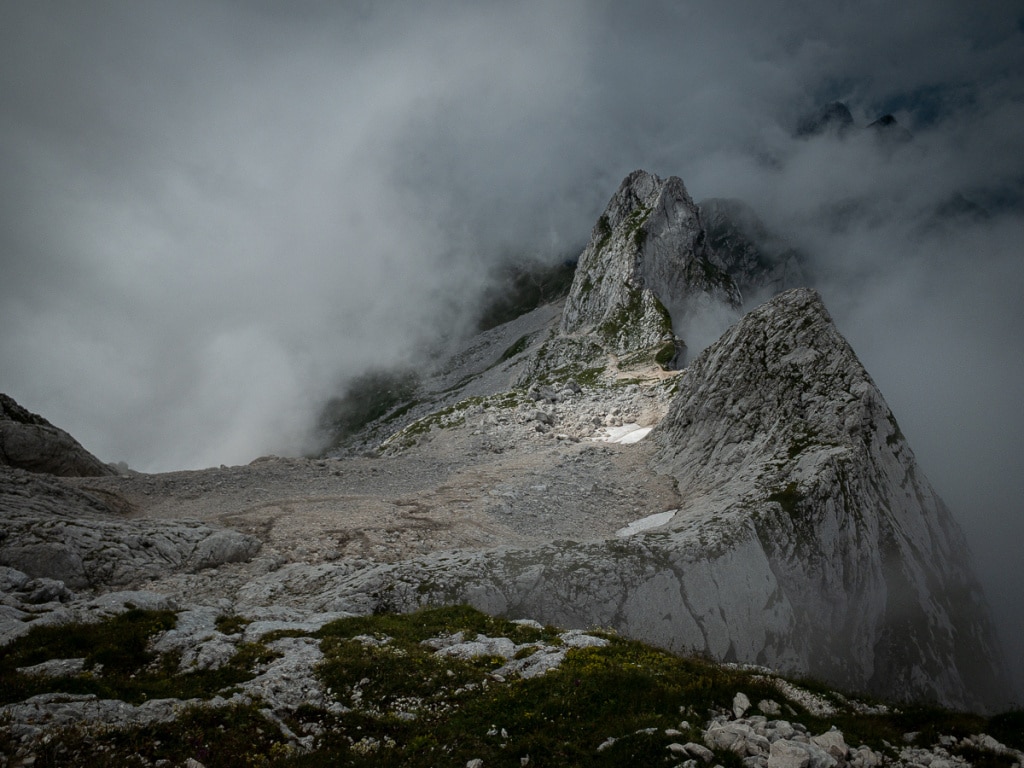
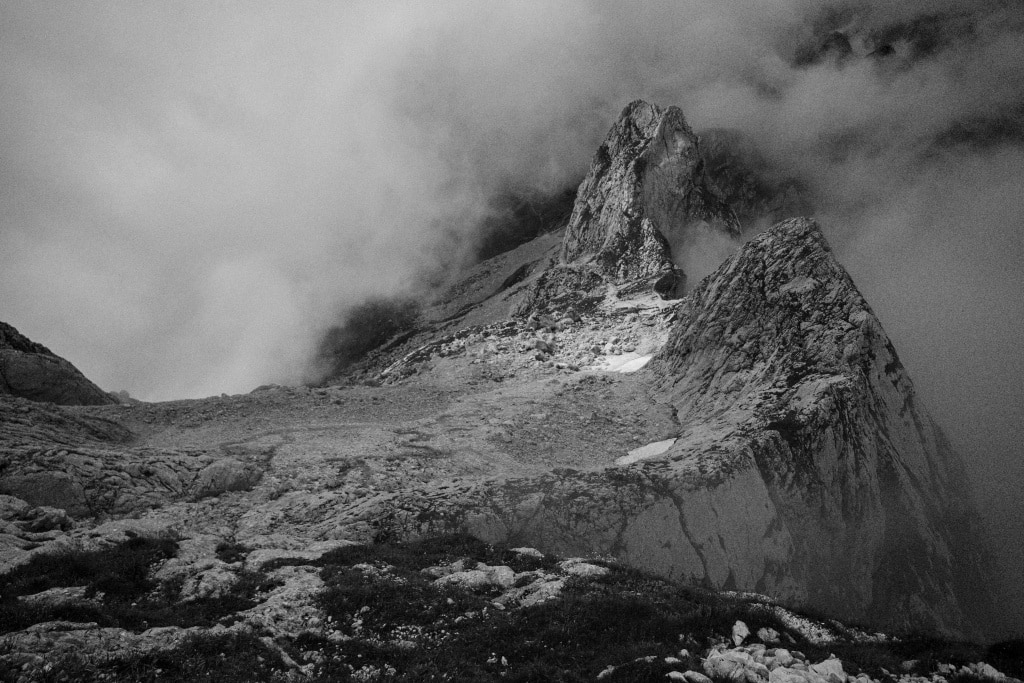
Mangart
Mangart is located in the Julian Alps on the border between Slovenia and Italy. It rises up to a height of 2,679 meters, and it’s the fourth highest mountain in Triglav National Park and a popular destination of mountain-lovers, mainly due to its beautiful views out onto the surroundings. It’s worth a visit even just because it has the highest road in Slovenia—one where you reach a height of 2,065 meters above sea level. But be prepared for sharp curves and several tunnels.
We set out for Mangart’s peak over its milder Italian approach, as we had neither the experience nor the equipment for the more complicated Slovenian via ferrata. However, the weather was not on our side during the ascent, it rained a full three times, and in the end we had to turn around at 300 meters below the peak due to the bad weather.

On my way up, I took most of my pictures on an iPhone XR with its camera in manual mode, using the Moment app. I set it to save photos to RAW, for better editing on a computer later on.
How I Edited This Photo
I uploaded the photo from the iPhone to my computer and opened it in Zoner Studio. Even though I shot it to RAW, it was still just a phone photo. So for me, my editing path was clear. I’d find a good choice among the freely available presets for Zoner Studio.
I opened up the photo in the Develop module and tried out all the presets one by one. The Sunbathing Memories preset from among the beach presets was the best fit for the given scene. It does a good job of emphasizing the drama of the place and of the weather that reigned there.
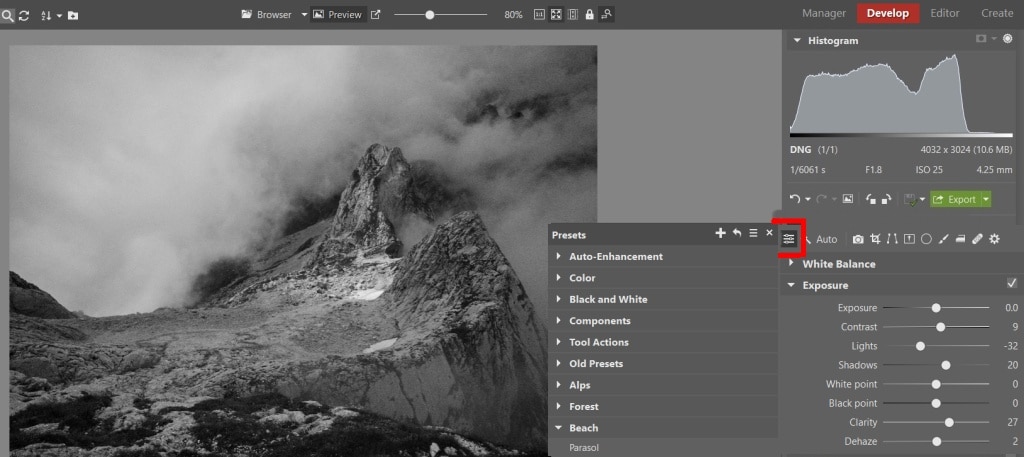
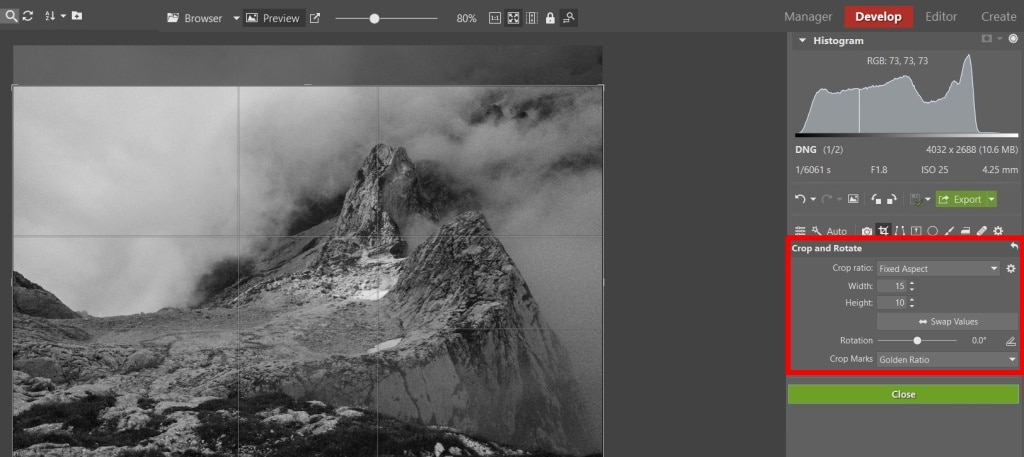
The only fine-tuning I did afterwards was a crop into a 15:10 ratio of sides using the Crop and Rotate tool (C).
Wrapping Up
If you ever come back from a vacation with a lot of photos, you’ll definitely appreciate quicker editing. And presets will help you with that. They let you show off your pictures to your family or friends immediately, and leave more complicated edits for later. Have you too brought back some nice photos from a vacation? Then show them off, for example on Zonerama.
There are no comments yet.