How Do You Create a Photo Collage? Layers and the Print Module Will Help

No matter whether you want to just place one photo inside another, or create a complicated collage, it’s easy to do in Zoner Studio. I’ll show you how to create a simple collage in a few clicks and lead you in detail through the process of creating more complex ones. As we’ll see, photo collages have a wide range of uses. You’ll be glad that you’ve learned how to make them.
As a photographer, you work on each photo separately, it’s true. But sometimes you need to squeeze pictures several into one. For example when you’re putting together something like an infographic, assembling a collage of vacation shots, producing a photo montage, or creating a motivational quote for social networks.
Two Roads to an Easy Collage
In Zoner Studio, there are two basic ways to produce a collage. They start out in two different places: in the Print module vs. the Editor module.
The Print module lets you create collages very quickly using predefined templates for “contact sheets,” which are regular grids with pictures and, optionally, information about them.
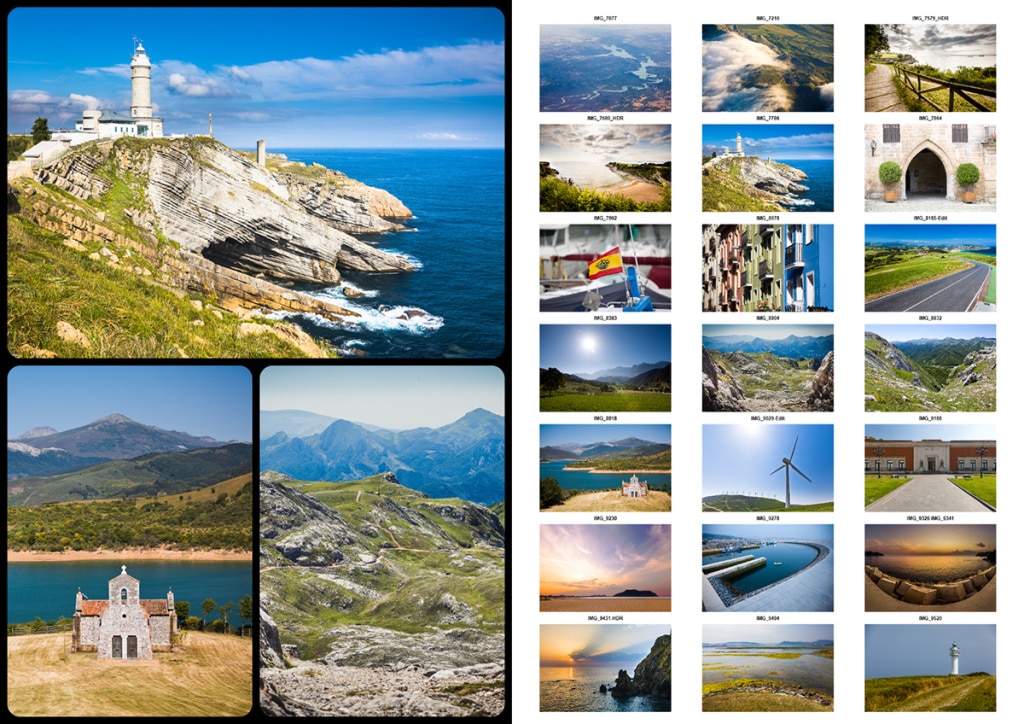
When you want to create a simple collage, or an actual contact sheet for that matter, the Print module is the ideal choice. You get your results in just a few clicks.
But to create something more complicated, reach for the Editor, module, which I’ll be discussing for the rest of this article. Here there are no predefined templates, so you have complete control over your results.
Use the Editor module when contact sheets’ little square frames aren’t enough—when you need more complicated shapes instead. Also reach for it when you want to overlap photos or use effects such as shadows, etc.
Work with Layers
You’ll be adding pictures to individual layers in the Editor and then working with and editing those layers one by one. Think of layers as stacked sheets of paper that you can move or re-order at any time.
Start With a Picture or Empty Space
Before you start, it’s good to have at least a rough idea of what you want to create. Almost everything can be fixed later, so you don’t have to have everything planned down to the very last detail, but planning ahead will save your work.
The first decision awaits you right at the start—what will you use as your foundation?
If you’ll be using a picture that you’ll be pasting smaller pictures into, start out your work in the Manager module: find the file you need there and then switch to the Editor.
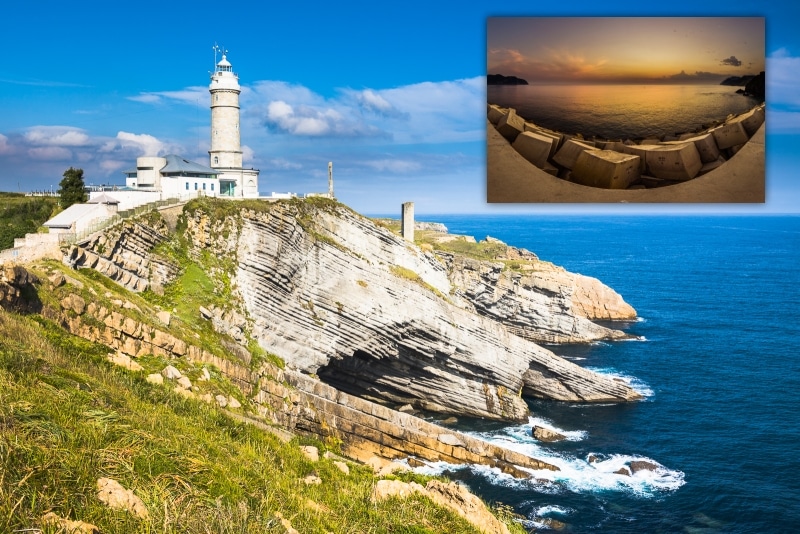
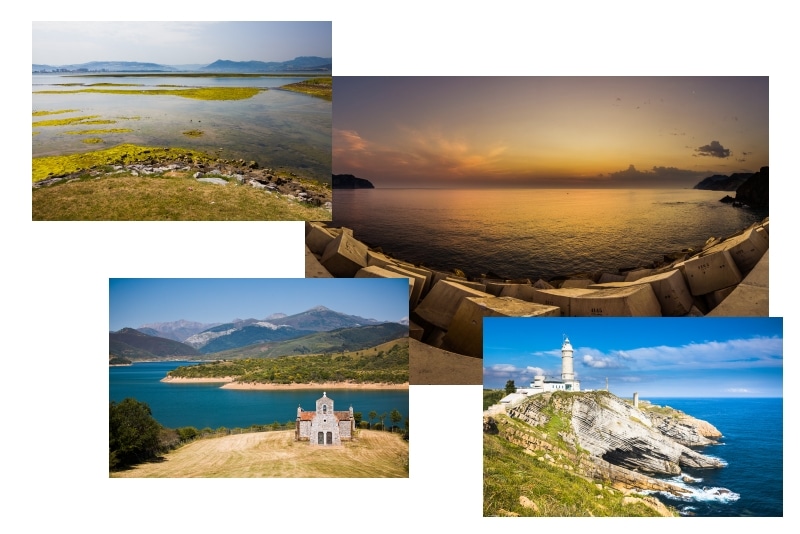
Meanwhile, if your plan is to lay out all of your pictures within an empty space instead, it’s better to start out in the Editor directly, roll down the File menu and use the New… item (Ctrl + N).
Set the size of this “canvas” based on how you’ll be using the collage. For the web, a long side of 1,000 to 2,000 pixels is enough, while for printing on a standard sheet of paper at good quality, you’ll want to have at least 2,480 x 3,508 pixels.
Pasting in the Pictures
Once you’ve got your base picture or blank space ready in the Editor, it’s time to add further photos. The steps for adding new photos are the same each time:
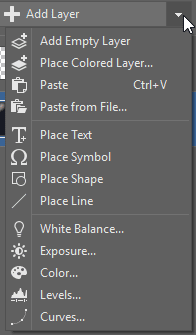
Above the layer list, there’s an Add Layer button, with a small down-arrow button next to it. Click this button; a menu will appear. Use Paste from File… in that menu.
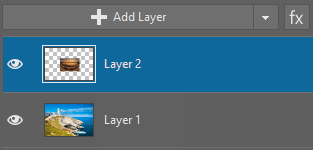
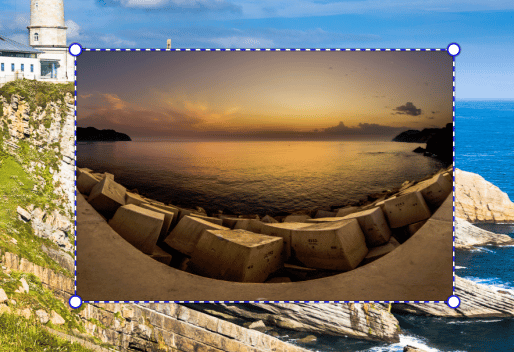
Meanwhile, Zoner Studio automatically activates the Move and Transform tool (V), so you’ll be able to reposition the new layer immediately. The guide points that appear around the layer are another sign that you can move and transform it.
Moving and Transforming
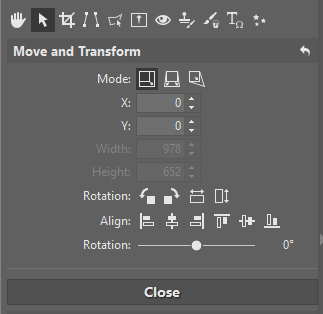
With the Move and Transform tool (V) active (either because you’ve just added a layer, or because you activated the tool yourself), click and drag the layer to move it. The right panel shows info on the layer’s current position.
To move it more precisely, use the cursor keys, which shift it by 1 pixel per tap. To shift it by 10-pixel steps instead, hold down the Ctrl key while tapping the cursor keys. To set precise coordinates, type them into the X and Y boxes on the right. Don’t get too stressed here, as you can always move the picture again later.
For resizing a pasted picture, the steps are a bit different. Use the same tool, but this time drag from one of the circle marks at the edge of the layer. When you start resizing the layer, Apply and Cancel buttons appear on the right. That means that you’re in a mode where the only thing you can do is resize the current layer.
To leave it, you have to apply your changes (settle on using them) or cancel them (throw them away). After you apply them, Zoner Studio recalculates the layer for its new size, irreversibly changing its dimensions and image quality. When a layer is made smaller, data is lost, and (short of re-pasting it), it can never be restored to its original size at its original quality. So think carefully before resizing pasted pictures.
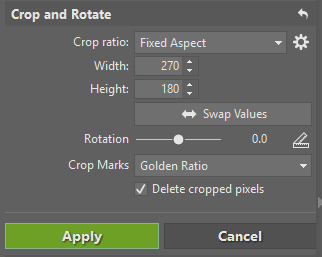

Tip: When you’re adding multiple pictures and you want them to all have the same size, it’s faster to prepare them at the right size in advance. To do that easily, use the Manager module. Just select all the pictures and use Export in the right panel. This shows a window; in that window, set TIFF as the Format instead of JPEG, to preserve the pictures’ quality, and Resize the pictures to meet your needs.
Layer Effects
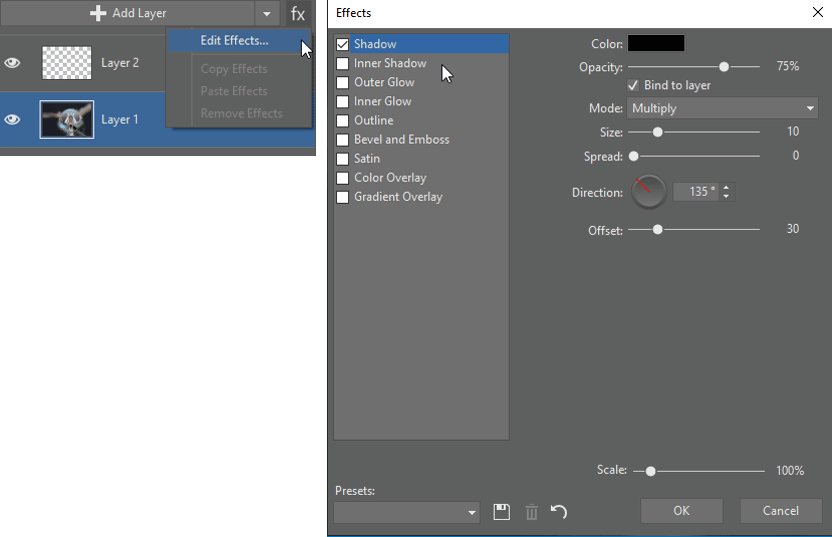
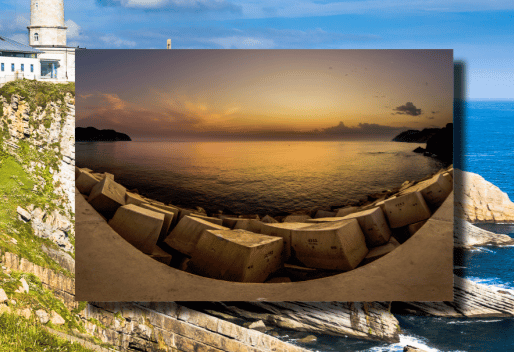
Every layer can have effects applied to it. These are automatically updated if the layer is later changed. For example a shadow or outline or covering the layer with a color or gradient. To add these effects, click the fx button that’s above the layer list. A window with effect settings for the current layer then appears—like the shadow effect in the illustration below.
The Many Shapes of Layers
A layer doesn’t have to have a rectangular shape. Every layer can have what’s called a mask, which defines which parts of it are visible, and which ones are invisible (transparent), or partly visible (translucent).
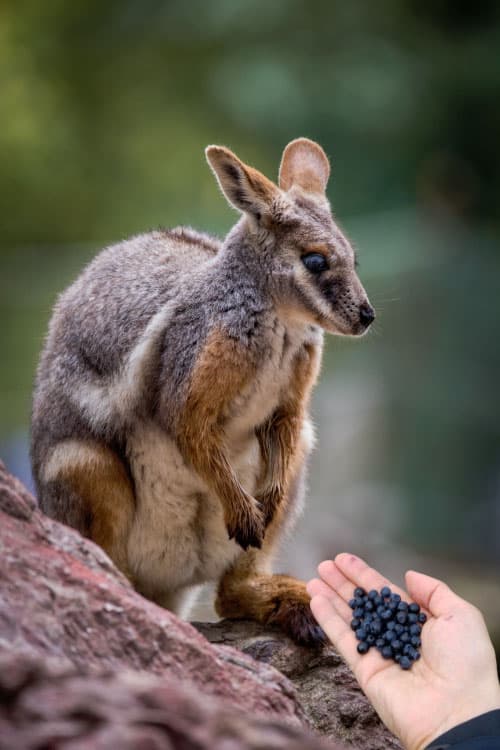
And masking is exactly what was used for the example below. Here’s what I did. I first opened the kangaroo photo in the Editor and pasted the layer with the hand and the mountains into it using the steps I’ve described above.
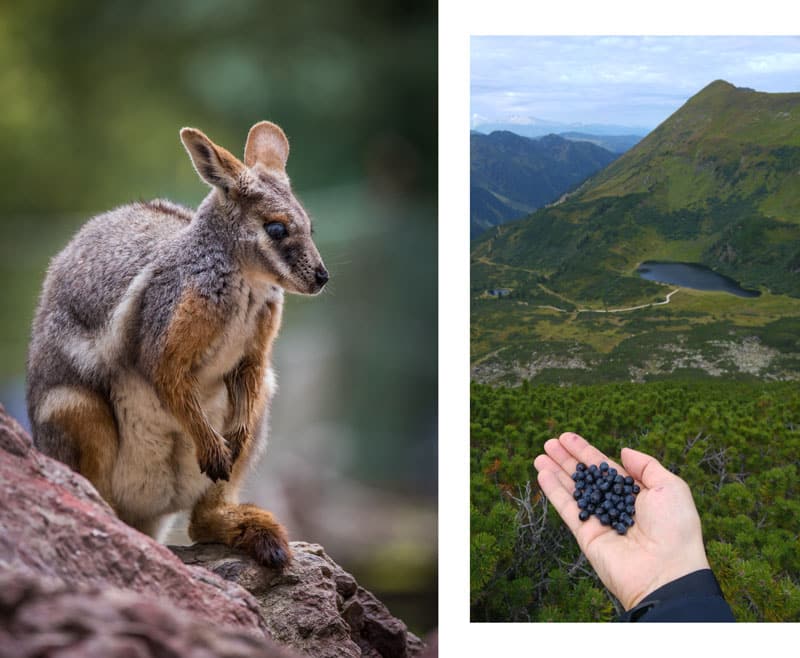
Then I selected the hand itself using the selection tools. The best way to use these tools varies from case to case, but here I took advantage of the fact that the hand has a completely different color than its background. So I chose the Magic Wand tool (W) with an appropriate Tolerance and gradually Shift-clicked to add more and more parts of the hand until all of it was selected. I didn’t worry about the blueberries at that stage, because I was concerned with getting the hand selection as precise as possible.
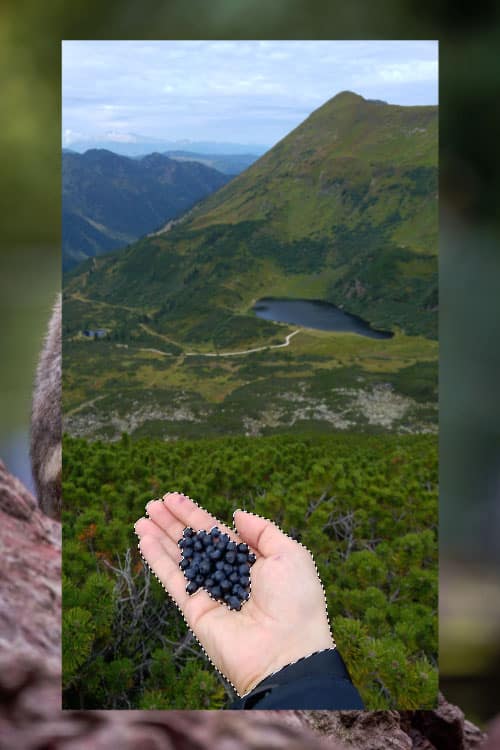
Adding the blueberries to the selection after this is easy because I don’t need any precision for that. I just switch from the Magic Wand (W) to the Lasso (L) and once again Shift-click to roughly frame the blueberries.
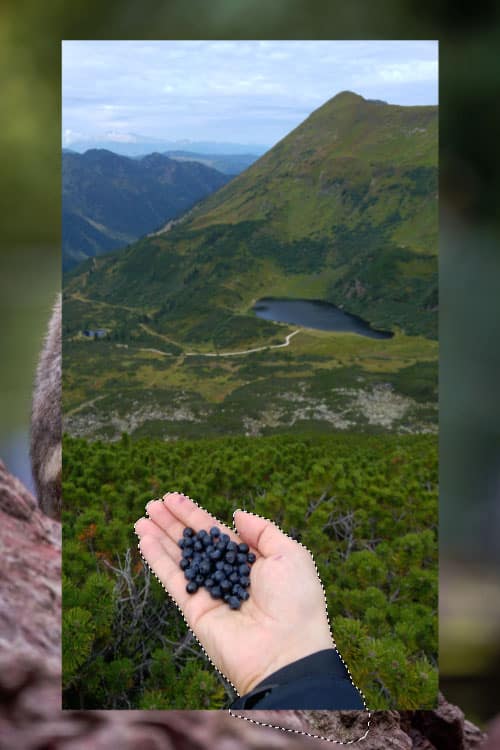
Once the masking is done, I right-click on the current layer in the layer list, choose the Mask item, and then click Reveal Selection beneath that. The selection is turned into a layer mask, and so everything but the selection is hidden. I now no longer need the selection, so I press Esc to cancel it.
I then reposition the layer again using the Move and Transform tool (V), and I’m done. After a process like this, you can make other edits too—change both the layer mask and the picture data and, for example, brighten layers, adjust their colors, or even draw over them. That’s the enormous power of layers.
It’s Easy
Joining multiple pictures into one isn’t complicated, and the workflows I’ve mentioned and described are useful in a variety of situations, from combining two pictures to creating very complex collages using dozens of source pictures. You can do practically anything with layers; what you make is just up to your creativity. I’ve described the specific steps for one situation, but if you want to learn more, go on and read our more general article about work with layers.

There are no comments yet.