How To Add a Frame to Your Photos
Most people look at photos on their monitor or phone. Printed photos are more for family albums and professional photographers. Still, printed photos are the best way to present your photography. Frames that you can easily add in Zoner Studio can help you better showcase your photos.
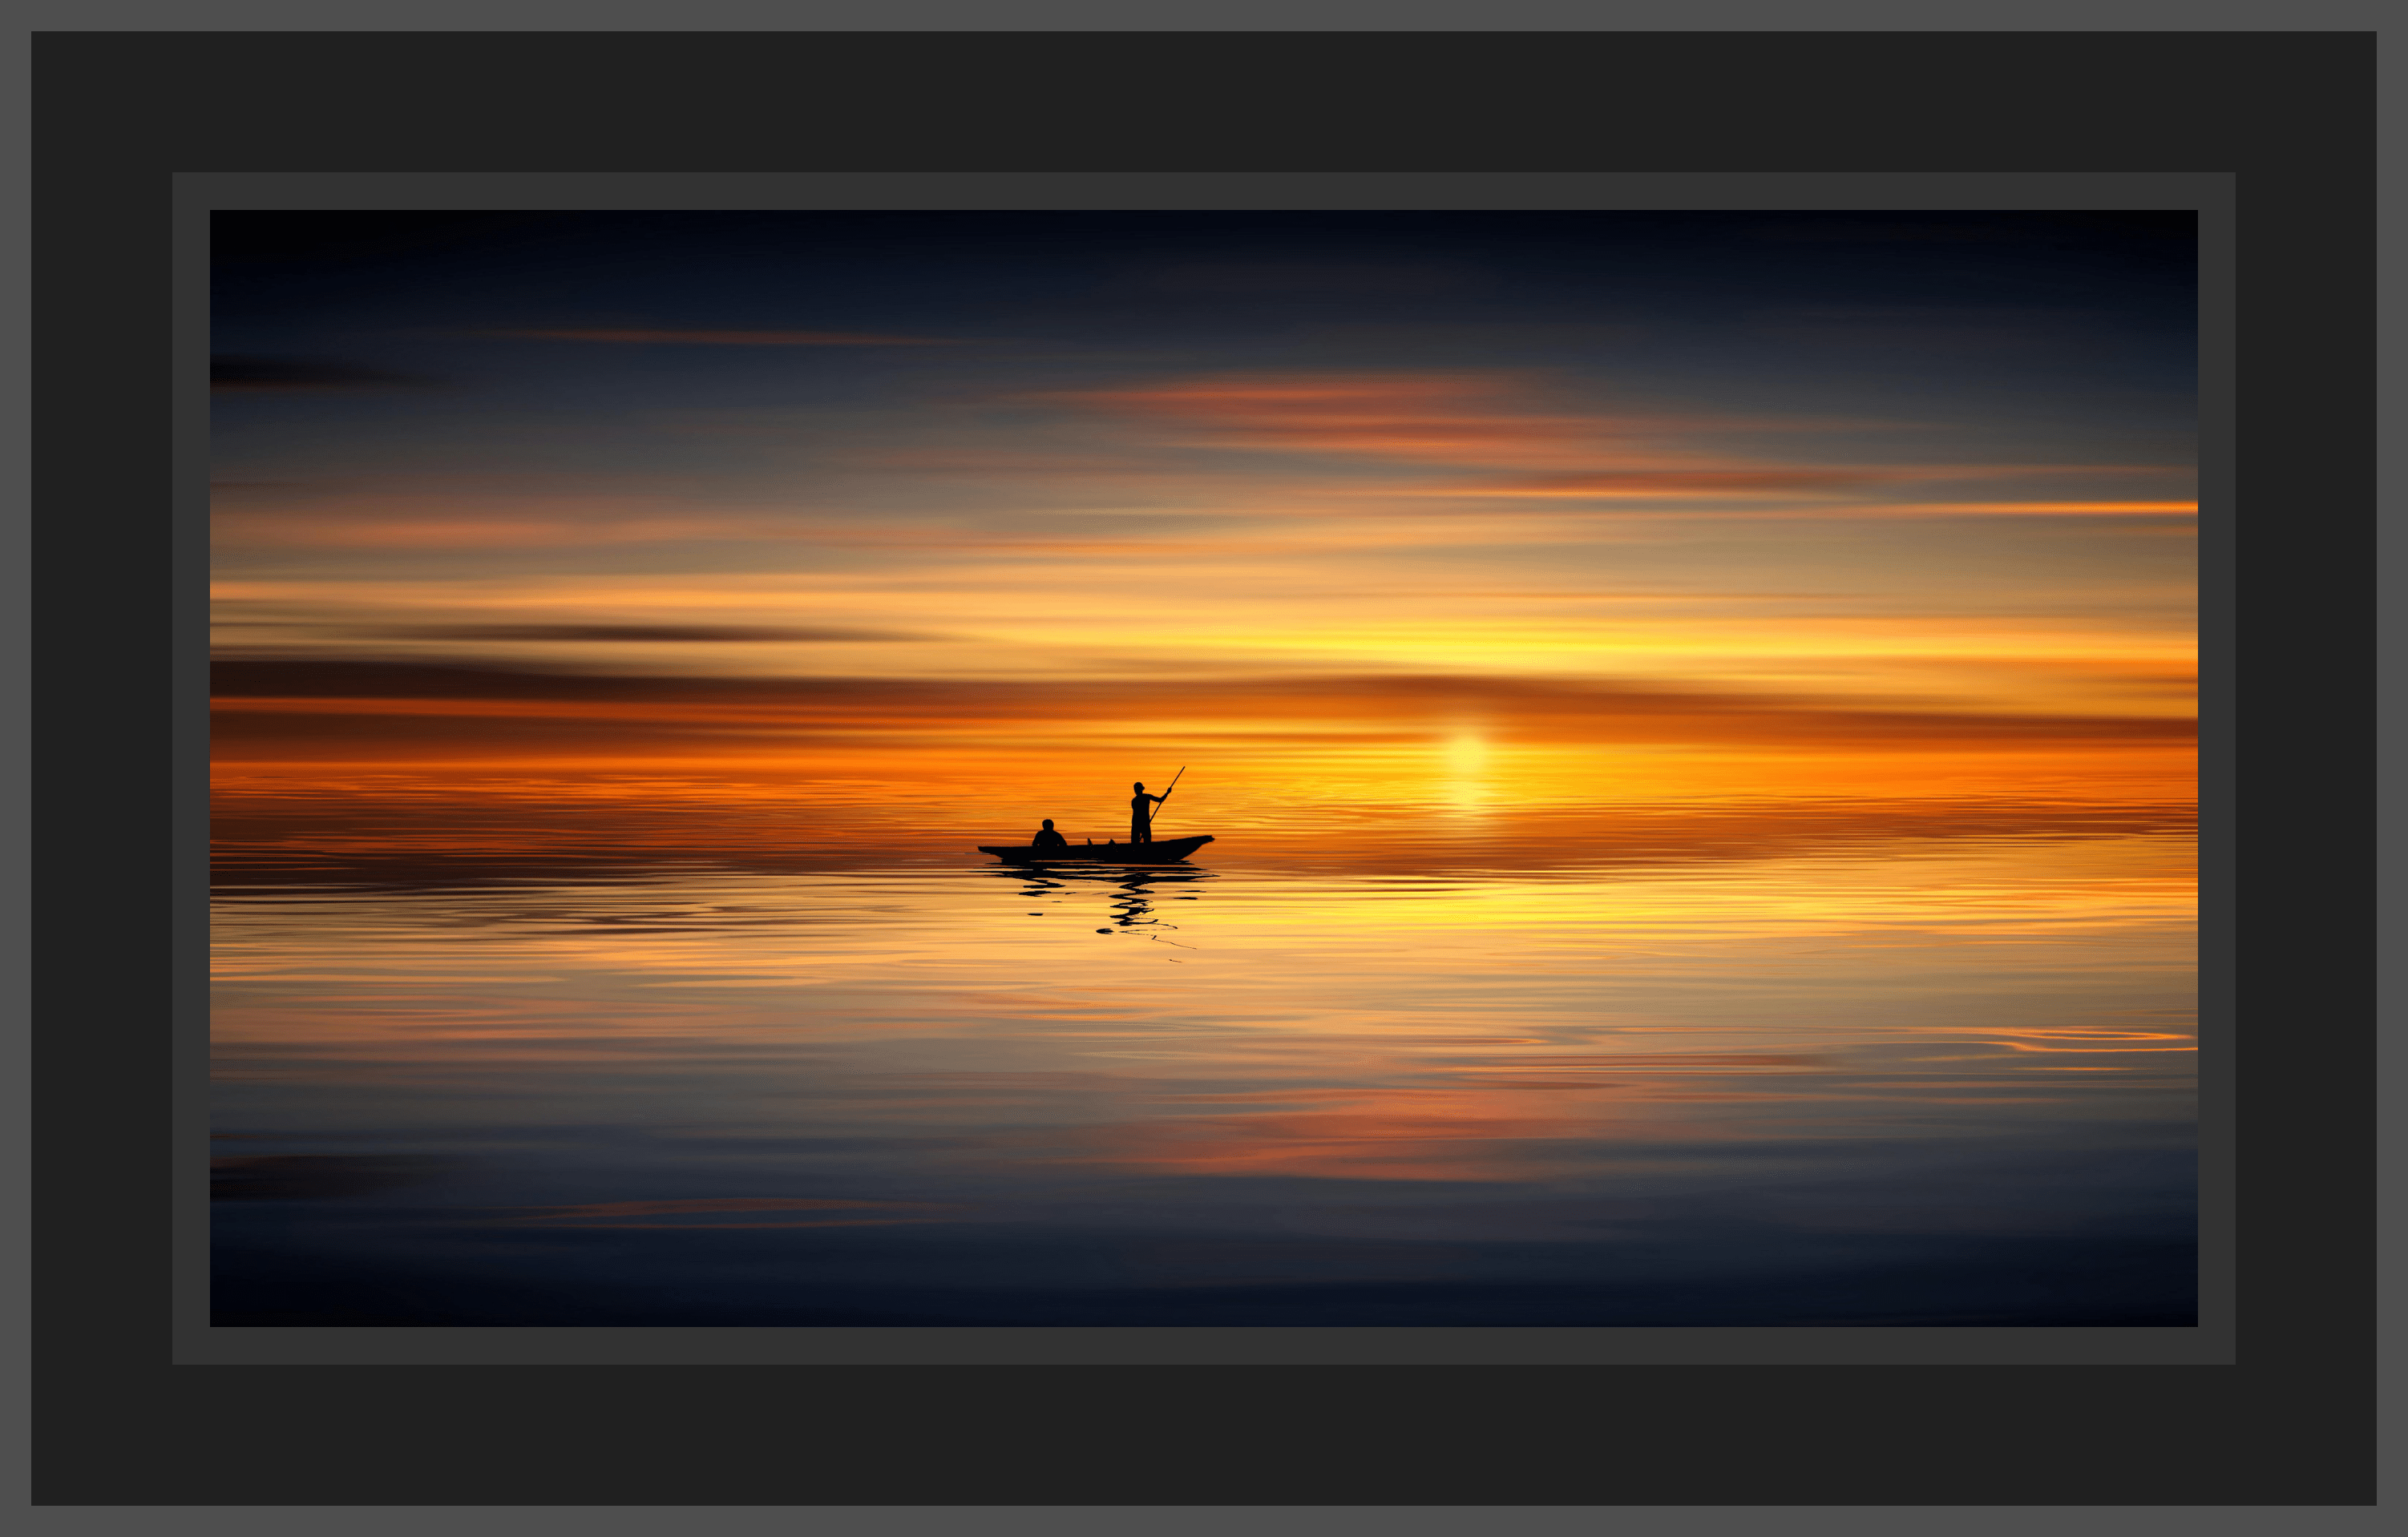
Final adjustments include putting the finishing touches on your photos before displaying them. In most cases, this process includes mounting or framing your photos. If you choose not to frame your photo, it’s a good idea to add a thin frame to emphasize your picture’s message.
Less is more when it comes to adding a frame to your photos, just like with adding a watermark or signature. Stick to tried and tested colors, like black and white, or a combination of the two. There are several different ways you can add frames to your photos using Zoner Studio.
In this article, we go over the quickest and easiest ways to add frames to your photos.

Before you add a frame, be sure to make a copy of your photo. You never know when you’ll need the original. After you’ve added a frame, you can’t go back to the original image.
To add a frame, open your photo in the Manager module. Then, choose Edit | Canvas & Borders (Ctrl+Shift+B). A window opens with a preview of the image before and after editing.
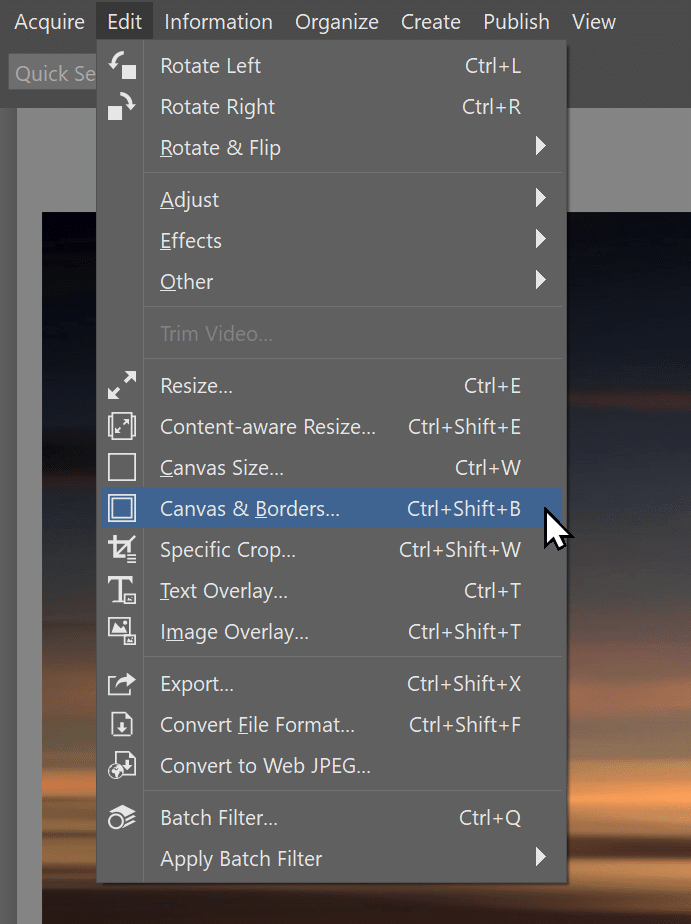
Maximize the Canvas u0026amp; Borders window to full screen. This gives you enough space to view the frame you choose in the preview.
Inside or outside frame
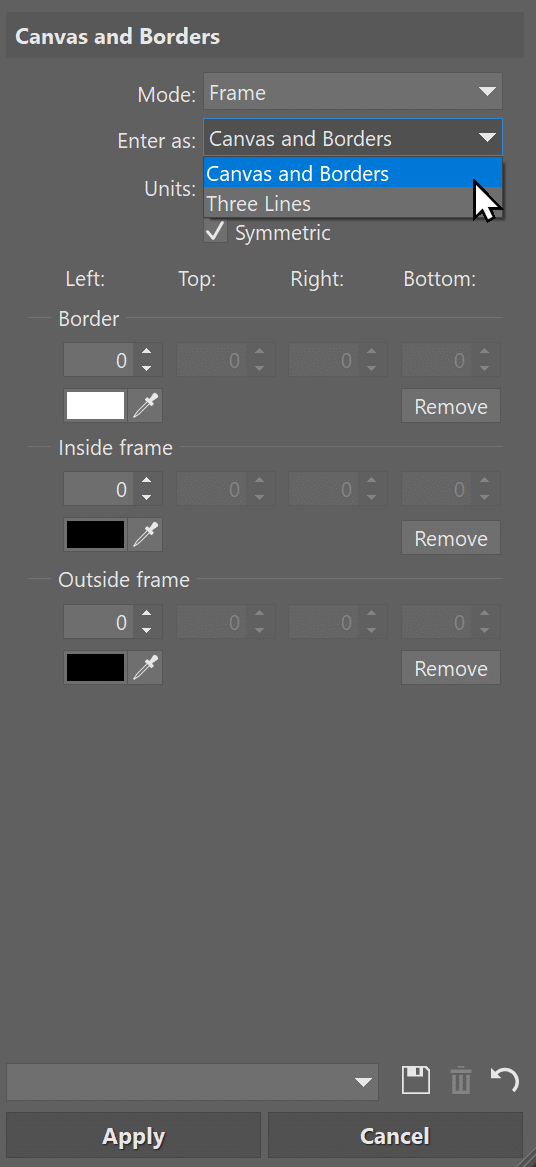
Before setting your frame’s size, you have to choose how to create the frame. You can choose from three options: Frame, Preserve size, or Preserve aspect ratio.
- Frame—Adds a frame to the outside edge of the photo, increasing the size.
- Preserve size—Adds a border from the edge of the image inwards, so part of the photo is covered, but the dimensions remain the same.
- Preserve aspect ratio—Covers part of the photo with the frame to keep the same aspect ratio as the original image.
The first option, Frame, is the least destructive option.

How your frame is created is on the very next line, Enter as. You have a choice of two options, Canvas and Borders or Three Lines. Select the unit for creating the frame—Pixels, Percent of height, or Percent of width. The simplest option is to use Three Lines and set the unit to Pixels.
Frame or lines?
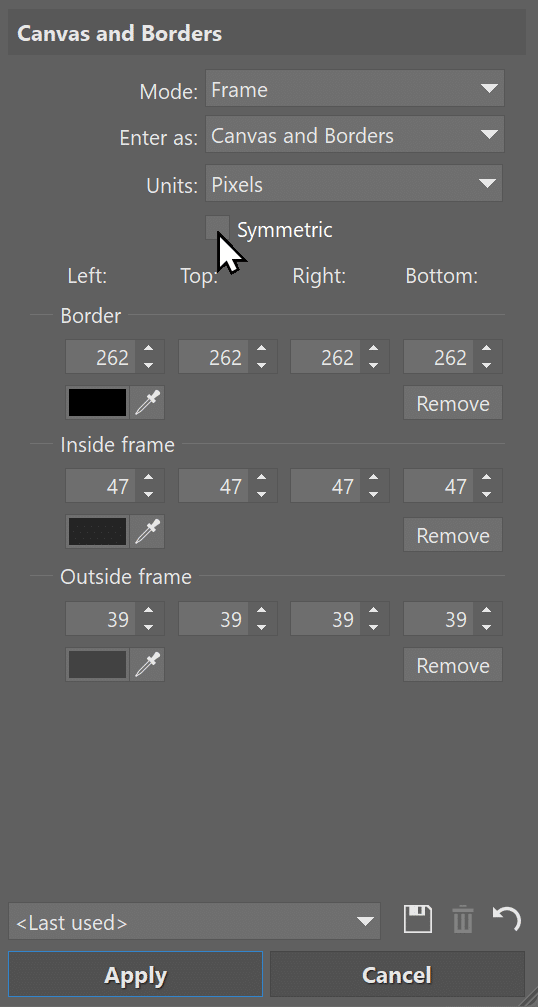
Setting the frame size is very easy. Before you get started, try two different frame options—Three Lines or Canvas and Borders. Everyone can find something different that suits them.
The key difference is that with Three Lines, you specify the width and color of each line from the edge of the image outwards. For Canvas and Borders, you specify the width of the border and the width of the inside and outside frames. The border is as wide as the width of the inside and outside frames.
Here is some number crunching to demonstrate making the first frame white with a width of 5 points and the second black with a width of 10 units.
- For the Three Lines option, enter 5 units for the first line and 10 units for the second line.
- For Canvas and Borders, the border will be 15 units (black) and the inside border will be 5 units (white).
The Symmetric frame checkbox is useful for adding a border on all four sides. When you use this option, you only need to enter the width of the frame in the first field and the others are automatically calculated. However, if you want to make the frame wider at the bottom, like for Polaroid-style photos, you have to enter all the values manually.
Frames can add a touch of class to your photos and Zoner Studio makes adding them a snap!
There are no comments yet.