Beginner’s Guide: How to Develop RAW Images
RAW images give photographers far more editing flexibility than JPEG. In the Develop module of Zoner Studio, you can find everything you need—from exposure adjustments and advanced color correction to AI tools for local editing. Learn how to open, edit, and export RAW files step by step.
In this article, you’ll learn:
- why RAW is better than JPEG and when it makes sense to shoot in RAW
- how to open and edit RAW files in the Develop module of Zoner Studio
- how to fine-tune exposure and colors
- how to export RAW files
While JPEG works well for quick sharing, RAW preserves image data directly from the camera sensor. This means greater dynamic range and more flexibility when correcting exposure or white balance, giving you results that look more natural and professional.
You also don’t have to worry about noticeable quality loss with RAW, because the data isn’t compressed nearly as much as JPEG. Shooting in RAW is a must if you take photography seriously.

Processing RAW files
RAW photos always need to be edited and exported. But the good news is, it’s not complicated. Basic RAW editing consists of the following steps:
- Open RAW image in Zoner Studio
- Adjust exposure and colors
- Sharpen
- Export
You can always add more adjustments as needed, but these steps apply to nearly every RAW photo.
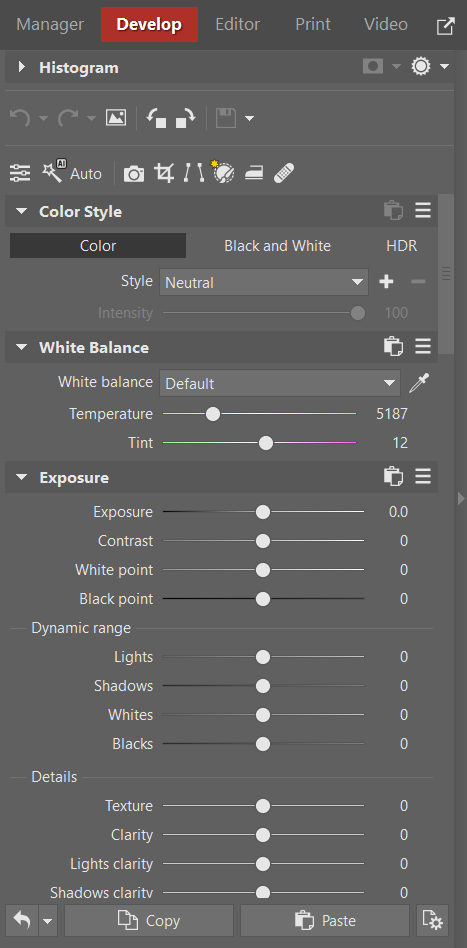
Edit RAW photos in the Develop module
The first step is to open the photo in the Develop module of Zoner Studio. The right panel is where you can find all the tools you need to process your RAW files.
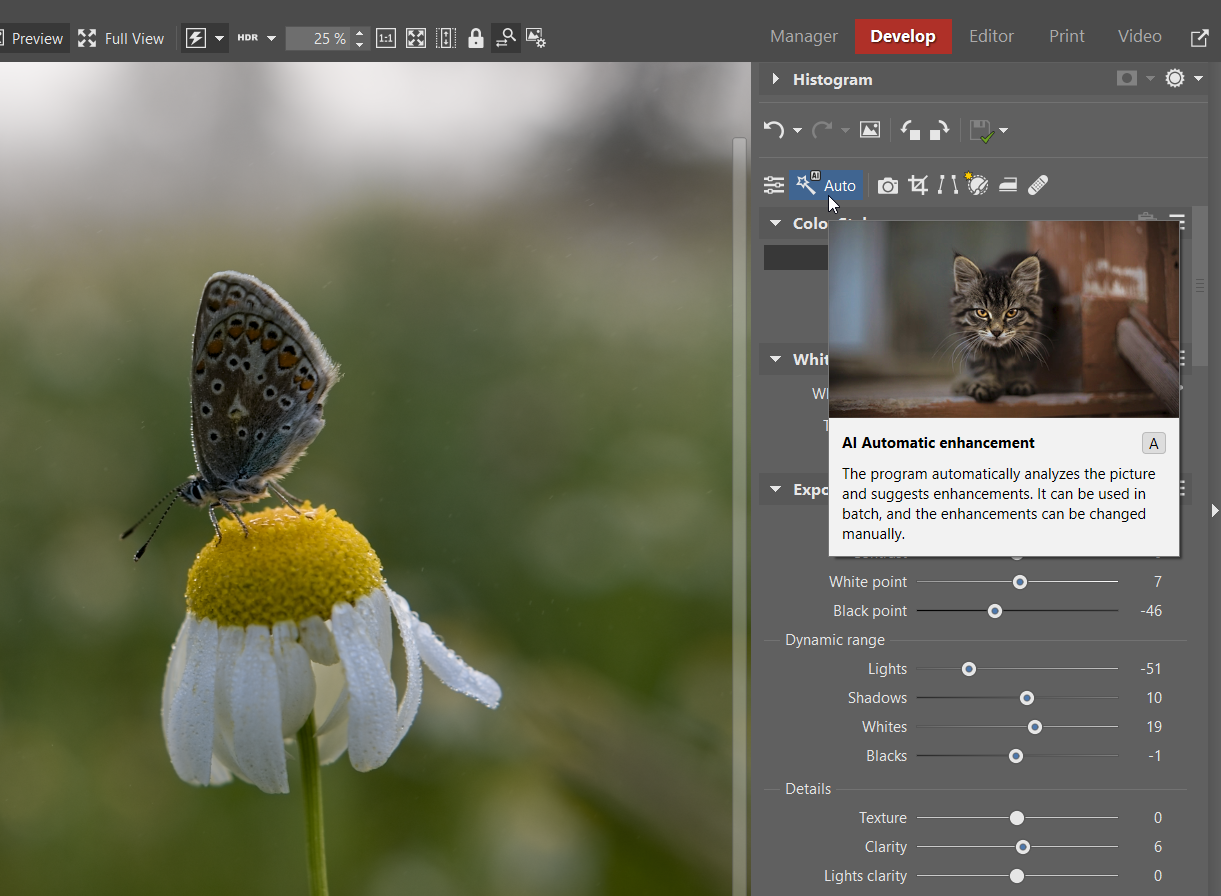
Start with Automatic Enhancement
A very simple yet effective first step is Automatic Enhancement (A), powered by AI. Using its algorithms, Zoner Studio analyzes the photo and adjusts exposure accordingly. It’s often a great starting point for further editing.
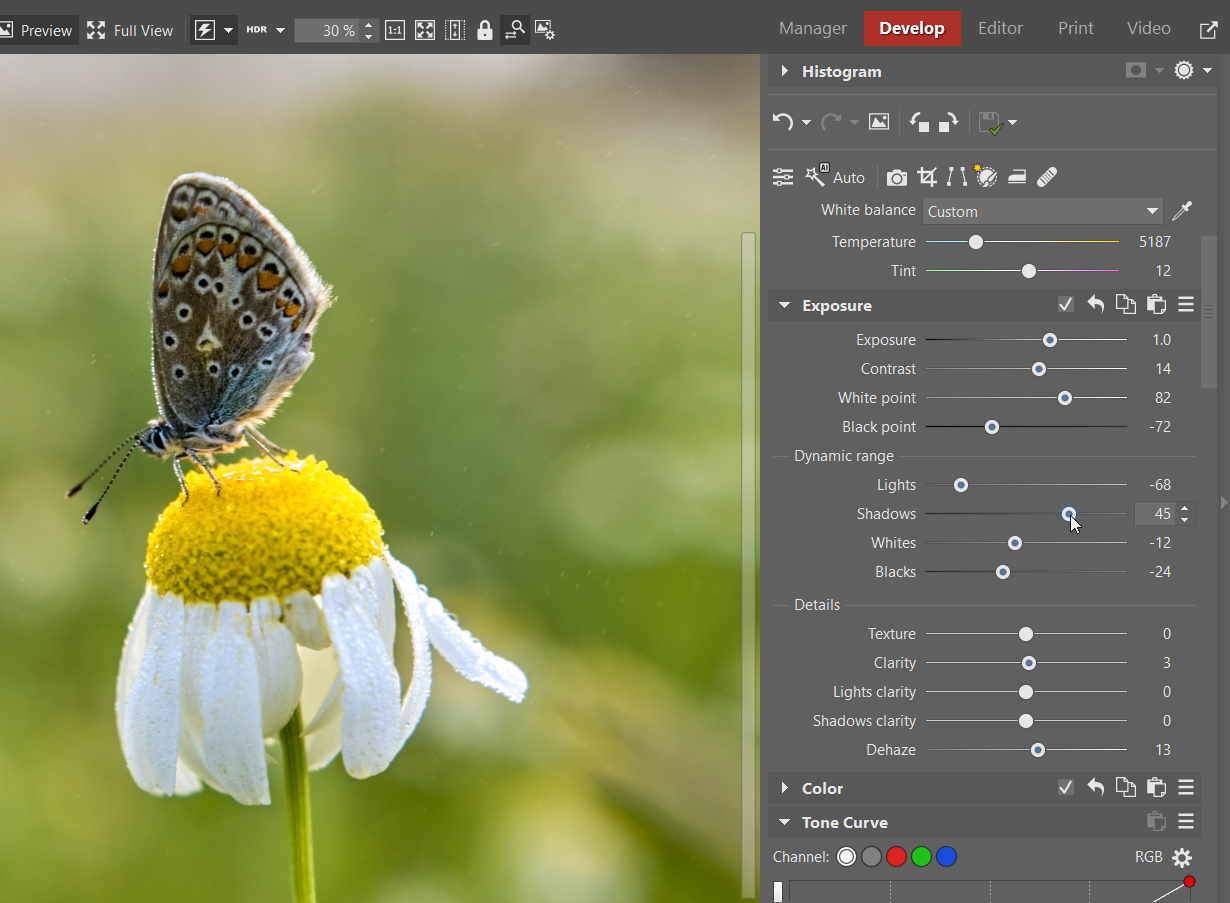
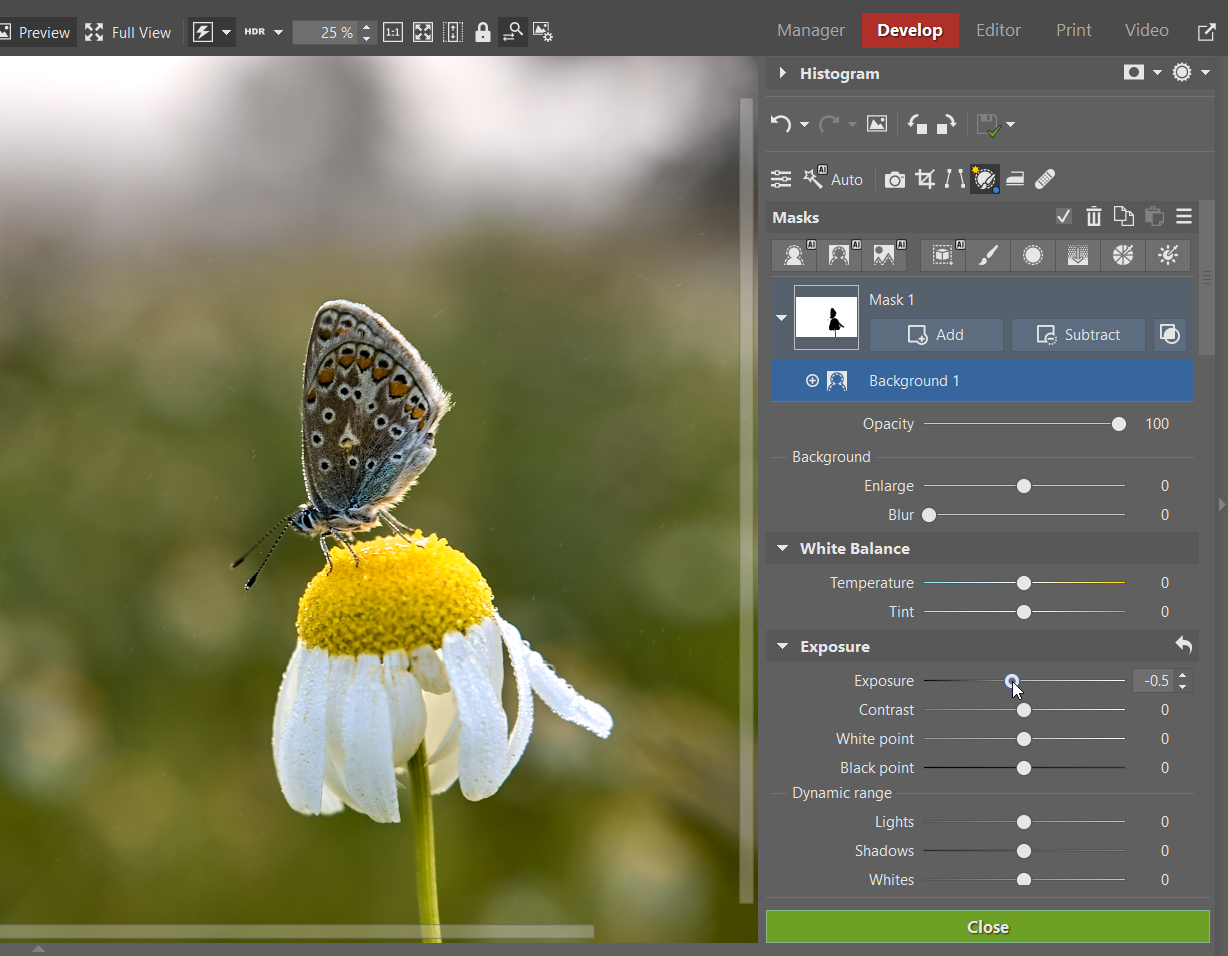
Fine-tune Exposure
But your work doesn’t end there; Automatic Enhancement is just the beginning. You’ll want to fine-tune the photo to your liking. In this example, I mainly adjust the sliders under Exposure and Dynamic Range. This brightens the image and gives it more contrast.
The image is still lacking something even after adjusting exposure. Let’s adjust the colors by increasing Vibrance and Saturation.
Sometimes it’s useful to adjust individual colors with Color Shift. In this case, I warmed up the yellows and greens and reduced their saturation since they were too dominant.

Reduce noise and sharpen
Slightly reducing noise and sharpening are always useful steps. Be sure to zoom to 100% so you can judge the intensity of your adjustments accurately. For this photo, noise wasn’t an issue, so a touch of sharpening did the trick.
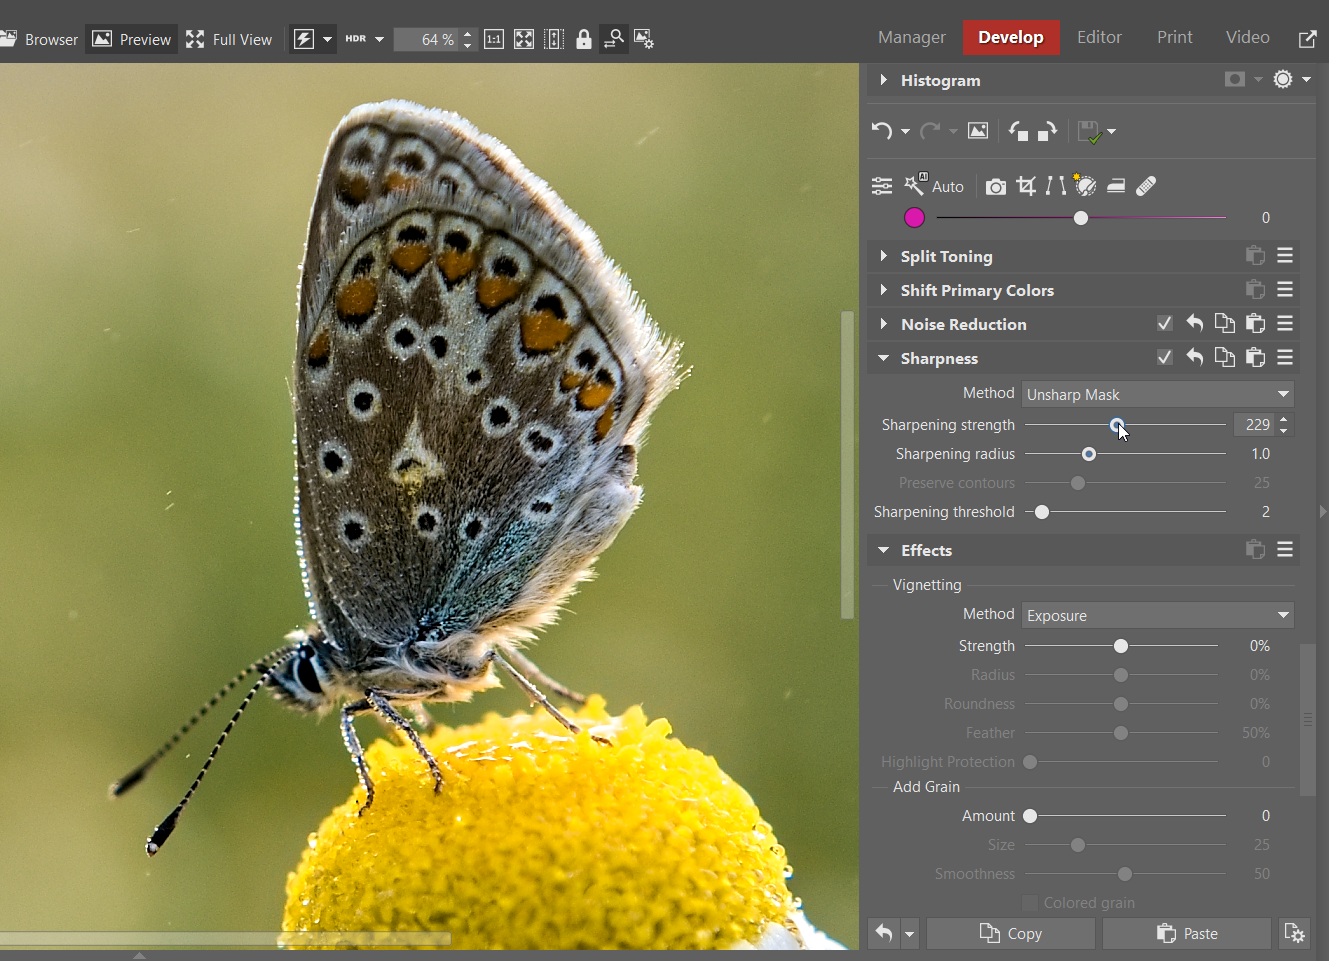
Final local adjustments
Being able to adjust specific parts of a photo is often essential. With AI masking, you can do it in just a few clicks. I want to darken the background so the butterfly and flower stand out more in this photo. I go to the right panel of the Develop module, open Local Adjustments (L), and select the Background AI mask.

Ready to Export
Once you’re happy with your editing, click the green Export button in the bottom filmstrip to save your final photo. If you’re working on a whole series of photos, it’s best to edit them all first and then export them as a batch. If the photos were taken under the same conditions, you can also use batch editing for even faster results.

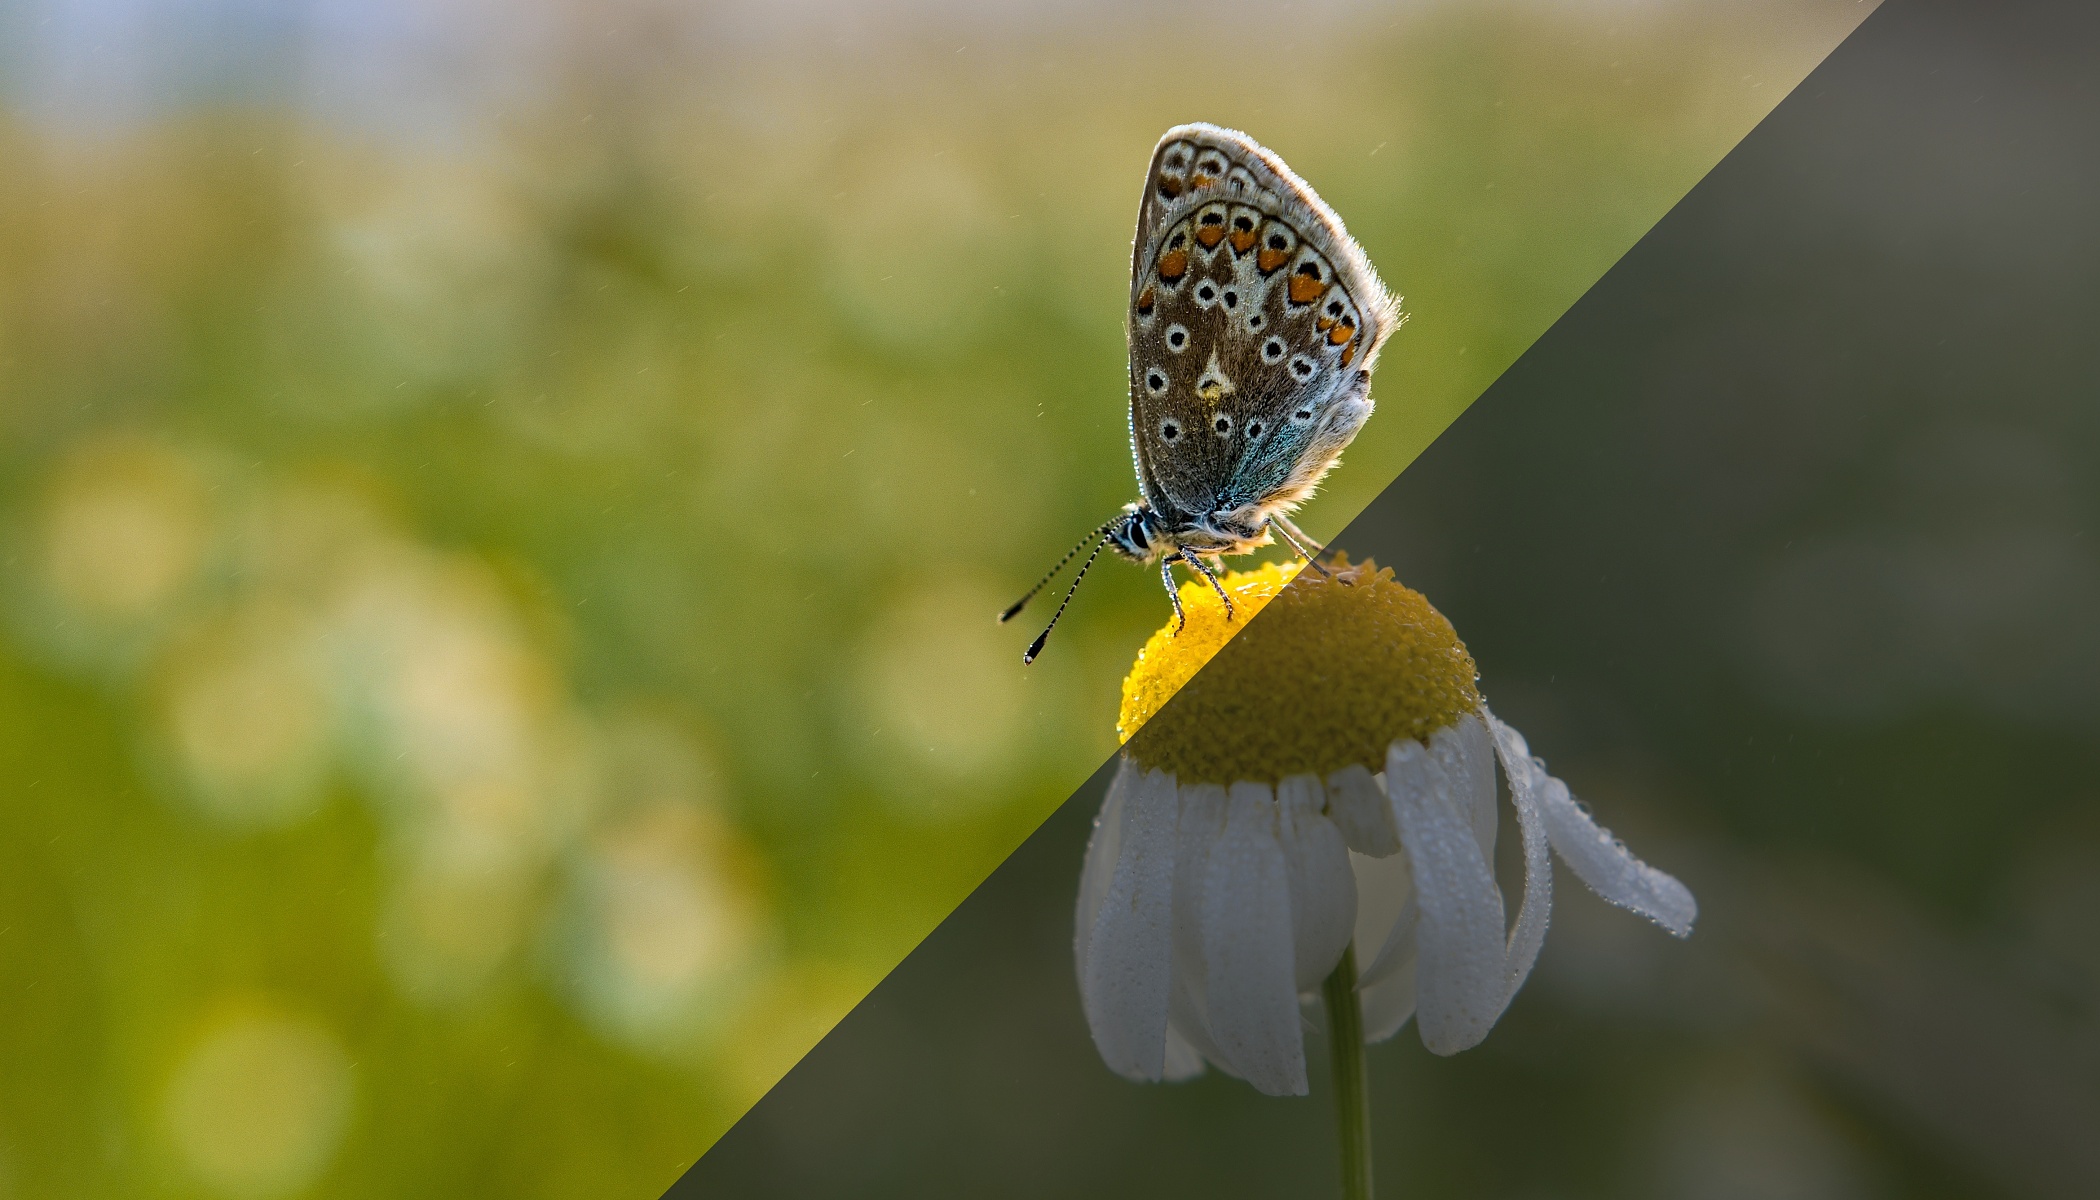
Compare before and after
There’s usually a big difference between the original RAW image and the final photo. RAW images often look dull and lack contrast, but after editing them in Zoner Studio, they match your vision. That’s the power of RAW—it doesn’t limit your creativity and gives you the freedom to turn your shot into the photo you imagined when you took the photo.
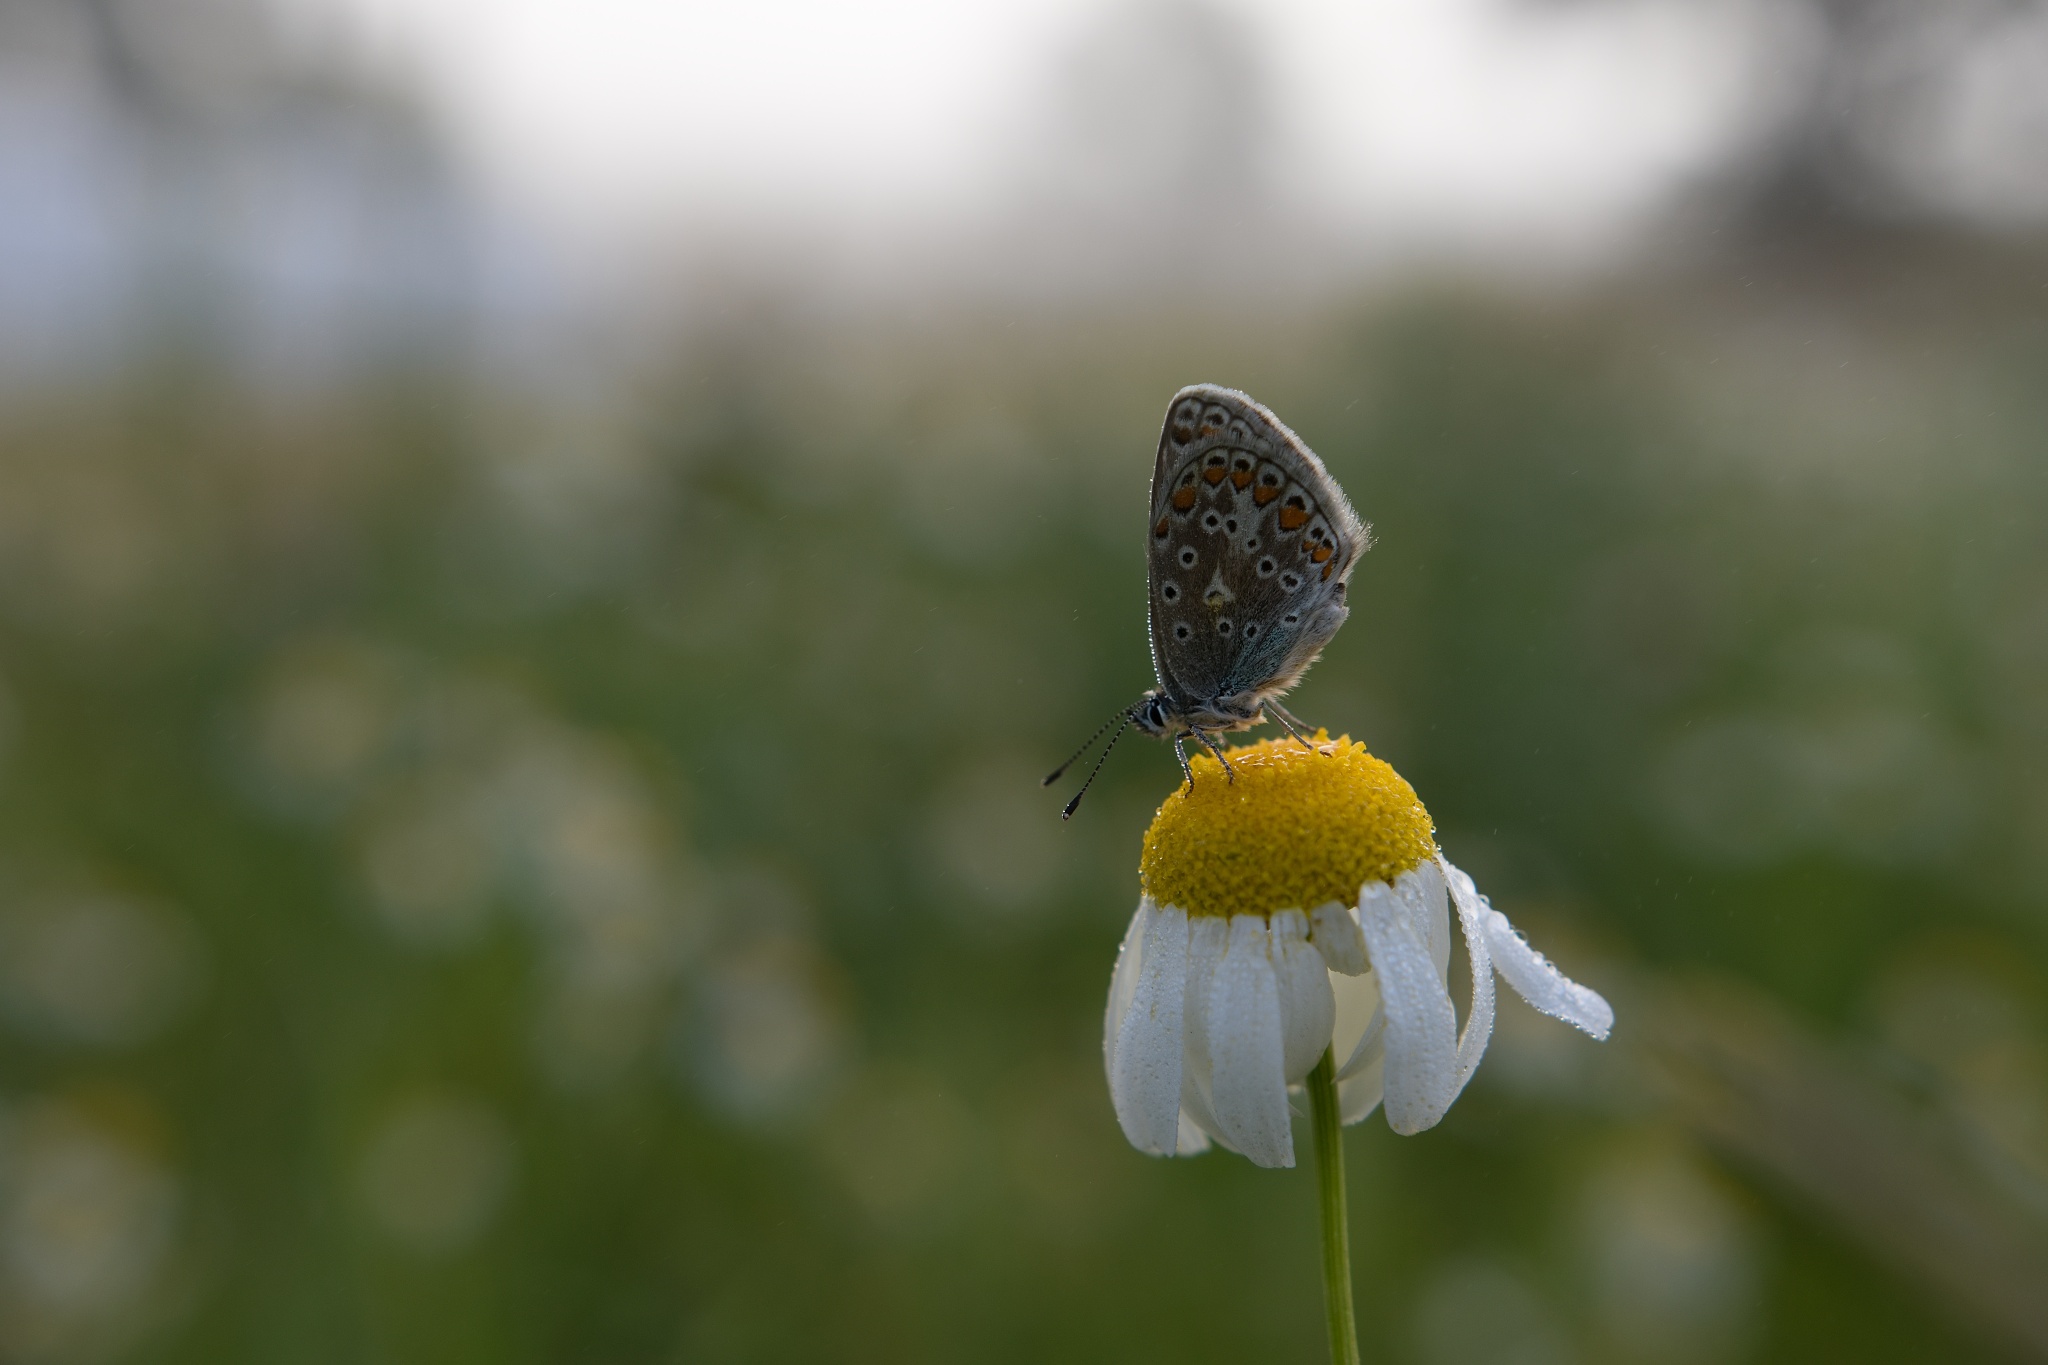
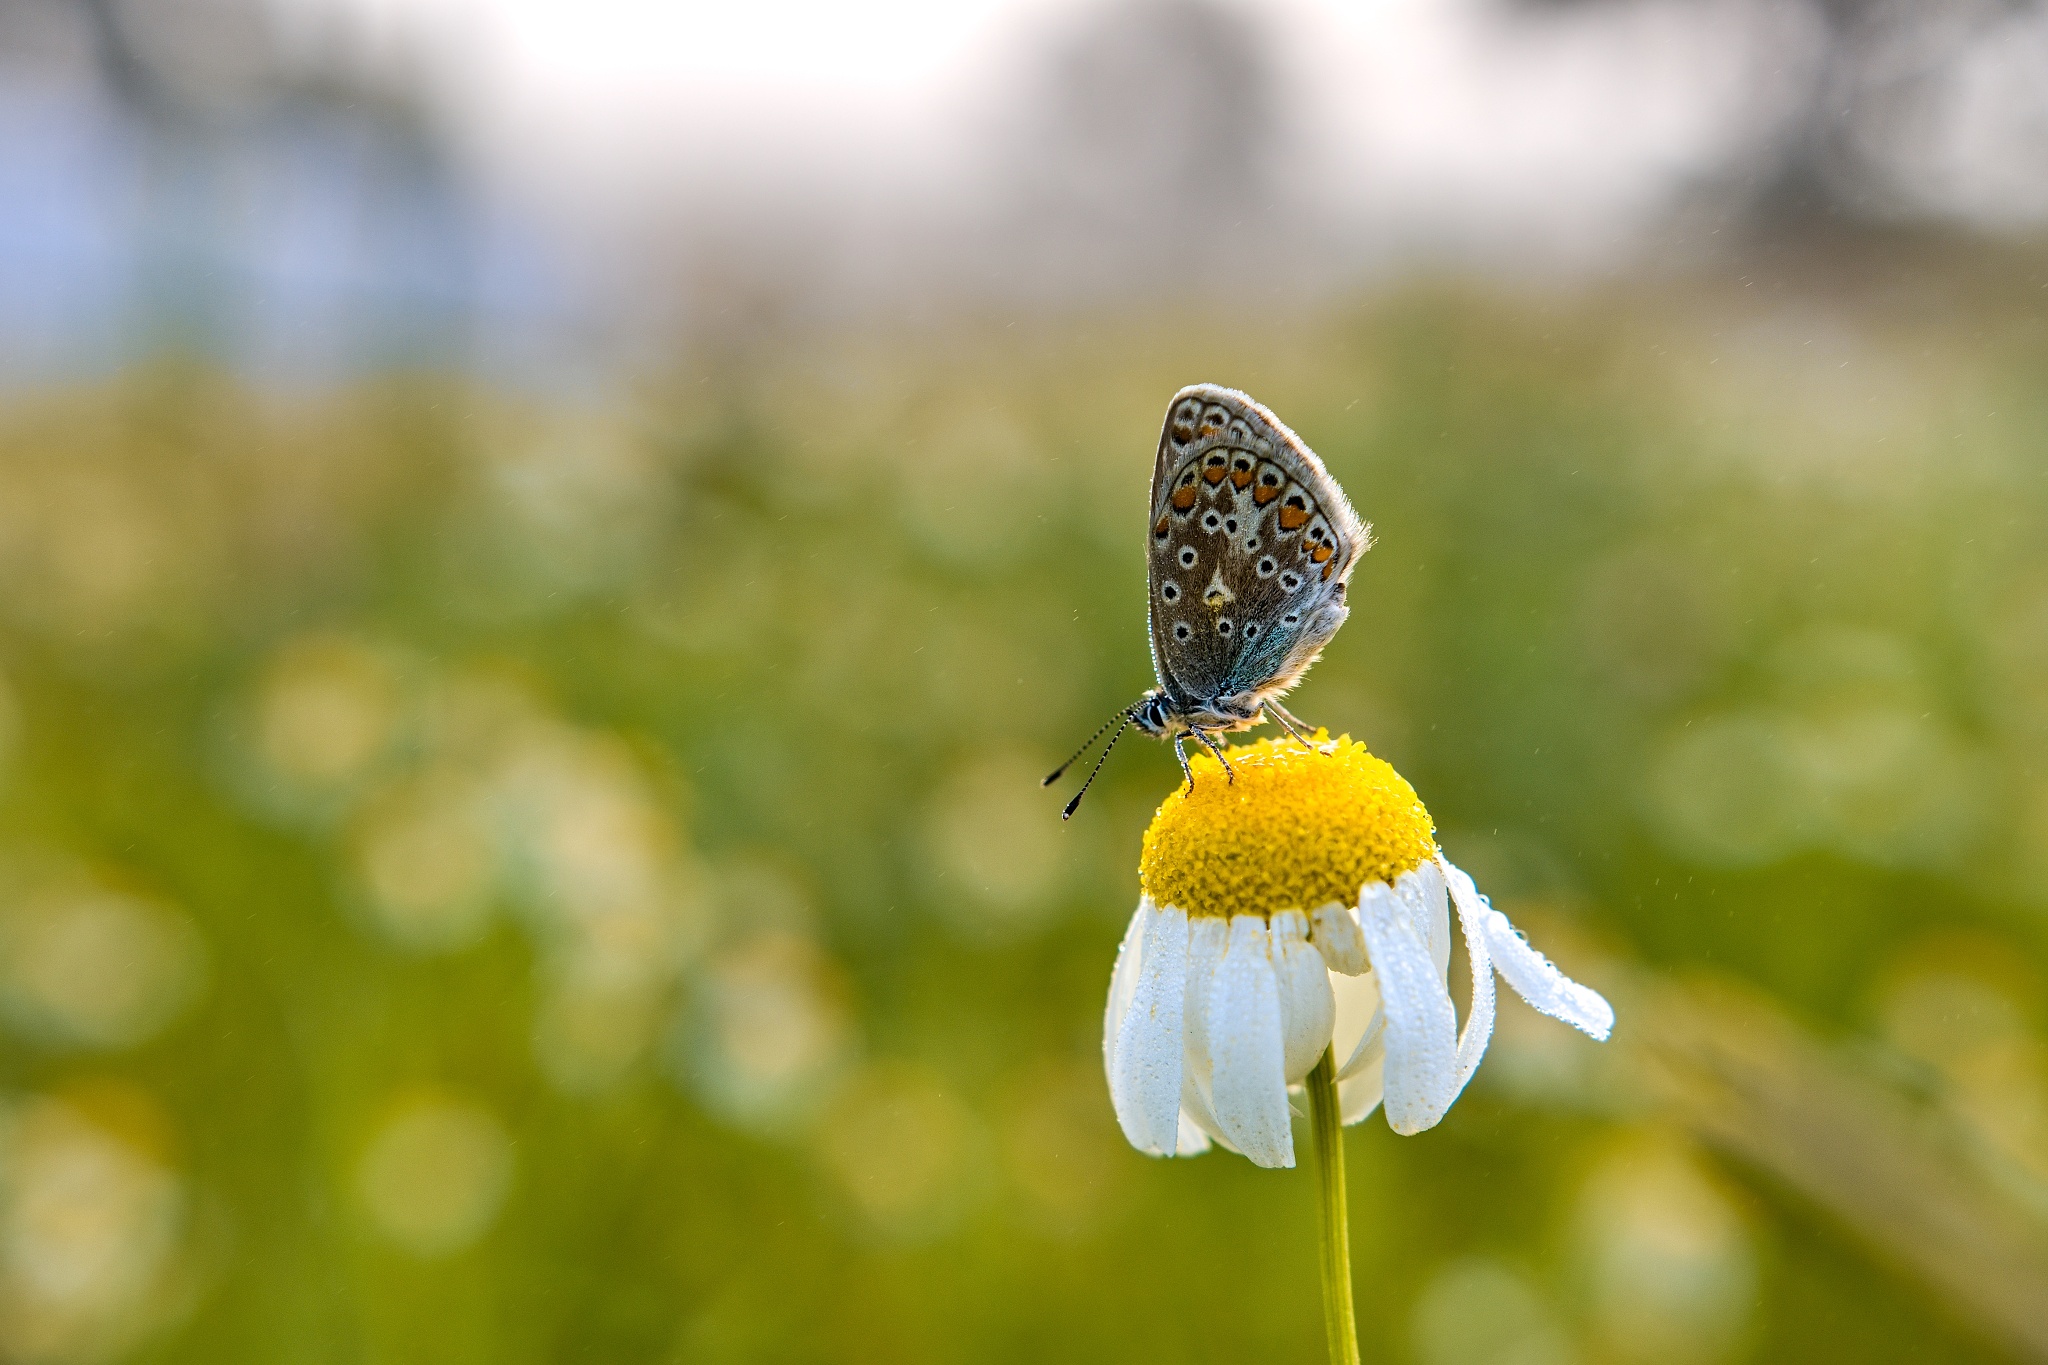
Compare the original and final images side by side.
See what editing RAW files is like for yourself. Download Zoner Studio free for 7 days, open the Develop module, and start editing!
FAQs
What is the difference between RAW and JPEG? RAW files store unprocessed image data directly from the sensor and offer a wide range of editing options, while JPEG files are processed and compressed. RAW is better for post-processing, while JPEG is more suitable for quick use.
Do I always have to shoot in RAW? No. JPEG is enough for everyday shots or photos meant just for social media. However, if you want maximum control over your photos’ exposure and colors, RAW is the clear choice.
What image formats are best for export? For sharing and online use, go with JPEG. For printing and archiving, choose TIFF.
Can RAW files be edited in bulk? Yes. In Zoner Studio, you can apply the same adjustments to an entire series of images or use Batch export, saving you lots of time.
What if I’m unsure about the settings? The Automatic Enhancement (A) feature is useful, which uses AI to quickly improve exposure and contrast. From there, you can fine-tune the details to your liking.
Cover Photo: Kevin Bruseby
Giorgio Nobili
I dont havw any website
Julian
1. Can I re-open a raw file and see the modifications I made the last time? Where are the modifications saved?
2. I Googled “Zoner’s Editoru” and got nothing.
admin
Julian, thank you for your question.
1. In RAW module, you will always see the history of adjustments in the History panel on the left side of the screen. The modifications are saved in XML file alongside your RAW files, so do not delete those, if you think you will need them in the future.
2. We are sorry, for the ’Zoner’s Editoru’ expression – it is a typo. The Editor (without U at the end) is a module of Zoner Photo Studio, where you can edit your photos (usually in JPG). It has many features, filtres and other adjustments do achieve a better pictures.
We hope this was helpfull and we wish you just a great photos!
William Bourdon
Good article. It should have noted the “level” slider in most all editing programs and put it to use.
James
Thanks for the article; jumping into RAW processing has been like drinking from a fire hose. Articles like this are a help working with specific tools, when and why to use them.
Zoner
Thanks for your comment, we’re happy to help!
Massoun Qusaibaty
I enjoyed the experience and I hope to stay with you to continue as an amateur photographer.