How to Master Zoom Burst: 6 Steps to Impressive Pictures

Zoom burst is an impressive photographic technique, and it’s also one you may have encountered before. It leads to an impactful picture that gives an impression of staggering speed and produces attractive optical effects. We’ll show you how to master this technique.
This is a creative photographic technique where you smoothly zoom in or out during the shot. So you’ll need to work with a sufficiently long exposure—one that will give you enough time to twist the zoom ring on your lens.
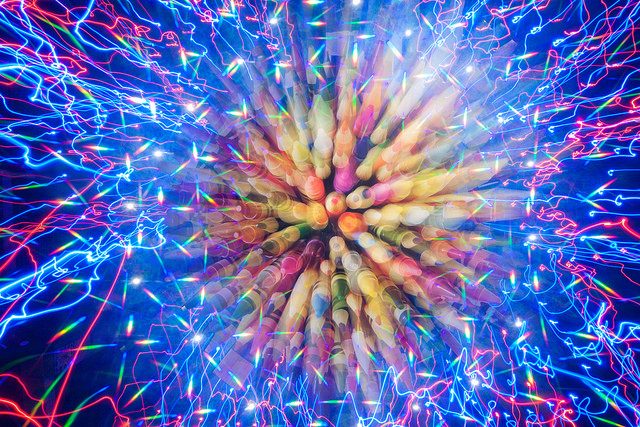
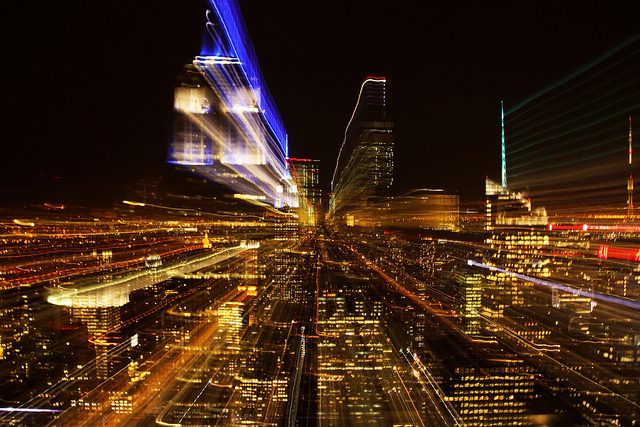
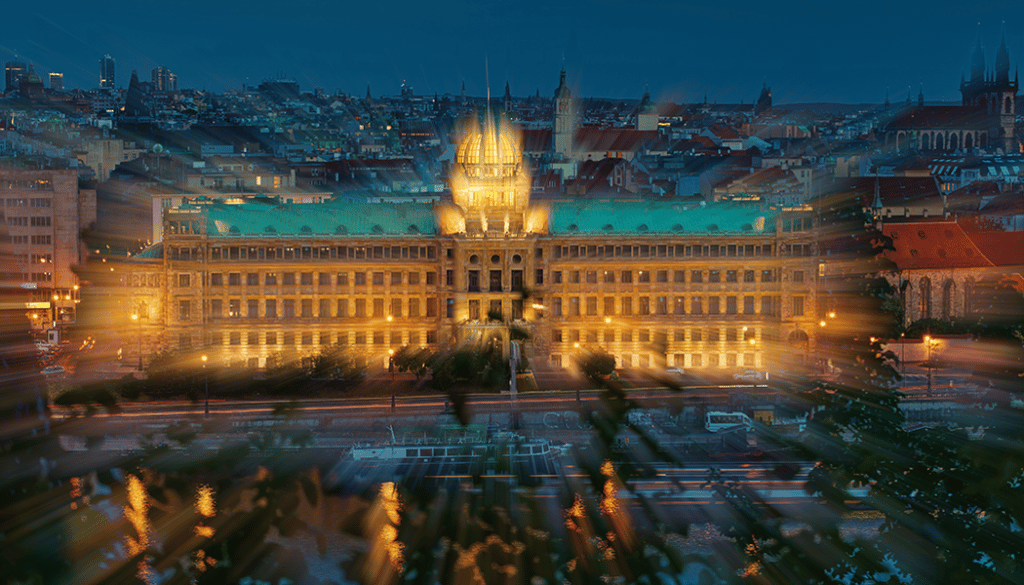
This photographic technique can produce two kinds of photos. First, entirely abstract photos in which you spend the entire time zooming. And second, photos where you only zoom at the start of the exposure, and the rest of it is normal. These give you an image that is mostly traditional, yet is made special with lines of light. This mainly fits well with night photography, where multiple point-lighting sources are captured in a photo and create the desired effect.
Tripods: Useful but not Essential
What is essential is a zoom lens (one with a modifiable focal length) that lets you smoothly manually control the focal length. You’ll find these lenses in DSLRs and mirrorless cameras with exchangeable lenses. So you can’t use this technique with a simple compact or a smartphone. There you’ll have to make do with imitating a zoom burst in Zoner Studio.
It’s certainly possible to hand-hold your camera if you’re shooting during the day, but you’ll get better results if you use a tripod. In low light (in the evening and at night)—in the time when this effect is at its most impressive—you will need a tripod or some other type of stabilization no matter what.

You’ll also need a camera and a lens that let you work in manual focusing mode, or at least turn off refocusing. After all, you’ll be starting your exposure at a different zoom level than the one for the picture’s final composition. If you let your camera focus automatically at the beginning, your final photo will be focused badly.
What to Do for the Shot
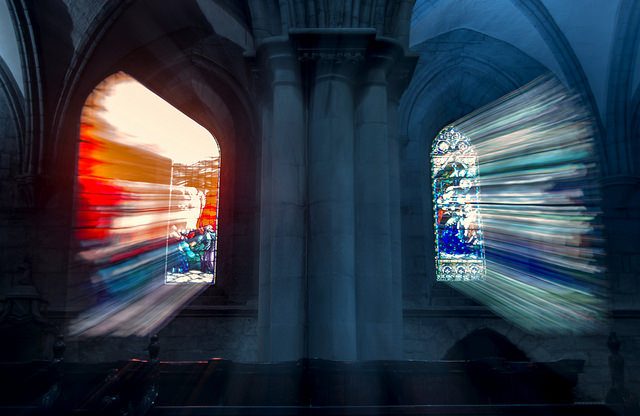
First pick a scene. For abstract photos, detail-heavy scenes such as a forest or graffiti on a wall make for good “subjects.” During nighttime shots, scenes that contain a variety of light sources are ideal, and so cityscapes and illuminated architecture work well.
1) Place your camera on a tripod and compose the final image. Use your lens’s widest focal length—although you can also do the opposite and use its longest focal length. There’s also the option of working with only a part of the zoom range, but note that if you do that, it’s more difficult to ensure you’re twisting the zoom ring at the right rate.
2) Either focus manually, or set the right focus now using autofocus and then turn off autofocus on the lens so that you won’t get any unwanted refocusing.
3) Twist the zoom ring to the opposite extreme than the final composition should have. So if you’re composing to your lens’s wide end, zoom out now to the longest focal length, and vice-versa.
4) Set the exposure parameters suitably. To make your work easier, you can work in a semi-automatic mode: Time Priority. For daylight work, set a shutter speed of 0.5 to 2 s. For night exposures, your exposure time will be more on the order of 30 s. Use your camera’s lowest ISO value and an aperture that fits the shutter speed you’ve set. If you use Time Priority mode, the camera will set such an aperture for you.
5) Press in the camera’s trigger, or better yet, use a remote trigger or a self-trigger.
6) Immediately after the exposure starts, begin twisting the lens’s zoom ring smoothly towards your desired composition. For a more abstract photograph, do this at a rate that ensures that the zooming will take up your whole exposure time. This will mainly come into play for daytime photos. When you’re photographing at night, it’s best to twist the ring at a speed that gets you to your final composition roughly halfway through the exposure. That way your subject will have sufficient detail. Here it’s good to experiment with differing ratios of time spent zooming and time spent unmoving.
Imitate a Zoom Burst in Zoner Studio
If you don’t have a lens with manual zoom, don’t despair. You can also easily imitate a zoom burst on a computer.
To quickly produce a simple zoom burst in Zoner Studio, you can use the Adjust – Blur… command (Ctrl+6) in the Editor.
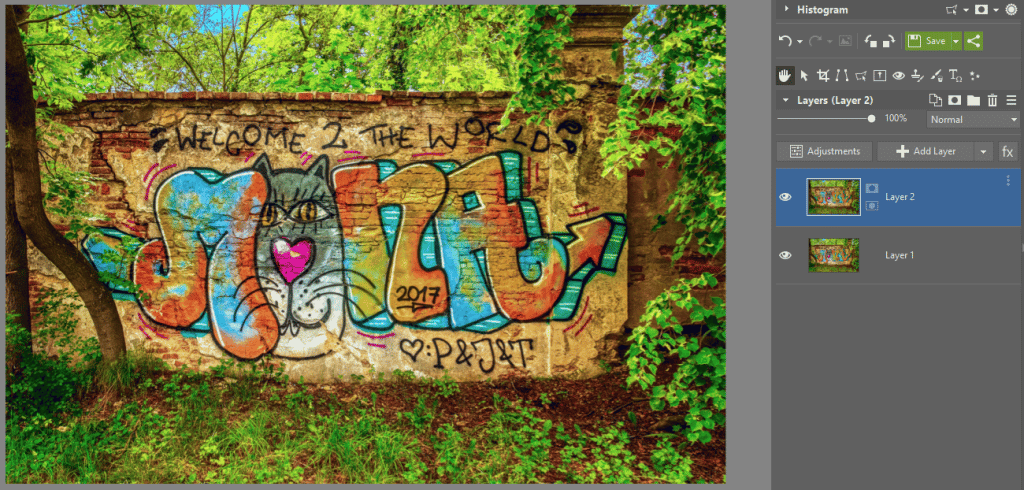
Set “Zoom” as the blurring type. You can easily change the effect’s strength and even set its optical center, which is something you can’t do on a camera: there the effect’s center will always be the center of the picture.
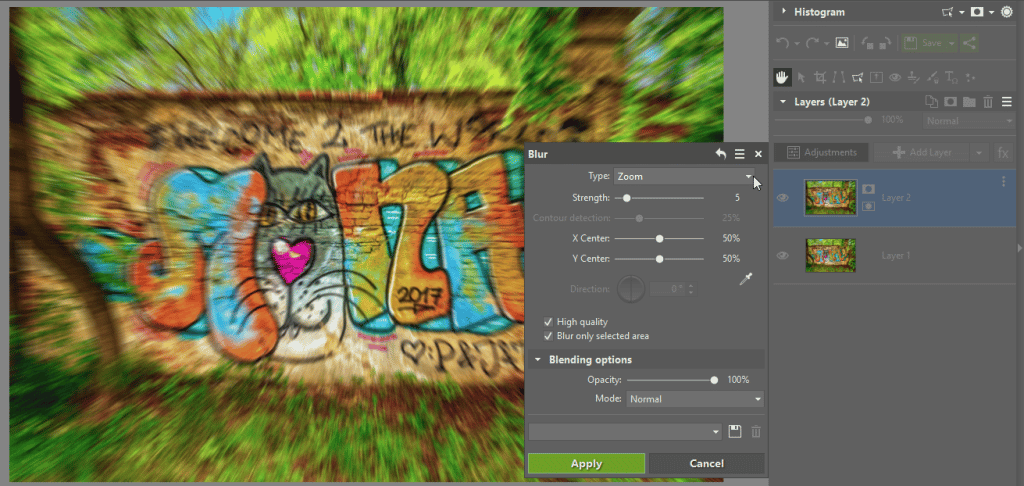
To imitate the effect of a combined night exposure (part of the exposure with zooming and part without), I set the blending mode for my zoom-burst layer to “Lighten.”
There are no comments yet.