How To Set Up HDR on Your PC and Zoner Studio
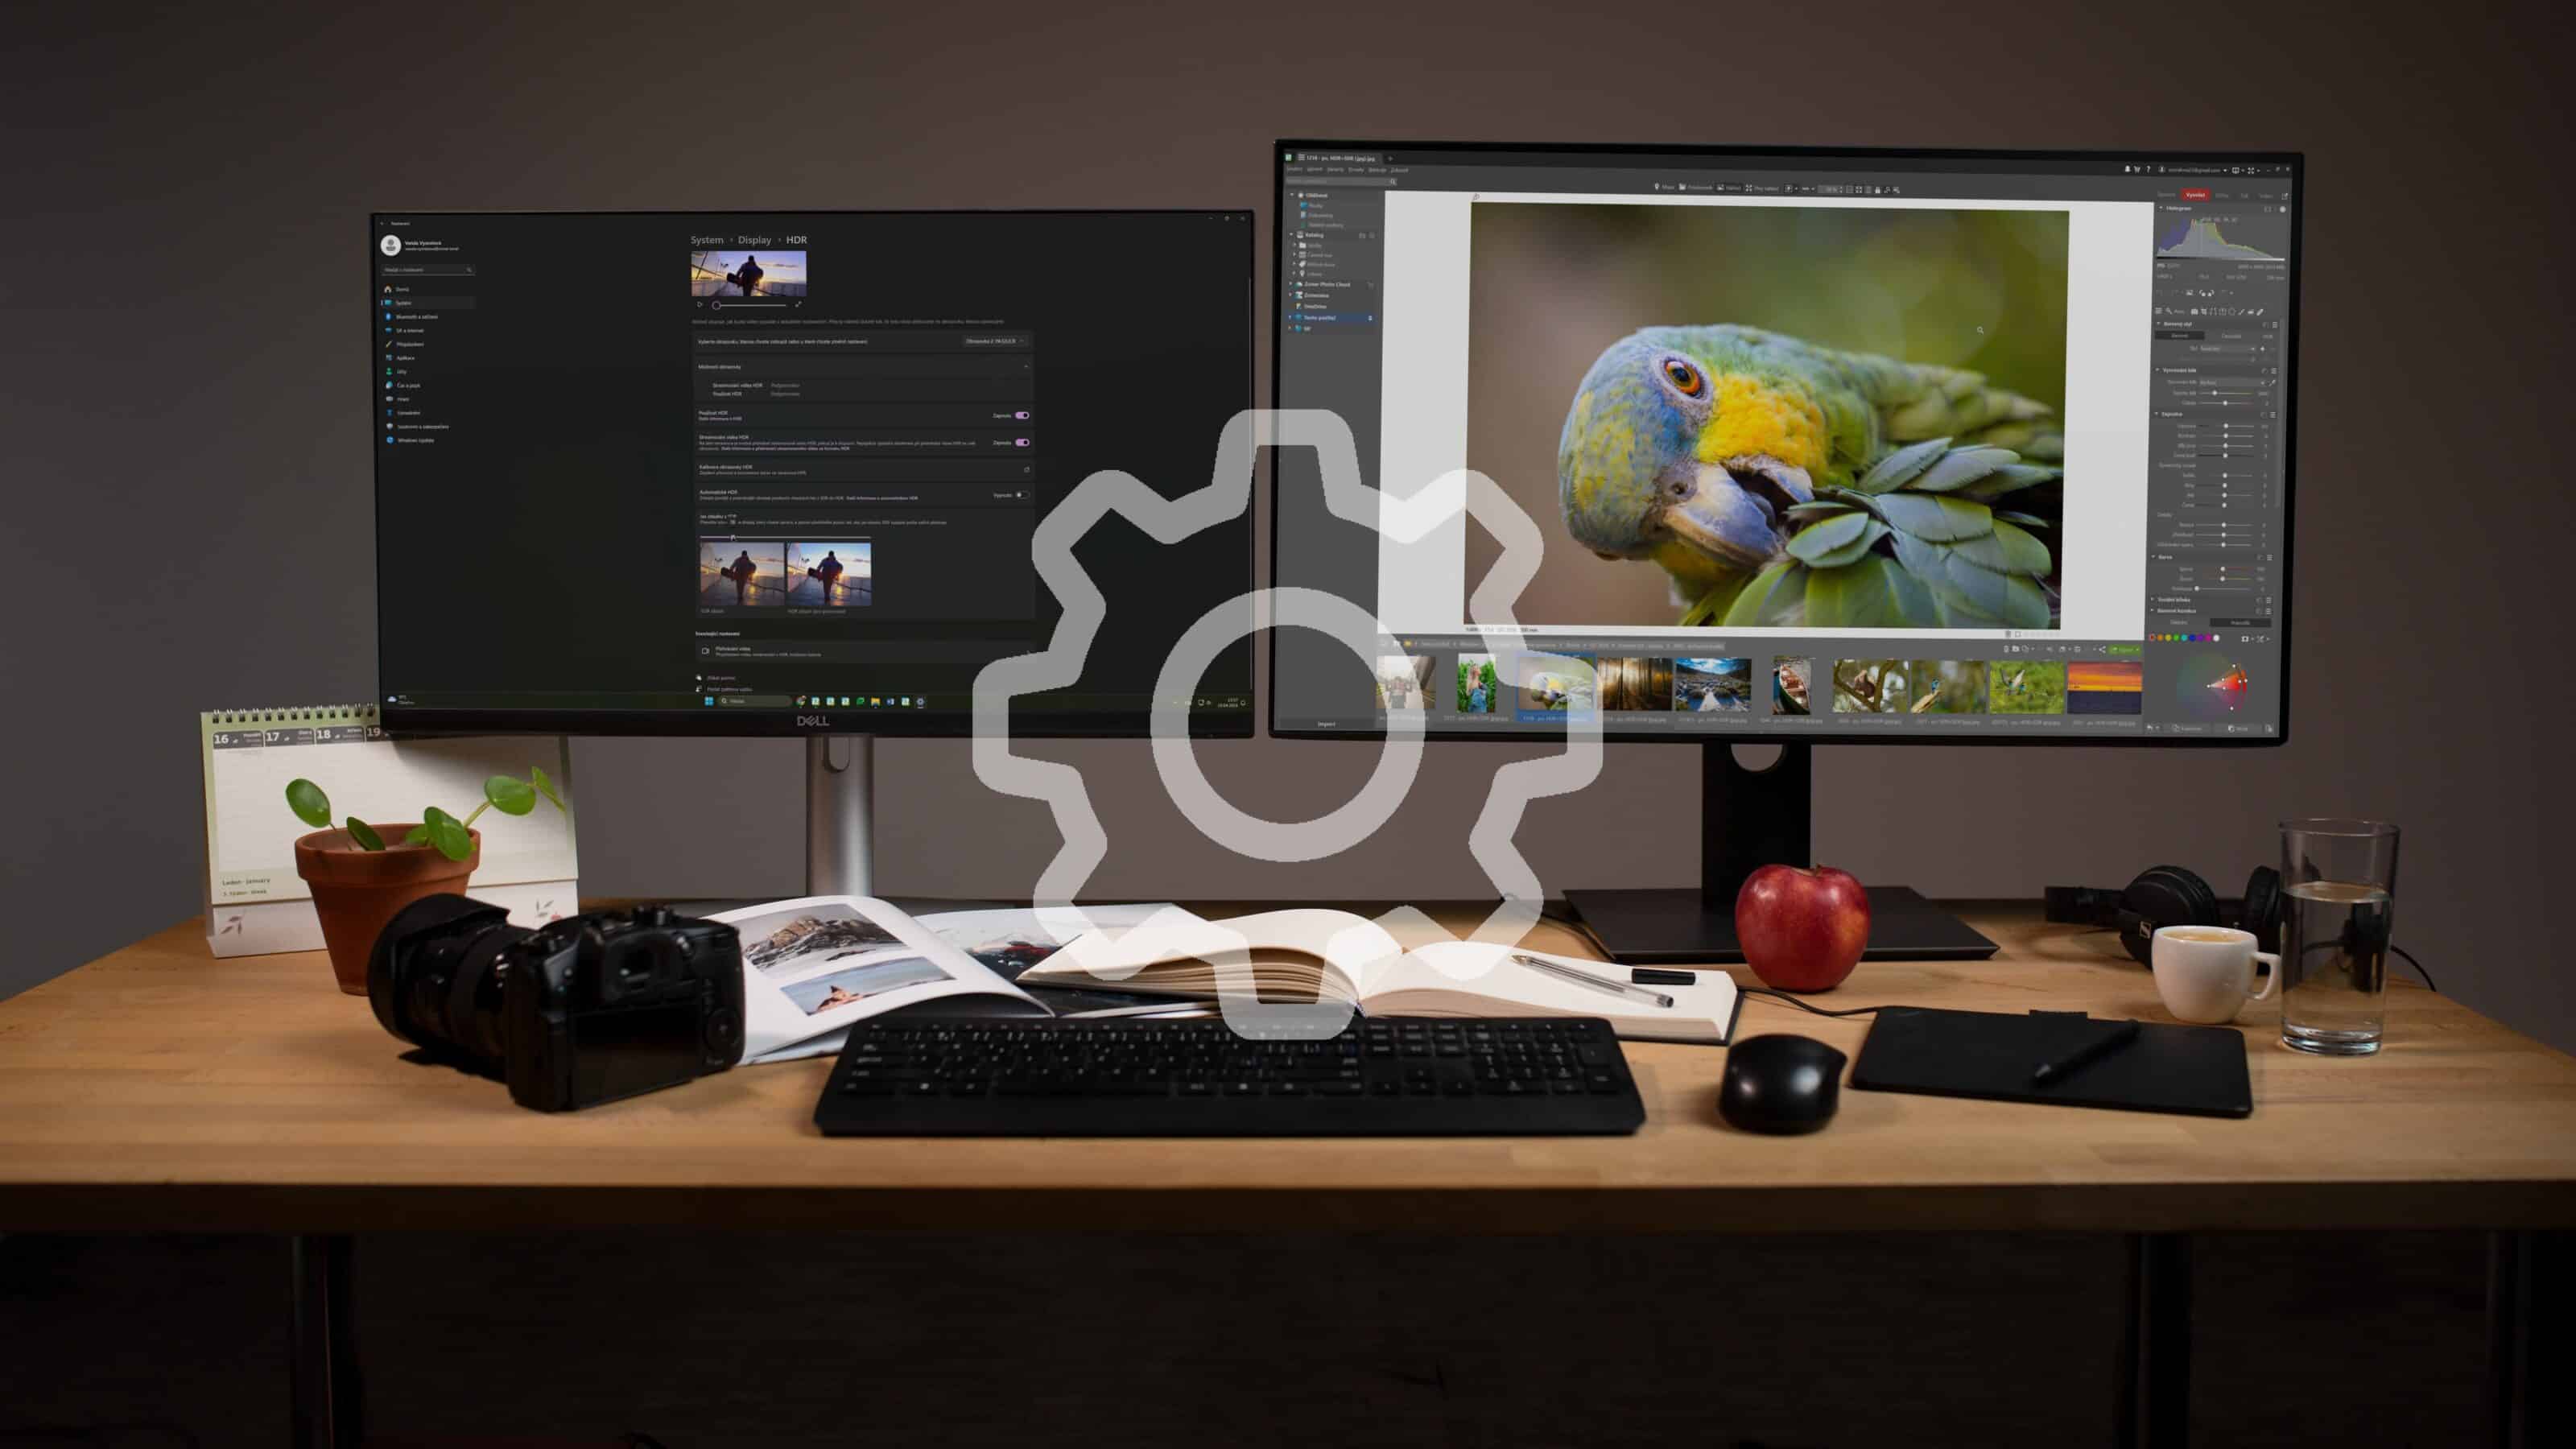
For HDR editing, you need a device that supports HDR display. Besides a device, you also need the right settings. Learn how to set up HDR on your monitor or laptop and on Zoner Studio.
You first need to know if your monitor supports HDR. You can usually find this information in the product description when purchasing. If you find out your monitor doesn’t support HDR and plan to purchase a new one, see our tips for choosing the right HDR monitor or laptop.
Monitor settings
Once we know our monitor supports HDR, we can make sure HDR is turned on. Sometimes HDR is turned off by default. If your monitor seems to not support HDR, check the Display menu to see if the feature is turned on.
Each manufacturer uses slightly different terminology, so we can’t walk you through the entire process. But if you find those three magic letters—HDR, in your Display settings, you are on the right track.

Windows settings
Next, make sure your Windows settings allow HDR display. Open Windows settings. Select System and then Display. Under Brightness and Color, you can see HDR. Open HDR to see what display options are supported.

In this case, you can see that Use HDR is supported. Below this option, enable Use HDR.

HDR display may not be able to be turned on for laptops, even if it is supported. Why? This situation generally occurs when the laptop is running on battery power because the battery saver is enabled by default. Enabling Optimize for image quality under battery settings turns off the battery saver and enables HDR even when running on battery.

You need to do the same for Video playback settings below. Select Optimize for video quality.

For the best HDR experience, there are often other system and monitor settings that need to be tweaked. Make sure you don’t have night light turned on. Next, turn off adaptive brightness so it doesn’t change “based on visible white space.”
In the case of a standalone monitor, also check the Display menu for Adaptive brightness. This can negatively affect your HDR experience. Again, each manufacturer may have similar “enhancements” hidden elsewhere. If they do, it’s mainly for energy-saving purposes.
Some manufacturers don’t have a way to turn off adaptive brightness. Depending on its strength, the monitor is either suitable for HDR photo editing or it’s not. Read more on this topic in our article on purchasing hardware.
Monitor calibration
Before you set up HDR, we recommend calibrating your monitor. The Microsoft Store offers a free Windows HDR Calibration. You can also access it from Windows settings or search for it in the Store (app store for your computer). Use the app to properly calibrate your HDR monitor.

The entire basic calibration process is very simple and intuitive—follow the on-screen instructions and move the sliders so the images are barely discernible from the rest of the screen. For Saturation in the last step, go based on what feels best. But if you don’t know, leave the Default settings.
SDR and HDR contrast ratio
Once we have everything turned on and the monitor calibrated, we set the correct SDR and HDR contrast ratio. You probably still have your Display settings open. If not, you can access Display settings by right-clicking the desktop.
If you have two monitors, click the one you have in HDR, then click Use HDR, which we already turned on.

Under Brightness for SDR, use the slider to decide how much of the brightness is reserved for HDR. We want to set the Brightness so SDR content is not too dark for working on the computer.
If you’re using a laptop, this slider won’t affect brightness. Adjust the brightness reserved for HDR using the buttons for the physical brightness of the monitor. The higher the standard brightness, the less brightness is reserved for HDR.

HDR settings in Zoner Studio
You can see the amount of brightness you are getting from your HDR images in the Histogram of Zoner Studio. Open your photo in the Develop module. Under Color Style, select HDR. The Histogram is divided into two parts that work with SDR and HDR display. The HDR part shows how much brightness is reserved (white line) for HDR photos that your current monitor settings and performance allow.
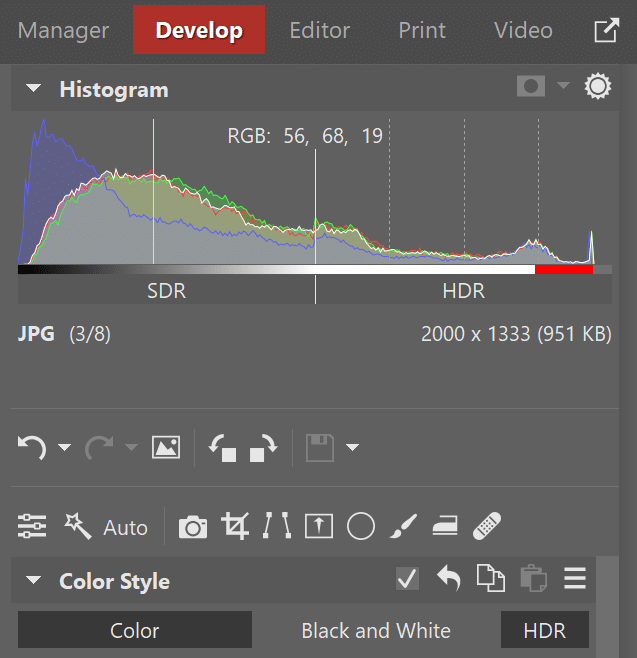
Part of the white line may be red. This shows you how much brightness available in the image data for HDR is not displayed on your computer. You either have to accept that this image data will be clipped or reduce the brightness in the HDR part of the photo. Or…buy a better HDR monitor.

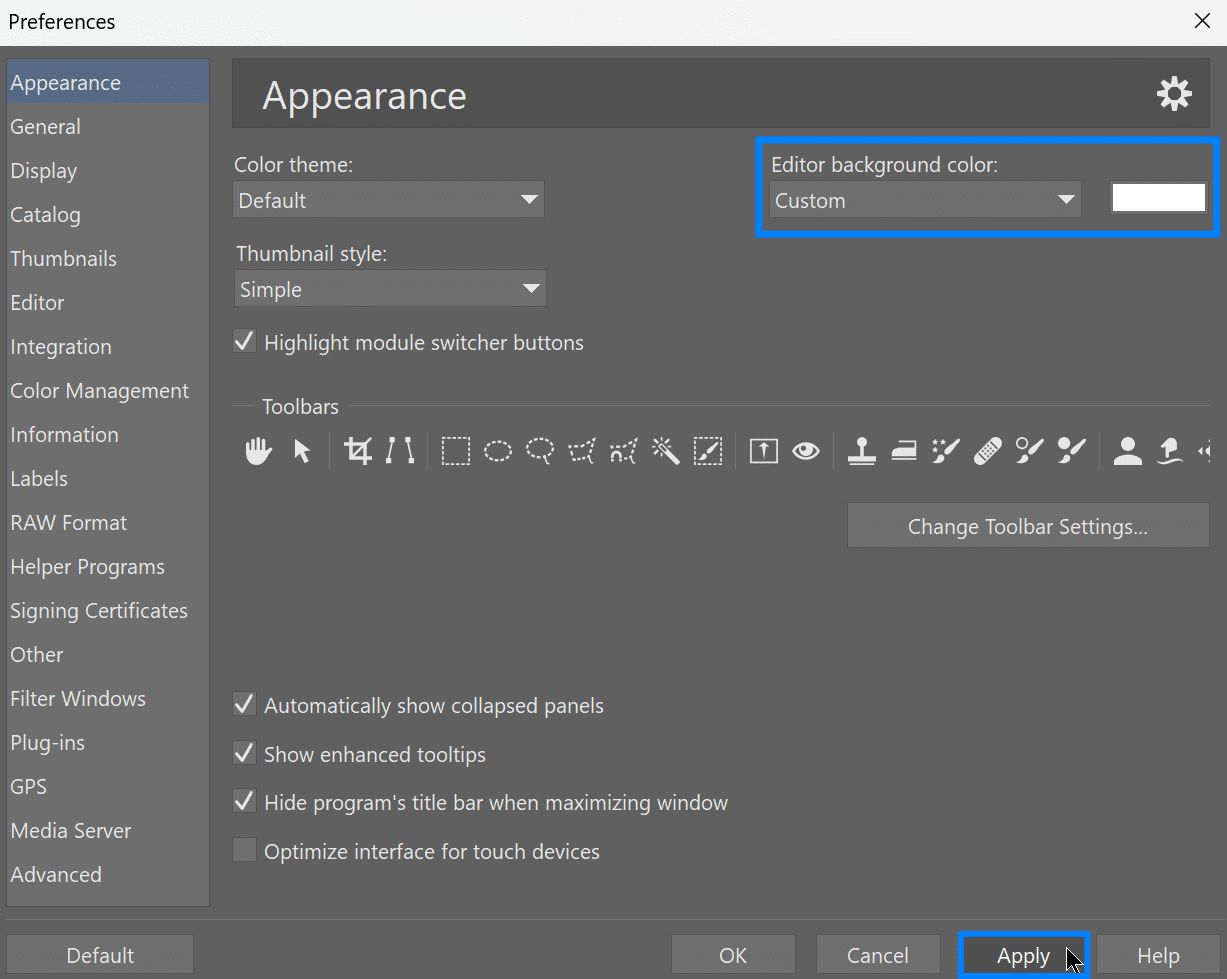
To see how an SDR and HDR monitor renders white, we recommend changing the background behind the photo to white. In Zoner Studio, open Preferences (Ctrl+M) – Appearance. Then, select Custom for Editor background color and white next to that. Click Apply to confirm the change.
Finally, you can also adjust the SDR and HDR brightness balance in Windows to find a better balance between normal brightness, like the Zoner Studio interface, and the HDR photo you’re editing.
With today’s monitors, you’re always looking for a compromise between a bright enough normal image and a large enough margin for HDR highlights. You may notice that when we see more intense white in an HDR photo, the background around the photo appears gray. That’s because there isn’t any more brightness available for white.
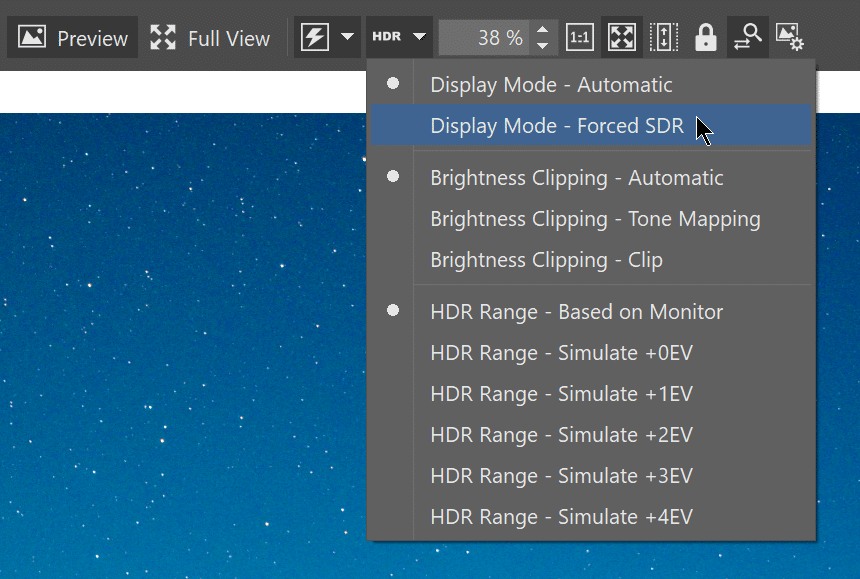
To adjust how HDR photos appear in the preview, use the HDR icon, which is located in the middle of the top bar, next to Fast Previews.

We recommend leaving the HDR settings as they are, if possible.
The default setting is Display Mode – Automatic, which automatically displays HDR if your photo is HDR. If not, it displays SDR. The Brightness Clipping setting is also set to Automatic. HDR range defaults to By Monitor. If you have a photo edited in both HDR and SDR and you want to see the SDR one, change the Display Mode to Forced SDR.
Now that you know how to set up your computer and Zoner Studio, you can start HDR editing! And if you don’t have Zoner Studio, download Zoner Studio free for 7 days with access to all its features.
There are no comments yet.