How to Take Perfect Seaside Photos
If you don’t live by the sea, every seaside visit is interesting and full of photo opportunities. Any beach photo will do as a souvenir, but what if you want to hone your abilities and get better pictures? Then take a look at these inspiring examples and tips to try on your next vacation.
The sea. Forever fascinating for everyone. Including photographers. The sea offers lots of opportunities for interesting pictures—pale blue lagoons, sunsets, fantastic waves. But to be honest, the sea itself is not very photogenic. You can have a lot more fun with the line between earth and sea—with the shoreline.
Horizon in the Middle? Think Twice
If you have a choice of where to put the horizon, it’s best to tilt the camera slightly up or down to put the horizon not in the middle, but instead a little higher or lower—roughly one-third into the frame. A centered horizon typically leads to a boring photo, one where people don’t really know where to look:

Canon 5D Mark II, Canon EF 16–35/2.8 II, 1/80 s, f/6.3, ISO 100, focal length 18 mm
By tilting the camera slightly, you get a much more dynamic photo. You can choose whether to make room for the sky, or for the waves. It’s up to you what’s more important at the moment.
In this picture I emphasized the subtle summer sky, supplemented by the blue-green of the waves below. I positioned the horizon even more extremely than the rule of thirds would suggest, but that rule’s only a guideline.

Canon 5D Mark II, Canon EF 16-35/2.8 II, 1/80 s, f/6.3, ISO 100, focal length 35 mm
In some situations, you have no choice. In the next picture the sky and the rising sun felt important to me, but I also wanted to capture the nearby rocks jutting out of the sea. So I broke the rule on horizons, since I found the other elements to be more visually important.

Canon 5D Mark II, Canon EF 16-35/2.8 II, 1/1000 s, f/7.1, ISO 400, focal length 35 mm
Watch the Surf’s Curves
Even more important than the horizon is the shore’s own shape. A straight shore may not lead to a bad photo, but a more complex shore will be much more interesting.
Personally I’ve come to like the bendy shores in small bays that, together with faraway land rising above the surface, form an S shape—either normally, or mirrored as in this case.

Canon 40D, Canon EF-S 55–250/4–5.6, 1/500 s, f/8.0, ISO 200, focal length 154 mm
S-curves are fairly easy to find, so here’s another example, not photographed from so atypically far away as the last one.

Canon 40D, Sigma 18–50/2.8, 1/400 s, f/8.0, ISO 400, focal length 26 mm
You might think that you can only photograph shorelines from up high, but you’d be a little wrong. Height helps, but you don’t need a lot. Even just a bit gives results like this. The only side effect is a vertically flattened S.

Canon 40D, Canon EF-S 10–22/3.5–4.5, 1/320 s, f/8.0, ISO 400, focal length 10 mm
Looking Back
You can also get effective pictures that look back from sea to shore. To take them, ride out on a boat, or here again make use of a bay, although this time you won’t be including it in full. Here the level shoreline is replaced by the dramatic lines of mountains or other things in the landscape.

Canon 40D, Canon EF-S 10–22/3.5–4.5, 1/200 s, f/11, ISO 200, focal length 14 mm
One alternative solution is to include man-made structures, like the Danish wind generators below.
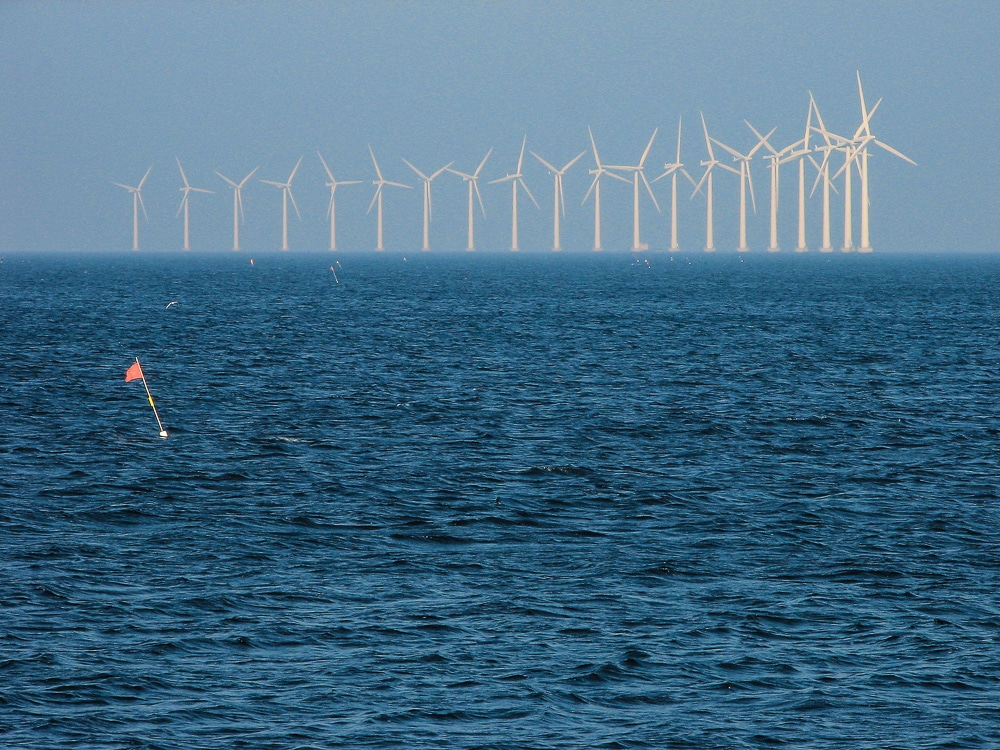
Canon PowerShot S2 IS, 1/320 s, f/6.3, focal length 39.1 mm (about 235 mm full-frame equivalent).
Sunfighter
I really like shooting against the sun while also keeping it inside the frame. This gives me truly forceful photos, but there’s a catch: the scene’s range of light and shadows, i.e. its dynamic range, is too large for the camera to handle automatically.

There are several solutions. The ideal solution is a real graduated ND filter, but they’re not always at hand, and work with them is awkward.
The second option is to take several pictures at different exposures and join them into an HDR image on a computer (for a guide to doing this, see our article How to Create HDR Photographs in a Few Easy Steps). This is a great solution… but sometimes it fails, mainly because your source shots may be shifted too much against each other, making it impossible to align them. Also, waves and other things in the picture can change between shots.
So the most direct method is to take one single photo, “exposed to the right” (underexposed on purpose) and digitally brighten it later. Here there’s also a catch: you risk noise problems. So you have to think about which of the three solutions is the best for your situation.
For context, here’s that third solution—a single shot in which I later brightened the lower third and slightly darkened the upper third:
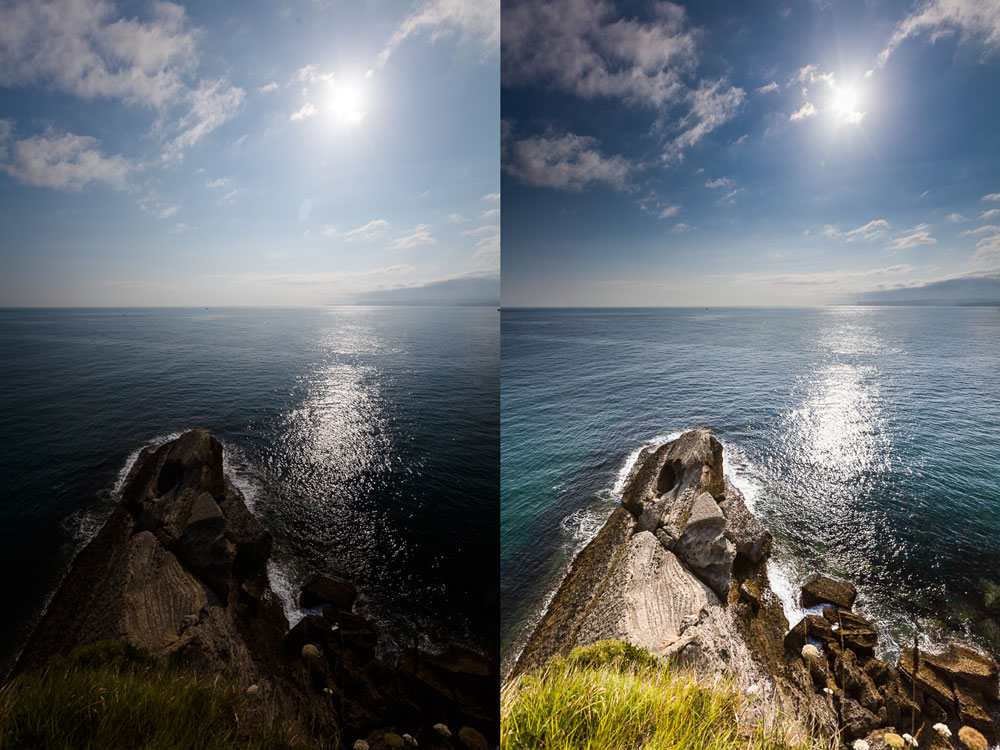
Canon 5D Mark II, Canon EF 16–35/2.8 II, 1/400 s, f/7.1, ISO 100, focal length 16 mm
Now the grass has digital noise that wouldn’t normally occur under such perfect light on a full frame camera. However, I’ve decided that here and now it’s not a showstopper.

Include Some Details
One popular trick in landscape photography is to include some nearby surroundings. That goes double for seasides. Find something interesting nearby, and you’ve won. Here it’s some small rocky outcroppings among the sand.

Canon 40D, Sigma 18–50/2.8, 1/160 s, f/8.0, ISO 400, focal length 18 mm
But don’t lose hope even if a distinctive shore like this isn’t available. In another place I used a small tripod (a Gorillapod) so that the camera could capture everything—from the details of small rocks, to waves, to cliffs on the faraway other shore. I set a high f-stop—f/25—to maximize my depth of focus, and I used a long, 0.5 second exposure to get some motion in the photo.

Canon 40D, Canon EF-S 10–22/3.5–4.5, 1/320 s, f/8.0, ISO 400, focal length 10 mm
Humans for Scale
Personally I usually photographlandscapes without people, for several reasons: it makes the photos feel cleaner to me, I don’t have to bother passersby or wait for them to move, and last but not least, I don’t need a model release if I sell the photos.
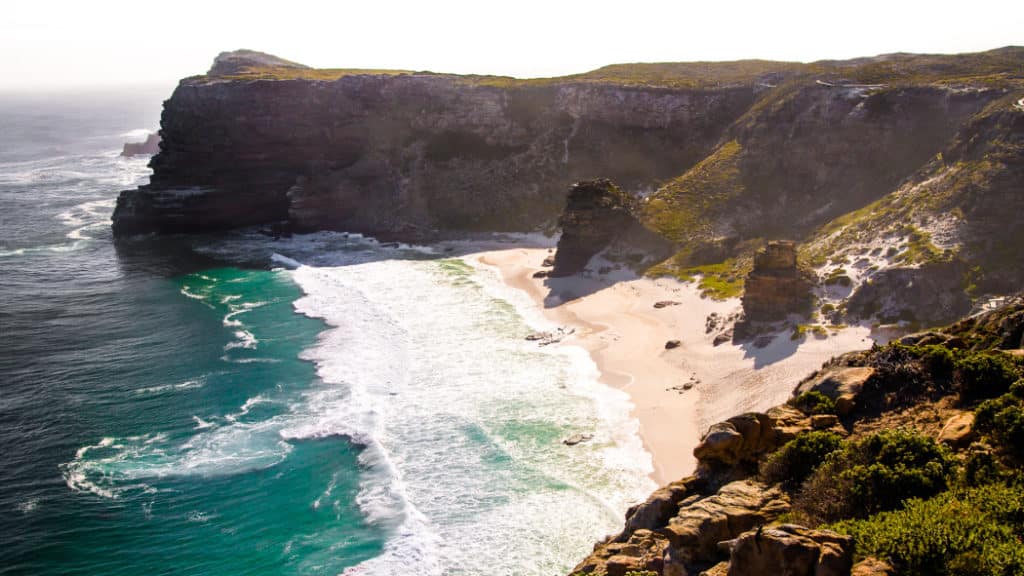
Despite this, I’ve found some pictures of mine with people. Including people does also have benefits. The biggest is that human figures illustrate the size of the landscape. Here, not just one but two people illustrate the hugeness of the rocky mass above the sea (even though at this resolution, the second person is almost indistinguishably small).

Canon 5D Mark II, Canon EF 16-35/2.8 II, 1/125 s, f/7.1, ISO 100, focal length 25 mm
Another option is to supplement the atmosphere using only a part of a person. In this photo I’ve included a random passerby on a busy beach. It was easy to prepare the shot in my head in advance and then wait until someone walked by in the right spot.

Canon 5D Mark II, Canon EF 70-200/2.8 II, 1/100 s, f/2.8, ISO 100, focal length 120 mm
Improvisation
I’ve only touched upon a few of the ways that you can depict the seaside. You always need to work from your situation and adapt to it on the fly. But I hope that these samples will inspire you and perhaps push you towards new angles you’ve never tried before.
There are no comments yet.