How to Achieve White Balance and Get Great Photos
White can be a difficult color to deal with when taking photos. Few cameras have the capability to capture it the way we see it. In many cases, the photo may look different than what we saw in reality. Whether you are trying to achieve the most realistic or most creative white balance, Zoner Studio has automatic and manual tools that make this a breeze.
Why we need a white balance
The human eye is capable of detecting white under any lighting conditions. Cameras aren’t that sophisticated. If you don’t set up your device before shooting, it can turn white into blue or orange. The photo then looks cold or yellowed. Either way, not what you wanted.
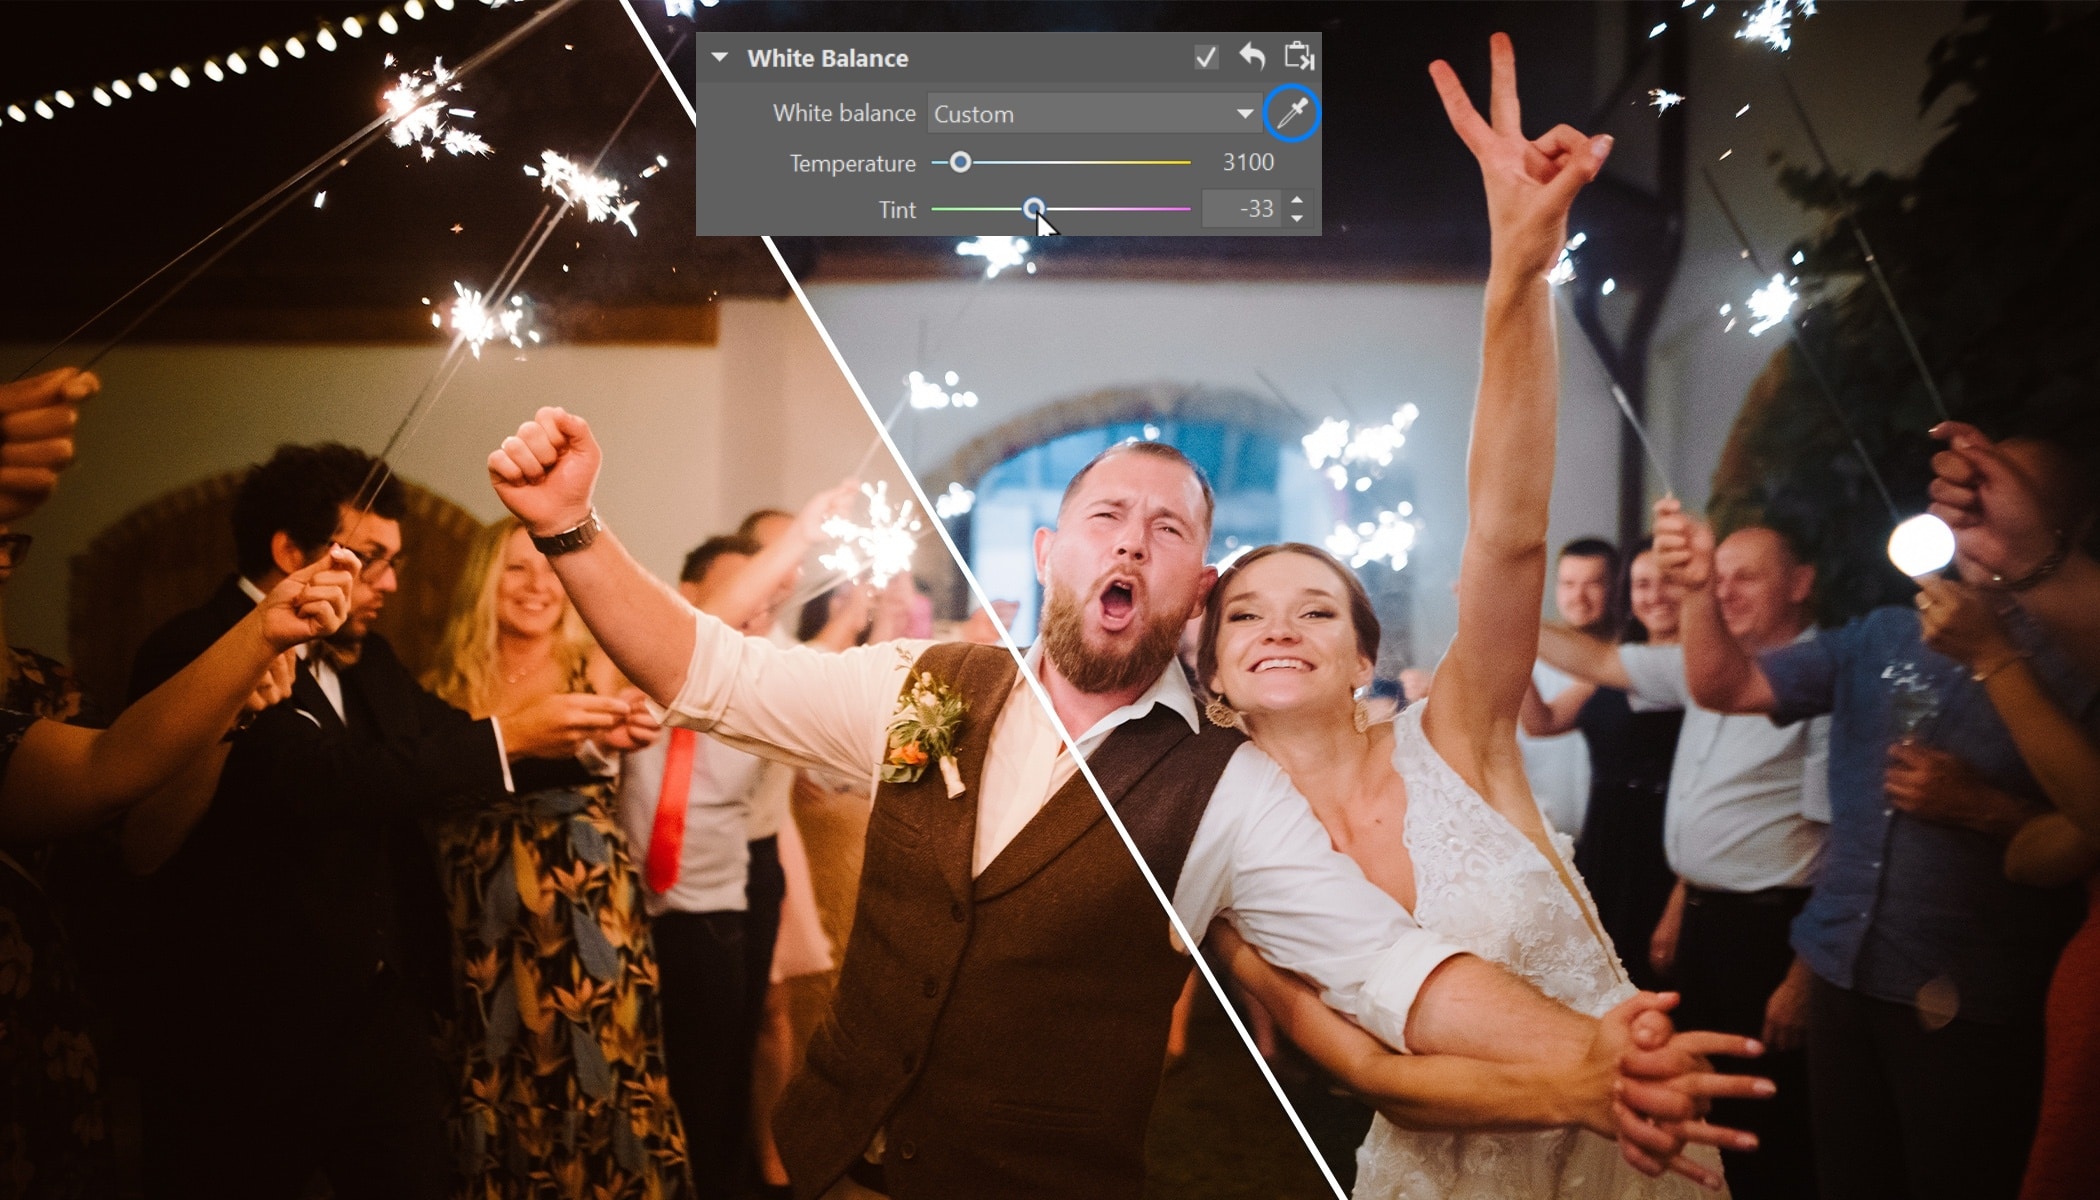
Situations like this are perfect for adjusting white balance in post-production. The White Balance function is found in the Develop and Editor modules of Zoner Studio. This tool is intentionally first in the editing tools because changing Temperature and Tint can completely change your photo’s color.
Automatic white balance is simple—select the eyedropper and click the area you want to be naturally white.
If you want to save yourself the trouble, try shooting in RAW. This gives you a wider range of editing options and you don’t have to worry about white balance when shooting because you can easily edit it in post-production.
Something still missing?
Sometimes a photo doesn’t look the way you want even after using the eyedropper for white balance. This is when manual adjustments come in. Move the Temperature slider to the left or right depending on whether you want the photo to look cooler or warmer. Also, don’t forget the Tint slider which controls the balance between greens and purples.
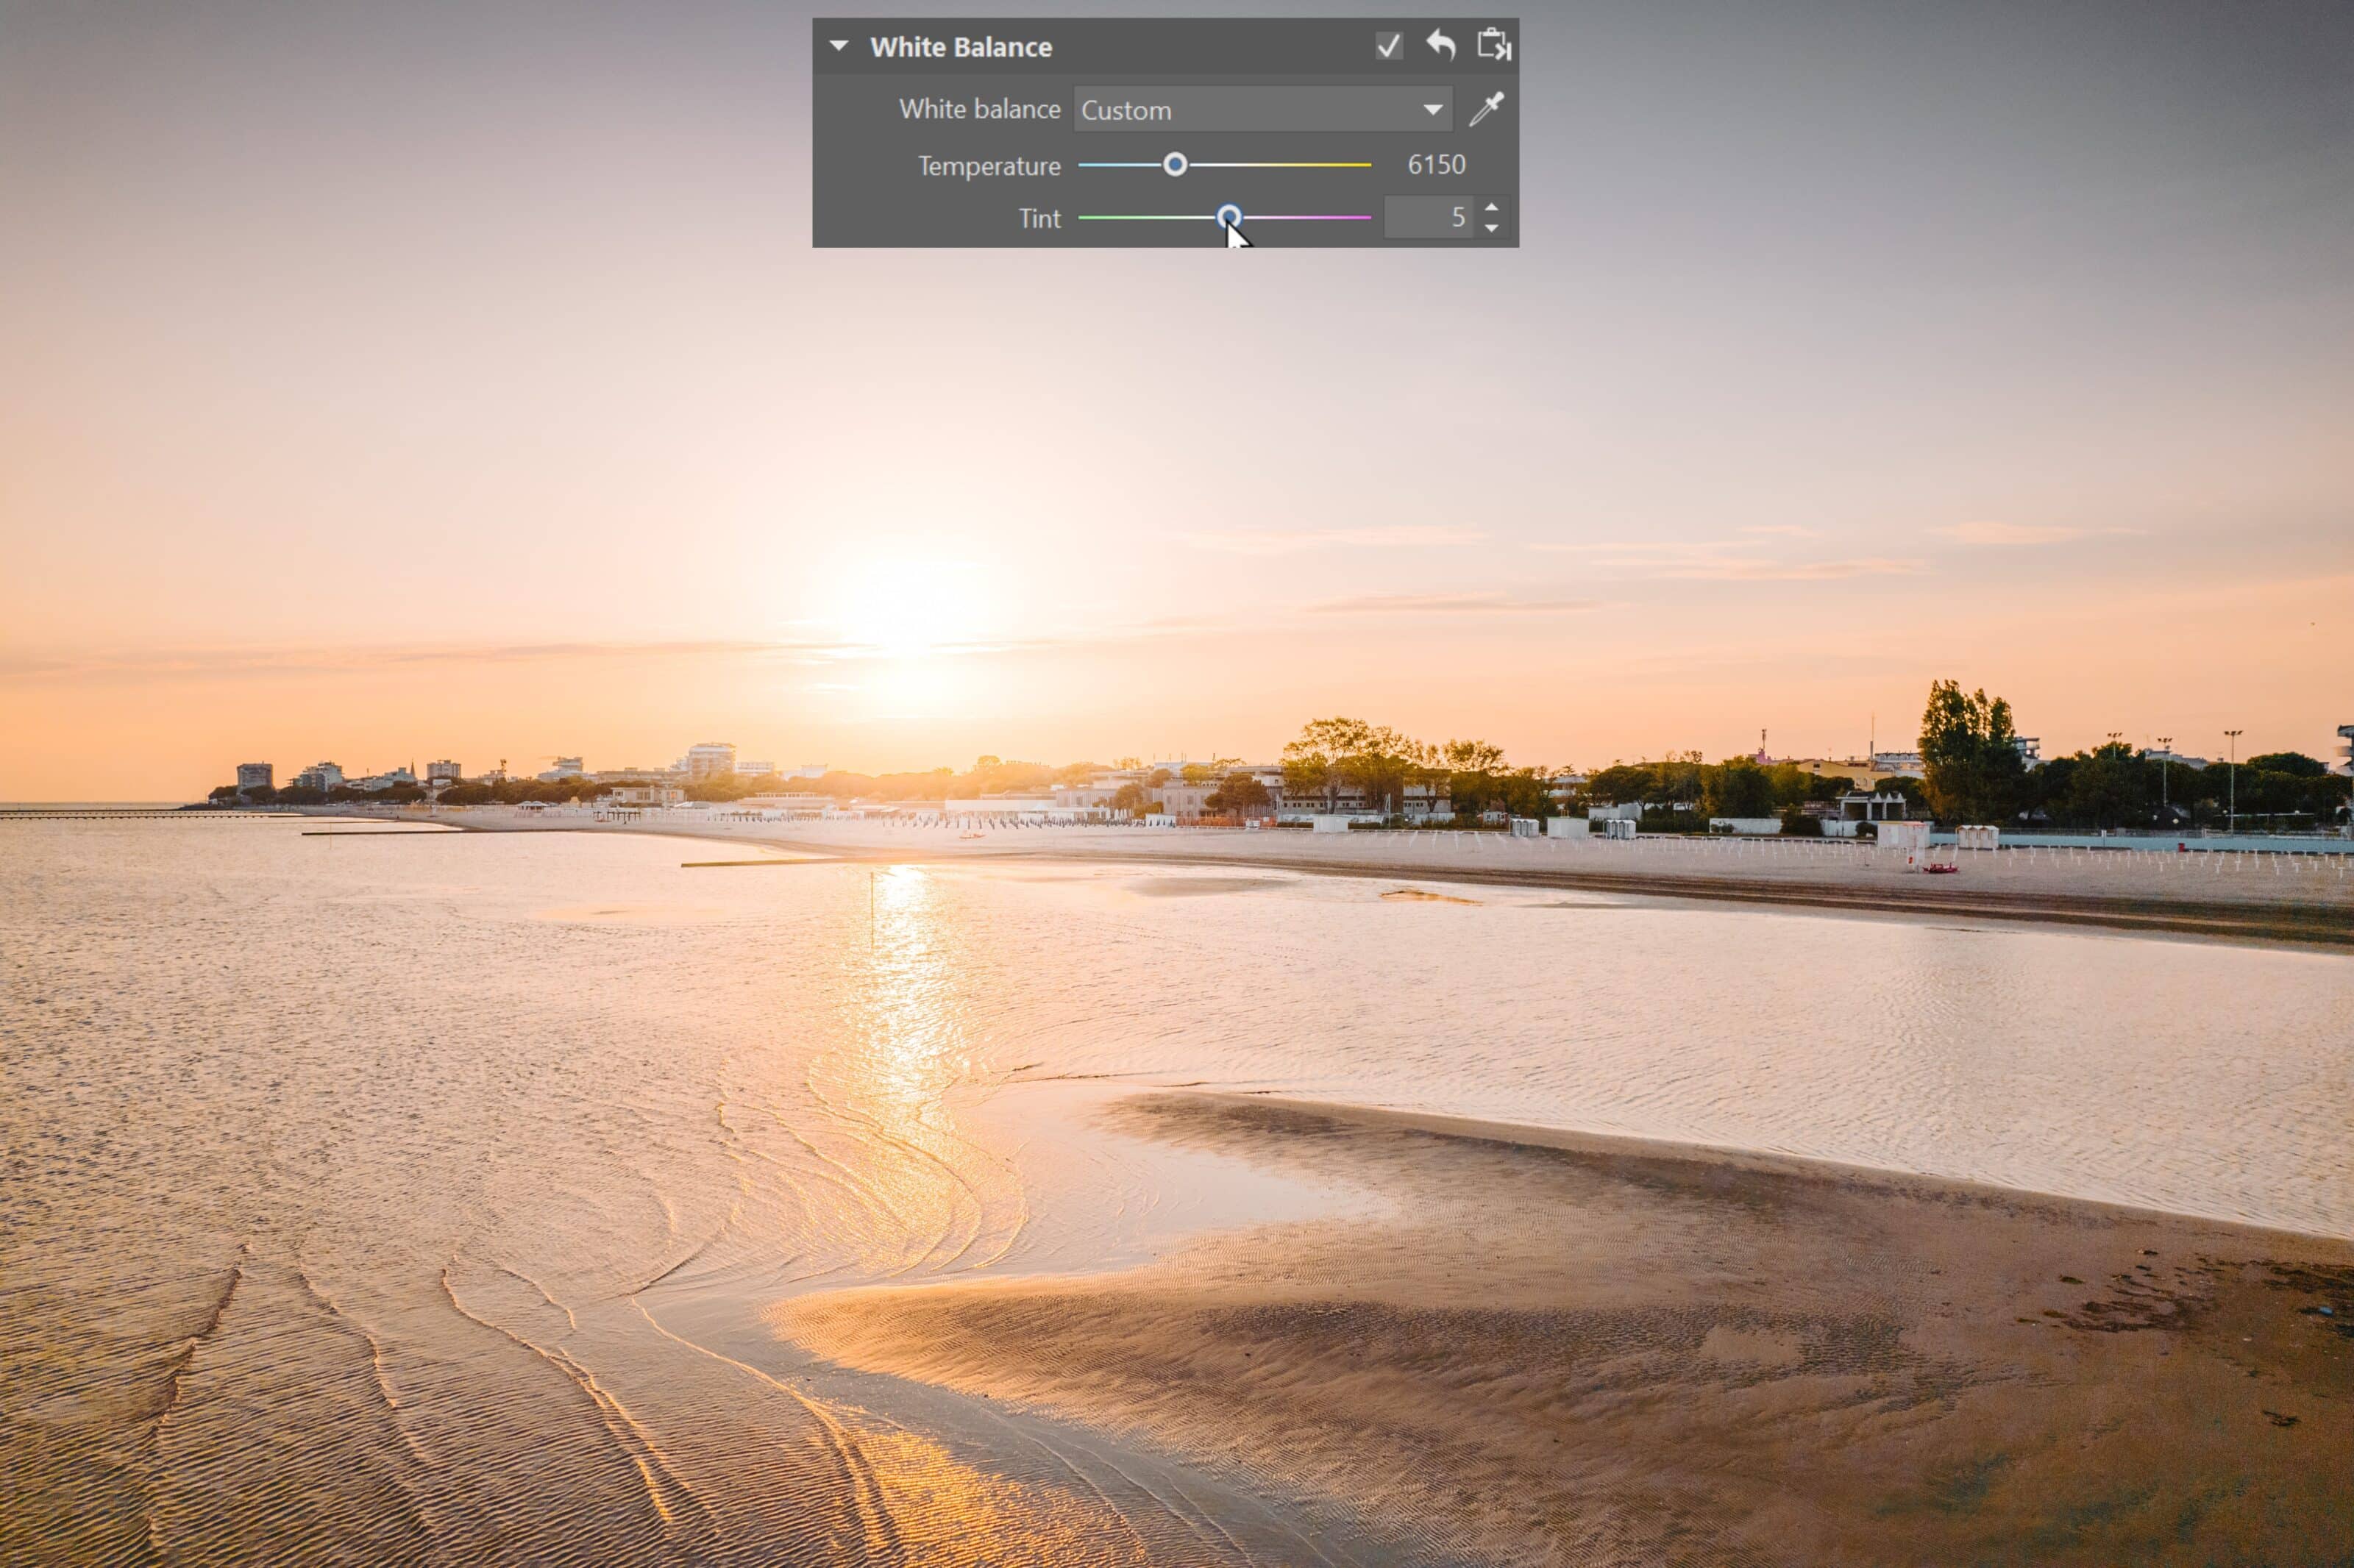
For sunset photos, neutral white can do more harm than good because it doesn’t convey the right atmosphere. In these cases, don’t be afraid to shift white to the right even more than the camera’s automation does.
Get creative with white balance
White balance is used not only to correct objective imperfections in a photo but also to make the photo look the way you want. That’s why you shouldn’t be afraid to get creative and play around with white balance.
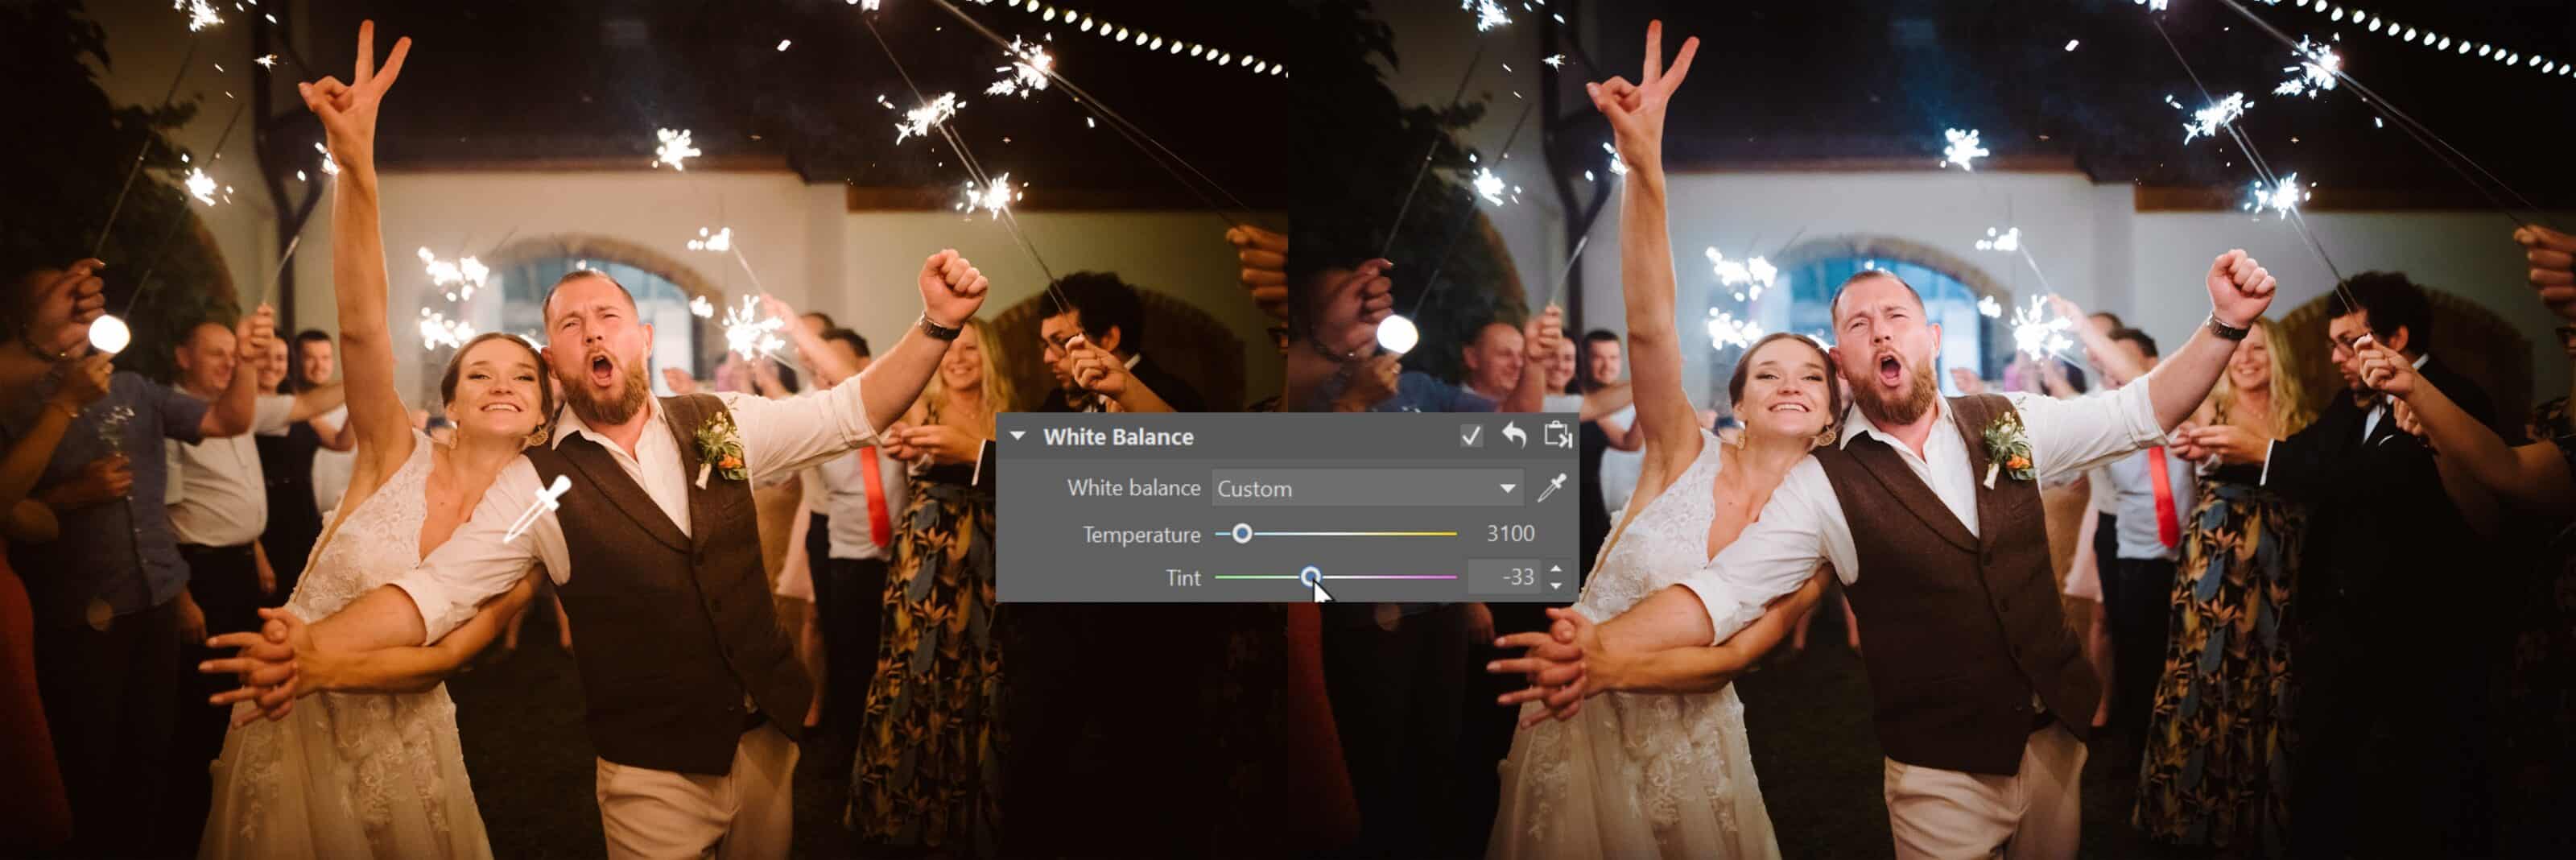
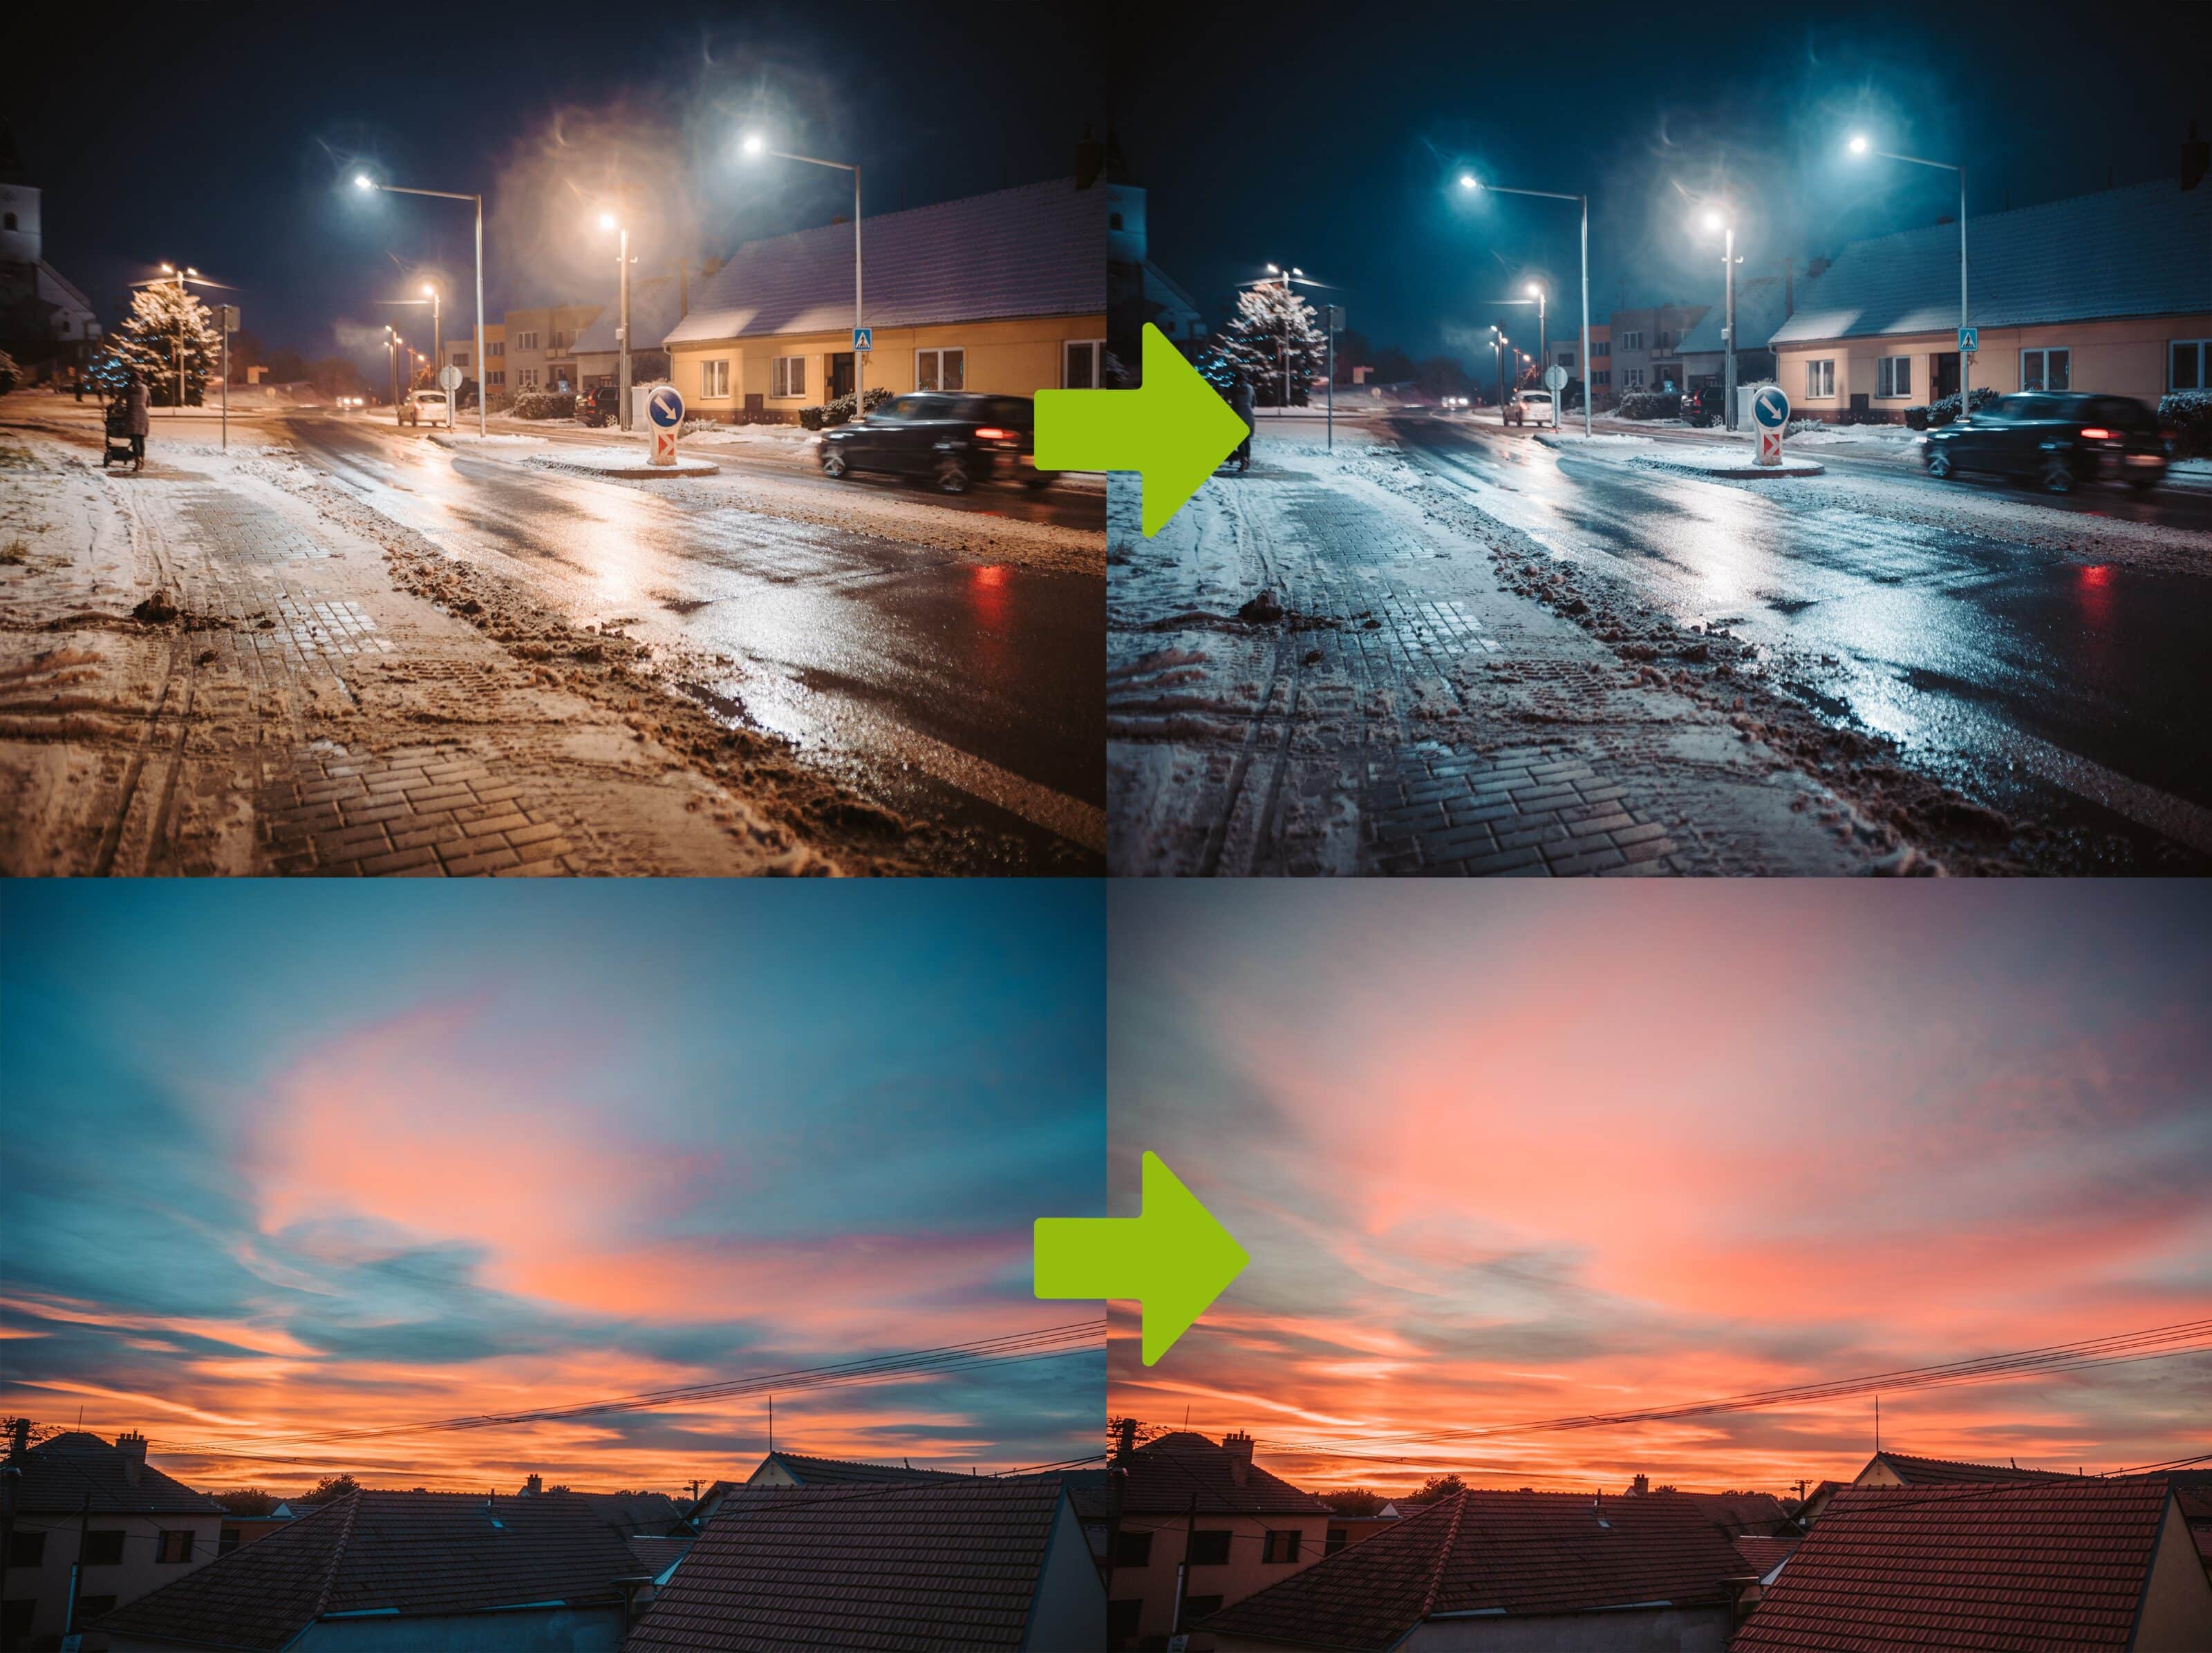
We’ll demonstrate the options for white balance in the following pair of pictures. Both pictures have a proper white balance by default. But to set the mood, it’s more interesting to shift the nighttime photo to cooler colors. For one thing, it will unify the light from the street lamps, where each one shines at a different brightness. It also gives the photo a darker atmosphere.
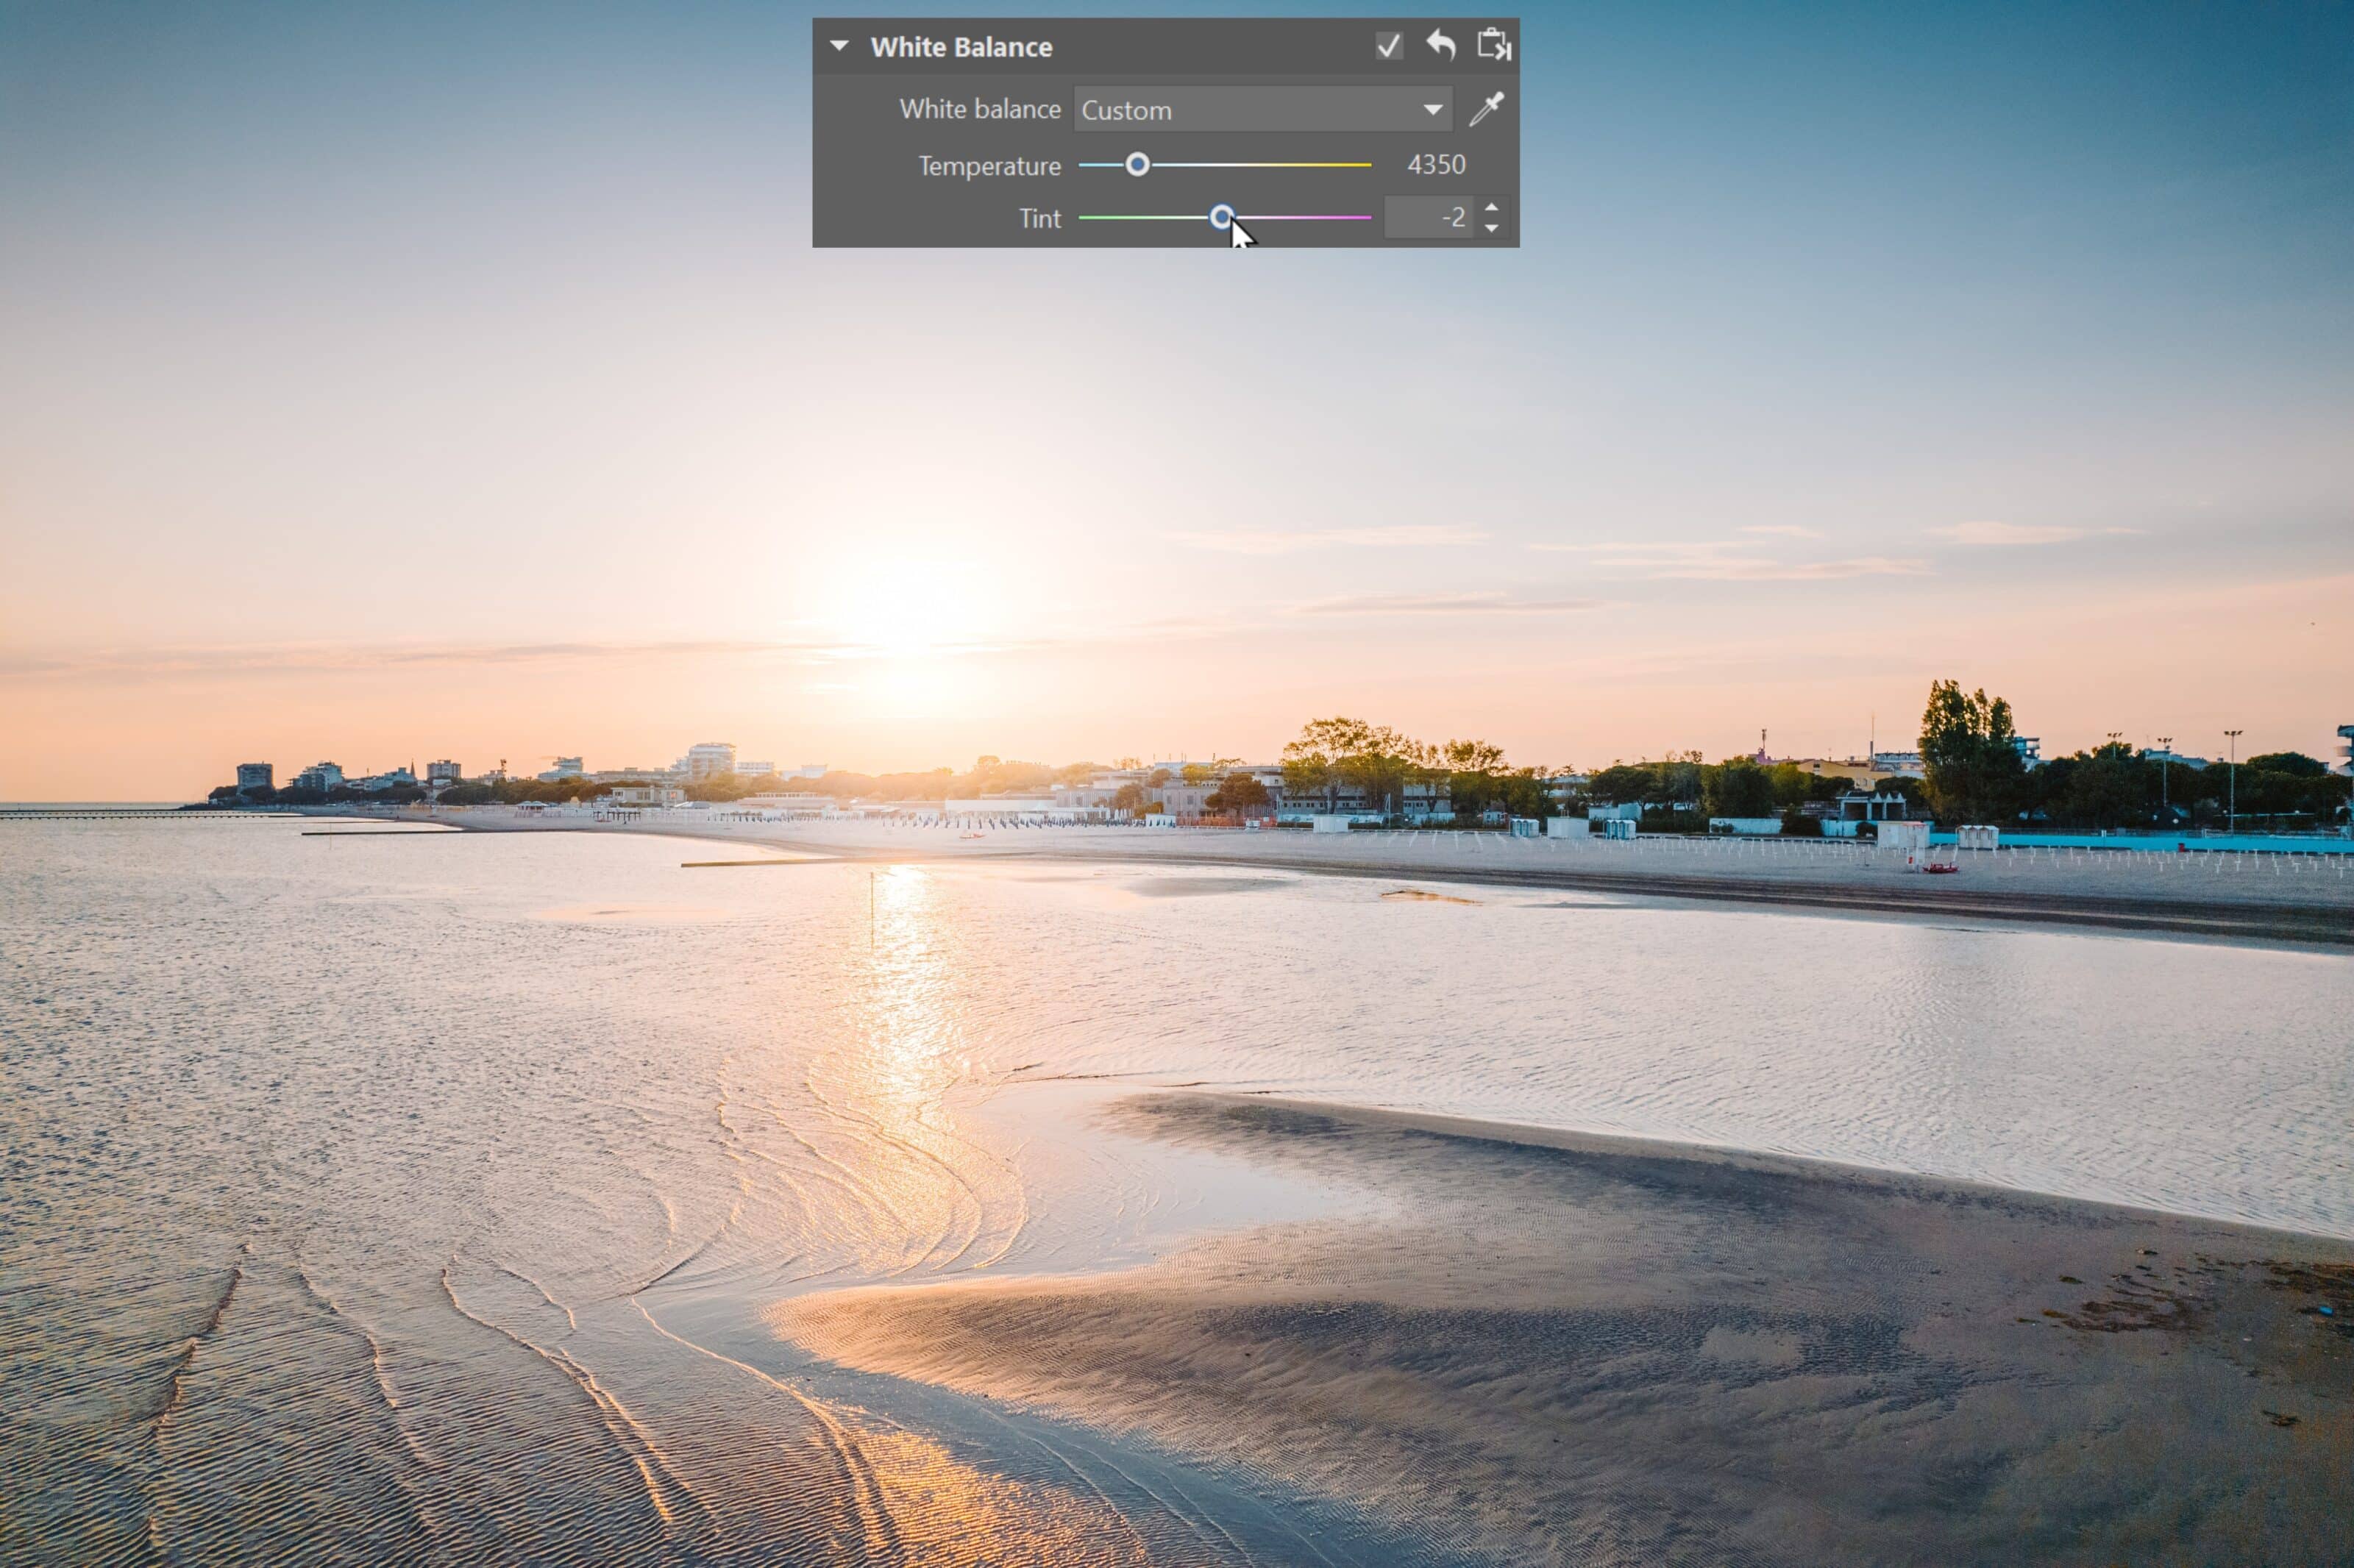
On the other hand, for the second photo of the red sky, it makes more sense to increase the Temperature to the right to make the sky even more full of red.
The rule of thumb is that if you want the scene to give a cooler impression (a mysterious forest, a lake, or foggy mornings), lower Temperature to bring out the blue tones. “Warm up” the scene by increasing Temperature and bringing out the red tones for sunsets, barbecues, and beach photos.
Further reading:
Download Zoner Studio and achieve perfect white balance today.
There are no comments yet.