Photo Hacks: Create Impressive Backgrounds or Your Own Photo Tent
There are many photo accessories out there to help you work faster and get flashy effects. But most of them are expensive. Fortunately, solutions exist for replacing these expensive tools cheaply. Learn to create your own photo tent or diffuser, and you’ll never have to buy expensive product photography gear again. And that’s not all. Check out our series of tricks for getting great photos while saving money.
In this article, we’ll show you how to produce a perfectly white background—and more. You can create an impressive color background just as easily. Play around and give your photos a little extra shine. And how about producing your own photo tent or diffuser? We’ll show you how to get started.
How to Create a White Background
It’s not easy to photograph an object in a way that gives it a pure white background. After all, in a photo, even the whitest surface will normally look gray. To actually get a background that looks white, you need to either:
- light it so it’s brighter than the object you’re photographing, or
- backlight it.
In a studio, the simplest approach is to put the product in a softbox and shoot against the light. But the costs for a studio light (no matter whether that’s a permanent light or a system flash) and a good softbox can even range into the hundreds of dollars.
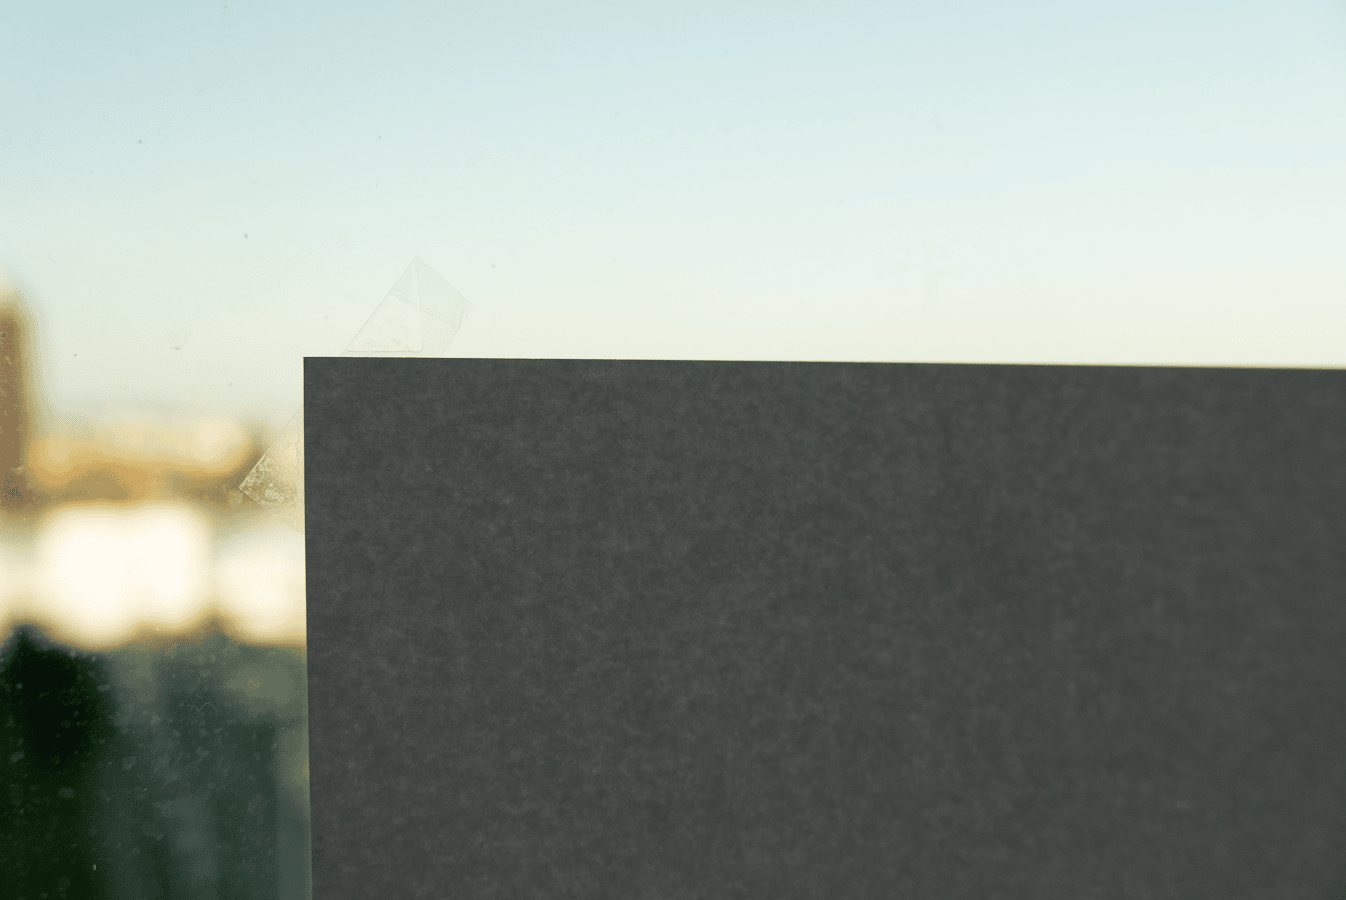
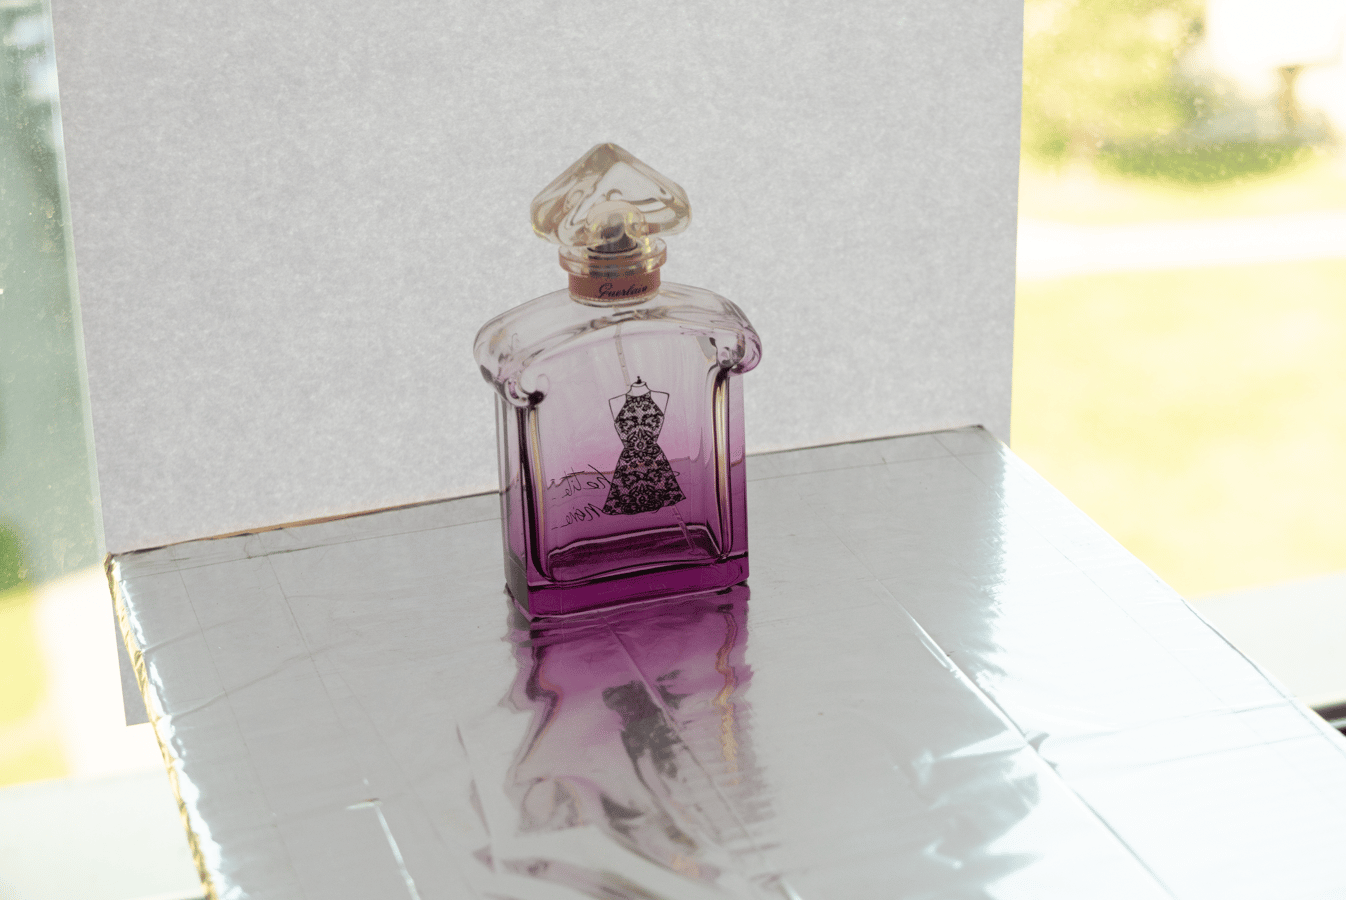
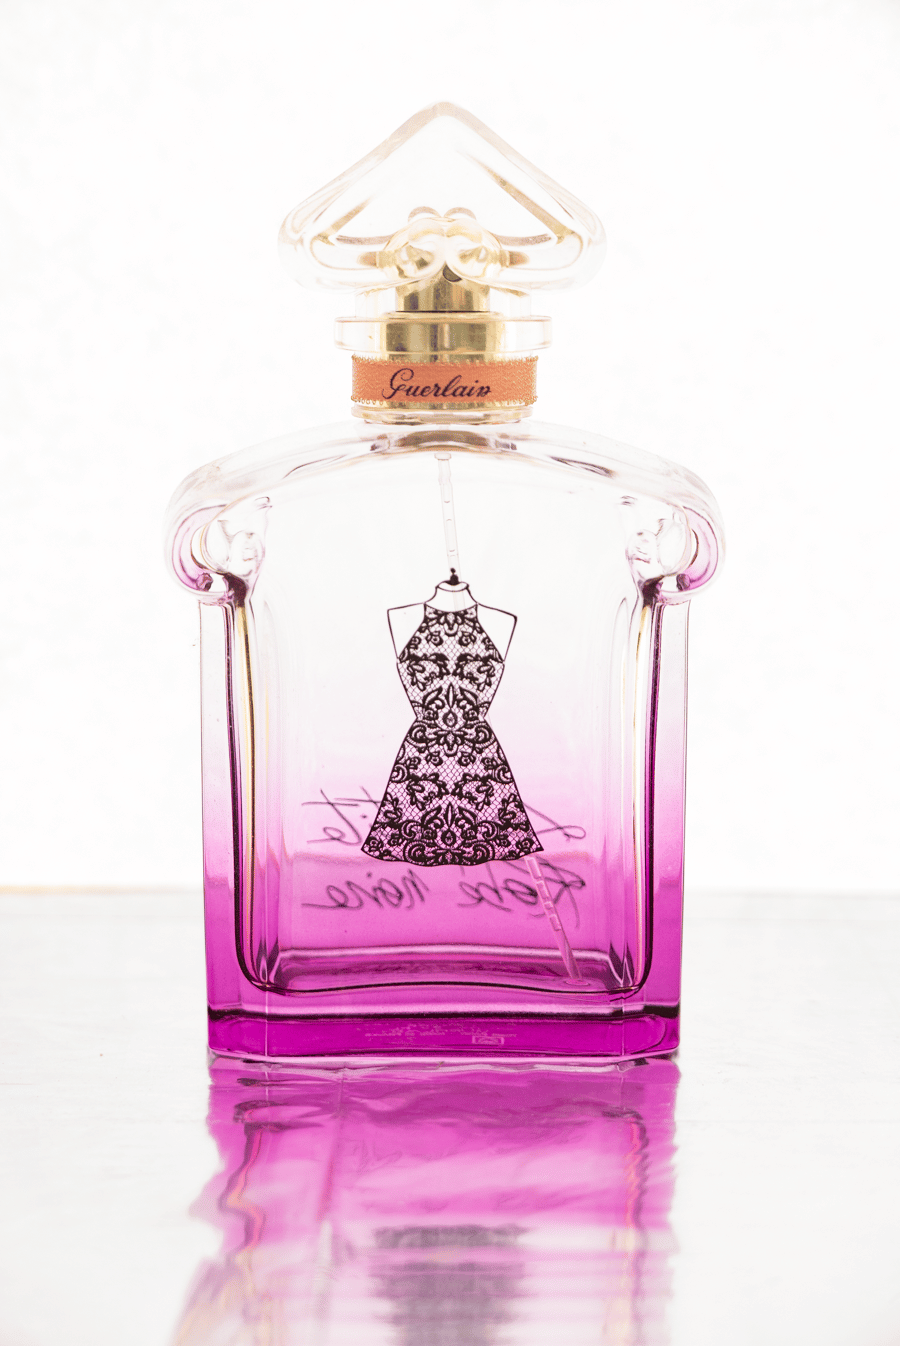
One very simple solution is to use light from a window. Tape an ordinary sheet of paper onto a window, and place the object you’re photographing in front of it. Now, since you’re shooting against the light, it will be relatively hard to set the right exposure. If you just shoot the picture on automatic, your camera will underexpose it.
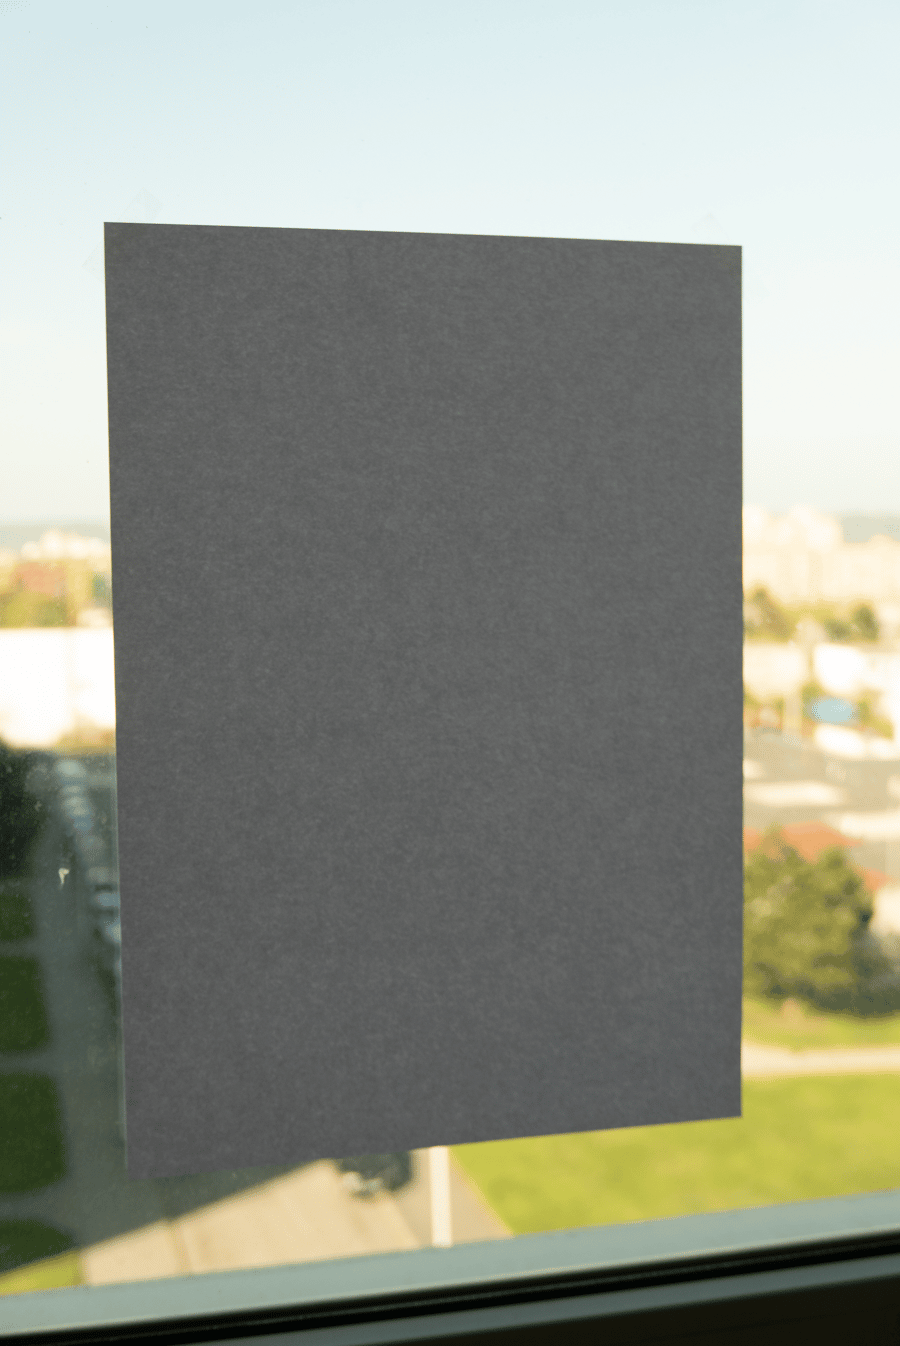
Use manual mode. Set the exposure level so that the background loses all details (i.e. so it’s pure white). Meanwhile, take care not to eliminate the details of the object you’re photographing. If that object has light-colored areas, then aim for an almost-white background instead. You can then just brighten it in Zoner Photo Studio X.
If you have a camera that doesn’t let you shoot in manual mode, get a bright enough exposure by setting positive exposure compensation. You can expect to need exposure compensation of several EV. The exact level needed will depend on the amount of exterior light.
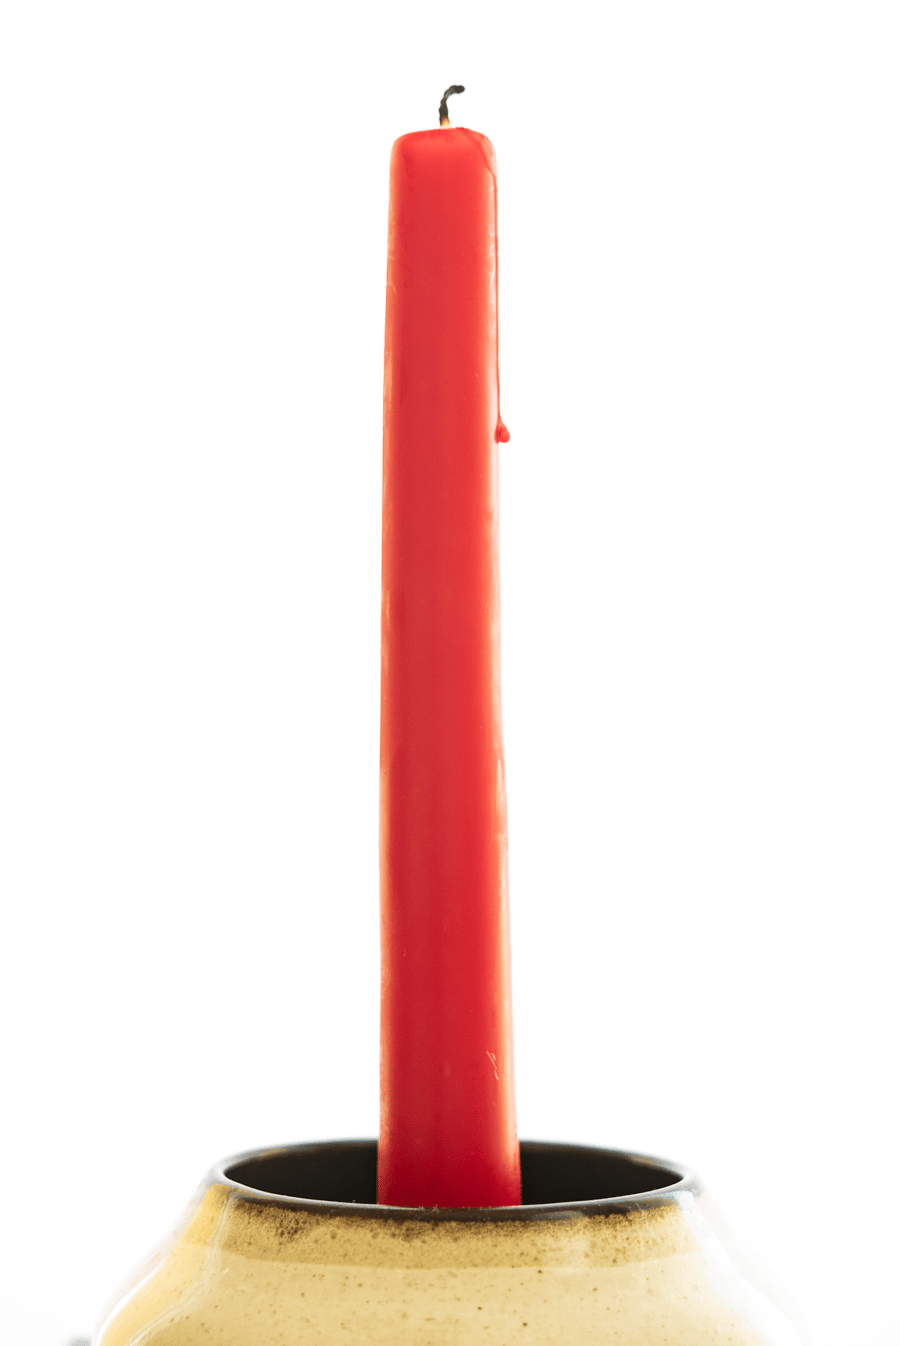
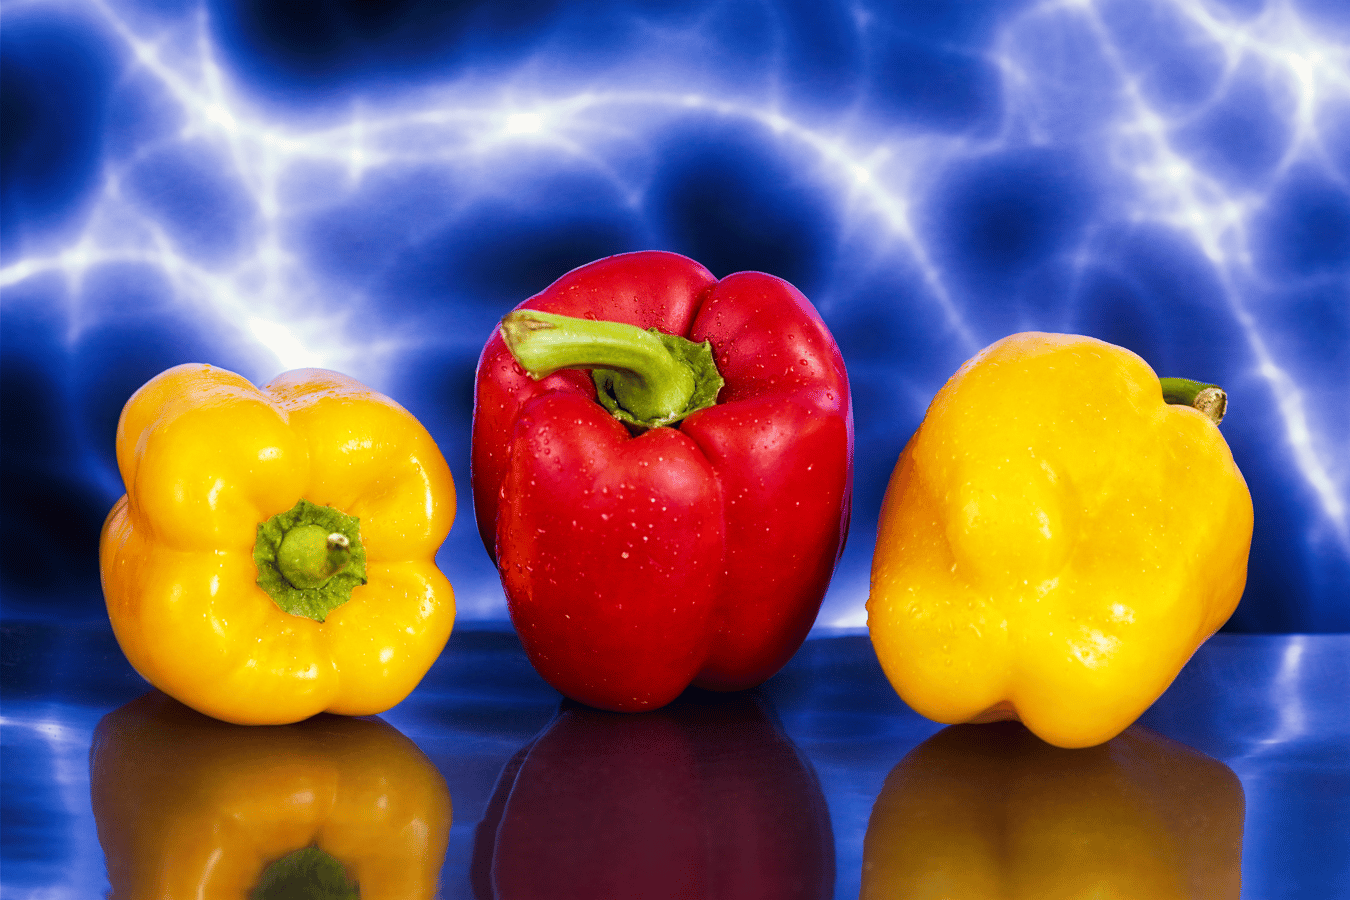
Flowers and portraits are two examples of good subjects for photos taken against bright backgrounds. For subjects like these, the mild loss of contrast that comes from shooting against the light does more good than harm.
Turn Your Laptop PC Into a Photo Background
But what do you do when it’s dark outside? Use the display of your laptop, monitor, or TV. If you set your monitor or television to be all white, it can easily serve you like a photo background even at midnight.
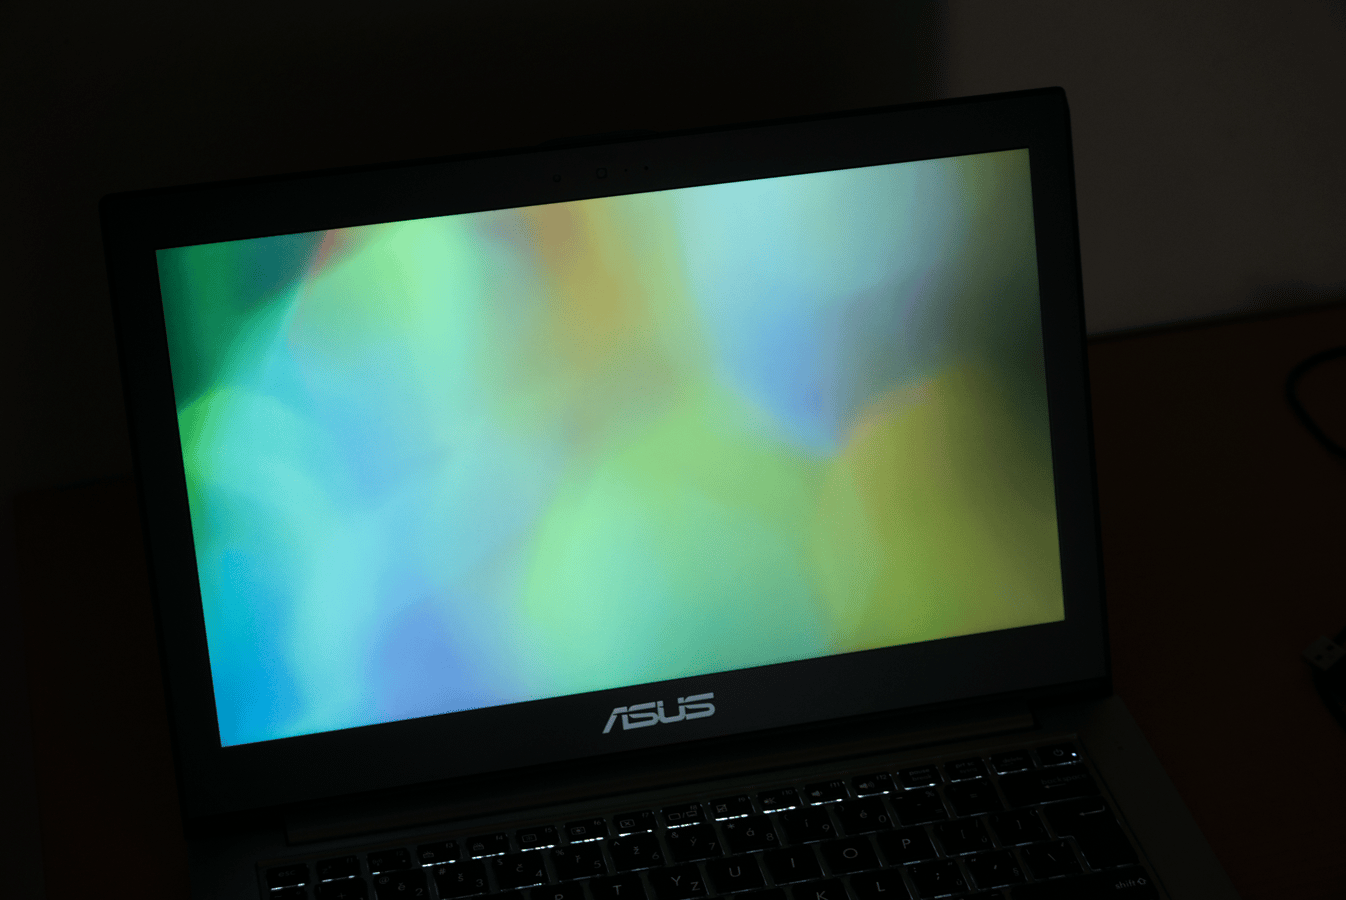
Also, when you’re using a monitor, you don’t have to stick to just a white background; you can adapt it however you like. It’s a good idea to use a monitor with a sufficiently high resolution (130 px/inch or more). That’s because for screens with lower resolutions, the “raster”—the grid of dots that they use—can become visible.
But if that’s all you have, you can solve the problem by using a lower f-stop to reduce the depth of field and by putting the subject as far away from the screen as is still workable. With a 13′′ laptop, I didn’t run into any problems when using Full HD resolution (1920 x 1080 px). With a 30′′ monitor, I also had no problems with the raster.
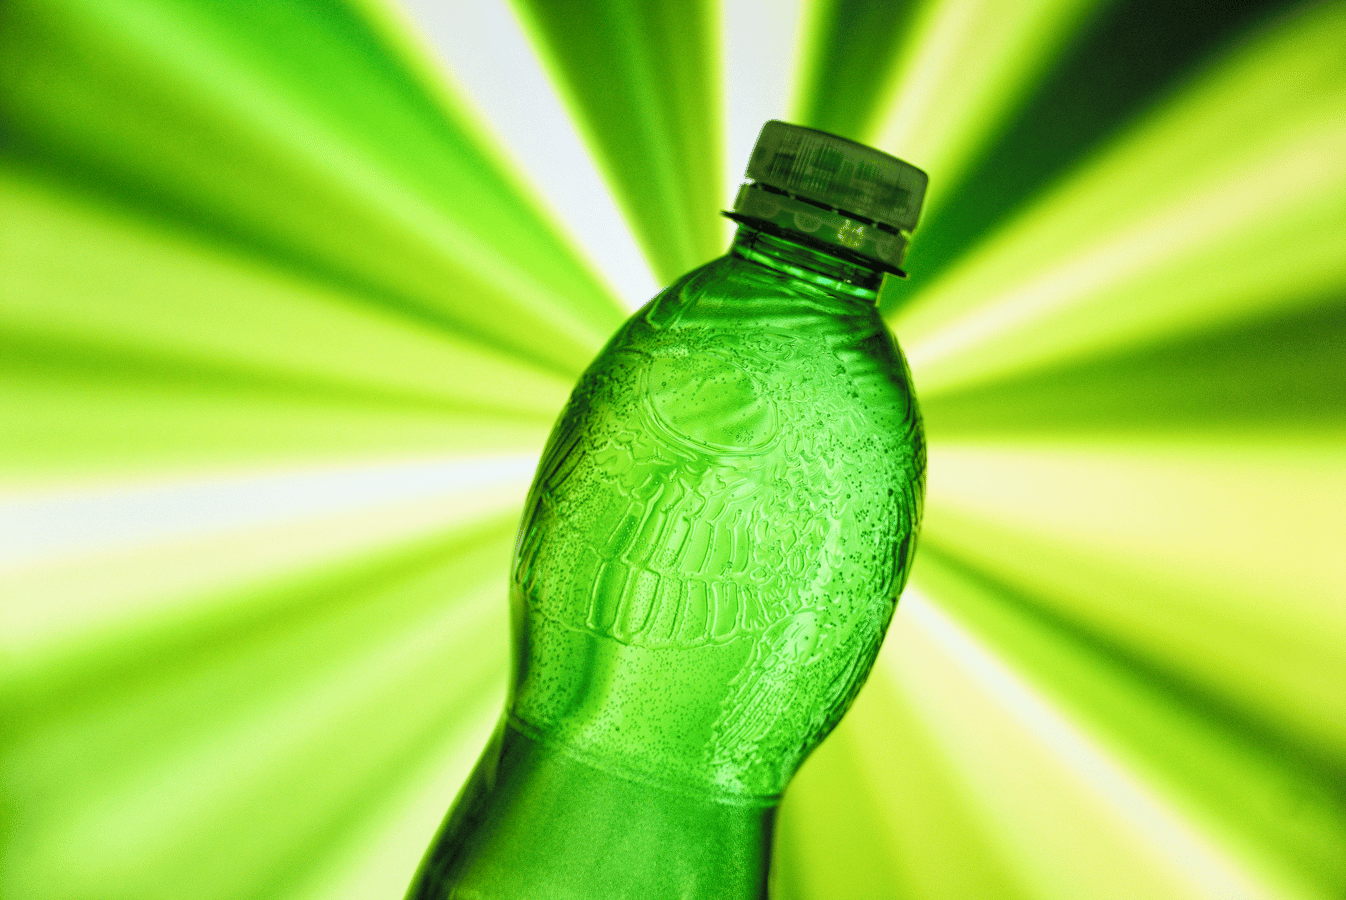

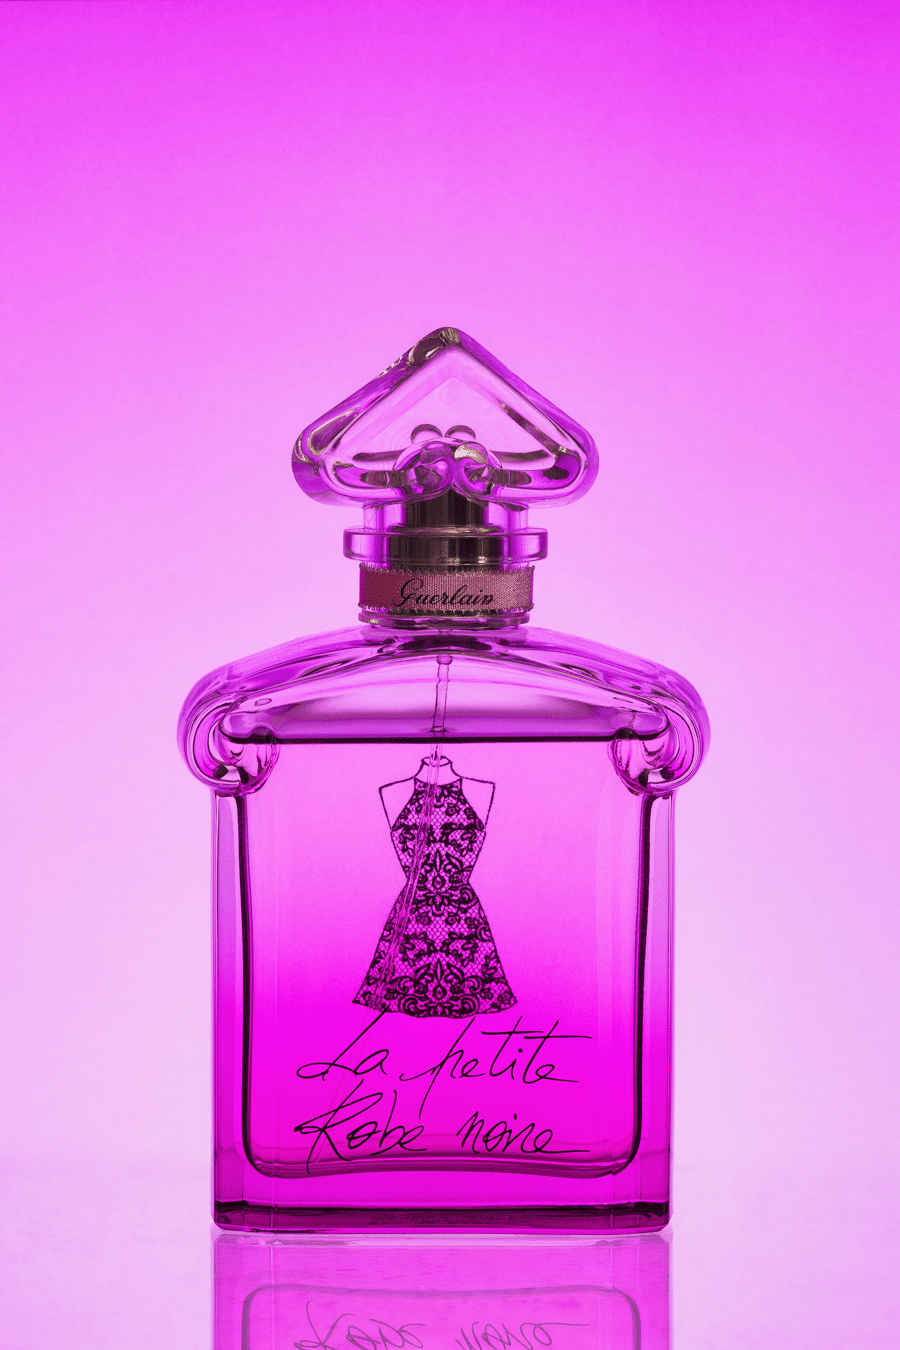
Reflections in Product Photographs
To make a product photo feel more special, try placing the product on some kind of shiny, reflective surface. For example, you can try a glass plate placed onto dark paper or cloth, or use tinted glass. If you want to produce a more dynamic-looking reflection, you can produce an aluminum reflecting the surface.
Glue aluminum foil onto cardboard, and place the photographed object on top of it. The final image will feel as if the subject were floating on water.
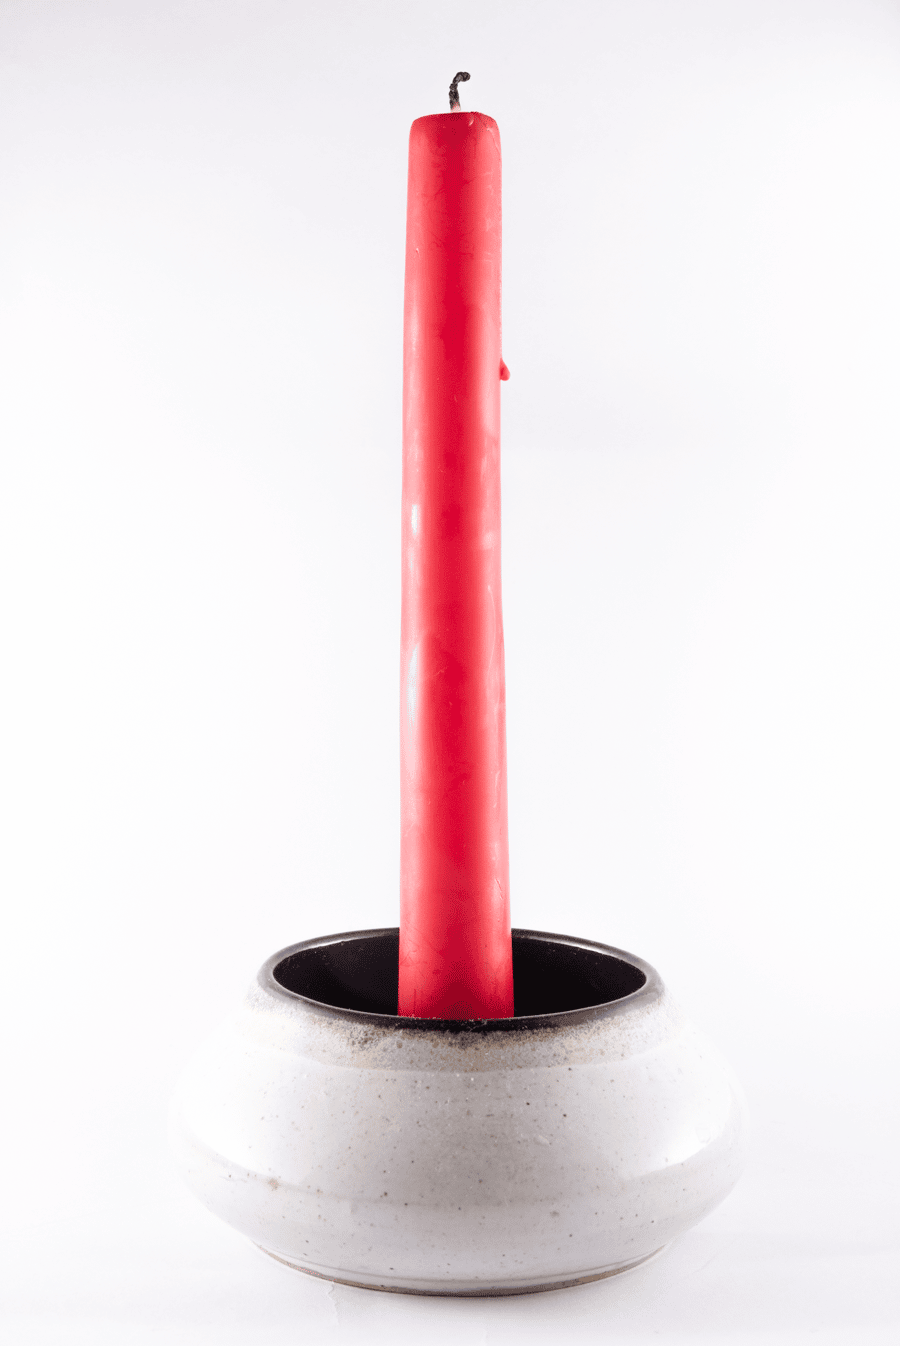
How to Replace a Photo Tent
Photo tents are used for photographing highly reflective objects, and especially metal ones. Why? Because metal surfaces act a little bit like mirrors. So when you’re photographing them, you have to deal with the fact that their surroundings will be reflected in them.
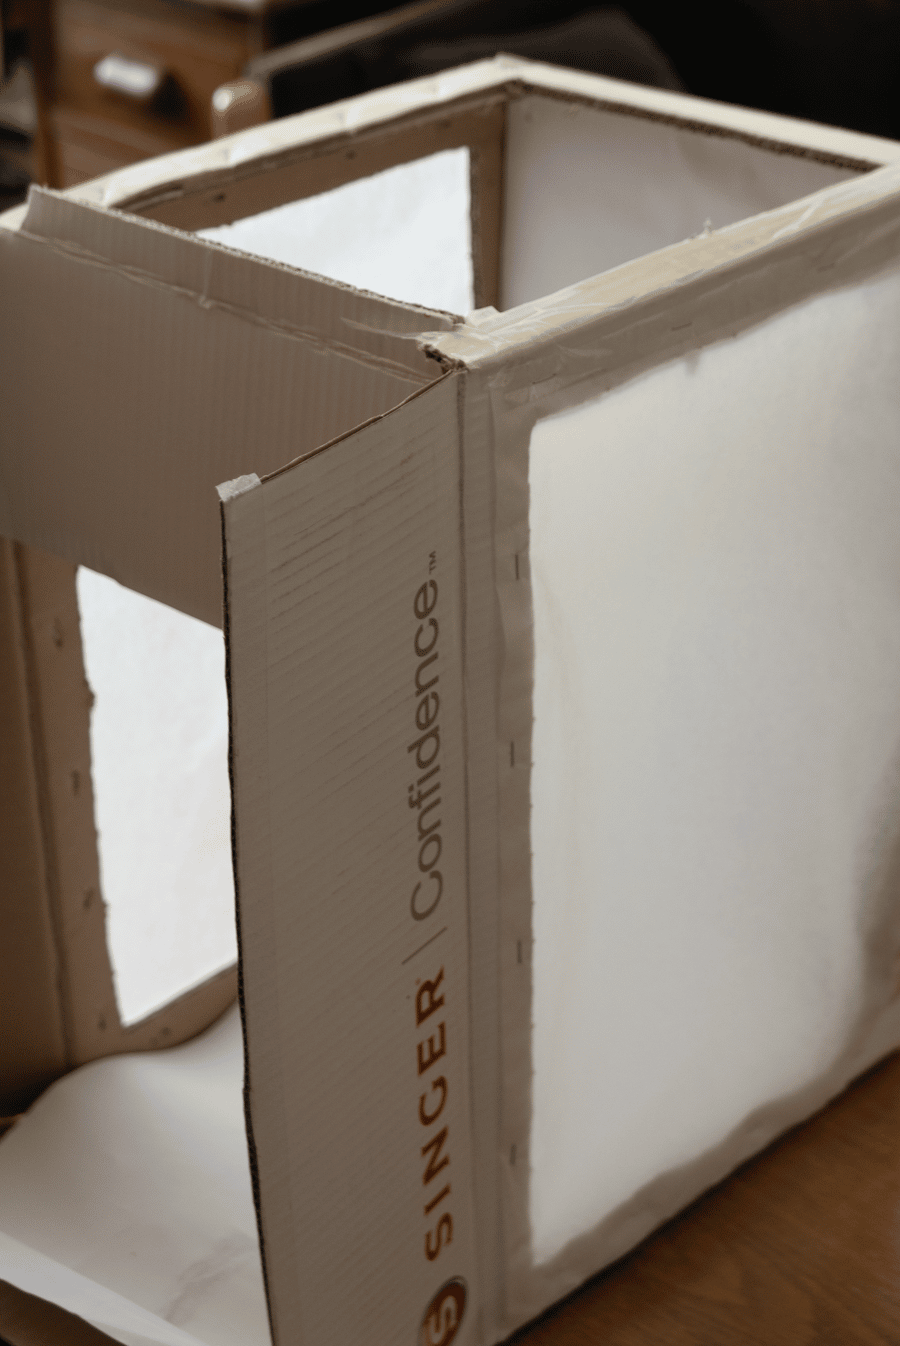
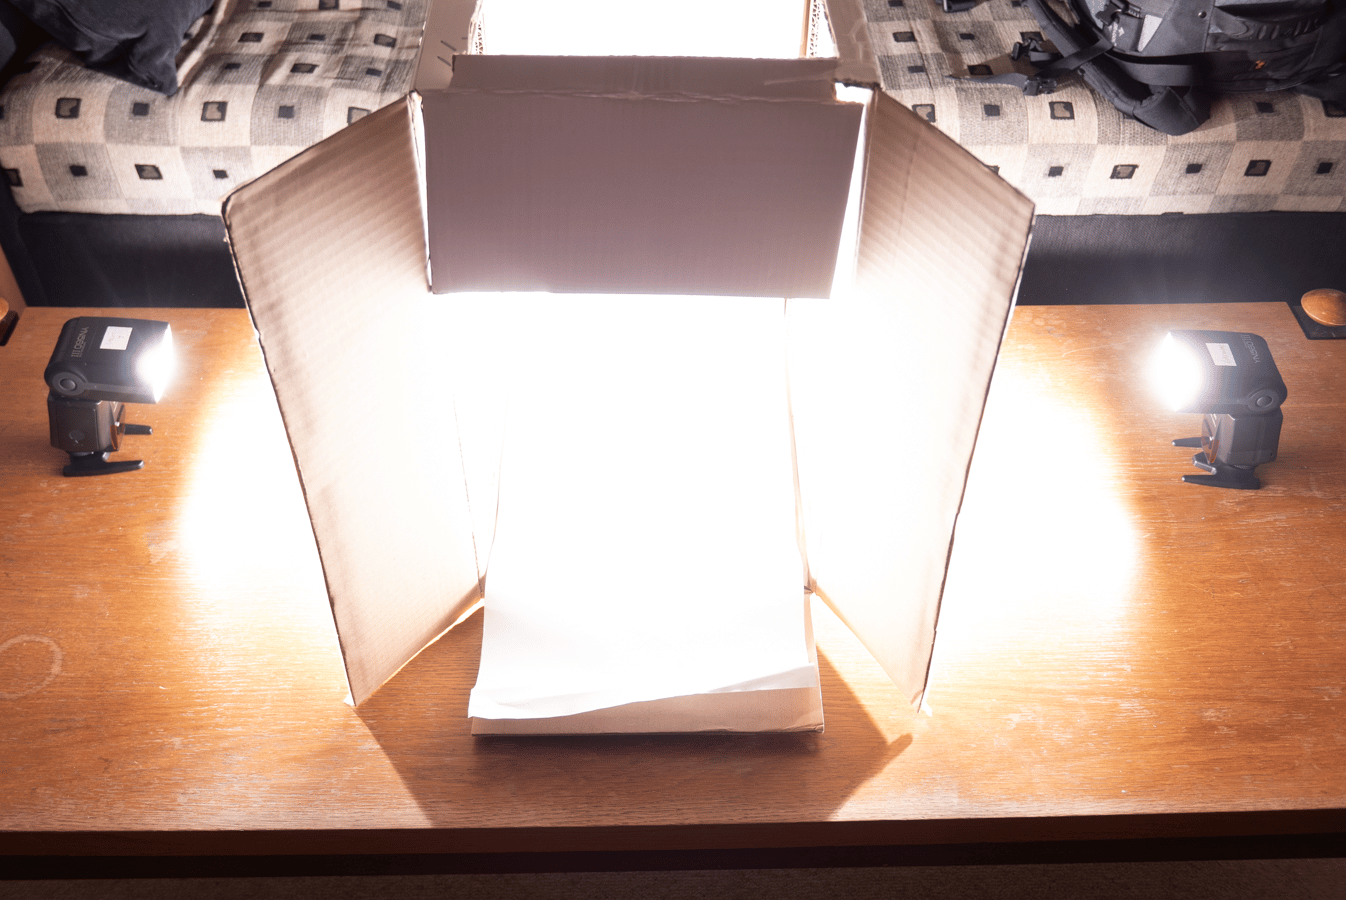
A light tent surrounds your photo’s subject from all sides with a neutral diffusing surface so that no distracting objects are reflected inside of it. Buying one of these tents on Amazon might typically run you $60 to $80 including shipping, though they can also cost far more. But if you don’t need to use one regularly, you can produce a simple one yourself quite cheaply.
You’ll need a large cardboard box and tracing paper (baking paper will work as well). Cut holes into three of its sides (literal sides—so, not the top or the bottom) and cover them with the tracing or baking paper. Place a large sheet of white paper inside the box to serve as an unbroken, “endless” background. Place the object you’re photographing inside the box, and light the box from the sides. If you’re taking your pictures under natural light or weak permanent artificial light, you’ll need to set long exposure time, and you’ll likely need to suitably stabilize your camera.
How to Diffuse the Light From a Built-in Flash
Flashes—no matter whether we’re talking about a camera flash or a system flash—produce very harsh light that saps all the life out of a scene’s colors. The traditional solution to this is to point the flash away from the subject and reflect its light off of a large neutrally colored surface (typically a white ceiling or wall). That way, diffuse light that’s much higher in quality hits the photographed object instead.
However, only a few camera models actually let you set the direction of their built-in flash. Otherwise, you’ll have to use a separate—and expensive—system flash. With a normal DSLR, you’ll have to use a trick… and here it is. Put a piece of somewhat stiff white paper in front of the flash. Ideally, this paper should be the size of a business card. It will direct the light from the flash upwards, and so the scene will be lighted with diffuse light reflected from the ceiling. Of course, that does mean that this particular tip only works when you’re indoors in a room with a suitable ceiling.

There are no comments yet.