Photo Story: Chasing Waterfalls

It’s usually not possible to shoot waterfalls from behind, but when an opportunity presents itself, but it’s taking advantage of an opportunity if it presents itself. Even if it means waiting for the right moment. This is the story of how exactly this type of photo came to be.
The Alps are filled with waterfalls—small, medium, and large. But only a special few fall so far from the rock ledge that you can walk behind them while staying relatively dry.
My first encounter
The waterfall in this article is the Johanneswaserfall near the village of Obertauern near Schladming. While the total height of the stepped cascade is about 60 meters, part of it is not visible, so the main fall is “only” about 38 meters high. The upper part of the rock forms a type of canopy which the water flows over. This creates a nook underneath with a hiking path.
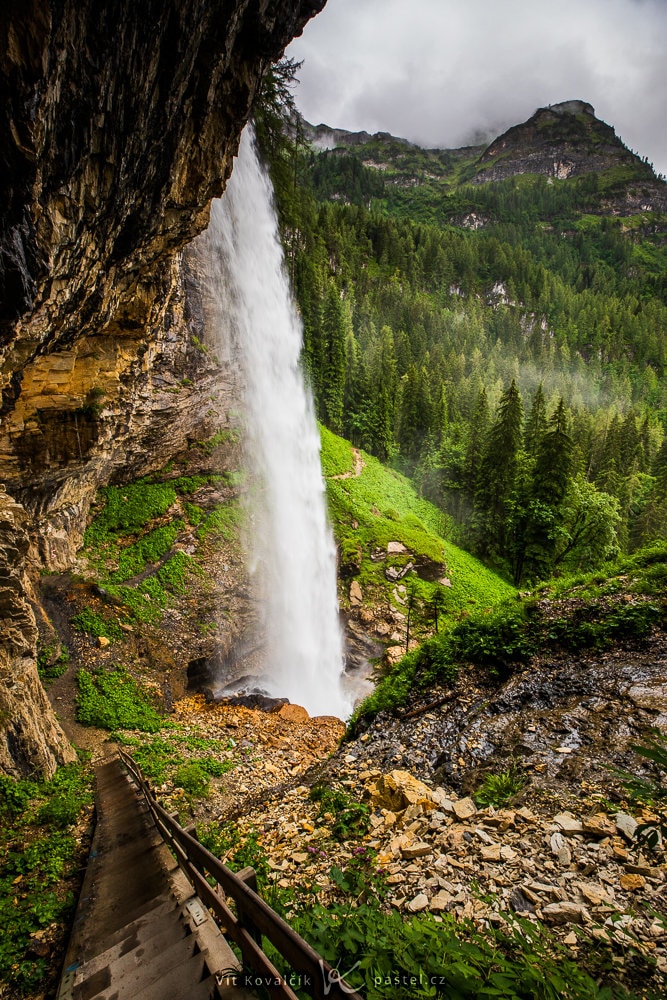
Canon 5D Mark IV, Canon EF 16-35/2.8 III, 1/40s, f/8, ISO 400, focal length 16mm
As you can see, it was a rough path to get down to the waterfall. If it weren’t for the waterfall, this path would certainly lead the other way. This path led to a steep incline of wooden steps, with water crashing around.
The water’s power was even more apparent at a closer distance and with a longer exposure:
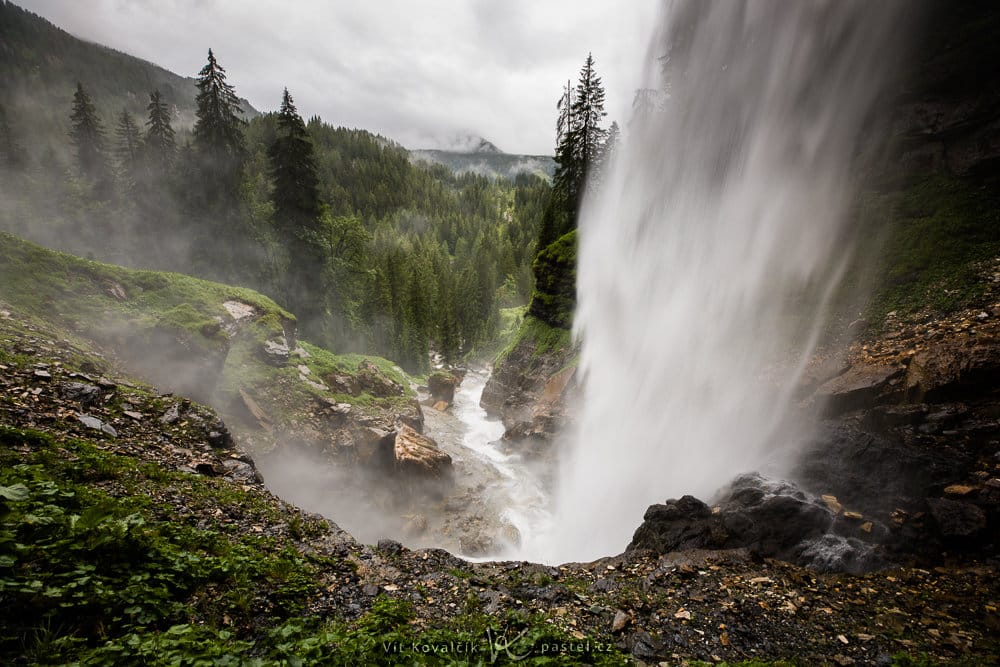
Canon 5D Mark IV, Canon EF 16-35/2.8 III, 1/25s, f/8, ISO 100, focal length 16mm
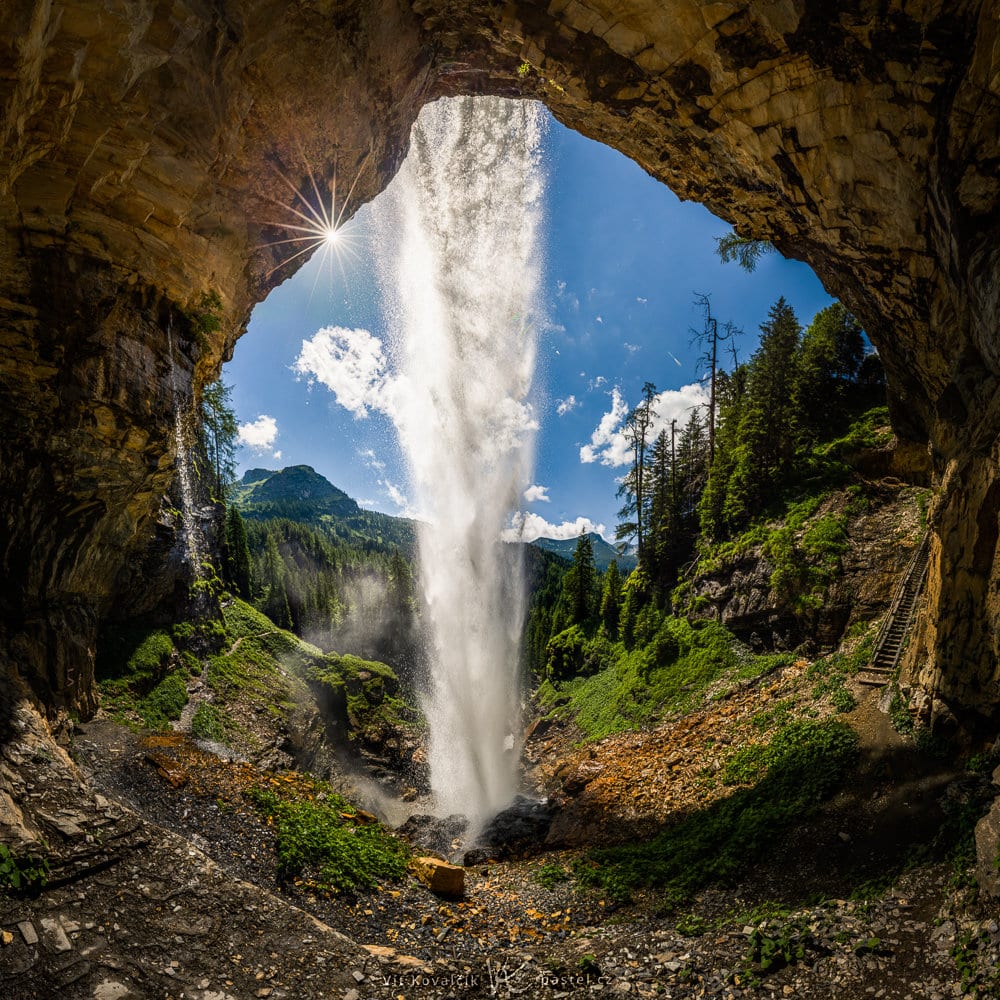
The waterfall is simply breathtaking. But because it was cloudy that day, I kept asking myself, “What would it look like if it were sunny?” I planned to answer that question, but first I had to figure out which direction of light would look best. After trying a few different compositions, I found that I could climb up to the rock ledge just above the path behind the waterfall and shoot from there.
Unfortunately, the setting is so huge and stretches out in all directions that my ultra-wide 16mm lens was not enough. I had to resort to shooting a panorama. With the flowing water, I wasn’t quite sure how the seams between photos would turn out, but I was willing to take a chance. Worst case scenario, I could always retouch any imperfections.
This was my first attempt with cloudy skies:
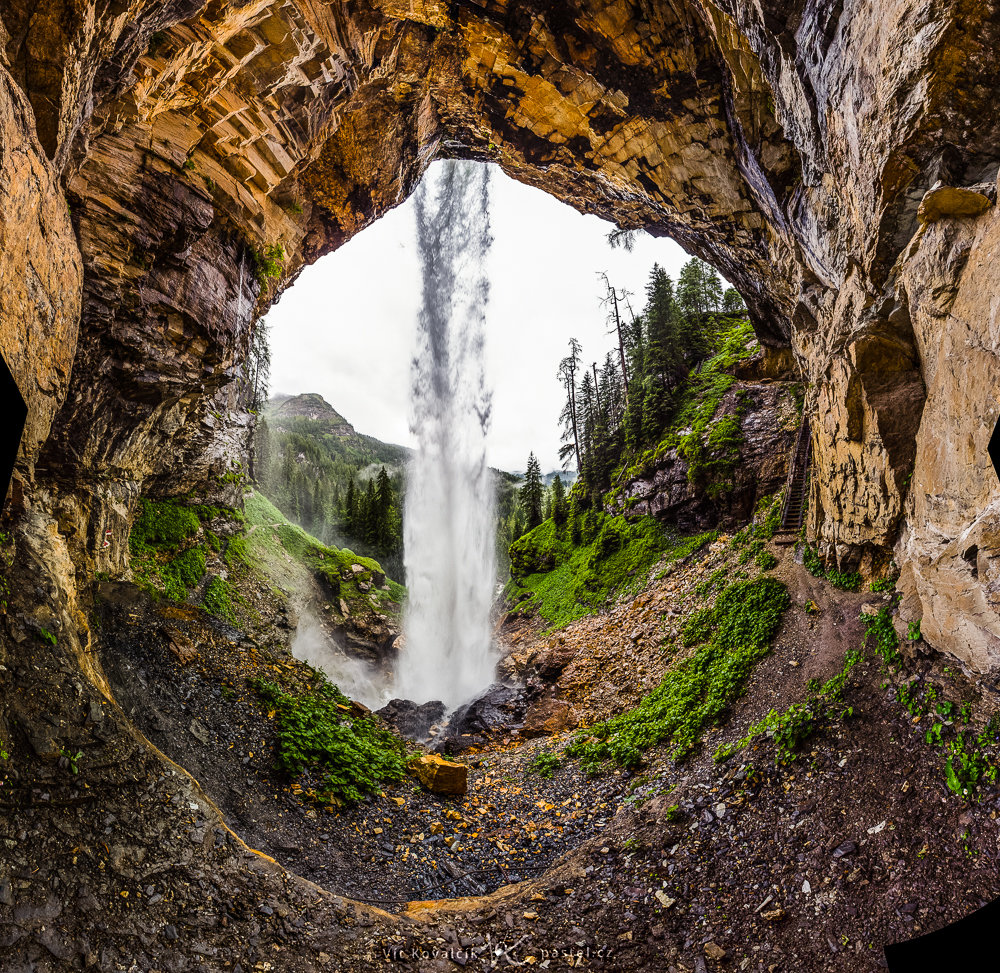
You can see that even though I’m in the depths of the cave, it is wet everywhere. The water from the waterfall splashes in all directions, so there’s no guarantee you’ll stay dry. For a hiker, it’s no big deal. But for a photographer, it means hiding the camera under your jacket and not being able to change lenses in the 50 meter vicinity around the waterfall.
Charting the position of the sun
I could have waited until right before sunset, but it seemed a bit much to have blinding sun directly behind the waterfall. I was much more tempted by the possibility of shooting the sun peeking out from behind the rock.
You can plan for the position of the sun using mobile apps. You can even examine the surrounding landscape using an image with the sun superimposed for different times of the day. I didn’t rely on this too much, because all it takes is a slightly different shooting position or slight inaccuracy in the phone’s compass and the result can differ significantly from reality.
I planned to return with a large cushion of time before the sun went over the edge of the rock, around early afternoon. If I arrived too late, there would be no way to fix it. I had my book in my backpack in case I came too early.
Next day with sun
I didn’t have to wait long. The very next day, beautiful weather awaited me.
When I returned to my spot, I discovered I was too early. The waterfall and its window were still in the shadows.
Canon 5D Mark IV, Canon EF 16-35/2.8 III, 1/60s, f/13, ISO 100, focal length 16mm
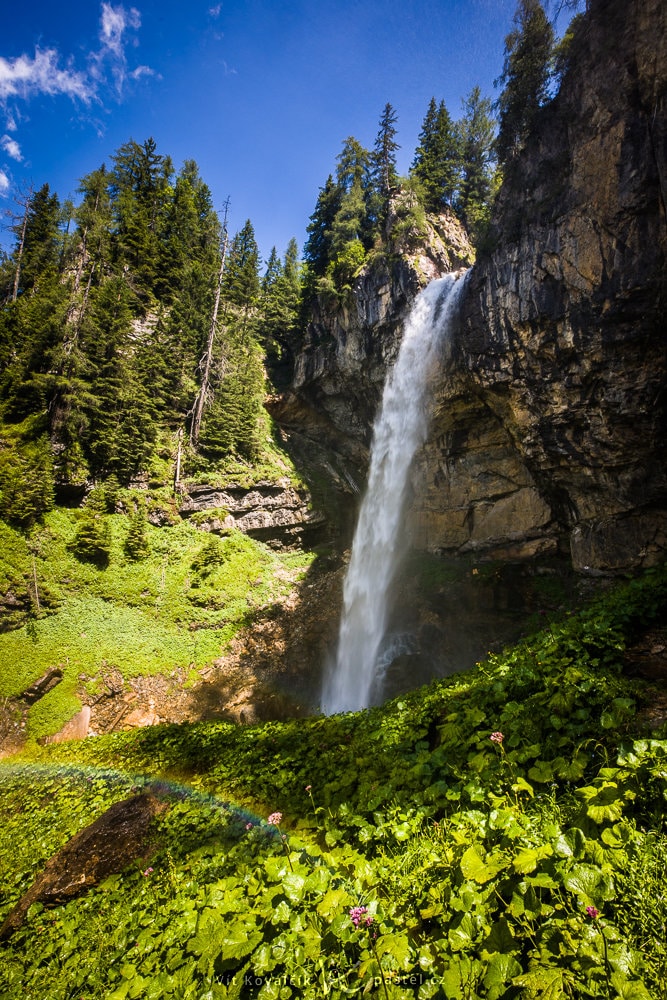
A rainbow made my wait much more pleasant. Even far away from the waterfall, there was a spray of water in the air. All I had to do was look away from the sun and the rainbow appeared. It’s just too bad that with the sun so high in the sky, it meant the rainbow would be under my feet. But that was something I could work with. Also, with the beautifully lit landscape and blue sky, I got much brighter photos than the previous day:
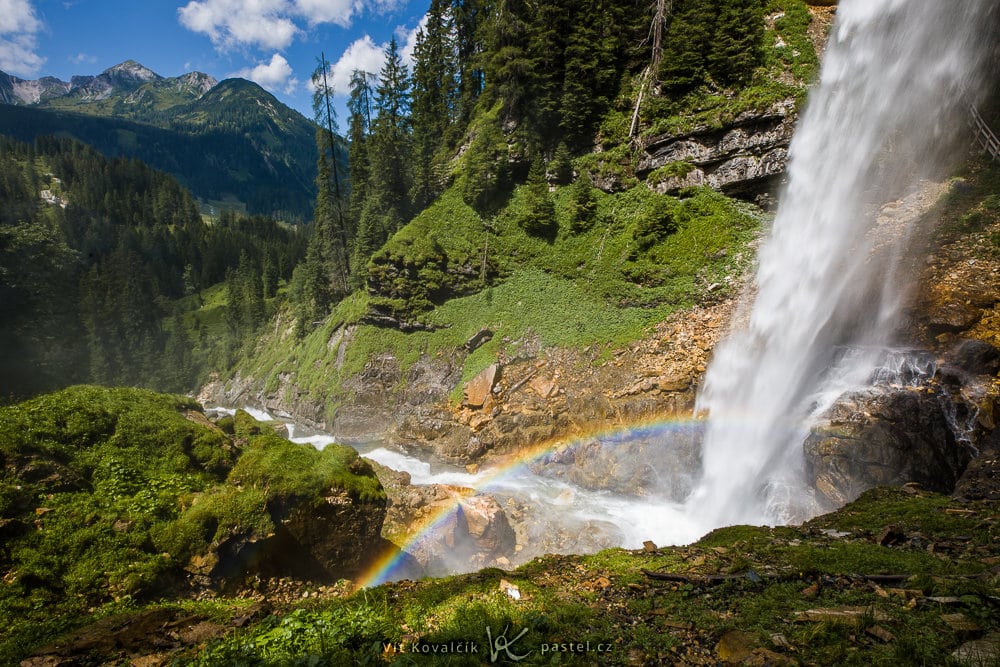
Canon 5D Mark IV, Canon EF 16-35/2.8 III, 1/50s, f/16, ISO 100, focal length 16mm
All that was left to do was wait for the sun behind the waterfall while reading in the woods about 100m away where I wasn’t sprayed by the mist. Every once in a while, I’d close my book and go see what the situation looked like, take new photos of the rainbow, and give my legs a stretch.
The final shoot
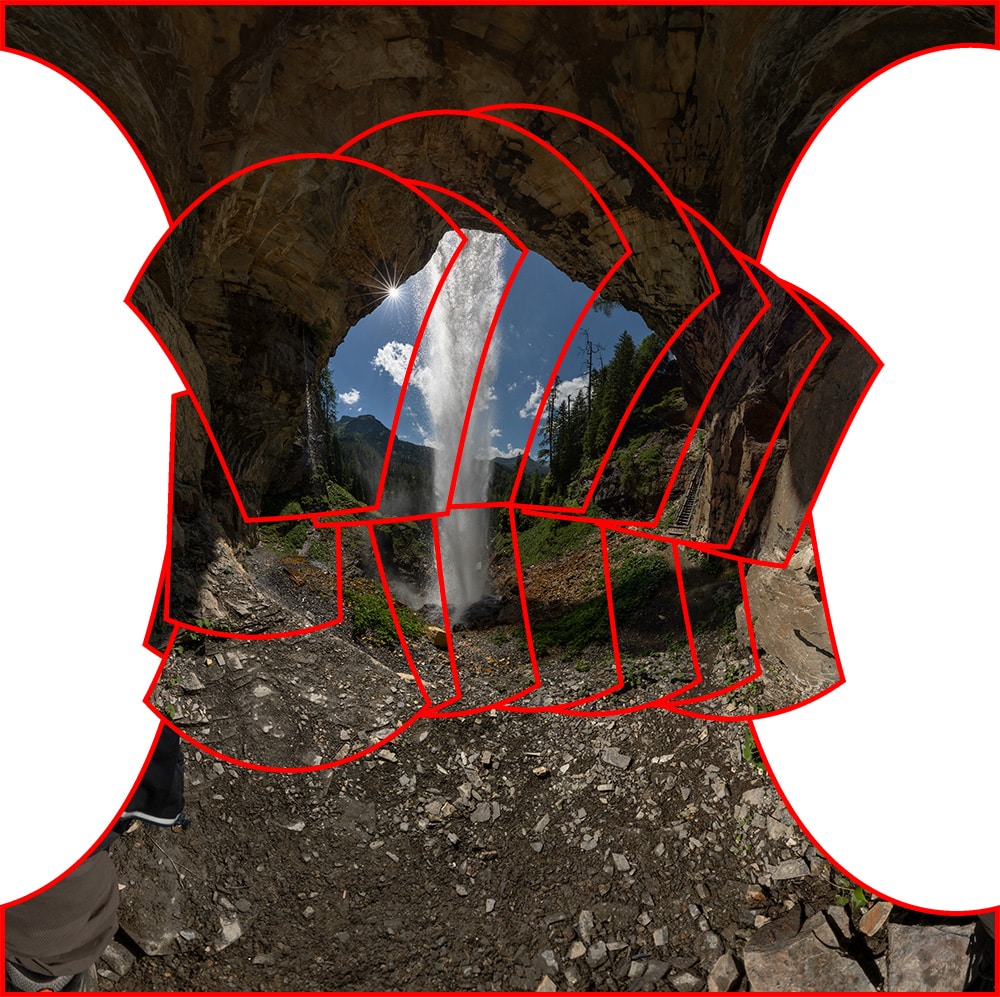
About two hours later, the sun was in the right place, and I was able to shoot the series of photos I was looking for. There was no room for my tripod on the ledge, so the images were shot handheld. To be safe, I used Exposure Bracketing. For every shot, I took a series of three different exposures. The result was 46 images in several rows. I had a relatively large number of overlapping images. Fewer would have been sufficient. However, I know from experience that a photo can be blurry or have other technical issues, so I was very happy to have backups.
Stitching together the panorama
I thought stitching the photos together would be a problem due to the movement of the water. But I used the Hugin program and it was able to handle this issue without too much trouble. In the end, I didn’t even make full use of all the exposures and do full HDR. It was enough to choose a few of them. I don’t have the entire process of the image with the layers anymore, but from the available clues, it looks like I used around 18 to 20 source photos from the original 46.
In the end, my editing consisted more of retouching the droplets on the lens against the sun. Of course, I also did global adjustments to brightness, contrast, color, etc.
Different days—different photos
I’m glad I was able to get a photo from behind the waterfall. It wasn’t easy. After all, the fact that while the waterfall is well known, I was only able to find a few pictures of it from behind. They certainly hadn’t turned out this well (this is subjective, of course). Patience and the option of a second trip also contributed to my success. These kinds of trips can’t always be done. But if you have the chance, don’t let it pass you by—an identical scene can look completely different.
There are no comments yet.