Printing and Sharing HDR Photos Online
HDR support in Zoner Studio opens a whole new chapter in photography. Once you’ve seen true HDR, you’ll never want to go back to normal SDR photography. You will want that full dynamic range with all the deep shadows, bright highlights, and rich colors. Learn how you can edit HDR photos to print or to upload to the internet or online photo galleries.
You can now access the full range of brightness for your entire photography workflow, from taking the photo all the way to post-processing and delivering final images. That feeling of euphoria, of a perfect world with perfect colors, abruptly comes to an end the moment we want to publish photos online, share with friends, or print.
Unfortunately, HDR monitors aren’t mainstream yet. Most users will view your photos on a normal SDR monitor or TV. Others may use more advanced mobile phone technology.
How SDR works
The simplest solution is to ignore the old SDR format and only share photos in HDR formats. This isn’t as ridiculous as it seems. Apps that can load and display HDR should also be able to handle displaying them on SDR devices.
What we don’t know is how each application displays HDR photos. There’s no standard for displaying HDR images. Some apps or devices simply clip the higher brightness levels. Others make a partial transition at the end of the range. Some attempt tone mapping, or compression of high dynamic range, some more successful than others.

We have no control over HDR display on SDR devices. Moreover, some applications can’t load the new HDR-supported formats.
If we want to specify how we want a photo to look on an SDR device, it must be edited for SDR display. The easiest way to do this is to edit the photo twice, once for HDR and once for SDR.
You then also have to export the photos twice. If you are posting online, you need to post each photo separately. Having two versions of the same photo gallery can significantly increase the amount of time you spend editing your photos.
At the same time, it’s clear that most settings are similar for SDR and HDR. Only the settings that affect dynamic range differ. This results in a fairly simple method that makes editing two versions quicker and easier.
Editing for HDR and SDR display
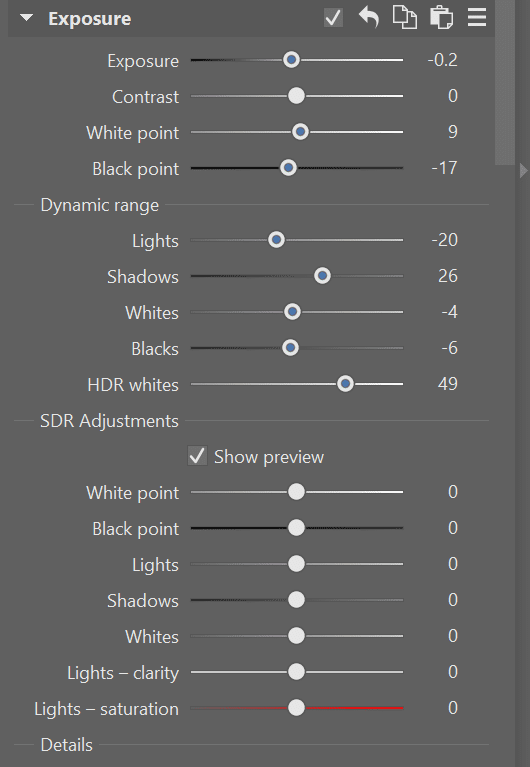
When you turn on HDR editing under Exposure in the right panel of Zoner Studio, you can see a new section entitled SDR Adjustments. SDR Adjustments is used to edit the SDR version of the photo. This is where the settings that users would set differently for HDR and SDR editing are duplicated.
However, since it would be too time-consuming to adjust these settings separately for HDR and SDR, these additional settings work in relation to each other. That is, they work as a correction of the main settings. HDR editing is only affected by the main settings. For SDR editing, the settings are a sum of the values of the global and local sliders.
This tells you how you should proceed with editing—First, turn on HDR editing and adjust the photo in HDR. Then, check the Show Preview box under SDR Adjustments and make SDR adjustments.

When editing in SDR, you only need to adjust sliders in the SDR Adjustments section. Adjusting global settings would affect the HDR editing that is already complete.
Normally, this isn’t noticeable, but if you edit the HDR version and turn on SDR editing options, the flaws of the SDR display are noticeable. Suddenly, your photo has bland highlights, is colorless, and lacks contrast.

It’s a good idea to take a break between editing in HDR and SDR to give your eyes a rest.
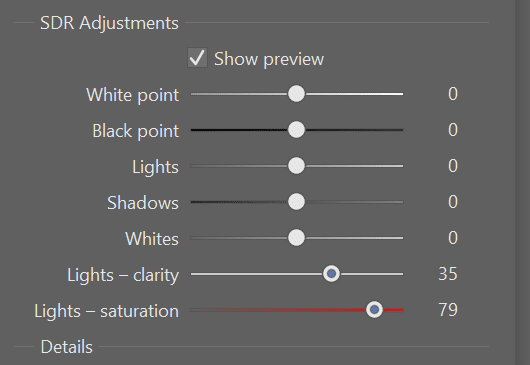
There are two additional settings under SDR Adjustments—Lights-clarity and Lights-saturation. These sliders can be used to bring out local contrast and color in the highlights and bring SDR editing at least somewhat closer to its more perfect HDR counterpart.
Export with gain map
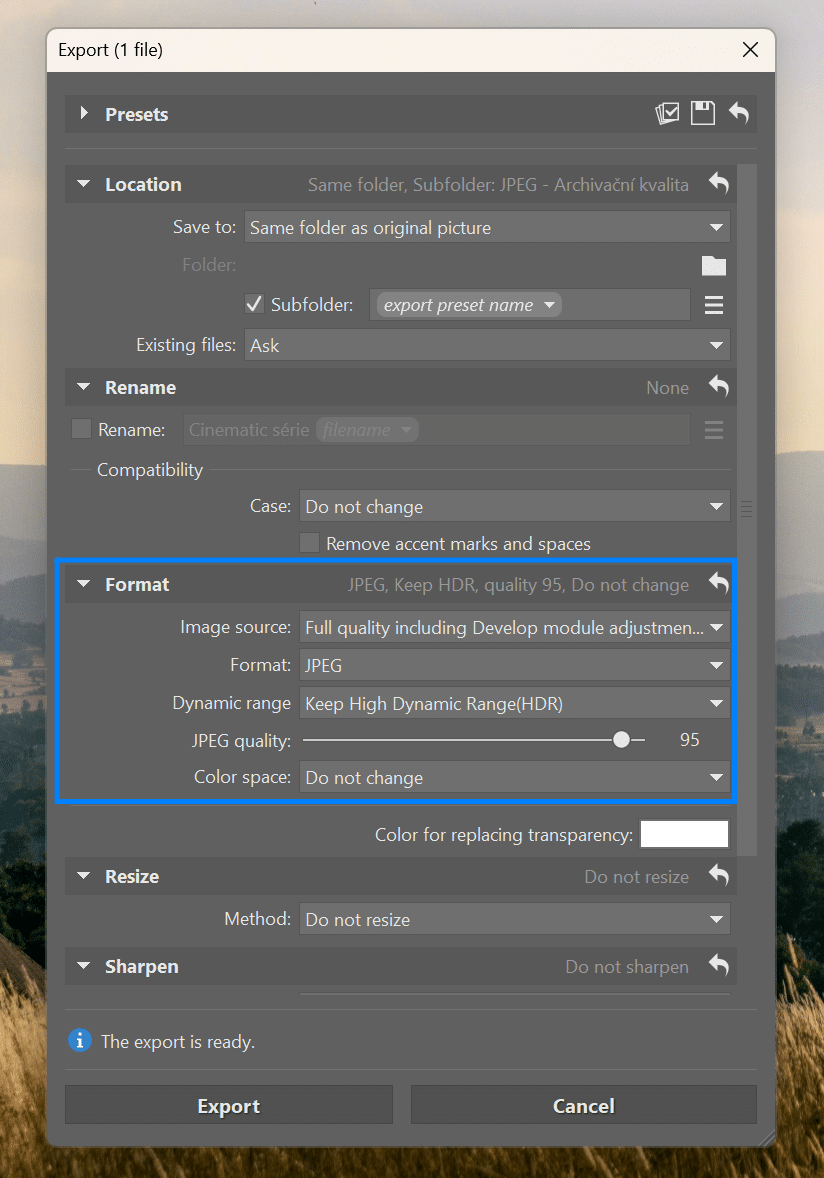
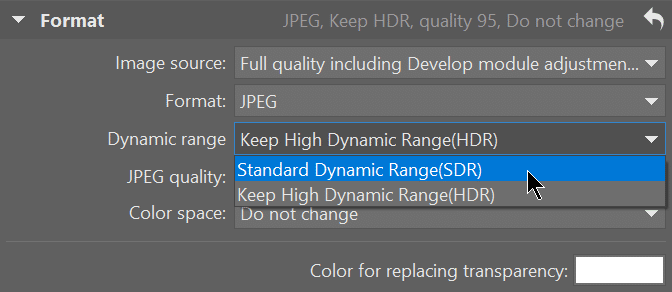
Now that we have edited both versions, we can export either HDR or SDR using the Dynamic Range option in the Export window. This is where the main benefit of HDR and SDR editing comes in. Some formats allow you to have both HDR and SDR adjustments saved in a single file.
Having both HDR and SDR in one file makes it possible to choose the right version of the photo at the moment of viewing, depending on your monitor’s, TV’s, or mobile phone’s capabilities. You can even display a combination. You may be surprised to know that this option is offered by some new and still poorly supported formats, but also by the widely-used and trusty JPEG format.
Gain maps are what give image formats this superpower.
With a gain map, you can determine how much each pixel is brightened. And if that’s not enough, JPEGs have added gain maps so that they remain backward compatible even for applications that don’t have this upgrade. This makes JPEG a near-perfect means of bridging the gap before HDR wins out and old displays become obsolete.
If you edit a photo for both HDR and SDR display and export to an HDR JPEG, Zoner Studio saves the SDR adjustments to the standard part of that format and adds a gain map to accurately reconstruct the HDR version. This file can then be used and shared without worrying about whether it will be displayed correctly.
Devices that support gain maps and can also display HDR content display HDR adjustments. If the device or software does not recognize this format or cannot display HDR content, it displays the SDR version just as it was edited using the sliders under SDR Adjustments.
One minor disadvantage of HDR JPEGs is that they are about 30% larger than the same images without a gain map. But with today’s storage capacities and internet speeds, this increase in size is negligible and outweighed by the advantages of the format.
Printing photos in HDR
Printing an image in HDR on a printer with full dynamic range is not yet possible. Printers are limited by the white toner and paper and don’t have the same high dynamic range as monitors. Simply put, you can’t illuminate paper.
It’s good to remember that JPEG uses lossy compression. If we require the highest quality for print, I’d recommend using a format that uses lossless compression, like TIFF.
In that case, when you export, you need to select the Forced SDR option under Dynamic Range. The photo then contains the image data with adjustments from SDR Adjustments.
HDR photography is gradually taking over the technology we’re using now. That’s why we shouldn’t be afraid of it or avoid it. For printing photos in HDR, we have to wait for high-quality processing in high dynamic range. But who knows if we’ll ever see it. That’s why we can’t give up on editing in SDR just yet.
Try editing your photos to their highest potential in both SDR and HDR in Zoner Studio. Download Zoner Studio free for 7 days with support for all functions, including print. Have your prints sent straight to your home.
There are no comments yet.