Refine Selection: The Easier Way to Work With Hair, Fur, and Other Complex Outlines
The article is over 5 years old. The information in it may be outdated.
![]()
We are working on its update. In the meantime, you can read some more recent articles.
Sometimes you want to change the background behind a person, animal, or other subject with a complicated outline… or to change that subject itself. The Refine Selection feature in Zoner Photo Studio will save you lots of time when you’re selecting flowers, people, or anything else with a complex outline.
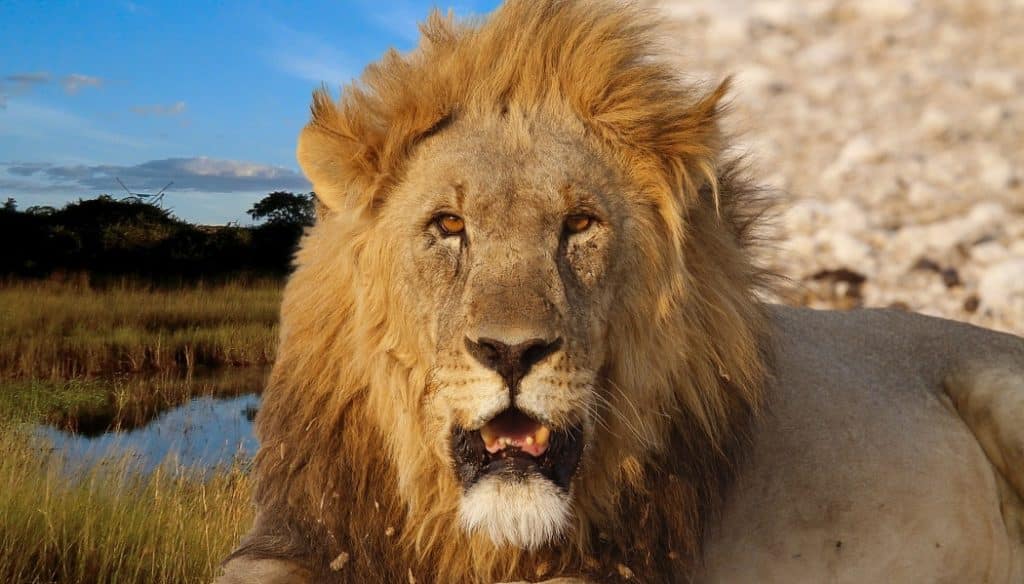
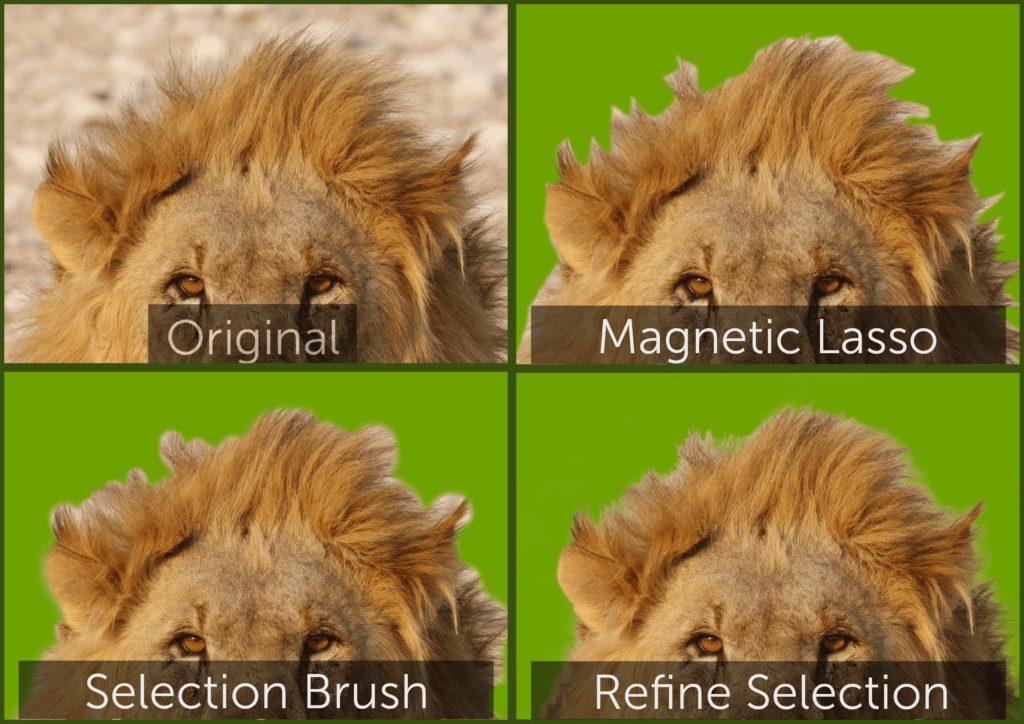
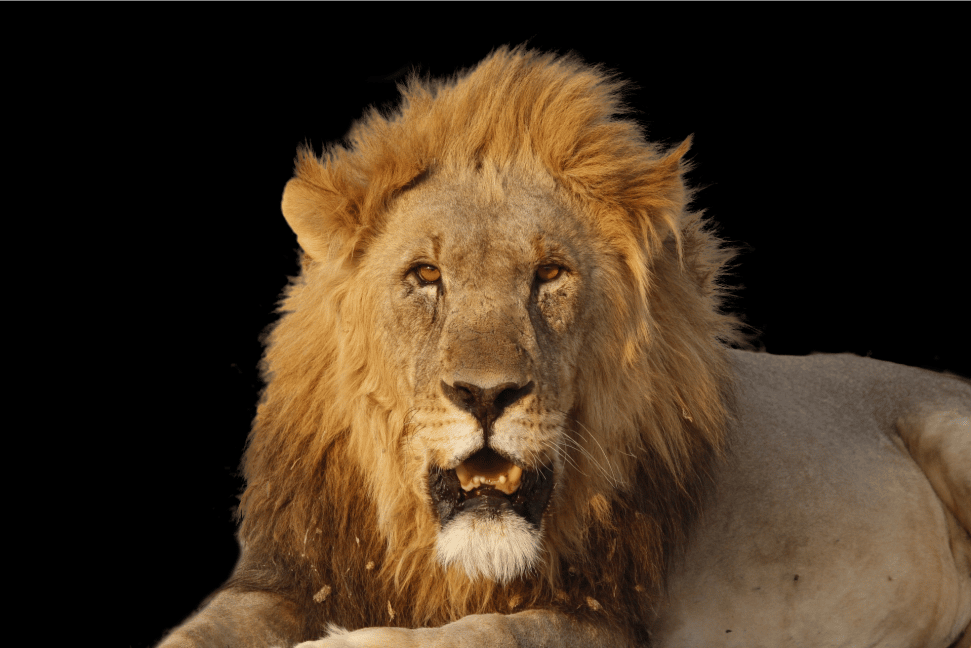
In our example we’ll be giving a lion a new home. In our original image, it’s against a brown sandy background. Because of this, any attempt to select it with the Magnetic Lasso would turn out quite poorly. The Selection Brush could give us a result that’s better, yet still rather low-fidelity. But the Refine Selection settings let us really select just the lion and its mane, and not its surroundings.
How Refine Selection Works
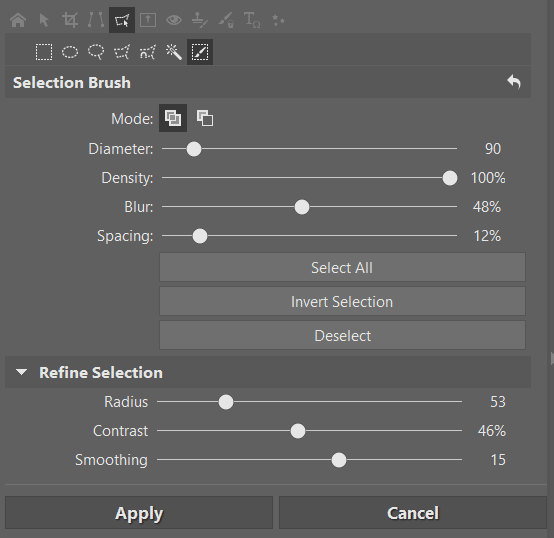
Every selection tool (like the Magic Wand, the Magnetic Lasso, and the Selection Brush) offers the Refine Selection feature, which can search for edges in your current selection and adjust it accordingly. The Refine Selection controls are in the right-hand panel, like the other controls for the selection tools.
You can set:
- how far away from the original selection the program will look – the Radius
- how strongly it will differentiate the subject and its surroundings – the Contrast
- how much it will smooth out the resulting selection – the Smoothing
Now we’ll use our lion example to explore how the individual settings affect the results you get from Refine Selection. Throughout our example, we’ll be aiming to copy this lion over a new background picture, while keeping it looking natural in its new “home.”
Start With a Basic Selection
You’ll get the best results with pictures where the subject (its fur, hair, flower buds, etc.) is sharp and high-quality, and where it clearly stands out from the background. Refine Selection won’t work well on low-contrast, low-quality photos where the subject has a blurry outline.
Open your chosen photo in the Editor, choose your favorite selection tool, for example the Selection Brush (Shift+Q), and make a rough selection of your subject. Or not so rough—the less rough your selection, the faster you’ll get your selection finalized.
Selection Display Modes
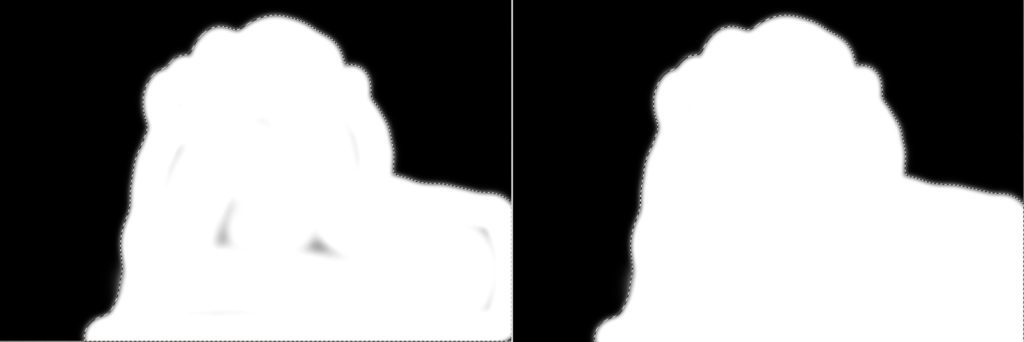
To give you a better idea of what you really are and aren’t selecting, Zoner Photo Studio offers selection display modes. The Selection Display Mode button is at the top right, below the module-switching buttons. Click the little triangle next to it to see the list of modes.
Right now what we want is the Black and White mode. Selected areas are shown in white, and unselected in black. Areas that are “partially” selected are shown in gray. (These “partial” selections are used to make a selection gradually “fade in” so it feels more natural.) Black-and-white mode is very good for uncovering any mistakes that might degrade your final results. Consider turning off the Show Selection Outline option. That will hide the “marching ants” around your selection, enabling you to examine its outline in detail.

Now take a look at your selection and use the Selection Brush to fill in any spots you missed.
Refining the Selection
Now that you’ve laid down a solid foundation, it’s time to refine it—to finalize it.
- Start by raising the Radius up from zero. The Radius determines how far from the original “black and white” border the program should seek the subject’s true outline (in this case, the lion’s mane).
- Raising the Contrast value tells the program to differentiate the lion’s golden mane more clearly from the sandy background.
- Here we won’t be using the Smoothing setting, because we plan to keep working with the picture.
You might feel tempted to push one or more of these three sliders hard to the right. Don’t. Or at least, certainly not at such an early stage in your work. This can produce overly sharp outlines that won’t look good in your final result. Instead of that, use the Selection Brush (remember, this is all work with selections) to clean up your new selection by removing elements that don’t belong with it. And vice-versa—for example here we’re restoring parts of the lion that Refine Selection saw as being part of its surroundings due to their brightness and contrast.
With this brief manual touch-up, you help the program to understand what you’re really aiming to select. The more thoroughly you do this, the more natural your final results will be.
After your cleanup, use Refine Selection again—now this feature has a better “notion” of what’s the lion and what’s not. If you’ll be copying and pasting the subject against a new background, then depending on how different that background is, you may have to repeat the refine-and-cleanup process more than once.
During your edits, you may want to switch among selection display modes, including the last two options, which show the selection against a white or a black background. These can help to reveal any imperfections in the selection, which you can then fix using the Selection Brush. These black or white background options are uncompromising towards flaws in your selection, but in most real-life situations, you don’t need for your selection to be absolutely perfect.
Turning Your Selection Into a Mask
So far you’ve been working with a selection (even if you’ve hidden the usual “marching ants”). Let’s take a look at how to turn that selection into a layer mask. (For an introduction to those, see our article on working with masks.) Right-click on the name of the layer with your subject (in our case, the lion) and then select Reveal Selection in the Mask submenu. That turns the selected part of the image into a layer mask.

Then turn off any special selection display mode you might have, as you won’t need it now. In our example, this is the stage where we paste the new background from a file. We then move that layer back behind the lion.


A Few Tips in Closing
For complicated selections,it can pay off to work part-by-part and store the individual selections to a mask. You can then add the mask to your selection at any time, and likewise store your selection to the mask at any time.
That way you can go back to refining your selection at any time—all you need to do is to turn the mask into a selection using the Mask > Add Mask to Selection right-click-menu item, and then continue refining from there.
Sometimes due to your technique or your technology, you may find that even with careful, repeated refining of your selection, you don’t get the results you want, and e.g. the original background shines through between strands of hair. In that case, try slightly shrinking the selection, by using Menu > Selection > Modify Selection, followed by the Stretch/shrink slider.
Every picture deserves an individual approach, but now you know the basic principles of Refine Select, and so you can get started taking advantage of it for your pictures!

wocmultimedia
Thanks Joseph, your article is very interesting and gave me some tips to use for some pictures I want to make out of my latest shootings.
Zoner
We’re happy, it’s useful for you, thanks!